As you know, the Windows 10 operating system, as well as other Windows versions, comes with the Windows Firewall. In Windows 10, the firewall allows users to install and run a third-party firewall. This kind of firewall works independently to block any suspicious activity on your computer. However, recently, some users reported that they are getting a notification on the Startup saying,
“Windows Firewall and <Third party firewall name> Firewall are both turned off; tap or click to see available options”.
This particular error could be caused by a lot of factors but when you manually check the firewall, you’ll find that there really is nothing wrong with both the Windows Firewall and the third party firewall. So if both the Windows Firewall and third-party firewalls like McAfee, Comodo, and many others are both turned off in Windows 10, then you need to do several things to resolve the problem – you need to check the supporting services that are required and uninstall and then reinstall the third party firewall on your computer. For more instructions, refer to the options provided below.
Option 1 – Try enabling all the supporting services for the firewall
The first thing you can do to resolve the error with the firewall is to check all of its supporting services by following these steps:
Tap the Win + R keys to open the Run utility and type “services.msc” in the field and then hit Enter to open the Windows Services Manager.
Next, look for the Windows Defender Firewall service among the given list of services.
Once you found it, make sure that its Startup Type is set to Automatic and that the status of the service is Running. So if it’s not running, just click on the Start button.
In addition, you also have to make sure that the following services’ status is set as follows:
Xbox Live Networking Service: Manual
Base Filtering Engine: Automatic
Once done, start the firewall again and check if the error is now fixed or not.
Option 2 – Try to uninstall and reinstall the third-party firewall
It is possible that the firewall error might be due to an error with the compatibility of the installation in Windows 10 and the third-party firewall. Thus, the next thing you can do is to uninstall the third-party firewall and then reinstall it again. Once you have uninstalled the third-party firewall, you can download its latest version from its official website and install it again. This should fix the error with the firewall.
Error code 652 is a runtime error. It hampers you from accessing and running your program on your system. If not resolved, it can also lead to program corruption.
Solution
Error Causes
Runtime Error 652 can occur due to several causes. These include:
Conflict of color depth within icons, the desktop, or a particular application in the Visual Basic environment. This happens when the Image
List control consists of more colors than the depth of what Windows can support.
Other causes include:
Malicious software and malware attack
Conflict with Terminate
Invalid or corrupt registry
Further Information and Manual Repair
If you are not a computer programmer and don’t have any sound technical expertise, then you might think of hiring a professional to resolve the error on your PC. But this can be costly as you may have to pay hundreds of dollars to the technician.
However, an alternative way to resolve the error code 652 is to download the Total System Care. This PC repair tool is integrated with an intuitive registry cleaner and a powerful anti-virus. It is safe, efficient, user-friendly, and available for free.
Restoro is a multi-functional error tool and a one-stop solution to resolve practically all kinds of PC-related problems. By running this repair tool, you can fix runtime error code 652 on your system in seconds.
Restoro
What makes Restoro a hot favorite among PC users is that it is simple and easy to use.
To operate this PC fixer, you don’t need to have the sound technical knowledge or be adept at computer programming. It can be used by all levels of PC users including beginners and intermediates.
It has a neat and clean layout with simple instructions and navigation making it easy for users to resolve even the mightiest errors in just a few clicks.
Restoro features
Whether the underlying reason for the error code 652 is malicious software or registry corruption, Restoro takes care of all. Registry corruption occurs due to unnecessary files and data overload in the hard disk. This includes junk files, internet history, invalid registry entries, and bad registry keys.
The registry cleaner embedded in Restoro intuitively detects and scans all registry issues.
It wipes and clears the hard disk from all the unnecessary and obsolete files and thus cleans up your disk space. It repairs the corrupt registry and also boosts your PC’s performance.
Thus it not only repairs the error code 652 but also resolves system slowdown issues by optimizing your system’s speed.
With the help of its in-built anti-virus, it removes all the malicious software on your system that could be triggering the error code 652.
Data security threats such as malicious software are detected and scanned and listed under the privacy error utility.
It is compatible with all Windows versions including both the latest and old versions. You can run it to scan error code 652 on any Windows version you have installed on your computer.
Restoro for error Code 652
Furthermore, as mentioned above Error Code 652 is safe to use. It is bug-free and besides, it offers users outstanding data safety. It has a backup file feature that helps you save and create backup copies of all the data you have on your system. This is carried for safety purposes.
It enables users to retrieve and recover data in case the data and files are lost during the repair thus sparing you from a big loss.
The error code 652 may be critical but it can be resolved in seconds with Restoro. Here’s how:
To get started click here to download and install Restoro on your system
Once installed, run it to scan for errors. It will take only a few seconds to scan your entire PC.
Then simply create a backup and click on repair to resolve and resume your desired program.
For best results, it is advised to run Restoro on the computer often. This will help you detect PC errors and repair them timely. It will help you ensure proper PC maintenance, health, and performance.
There are several kinds of errors you could encounter when you are running Windows 10 on a virtual machine. The Windows OS knows the difference between booting up in a standalone computer or in a virtual machine. This is why some specific drivers and system capabilities are used while emulating the Windows OS on software and during this phase, there are times when the System Preparation may throw up an error that says, “A fatal error occurred while trying to sysprep the machine”.
This kind of error arises due to a race condition wherein the Sysprep command tries to stop the Microsoft Distributed Transaction Coordinator or MSDTC service and the VMware tool tries to start the MSDTC service. You may also see the following messages logged in the Setuperr.log file:
[0x0f0082] SYSPRP LaunchDll:Failure occurred while executing ‘C:Windowssystem32msdtcprx.dll,SysPrepDtcCleanup’, returned error code -2146434815[gle=0x000000b7]
To fix the 0x0f0082, 0x0f0070, 0x0f00a8 Sysprep errors, you can check out two potential fixes. First, you have to check the status of the MSDTC service and the second one is to check the settings in the Windows Registry. Note that these fixes are proven to be effective on many users and apply to several versions of Windows, including Windows 10.
Option 1 – Check the status of the MSDTC service via Command Prompt
As mentioned, the error could be caused by the malfunctioning of the MSDTC service or it. Thus, you have to uninstall and reinstall the MSDTC service to resolve the problem and you can do that using Command Prompt. Follow the steps below.
In the Start Search, type “command prompt” and from the results, right-click on Command Prompt and then select the “Run as administrator” option to open it with admin privileges.
If a User Account Control or UAC prompt appears, just click on Yes to proceed.
Once you’ve opened Command Prompt, execute this command: msdtc –uninstall
The command you just entered will uninstall the MSDTC service. After that, you need to execute this second command to reinstall the service: msdtc –install
Now exit Command Prompt and check if the error is now fixed.
Option 2 – Check the Registry settings
Tap the Win + R keys to open the Run dialog box and type “Regedit” in the field and click OK or hit Enter to open the Registry Editor.
After opening the Registry Editor, navigate to this registry path: HKEY_LOCAL_MACHINESOFTWAREMicrosoftWindows NTCurrentVersionSoftwareProtectionPlatform
From there, look for a DWORD value that’s named “SkipRearm” and double click on it.
Then change its value data to “1”.
Restart your computer to apply successfully apply the changes made and check if it was able to fix the error.
If you encounter a Blue Screen error that points out to the CMUDA.sys, read on as this post will guide you in fixing it. The CMUDA.sys file is a Windows operating system driver file that is related to the USB Device Audio capabilities of a computer. There are times when this file causes Blue Screen error due to some conflicts in RAM or some incompatible firmware or hard disk issues, corrupted drivers or malware infection, and so on.
There are various Blue Screen errors that are related to the CMUDA.sys file such as:
KMODE EXCEPTION NOT HANDLED
PAGE FAULT IN A NONPAGED AREA
IRQL NOT LESS OR EQUAL
SYSTEM THREAD EXCEPTION NOT HANDLED (CMUSBDAC.sys)
In most cases, the CMUDA.sys file usually triggers the SYSTEM_THREAD_EXCEPTION_NOT_HANDLED Blue Screen error. Although this Blue Screen error may seem complicated, its workarounds are straightforward so you won’t have any problems in following them.
Option 1 – Try to update or rollback your device drivers
If the first option didn’t work for you, then it’s time to either update or roll back the device drivers. It is most likely that after you updated your Windows computer that your driver also needs a refresh. On the other hand, if you have just updated your device drivers then you need to roll back the drivers to their previous versions. Whichever applies to you, refer to the steps below.
Open the Devices Manager from the Win X Menu.
After opening the Device Manager, locate the device drivers that are marked with a small yellow exclamation mark icon and right-click on each one to open their Properties. On the other hand, you can also look for sub-entries under Sound, video, and game controllers like the C-Media USB Audio Class
After that, switch to the Driver tab and click on the Uninstall Device button.
Follow the screen option to completely uninstall it.
Finally, restart your computer. It will just reinstall the device drivers automatically.
Note: You can install a dedicated driver on your computer in case you have it or you could also look for it directly from the website of the manufacturer. You can download the as C-Media USB Audio Class driver from the cmedia.com website.
Option 2 – Try to recreate the CMUDA.sys file
The first thing you can try is to recreate the CMUDA.sys file. Every time your Windows 10 PC boots up, it looks for all the system drivers in place and if it is unable to find them, it tries to create them. Which is why if you remove your corrupt driver file, chances are, you might get a fixed file recreated just for you. How? Refer to the steps below.
Boot your Windows 10 PC in Safe Mode.
Then open File Explorer and navigate to this location: C:/Windows/System32/drivers
From there, look for the file named sys and rename it to CMUDA.old.
Note: As you can see, the file’s extension has changed from .sys to .old.
Now restart your computer and check if the CMUDA.sys Blue Screen error is now fixed.
Option 3 – Run the Blue Screen Troubleshooter
The Blue Screen troubleshooter is a built-in tool in Windows 10 that helps users in fixing BSOD errors. It can be found on the Settings Troubleshooters page. To use it, refer to these steps:
Tap the Win + I keys to open the Settings panel.
Then go to Update & Security > Troubleshoot.
After that, look for the option called “Blue Screen” on your right-hand side and then click the “Run the troubleshooter” button to run the Blue Screen Troubleshooter and then follow the next on-screen options. Note that you might have to boot your PC into Safe Mode.
On the other hand, you can also try running the online Windows 10 Blue Screen troubleshooter from Microsoft. It is a wizard that could help you fix any Stop errors related to the CMUDA.sys file and will offer you helpful links as you use it.
Option 4 – Try running the DISM tool
You can try running the Deployment Imaging and Servicing Management or DISM tool to fix the Wdf01000.sys Blue Screen error. Using this built-in tool, you have various options such as the “/ScanHealth”, “/CheckHealth”, and “/RestoreHealth”.
Open the Command Prompt with admin privileges.
Then type in the following commands and make sure to hit Enter right after you type each one of them:
Dism /Online /Cleanup-Image /CheckHealth
Dism /Online /Cleanup-Image /ScanHealth
exe /Online /Cleanup-image /Restorehealth
Do not close the window if the process takes a while as it will probably take a few minutes to finish.
Option 5 – Run System Restore
Running System Restore might also help in fixing Blue Screen errors related to the CMUDA.sys file.
Tap the Win + R keys to open the Run dialog box.
After that, type in “sysdm.cpl” in the field and tap Enter.
Next, go to the System Protection tab then click the System Restore button. This will open a new window where you have to select your preferred System Restore point.
After that, follow the on-screen instructions to finish the process and then restart your computer and check if the problem is fixed or not.
As you know, Microsoft’s consumer cloud storage platform is none other than OneDrive. It is where users can save any of their files albeit it’s mostly used to store common files like documents and photos. However, there are times when you might encounter some problems when saving these files. Recently, some users reported that they had problems saving Word documents to OneDrive and if you experience the same issue, then you’ve come to the right place as this post will guide you on how to resolve it.
According to users who encountered the problem, when they try to save Word documents on OneDrive, an error message appears instead stating, “This is not a valid file name”. This kind of error only occurs when the file is opened from within OneDrive for saving in a different folder. In other words, if the file is saved in the same folder, the error won’t pop up but if it is saved in a separate folder, that’s when the error appears. Worry not though for fixing this error is not complicated and won’t take too long.
It seems that this error is due to the 259-character limitation when creating and saving files as far as the Office products are concerned. To resolve it, there are several workarounds you can check out. Before you proceed with these workarounds, make sure that you have a stable internet connection.
Option 1 – Try renaming the file with a shorter name
The first thing you can do to fix the problem is to rename the file with a shorter name. Just right-click on the file and select the Rename option from the menu and then type in the new name and click OK or tap Enter to rename the file.
Option 2 – Try renaming the folders where the file is located
Like what you did in the first given option, all it takes is a right-click but this time on a folder. Rename the folder with a different name and save the changes made and then check if you can now save the Word document on OneDrive.
Option 3 – Try moving the file to a folder with a shorter path
If the first two options didn’t work, you can try moving the file to a folder with a shorter path. Note that it is not the same as doing it locally on a Windows 10 computer so you have to right-click on the file and select the “Move to” option. After that, locate the folder where you want to move the file and select it and then click on the Move button to complete the task.
Option 4 – Try making some changes in the document
You could also try to make some modifications to the document. Once you’ve done that, click the File tab and select the Save As option and then go to the folder where you want to save the file and tap enter.
The error code 0x800CCC0E is an Outlook error that appears while using either Microsoft Outlook or Outlook Express. The error message hampers your ability to send and receive emails.
Solution
Error Causes
0x800CCC0E Outlook error code is triggered by multiple reasons including:
Improper connection with SMTP (Simple Mail Transfer Protocol) server
Damaged files
Registry corruption
In most cases, it’s the registry that gets corrupted which leads to the occurrence of 0x800CCC0E error code display. This typically happens when you try to update your Outlook/Outlook Express version.
When updating, you need to remove all the software files of the previous Outlook version which includes the registry too. If the files are not removed from the registry, the new version update will often fail. The junk files of the old version are likely to damage and corrupt the registry.
Further Information and Manual Repair
It is advisable to repair the error code 0x800CC0E right away to avoid inconvenience and system failure and fatal crashes which can lead to valuable data loss.
Cause: Improper connection with SMTP (Simple Mail Transfer Protocol) server
Solution: If the cause of the 0x800CCC0E is SMTP server connection failure, then the best way to resolve the error is to reconfigure your email account settings. Make sure that port 25 is being used in the SMTP area. Port 25 is the standard outgoing mail port.
If the SMTP setting is on port 25 then another reason for the error 0x800CCC0E can be your anti-virus or firewall software enabled on your PC. Turn it off for a moment and then try sending emails from your Outlook.
Cause: Damaged Files and Registry Corruption
Solution: If the error code is triggered due to registry corruption and file damage, then the best way to resolve it is to download Restoro.
Restoro is a safe, efficient, and highly functional inbox cleaner and a system optimizer embedded with numerous powerful utilities designed to repair multiple PC-related errors including the error code 0x800CCC0E when triggered by registry corruption.
This cutting inbox cleaner scans your PC entirely and detects all the unnecessary and malicious files saved in your system’s registry like junk files, internet history, invalid entries, and files of the uninstalled programs. These files take up most of the registry disk space thus causing the registry files to get damaged and corrupt and triggering error codes like 0x800CCC0E.
With the help of Restoro, you can easily wipe out all such files from your system in just one click. After scanning for errors all you need to do is click the repair tab to make your registry disk clutter-free.
Once the clutter is removed, update the new version of the Outlook/ Outlook Express again on your system and then try sending emails. You’ll see two noticeable differences after repairing your PC with Restoro.
One is that you will be able to install the new version and send emails smoothly from your Outlook account without any 0x800CCC0E error pop-ups. And the second difference you’ll see is the change in your PC performance. This tool optimizing your PC speed and reduces boot time.
This tool is very simple and easy to use. It has a neat design layout and a user-friendly interface which makes it easy for all levels of users to use Restoro smoothly with zero complexity. In just a few clicks the error message 0x800CCC0E is resolved. What makes this tool a favorite among users is that it does not require any skills or technical know-how.
To get started here’s what you need to do:
Click here to download Restoro software on your PC
Once the download is complete, run it to scan for 0x800CC0E error
After the scanning is successfully complete, click on the Repair button to fix the error right away.
Then install the new version of Outlook/ Outlook Express again on your system
Disk partitioning is a concept that’s been around for so long, but is still only familiar to few. If done right, it can help get your computer in perfect order.
Today we bring you a simple definition of disk partitioning, its pros and cons, and a quick tip on how to do it properly to reap its full benefit!
Definition and purpose
The simplest way to define disk partitioning would be: it’s exactly what it sounds like. It means taking a hard disk drive and separating it into different segments. These segments are called partitions. You can visualize it as cutting a cake into smaller pieces - not necessarily of the same size, though.
So what is the purpose of these pieces?
Well, when you first get a hard drive, it’s basically just a bunch of unallocated storage space. Until there’s at least one partition, this space is unusable to your operating system. Once you create a partition, your OS will recognize it as usable storage space.
You can choose to create a single partition and use it for all your files, from program files to personal data. A lot of off-the-shelf computers come with one primary partition like this and a small secondary one reserved for recovery purposes.
Whether or not you want to split your disk into more than one segment is up to you. We would generally recommend it, though. The whole point of partitioning is for each segment to have its own purpose.
So treating all your storage space as a single unit containing different file types would be like constructing an office building with only one massive room for everything - day-to-day work, conferences, interviews, etc. And all of this for different departments of the company. You can see how this might get a little messy.
Creating multiple partitions eliminates the task of running several different types of files from the same place. This takes a heavy load off the entire process of accessing data.
Disk partitioning also brings a ton of other benefits to the table. An important disclaimer, though: there are disadvantages too. We will walk you through both sides to help you get an objective idea and make an informed decision.
Source: Kina on Unsplash
What are the benefits of disk partitioning?
1. Better file organization
This is the most obvious and perhaps the biggest advantage of partitioning your hard drive.
As we already mentioned, partitioning allows you to create separate segments for different file and data types. You wouldn’t want to use the same partition for your system files and for games, would you?
If organization and time management are important to you, then multiple partitions are the right solution. Searching for specific files will be much easier overall. Say you have one hard drive, but three partitions: C for the system files alone, D for multimedia files and documents, and E for games and apps. Your computer loads the system from C without interference from the other two, and you know exactly where to look when searching for a file.
2. Easy reinstallation
File management isn’t the only thing made faster and simpler thanks to partitioning. If you opt for creating multiple segments on your drive, reinstalling Windows will be easy peasy.
That’s because all you need to do is format the partition your system is on. Then you reinstall the OS on it, and there you go. Now you have a clean installation, with all your files saved on other partitions intact. You can even make a copy of your system partition, so you can revisit the exact same installation in the future if you want. And the whole time your pictures, music, documents stay exactly where you left them.
Source: Andrew M on Unsplash
3. Possibility of using multiple file systems
By now you’ve understood that partitions function completely separately. This means that, if for some reason you need multiple file system capabilities, partitioning will allow that.
One segment could be used for, say, an NTFS file system, while another could run ext or APFS.
4. Running different OSes
You’re an avid Windows user but need to use Linux on the side? No problem. You don’t need to buy a separate computer or anything. The possibility of running different file systems also means you can use partitioning to run multiple operating systems.
Doesn’t that sound enticing? One machine for multiple totally different uses!
5. Backup and recovery made simple
Data loss can happen on any disk, partitioned or not. However, it’s much easier to get it back on a partitioned one. You know where you stored what, and each partition can be backed up exactly as it is. It’s also a lot faster to back up single partitions than entire hard drives.
Ultimately this also means a faster path to recovery. If you lose or accidentally delete important files and data, you might want to use a recovery tool like Recuva to scan for them and get them back. Recuva is even powerful enough to recover data from damaged hard drives. But no matter how powerful, scanning a whole drive is strenuous for any recovery tool. Scanning independent partitions is a lot more convenient than that, and will get you to your goal more efficiently.
6. Optimized performance
Now, let’s keep in mind that computer performance is influenced by a number of factors. Partitioning alone isn’t what makes it better or worse. However, it can contribute to optimization. It’s easier for your computer to scan, say, a 40 GB partition to fetch the system file it needs than scanning the entire capacity of your drive.
7. Improved security (possibly*)
Separate partitions can help make your system more secure. Firstly, they minimize file corruption. If one partition gets corrupted, the others should remain unaffected. And keeping in mind the previous point about backup and recovery, ‘fixing’ the damaged partition would be much easier than fixing the entire hard drive.
Partitioning also improves security in terms of malware protection. A malicious attack on one partition is easier to deal with than malware on the whole drive. If your system partition gets infected, you can simply reinstall your OS and that should do the trick.
*Do keep in mind that partitioning can’t defend you against more advanced attacks. So make sure not to give in to a false sense of security.
What are the disadvantages of partitioning?
1. Data is still vulnerable
Yes, it’s easier to back up and recover data from independent partitions. And yes, partitioning may help protect separated files and data to a higher degree. But remember: everything is still on a single physical drive. So while digital errors and issues may be easier to deal with on partitioned drives, physical damage obviously won’t be.
If your hard drive is destroyed in some way, all data on it will be gone. That’s why, if you have crucial files on your PC, it’s important to give them the proper backup treatment before it’s too late.
2. Disbalance of space
Allocating storage space on separate partitions may be a little more tricky than you think. You may fill up one partition a lot faster than another. So on one side you’re struggling with space, and on another you have too much of it to spare. Imagine nearly filling up your system partition and then it turns out you need a lot more space for its updates than you thought.
That’s why you really have to be sure you actually have enough files of different types that you need help managing efficiently. Otherwise you’ll just create a struggle and disbalance in terms of storage.
3. Increased risk of error
If done incorrectly, partitioning can lead to more harm than good. Aside from space disbalance, there is an increased risk of incorrect partition sizes and formatting. Plus, human error is also a factor: in a moment of distraction, you may erase one partition when you meant another. Undoing such mistakes will definitely be tedious and time-consuming.
4. SSDs eliminate the need of partitioning
SSDs (solid-state drives) don’t function in the same way that HDDs do. They have faster read times and can organize files on their own. This quite literally eliminates the need for organization on your part.
Partitioning: yes or no?
The bottom line is that multiple partitions might not be necessary for the average user. But if you’re planning on storing many file types or different file and operating systems on the same PC, then you should give it a shot. It’s also an excellent solution for businesses, of course.
And if our pros and cons list isn’t enough to help you decide, you can always send us a message and we’ll help you make the right choice.
Decided to partition your hard drive?
If you’ve decided to give it a go, you definitely should make sure to do it right.
The two most effective and reliable ways to partition are using the built-in options on Windows or investing in a dedicated partitioning tool, like the EaseUS Partition Master. Which one you'll opt for depends on your specific needs.
Option 1 may be more suitable for users with at least some level of experience. In this case, you’d have to know exactly which steps to take without making errors. This is done in Disk Management on Windows 10/11. From there, you can select the partitions you’d like to split into different volumes of selected sizes.
If this is your first time partitioning, we highly suggest you either consult professionals for this or move on to option 2. The EaseUS partitioning software is specifically designed for beginners, with an intuitive interface helping you succeed in the process. All you need to do is pick the Partition Master package tailored to your needs and follow their guide.
Each package offers technical support as well, and even free upgrades (to varying degrees based on your subscription). Plus, all of this is valid for not one, but two PCs.
It’s the perfect solution for a smooth and error-free partitioning process. If you want to organize your hard drives efficiently and make the most of all your space without doing irreparable damage, it’s definitely worth the investment.
If you aren’t able to pull up any website and instead got the ERR QUIC PROTOCOL ERROR error message in Google Chrome then read on as this post will help you resolve the problem. When you encounter such an error in Chrome, you will see the following error message:
“This site can’t be reached, The webpage at [website URL] might be temporarily down or it may have moved permanently to a new web address, ERR_QUIC_PROTOCOL_ERROR”
This kind of error message pops up when the URL is down. However, if you are certain that the site is not down and you’re still seeing this error message, then troubleshoot further using the suggestions given below.
Option 1 – Try to disable the QUIC Protocol
QUIC is an experimental transport layer network protocol that is present in Google Chrome in order to establish a connection between two endpoints over UDP. So if there is any problem on the development side, you will most likely encounter ERR_QUIC_PROTOCOL_ERROR on your Google Chrome browser when you try to open any website. Thus, you have to disable the QUIC protocol in order to resolve the error. How? Simply follow the steps below.
Open your Google Chrome browser.
Now type in “chrome://flags/” in the address bar and hit Enter.
After that, look for the Experimental QUIC protocol which should be set by default.
Then expand the drop-down menu and select Disable.
Restart Google Chrome and see if the error is fixed or not.
Option 2 – Disable VPN
As mentioned, if you are using VPN, this could be the reason why you’re getting the Windows Update error 0x800F0922 so the most obvious thing to do is for you to turn off the VPN and try to run the Windows Update once more. And if you use a VPN software that works using their software, you can just completely exit or log-off from its account. On the other hand, if you are using a built-in Windows 10 VPN, you can simply turn it off or delete all the settings you have created there. Although it’s understandable that you might have to use a VPN connection to connect to the work network, you really have to disable it at least until the Windows Update is no longer stuck in the error 0x800F0922. It would be best if you do this when you are not working.
Option 3 – Disable the Proxy server
You can also try to disable the Proxy server to fix the ERR_QUIC_PROTOCOL_ERROR in Chrome. Refer to these steps to do so:
Tap the Win + R keys to open the Run dialog box.
Then type “inetcpl.cpl” in the field and hit Enter to pull up the Internet Properties.
After that, go to the Connections tab and select the LAN settings.
From there. Uncheck the “Use a Proxy Server” option for your LAN and then make sure that the “Automatically detect settings” option is checked.
Now click the OK and the Apply buttons.
Restart your PC.
Note: If you are using a third-party proxy service, you have to disable it.
Today most users have an SSD drive, times have changed and SSD has become your typical computer equipment.
A lot of time has passed from the first SSD hard drives up to today and technology has evolved and improved but still, there are some cool tricks and tips to speed up and extend the lifespan of your SSD hard drive.
That being said let us dive right into what I would like to call the essentials of having an SSD hard drive.
Keep your SSD firmware up to date.
This one really is a no-brainer, keeping your firmware updated at all times will ensure longer life and SSD stability. The trick here is that each SSD manufacturer has its own ways of updating firmware so this is not something universal, you will have to go to the official website of your SSD manufacturer and get firmware updates and instructions from them directly.
Enable ACHI.
Advanced controller host interface or short ACHI is a feature that will ensure that your Windows will support all of the features that come with running SSD on your computer. It controls the TRIM feature which is crucial in helping Windows itself in its garbage collection on your hard drive. In order to enable ACHI, you will have to do it from your BIOS and it would be very good if the feature is enabled before Windows itself is installed so it can take full advantage of it.
Enable TRIM.
TRIM feature is vital in extending your SSD lifespan and it should be enabled by default in Windows but you can never be too cautious and double-check and enable if needed. To make sure it is enabled, open your command prompt and type in: fsutil behavior set disabledeletenotify 0
Make sure your system restore is enabled.
In the first SSD days, system restore was really a feature that you wanted to be disabled in order to prevent and extend the life span of your SSD drive, but we came a long way from there and today there is no reason to keep this feature turned off since it can be helping many ways with both your system and SSD.
Disable Indexing in Windows.
A large portion of the speed of your SSD drive is used for indexing files in Windows. Of course, the indexing feature is great if you store everything on your SSD drive but if by any chance you have another drive for your backup, pictures, music, etc. it would be highly beneficial for you to turn it off on your SSD. To turn indexing off click on your start menu, click on the computer. Right-click on your SSD and then click on properties. De-select boxthat says: Allow files to have contents indexed in addition to file properties and click OK. Once you do this the operating system will apply this to all the files and folders on the drive. If you see a dialog telling you that it couldn’t remove a file from the index, click Ignore All.
Keep Windows defrag ON.
This also was the option in early SSD days which was better to be OFF, but as said before since technology has been making progress and Windows has been improved and made aware of SSD drives, defrag has evolved as well, and now it is more of optimization tool then defragmenter which was once.
Disable Prefetch and Superfetch.
Windows is placing information in both physical and virtual memory for applications that you are not currently using but they are used often in order to speed their response time. If you are running low on space or having struggles with virtual memory it would be best to turn them both off. Go to registry manager and find: HKEY_LOCAL_MACHINE\SYSTEM\CurrentControlSet\Control\Session Manager\Memory Management\PrefetchParameters, there you have 2 values: EnablePrefetcher and EnableSuperfetch, set both values to 0.
Disable Search and Superfetch services.
Disabling Superfetch in the registry is not all work, Press WINDOWS + R to bring run dialog, type in it services.msc, Find both Search and Superfetch and disable them.
Configure Write Caching.
Write caching can be enabled and disabled in the device manager by expanding disk drives, right-clicking on SSD, then click properties, select the policies tab. In the tab, there is the option to Enable write caching on the device. Now trick in this is that you will need to try and benchmark your SSD with both options turned ON and OFF since different manufacturers have different performances with this option being ON or OFF.
Disable CleanPageFileAtShutdown and LargeSystemCache.
Page file and a large cache of page files are not something that we longer need, since SSD writes with great speed in its flash memory both of these options can be disabled and you will both speed up shut down the process of your system and save some SSD life since page files will not be written. Find both options in the registry under the key: Computer\HKEY_LOCAL_MACHINE\SYSTEM\CurrentControlSet\Control\Session Manager\Memory Management set both to 0
Set high performance in Power options.
This option in power management will prevent your SSD from constantly shutting down and bringing it up increasing speed without sacrificing its life span.
These are tips and tricks for having great and longer life as well as speed for your SSD drive. We hope that you have found them useful and that you will come again to check new articles published daily for easier IT life.
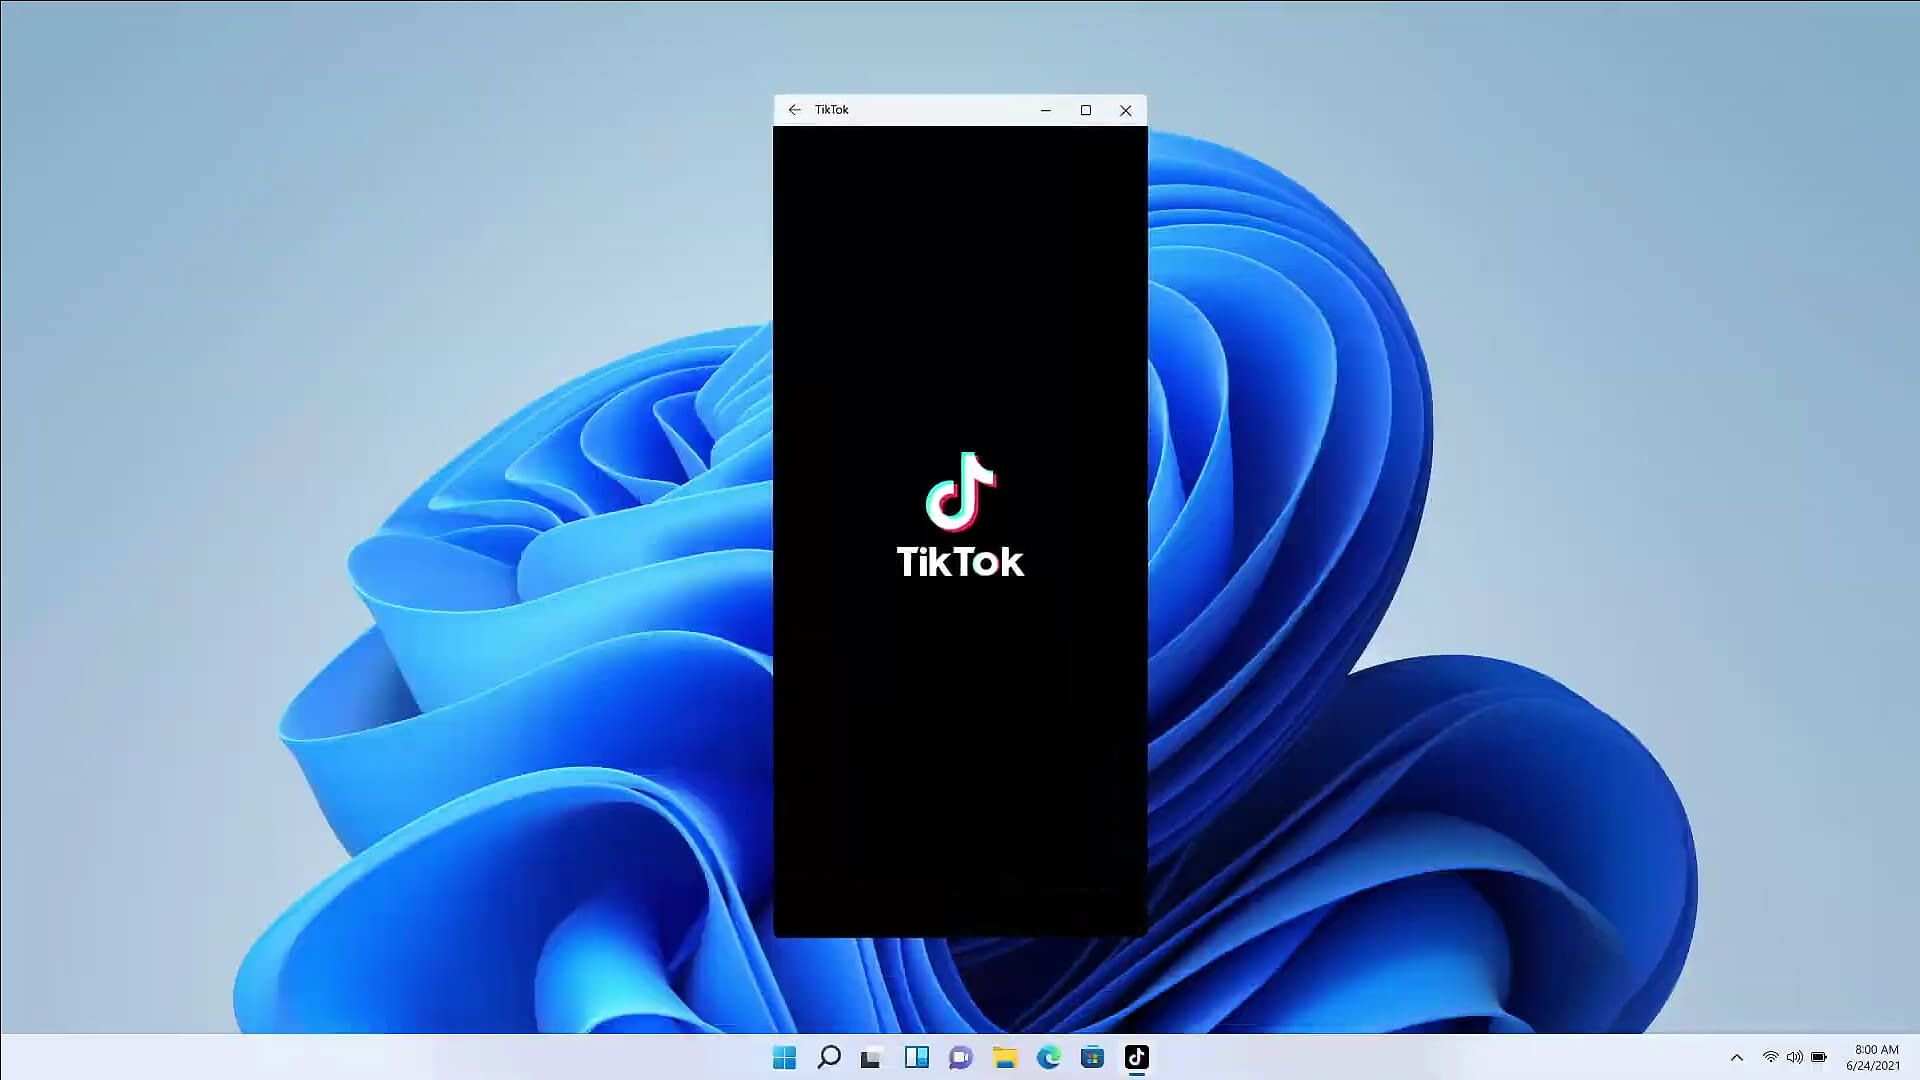
The euphoria around Windows 11 is not dying and reveal that Android apps will work natively inside Windows 11 has raised many emotions and questions.
So, Microsoft has announced that Android apps will run natively inside Windows 11 OS and that they will reside alongside your other installed ones as icons, etc.
It is no secret that many users have been using emulation software to run Android apps inside Windows so far, so what is the difference?
It is still emulation
Whatever you would like to believe it is still emulation and Android apps are at the end of the day still Android apps running inside emulated environment.
This time we will not need third-party emulation software running inside Windows, we will have third-party emulation services running inside Windows.
Intel has teamed up with Microsoft in order to integrate Intel bridge algorithms in order to run Android apps, meaning that yea, pretty much we have emulation services running in order to run the application.
The problem with this kind of approach is that well emulation software is running and consuming system resources only when we start it, this kind of service is always running and always consuming resources and for someone who really does not care about Android apps at all, this is just a waste of resources.
Android store
The store is another issue here, instead of the Google play store we will have the Amazon app store integrated inside the new Microsoft store.
This means that any kind of for example game progress or login information from Google store cannot be transferred into Windows 11, add to that information that in the Amazon app store there are tons of missing applications like SLACK, TRELLO, BitWarden, etc and we might have a serious question here about the use of this feature.
Android apps that do not use Android services
If you even look past that it is still emulation and that it is available on the Amazon app store there is still concern about applications not using Google services for their running.
Many Android apps are relying on Google services like location or optimize their use of on-device resources, handle in-app purchases, etc. that cannot be found on this system.
Uber is a prime example that uses Google location service to determine your location and for its mapping data, with that application, is useless.
Other like Guardian will even pop up message that says Google play service is required in order to even work.
Android apps without Eero system
Amazon Eero system for enhanced internet access is not even yet available in its own app store which brings us to missing some key players like Bank of America, Chase mobile, Bueller, etc.
And across the board, the apps that are present in the Amazon Appstore are often as good as abandoned. Lots of titles are numerous versions behind their up-to-date Play Store counterparts, and plenty of programs you encounter in the Amazon environment clearly haven't been touched in years.
Conclusion
Many new Windows 11 features are quality features that I personally consider good but although this one seems innovative and good I simply cannot stand back it up.
Android apps were already inside Windows with emulation software which used google services and was working just fine, this was not needed in my opinion.
Check your connection. Microsoft Store needs to be online. It looks like you’re not.Check connectionCode: 0x80072F7D
This is the error that you get if trying to open the Microsoft store on Windows 10 and it fails. If you experienced this error and are unable to access the store do not despair we are here to help you. This particular error is usually due to some internet issues, follow the presented guide step by step in order to solve it and be able to access the Windows store again.
Check your Internet connection
Since this error is closely tied to internet connection it is advisable to first eliminate the obvious and check if your computer is connected to the internet.
Run Network troubleshooter
Built-in Windows troubleshooter is a great tool and we will be using it in the next few segments in order to locate the issue and fix it.
Open Windows 10 Settings app using the WINDOWS + I
Click on Network & Internet
Click on Network troubleshooter
Select network adapter to diagnose
Press the Next button.
Run Internet Connections troubleshooter
Press WINDOWS + I to open the Settings app
Click on the Update & Security
Click on the Troubleshoot
Select Additional troubleshooters option
Click on Internet Connections option
Hit Run the troubleshooter button.
Run Windows Store Apps troubleshooter
Press WINDOWS + I to open the Settings app
Select Update & Security
Click on the Troubleshoot
Use the Additional troubleshooters option
Click on the Windows Store Apps option
Press Run the troubleshooter button
Temporarily disable security software
Your antivirus or firewall might be interfering with the application, sometimes, in some cases store is detected as a false positive in some security applications, and its access to the internet is cut. Disable your security suite to see if this is the case.

 Error Causes

 The euphoria around Windows 11 is not dying and reveal that Android apps will work natively inside Windows 11 has raised many emotions and questions.
So, Microsoft has announced that Android apps will run natively inside Windows 11 OS and that they will reside alongside your other installed ones as icons, etc.
It is no secret that many users have been using emulation software to run Android apps inside Windows so far, so what is the difference?
The euphoria around Windows 11 is not dying and reveal that Android apps will work natively inside Windows 11 has raised many emotions and questions.
So, Microsoft has announced that Android apps will run natively inside Windows 11 OS and that they will reside alongside your other installed ones as icons, etc.
It is no secret that many users have been using emulation software to run Android apps inside Windows so far, so what is the difference?