Logo

Fix Black background behind Folder icons

The File Explorer in Windows 10 provides several ways to organize the contents of folders and files in the system. Windows users can utilize some efficient styles to view the contents of the file system as per the user’s requirement. A user may opt to display the file picture in large size thumbnails while the other one could opt to set the icons of folder and files in a small or medium size list. On the other hand, while setting up several styles for the folder and file icons, some Windows 10 users have experienced some unusual issues where there is the Black background showing up behind folder icons. They tried refreshing the File Explorer a couple of times but it didn’t help in fixing the problem and the black squares are still visible on some folder icons.

The black squares behind the folder icons might look disturbing though it’s not really a big problem and is merely a graphical glitch that does not cause any damage or whatsoever to the content of the folder and files. The most likely cause of this glitch might have something to do with the corrupted system files or it could also be caused by outdated thumbnail caches. In addition, graphical glitches like this one could also occur if you are using out outdated graphics drivers. To fix this problem, you need to follow the options laid out below.

Option 1 – Try using the Disk Cleanup to remove Thumbnail files

The Disk Cleanup tool is one of the options you can try to fix the black squares behind the folder icons. Through this tool, you can delete all the Thumbnail files on your disk. To use it, refer to these steps:

  • Open the Search bar and type “disk cleanup” in the field.
  • After opening Disk Cleanup from the search results, then from the drop-down menu select the C: drive to clean up and click OK.
  • Wait for the scanning process to complete. Once it’s done, select the files you want to delete.
  • Ensure that you select the box labeled “Thumbnails” under the Files to Delete section then click on OK.
  • After that, a confirmation box will appear, just click on Delete files to delete the files permanently.
  • Restart your PC.

Option 2 – Try resetting the Thumbnail cache

You have the option to manually delete the Thumbnail Cache to resolve the black square background behind the folder icons issue. Follow the steps given below to reset the Thumbnail cache.

  • Open the File Explorer.
  • Next, navigate to the View tab and select the option with Hidden items to display all the hidden folders and files.
  • Next, go to this path: C:Users<username>AppDataLocal
  • In the given path, make sure that you put your actual username in the username field. Then look for a file named “IconCache.db”. Right-click on this file and click on Delete.
  • After that, go to this path: C:Users<username>AppDataLocalMicrosoftWindowsExplorer
  • From there, select all the files and delete them.

Note: If a prompt appears saying, “The files are in use and cannot be deleted”, simply select the “Do this for all current items” option and then click on Try Again. If you get an error message, click on Cancel to close the window and restart your computer.

Option 3 – Try updating or reinstalling the Graphics driver

  • Tap the Win + R keys to open the Run dialog box and then type in devmgmt.msc and tap Enter or click OK to open the Device Manager.
  • Expand the section for the outdated device drivers.
  • And then select the outdated driver(s) and right-click on it/them.
  • From the drop-down menu, select the Update Driver option if you wish to update the driver or select the Uninstall device if you want to uninstall the driver and then follow the on-screen instructions to install the latest version of the driver.
  • Restart your PC after the installation to allow the system to reinstall the driver.

Do You Need Help with Your Device?

Our Team of Experts May Help
Troubleshoot.Tech Experts are There for You!
Replace damaged files
Restore performance
Free disk space
Remove Malware
Protects WEB browser
Remove Viruses
Stop PC freezing
GET HELP
Troubleshoot.Tech experts work with all versions of Microsoft Windows including Windows 11, with Android, Mac, and more.

Share this article:

You might also like

Fix Err_Connection_Closed in Windows
If you suddenly encounter an error message that says, “This webpage is not available, Err_Connection_Closed” while browsing the internet or visiting a website and the website fails to load, then it means that there is some problem with your network connection. Similarly, you may also get other error messages like “Err_Network_Changed”, “Err_Connection_Reset” and “Err_Internet_Disconnected” errors in different browsers like Chrome, Firefox, and Edge. The problem lies in your Windows 10 computer and your internet connection since this is a network issue. So before you troubleshoot the problem using the suggestions given below, you need to refresh your browser first or you could also tap Ctrl + F5 on your keyboard to hard reload the webpage. If you’re still getting the same error message, then proceed to the guide below.

Option 1 – Try removing the Proxy

Removing the Proxy might also help you in fixing the “This webpage is not available, Err_Connection_Closed” error. Here’s how you can do it:
  • Tap the Win + R keys to open the Run dialog box.
  • Then type “inetcpl.cpl” in the field and hit Enter to pull up the Internet Properties.
  • After that, go to the Connections tab and select the LAN settings.
  • From there. Uncheck the “Use a Proxy Server” option for your LAN and then make sure that the “Automatically detect settings” option is checked.
  • Now click the OK and the Apply buttons.
  • Restart your PC.
Note: If you are using a third-party proxy service, you have to disable it.

Option 2 – Try using Google Public DNS

If the first option didn’t resolve the issue, you can try to use the Public DNS by Google and see if it can help fix the problem. You have to modify the DNS settings in your system explicitly and use the DNS IP addresses.
  • The first thing you have to do is right-click on the network icon in the Taskbar and select Network and Sharing Center.
  • Next, click on the “Change Adapter Settings” option.
  • After that, search for the network connection that you are using to connect to the internet. Note that the option might be “Wireless Connection” or “Local Area Connection”.
  • Right-click on your network connection and click on Properties.
  • Then select the new window to choose the “Internet Protocol 4 (TCP/IPv4)” option.
  • After that, click on the Properties button and click the checkbox in the new window for the option “Use the following DNS server addresses”.
  • Type in “8.8.8.8” and “8.8.4.4” and click OK and exit.

Option 3 – Reset Winsock, TCP/IP & Flush DNS

Resetting Winsock, TCP/IP, and flushing DNS might help you resolve the Err_Connection_Closed error. To do so, follow these steps:
  • Right-click on the Start button and click on Command Prompt (administrator) so you can pull up an elevated Command Prompt.
  • After that, execute each one of the commands listed below. And after you typed in one after the other, you have to hit Enter.
  1. netsh winsock reset – type in this command to reset Winsock
  2. netsh int ip reset resettcpip.txt – type in this command to reset TCP/IP
  3. ipconfig /flushdns – type in this command to flush the DNS cache
  • Next, restart your PC and check if the problem’s fixed.

Option 4 – Disable both the Antivirus program and Firewall temporarily

There are times when antivirus programs and the firewall blocks a website that they consider to be malicious or even because of false-positive effects which is why you have to disable these programs temporarily as it might be the reason why you’re getting the “This webpage is not available, Err_Connection_Closed” error when trying to browse the internet.

Option 5 – Try to check the network cables and then restart your router

The most obvious thing you can do first is to try checking if the network cables connected to your computer or router are properly connected or not. If it turns out that some network cables are not connected properly, then it’s probably why you’re getting this error.

Option 6 –Try a Network Reset

When all else fails, you might have to consider resetting your entire network settings. Simply follow the steps below to do so.
  • Click on the Start button and then click on the gear-like icon for Settings to open it.
  • Next, select Network and Internet.
  • Then scroll down and look for “Network Reset” – click on it and then click on the Reset now button.
Read More
How to send your PDF file to amazon Kindle
Kindle is, without doubt, a great piece of hardware, perhaps it is the closest thing to a book within the domain of digital devices. With its low price and usability, it has found itself in many homes and within the grasp of many readers in the world. You can buy digital books in the Amazon store for fraction of a regular price if it digital Kindle edition. You keep your library in the cloud and download just books you want to read on your device. In this article, we will explore how you can send your existing PDF or any other supported file that you already have to your kindle device so you can read it on it.

Before we begin, you should make sure the file you're trying to convert is compatible with the Kindle:

HTML RTF JPEG GIF PNG BMP or PDF The compatible file types cover most formats you're likely using, but if you find the document you want on your Kindle isn't compatible, there are a few ways to convert it. In the program it typically opens into, like Microsoft Word for .doc files or an image editing apps for .PNG ones, select 'Save As', and in the drop-down menu, see if any of the compatible options are available. If not, you could try a PDF converter tool. There are plenty of great paid options and a few good free ones too.

Transfering PDF

To get a PDF on a Kindle, you're going to need to know your Kindle's email address. You'll need to head over to the Amazon website and sign in first. Select 'Your devices and content', click 'Manage Devices'. You should see a list of the books you have assigned to your Kindle account, above this list, in a toolbar should be some options - you'll currently be on 'Content', which should be followed by 'Devices', 'Preferences' and 'Privacy Settings'. Click on 'Devices', and in the next menu, select the option for the Kindle you want the document on. You'll be brought to a Device Summary page which tells you your Kindle email as well as the type of device it is. You now need to approve your personal email, so that when the Kindle receives your PDF, it knows to download this. Make sure the email you approve is the one you're planning to send documents to your Kindle from otherwise it won't work. To approve your email address follow the steps for finding your Kindle email address but instead of selecting 'Devices' in the top bar, click 'Preferences'. Scroll down this list until you find Personal Document Settings, and select this option so it expands into more options. From here, scroll down until you find 'Approved Personal Document E-mail List'. This list will show people who can email stuff to your Kindle, Below the emails is an option to 'Add a new approved e-mail address', which you should select. Enter your email address and click 'Add address' to get yourself approved. Head over to your email client of choice, attach the file to an email, and send the email to your Kindle email address. You're able to send multiple documents at once, so if you have loads of files you want on your Kindle, you don't need to send separate emails. If you're sending over a PDF file, you can ask Amazon to automatically convert the file into a Kindle one, which lets you annotate the sections and change the font size. Simply put the word 'convert' as the subject line and the rest will be handled for you. 'Sync Your Kindle'.
Read More
Fix a Steam Disk Write error

Disk Write Error in Steam is thrown at you while you try to download or update the game in your library. If you are an unfortunate user of Steam that has encountered this error do not sweat, the error is usually tied to permission in windows or file corruption and not to hardware issues and can be easily resolved.

In this guide, we will go through solutions for this specific error and it is advisable to go through solutions as they are presented since they go from the easiest and most common issues.

steam disk write error

Restart PC and Steam

The easiest and quickest way of resolving this issue is just a simple restart of the Steam client. Just completely quit Steam and they run it again, if this has not solved the issue try rebooting your PC. In most cases, this can solve the issue since this error is known to be introduced with some communication issues with OS (Windows)

Set Write permissions

Disk write permissions could also cause this error because if by any chance the Steam library folder has been set or changed to the read-only client would be unable to write anything in it. To easily solve this issue completely exit the Steam client and rerun it as administrator. Just right-click on it and select Run as Administrator. If this has solved your issue run Steam always as an administrator.

To run always as an administrator right click on the steam executable, go to properties, and inside properties go to the compatibility tab. In the compatibility tab check run as administrator and click on OK.

Clear download cache

If for any reason cache has become corrupted there is a big chance that this might be an issue why there is a disk drive error in Steam. To clear download, cache goes into your client, and on top drow down menu click on steam. Find and open settings and inside go to the downloads tab. Locate a clear download cache and immediately you will be prompted to restart Steam. After restart, you will be asked to login into steam and the issue with disk write should be gone.

Repair library folder

Library folder issues can also be the source of disk write annoyance so let's repair them. Click steam in the top left and go to the settings. Locate and click on Downloads and then go to Steam library folders. You will be here shown all disk drivers you are using for steam games and all of the games that are downloaded.

Select the game you are getting errors with and click on three dots on the far right. From the menu choose the repair folder option. Take note that the more games you have installed, the more time the repair process will need.

Change download server

Sometimes the issue is not at your end at all, servers can experience problems and outrages and this can directly reflect at your end with a disk write error. If any of the previous solutions have not resolved the issue this is the next logical step to try. If the server is facing issues then changing the download server will resolve the issue at your end.

Click on settings in the top drop-down menu and then click on the Steam library folder. Find the downloads page and then click on download region, Choose another server than one nearest to your location since that's what will Steam choose by default.

Read More
Quick Fix Guide for STOP 0x00000014 Error

What Is STOP 0x00000014 Error?

0x00000014 error is actually an error that is always displayed on a STOP message.

It is also known as Blue Screen of Death, abbreviated as BSOD. When this error occurs, the message that is displayed to the user either says ‘STOP: 0x00000014’ or states ‘CREATE_DELETE_LOCK_NOT_LOCKED’. It is crucial to fix this error to ensure your program is functioning appropriately. If this error message is not rectified, you might be opened to other error messages, such as error code 0x000000d1

Solution

Restoro box image Error Causes

As far as the causes of STOP 0x00000014 error are concerned, this error usually occurs when a device driver or hardware problem occurs. This error may also occur if users attempt to run some specific application or update or modify an existing application. When a 0x00000014 error occurs, the operating system restarts to disable the PC from performing any further.

Without taking into consideration the causes of its occurrence, it is crucial to make sure that the 0x00000014 error is fixed as soon as possible to eliminate any undesired inconvenience in the future.

Further Information and Manual Repair

A lot of times when an operating system tries to recover from the STOP 0x00000014 error, the user is prompted that Windows has recovered from an unexpected shutdown.

However, if Windows fails to recover on its own, manual repair has to be performed.

While there are several ways this error can be fixed, some of the most effective and efficient ways of troubleshooting the 0x00000014 error are listed below as follows.

  • Restart your computer. Often simply restarting the computer can help eliminate the problem.
  • If restarting the system doesn’t help, find if you have recently modified or altered any hardware or driver. It is possible that the 0x00000014 error has been caused by the recent modification. Undo the changes and find out if the error occurs again. If it doesn’t, it is highly likely the issue has been resolved.

However, if the error persists, some solutions that may work are outlined below.

  • Start your system using the Last Known Good Configuration. This will undo any changes in the driver and recent registry.
  • Another solution is to manually perform System Restore. This will also return the system back to its former state.
  • Another idea that my work is to use roll back the device driver. When the driver will return to its previous version, the problem will easily be resolved.

To keep the 0x00000014 error from occurring in the future, it is advised to unplug any newly installed hardware or reinstall any deleted software.

If you're not tech-savvy and wish to get this error code rectified in a jiffy, download a powerful automated tool and perform a computer scan.

Read More
3 Methods To Fix Qtcore4.dll Error

Qtcore4.dll Error - What is it?

Qtcore4.dll is a dynamic link library file that helps Microsoft Windows in loading several key components of the system. The Qtcore4.dll error occurs when the Qtcore4.dll file cannot be loaded to run the application supported by this .dll file. The Qcore4.dll missing error message may occur while booting your system or launching a certain program. It is a blue screen of death error type. The Qtcore4.dll error code is often displayed as:

BLUE SCREEN ERROR - QtCore4.dll Not Found

Filei386QtCore4.dll could not be loaded. The error code is 7. Setup cannot continue. Press any key to exit.

Solution

Restoro box imageError Causes

This error code is triggered by a variety of reasons such as:
  • Windows file allocation file gets damaged
  • Your computer BIOS (Basic Input/Output System) are misconfigured
  • The Qtcore4.dll file gets corrupt
  • Registry gets damaged and corrupt
  • Non-Microsoft program not running in tandem with Windows
  • Malware attack
  • Improper hardware driver software
It is advisable to fix the Qtcore4.dll error code immediately as this error can pose serious threats to your system. Qtcore4.dll error can lead to system breakdown.

Further Information and Manual Repair

Here are some ways of fixing the Qtcore4.dll error on your system:

1. Re-install the Program Causing Qtcore4.dll error message to pop up

As dll files are shared files sometimes due to program deletion and installation .dll file settings can get misconfigured, damaged, and corrupt. In such a scenario, you can try reinstalling the program that is causing Qtcore4.dll error message to appear on the screen.

2. Reconfigure your Mis-configured BIOS

If BIOS misconfiguration is the cause of this error code on your system, then try reconfiguring your system’s misconfigured BIOS.
  • To do this boot the computer and then press the BIOS designated keys to enter the BIOS. The keys may vary from manufacture to manufacture but typically, the setup keys are F2, F10, F12, and Del.
  • Once you figure out the setup keys, press them rapidly when booting the computer.
  • After successfully hitting the setup keys, the BIOS will load and you will see the BIOS setting menu on your screen. Adjust settings. Go to SATA Operation and change RAID AHCI to RAID ATA. Save changes and then exit.

3. Scan Your PC with a Registry Cleaner and an Antivirus

However, after adjusting the BIOS if the error still pops up on your screen, then this indicates the problem is bigger than you think. It triggers either malware attack or registry corruption. If these are the underlying causes for the Qtcore4.dll error on your system then you need to scan your PC with a registry cleaner and an antivirus. Registry is the main database of your system; if this gets corrupt it is most likely to result in system failure and valuable data loss. And as for malware, the biggest concern is data security threats. Today’s advanced and lethal malware like viruses and spyware can give easy access to hackers to enter your system from a remote location, browse through your confidential and private data and manipulate it to their advantage. This has led to a surge in various types of cyber crime, data breaches, and identity theft cases over the years. To avoid all this while resolving the error code Qtcore4.dll on your PC, registry cleaning and repair and antivirus scan are needed. You can either download 2 separate tools on your system to scan your PC which by the way will take a lot of time and increase your chances of the system slow down or you can download Restoro.

Why Restoro?

  • Total System Care is an advanced, user-friendly, high, and multi-functional repair.
  • It is deployed with a powerful and intuitive registry cleaner. It also functions as a system optimizer. It spares you from downloading numerous tools to address and resolve different errors on your PC.
  • It is your one-stop solution for not only Qtcore4.dll problems but practically all PC-related issues.
  • The registry cleaner utility detects all the malicious, unnecessary, and obsolete files overloading and corrupting your RAM.
  • This includes junk and temporary files. It wipes them out thus clearing your disk space. Simultaneously, it also repairs the damaged and misconfigured dll files including the Qtcore4.dll file, and fixes the corrupt registry.
  • The privacy error utility has the properties of an antivirus. It detects and removes malware, viruses adware, and spyware from your system in seconds.
  • Total System Care resolves the Qtcore4.dll error on your system and boosts the performance of your system. It has a simple and neat interface which makes it quite easy for users to operate it, even those who are not technically adept.
  • It is compatible with all Windows versions
Click here to download Restoro and repair the Qtcore4.dll error on your PC.
Read More
Software review series: Adobe Photoshop
From photo editing and compositing to digital painting, animation, and graphic design you can do it all in Photoshop. Bring ideas to life across desktop and iPad. Magically transform images with the power of AI. Learn new skills and share your projects via Livestream. Started as a photo editing application, photoshop has surpassed the original ideas and designs in the following years growing with each release and including more tools and flexibility not matched in other applications. Photoshop was the first to introduce many new features and set standards for other applications. How years have passed product grew and innovation was pushed forward, it took some time but eventually, photoshop was able to set itself as the industry-standard application for pixel editing and it holds that position even today. Throughout the world artist all over the globe are using it to create digital art in various fields be that illustrations, film, photography, texturing, etc. Its vast majority of tools and possibilities as well as its extensibility with plugins, actions, brushes have cemented it in the highest place in any designer or artist toolkit. Today you can get it as a part of a creative suite for a monthly fee on the official adobe website and even if you do not need other creative suite applications photoshop is worth the fee alone. Simply you have to try it, learn it, and then harvest its power. If you would like to read more helpful articles and tips about various software and hardware visit errortools.com daily.
Read More
Fix 0x0000007c (ERROR_INVALID_LEVEL) in W11
0x0000007c error inside Windows 11 is a printer error that is manifested when Windows users are trying to connect to a shared network remote printer. Error is displayed by the message:
Windows cannot connect to the printer. Operation failed with error 0x0000007c.
If you are experiencing this type of annoyance, fear now we are providing you with several solutions to this problem.

0x0000007c (ERROR_INVALID_LEVEL)Update Windows 11

  1. Open the Start menu, click on the settings app
  2. Select Windows update tab
  3. Click on Check for updates
  4. Click on Advanced options
  5. Inside select Optional updates
  6. If there are optional updates click on Download & Install

Run the printer troubleshooter

  1. Press ⊞ WINDOWS + I to open settings
  2. Click on Troubleshoot navigation on the system tab
  3. Select Other trouble-shooters
  4. Click on the Run for printer troubleshooter
  5. If the error is found click on Apply this fix

Restart the Print Spooler Service

  1. Right-click on the Start button
  2. Click on RUN
  3. Type in services.msc and press OK
  4. Right-click on Printer Spooler service and select Restart

Clear the Print Spooler

  1. Open services like in the previous step
  2. Right-click Print Spooler and select STOP
  3. Open File explorer
  4. Navigate to: C:\Windows\System32\spool\drivers\x64\3 (64-bit Platform) C:\Windows\System32\spool\drivers\W32X86\3 (32-bit Platform)
  5. Delete everything inside folders
  6. Go back to services, right-click on Print Spooler and select RESTART

Reinstall Driver for printer

  1. Right-click on Start and select device manager
  2. Double click on the Print queues category
  3. Right-click on the printer and select Uninstall device
  4. Click on Uninstall on prompt
  5. Right-click on the Print queues category and select Scan for hardware Changes
Read More
Guide to Fixing PFN_LIST_CORRUPT Blue Screen

PFN_LIST_CORRUPT Blue Screen - What is it?

PFN_LIST_CORRUPT is a blue screen of death error code. It occurs when the PFN (Page Frame Number) list becomes corrupt. The Page Frame Number is basically used by your hard drive to determine your location of each one of your files on the disk. This error may occur when starting up the program or while using it. Blue screen of death errors occurs without any warnings. The program disrupts all of a sudden and the computer screen turns blue.

Solution

Restoro box imageError Causes

PFN_LIST_CORRUPT Blue Screen error may occur due to multiple reasons. Some of the common reasons include:
  • Hardware problems
  • Device driver issues
  • Registry problems
  • Viral Infection
It is recommended to resolve the PFN_LIST_CORRUPT Blue Screen of Death error immediately without any delay virtually because this error can be quite fatal to your PC. It can pose serious threats to your system like system freeze, crash, failure, and valuable data loss. Furthermore, if the error is related to viral infection, it can expose you to privacy issues, data breaches, and cybercrime too.

Further Information and Manual Repair

This is a critical PC error but easy to resolve. You don’t need any technical expertise to fix this error on your PC. Here are some quick and easy methods to resolve PFN_LIST_CORRUPT Blue Screen error:

Method 1: Install Compatible Device Drivers

Sometimes when new hardware is added to the PC, you need to install updated versions of the device drivers to ensure there are no incompatibility issues. Incompatibility between the hardware and device drivers may generate PFN_LIST_CORRUPT Blue Screen of death error on your screen. To resolve, it is advisable to download and install the latest updated versions of the device drivers from the manufacturer’s website.

Method 2: Scan for Viruses

PFN_LIST_CORRUPT Blue Screen of Death error may occur due to viral infection too. Viruses and spyware enter your PC when you log on to unreliable websites and download programs from there or open phishing emails on your PC. These viruses corrupt and damage programs and files resulting in such errors. To fix the issue, you need to install a powerful antivirus and ensure all kinds of viruses and spyware are detected and removed from your system.

Method 3: Clean and Restore the Registry

PFN_LIST_CORRUPT Blue Screen error indicates poor PC maintenance. When you don’t clean and remove unnecessary and obsolete files like junk files, bad registry keys, cookies, internet history, temporary files, and invalid entries from the registry, the registry overloads and gets damaged. These files accumulate taking up a lot of disk space and also corrupt system files. If these files are not removed timely, it results in registry issues like a blue screen of death errors and run-time errors. To remove these files and clean the registry, you need to install a powerful registry cleaner. Whether the underlying cause for PFN_LIST_CORRUPT Blue Screen of Death error on your PC is viral infection or registry issues, to resolve the BSOD error code in seconds download Restoro. This is a cutting-edge and multi-functional PC fixer deployed with both an antivirus and a registry cleaner. Additional features include a system optimizer too. It is user-friendly and easy to operate. You can download it on all Windows versions without any hassle. It is safe and bug-free. The registry cleaner feature scans and removes all unnecessary files, cleans and repairs the registry while the antivirus utility simultaneously removes all kinds of malicious software including spyware, viruses, Trojans, and malware. Click here to download Restoro now and resolve the PFN_LIST_CORRUPT Blue Screen of Death error immediately!
Read More
MSASCui.exe - Quick Fix Guide
MSASCui.exe is a digitally signed file from Microsoft located in folder C:\Program Files\Windows Defender. It is a component of Microsoft Windows Defender Antispyware. This file is responsible for performing spyware scans. It is already installed in Windows Vista operating system. MSASCui.exe becomes an error code when it is found in another path. It is categorized as a Windows runtime error.

Solution

Restoro box imageError Causes

The cause of MSASCui.exe error is triggered by:
  • Corrupt or damaged registry entries
  • Virus Infection
The potential risks of MSASCui.exe error are:
  • Slow PC performance
  • Data loss
When this file becomes an error, it will display messages like:
“This application has failed to start to run on Windows because MSASCUI.exe cannot be found.” “Windows Defender cannot work properly and protect the Windows system effectively”
The message will keep popping up on your computer screen time and again.

Further Information and Manual Repair

When you experience an MSASCui.exe error on your PC, it is advisable to fix and repair it immediately before it causes serious damages to your system. Here are some DIY quick solutions to repair MSASCui.exe error:

Solution 1:

If the speed of your PC reduces significantly and you also see MSASCui.exe error message pop on your screen, then in this case it is advisable to uninstall the Windows Defender program from your PC. To do so, follow these instructions:
  • First, open the Windows Task Manager by pressing the “Ctrl, “Alt” and “Delete” keys on the keyboard.
  • Now click the ‘Processes’ tab. This will show the currently running processes on your system.
  • Scroll down and click on “MSASCui.exe” and then end the process. This will stop the program from running on your PC.
  • After this go to the start menu and double click on ‘My Computer’ and click on the C drive.
  • Choose the option ‘Program Files’ and then click on the ‘Windows Defender’ folder.
  • Now to delete this folder, right-click and select ‘delete’. This will uninstall the program, fix the MSASCui.exe error, and also improve the performance of your PC.

Solution 2:

If you find the MSASCui.exe file located in some other path, then this is an indication of a virus. In this case, it is recommended to run an antivirus program on your PC to scan and delete all viruses. If you don’t have an antivirus program already installed on your system, then you should download it. Once antivirus software is downloaded, simply run it to scan viruses and then click on delete to remove all the viruses on your system. This will help you resolve the MSASCui.exe error caused by malware on your PC right away.
Read More
Stop showing browser tabs when alt+tab, Win11
windows browser tabs removed alt tab
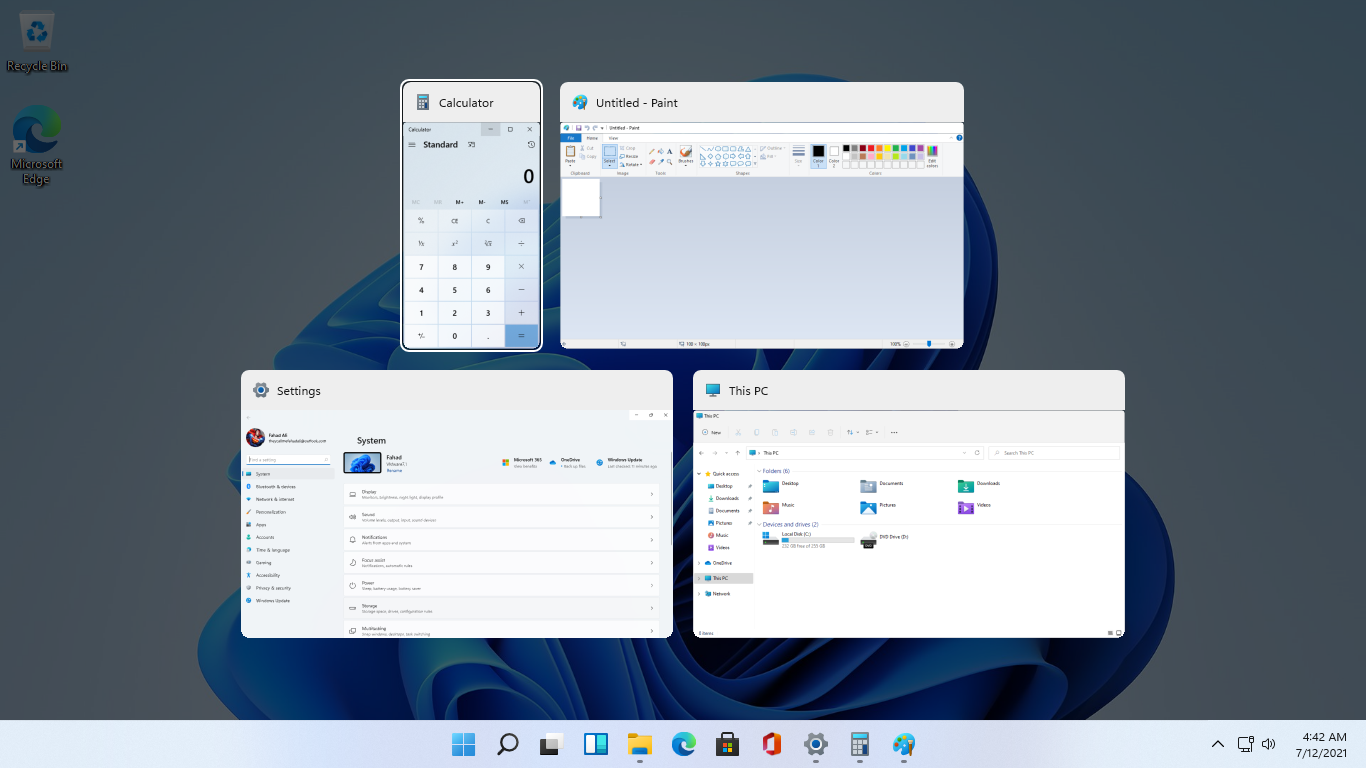
As in previous Windows 10, inside Windows 11 also when you press the ALT + TAB key combination you will get a preview of all running applications along with all Browser tabs so you can go through them and pick the one you want to switch to. Alto, I personally am a big fan of alt-tabbing, I must admit that I am not a big fan of having multiple browsers tabs on screen when I do press key combo. Luckily there is a very easy way to turn this feature off. Turning browsers tabs thumbnails off
  1. Press ⊞ WINDOWS + I to open settings
  2. Click on System in the sidebar
  3. Scroll down and select Multitasking
  4. Find Alt + Tab section and click on the drop-down menu
  5. Pick Open Windows Only
  6. Close settings
Now when you press the ALT + TAB key combination you will still see your browser but only an active tab in it instead of all tabs as different preview thumbnails.
Read More
1 2 3 171
Logo
Copyright © 2023, ErrorTools. All Rights Reserved
Trademark: Microsoft Windows logos are registered trademarks of Microsoft. Disclaimer: ErrorTools.com is not affiliated with Microsoft, nor claims direct affiliation.
The information on this page is provided for information purposes only.
DMCA.com Protection Status