Sometimes, some applications after they are installed will put their shortcut in the context menu (right-click on desktop) for easy access, most of the time these are some system tied applications like AMD and Nvidia control panels or archives like WinRAR or 7ZIP but it can happen even for some usual application to do this.
There are some applications that you use frequently and they could be worth putting in the context menu, if you want to avoid clutter on the desktop or in the taskbar this is the third place that you should consider placing shortcuts.
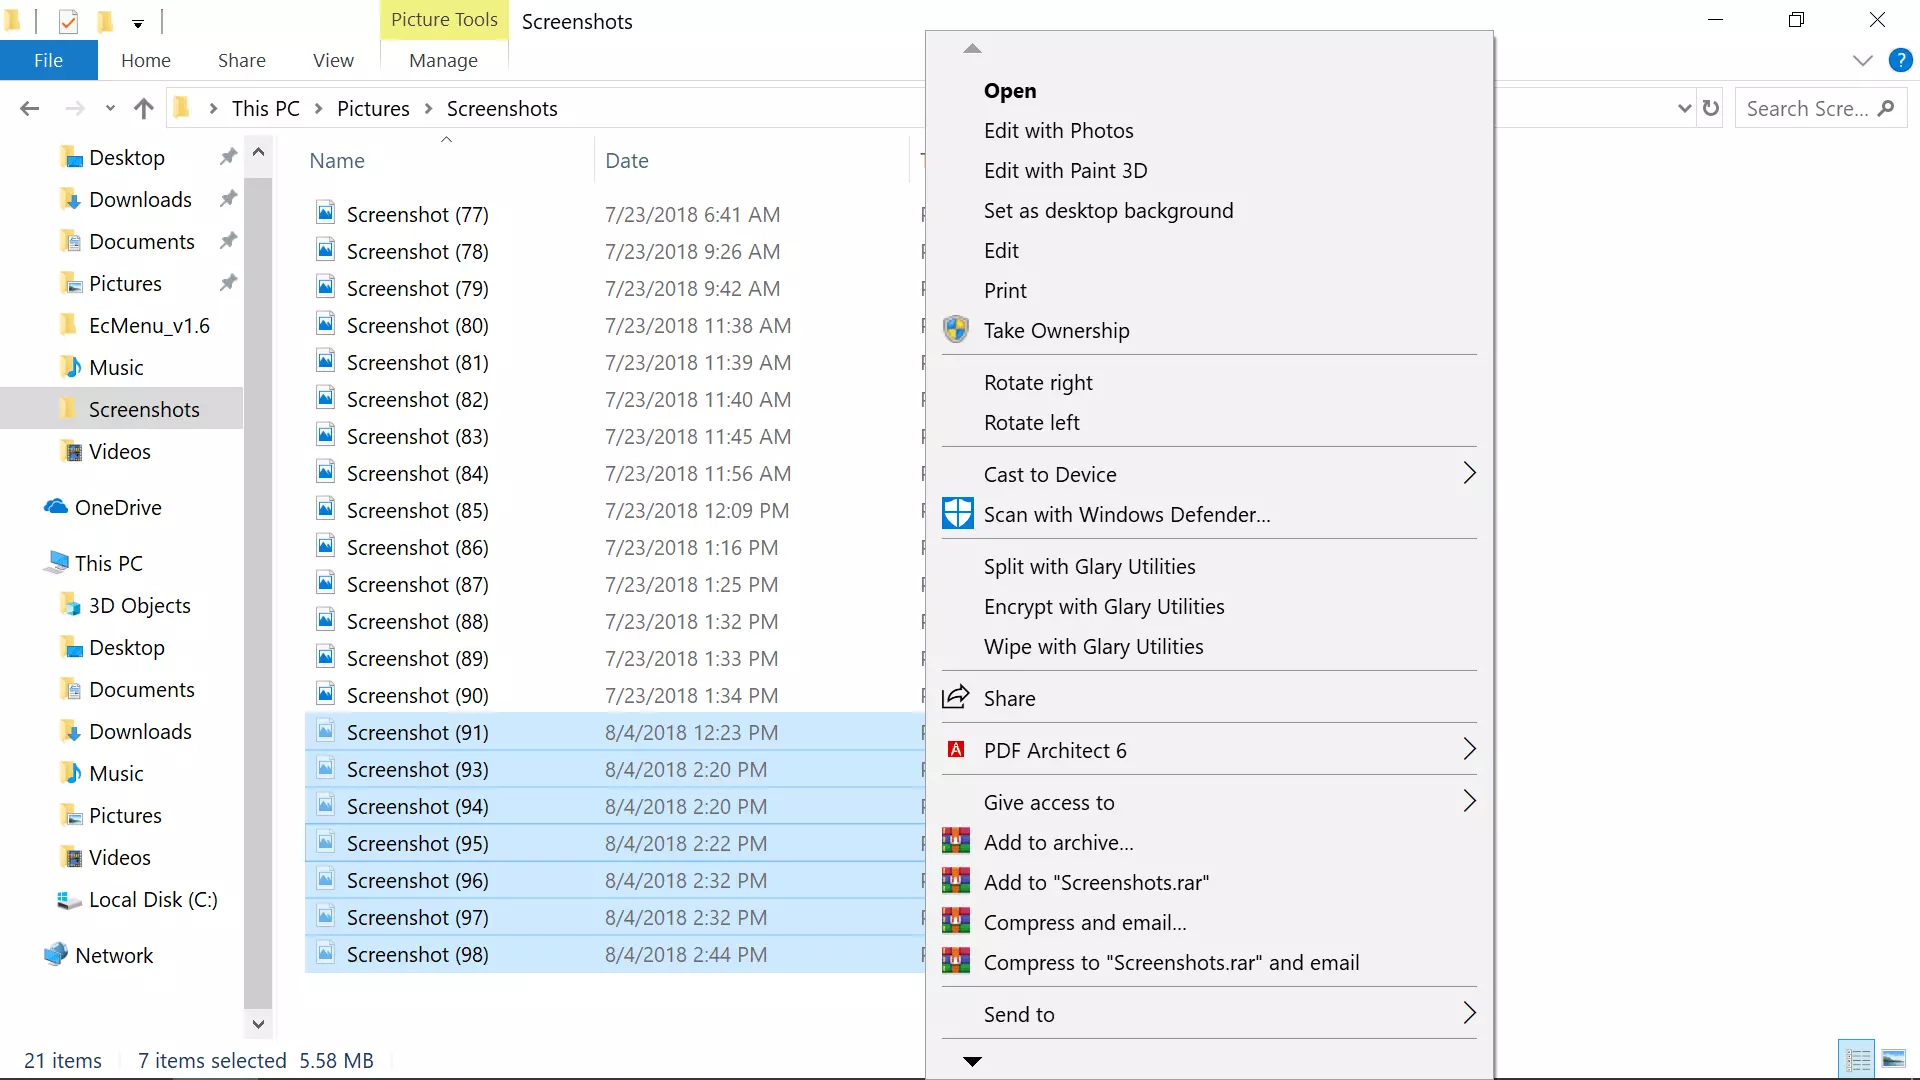
Doing this will require some playing and tweaking in the Windows registry editor so be careful when editing the registry since bad entries can lead to system crash or instability. Follow step-by-step instructions.
Adding apps to the context menu in the registry
Creating entry
Open the registry editor by searching Regedit and pressing enter than inside of the registry editor search for the next key:
HKEY_CLASSES_ROOT\Directory\Background\shell
Select shell and right-click on it, hover over New and in the submenu click on Key. In the next step, you need to name a key, this name will be the thing that will be shown in the context menu when you right-click on a desktop so type in the name that you would like or the name of the application that you wish to add to the menu.
If you wish you can even add a keyboard shortcut to launch this specific application. To do this select entry that you have created and edit the default value, inside the edit string in the Value data field type first & and after that key that you would like as a shortcut. Now after right click if you hit your shortcut key app will be launched right away.
Adding command
The next task is to create a command key that will actually hold the command to launch the application. Right-click on the entry that you have created, hover over New, and click on Key.
Next, you’ll need to create the command key that will actually hold the command used to launch the application. Right-click on the new Notepad key, and then choose New \ Key from the menu. Name this key 'command', all in lower case and without hyphens.
Now in order to finish setting the launcher, you need the full path of the file that you would like to run. Locate your file in file explorer or in another tool and copy its path by SHIFT + right-clicking on the file itself and choosing copy as path option.
Now click on the command key and double click on the default key on right to edit it, inside the field value data paste your path to executable. close and save the registry and you are done.

 Intel announced that Pat Gelsinger (CEO) and Dr. Ann Kelleher (technology Department head) will discuss Intel’s process and packaging innovations on an upcoming webcast that will happen on July 26th.
The spokesman will talk and provide a deeper look at the process and packaging roadmaps for Intel. As we know Intel is planning to expand its production capabilities, outsource some of its technologies and offer foundry services to other chip design companies.
The strategy will also include a shift to a 7nm process and Intel’s effort to set itself again as leader of CPU performance by 2024.
There is also a chance that we will hear exact plans for Intel in the next three or four years.
Intel didn't reveal much else about what Gelsinger and Kelleher plan to discuss during the webcast. The event will be streamed on July 26 at 2 pm PT via the Intel Newsroom; it will also be available to watch on-demand after the stream ends.
Intel announced that Pat Gelsinger (CEO) and Dr. Ann Kelleher (technology Department head) will discuss Intel’s process and packaging innovations on an upcoming webcast that will happen on July 26th.
The spokesman will talk and provide a deeper look at the process and packaging roadmaps for Intel. As we know Intel is planning to expand its production capabilities, outsource some of its technologies and offer foundry services to other chip design companies.
The strategy will also include a shift to a 7nm process and Intel’s effort to set itself again as leader of CPU performance by 2024.
There is also a chance that we will hear exact plans for Intel in the next three or four years.
Intel didn't reveal much else about what Gelsinger and Kelleher plan to discuss during the webcast. The event will be streamed on July 26 at 2 pm PT via the Intel Newsroom; it will also be available to watch on-demand after the stream ends. 
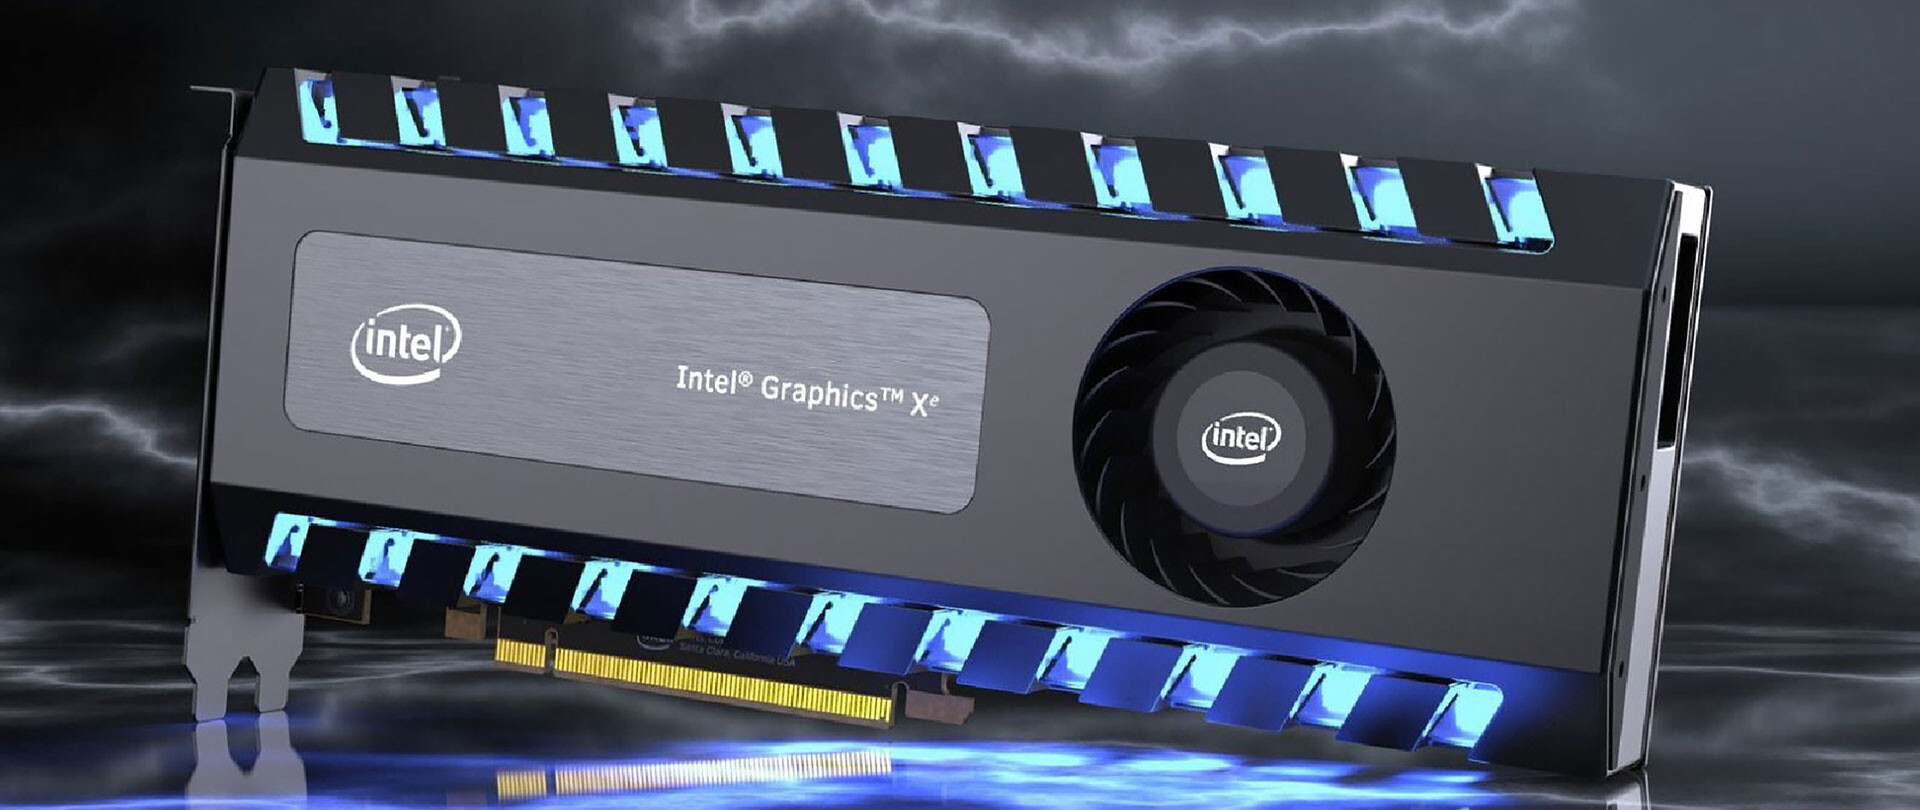 This is not the first time that Intel is trying to enter the GPU field but its adventures so far were, well let us agree not so good. All of that is hoping to be changed with the upcoming ARC GPU. The first generation of Arc graphics, code-named Alchemist and previously known as DG2, will support desktop PCs and laptops and is set to arrive in the first quarter of 2022.
Alchemist will have hardware-based Ray tracing and AI-driven supersampling. This indicates that GPU is aimed to compete in the Hi-end spectrum and battle side by side with Nvidia and AMD on the market. Alchemist will also pack full DirectX 12 Ultimate support.
Intel also released names for the next upcoming future generations of ARC GPUs: Battlemage, Celestial & Druid. More information about ARC products will be released later this year.
“Today marks a key moment in the graphics journey we started just a few years ago. The launch of the Intel Arc brand and the reveal of future hardware generations signifies Intel’s deep and continued commitment to gamers and creators everywhere,” Roger Chandler, Intel vice president, and general manager of client graphics products and solutions.
This is not the first time that Intel is trying to enter the GPU field but its adventures so far were, well let us agree not so good. All of that is hoping to be changed with the upcoming ARC GPU. The first generation of Arc graphics, code-named Alchemist and previously known as DG2, will support desktop PCs and laptops and is set to arrive in the first quarter of 2022.
Alchemist will have hardware-based Ray tracing and AI-driven supersampling. This indicates that GPU is aimed to compete in the Hi-end spectrum and battle side by side with Nvidia and AMD on the market. Alchemist will also pack full DirectX 12 Ultimate support.
Intel also released names for the next upcoming future generations of ARC GPUs: Battlemage, Celestial & Druid. More information about ARC products will be released later this year.
“Today marks a key moment in the graphics journey we started just a few years ago. The launch of the Intel Arc brand and the reveal of future hardware generations signifies Intel’s deep and continued commitment to gamers and creators everywhere,” Roger Chandler, Intel vice president, and general manager of client graphics products and solutions.  Many Linux users if not all of them can run their distros from a USB drive but did you know you can run Windows 10 from a USB drive as well?
Microsoft has introduced all the way back to Windows 8 one feature called Windows To Go and it kept it in Windows 8.1 and in Windows 10 as well.
This feature is intended as a convenient way for workers to carry their corporate environments with them, but having your own copy of Windows on a thumb drive could be handy for backup purposes, too, or if you frequently use public machines that lack your preferences/applications or that have a restricted OS.
Many Linux users if not all of them can run their distros from a USB drive but did you know you can run Windows 10 from a USB drive as well?
Microsoft has introduced all the way back to Windows 8 one feature called Windows To Go and it kept it in Windows 8.1 and in Windows 10 as well.
This feature is intended as a convenient way for workers to carry their corporate environments with them, but having your own copy of Windows on a thumb drive could be handy for backup purposes, too, or if you frequently use public machines that lack your preferences/applications or that have a restricted OS.