
Code 0x80070070 – 0x50011 – What is it?
If you’ve recently tried installing Windows 10, you might have encountered error code 0x80070070 – 0x50011 or its alternatives (error code 0x80070070 – 0x50012 and 0x80070070 – 0x60000). Whatever formats this error code presents itself in, it's usually accompanied by a barrage of other errors, as underscored on Microsoft’s official site. If you’ve encountered this error code, it simply means that your computer system might not have the required or required space to install the upgrade.
Likely, if you’ve experienced error code 0x80070070 – 0x50011, it’ll likely appear in the formats highlighted below:
- 0x80070070 – 0x50011
- 0x80070070 – 0x50012
- 0x80070070 – 0x60000
Solution
 Error Causes
At present, this Windows 10 upgrade error is triggered or caused by various factors:
- Lack of computer resources or space
- Virus/malware infestation
- A clogged registry
Further Information and Manual Repair
Whilst new, not much information has been propagated regarding this error. However, there are some manual / practical steps you can take to have your Windows 10 upgrade up and running. Since the primary aspect of solving this problem is to make space on your computer system, here are some ways in which you can do so manually.
Method 1: Get more space
- Check the current space on your computer
Before making attempts to create space on your computer, it’s vital that you check to decipher how much free space you have available.
- Make use of Disk Clean-up
Since there’s a free service available on your computer to create space, why not use it and save time? If the Disk Cleanup tool is employed regularly, this will free up hard drive space and optimize your computer to work better.
- Remove unwanted desktop apps
There are several apps lying around on your computer that you simply don’t use, uninstall those and make space to elude error code 0x80070070 – 0x50011 or its alternatives (Code 0x80070070 – 0x50012, Code 0x80070070 – 0x60000)
- Remove or archive files
If you have lots of photos, media, documents (files), videos, etc, that you don’t use or will only need in the future, try cloud storage. You’ll still have those files within your possession but just not in a physical location. However, they’re still accessible. Another suggestion: If you use programs such as One Drive or Google Drive for desktop, limit your use to only the online application.
- Add more storage
If you’re not able to implement the above steps to clear some space to accommodate your Windows 10 upgrade due to error code 0x80070070 – 0x50011, acquire more storage. This can be expanded by incorporating storage devices such as USB flash drives, CDs, cloud storage, and SD Cards.
Method 2: Scan your computer for virus/malware
If you regularly download stuff, especially software on the Internet from ‘not so secured’ sites, you might have picked up something. You might have downloaded malware or virus (along with other legit programs).
To resolve this issue, it’s advised and very important that you download a powerful antivirus and perform a complete scan of your computer system. After you’ve detected and removed the suspected malware/virus, you’ll then be able to eliminate error code 0x80070070 – 0x50011 and resume with your Windows 10 upgrade.
Method 3: Clean up your computer’s registry
If you do not clean your computer’s registry often, it could become congested or clogged by .XML files, junk files, and cookies. To resolve this problem, clean your registry by using a powerful and user-friendly tool to clean up the problem.
Click here to download Restoro.
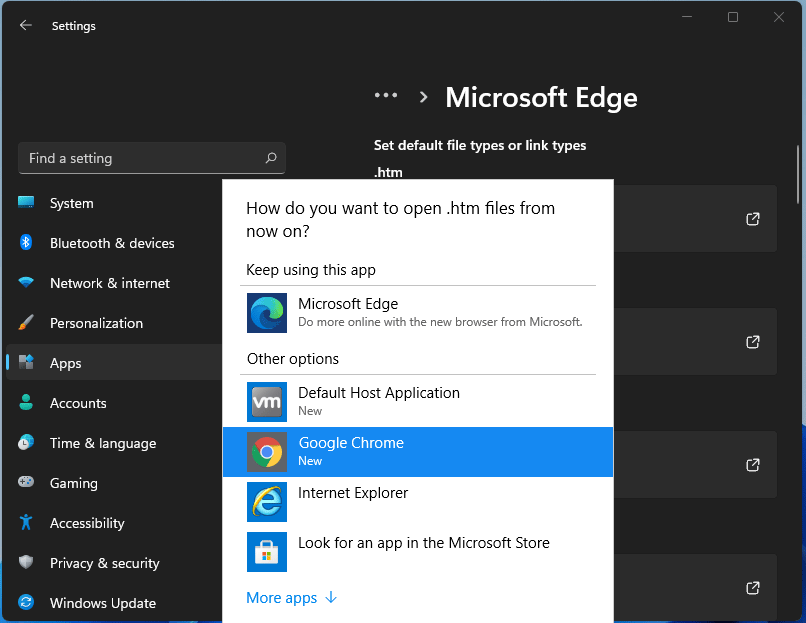 For anyone who is not aware, when Windows 11 was released if you wanted to switch to another browser you had to go into the settings app and choose the default browser for different types of file extensions like HTML, HTM, PDF for opening on the web, etc. Of course, this was completely unnecessary and it was not well received by users. So after some time, Microsoft backpedaled to standard one click, choose your default browser solution that existed in the previous version of Windows OS.
Altho sometimes Microsoft knows how to irritate its users base, it is good to know that they can also listen and fix things that are required.
For anyone who is not aware, when Windows 11 was released if you wanted to switch to another browser you had to go into the settings app and choose the default browser for different types of file extensions like HTML, HTM, PDF for opening on the web, etc. Of course, this was completely unnecessary and it was not well received by users. So after some time, Microsoft backpedaled to standard one click, choose your default browser solution that existed in the previous version of Windows OS.
Altho sometimes Microsoft knows how to irritate its users base, it is good to know that they can also listen and fix things that are required.  Once the device window opens, click once on printers and scanners, and on the right window go to the bottom and uncheck Let windows manage my default printer.
 Unchecking that box will let Windows know that we do not wish anymore for him to set our default printers according to their use. Once the checkbox is clear go up to your printer list and click on the printer you wish to use as the default one. I will choose Microsoft Print to PDF as my default printer and click on it. Once the printer is clicked option menu will appear.
 When the option menu appears under the printer name, click on Manage which will take you to the printer management screen. When you are on the manage screen, click on the Set as default button, and you are done.

 Windows 11 will bring some old applications in new looks and some will get additional features as well. One of the old apps that will get new stuff is a calculator.
The calculator was always a way to go application for quick calculations but Microsoft aims to expand on that and make the calculator a little more useful.
The first thing that you will notice is the calculator look, the calculator has now an application theme setting that allows you to change the look of the application. It comes in standard and professional mode as usual but this time calculator will come with features that will enable it to handle some programming and engineering tasks.
The new calculator features a full graphing mode that lets you visually analyze a graph to identify key features. It also packs a deep converter that can switch between more than 100 units and currencies.
Windows 11 will bring some old applications in new looks and some will get additional features as well. One of the old apps that will get new stuff is a calculator.
The calculator was always a way to go application for quick calculations but Microsoft aims to expand on that and make the calculator a little more useful.
The first thing that you will notice is the calculator look, the calculator has now an application theme setting that allows you to change the look of the application. It comes in standard and professional mode as usual but this time calculator will come with features that will enable it to handle some programming and engineering tasks.
The new calculator features a full graphing mode that lets you visually analyze a graph to identify key features. It also packs a deep converter that can switch between more than 100 units and currencies.


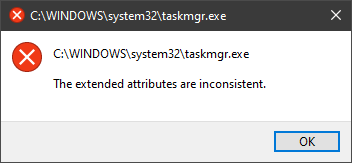 In this guide, we will show you common ways in fixing Extended Attributes are inconsistent errors inside your Windows that are easy to do and less time-consuming than complete reinstallation of the system.