Adobe.DLL is one of the numerous Dll files you are going to encounter on your Personal Computer.
This isn't a system-established service and is usually the consequence of the sort of applications you install on your own Personal Computer.
Because adobe.dll is a low-program process, in the event that you find it present on your pc, you can easily end it. It isn't required for the normal working of your OS but might trigger permanent harm if left unchecked.
Don't forget that the Computer uses the AdobePDF.dll file for assorted tasks, and you need to make sure it's installed correctly.
Solution
Error Causes
When the adobe.dll is left un-fixed, you may shortly have to deal with sluggishness on your Computer. Simply put, this impedes the standard and amount of work you do while using your PC and impacts your productivity.
Sometimes, adobe.dll happens because your computer experiences an overload. As a result, while resolving the malfunction, you've got to look for methods of decreasing the system overload. It's possible that lots of processes are functioning on your PC concurrently. Quit these processes.
Lousy setup of the adobe.dll file causes this error too. Check and fix the files and settings that Adobe.Dll requires to run and you may not have to content with these error anymore.
Further Information and Manual Repair
Even though the adobe.dll may severely influence the functioning of your Computer, it is really a trouble or malfunction that one can fix manually.
Permanently Un-Installing the Adobe.dll Component is one of the better methods for repairing the malfunction.
Yes, you are able to completely eliminate the adobe.dll issue. The thing you really need to do is un-install it from your own computer fully, and for good.
Quit the many processes operating on your Computer and you may get rid of the adobe.dll malfunction.
Adobe.dll regularly happens due to system overload. Thus, the first thing you need to assess is if several processes are operating on the device. If they're, search for methods to stop them, and you'll not have to worry about the adobe.dll error anymore.
Utilize Microsoft System Configuration Utility
The MS System-Configuration Utility will settle the system overload problem, thus freeing up space for your programs to run smoothly and possibly avoid malfunctions, including adobe.dll. The Microsoft System-Configuration Utility manually locates and eliminates all running processes.
Perform Scans On Your Computer
Running scans on your own Computer may enhance or increase its operation. This technique may also aid in examining your Computer for adobe.dll, or such associated malfunctions, and resolve them forever.
Repair Adobe.Dll Files and Settings' Errors.
Considering that the adobe.dll malfunctions can be a result of the existence of malfunctions on your own PC's files and options, fix these properly. Begin by fixing the settings on the files and options utilized by your Computer to perform the adobe.dll, and you may have removed this issue completely.
Finally, establish the source of the error message to effectively solve it. Once you do that and fix it, your PC will resume normal operations and even boost your work and productivity.
As you know, Airplane mode is the one that gets devices in such a state where all the wireless connections are turned off. However, recently, there are some reports from users claiming that the Airplane Mode turns on by itself in their Windows 10 computers. This kind of problem could be due to an error with the Network driver, third-party applications, and many other factors. Other users also reported that the Airplane Mode automatically flickers, while some stated that they aren’t able to toggle the option for Airplane mode.
There are several options you can try to resolve this problem. You can try to configure the Power Management settings for the driver or run the Network troubleshooter. You could also roll back, reinstall or update the Network driver, as well as troubleshoot the problem in a Clean Boot State. For more details, follow each one of the given options below.
Option 1 – Try configuring the Power Management settings for the driver
The first thing you can do to fix the problem is to try configuring the Power Management settings for the driver. How? Refer to these steps:
Tap the Win + X keys to open the WinX menu and from there, select the Device Manager to open it.
Next, expand the Network adapters and select the entry for your Wi-Fi hardware.
After that, right-click on it and select Properties.
From there, go to the Power Management tab and uncheck the “Allow the computer to turn off this device to save power” option.
Once done, restart your computer and see if it has fixed the problem.
Option 2 – Try to run the Network troubleshooter
To run the Network Troubleshooter, refer to these steps:
Open the Search bar on your computer and type in “troubleshoot” to open the Troubleshoot settings.
Next, scroll down and select the “Network Adapter” option from the right pane.
Then click on the Run Troubleshooter” button.
After that, your computer will check for any possible errors and will pinpoint the root cause of the problem if possible.
Restart your computer.
Option 3 – Try to update, rollback or reinstall the Network adapter drivers
The next thing you can do to resolve the problem is to update the Network Adapter drivers by following these steps:
Tap the Win + R keys to launch the Run window and then type in the “devmgmt.msc” command and hit Enter to open the Device Manager window.
Under the Device Manager, you will see a list of drivers. From there, look for the Network Adapters and expand them.
Look for the Broadcom Network Adapter and right-click on it, as well as other network adapters that have an exclamation icon, and update them all.
Restart your PC and see if it helped in fixing the problem.
Note: If updating the network drivers didn’t help in fixing the problem, you can also try to roll back the very same drivers from their previous versions and restart your Windows 10 PC. After that, the system itself will reinstall the drivers you just uninstalled. Alternatively, you can also download and install the drivers from the manufacturer’s website directly.
To reinstall the network adapter drivers, refer to these steps:
Open the Devices Manager from the Win X Menu.
Then locate the device drivers and right-click on them to open the Properties.
After that, switch to the Driver tab and click on the Uninstall Device button.
Follow the screen option to completely uninstall it.
Finally, restart your computer. It will just reinstall the device drivers automatically.
Option 4 – Try to reset the Network Adapter
You can also try to perform a Network Reset to resolve the problem. This will reset the entire network configuration including your IP address. To perform Network Reset, follow these steps:
Tap the Win + I keys to open Settings.
From there, go to the Network and Internet section.
Next, scroll down and look for “Network Reset” under the status pane.
After that, click on Network Reset and then on Reset now to start resetting the network configuration. Once done, check if it is able to fix the error or not.
Option 5 – Try putting your computer in a Clean Boot State
You can also troubleshoot the problem in a Clean Boot state. It could be that there are some third-party applications in your computer that are causing the Airplane Mode to behave in a strange way. So, to isolate this possibility, you need to boot your computer in a Clean Boot State be using these steps:
Log onto your PC as an administrator.
Type in MSConfig in the Start Search to open the System Configuration utility.
From there, go to the General tab and click “Selective startup”.
Clear the “Load Startup items” check box and make sure that the “Load System Services” and “Use Original boot configuration” options are checked.
Next, click the Services tab and select the “Hide All Microsoft Services” check box.
Click Disable all.
Click on Apply/OK and restart your PC. (This will put your PC into a Clean Boot State. And configure Windows to use the usual startup, just simply undo the changes.)
After you’ve set your computer into a Clean Boot State, try to observe if the Airplane mode is now back to normal or not.
As you know, the Win + X menu, which is the shortcut context menu, is a useful way to launch several utilizes in Windows such as Power Options, Windows PowerShell, Event Viewer, Device Manager, and so on. However, there are times when you might experience difficulty in identifying the required utility. This is actually a part of the Windows 10 shell that goes out of scope in the customization of Windows 10. However, there is an easy trick you can use to do that. So in this post, you will be guided on how you can rename the options in the Win + X menu in Windows 10.
In case you don’t know, the context menu is divided into three groups. Microsoft has categorized the bottom-most part as Group 1, while the middle part is categorized as Group 2 and the first part as Group 3. To rename these options, you need to use File Explorer and follow the instructions laid out below.
Step 1: First, tap the Win + E keys to open File Explorer.
Step 2: Next, navigate to this path: %LocalAppdata%MicrosoftWindowsWinX
Step 3: From there, you should see three folders as Group 1, Group 2, and Group 3. Open the appropriate folder of your choice.
Step 4: After that, right-click on the shortcut option you want to rename and then select Properties.
Step 5: Next, navigate to the Shortcut tab under the Properties window.
Step 6: Now in the text field of Comment, enter the new name of the option you selected.
Step 7: Click on the Apply and OK buttons to save the changes made.
Note: You can now either Sign back in or sign out of your Windows 10 User Account to see the result of the changes you’ve made. You could also restart the process of File Explorer via Task Manager. This will close the File Explorer as well as the shell components and then only launch the shell components again. In addition, you can check the Win + X menu to see the customized name that you’ve just set for a particular option. As you can see, even though it does not add anything extra, it is still a lot better in knowing how you can customize it.
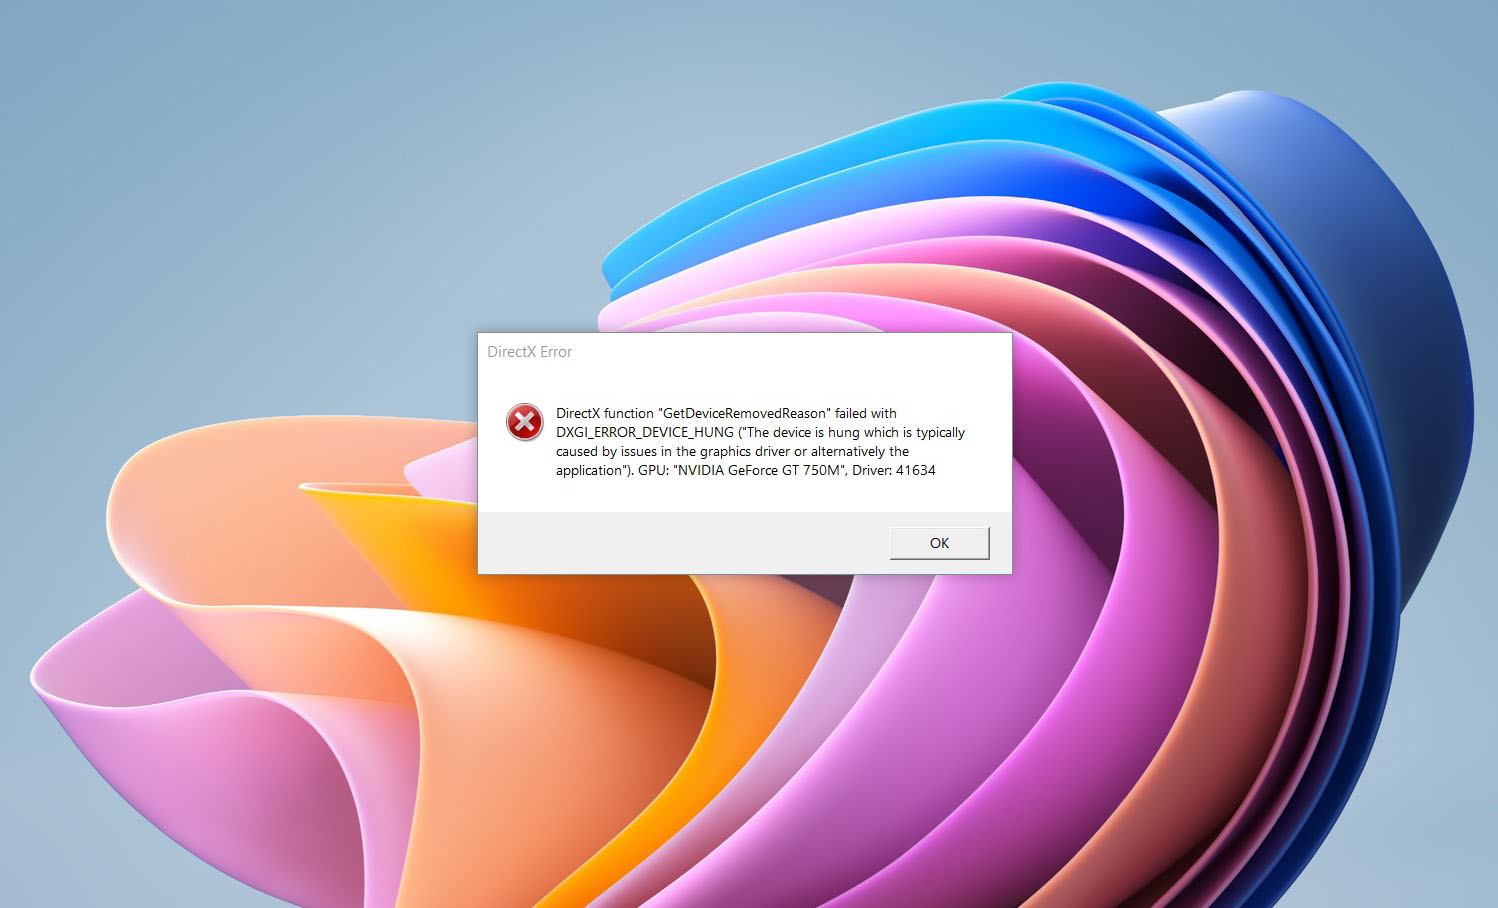
DirectX function GetDeviceRemovedReason error is a DirectX error that comes up during playing games on Windows 11 operating system. Usually, the error occurs in gaming systems powered by AMD and very rarely if any times at all on Nvidia or intel platforms.
If you are one of the gamers affected by this error, fear not because we have a solution for you. Follow provided fix guide in order to correct this error and get back to gaming asap.
1. Update drivers
The first thing of course is to update your graphic card driver, you can do this with your graphic cards panel software or directly in Windows itself but the best practice and one that I would recommend is to go to your graphic card manufacturer’s website and download the latest driver there, and then install it inside Windows 11.
2. Change power mode
Changing power mode inside Windows 11 can solve this issue since sometimes Windows power manager if it is set to anything except best performance can interfere with the proper functioning of the graphic adapter, and because of this error. To change the power setting do the following:
Press ⊞ WINDOWS + I to open settings
Click on the System tab
Select power & battery on the right part
Click on the menu beside power mode
Select the best performance
3. Run SFC scan
Corrupted system files can also cause this error and if previous steps have not resolved it we will use Windows built-in tool SFC scan to find and repair all bad files in windows.
Press ⊞ WINDOWS + S to open the search menu
Type in Windows terminal and run it as administrator
If prompted click on YES on UAC
Press CTRL + SHIFT + 2 to run command prompt
Type in sfc /scannow and press ENTER
Wait for the whole process to finish and then reboot your system
4. Reinstall the problematic game
Sometimes game files can get corrupt and maybe even overwritten, try with game reinstallation if the problem still persists.
The PST file could be around 2 gigabytes if you are using MS Outlook 2002 or any earlier versions for your own personal Folders. The 2GB filesize malfunction occurs when your PST memory both reaches or exceeds this limit.
The 2GB size problem code is, in addition, referred to as an outsize PST file error.
When this error happens you may be unable to deliver or receive e-mails via your Outlook account. Moreover, you'll likewise not be able to add any new data or even view your important calendar items, notes, and saved drafts.
MS-Outlook shows several types of problem codes which indicate the 2GB file size dilemma. Listed below are some of the messages that can be displayed on your monitor:-
The file could not be added to the folder. The action could not be completed.
Errors have been detected in the file xxxx.pst. Quit all mail-enabled applications.
Task 'Microsoft Exchange Server' reported error (0x00040820):'Errors in background synchronization. In most cases, further information is available in a synchronization log in the Deleted Items folder.'
xxxx.pst cannot be accessed - 0x80040116
Solution
Error Causes
The simple explanation for this malfunction is that you have maxed out the two gigabytes account limit. This happens in case you continue downloading fresh data and saving files and the old emails in your Outlook account.
Over time, the space becomes limited and along with it the 2 GB file limit error.
This error also presents a critical danger of data loss which is a possibility in your Outlook account, which hinders you as well from fully utilizing your email account.
For regular Outlook customers, who utilize this program for practically all email communication within as well as outside the office, this error is annoying and frustrating as it causes a great deal of annoyance as well as decreases their performance and productivity.
What exactly are the Symptoms?
Below are a few signs that will help you recognize the 2GB file-size error:
Inability to fill and open the OST and PST files
Error messages pop-ups
Failure to send emails
Failure to make or edit new contacts
Inability to synchronize the file
Further Information and Manual Repair
It is desirable to fix this error code right away especially if this is the preferred strategy to carry out communication in your office. Fix it immediately or else you might not receive e-mails that are important from your colleagues.
There are 3 ways to solve this issue.
Method 1
One is to remove the old e-mails and connections and replace them with new ones. This may not be the best option for you in case you don't wish to lose emails and your old contacts.
Method 2
The second alternative would be to install a fresh version of MS-Outlook like 2010. The file-size limits of OST and PST files in these editions are larger than in ms-outlook 2002.
On the other hand, this is a good idea for the long run but may not be the best idea for today as you will not have the ability to recover your previous e-mails and contacts that are outdated.
Method 3
The third and maybe the method that is best to resolve the 2GB file size limit error while ensuring the restoration of your old e-mails and contacts as well as increasing the limit to 4GB, is Restoro program's installation. Here may be the best recovery program on the market.
It is really easy to use, safe, exceptionally functional, secure, and especially can resolve this issue. Technical expertise isn't needed by you to perform your way around this device.
All you should do is:
Click here to download and install the Restoro repair tool on your computer. In your MS Outlook account, you can restore all your data in just a couple of clicks.
Talking of data recovery, this software can also help you recover all those other e-mails before the PST malfunction happened, or that you may have deleted. So, if you have deleted any significant email that you want to recover, this will undoubtedly be of use for you.
By installing it on your system you can double your Outlook account's quality to twice as much as the standard size.
If there are any third-party add-ons or proxy settings that interfere with your Windows 10 computer’s internet connection, then you will most likely encounter a problem where you see an error message saying, “Website is online but isn’t responding to connection attempts” when you try to run the Network Adapter troubleshooter.
Like pointed out, this kind of error can be caused by some proxy settings that prevent the connection. On the other hand, it could also be caused by some third-party add-ons. To fix this error, read on as this post will guide you on what you can do to fix it. You can try to turn off the proxy settings or disable the add-ons on your browser. You can also try resetting both the TCP/IP and DNS as well as reset the network. For more details, refer to the options provided below.
Option 1 – Try to turn off the proxy settings
There are some users who reported that they’ve fixed the problem after they’ve disabled the use of a proxy server using the built-in way. Follow the steps below to disable the proxy server.
Tap the Win + R keys to open the Run dialog box.
Then type “inetcpl.cpl” in the field and hit Enter to pull up the Internet Properties.
After that, go to the Connections tab and select the LAN settings.
From there. Uncheck the “Use a Proxy Server” option for your LAN and then make sure that the “Automatically detect settings” option is checked.
Now click the OK and the Apply buttons.
Restart your PC.
Note: If you are using a third-party proxy service, you have to disable it.
Option 2 – Try disabling the add-ons or browser extensions
The next thing you can do to fix the problem is to disable any extensions or add-ons on your browser. For instance, if you are using Chrome, here’s what you have to do:
Open Chrome and press Alt + F keys.
Go to More tools and click Extensions to look for any suspicious browser extensions or toolbars.
Click the Recycle bin and select Remove.
Restart Chrome and press Alt + F keys again.
Proceed to On Startup and mark Open a specific page or set of pages.
To check if the browser hijacker is still active, click Set pages, if it is active, overwrite the URL.
Option 3 – Try to update the Network Adapter Driver
Follow the steps below to update your Network Adapter Driver:
Tap the Win + R keys to launch the Run window and then type in the “MSC” command and hit Enter to open the Device Manager window.
From there, expand the list of all the network drives and update each one of them.
Note: If updating the network drivers didn’t help in fixing the problem, you can also try to uninstall the very same drivers and restart your Windows 10 PC. After that, the system itself will reinstall the drivers you just uninstalled. Alternatively, you can also download and install the drivers from the manufacturer’s website directly.
Option 4 – Try to reset the TCP/IP and the DNS cache
As you know, the TCP/IP or the Internet Protocol is the most important thing if you want to use the internet on your computer. That’s why if it ends up getting corrupted, you need to reset the TCP/IP to fix the problem. To reset TCP/IP, refer to these steps:
In the Windows start to search, type “command prompt” and right-click on Command Prompt from the search results.
Then select the “Run as administrator” option to open Command Prompt with admin privileges.
After that, execute this command: netsh int ip reset resettcpip.txt
Next, execute this second command: ipconfig /flushdns
Once it’s done, exit Command Prompt and restart your computer and then check if the error is now fixed.
Option 5 – Try to reset the Network
You can also try to perform a Network Reset to resolve the problem. This will reset the entire network configuration including your IP address. To perform Network Reset, follow these steps:
Tap the Win + I keys to open Settings.
From there, go to the Network and Internet section.
Next, scroll down and look for “Network Reset” under the status pane.
After that, click on Network Reset and then on Reset now to start resetting the network configuration. Once done, check if it is able to fix the error or not.
It has been some time since the release of Diablo 2 resurrected and overall reception was pretty good. People are enjoying the old classic game in hi-def. resolution and with new and improved visuals. Sadly some server issues are present still until this day and somewhat spoil the experience for players.
The greatest lag and server crashes are pinpointed to game-creating events. When a player creates a new online game, the server needs to pull a lot of details from the database and make a game, due to some legacy code present this process takes some time and it is demanding a bit on the server-side, and although code was optimized to cater to more modern approach some legacy code still remains.
Another thing that was spotted to affect performance itself is player behavior, to be more specific, modern gamer behavior. Where players find good builds and runs on the internet and then go to farm-specific areas or bosses for loot or experience points, which in return boils down to making plenty and short runs that are made by creating games and after run eliminating them. Now pair that with the previous statement about legacy server and database code and you can add 1 and 1 and see how this might be an issue.
A lot of short games over legacy code are placing games in a state it was not designed for back in 2001 and therefore we have issues. Sadly solutions without completely rewriting the whole code are not very promising and they include rate limiting, which will prevent players to create many games in succession in a short period of time and maybe even login queues to drop a load on servers.
Blizzard reached to people in the whole company, even old diablo 2 developers to ask for advice and they say that they are working on solutions so they could lift limitations and have everything running fine.
Stable Diffusion is a machine learning model developed by Stability AI to generate digital images from natural language descriptions. The model can be used for different tasks like generating image-to-image translations guided by text prompts and upscaling images.
Unlike competing models like DALL-E, Stable Diffusion is open source and does not artificially limit the images it produces. Stable diffusion was trained on a subset of the LAION-Aesthetics V2 data set. It can run on most consumer hardware equipped with a modest GPU and was hailed by PC World as "the next killer app for your PC".
Since Stable Diffusion is run locally and not in the cloud, as mentioned there is no limit to the number of images that you can produce but in order to use it you will have to get down a little dirty with setting your PC environment for it since it is not really an application, it is a command line text based descriptor that will use python to generate your images, so there is no install nor GUI.
In this guide, we will show you how to both install and run Stable Diffusion on your local PC so you can start producing some cool images all by yourself.
Hardware and software requirements
Make no mistake, Stable Diffusion will not run on a potato PC, in order to harvest the power of AI-generated imagery this is what you will need:
A GPU with at least 4GB of VRAM
10GB of hard disk space
Python and libraries (Miniconda3 installer will install everything you need)
The Stable Diffusion files
Git
Any OS (Windows, Linux, macOS)
Installing components
For this tutorial, we are covering the installation and running of Stable Diffusion on Windows PC. The steps presented here are presented in a way that installation can be performed on any operating system but precise instructions will be for Windows OS.
GIT
The first thing to do is to install GIT. It is a tool that will let you easily maintain and install repos from the internet. to install it go to: https://git-scm.com/ and click on download. Follow the instructions for your version of the operating system. If you are a developer you are familiar with GIT and if you already have it installed you can skip this step.
One thing that is important when installing GIT locally is to select to use it via the command line (the second option that says "Git from the command line and also from 3rd-party software").
Miniconda3
Now when we have GIT installed, next thing is to use Miniconda3 to install python and all required libraries that are needed. Get the installer at: https://docs.conda.io/en/latest/miniconda.html
Miniconda3 is basically an easy installer so you do not have to install tons of stuff manually from different websites and sources, it is nicely packaged in the installer that will take care of everything.
Stable Diffusion
After the previous two steps, we are ready now to actually install Stable Diffusion. Go to https://huggingface.co/CompVis/stable-diffusion#model-access and install the latest library (as of the writing of this article currently it is stable-diffusion-v1-4-original, the last one on the right), the library is almost 5GB in size so be prepared for big download.
Once downloaded click on the Windows start button and type in Miniconda3 and click on open. Create a folder and name it how you want on a drive of your choice. For this example, we will install it all in disk C under folder AI_art, follow the instructions below but use your own names and destination instead. Do not close Minicoda3 after typing commands!!!
cd c:/
mkdir AI_art
cd AI_art
Extract GitHub files that you have downloaded into your new folder and get back to Minicoda3 and type the next commands:
Let the whole process finish, some files are large and it might take a while. After the whole process is finished and completed, copy the checkpoint file that you have downloaded into: C:\AI_art\stable-diffusion-main\models\ldm\stable-diffusion-v1
After the file is copied rename it to model.ckpt and you are finished.
Running Stable Diffusion
The created environment is needed in order to actually use Stable Diffusion to create images. Each time you want to use it you will have to run it, so go into Miniconda3, and inside it type:
conda activate ldm
cd C:\AI_art\stable-diffusion-main
after we are inside the folder call the script with the parameters:
python scripts/txt2img.py --prompt "TXT DESCRIPTION OF IMAGE THAT YOU WANT TO CREATE" --plms --n_iter 5 --n_samples 1
and that's it, your image is created and it is located in C:\AI_art\stable-diffusion-main\outputs\txt2img-samples\samples
Error code 80073712 is one of the dozens of error codes affecting Windows 10 users. It occurs when users attempt to upgrade their operating system but experience a failure. The error code usually results from problems associated with missing or damaged files within Windows Update. Common symptoms of this error code include the following:
The inability of Windows Update to successfully complete the upgrade process
Message box highlighting the presence of error code
Solution
Error Causes
In the case of error code 80073712, the issues preventing Windows Update from completing the upgrade process are most likely due to problems with files within Windows Update. For instance, there may be corruption within the Component-Based Servicing (CBS) manifest.
Further Information and Manual Repair
Manual repair methods offer solutions to Microsoft users who are experiencing Windows error codes like the upgrade error code 80073712 in Windows 10. The manual repair methods in this article are not guaranteed to fix problems unrelated to this error code. Thus, be certain you are experiencing error code 80073712 before you attempt to implement the solutions provided below.
Method One: Run Windows Update Troubleshooter
Since issues related to Windows Update may be causing error code 80073712 to occur, one of the best solutions you can consider is to run the Windows Update Troubleshooter. This troubleshooter will be able to detect and fix corruptions within Windows Update files or any other issues directly related to Windows Update. To implement this manual repair method, follow the steps listed below:
Step one: Open your Internet browser
Step two: Type www.microsoft.com/downloads
Step three: Type Windows Update Troubleshooter in the search bar at the top-right corner of the Microsoft website.
Step four: Select Windows Update Troubleshooter then wait for the webpage to load.
Step five: Select Run troubleshooter
Once you run the troubleshooter, you should be able to verify and fix any errors within Windows Update files. Restart your machine after the troubleshooting process is complete them proceed by checking Windows Update to see if you are able to complete the upgrade. If Windows Update downloads the upgrade and the installation of the upgrade occurs, the problem has been resolved. Otherwise, error code 80073712 will reoccur, in which case you will need to move to manual repair method two.
Method Two: Run DISM Tool
Another option available to Windows users experiencing error code 80073712 is to download and run the Deployment Image Servicing and Management (DISM) tool. This tool checks for inconsistencies or corruptions that may be preventing Windows Update services from functioning correctly. To download and run the tool, follow the instructions below:
Step one: Type Command Prompt in the search box near the Start button
Step two: Right-click Command Prompt, then click Run as administrator, providing administrator password or confirmation where necessary.
Step three: Select Allow
Step four: Press Enter after typing the following command:
DISM.exe /Online /Cleanup-image /Restorehealth
Wait a few minutes to ensure that the process is complete. Once you’ve run the DISM tool, it will detect errors, for instance within registry data, and correct or replace them. Restart your machine after running this tool then check Windows Update. Attempt to download the upgrade to see if you have successfully resolved error code 80073712. If you experience an upgrade failure, move to the next manual repair method mentioned below.
Method Three: Perform a Clean Install of Windows 10
The issues related to error code 80073712 may also be resolved by performing a clean install of Windows 10. This manual repair method ensures that any previous versions of your Windows operating system are removed before you attempt to access an upgrade. This can prove effective as it helps users avoid issues that would otherwise cause error codes or poor PC performance in cases where errors are present on one’s system.
To successfully perform a clean installation of Windows 10, be prepared to follow step-by-step procedures that include the following:
Step two: Click Run, then select Create installation media for another PC
Step three: Select changes to the installation options, then select Next
Step four: Choose USB flash drive or ISO file, then click Next
Step five: Select drive, then Next
Step six: Select Finish, then restart your computer, ensuring that the media option you choose, whether USB flash drive or DVD, is in your machine before you choose to reboot.
Step seven: Press any key then follow the prompts provided to set up Windows 10.
Method Four: Download an Automated Tool
If you wish to always have at your disposal a utility tool to fix these Windows 8 and other related issues when they do arise, download and install a powerful automated tool.
Windows PowerShell is a powerful tool inside the Windows environment often overlooked by typical users which is a great mistake since it can offer a large array of functionality and usability and if used well can offer a unique working experience.
Today we will be using PowerShell to turn the WEB camera off so it can not be accessed, completely disabling it for use. You might want to do this for security reasons or just want to learn few new things. Whatever your reason might be, I am welcoming you to this tutorial and please do keep reading.
Finding device ID
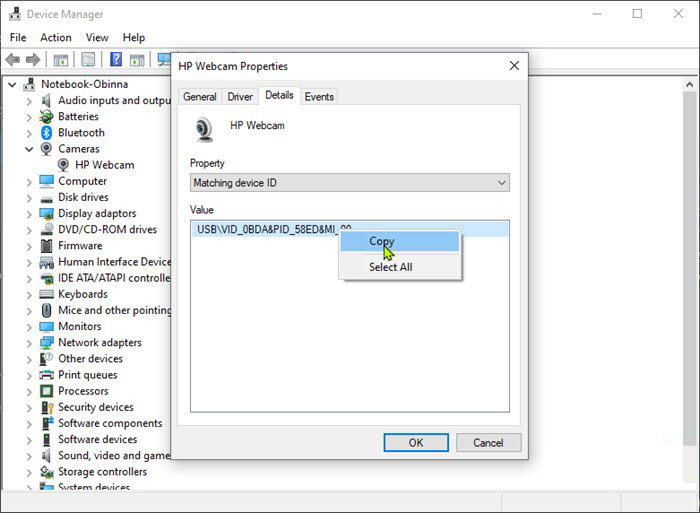
In order to disable the WEB camera first thing we need to do is to find a matching device ID. We will find this value inside the device manager, so press ⊞ WINDOWS + X to open the secret menu.
In the menu choose device manager and click on it.
When the device manager opens, expand the Imaging devices or Cameras section.
Right-click Integrated Camera or the primary webcam, and click Properties.
Go to the Details tab.
Under the Property section, click to select Matching device ID from the drop-down.
Right-click the value and select CopyThe next step is to download and install Windows Driver Kit (WDK)
PowerShell script
Create and run a PowerShell script with the following parameters/values to disable the camera. Substitute the <FOLDER> placeholder with the actual name of the folder where your copy of Devcon is residing
$id = (Get-CimInstance Win32_PnPEntity |

where caption -match '<PRIMARY CAMERA>').pnpDeviceID

$ppid = "{0}{1}" -f '@',$id

Set-Location c:\<FOLDER>

Devcon status $ppid

Devcon disable $ppid

Devcon status $ppid
To enable the camera device, run the command below in PowerShell:
Hello and welcome to our Business Email Etiquette. Most people have experience in writing emails at some point before in their lives. However, the emails an average person writes are probably personal emails and not mails for work purposes.
Emails you send to friends are incredibly different in content and context to business emails you would send to customers or employers or even other colleagues in your workforce.
So, if you have a job that involves you writing emails to people in business style, learning business email etiquette is an absolute must for you.
1. Heading layouts
When you are sending emails to friends, you generally lay them out like a memo. This means there is very little detail in the layout besides basic greetings and paragraphs, usually starting with the greetings.
However, with a business email, it is best to lay it out exactly like you would lay out a formal letter. You need to put the company’s address in the right-hand corner and the date as well. Only then must you go on to the greetings.
This will make your email look more formal, making you seem like a professional who knows what they are doing as opposed to someone who just couldn’t be bothered spending the extra time to get the layout right.
2. Proper greetings
When you are sending an email to a friend, you usually greet them informally. If their name was Mary Johnson, you’d probably start your letter with a ‘Hey Mary’ or a ‘Hello Mary.’
However, this is not considered a professional way to write an email to a customer or other important person in your business. Again, you must use the proper method that you would greet someone with were you writing them a formal letter instead.
If your customer is Mary Johnson again, you should greet her with respect. ‘Dear Ms. Johnson’ would be the most appropriate way to start off your letter’s actual body in this case. If you do not know the recipient’s name, then you should start with a simple ‘Dear Sir or Madam.’
Politeness will always get you incredibly far, no matter what line of work you are in.
3. Informal language
You should get straight to the point with your email. Don’t dawdle on with it like you would if chatting to a friend and don’t write it how you would speak either.
You use language that sounds impressive and smart while not using such obscure language that your recipient doesn’t know what you are saying. All the time, you must keep it informal where possible, possibly even impersonal as well.
It will make you seem very professional in the long run.
4. Signing off
When you are sending your email, you must end it as you would with a letter also. Don’t just say ‘Bye’ and your first name; that is too personal.
You need to say ‘yours sincerely if you know the name of the recipient and ‘yours faithfully’ if you do not. Then you should end with your full name and whatever position you have at the company. (CEO, technical staff etc.)
So there you have it! All you need to do now is to show your boss that you can handle the emails from now on!


 If you are one of the gamers affected by this error, fear not because we have a solution for you. Follow provided fix guide in order to correct this error and get back to gaming asap.
 The greatest lag and server crashes are pinpointed to game-creating events. When a player creates a new online game, the server needs to pull a lot of details from the database and make a game, due to some legacy code present this process takes some time and it is demanding a bit on the server-side, and although code was optimized to cater to more modern approach some legacy code still remains.
Another thing that was spotted to affect performance itself is player behavior, to be more specific, modern gamer behavior. Where players find good builds and runs on the internet and then go to farm-specific areas or bosses for loot or experience points, which in return boils down to making plenty and short runs that are made by creating games and after run eliminating them. Now pair that with the previous statement about legacy server and database code and you can add 1 and 1 and see how this might be an issue.
A lot of short games over legacy code are placing games in a state it was not designed for back in 2001 and therefore we have issues. Sadly solutions without completely rewriting the whole code are not very promising and they include rate limiting, which will prevent players to create many games in succession in a short period of time and maybe even login queues to drop a load on servers.
Blizzard reached to people in the whole company, even old diablo 2 developers to ask for advice and they say that they are working on solutions so they could lift limitations and have everything running fine.
The greatest lag and server crashes are pinpointed to game-creating events. When a player creates a new online game, the server needs to pull a lot of details from the database and make a game, due to some legacy code present this process takes some time and it is demanding a bit on the server-side, and although code was optimized to cater to more modern approach some legacy code still remains.
Another thing that was spotted to affect performance itself is player behavior, to be more specific, modern gamer behavior. Where players find good builds and runs on the internet and then go to farm-specific areas or bosses for loot or experience points, which in return boils down to making plenty and short runs that are made by creating games and after run eliminating them. Now pair that with the previous statement about legacy server and database code and you can add 1 and 1 and see how this might be an issue.
A lot of short games over legacy code are placing games in a state it was not designed for back in 2001 and therefore we have issues. Sadly solutions without completely rewriting the whole code are not very promising and they include rate limiting, which will prevent players to create many games in succession in a short period of time and maybe even login queues to drop a load on servers.
Blizzard reached to people in the whole company, even old diablo 2 developers to ask for advice and they say that they are working on solutions so they could lift limitations and have everything running fine. 
 In the menu choose device manager and click on it.
 When the device manager opens, expand the Imaging devices or Cameras section.
Right-click Integrated Camera or the primary webcam, and click Properties.
Go to the Details tab.
Under the Property section, click to select Matching device ID from the drop-down.
Right-click the value and select Copy
When the device manager opens, expand the Imaging devices or Cameras section.
Right-click Integrated Camera or the primary webcam, and click Properties.
Go to the Details tab.
Under the Property section, click to select Matching device ID from the drop-down.
Right-click the value and select Copy
 The next step is to download and install