Kernel_Data_Inpage_Error is a BSOD (blue screen of death) error.
Also, know as a 0x0000007A Stop error. This bug check indicates that the requested page of kernel data from the paging file failed to be read into memory. In simple words, this means that Windows has trouble reading from the memory.
This can apply to both kinds of memory: stored memory on your hard drive and also the dynamic memory in your RAM.
The Kernel_Data_Inpage_Error turns your computer screen all blue, stops the program being executed, and sometimes even leads to abrupt system shut down.
Error Causes
Kernel_Data_Inpage_Error may occur due to numerous reasons. The exact cause of this error can easily be found by going through the code displayed in the parameter of 0x00000007A.
Let’s take a look at Kernel_Data_Inpage_Error parameter codes and the underlying causes of its occurrence:
0xC0000009A- This parameter code triggers missing nonpaged pool resources
0xC0000009C- This represents the installed hard disk drive has bad sectors.
0xC0000000E- This indicates a hardware failure or an incorrect drive configuration
Further Information and Manual Repair
No matter what the cause for Kernel_Data_Inpage_Error may be, it is advisable to fix it immediately as blue screen of death error codes are considered to be critical PC errors that can cause serious damages and even result in valuable data loss.
Here are a couple of ways to repair this issue on your system:
1. Call the ‘Chkdsk’ (check disk) command on your system.
Windows XP, Vista, and 7 users can call this command, by pressing Windows Key +F and type in ‘chkdsk’ and run.
However, you can’t run it while actively using Windows but you can always schedule it to start automatically the next time your computer turns on. Wrap up what you need and then reboot. Chkdsk disk checking process can take a long time, especially on large and slow hard drives.
To run this command on Windows 8, open Windows search by pressing Windows Key+ F and then type ‘cmd’. Then right-click on the command prompt and choose the option ‘Run as Administrator’.
To continue with the disk checking process, here you will be prompted to provide your administrator authentication.
Once you insert the administrator authentication, type the command ‘Chkdsk C:/f/r/x” where the letter ‘C’ indicates the drive you want to examine and repair. Run it to scan for Kernel_Data_Inpage_Errors on your system. Chkdsk command will detect and repair errors on the hard drive and then automatically reboot.
Limitations to this Solution:
‘Chkdsk’ is a value-adding inbuilt disk checking tool in PC new Window versions; nonetheless, this command has certain limitations.
It is time-consuming. You may have to wait for a long time for it to scan your system. Also when disk check is running, you will have to stop all other activities on your system. Furthermore, Chkdsk does not scan and fix all registry errors and other PC-related errors.
So, you can’t be 100% sure that it will resolve all the Kernel_Data_Inpage_Errors on your PC.
Both the Windows 10 and Windows Server operating systems have a number of common system files that vary from the ones that support the installation, boot process, and other operations or tasks in the system. However, if any of these files get corrupted, it might cause some errors during the setup of the Windows 10 operating system. One of these errors is the “Windows cannot find the Microsoft Software License Terms” error.
“Windows cannot find the Microsoft Software License Terms. Make sure the installation sources are valid and restart the installation.”
The only option given when you encounter this error is to click on the OK button and nothing else and then the setup gets interrupted and won’t push through. To fix this error and proceed with the installation, you can try to get a new installation image or switch ports, or fix the CFG file. For more details, follow each one of the potential fixes provided below.
Option 1 – Try to get a new installation image
It is possible that there might be some issues with the installation image. It could be corrupted or was modified illegally. Or it could be that the bootable storage device created might have damaged sectors or installation. To resolve this problem, you need to download a fresh copy of the Windows 10 installation image using the Windows Media Creation tool or simply use the ISO image separately and then build a bootable USB.
Option 2 – Try to switch Ports
The error might be caused by the connection to the USB port. It could be that the port is unstable due to a number of factors that resulted in the interruption of the installation process. To fix this problem, you can try switching the USB port or if you are using an optical drive, you can get an external USB optical drive or connect it to another port internally and see if it fixes the problem.
Option 3 – Try to fix the CFG file
If none of the first two options worked, then you might want to fix the CFG file. This file is a configuration file format used for storing settings. All you have to do is download the CFG file. Once you’ve downloaded this file, copy this file to the root of your bootable drive and then check if it fixes the error. If not, then try to copy the same file inside the “/sources/” folder inside the root of the drive. This should fix the error.
Hello everyone and welcome to how to fix Windows when it is not starting tutorial. Here we will tackle some common problems and solutions in order to help you to get back both your computer and Windows in working order.
Windows not booting and loading is an annoying issue that can even result in complete loss of your data and can also consume a lot of time if no other solution than clean install remains. Also if you are not tech-savvy, this issue can cost you as well since you will have to hire a professional to solve this problem for you.
Here at Error Tools, we aim to help so you can overcome your PC issues yourself by providing you daily with tutorials, tips, and tricks and helping you with all of your Windows issues.
All of that being said, let's see what are issues that can prevent your computer or Windows from booting up and get around them so everything is back in working order.
Use repair tool
Windows 10 comes with a startup repair tool that has the goal to repair and fix errors preventing Windows from booting up. To use this tool however you will need Windows 10 bootable USB stick. You can create a bootable USB directly on the Microsoft site. Once you have it ready, plug it in and reboot your computer, choose to boot from USB. When you are on the Windows setup screen, click on next and then on Repair your computer.
Go to troubleshoot > Advanced options > Startup repair.
When Startup repair is clicked, Windows will boot, scan files for issues, and if they are found he will automatically fix them.
“Windows Failed to Start” 0xc00000f error
If you get this error on your boot of Windows, then you have corrupted boot configuration data. In order to fix this error, you will also need a bootable USB with Windows 10 on it. Make one on the Microsoft site if you don't have it and reboot your computer, boot from USB, on the setup screen click on next and then on Repair your computer. Click on Troubleshoot and then on the command prompt. In the command prompt type the following:
bootrec /FixMbrbootrec /FixBootbootrec /ScanOsbootrec /RebuildBcdexit
Reboot your PC without a USB
Boot into safe mode
Safe mode for Windows loads only its core without drivers and with minimal services. If you can boot into safe mode then the issue is with some application or driver causing the problem. Try the selective boot option to eliminate what is causing the error.
Make sure your hardware is connected
Some RAM or hard drive out of socket can cause Windows not to be able to boot, check all connections just in case.
If everything else fails, perform a clean Windows installation. The reason for Windows not booting up can be caused by various viruses and malware also if that case it would be best to format and perform a clean install.
If your Windows 10 computer is currently experiencing high CPU usage because of the IAStorDataSvc, read on as this post will show you what you can do to resolve the issue. The high CPU usage of IAStorDataSvc is because of the Intel Rapid Storage Technology. It appears as a Service that may not only result in high CPU usage but also high disk and memory usage, as well as slow computer performance and overheating of your PC. This problem usually occurs on HP computers and on any computers that are using the Intel Rapid Storage Technology. You might also notice that your fan runs at high speed each time this issue occurs with the average CPU usage spiking up to 50%.
Take note that this service is used to speed up file access. However, if you are not using an SSD on your computer, then it’s not really necessary for you to have the IAStorDataSvc installed. To resolve this issue, here are some options you can try.
Option 1 – Update or reinstall or remove the IAStorDataSvc driver
Before you proceed, you need to decide first if you want to update, reinstall or remove the IAStorDataSvc driver. To make things easier for you, you can try downloading the latest driver from the Intel Download Centre and then install it on your computer. If it works, good, but if not, you might want to consider removing the driver completely and just let the Windows Update look for the right driver for your computer after you restart it. There are times when the drivers installed are incompatible with the latest Windows update which results in issues like high CPU usage.
Tap the Win + X + M combination on your keyboard to open the Device Manager.
After that, look for the Intel Rapid Storage Technology driver, right-click on it and then select Uninstall.
Now restart your computer for the changes to take effect.
Note: You might also have to go to the list of installed programs and uninstall a program that is listed as “Intel Rapid Storage Technology driver”. To do so, refer to these steps:
In the Cortana Search box, type “control panel” and from the search results that appear, click on Control Panel.
After opening Control Panel, select Programs > Programs and Features which will open the list of installed programs on your computer.
From there, look for Intel Rapid Storage Technology and uninstall it.
Option 2 – Try to disable the IAStorDataSvc via Services Manager
Tap the Win + R keys to open the Run dialog box.
Then type “services.msc” in the field and hit Enter to open Services.
Next, look for the Intel Rapid Storage Technology services from the list of services and then double-click it.
Then change its Startup type to “Disabled”.
After that click on the Apply button and then OK to save the changes made.
Now exit the Services window and check if the problem’s resolved.
Still sitting on the fence about upgrading to Windows 11 because you don’t know what to expect? Interestingly, the new edition somehow manages to be both a total revamp and still very similar to its predecessor in many ways. It’s really something to experience for yourself.
We do want to give you a sneak peek, though. So here’s an overview of the biggest changes Windows 11 brings to the table.
What’s different in Windows 11?
1. Visual changes
The first thing anyone will notice after switching to Windows 11 is the striking visual difference. The entire interface is smoother, cleaner and more minimalistic than on Windows 10, even resembling the macOS in some instances. Perhaps the most obvious change in appearance is the Start menu and Taskbar location, which is now at the bottom center. It’s actually very neat, but if you’re someone who loves familiarity, don’t worry, you can move it back to the left.
Centralized Taskbar and Start menu
Moreover, you’ll notice that the Taskbar includes a Microsoft Teams icon by default (which you can, of course, remove) and that Live Tiles are gone. The News and Interests section has also been removed - or, shall we say, replaced. As opposed to Windows 10, news, weather forecasts and other information are now displayed as widgets.
To add to the cleanliness of the UI, Microsoft also enhanced the ‘Snap Layouts’ feature to help you better organize your windows and maximize screen real estate. It’s similar to app grouping on your smartphone. In Windows 10 this feature is slightly restricted, as it requires some manual resizing and dragging. In Windows 11, you can just hover over the minimize/maximize option on a window, select a layout and throw the windows in there.
Snap Layouts
2. New accessibility features
Microsoft has certainly paid attention to accessibility with Windows 10, but Windows 11 takes this to a whole new level.
One of the ways Windows 11 has taken things up a notch is by adding the long-awaited ‘Live Captions’ feature and advanced Narrator options.
Live Captions apply both to media played on your PC as well as your own speech when you’re using the microphone. Keep in mind that, as with almost all kinds of subtitles, you have to be prepared for a potential delay. However, it’s barely noticeable and doesn’t take away from the usefulness of this awesome new feature whatsoever.
As for the Narrator, there are three new voice packs to choose from. Microsoft has tried to put emphasis on a more natural voice than we are used to. So, now you can choose between Aria, Jenny and Guy, who will read pretty much anything off your screen out loud. Aside from this, Microsoft has also expanded the list of braille displays supported by the Narrator feature. For users with anxiety or trouble concentrating, a welcomed addition is the Focus app, which is no longer part of the Clock app. It’s now separate and called ‘Focus Sessions’, automatically triggering the Do Not Disturb mode when activated. It blocks all pop-ups and flashes and lets you work in peace until you’re ready to switch it off.
3. Android apps
Android users may rejoice! Windows 11 supports the use of your favorite applications now.
Microsoft has done this by integrating the Amazon Appstore to the Windows 11 Microsoft Store. From there, you can download your favorite Android apps and use them on your PC in a smartphone-like window.
Unfortunately not too many apps are supported at this time, but Microsoft is working on making the emulation possible for many more. Also, the option is only available in specific regions at this moment - check out if you’re one of the lucky ones.
4. Improved gaming performance
Avid gamers will be happy to hear that Microsoft has put some effort into streamlining Windows 11 for their gaming needs.
To give gamers a supreme visual experience, Windows 11 offers the ‘Auto HDR’ feature. As long as your monitor is HDR-compatible, this feature will automatically adjust the colors, brightness and contrast of games without any input from you.
Another update is DirectStorage, which we were introduced to in Windows 10 already. In Windows 11, it’s been improved to tweak loading times and overall gaming performance efficiency even better. The predisposition for it to work optimally is that your device has an NVMe SSD.
The Xbox Game Bar also helps gamers towards a smoother experience. It allows in-game screenshots, viewing processes that are running (similar to the Task Manager), monitoring the CPU and GPU performance and frame rate, integrating the Xbox App and more. There’s also a number of widgets you can now use with the Game Bar, for example the Spotify widget.
Xbox Game Bar
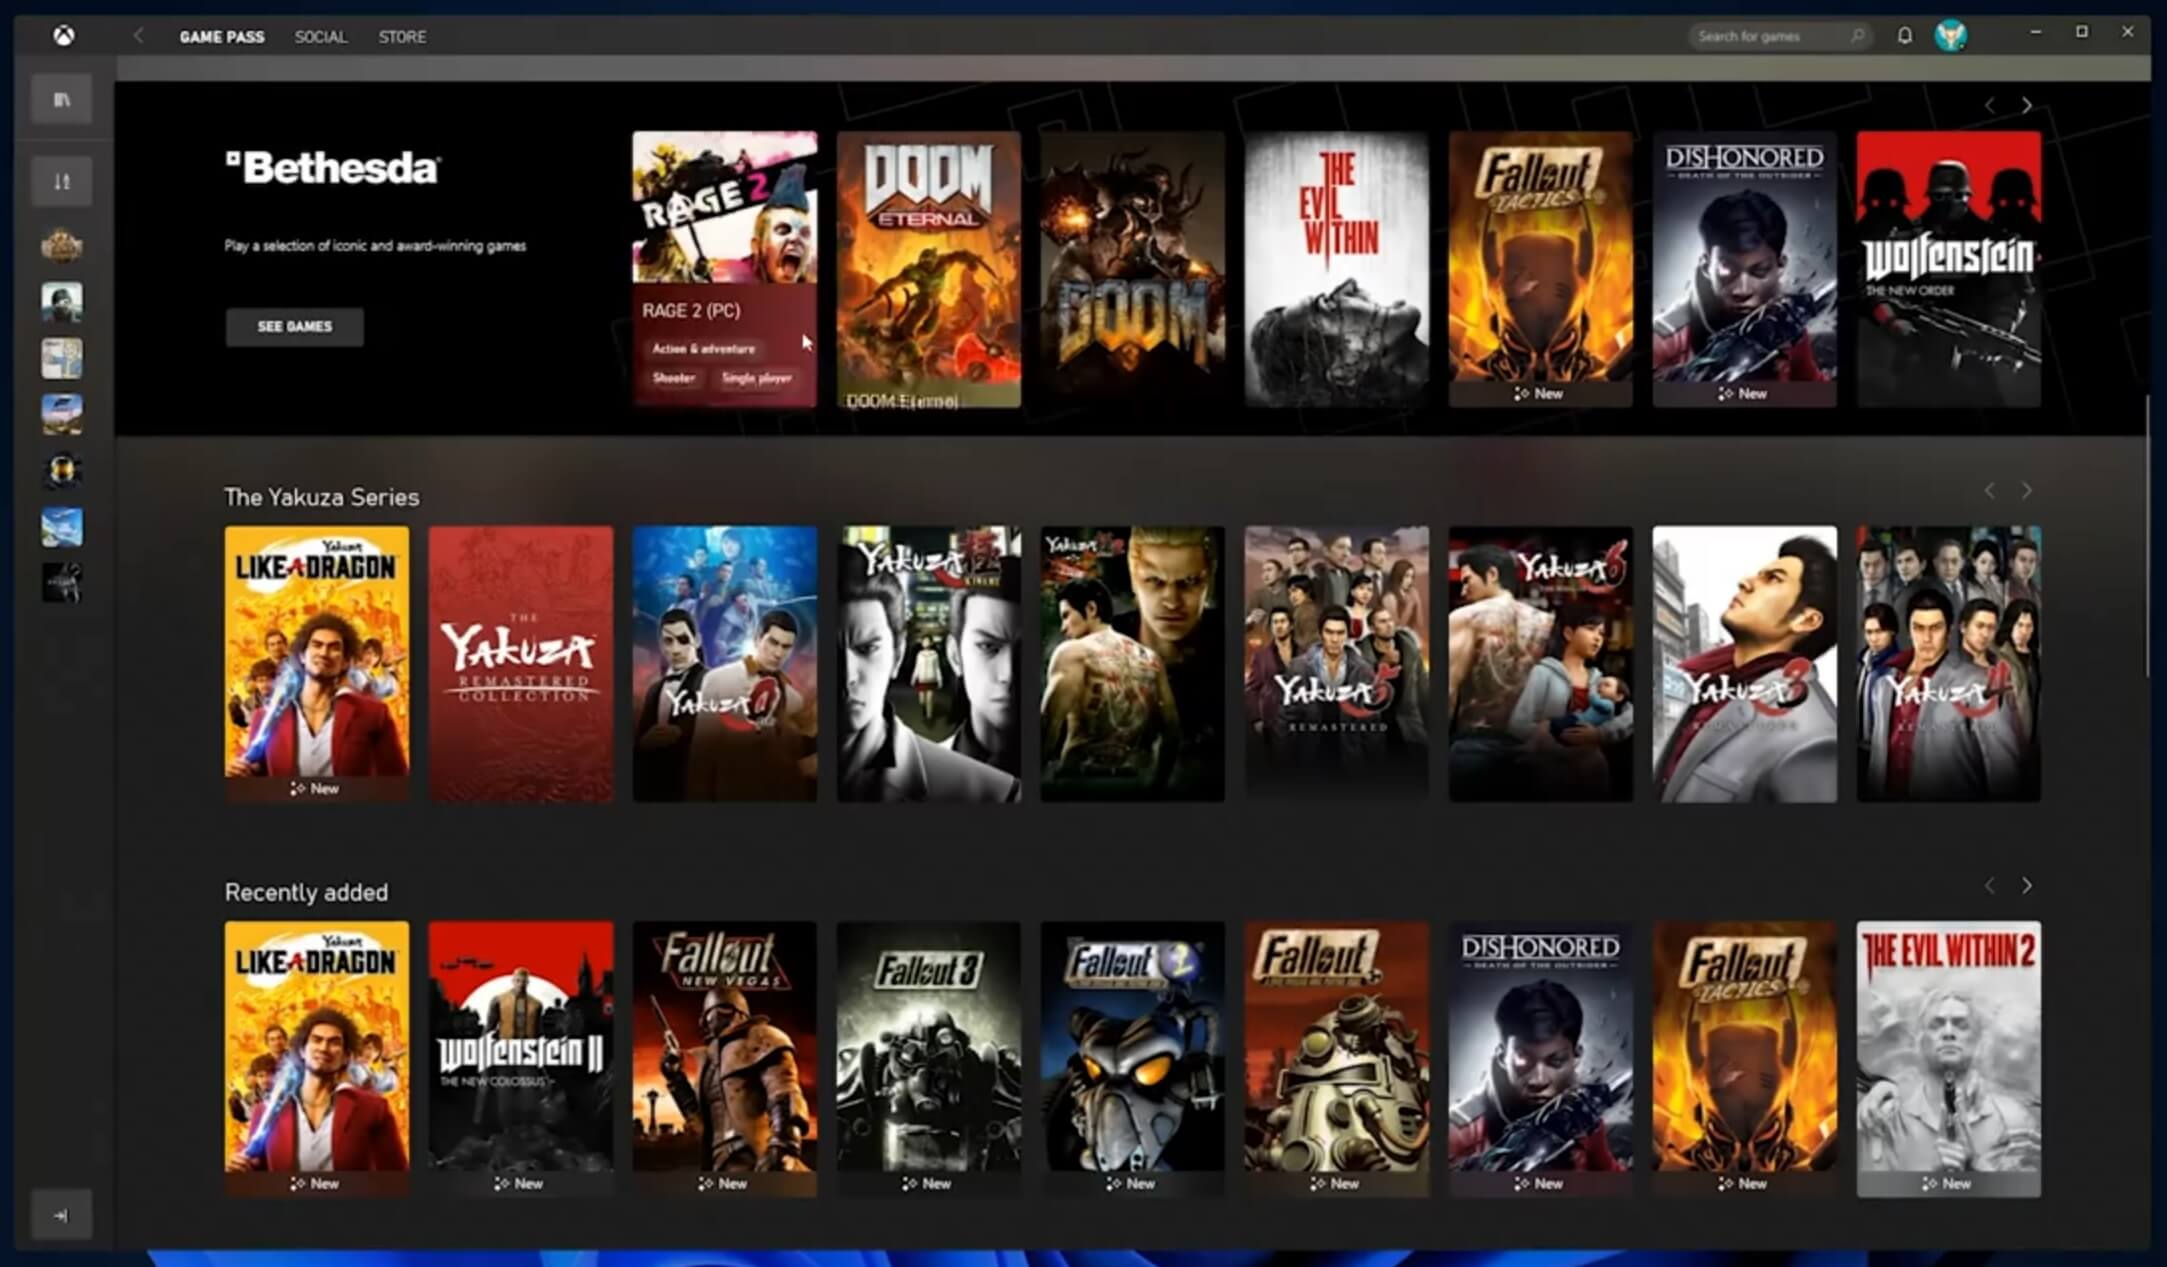
Another cool addition is the Xbox Game Pass, which unlocks hundreds of games to play on your Xbox App, with new additions coming in every month.
5. Smart App Control
Aside from a sleek new look and better accessibility for all users, Windows 11 also comes with a security power-up. Bear in mind that this feature is only available on clean Windows 11 installs.
Smart App Control (SAC) is an AI-powered new feature designed to protect your PC from potential threats. It blocks untrustworthy apps and adware and helps detect potentially unwanted apps, maintaining your PC’s performance and keeping your system safe.
It comes with an ‘Evaluation’ mode, which you should definitely select when running SAC for the first time. That way, the app monitors your usage and assesses whether you’re a candidate for SAC. Some users need it to be on all the time, for others it might be too distracting. Evaluation mode will turn SAC on or off based on your usage.
Don’t disable SAC again unless you’re absolutely sure you don’t need it, since reenabling it will require a fresh install. We recommend you don’t turn it off, as it is a neat feature protecting your data and files from malware at all times.
Summary
Have we piqued your interest in trying Microsoft’s latest OS? It’s a pretty exciting new iteration, but we’ll let you find out for yourself. We hope you like it!
As you know, Microsoft is consistent in pushing updates to its supported versions of the Windows operating systems in order to make it better and defend it from different kinds of vulnerabilities. And pushing billions of active Windows computers every now and then is really not an easy thing to do since it calls for a complex Windows Update delivery module. These complexities often give rise to various errors like the Windows Update error code 0x80004005.
When you encounter this kind of Windows Update error, you will see the following error message on your screen:
“There were problems installing some updates, but we’ll try again later. If you keep seeing this and want to search the web or contact support for information, this may help 0x80004005.”
This kind of Windows Update error occurs due to an issue while either installing or downloading an update. There are several ways you can fix the problem. You can try to replace the dpcdll.dll file, reset the Windows Update-related services, run the Windows Update troubleshooter or manually install the Windows Updates. For more details, check out the options given below.
Option 1 – Try to replace the DLL file with a trusted source
The first thing you can do is to replace the dpcdll.dll file with a trusted source.
First, you need to get the new dpcdll.dll file from another computer with preferably the same file version number as your computer.
After that, you need to boot your PC into Safe Mode and navigate to the paths listed below and then replace the file using a USB drive or other external storage devices.
For x86: This PC > C:/Windows/System32
For x64: This PC > C:/Windows/SysWOW64
Next, type “cmd” in the Cortana search box and right-click on Command Prompt, and select “Run as administrator” to open it with administrator privileges.
Now type the “regsvr32 dpcdll.dll” command and hit Enter.
Restart your PC and check if the error is now fixed.
Option 2 – Try to reset the Windows Update components
If by any chance that the third option didn’t work, you can also try resetting the Windows Update components as it could also help you resolve the Windows Update error. How? Refer to the following steps:
Open Command Prompt with admin privileges.
After that, type each one of the following commands and hit Enter after you key in one after the other.
net stop wuauserv
net stop cryptsvc
net stop bits
net stop msiserver
Note: The commands you entered will stop the Windows Update components such as Windows Update service, Cryptographic services, BITS and MSI Installer.
After disabling WU components, you need to rename both the SoftwareDistribution and Catroot2 folders. To do that, type each one of the following commands below and don’t forget to hit Enter after you type one command after the other.
Next, restart the services you’ve stopped by entering another series of commands. Don’t forget to hit Enter after you key in one command after the other.
net start wuauserv
net start cryptsvc
net start bits
net start msiserver
Close Command Prompt and reboot your PC.
Option 3 – Run the Windows Update Troubleshooter
You might also want to run the Windows Update Troubleshooter as it could also help in fixing Windows Update error 0x80004005. To run it, go to Settings and then select Troubleshoot from the options. From there, click on Windows Update and then click the “Run the troubleshooter” button. After that, follow the next on-screen instructions and you should be good to go.
Option 4 – Try downloading and installing the Windows Updates manually
Windows Update Error 0x80004005 might be due to a Windows Update that has failed. So if it is not a feature update and only a cumulative update, you can download the Windows Update and install it manually. But first, you need to find out which update has failed, and to do so, refer to the following steps:
Go to Settings and from there go to Update and Security > View Update History.
Next, check which particular update has failed. Note that Updates that have failed to install will be displayed under the Status column which has a label of “Failed”.
After that, go to the Microsoft Download Center and look for that update using its KB number and once you find it, download and then install it manually.
Note: You can also use the Microsoft Update Catalog, a service from Microsoft that provides a list of software updates that can be distributed over a corporate network. With the help of this service, it can be easier for you to find Microsoft software updates, drivers as well as fixes.
Steam Autumn sale is still raging and other storefronts like EPIC and GOG have also had their go, and as the year slowly closes we reflect on the best games released this year.
The games presented are not in any particular order and as sales are still raging pick one for you for a good time.
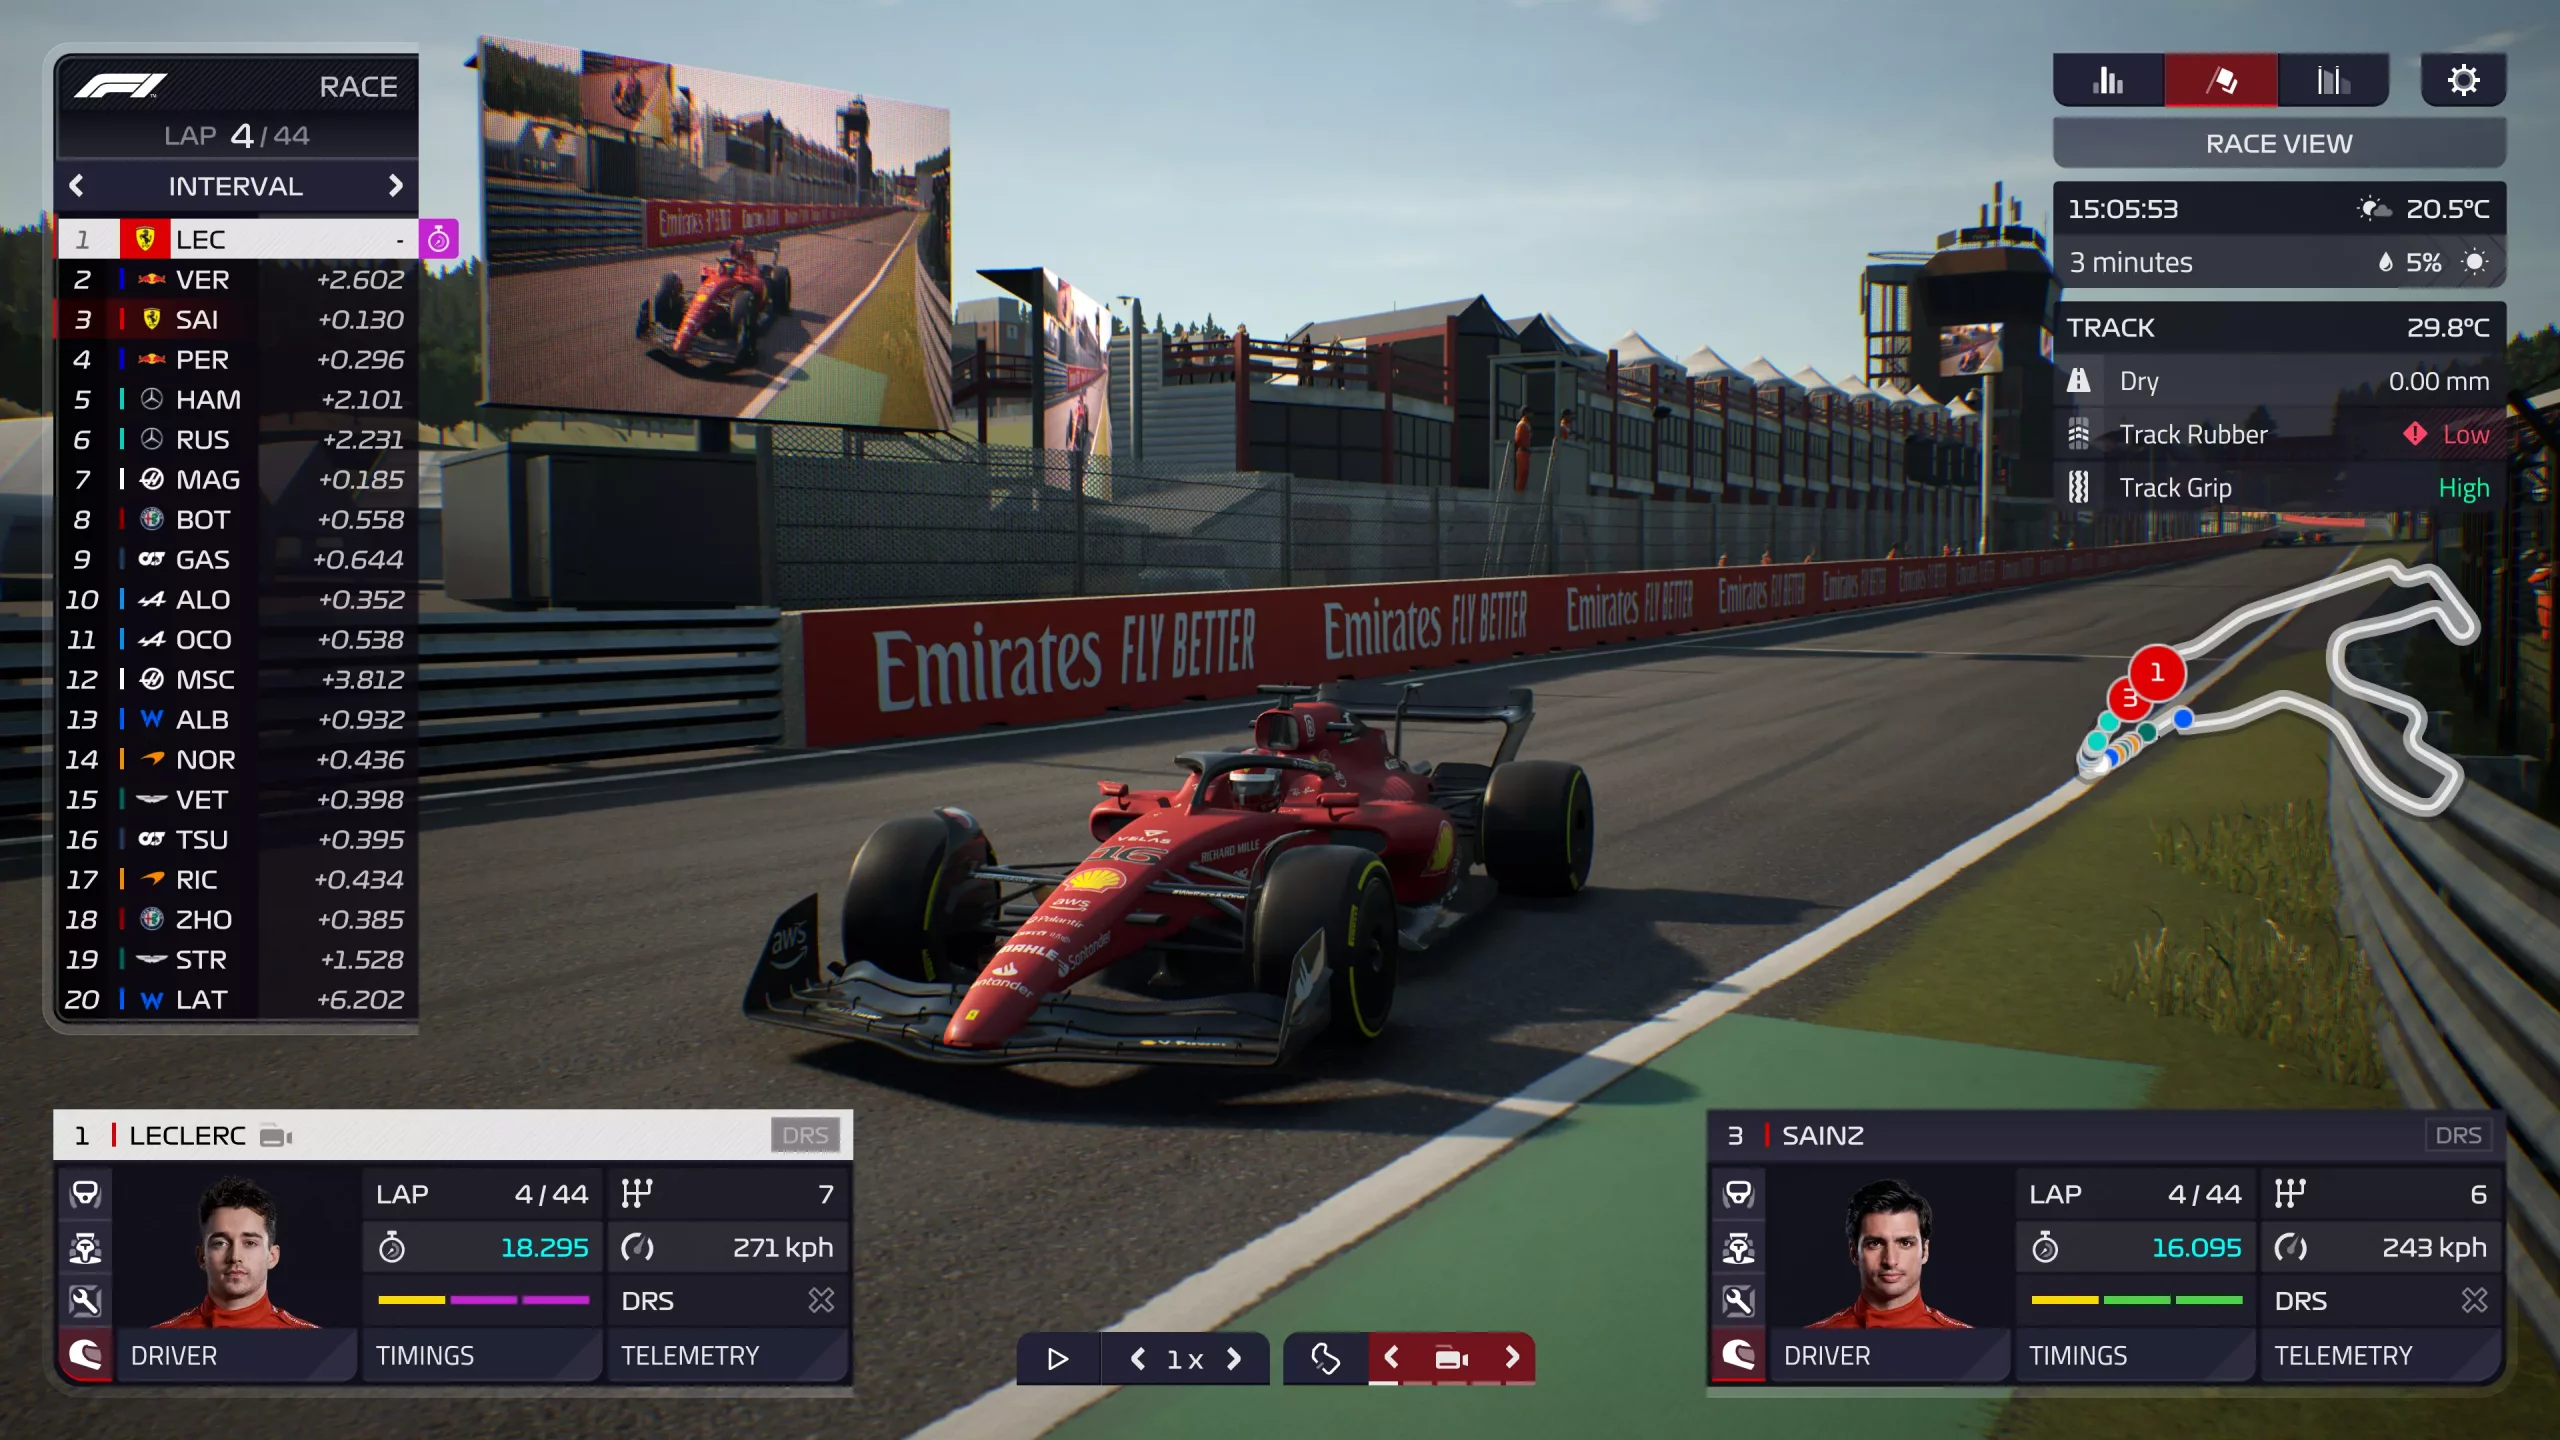
F1 Manager 22
If you are into formula racing this new manager is something we will wholeheartedly recommend. How it has been a very long time since a good F1 manager has been released this one is breath of fresh air. Masterfully done and fun to play, also licensed with real teams and cars get it here: https://store.steampowered.com/app/1708520/F1_Manager_2022/
Stray
I like cats, but this game is on another level from its competitors. Unique approach, great storyline, and of course orange cat as the main character! Set in a cyberpunk environment following the story of some unfortunate androids you can do most cat things like playing in boxes, etc but essentially the game is a puzzle platformer which in my opinion is a great thing. Meow your things and get the game while it is discounted: https://store.steampowered.com/app/1332010/Stray/
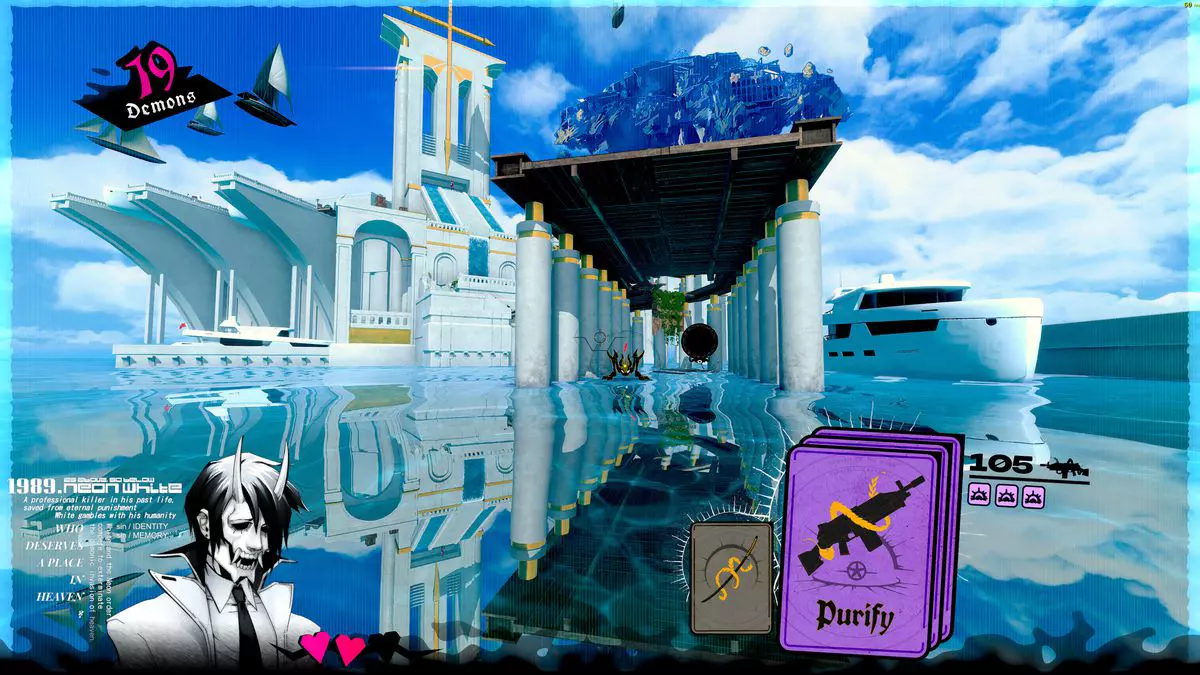
Neon White
Mirror's Edge was the very unique game when it was released introducing parkour into the gaming world, and Neon white brings it one level up. With competitive parkour FPS gameplay this game is great for killing some time and competing with your friends but most of all it is fun to play experience. Get it here: https://store.steampowered.com/app/1533420/Neon_White/
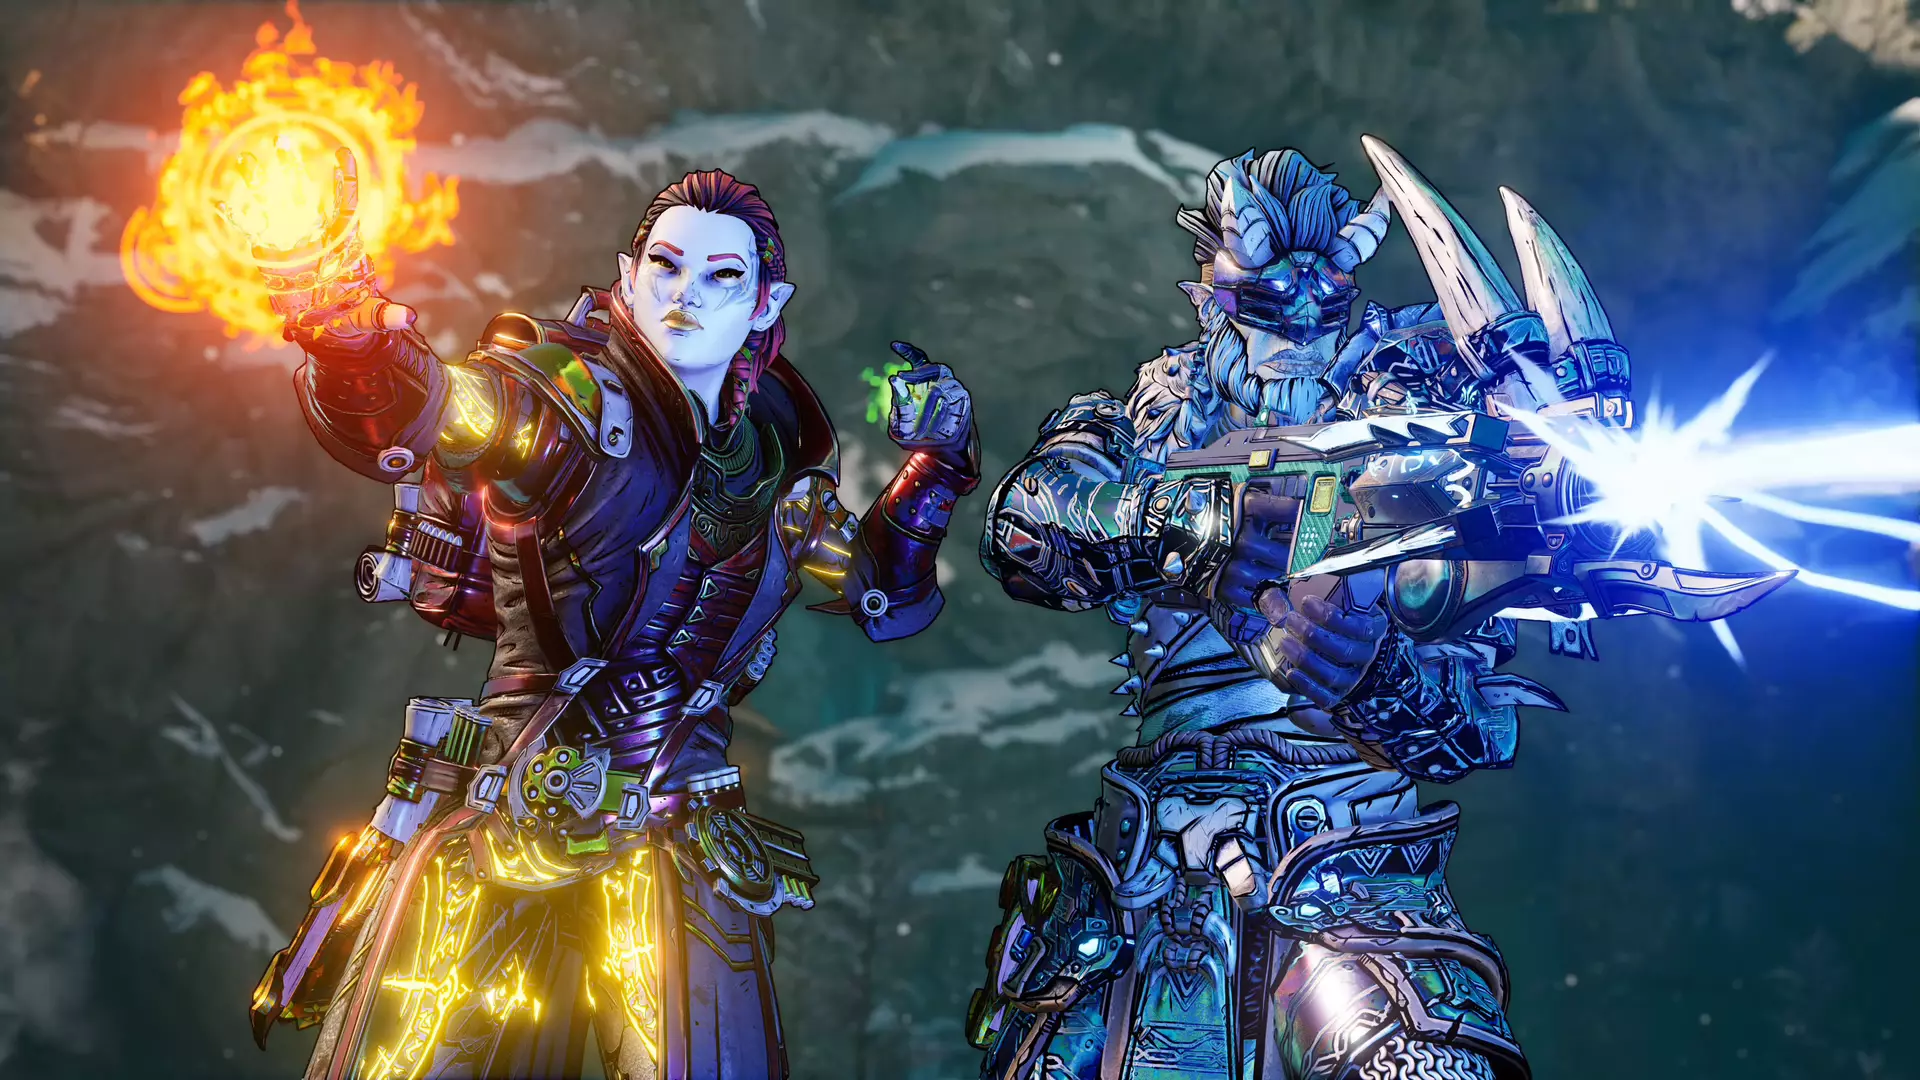
This game needs to be experienced in order to fully grasp its magnitude and quirkiness. From the creators of borderlands comes a new IP fusion of fantasy, guns, and crazy ideas all wrapped into an action RPG looter shooter with a recognizable borderlands style of graphics. https://store.steampowered.com/app/1286680/Tiny_Tinas_Wonderlands/
Norco
Winner of multiple awards, Norco is a classic point-and-click adventure game with a great sci-fi story with a lot of environmental focus. Story and atmosphere are the main selling points for the game and if you enjoy good stories with interesting characters give this one a go: https://store.steampowered.com/app/1221250/NORCO/
Final Fantasy 14: Endwalker
Expansion for Massive multiplayer online roleplaying game brings so much to the table that we just could not oversee it and place it aside. Technically not full standing game since it is the expansion it still delivers on many fronts and since it is supposedly the last expansion now is the best time to pick it up and give a final fantasy 14 a go: https://store.steampowered.com/app/1592500/FINAL_FANTASY_XIV_Endwalker/
Elden Ring
Of course, the list would not be complete if we did not include Elden ring, a great example of how a difficult but well-executed game can go over and beyond. With a story on par with great epics and compact as in dark souls, this title will provide you with many hours of gameplay and content. https://store.steampowered.com/app/1245620/ELDEN_RING/
Every now and then, the Windows Installer can also encounter some problems or glitches. One of these problems is where the Windows Update Standalone Installer, Windows Defender as well as Windows Firewall throws an error message that says, “The specified service does not exist as an installed service, 0x80070424”. This type of error can actually affect various applications on your computer so you have to fix it as soon as you can.
Although there is no clear reason for what really causes this error, there are various suggestions you can try to fix it.
Option 1 – Try to run the Windows Update troubleshooter
Windows 10 have various troubleshooters that can help you resolve many system issues. So if you’re dealing with errors “The specified service does not exist as an installed service, 0x80070424”, you can run the Windows Update troubleshooter to resolve it.
To run it, go to Settings and then select Troubleshoot from the options. From there, click on Windows Update and then click the “Run the troubleshooter” button. After that, follow the next on-screen instructions and you should be good to go.
Option 2 – Try to reconfigure the Windows Time Service
In the Start Search, type “command prompt” and right-click on Command Prompt from the search results.
Then click on the “Run as administrator” option to open Command Prompt with admin privileges.
Now execute each one of the given commands sequentially and hit Enter right after you type each one of them.
net stop W32time
exe /unregister
exe /register
net start W32time
After executing the given commands above, wait until it says, “W32Time successfully registered”.
Option 3 – Try to restart related Windows services
First, type “command prompt” in the Start Search and right-click on Command Prompt from the search results.
Then click on the “Run as administrator” option to open Command Prompt with admin privileges.
Now execute each one of the given commands sequentially and hit Enter right after you type each one of them.
SC config wuauserv start= auto
SC config bits start= auto
SC config cryptsvc start= auto
SC config trustedinstaller start= auto
Note: The commands you’ve just executed will make sure that the required Windows services are available.
Option 4 – Try to download and install the Windows Update Agent
You might also want to download and install the latest Windows Update Agent as it could also help you resolve the “The specified service does not exist as an installed service, 0x80070424” error.
Option 5 – Try to reset the Windows Update components
If by any chance that the second option didn’t work, resetting the Windows Update components could also help you resolve the problem. How? Refer to the following steps:
Open Command Prompt with admin privileges.
After that, type each one of the following commands and hit Enter after you key in one after the other.
net stop wuauserv
net stop cryptsvc
net stop bits
net stop msiserver
Note: The commands you entered will stop the Windows Update components such as Windows Update service, Cryptographic services, BITS, and MSI Installer.
After disabling WU components, you need to rename both the SoftwareDistribution and Catroot2 folders. To do that, type each one of the following commands below, and don’t forget to hit Enter after you type one command after the other.
Next, restart the services you’ve stopped by entering another series of commands. Don’t forget to hit Enter after you key in one command after the other.
net start wuauserv
net start cryptsvc
net start bits
net start msiserver
Close Command Prompt and reboot your PC and then check for updates on your computer and see if the error is resolved.
Option 6 – Try running the Windows Firewall troubleshooter
You could also try to run the Windows Firewall troubleshooter as it might also help you fix the problem. This could help in repairing and fixing Windows Firewall issues automatically. Check if it’s available for your Windows.
Microsoft has presented its next version of their flagship product, Windows 11, and feelings are divided among users.
Some users like it very much and eager to upgrade, some do not like the graphic overhaul it went through, but overall I think Microsoft has done a good job with it.
Here in this article, we will discuss some of the new features which Windows brings to the table, well at least ones that were showed, I am sure there are plenty more which we will see once OS has been released.
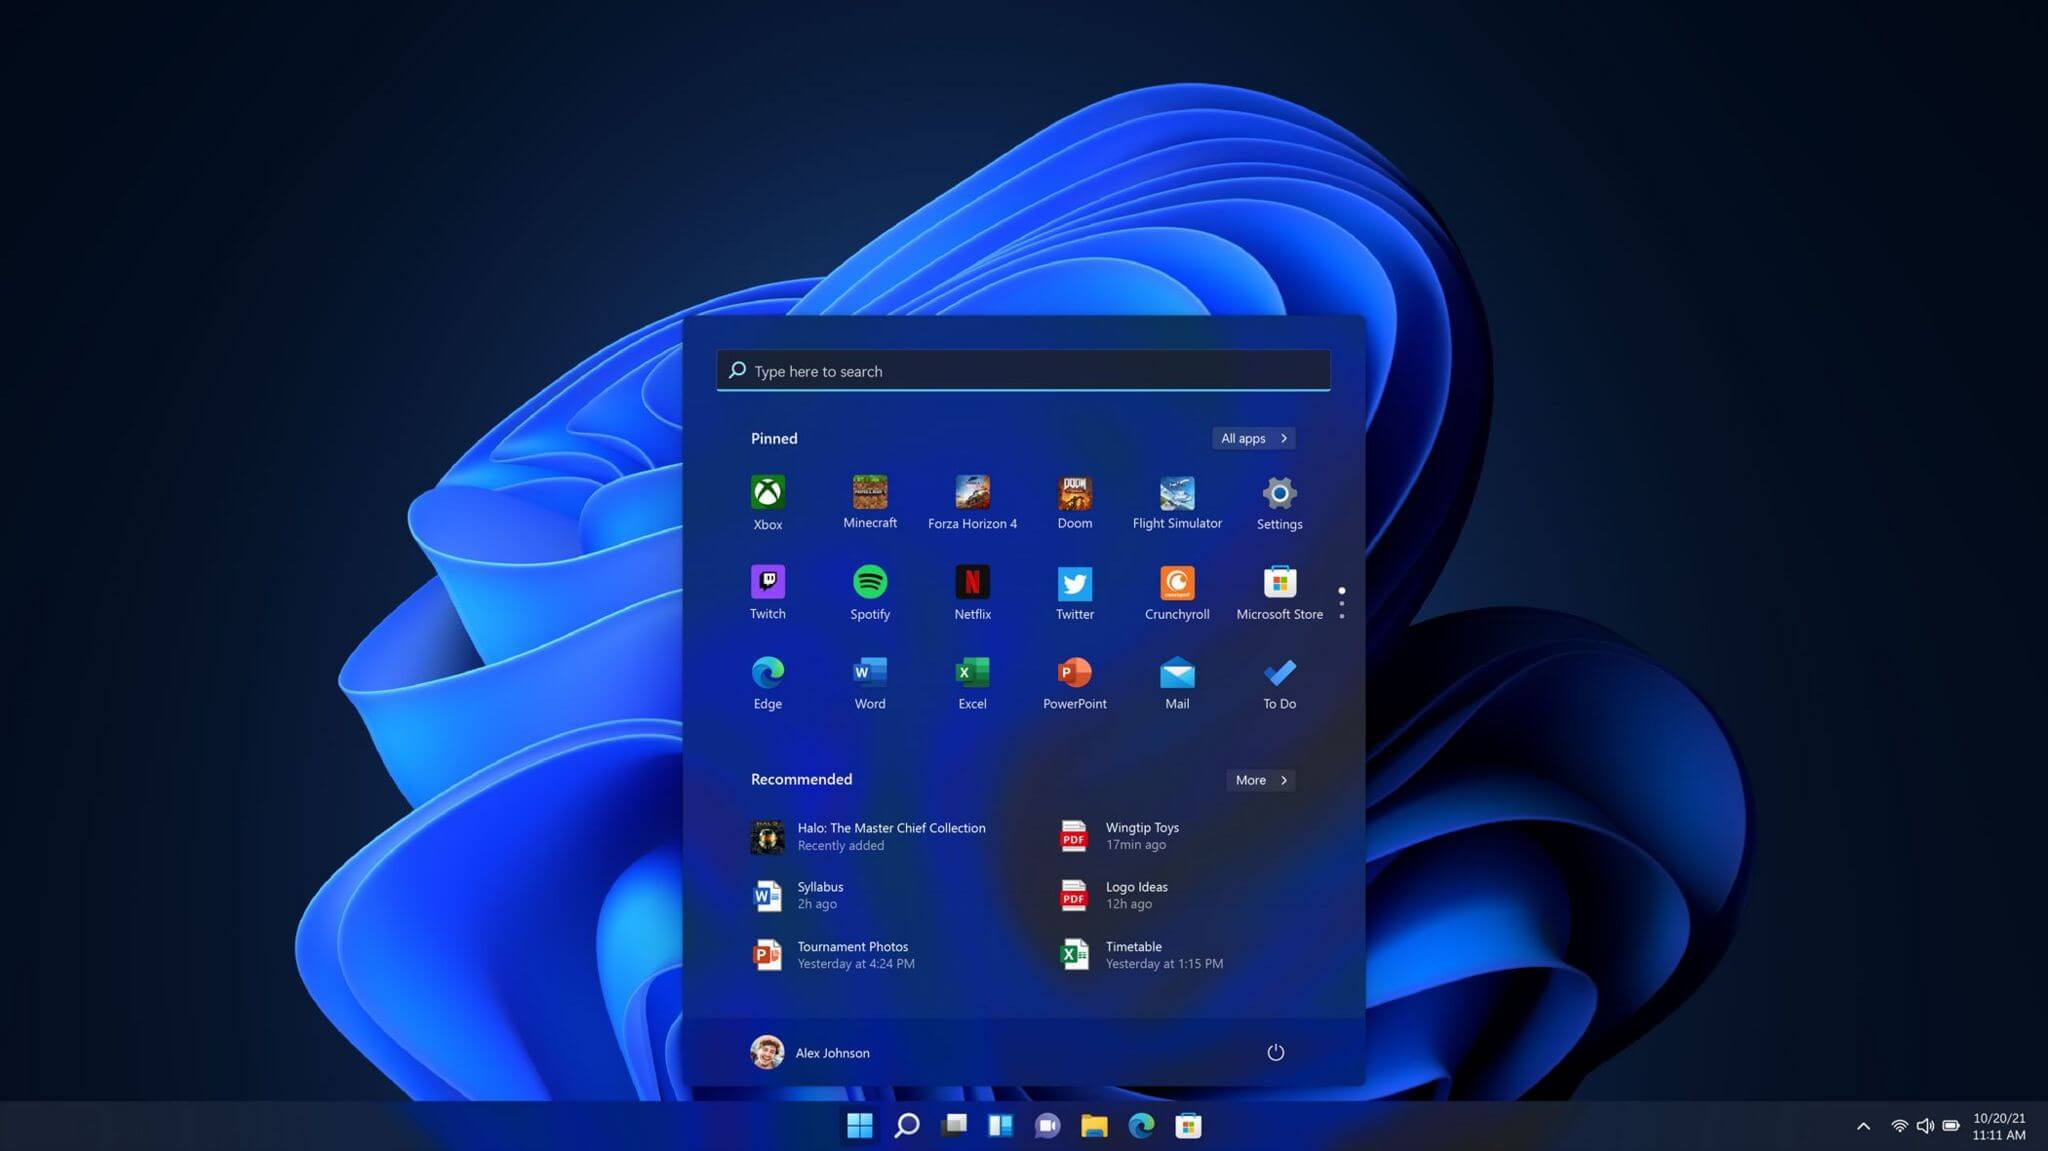
New Start menu
One of the first things that everyone saw when Microsoft has unveiled Windows 11 is its Start menu. Funny enough this is what has caused most of the divide among users, some find it interesting, and some do not like it. Truth is, it is different, and it is centered in the middle instead of the lower left part of the screen.
It has been confirmed however that the Start menu can be moved to any part of the screen so if you want, you could place it on the lower left as it has always been.
Live tiles do not longer exist in the Start menu, instead, we have styled simple icons.
Windows 11 Snap controls are great
If you have used the cascade option in previous Windows versions then it is most likely that you will like the new Snap controls.
You can quickly snap windows side by side, or arrange them in sections on your desktop just by hovering over maximize button on the title bar.
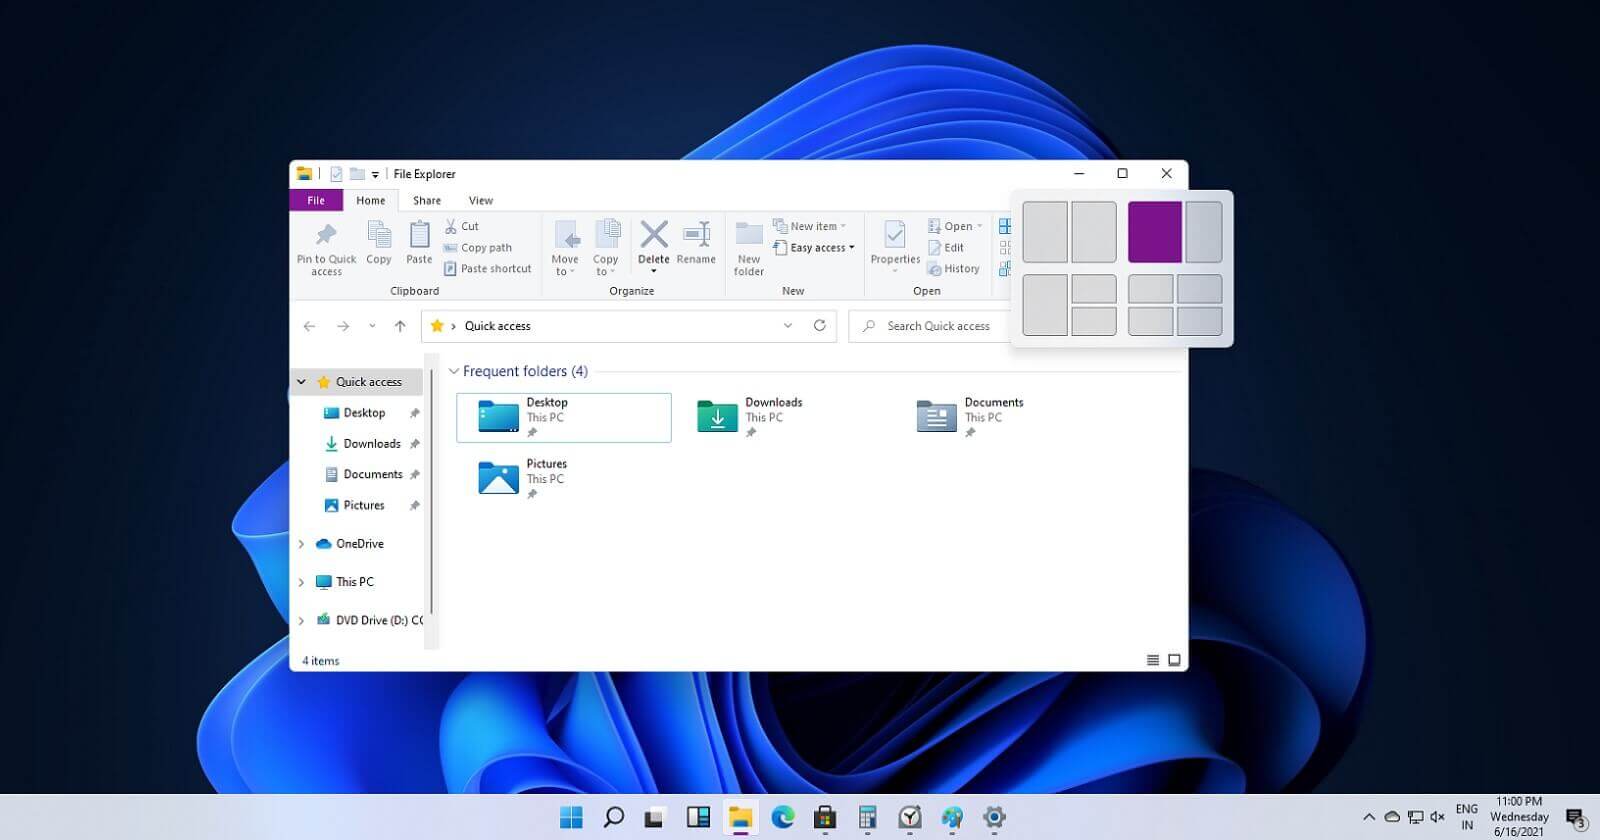
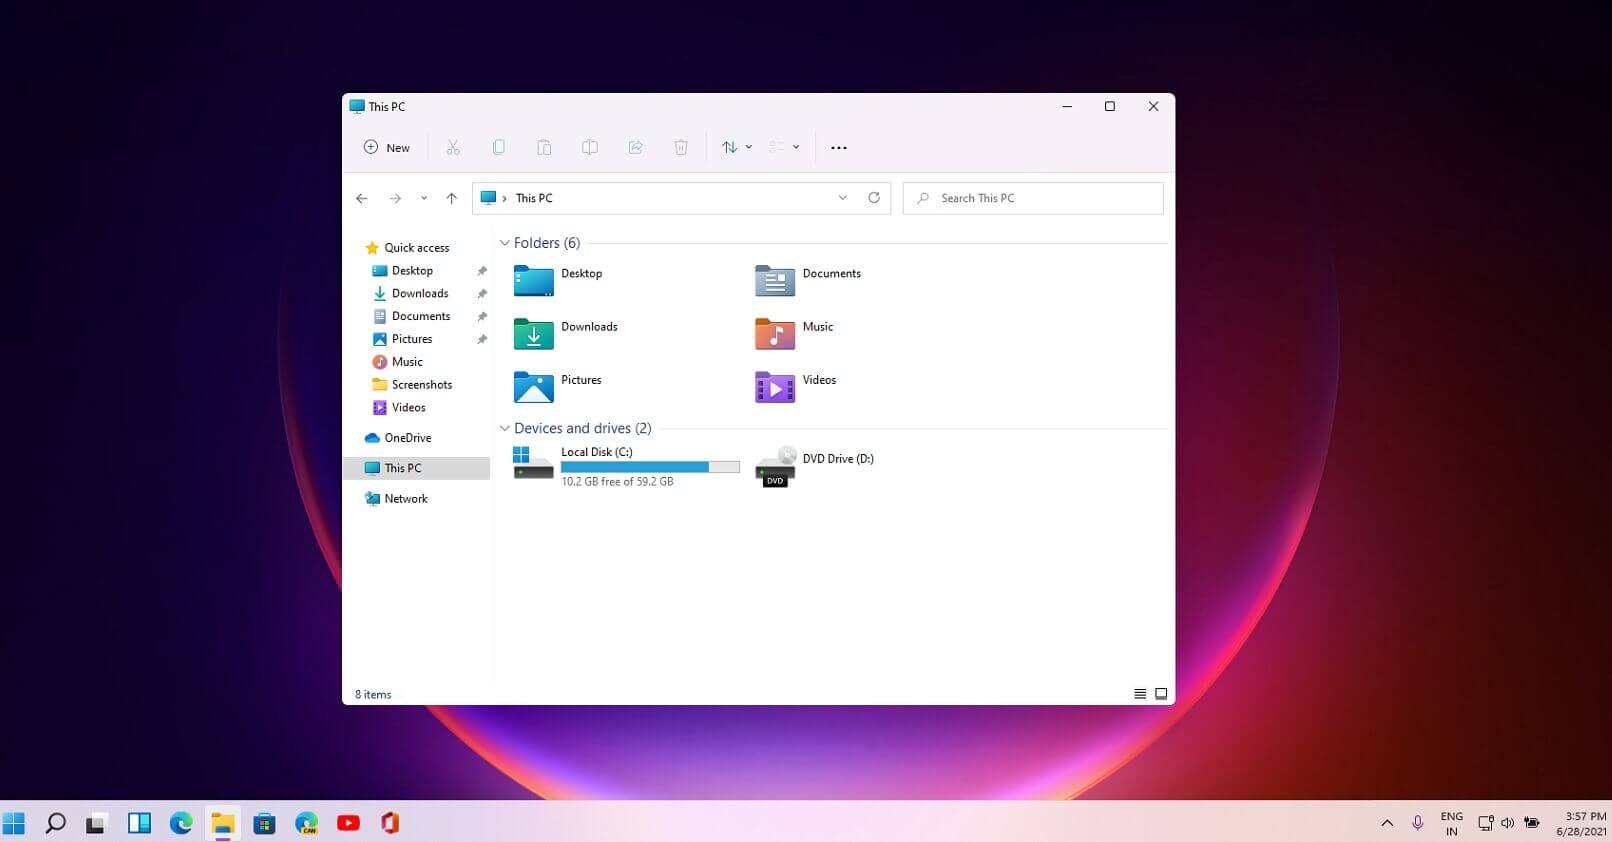
Windows 11 File Explorer
File explorer has gone through some visual and design changes, the ribbon on top has been completely removed and replaced with a header-like feature with a slick and clean design.
The header contains a nice organized and designed single row of icons like cut, paste, copy, rename, delete, and new folder icons.
Settings app ovberhaul
The settings app also has gone through visual and design changes. It has a new design that is very visually appealing and navigation has been simplified and more organized. Finding the right and desired setting is much faster and clearer now.
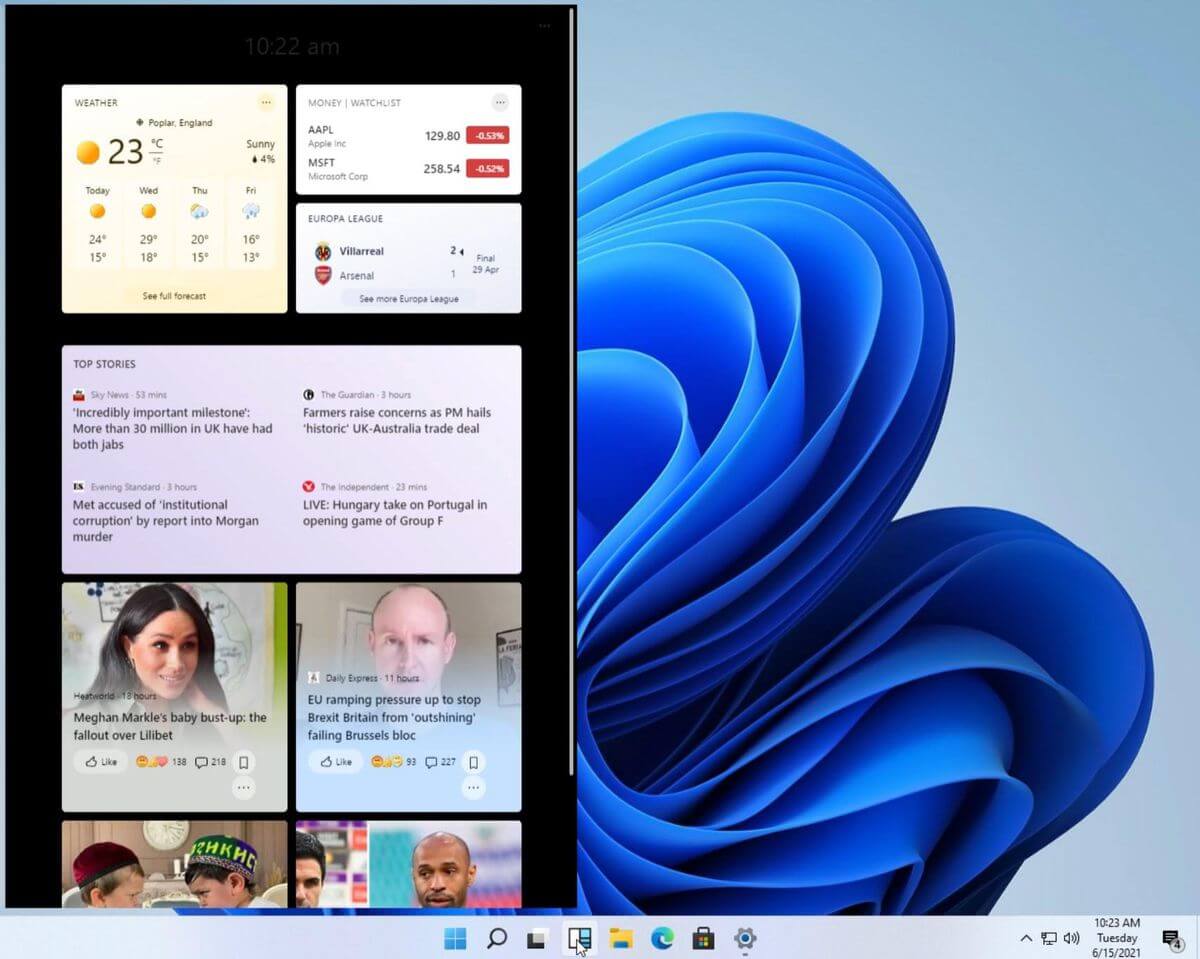
Widget tab makes comeback in Windows 11
Yes, widgets are back but not like you remember them.
Instead of being all-time present at your desktop like once they used to be, now there is a button on the taskbar which brings the widget bar up that contains desired widgets. This way they are easily accessible and do not clutter desktops.
So far we have weather, news, calendar, and stocks widget but we will see how development on these goes. I expect to have community-made widgets like in old days for all of our needs.
XBOX app
The new Xbox app is now integrated into Windows 11, offering quick access to Xbox Game Pass games, the social parts of the Xbox network, and the Xbox store.
Security and TPM 2.0 in Windows 11
As widely known by now Windows 11 will require you to have a TPM 2.0 module capable CPU in order to install it.
This system requirement has caused a lot of controversies but essentially it seems that MS's goal is to protect your personal data by using this module.
The upside of course is that your data will be protected much more than in previous Windows versions, the downside, of course, will be that you will need newer hardware to run OS on it.
and that is essentially it, keep on tuned on more Windows 11 information and overall articles tied to PC and technology here at errortools.com
Diablo 2 resurrected has hit official release and servers seem to be finally taken care of and everything seems to be running smoothly now. The game also received great praise from gamers and attracted old players of the original Diablo 2 game.
Speaking of old players of old Diablo 2, they can transfer their old characters into remaster and continue playing them within this new great HD environment. There are some steps and requirements but we are here to help and transferred characters will bring full stash, inventory, and equipped items with them.
Requirements
There are not many requirements for this transfer to occur but they must be respected in order to be successful. The first thing is a minor requirement and somewhat annoying but it needs to be done, firstly fire up Diablo 2 resurrected and create a character, any kind of character with any kind of name, any kind of class. This strange requirement is to actually create a character folder and register it inside D2 resurrected so we can copy old ones there.
The second requirement will be that characters that you wish to be transferred must be offline characters. Old battle net online characters cannot be transferred at this moment and probably will not be in the future as well. So for all of you that wish to transfer online characters, bad luck, for the rest of us casuals playing offline single-player mode, we can enjoy our characters.
Process of diablo 2 character trasfer
The process itself of transferring characters when previously mentioned requirements are met is just a simple and copy operation. If you have somewhere backed your characters go into your backup folder and copy files in c:\users\*current user*\saved games\*diablo 2 resurrected folder*
If you do not have characters backed up and just have old Diablo 2 installed and playing it, you can go to c:\users\*current user*\saved games\*diablo 2 folder* and just copy all characters files into c:\users\*current user*\saved games\*diablo 2 resurrected folder*
Your old characters end with .d2s extension, grab all that you want to transfer, and copy them into D2R. Take note that copied characters cannot be brought back into Diablo 2, once they are copied into Diablo 2 resurrected all further progress on them will be tied to the new game.
Conclusion
That’s it about the transfer process and requirements for it. Fire up the new game version and enjoy.
If you have a USB that has stopped working and does not show any signs of life do not throw it away just jet.
Hello and welcome to another great tutorial on errortools.com, today we will explore how to bring back to life dead USB memories.
Detect a Corrupted Drive:
If your computer is still able to detect your USB drive, you might want to know if it’s been corrupted. Select the Properties of the drive folder and check the device status. If it says This device is working properly this USB drive is worth saving. There’s no need to worry if you can’t see the USB drive folder.
Erase the USB Drive with Diskpart Tool
Press ⊞ WINDOWS + X top open start menu and choose Command prompt (admin)
Type diskpart and press ENTER
Type in list disk and press ENTER
Locate your USB drive by size and type in select disk#, where # is the number of removable disks.
Reallocate the USB Drive Volume
Press ⊞ WINDOWS + R to open the run dialog and type in diskmgmt.msc
Select the USB drive and Right-click on it and select create simple volume. It will lead to a new simple volume wizard window.
Once you click next, you can specify the volume size for the pen drive. Select the maximum volume, which is shown as a default unit in MB.
As soon as you see the next step, select assign drive letter which will help you view your pen drive once again.
Format the partition in the next step. This may be just an extra step because you have already wiped the data clean. But it is always better to be sure.
Click Finish to complete the new simple volume wizard which will now be allocated to the USB drive.
After you reallocate the unallocated USB drive space, you will be able to view the USB drive storage once again.


 One of the first things that everyone saw when Microsoft has unveiled Windows 11 is its Start menu. Funny enough this is what has caused most of the divide among users, some find it interesting, and some do not like it. Truth is, it is different, and it is centered in the middle instead of the lower left part of the screen.
It has been confirmed however that the Start menu can be moved to any part of the screen so if you want, you could place it on the lower left as it has always been.
Live tiles do not longer exist in the Start menu, instead, we have styled simple icons.
One of the first things that everyone saw when Microsoft has unveiled Windows 11 is its Start menu. Funny enough this is what has caused most of the divide among users, some find it interesting, and some do not like it. Truth is, it is different, and it is centered in the middle instead of the lower left part of the screen.
It has been confirmed however that the Start menu can be moved to any part of the screen so if you want, you could place it on the lower left as it has always been.
Live tiles do not longer exist in the Start menu, instead, we have styled simple icons.
 If you have used the cascade option in previous Windows versions then it is most likely that you will like the new Snap controls.
You can quickly snap windows side by side, or arrange them in sections on your desktop just by hovering over maximize button on the title bar.
If you have used the cascade option in previous Windows versions then it is most likely that you will like the new Snap controls.
You can quickly snap windows side by side, or arrange them in sections on your desktop just by hovering over maximize button on the title bar.
 File explorer has gone through some visual and design changes, the ribbon on top has been completely removed and replaced with a header-like feature with a slick and clean design.
The header contains a nice organized and designed single row of icons like cut, paste, copy, rename, delete, and new folder icons.
File explorer has gone through some visual and design changes, the ribbon on top has been completely removed and replaced with a header-like feature with a slick and clean design.
The header contains a nice organized and designed single row of icons like cut, paste, copy, rename, delete, and new folder icons.
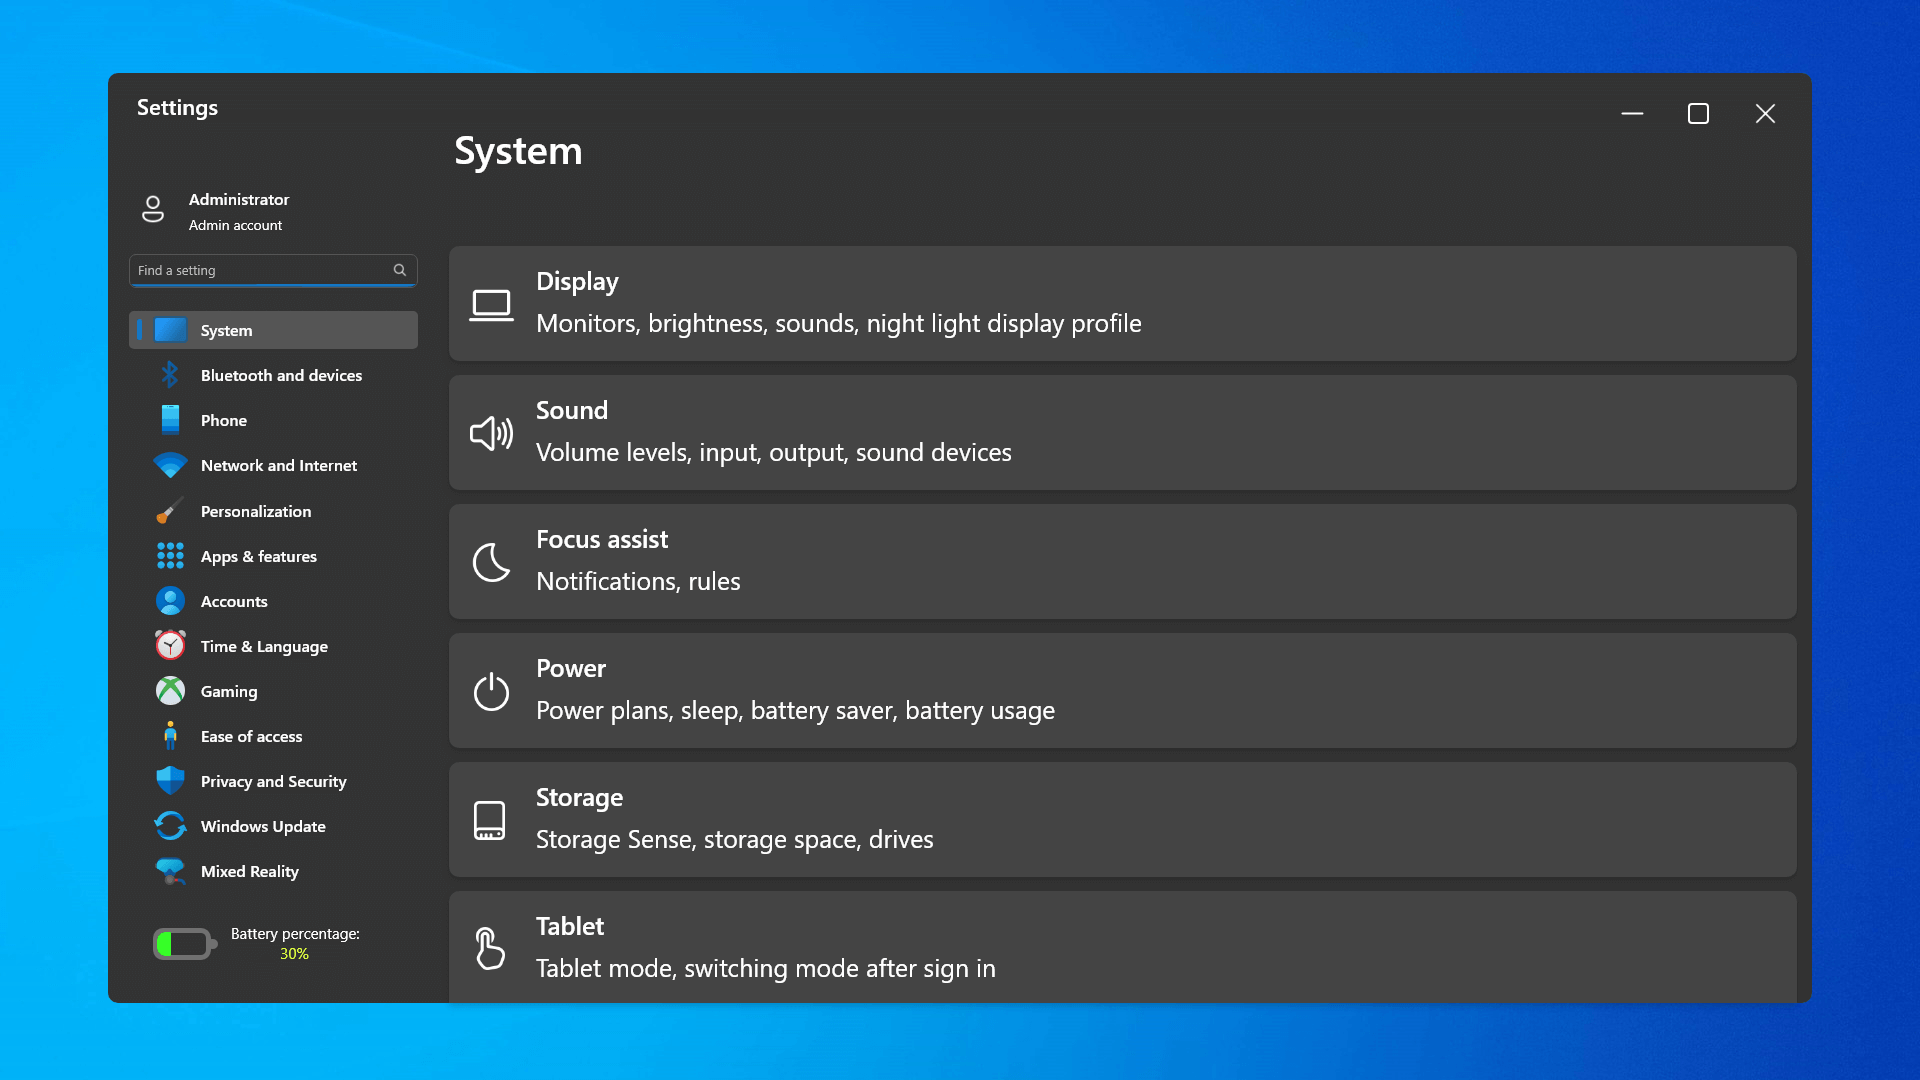 The settings app also has gone through visual and design changes. It has a new design that is very visually appealing and navigation has been simplified and more organized. Finding the right and desired setting is much faster and clearer now.
 Yes, widgets are back but not like you remember them.
Instead of being all-time present at your desktop like once they used to be, now there is a button on the taskbar which brings the widget bar up that contains desired widgets. This way they are easily accessible and do not clutter desktops.
So far we have weather, news, calendar, and stocks widget but we will see how development on these goes. I expect to have community-made widgets like in old days for all of our needs.
Yes, widgets are back but not like you remember them.
Instead of being all-time present at your desktop like once they used to be, now there is a button on the taskbar which brings the widget bar up that contains desired widgets. This way they are easily accessible and do not clutter desktops.
So far we have weather, news, calendar, and stocks widget but we will see how development on these goes. I expect to have community-made widgets like in old days for all of our needs.
 The new Xbox app is now integrated into Windows 11, offering quick access to Xbox Game Pass games, the social parts of the Xbox network, and the Xbox store.
 As widely known by now Windows 11 will require you to have a TPM 2.0 module capable CPU in order to install it.
This system requirement has caused a lot of controversies but essentially it seems that MS's goal is to protect your personal data by using this module.
The upside of course is that your data will be protected much more than in previous Windows versions, the downside, of course, will be that you will need newer hardware to run OS on it.
and that is essentially it, keep on tuned on more Windows 11 information and overall articles tied to PC and technology here at errortools.com
As widely known by now Windows 11 will require you to have a TPM 2.0 module capable CPU in order to install it.
This system requirement has caused a lot of controversies but essentially it seems that MS's goal is to protect your personal data by using this module.
The upside of course is that your data will be protected much more than in previous Windows versions, the downside, of course, will be that you will need newer hardware to run OS on it.
and that is essentially it, keep on tuned on more Windows 11 information and overall articles tied to PC and technology here at errortools.com 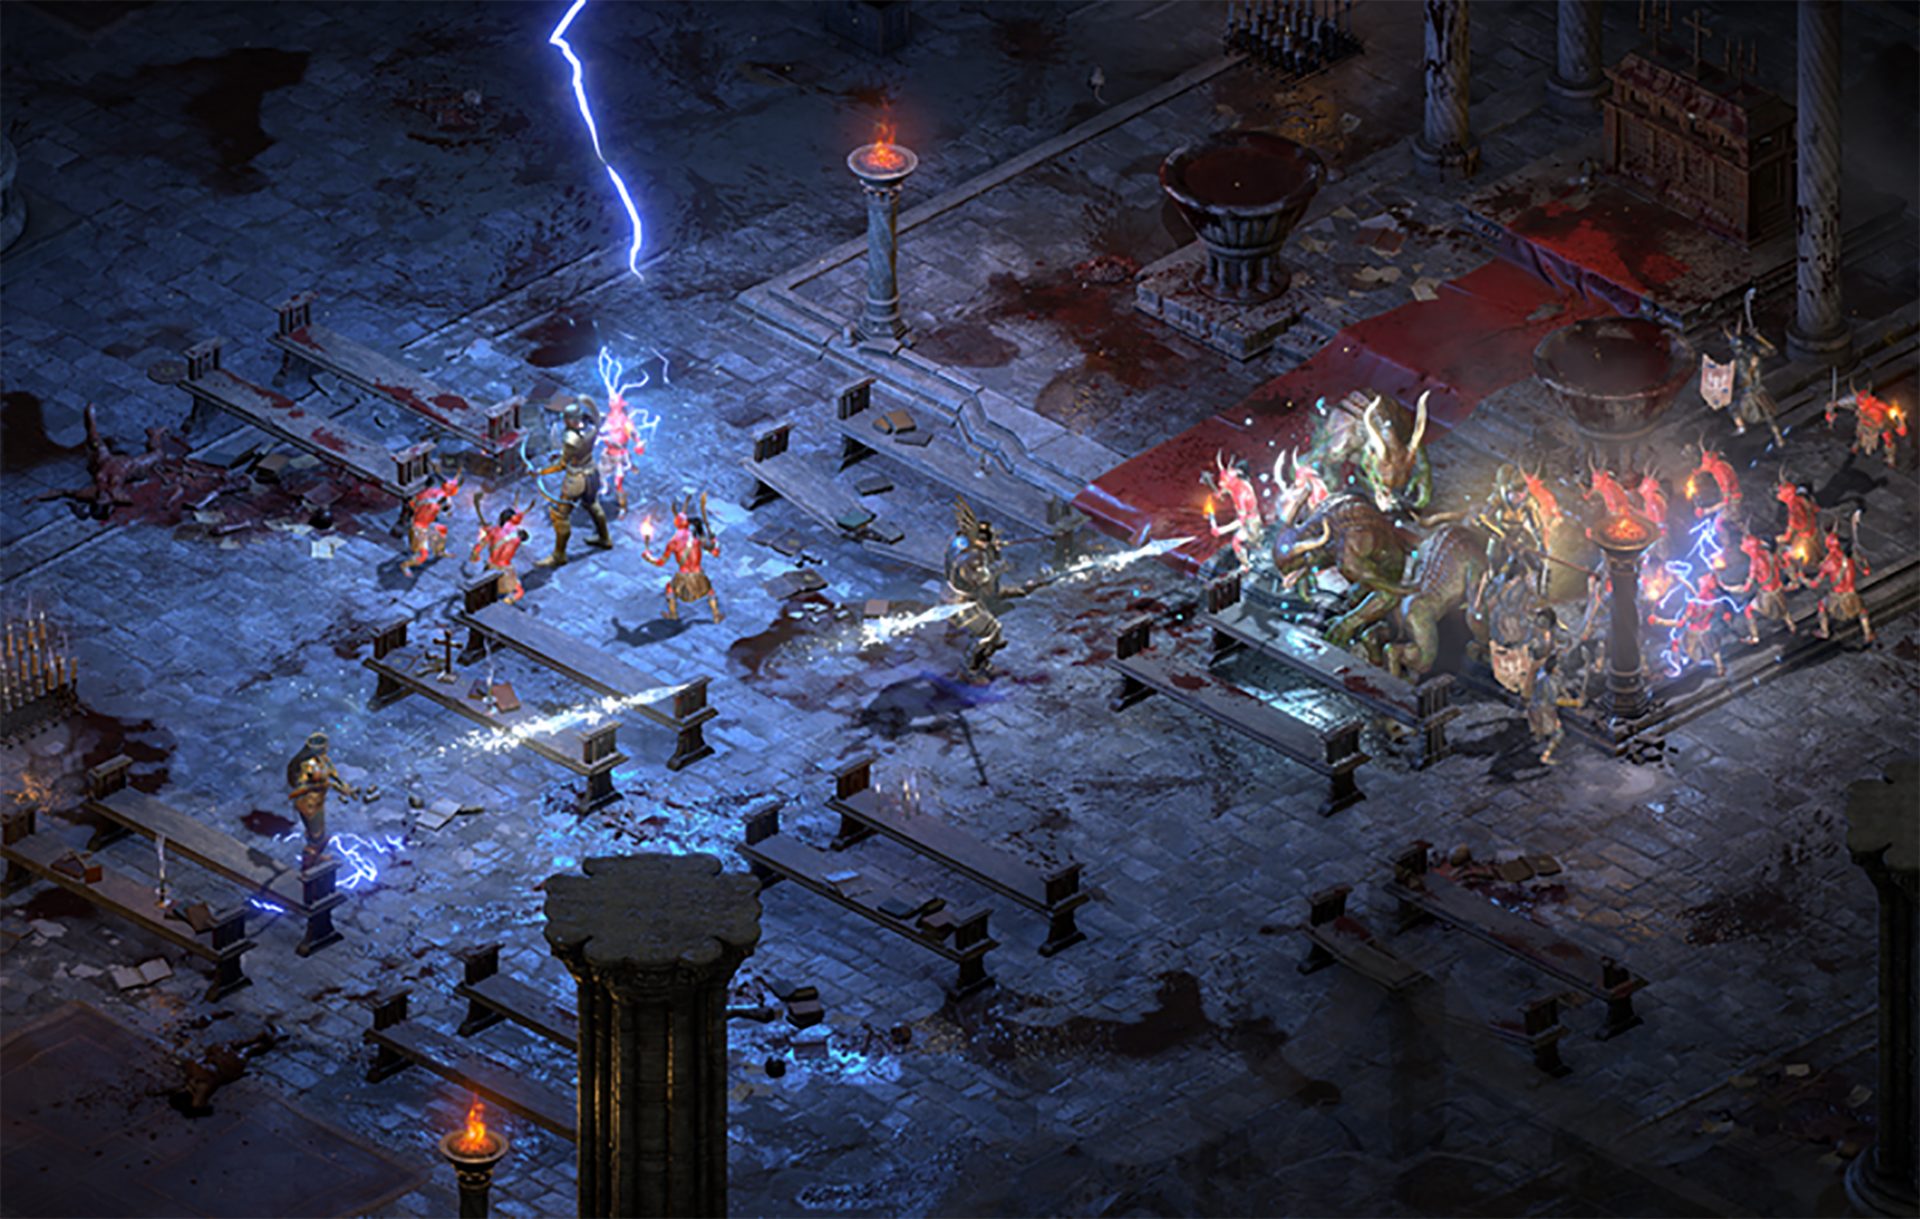 Speaking of old players of old Diablo 2, they can transfer their old characters into remaster and continue playing them within this new great HD environment. There are some steps and requirements but we are here to help and transferred characters will bring full stash, inventory, and equipped items with them.