Stop 0x000000A is a type of blue screen of death error associated with Windows XP. It occurs either during or after the installation of Windows XP. In other cases, the stop 0x000000A error may occur when the device driver uses an incorrect memory address, causing an IRQ conflict.
The Stop 0x000000A error message means that a process or a driver attempted to access a memory section without permission. The stop error message is displayed in the following format:
Stop: 0x0000000A (parameter1, parameter2, parameter3, parameter4)
IRQL_NOT_LESS_OR_EQUAL
*** Address x has base at x - filename
 Error Causes
The stop 0x000000A error is triggered due to multiple reasons. These include:
Blue screen of death errors like the stop 0x000000A error code is critical. These errors may pose serious PC threats. When this error occurs the computer screen turns blue, the program running on the system stops and if the error is not fixed in time it may also result in a system crash and failure.
To resolve the Stop 0x000000A error on your PC, here are some solutions that you can try:
To do this, click on the start button and go to the control panel. Then double click the system icon and locate the ‘System Properties’ window. After that click on the ‘hardware’ tab and then click the ‘Device Manager’ button. Here locate the device that you recently updated which could be causing the IRQ conflict.
Now double click the device recently updated and click the driver tab. Then click on the ‘Roll Back Driver' button. Wait for the process to finish and then simply reboot your system.
Another method to resolve the Stop 0x000000A error on your system is to specify the hardware abstraction layer (HAL). This can be done during Windows XP installation startup. Simply press the F5 button on your keyboard while the “Setup is inspecting your computer’s hardware configuration’.
When prompted, make sure that you specify the correct computer type and HAL (the Hardware Abstraction Layer). Most computers use a single processor, if your computer also has a single processor then simply select ‘Standard PC HAL’ computer type from the menu. Now reboot your PC and then reinstall the Windows XP operating system.
If the error is still not resolved then try turning off features in CMOS settings
Turn off all the following features in the CMOS settings:
After turning off these features, try reinstalling Windows XP again. If this works, then that’s great! However, if it doesn’t, then try method 4; maybe the cause of the stop 0x000000A is associated with incompatible drivers.
Sometimes device driver compatibility can also shoot up the stop 0x000000A error message.
First, remove the drivers that are incompatible with Windows XP. Now obtain and install new Windows XP compatible drivers. To do this, go to the start menu and the control panel. Now double click on Add or Remove Programs icon. Select the drivers that are incompatible with Windows XP and click on the remove button.
After that restart PC and install Windows XP, compatible drivers, for the hardware devices on your system.
If all the methods discussed above do not resolve the stop 0x000000A error on your PC, then it means either your computer is affected by an infection virus or the problem is associated with the registry like disk fragmentation and invalid entries.
To scan for both viruses and registry issues simultaneously in seconds, it is advisable to download Restoro.
Restoro is an advanced and multi-functional PC repair tool integrated with powerful utilities including a registry cleaner, antivirus, and a system optimizer. It also scans for Active X controls and class ID errors.
The registry cleaning utility scans your entire PC for all possible registry issues triggering different error codes including the stop 0x000000A error. It wipes out all the unnecessary files cluttering and damaging the registry including cookies, temporary files, junk files, and invalid entries.
It repairs the fragmented disk and the registry thereby resolving the stop 0x000000A error on your system.
The privacy error utility functions like an antivirus. It detects all kinds of malicious software on your system including malware, adware, spyware, and viruses. These are removed immediately thus making your PC error-free.
Restoro is safe, efficient, and user-friendly. It is compatible with all Windows versions including XP. It has a sophisticated interface and a neat layout which makes it quite easy to operate and workaround.
Click here to download Restoro and repair your PC and resolve the stop 0x000000A error code now!

In today's time, Wi-Fi is a common occurrence, each household has it, on town squares, there are free Wi-Fi hotspots, etc. But sometimes when relaxing at home WI-Fi can fail on us and stop working. If this happens to you do not lose your mind because we have several troubleshooting help tips and ways to get it back quickly so you can continue with your browsing and using your internet.

Yes, we will start with this typical cliche in IT and tech in general. Surprisingly this method still proves over and over again to be true and effective. Over time some electric components simply start working a little bit differently, electrostatic electricity can accumulate on some parts and they can cause issues. By turning off the device and leaving it for some time you are discharging accumulated electrostatics and placing it again into normal working mode.
Unplug your router and leave it for at least 30s like that, a full 1 min is recommended, and then plug it back. Turn it on and restart your computer in order to reboot addresses.
If simple have you tried unplugging it and plugging it back in did not work let us reset DHCP. Click on the start button and type in PowerShell, then click on Run as administrator. Once inside the PowerShell type in the following command followed by ENTER: ipconfig /release and after the command finishes, type in: ipconfig /renew also followed by ENTER key. Try the connection again.
The next thing that we will try if the previous one failed is to reset the TCP/IP stack to eliminate corruption of settings files. Like in the previous step, press Start and type in PowerShell and click on run as administrator. inside type in: netsh int IP reset and press ENTER key. Wait for the process to finish and reboot your PC.
WinSock is yet another part of Windows OS that is responsible for network communication and resetting it could solve the issue. Again go to PowerShell as described in previous steps and type in this time: winsock reset and press ENTER. Wait for the process to finish and restart your computer.
Change TCP IP setting back to automatic if you have set manual Ip address on your computer.
Update your network driver via the manufacturer's website of your network adapter. There is a chance that somewhat updates are available to address some issues discovered.
Factory reset your router on the back by locating the reset button on it and pressing and holding it for around 10s.
Turn off your firewall and antivirus protection in order to eliminate it from blocking your internet access.
0x80004005 Outlook is an error that users commonly encounter while attempting to send or receive emails on Outlook.
The message that appears usually states “This message could not be sent. Try sending the message again or contact your network administrator."
The client operation failed. Error is [OX80004005- 0X0004B9-OXOO501].
This error is usually caused by a problem in the Local Area Network or LAN. What actually happens is that signals with the wireless LAN are lost or a connection problem occurs within the network cable.
As a result, the 0x80004005 Outlook error is triggered while sending or receiving an email. Sometimes the problem goes away on its own. However, if it recurs after a few hours, it shows that some problem exists within the network.
Also, it is important to understand that different factors can affect the quality of wireless connections in a network.
For instance, garage door openers, microwave ovens, and Bluetooth devices can easily become obstacles, disrupting the connection and causing the quality to degrade. Other causes are listed below as follows.
It is a must to fix this error otherwise potential risks associate with this error such as permanent damage and blue screens.
There are two ways to fix this error and both are listed below as follows.
Both these workarounds will work. Therefore, it is advised that you employ any one of them as per your needs.
Customers will most likely encounter the “We couldn’t update system reserved partition” error when upgrading to Windows 10 from Windows 7 or Windows 8.1. This error may also come with error code 0xc1900104 or error code 0x800f0922.
Error Cause“We couldn’t update system reserved partition” Windows 10 upgrade error is normally caused by too little space on the System Reserved Partition (SRP). The System Reserve Partition is an additional small partition created by Windows, which stores boot files. The SRP can be filled up with security apps and third-party anti-virus. Once this partition has insufficient space, the system will not be able to upgrade to Windows 10.
Caution: The following steps are complex and need to be done by experienced users especially using the command line. Once an error is made in entering commands, there’s a chance that your device can be put in a no-boot situation, or data stored on the device can possibly get lost.
To upgrade to Windows 10, your device needs to have at least 15MB free space on the System Reserved Partition. Follow the procedure below and then try upgrading again.
NOTE: While in Admin mode, some apps like OneNote will not run.
Doing this method will make a permanent, but small increase in the free space of the device’s SRP.
a. Open the Run window by pressing the Windows key + R. Type diskmgmt.msc then hit Enter. b. Select System Reserve partition then right-click on it.
c. Choose Change Drive Letter and Paths then select Add.
d. Type Y for the drive letter then click OK.
e. Click on the Start button and search for cmd. In the results, right-click on Command Prompt then choose Run as administrator. The command prompt window will appear.
f. Type Y: at the command prompt then press Enter.
g. Once you’ve switched to drive Y, type takeown /d y /r /f . then hit Enter.
NOTE: Ensure that the space and period after “f” is included in order for the command to work properlyh. Type icacls Y:* /save %systemdrive%NTFSp.txt /c /t then hit Enter to back up the permission to the drive.
NOTE: Ensure that all files are marked as successful and that no files are marked as failed.
i. Type whoami then hit Enter. Record the username that appears. Afterwards, type icacls . /grant <username you got from whoami>:F /t then press Enter.
NOTE: Ensure that there’s no space between the username and “:F” or the command will not work.j. In the File Explorer, open the SRP drive and select the Boot folder. Choose the language folders you want to permanently delete. Language folders are named with four letters split with a hyphen. For example: de-DE is the German language while en-US is the U.S. English language.
2. Truncate the NTFS Log:
a. Open the Command Prompt then type chkdsk /L Y: to check the size of the NTFS Log. If the NTFS Log size is less than 5000KB, you need not truncate the file.
b. Type chkdsk /L:5000 /X /F then hit Enter to truncate the NTFS Log.
c. Return to Disk Management window. Select Action menu then select Check if the device’s SRP now has a larger amount of free space. Once there’s enough space, right click the System Reserve Partition then select Change Drive Letter and Paths. Choose Y: then select Remove.
3. If there’s still not enough available space after truncating the NTFS Log, resize the USN journal:
a. Open the command prompt then type fsutil usn queryjournal Y: to display the size in hex value. Convert the hex value to decimal then divide it by 1048576. The result you will get will be in MB. If the journal size is 30MB or more, proceed with truncating the file.
NOTE: To convert the Hex value to Decimal, open the Calculator app in Windows then choose View menu. Select Programmer then choose Hex. Type the Hex value then choose Dec.
b. Type fsutil usn deletejournal /D /N Y: then hit Enter to delete the journal. Type fsutil usn createjournal m=1500 a=1 Y: to recreate the journal having the new log size value.
a. Type icacls Y: /restore %systemdrive%NTFSp.txt /c /t in the Command Prompt. Check if the files were successfully processed before proceeding. If you see a message saying some files failed while processing, this is normal since some of the files have already been deleted before performing a backup. However, if there are no successful files indicated, the command was not properly executed.
b. Type icacls . /grant system:f /t then hit Enter to adjust the ACL back to System. Now, you can set the owner of the drive by typing icacls Y: /setowner “SYSTEM” /t /c then press Enter.
c. Check if the device’s SRP now has enough free space by going back to Disk Management and refreshing the data. If the SRP already has sufficient space, you can now remove the drive letter. Right-click on the System Reserved Partition then choose Change Drive Letter and Paths. Select the Y: drive then choose Confirm deleting the drive letter by clicking OK.
This method makes a larger, but temporary, increase in the SRP free space.
1. Be sure you have an external drive having at least 250 MB free space and formatted as NFTS.2. Open Run by pressing the Windows key + R. Type mscthen to choose the Recovery Partition. Right-click on it then choose Change Drive Letter and Paths.
3. Select Add then type Y for the drive letter, click
4. Click on the Start screen then type cmd in the search bar. In the results, right-click on Command Prompt then choose Run as administrator. The command prompt window will appear.
5. Switch to another drive by typing Y: in the command prompt. Once you’re in the drive Y, type takeown /d y /r /f .
NOTE: Ensure that space and period after “f” are included in order for the command to work properly.
chkdsk /f /r
 If you are one of the mentioned users and for any reason, you do not wish to have a touchscreen-enabled then sit back and relax, we have you covered in this tutorial on how to fully disable touchscreen inside Windows 11.
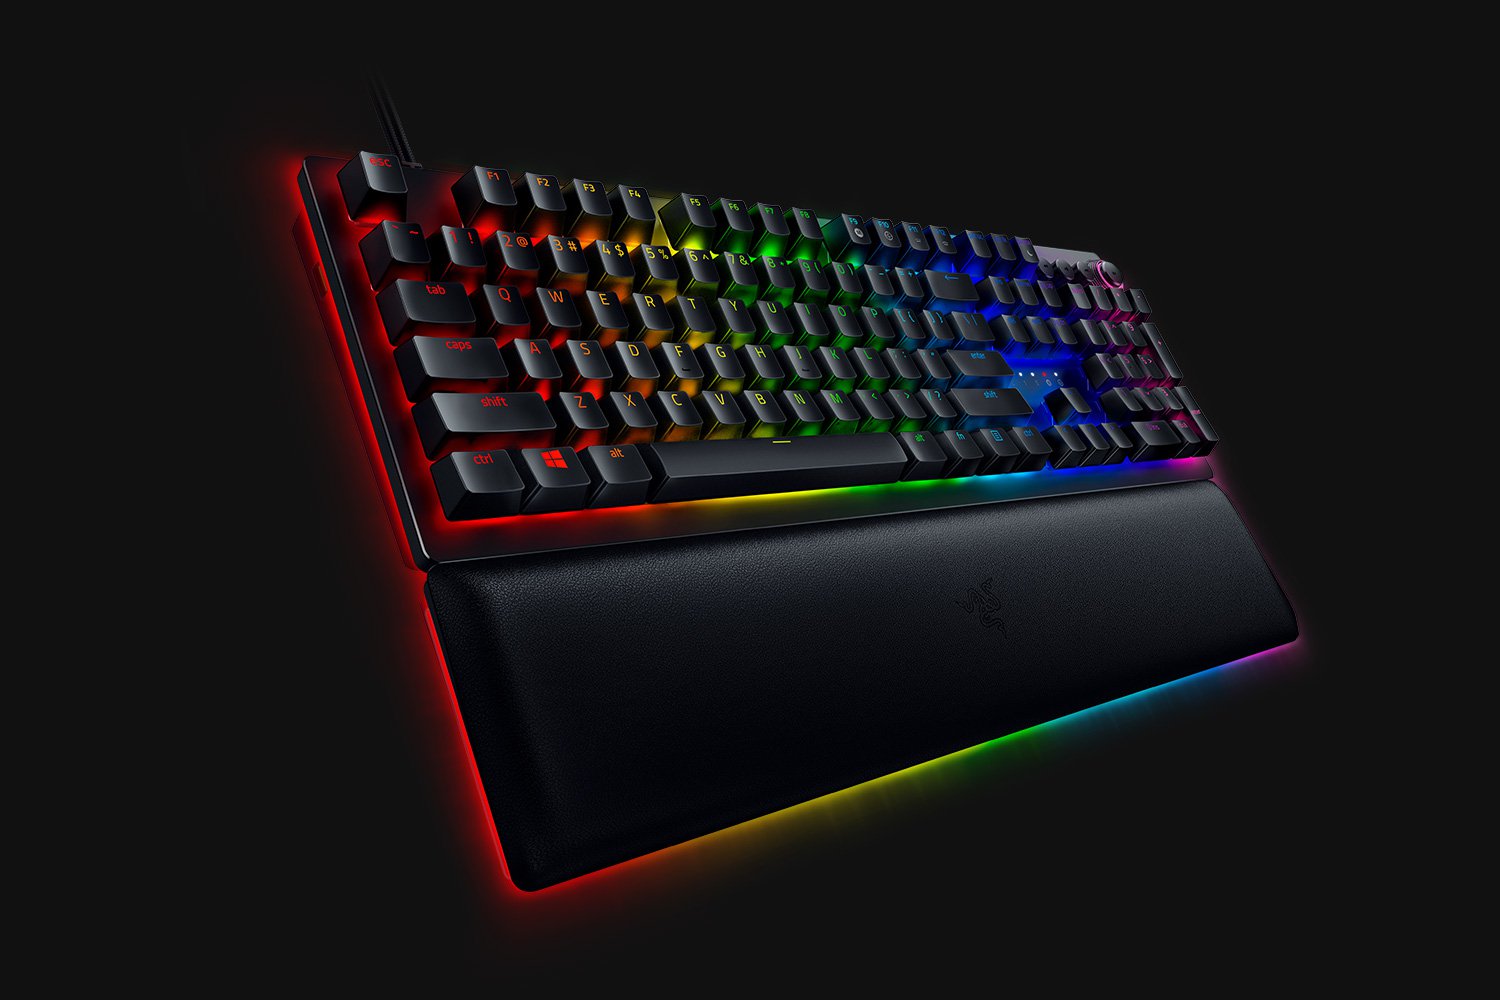 When it comes to computer peripherals first thing that comes to people's minds is probably Mouse and Keyboard. Also when discussing peripherals brands, Razer is not a stranger and over the years it has built its name and cult following.
Razer’s mechanical keyboards have been always in the upper field of quality and trust from users and Huntsman is no different.
When it comes to computer peripherals first thing that comes to people's minds is probably Mouse and Keyboard. Also when discussing peripherals brands, Razer is not a stranger and over the years it has built its name and cult following.
Razer’s mechanical keyboards have been always in the upper field of quality and trust from users and Huntsman is no different.