Quest 2 has been crowned as the best overall VR headset by many websites, and to be honest it is really a great piece of equipment deserving of every praise it gets. It seems that Meta feels that it can do better so the new upcoming Quest Pro is upgraded and a new line of VR sets from this company. The economic standard Quest line will not be shut down and it will still remain as an economic version of Meta's VR product line.

Quest Pro will be added as a new line of the better product line with better performance and better quality. It is the first VR headset that is packing Qualcomm Snapdragon XR3+ Gen 1 chipset, 12GB of RAM, 256GB of internal storage, and 10 high-resolution sensors. Of course, this much power and improvement come with a higher price tag, this time that price tag is $1,499.99.
The new VR headset promises industry-leading visuals with a new optical stack instead of Fresnel lenses in Meta Quest 2 with thin-layer pancake optics that fold light reducing the depth of the optical module by 40% and at the same provides clear and sharp visuals.
The headset will give display more vivid colors, richer colors, and higher contrast by incorporating local dimming and quantum dot technology. It composes of specialized backlight hardware accompanied by software algorithms that can control more than individual LED blocks independently.
The Quest Pro will also come packed with new Meta Quest Touch Pro controllers. They will feature three built-in sensors to track the controller's position completely independent of the headset which means that tracking and range of motion will be improved. These new controllers will also be sold separately at the cost of $299.99 and they can be used with Quest 2.
The headset is available for preorder and it will start shipping in late October on the Meta website


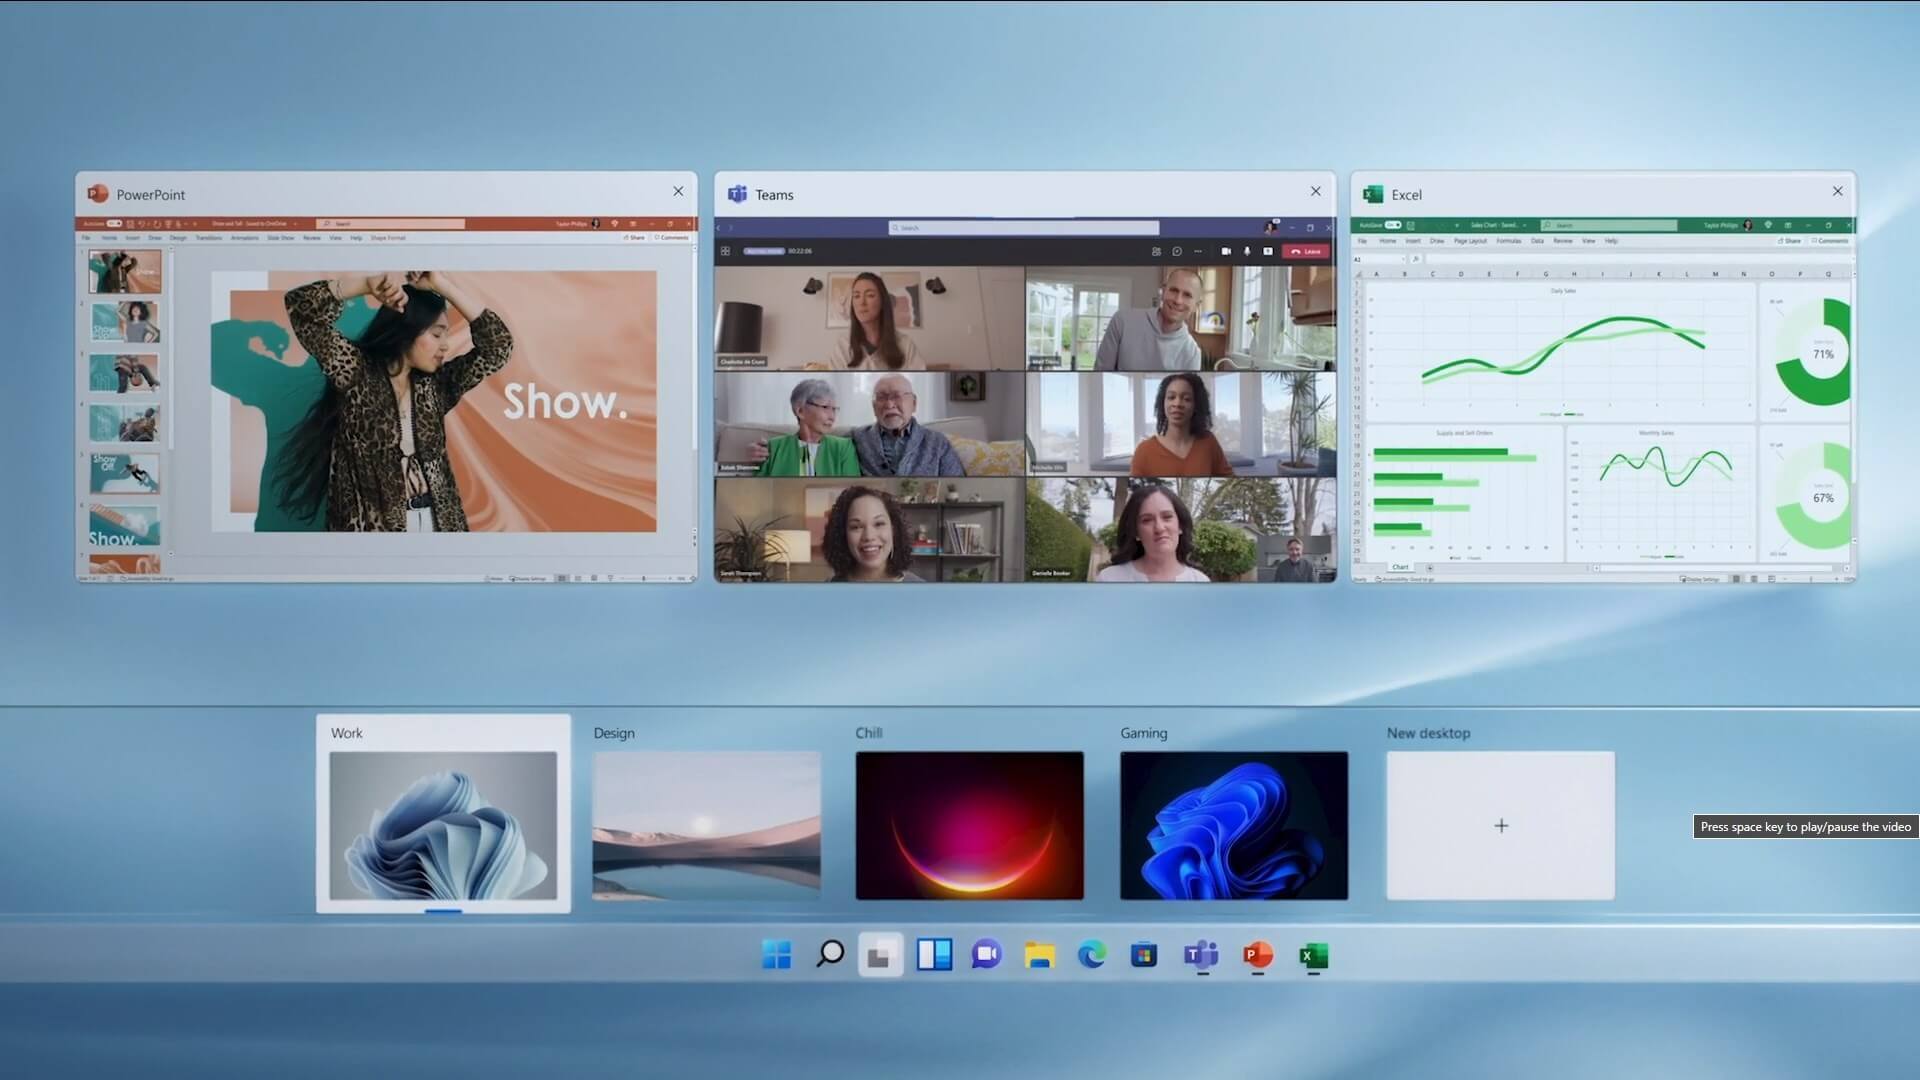 The feature that was originally planned for now scrapped Windows 10X is included in Windows 11. You will be able to customize your Virtual desktop with different wallpapers for each screen.
In order to fully customize your virtual desktops with different wallpapers follow this easy step-by-step guide.
The feature that was originally planned for now scrapped Windows 10X is included in Windows 11. You will be able to customize your Virtual desktop with different wallpapers for each screen.
In order to fully customize your virtual desktops with different wallpapers follow this easy step-by-step guide.