One of the useful features that came with Windows 10 is the Mobile Hotspot although there’s a downside to it – it drains your battery faster especially if your Windows 10 device is running on battery. Another one of its flaws in the implementation of this feature is that it stays activated even when the connection is idle. In other words, it is still activated even if no devices are connected to it. As a result, it consumes battery life and affects it. There are also instances when it affects the performance of the network connection. At the time of writing, Microsoft hasn’t done anything about this dilemma yet so in the meantime, you can continue reading this post to resolve this issue on your Windows 10 device.
You can remedy this Mobile Hotspot issue by running a command in Windows PowerShell. To get started, follow the given instructions below.
Turn off Mobile Hotspot Automatically:
Step 1: The first thing you have to do is to copy the following command:
Step 2: After copying the command given above, open the Notepad app and paste the command you copied there and save it. And when saving it, select the “Save as” option and its File type as “All files”.
Step 3: After that, put “TurnOnTimer.bat” as the file’s name and save it on your Desktop.
Step 4: Once done, run the file you just created, and when a User Account Control or UAC prompt appears, just click on Yes.
Step 5: After you run the file, it will run a series of scripts in a command line which will turn off the Mobile Hotspot automatically when idle.
And that’s how you automatically turn off the Mobile Hotspot when your Windows 10 device is idle. On the other hand, if you want to undo the changes made, you can always do so using the steps provided below.
Turn on Mobile Hotspot:
Step 1: Copy and paste the following command in the Notepad app:
Step 2: After copying and pasting the command, save it as “TurnOffTimer.bat” on the Desktop.
Step 3: Once done, run the file like what you did earlier and select Yes when a UAC prompt pops up. This will run a series of scripts on a command line which will revert the changes back to their default state.
Scammers have decided to target Windows’s 10 App installer process in order to infect your computer and steal your data.
As in most usual online scams, everything starts with a strange email containing threats and other poorly written and composed speech. At the end of the given email, there would be a link claiming that you, of course, need to read it and follow instructions about the threat, if you click the link it will open a web page where you will have an innocent-looking PDF file with more information about the threat itself.
If you click on a seemingly innocent PDF file it will summon Windows 10's AppInstaller.exe tool, kickstarting a download-and-run process that'll put you in a bad place very quickly. From there, you'll have to deal with the dangers of malware BazarBackdoor, including data and credential theft.
This kind of scam is nothing new but the interesting thing here is that it uses App installer and by clicking on a link you are opening and giving permission for a malicious crook to use it. So, stay safe and do not click on any links from unknown emails no matter what.
2021 is nearing toward the end and with just a couple of days remaining in this year, we are happy to look forward to the next year. So in large anticipation of what will next year bring us, we are taking a good design look at this one and making a list for you of what graphic design software you should learn and use in the upcoming 2022.
Before we dive into it in more detail and predictions please be aware that this article is based upon my personal opinion drawn from the research of current trends and standards. That being said let's dive right into details.
Adobe Photoshop
Whether you like it or not, Adobe has cemented itself with its flagship application Photoshop and how things are looking this situation will not change any time soon. Photoshop is an extraordinary pixel manipulation software that has the ability to work with both animations and vector graphics as well making it a great single application for all-around design needs. It has been industry-standard design software for the web, print, and all other kinds of design all over the globe and this will not change in near future. With its constant updates and expansion of its abilities, this is a must-have tool in your design tool belt. If you are looking to find work as a designer you will have to know how to work with photoshop.
Adobe illustrator
Many will tell you that is photoshop for raster graphics, the illustrator is for vectors. First started as illustrator 88 on Mac right away it took first place for vector graphics from FreeHand and it continued on its path of vector dominance. After some time and more integration with photoshop Adobe managed to overthrow Corel Draw as well winning the title for best vector editing software with illustrator. Same as with photoshop, if you are planning to work in a serious industry you will need to know the illustrator.
Adobe InDesign
We are still in Adobe train and it is moving hard, InDesign is graphic design software aimed for paper publications. If you need to create and prepare any kind of professional publication for printing InDesign is the application to go to. With its specific print aimed features it is a must-have for any graphic designer.
Corel Draw Graphic Suite
Once the king of vector and print design but dethroned by Adobe Corel Draw still has some punches to stay relevant in the field. With some cool features like symmetry and long shadows, it stands out from its competitors for its ease of use. Corel was always focused on easy to learn, and difficult to master and it is still following that kind of thinking. Granted not many employers will require you to be a master of Corel Draw but some of them will request that you are familiar with the application. One of perhaps the greatest advantages of Corel over Adobe is not locking you into a subscription making Draw suit a great choice for freelancers and designers that want to own software, not rent it.
Affinity Designer
The first software from Affinity was Photo, made as a cheap version one-time purchase competitor for photoshop. Later it has released Designer, also a one-time purchase competitor for illustrators. If we are going to take a good look into a feature for feature comparison, both Adobe and Corel will win over Affinity but if we take a look at a price that is a one-time purchase Affinity will win over easily. Priced only at $54.99 it is a steal, and taking into account that many designers will not require any very advanced features found in Corel or Adobe applications Affinity is the way to go.
Inkscape & GIMP
Speaking of price, nothing beats free, and both Inkscape and GIMP are completely free. offering very decent and competitive features applications will require you to get used to their own specific UI and workflow, but once you get a grasp of them, you will be able to do most design work in them. One of the downsides of using these free open source apps is their limited export options but if all that is required from you is to deliver a typical SVG, JPG, EPS, PNG, or PDF file you are good to go.
Colorcinch
Free with basic functionality with the option to purchase more advanced features Colorcinch is a great application if you are on quickly developing and creating graphics for social media posts. Add quickly text or filters, quickly do the color adjustment and save for social apps. The application also within its basic boundaries can work directly on the website without you requiring to even install it making it one of a kind. Go try it at the official site and enjoy yourself.
Conclusion
If you have followed the graphic design scene you will notice that nothing has changed and it will not change in near future. This just speaks about how much industry is defined and how little change is there over time. I advise if you can to get and learn adobe suite since it is industry standard and is required from almost every employer today. Rest applications on the list are great alternatives and can bring you income and offer you a way to finish your project.
It really sucks when you can’t fully enjoy the newest version of your favorite OS.
Windows 11 is still relatively fresh and consequently has some annoying little bugs that really ruin our experience. The good news is that you’re not alone and most of them are easy to fix.
Here are 5 commonly reported Windows 11 issues and what you can do to get rid of them.
1. Windows 11 audio problems
One of the absolute most irritating things in the world is struggling with the sound on your computer. Windows 11 users have reported facing the issue of low or no sound. If you’re currently experiencing the same frustration, you can be relieved. Chances are fixing it will only take a few minutes.
The first thing to check would be whether you accidentally muted your device by pressing the mute button on your keyboard. Yes, we know it sounds a lot like the old “have you tried turning it off and on again?” But it’s important to leave no stone unturned, and the most obvious things are usually the ones we easily overlook.
Moreover, if you have several audio output sources, check whether the right one is selected. You can do this via the Action Center or through Settings. If you want to use the same source every time, we also recommend you set it as the default one.
It’s also important to have a good, up-to-date audio driver. More often than not, this will be the true cause of your audio struggles. Make sure to update your driver, and if that doesn’t work out, you can always un- and reinstall it or install a different one.
Lastly, if all attempts remain unsuccessful, run the audio troubleshooter to figure out what’s actually going wrong.
2. Unable to find files
Such a powerful new operating system, yet it can’t seem to do the simplest thing imaginable? The File Explorer not responding on Windows 11 is one of the most frustrating and most common problems with Microsoft’s newest iteration of its awesome OS.
However, 9/10 times it can be fixed by simply restarting your PC. You could also try killing the Windows Explorer process in the Task Manager and then rerunning it.
If these don’t help, check whether there are any pending Windows 11 updates. A single missing update can compromise your PC’s functionality, so always make sure to install them all on time.
Should none of that work, then there are other ways to solve the File Explorer problem. However, then the issue is probably a bit deeper and it’s no longer in the ‘easy fix’ territory.
3. Start menu not working
Just like the File Explorer, the Start menu is a fundamental element of your OS. So, it’s only natural that its malfunction grinds your gears. It may be more customizable than on previous Windows versions, but it doesn’t always work smoothly.
If you’re facing the so-called Start menu critical error, there are a few things this could be caused by. Usually it means you turned off your system while an important update was still being installed, there is a corrupt file on your PC, or Windows forcefully stopped a program.
Whatever the reason, the solution should be pretty simple. Try the basic steps: restarting your File Explorer (like we explained above) and signing out and back into your account. If that doesn’t do anything, you may want to try uninstalling third-party start menu apps (if you have any), since they can interfere with your default programs’ functionality.
Now, those are the easy fixes. If you get nowhere with them, you might need to identify the root cause and search for more complex solutions than that.
4. Snipping tool not working
Our beloved screenshot tool was introduced with Windows 10 and Microsoft decided to keep it. However, you were probably just as disappointed as us when you tried to run it and failed.
Normally, this can be fixed by installing the latest Out-of-band (OOB) update, or even pending updates in general. Even if your system appears to be up-to-date, run the checker just in case.
Another cool thing Windows 11 lets you do is ‘Repair’ and ‘Reset’, which is the easiest way to troubleshoot your Snipping tool. If this fails, you can also try the good old un- and reinstall method. Simply uninstall the tool through the Control Panel and reinstall it from the Microsoft Store.
Furthermore, in the case of an upgrade from Windows 10 to 11, it may be that the old Snipping tool version is interfering with the launch of the new one. If you don’t care that much about the additional options available with the enhanced screenshot tool, you can use the old version instead.
Simply go to your C Drive, find the Windows.old folder, search for the tool and open it from there. Make sure to pin it to your taskbar as well, if you know you’re going to use it often.
5. Can’t install the latest update
The latest Windows 11 version, 22H2, has brought tons of enhancements to our dearest operating system. Unfortunately, a lot of users still haven’t had the opportunity to experience it. A mere update of your OS version should be the one thing that goes smoothly, but sometimes that’s not the case.
Failure to install 22H2 can be caused by a few things. Most commonly, the issue is caused by lack of storage space or corrupted files, but there could be other culprits.
There are a couple of things you could try. For example, it’s crucial that your drivers be up-to-date and some important services be enabled. These are: Windows Modules Installer, Background Intelligent Transfer Service, Cryptographic Service, Windows Update services.
To enable them, search ‘Services’, find the service you need and right-click on it. Open ‘Properties’ and select the startup type ‘Automatic’.
It may also be necessary to unplug all peripherals that aren’t crucial and disable third-party antivirus tools until after the update is finished.
Ultimately, you can run the Windows Update troubleshooter to detect and fix other possible issues.
Summary
Tiny bugs like these are nothing out of the ordinary. That said, we still all hate when they happen.
Hopefully some of our solutions have helped you to a smoother Windows 11 experience. But if you’re still struggling, feel free to reach out to us. We’d be happy to help!
RadioRage is a potentially unwanted application developed by Mindspark Inc. This browser add-on is compatible with Mozilla Firefox, Internet Explorer and Google Chrome and claims to enhance the Internet browsing experience by allowing users to listen to their favorite music via the installed toolbar.
RadioRage Toolbar is categorized as adware since it infiltrates computers and after successful installation, this browser extension redirects browsers to home.tb.ask.com. And changes your default search engine to myway.com.
While active on your computer RadioRage collects user information such as browsing data, website clicks, and sometimes even sensitive user information, that it later sells / forwards to its ad distributors.
About Browser Hijackers
Browser hijacking is regarded as the internet’s constant risk that targets web browsers. It’s a type of malicious software that modifies your internet browser’s settings so that you are redirected to websites or pages that you had no intention of checking out. They are made to interfere with browser programs for many different reasons. These are typically used to force visitors to a specific website, manipulating web traffic to generate ad revenue. Most people assume that the browser hijacker is just a harmless website but that is not the case. Nearly all browser hijackers pose an actual threat to your online safety and it is necessary to classify them under privacy dangers. In a much worst case, your browser can be hijacked to download malicious software that will do a great deal of damage to your PC.
Key signs that your web browser has been hijacked
The typical signs that signify having this malicious software on your computer are:
1. your web browser’s home page is suddenly different2. you get re-directed to internet sites you never intended to visit3. The default search page of the browser is modified4. you see multiple toolbars on the web browser5. you might notice many pop-up ads on your screen6. web pages load slowly and sometimes incomplete7. you cannot go to specific sites such as home pages of security software.
So how does a browser hijacker infect a PC
There are many ways your computer could become infected with a browser hijacker. They typically arrive by way of spam email, via file-sharing websites, or by a drive-by download. They may also be deployed through the installation of a web browser toolbar, add-on, or extension. Some internet browser hijackers spread in user’s computers by using a deceptive software distribution method known as “bundling” (often through freeware and shareware). Well-known examples of browser hijackers include Conduit, CoolWebSearch, Coupon Server, OneWebSearch, RocketTab, Searchult.com, Snap.do, and Delta Search.
Browser hijackers might record user keystrokes to collect potentially valuable information leading to privacy concerns, cause instability on systems, drastically disrupt the user experience, and finally slow down the computer to a point where it becomes unusable.
Browser hijacker removal methods
One thing you can try to eliminate a browser hijacker is to locate the malware within the “Add or Remove Programs” list of the Windows Control Panel. It might or might not be there. When it is, try to uninstall it. But, the majority of hijackers are really tenacious and require specialized tools to get rid of them. Inexperienced PC users should never attempt the manual form of removal, as it demands detailed system knowledge to carry out repairs on the computer registry and HOSTS file.
What To Do If You Cannot Install Any Anti-virus?
Every malware is detrimental and the effects of the damage will vary based on the specific kind of malware. Some malware is meant to restrict or prevent things that you wish to do on your computer system. It may well not permit you to download anything from the internet or it will prevent you from accessing a few or all websites, especially the anti-virus sites. So what should you do if malware keeps you from downloading or installing Anti-Malware? Refer to the instructions below to eliminate malware through alternate methods.
Use Safe Mode to resolve the issue
If the malware is set to run at Windows start-up, then booting in Safe Mode should avoid it. Only the bare minimum required applications and services are loaded when you boot your computer or laptop into Safe Mode. Listed below are the steps you need to follow to eliminate viruses in Safemode.
1) At power on, hit the F8 key before the Windows splash screen begins to load. This will bring up the Advanced Boot Options menu.2) Select Safe Mode with Networking with arrow keys and press ENTER.3) As soon as this mode loads, you will have an internet connection. Now, get the malware removal software you want by utilizing the browser. To install the application, follow the guidelines in the installation wizard.4) As soon as the software is installed, allow the scan run to eliminate viruses and other threats automatically.
Switch over to some other web browser
Certain viruses might target vulnerabilities of a particular browser that block the downloading process. When you suspect that your Internet Explorer happens to be hijacked by malware or otherwise compromised by online hackers, the ideal plan of action is to switch over to a different web browser such as Firefox, Chrome, or Safari to download your favorite computer security application – Safebytes Anti-Malware.
Run anti-malware from a pen drive
Another approach is to download and transfer an antivirus program from a clean PC to run a virus scan on the infected system. Follow these steps to employ a flash drive to fix your infected system.
1) Make use of another virus-free computer system to download Safebytes Anti-Malware.2) Insert the pen drive onto the same computer.3) Run the setup program by double-clicking the executable file of the downloaded software, with a .exe file format.4) Select the USB flash drive as the destination for saving the file. Follow activation instructions.5) Now, transfer the flash drive to the infected computer.6) Double click the Safebytes Anti-malware icon on the pen drive to run the software.7) Hit the “Scan” button to run a full computer scan and remove viruses automatically.
Let's Talk About SafeBytes Security Suite!
These days, anti-malware software can protect your laptop or computer from various forms of online threats. But wait, how to select the right one amongst several malware protection software that’s available in the market? Perhaps you might be aware, there are many anti-malware companies and tools for you to consider. Some are really worth your money, but many aren’t. When looking for anti-malware software, purchase one which gives solid, efficient, and complete protection against all known computer viruses and malware. One of the recommended software programs is SafeBytes AntiMalware. SafeBytes carries a really good reputation for top-quality service, and clients seem to be very happy with it.
SafeBytes anti-malware is a highly effective and user-friendly protection tool that is designed for end-users of all levels of computer literacy. This application could easily detect, remove, and protect your personal computer from the most advanced malware attacks including spyware, adware, trojan horses, ransomware, PUPs, worms, parasites as well as other possibly damaging software programs.
There are numerous amazing features you’ll get with this particular security product. Listed below are a few of the great ones:
Real-time Protection: SafeBytes gives you round-the-clock protection for your computer limiting malware intrusions in real-time. It’ll continuously monitor your laptop or computer for hacker activity and also gives end-users sophisticated firewall protection.
Antimalware Protection: Built upon a greatly acclaimed antivirus engine, this malware removal application is able to find and remove several obstinate malware threats such as browser hijackers, PUPs, and ransomware that other common anti-virus applications will miss.
Web protection: SafeBytes checks and gives a unique safety ranking to every site you visit and block access to webpages considered to be phishing sites, thus protecting you from identity theft, or known to contain malicious software.
Light-weight: This application is not “heavy” on the computer’s resources, so you’ll not find any performance problems when SafeBytes is working in the background.
24/7 On-line Tech Support: Support service is accessible 24 x 7 x 365 days via email and chats to answer your questions.
Technical Details and Manual Removal (Advanced Users)
If you wish to manually remove RadioRage without the use of an automated tool, it may be possible to do so by removing the program from the Windows Add/Remove Programs menu, or in cases of browser extensions, going to the browsers AddOn/Extension manager and removing it. You will likely also want to reset your browser.
To ensure the complete removal, manually check your hard drive and registry for all of the following and remove or reset the values accordingly. Please note that this is for advanced users only and may be difficult, with incorrect file removal causing additional PC errors. In addition, some malware is capable of replicating or preventing deletion. Doing this in Safe Mode is advised.
The following files, folders, and registry entries are created or modified by RadioRage
If you have multiple products with Windows on them, Copy & Paste text between them is easy as 1,2,3 and we will be happy to tell you how can you do it.
Hello and welcome everyone, today we will see how can we share text information between 2 devices using Windows 10 in instant. In order for you to be able to share text information between devices, there are two prerequisites that you must meet. The first is that all devices must be connected to the internet, the second is that you must have a Microsoft account.
If you have both of these things continue with the tutorial, if you do not have a Microsoft account go to Microsoft website and create one for free.
Also, know that this option needs to be turned ON on all devices in order to work. So steps we will explain will have to be done on each device, if you already have some device logged in and connected to Microsoft account, you can skip setting it up.
Click on ⊞ WINDOWS and click on settings.
Then click on System.
Once you are in the system, on the left tabs find and click on Clipboard.If you are not logged in to your Microsoft account do so on the right panel by locating Sync across devices and click on sign in.
When you are signed in click on the option to turn it on.
One option is turned ON, you will be greeted with two choices, to copy everything from the clipboard automatically or to choose text which you want to sync and paste it with ⊞ WINDOWS + V. Choose whatever better suits your needs, and you are done.
Repeat these steps for other devices and you are done.
When it comes to computer peripherals first thing that comes to people's minds is probably Mouse and Keyboard. Also when discussing peripherals brands, Razer is not a stranger and over the years it has built its name and cult following.
Razer’s mechanical keyboards have been always in the upper field of quality and trust from users and Huntsman is no different.
Tech specifics of Huntsman keyboard
Mechanical optical switches
Razer has introduced their new optical technology switch with this keyboard. These switches are faster and more accurate than typical mechanical switches and if tests are to be believed this is the fastest keyboard currently on the market.
Multi-functional digital dial
A multi-function digital dial with three tactile media keys gives you instant access to everything from brightness to volume in seconds. All programmable and customizable through Synapse 3, so you can set your preferred configurations right at your fingertips.
10-key rollover
Anti-ghosting technology that enables 10-key simultaneous presses at the same time
4-side underglow with Razer chroma
Go crazy and personalize lighting effects any way you want with a full 4-side underglow and 38 customization zones. Powered by Razer Chroma
Feel and noise
In the department of noise, well it is the mechanical keyboard so naturally, it will be louder than membrane ones but in terms of comparing it to other mechanical keyboards it is within the same noise range, maybe just a tiny bit silenced.
The keyboard comes with 2 different types of switches, purple clicky ones that are louder and have that *click* sound for sound feedback, and red ones, that are not equipped with clicky sound but are linear providing slightly faster performance.
If you choose the Huntsman elite model of the keyboard it will come with a nice hand resting mat that is very comfortable and feels right. Using a keyboard feels like using a Razer keyboard, it is responsive and gives that superior mechanical feeling.
Conclusion
Razer Huntsman mechanical keyboard is not the cheapest nor the best on the market but it is the fastest one out. It is in the top tier of keyboards and worth the investment.
RebateInformer is a browser extension for Google Chrome. This extension monitors the web pages the user is visiting and checks against an affiliate database for various rebates and coupons related to the context of the products being shown in the browser.
This extension analyzes websites your browser visits and attempts to find deals associated with the merchant’s product offerings. If an offer is found, it is injected into the deals page even if it's sold by a different merchant at a higher price.
Several anti-virus scanners have marked this extension as Potentially Unwanted, and due to its data mining behavior, it is not recommended to keep it on your computer.
About Browser Hijackers
Browser hijacking is regarded as the web’s constant problem that targets web browsers. It is a type of malicious software that alters your web browser’s settings and redirects you to sites or webpages that you had no intention of visiting. Browser hijacker malware is created for numerous reasons. It redirects you to the sponsored sites and injects adverts on your internet browser that helps its creator generate ad revenue. It could seem naive, but the majority of these websites are not legitimate and may pose a serious threat to your online safety. Additionally, hijackers can make the whole infected system fragile – other dangerous malware and viruses will use these opportunities to intrude into your computer system effortlessly.
Browser hijacking symptoms
There are many different symptoms that indicate the web browser has been highjacked: your browser’s home page is suddenly different; new bookmarks pointing to porn websites are added to your bookmarks; the default internet search engine and the default browser settings are modified; unsolicited new toolbars are added to your browser; numerous pop-up adverts show up and/or your browser pop-up blocker is disabled; your web browser starts running slowly or displays frequent errors; you’re blocked to access the websites of computer security solution providers.
How browser hijacker infects computers
There are several ways your PC could become infected with a browser hijacker. They usually arrive through spam e-mail, via file-sharing networks, or by a drive-by-download. They also come from add-on applications, also called browser helper objects (BHO), browser extensions or toolbars. Sometimes you may have inadvertently accepted a browser hijacker as part of an application package (generally freeware or shareware). An example of some notorious browser hijacker includes Conduit, Anyprotect, Babylon, DefaultTab, SweetPage, Delta Search, and RocketTab, however, the names are continually changing.
Browser hijackers could record user keystrokes to collect potentially valuable information that leads to privacy concerns, cause instability on systems, drastically disrupt the user experience, and eventually slow down the computer to a point where it becomes unusable.
Browser hijacker removal
Some browser hijacking can be simply stopped by finding and removing the corresponding malware software through your control panel. Unfortunately, many of the software packages utilized to hijack a web browser are deliberately built to be hard to detect or remove. Furthermore, manual removals require in-depth system knowledge and thus could be a very difficult job for novice computer users.
Professionals always suggest users remove any malicious software including browser hijacker by using an automatic malware removal tool, which is better, safer, and quicker than the manual removal technique. Safebytes Anti-Malware features a state-of-the-art anti-malware engine to help you prevent browser hijacker infection in the first place, and mop up any existing problems. And employ a PC optimizer to erase all associated files in the registry and fix browser problems.
Can’t Install Safebytes Anti-malware due to the presence of a Virus? Try This!
Malware can cause all sorts of damage once they invade your system, from stealing your personal information to deleting data files on your computer. Some malware sits in between the computer and the net connection and blocks a few or all internet sites that you would like to visit. It could also block you from the installation of anything on your system, especially the anti-malware program. If you’re reading this right now, you’ve perhaps recognized that a malware infection is the real cause of your blocked web traffic. So how to proceed when you want to install an anti-virus application such as Safebytes? Refer to the instructions below to eliminate malware by alternate methods.
Download the software in Safe Mode with Networking
In Safe Mode, you can actually modify Windows settings, uninstall or install some applications, and get rid of hard-to-delete viruses. If the malware is set to load automatically when the computer boots, shifting into this mode may prevent it from doing so. In order to enter into Safe Mode or Safe Mode with Networking, press F8 while the computer is booting up or run MSConfig and find the “Safe Boot” options under the “Boot” tab. As soon as you reboot into Safe Mode with Networking, you could download, install, and update the anti-malware program from there. After installation, run the malware scanner to remove standard infections.
Obtain the anti-malware software using an alternate web browser
Web-based malware can be environment-specific, targeting a particular web browser or attacking specific versions of the web browser. The ideal solution to avoid this issue is to choose a browser that is renowned for its security measures. Firefox contains built-in Malware and Phishing Protection to keep you secure online.
Install anti-malware on a thumb drive
Here’s another solution which is using a portable USB antivirus software that can check your system for malicious software without needing installation. Do these simple steps to clean up your infected PC by using a portable antivirus.
1) Download Safebytes Anti-Malware or MS Windows Defender Offline onto a virus-free computer.2) Connect the USB flash drive to a USB port on the clean computer.3) Double-click the Setup icon of the anti-malware program to run the Installation Wizard.4) Choose the drive letter of the flash drive as the place when the wizard asks you where you want to install the antivirus. Follow activation instructions.5) Transfer the USB drive from the uninfected computer to the infected PC.6) Double-click the anti-malware program EXE file on the USB flash drive.7) Hit the “Scan Now” button to begin the virus scan.
Review of SafeBytes Anti-Malware
These days, an anti-malware program can protect your computer or laptop from different types of internet threats. But how to select the right one amongst various malware protection application that’s available in the market? You may be aware, there are numerous anti-malware companies and tools for you to consider. A few are very good ones, some are ok types, and some are simply just bogus anti-malware programs that can damage your PC themselves! You need to be very careful not to pick the wrong application, particularly if you purchase a premium application. With regards to commercial antimalware tool options, many people go with popular brands, such as SafeBytes, and are quite happy with it.
SafeBytes anti-malware is a reliable tool that not only protects your PC permanently but is also quite user-friendly for people of all skill levels. With its most advanced virus detection and repair technology, this software will help you protect your personal computer against infections brought on by different types of malware and other internet threats, including spyware, adware, trojans, worms, computer viruses, keyloggers, potentially unwanted program (PUPs), and ransomware.
SafeBytes has got a plethora of features that can help you protect your computer from malware attacks and damage. Here are some typical features found in this application:
Real-time Protection: SafeBytes provides round-the-clock protection for your computer restricting malware intrusions instantly. It will check your PC for suspicious activity regularly and its unparalleled firewall guards your PC against illegal entry by the outside world.
Robust, Anti-malware Protection: This deep-cleaning anti-malware software goes much deeper than most antivirus tools to clean your personal computer. Its critically acclaimed virus engine detects and disables hard-to-remove malware that conceals deep inside your PC.
Safe Web Browsing: Safebytes assigns all sites a unique safety rating that helps you to get an idea of whether the webpage you’re just about to visit is safe to view or known to be a phishing site.
Low CPU Usage: SafeBytes is really a lightweight tool. It consumes a very small amount of processing power as it runs in the background so you won’t notice any system performance issues.
24/7 Online Support: Expert technicians are at your disposal 24/7! They will quickly fix any technical issues you may be experiencing with your security software.
To sum it up, SafeBytes Anti-Malware offers superb protection combined with an acceptable low system resources usage with great malware detection and prevention. You now may know that this particular tool does more than just scan and delete threats on your computer. So if you are looking for the best anti-malware subscription for your Windows-based PC, we strongly recommend the SafeBytes Anti-Malware tool.
Technical Details and Manual Removal (Advanced Users)
If you do not wish to use malware removal software and prefer to get rid of RebateInformer manually, you may do so by going to the Add/Remove Programs menu in the Control Panel and removing the offending software; in cases of browser plug-ins, you can uninstall it by visiting the browsers Add-on/Extension manager. You will definitely also want to reset your browser.
Lastly, check your hard drive for all of the following and clean your registry manually to get rid of leftover application entries following an uninstallation. However, this can be a difficult task and only computer professionals could perform it safely. Also, some malware is capable of replicating itself or preventing deletion. It is highly recommended that you carry out the removal process in Windows Safe Mode.
Can’t connect to this network Internet connectivity issues present a complex problem with simple solutions for PC and laptop users. First, it is usually recommended that users rule out problems with the internet connection, router, and Wi-Fi settings before proceeding to troubleshoot settings on your PC/laptop. Once the rest are ruled out, we can then proceed with the following troubleshooting steps and guidelines to fix your wifi connection issue:
The first step is to update your windows network adapter driver. Connectivity problems may arise if your network driver is not updated or if it is incompatible with the network adapter. To do so, you may resort to any third-party driver scanning and installing programs found online. This solution should have resorted if users don’t want the hassle of perusing through windows settings that users may not be familiar with.
However, this solution requires a pre-existing internet connection other than wifi, so it is recommended you have a backup internet connection via ethernet.
The second step is to uninstall the driver for your network adapter. This solution is to be reported if there is an issue with the driver as restarting the PC after the following steps let windows reinstall the driver again:
Open the quick access menu on your keyboard by pressing the Windows key and X key at the same time and select “Device Manager” from the menu list.
From the list of devices, select “Network Adapters”
Usually on the top of the list is the Wireless Network Adapter
Right-click the Wireless Network Adapter and select the option to “Uninstall device”
You will be given a confirmation in a new separate window to proceed. Click “Uninstall” to proceed.
After completing the previous steps, try rebooting your Windows PC and reconnecting to see if it works.
A third step is to disable the 802.1 1n modes of your network adapter by following the next steps:
First press the Windows logo key and the X key at the same time to bring up the quick-access menu. And like the previous step, select “Device Manager”
From the list of devices, select “Network Adapters”
Right-click the Wireless Network Adapter from the drop-down menu and select properties
Under properties, select the “Advanced” tab then select the 802.1 1n Mode. To the right drop-down menu change the option to “Disabled” and click “Ok”
After, try to re-establish the connection to see if the steps have worked.
In the event that any of the preceding did not fix your problem, it helps to take a second look at the router and network settings using the interface provided by your ISP. A simple reset to the back of your router often fixes the issue. Also, try to check if you have any other administrative capabilities over the network to determine whether your device, in particular, has been MAC filtered or if the frequency of your wireless adapter is not compatible with the broadcast frequency of your router.
If you encounter the “Diskpart failed to clear disk attributes” error when you try to change the read-only state of a storage device using the Diskpart application and the request is denied, worry not for this post will give you a couple of fixes to resolve the problem. As you know, Diskpart is used for resolving read-only storage devices by changing their attribute via the command line. So if it is not able to change the attribute of the storage device, then you will most likely encounter an error such as this one. This kind of error is not uncommon and as long as there are no damaged physical attributes, you can resolve it right away.
There are tons of reasons why you’re getting this error while using Diskpart, it could be that the storage device has a physical write-protected switch or the disk is hidden or has bad sectors. It could also be because the storage drive might be in RAW format or that you are running the Diskpart application without admin privileges. Whatever the cause may be, here are some options you can try to fix the problem but before you proceed, make sure that you log on to your PC as an administrator.
Option 1 – Check if there is a physical switch on the storage device
There are some USB devices and SD card readers that have a write-protected physical switch that disables all the writable options on the storage device and so if it is turned on, Diskpart won’t be able to change the disk attribute to writable. To check, simply look for the physical switch on both sides of the device and once you found it, make sure that it is toggled off and then plug the storage device back in then try running Diskpart once again.
Option 2 – Modify the WriteProtected key in the Registry Editor
Before you proceed, you have to create a System Restore Point first.
Tap the Win + R keys to open Run and type “Regedit” in the field and hit Enter to open the Registry Editor.
After that, look for the “WriteProtect” registry entry which is located on the left side of the window, and then double click on it.
Change its value to “0” and click OK to save the changes made and exit the Registry Editor.
Option 3 – Run CHKDSK to check the drive for errors
When it comes to some issues concerning the hard drive or removable devices, there is a utility in Windows that might help which is called “chkdsk”. This error check utility can help with several issues in the system including the “Diskpart failed to clear disk attributes” error.
Tap the Win + S keys to open the Search box.
Then type “command prompt” in the field and from the search results that appear, right-click on Command Prompt and select “Run as administrator”.
After opening an elevated command prompt, copy and paste the following command and hit Enter:
Note: In the command given above, “[/F]” will try to fix the system errors while “[/R]” will be the one to fix the bad sectors.
Now if you are prompted to run CHKDSK after your reboot your PC, just tap Y and reboot your PC.
If CHKDSK is not able to find any errors, tap the Win + E keys and navigate the access window. From there, right-click on the concerned drive and click on Properties.
After opening Properties, click on the tab Tools and then click on the “Check” button under the Error-checking section.
Wait until the process is completed and then restart your computer.
Option 4 – Clear the attributes on RAW
Tap the Win + S keys then type “diskpart” in the field.
Click the Diskpart application and if a User Account Control dialog box pops up, click Yes to proceed.
After opening an elevated Command Prompt, type in the commands listed below and make sure to tap Enter right after you key in one command after the other.
list volume
select volume‘n’ (In this command, you have to replace ‘n’ with the volume number of the drive)
format fs=fat32 quick (In this command you also have the flexibility to change the format to ‘ntfs’ or ‘exfat’)
After executing the commands given, unplug the removable storage device and wait for a couple of seconds and then plug it back in.
Now try any normal write operations and see if the error no longer appears.
Option 5 – Try checking the hardware components
On the other hand, it is also possible that the issue has something to do with a hardware problem and so you need to check the hardware components on your computer to determine that.
Recently, several users reported an issue on their Windows 10 computers where the taskbar is not visible when they tried to connect to a computer via Remote Desktop Protocol or RDP. The Remote Desktop Connection feature uses the RDP which allows users to access a computer remotely. This is actually different from the taskbar being hidden automatically until the pointer hovers on it since, in this scenario, the taskbar is completely not accessible which makes using the remote computer entirely difficult, if not impossible.
There are several suggestions you can check out to resolve this problem, you can try to restart the process of Windows Explorer via Task Manager or you could clear the cache for multiple processes. You could also try to reinstall the Shell Experience components or show the local taskbar in the Remote desktop. Moreover, you could also try to update, uninstall or roll back the display driver/graphics card driver. For more details, refer to each one of the options given below.
Option 1 – Try to restart the Windows Explorer process
The first option you have to try to fix the problem with the taskbar is to simply restart the Windows Explorer process in the Task Manager.
Tap the Ctrl + Shift + Esc keys to open the Task Manager.
Next, go to the Processes tab and find the process of Windows Explorer.
Once you find it, right-click on it and select Restart to restart its process.
After that, restart your computer and see if you can now see the Taskbar.
Option 2 – Try clearing the cache of multiple processes
The next thing you can do to resolve the problem is to clear the cache of many processes in your computer. To do so, follow these steps:
Open the Notepad app and paste the following content in the text area:
After that, tap the Ctrl + S keys to save the changes you’ve made in Notepad and select the “All files” as its file type, and then name it “CacheClearTWC.bat”.
Next, go to the location where you saved the file using File Explorer and then run it. This will run a couple of batch scripts which will clear the cache of multiple processes in the system.
Tap the Win + X keys and select the “Windows PowerShell (Admin)” option to open PowerShell as admin.
Next, execute this command in the command line: Get-appxpackage -all *shellexperience* -packagetype bundle |% {add-appxpackage -register -disabledevelopmentmode ($_.installlocation + “appxmetadataappxbundlemanifest.xml”)}
After the command has been executed, this will reinstall the Shell Experience components and should fix the problem with the taskbar.
Option 4 – Update, uninstall or rollback the Graphics card drivers
First, boot your computer into Safe Mode.
After that, tap the Win + R keys to launch Run.
Type in MSC into the box and tap Enter or click OK to open the Device Manager.
After that, a list of device drivers will be displayed. From there, look for the Display Adapters and click on them.
After that, right-click on each entry under the Display Adapters and select the “Uninstall Device” option from the menu.
Now restart your computer.
After restarting your computer, go to the Settings app and Check for Updates in the Windows Update section.
Note: You also have the option to go directly to the website of your graphics card manufacturers like NVIDIA, Intel, or AMD and go to the section called Drivers then check if there’s a new available update – if there is, download and install it.

 As in most usual online scams, everything starts with a strange email containing threats and other poorly written and composed speech. At the end of the given email, there would be a link claiming that you, of course, need to read it and follow instructions about the threat, if you click the link it will open a web page where you will have an innocent-looking PDF file with more information about the threat itself.
If you click on a seemingly innocent PDF file it will summon Windows 10's AppInstaller.exe tool, kickstarting a download-and-run process that'll put you in a bad place very quickly. From there, you'll have to deal with the dangers of malware BazarBackdoor, including data and credential theft.
This kind of scam is nothing new but the interesting thing here is that it uses App installer and by clicking on a link you are opening and giving permission for a malicious crook to use it. So, stay safe and do not click on any links from unknown emails no matter what.
As in most usual online scams, everything starts with a strange email containing threats and other poorly written and composed speech. At the end of the given email, there would be a link claiming that you, of course, need to read it and follow instructions about the threat, if you click the link it will open a web page where you will have an innocent-looking PDF file with more information about the threat itself.
If you click on a seemingly innocent PDF file it will summon Windows 10's AppInstaller.exe tool, kickstarting a download-and-run process that'll put you in a bad place very quickly. From there, you'll have to deal with the dangers of malware BazarBackdoor, including data and credential theft.
This kind of scam is nothing new but the interesting thing here is that it uses App installer and by clicking on a link you are opening and giving permission for a malicious crook to use it. So, stay safe and do not click on any links from unknown emails no matter what.  Before we dive into it in more detail and predictions please be aware that this article is based upon my personal opinion drawn from the research of current trends and standards. That being said let's dive right into details.


 Once you are in the system, on the left tabs find and click on Clipboard.
 If you are not logged in to your Microsoft account do so on the right panel by locating Sync across devices and click on sign in.
 When you are signed in click on the option to turn it on.
 One option is turned ON, you will be greeted with two choices, to copy everything from the clipboard automatically or to choose text which you want to sync and paste it with ⊞ WINDOWS + V. Choose whatever better suits your needs, and you are done.
Repeat these steps for other devices and you are done.
One option is turned ON, you will be greeted with two choices, to copy everything from the clipboard automatically or to choose text which you want to sync and paste it with ⊞ WINDOWS + V. Choose whatever better suits your needs, and you are done.
Repeat these steps for other devices and you are done. 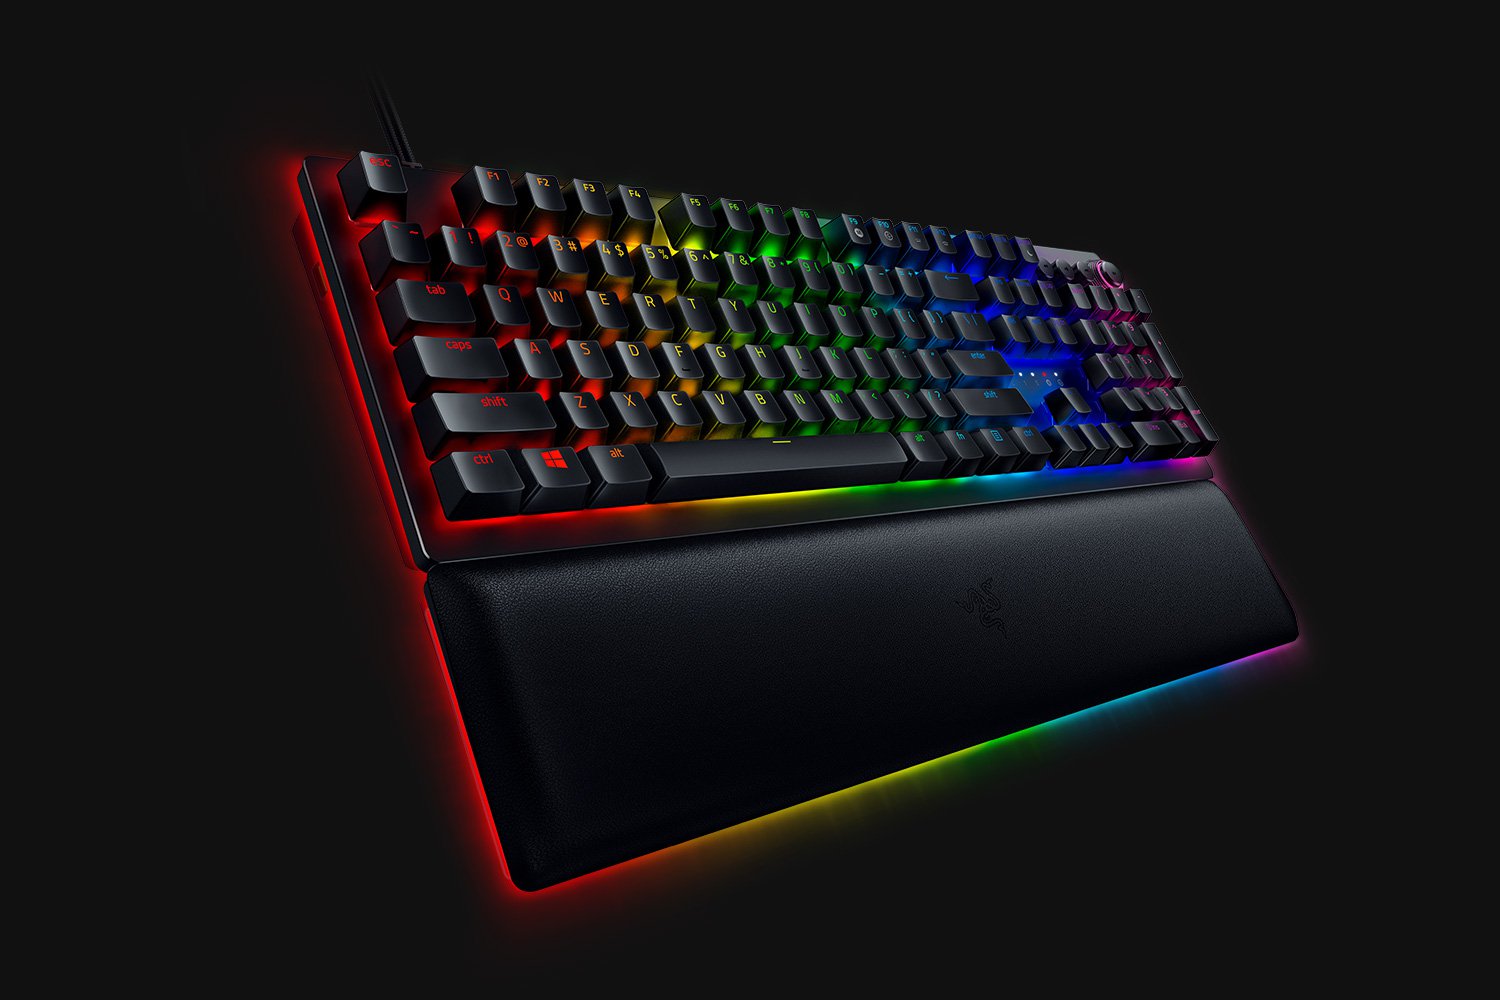 When it comes to computer peripherals first thing that comes to people's minds is probably Mouse and Keyboard. Also when discussing peripherals brands, Razer is not a stranger and over the years it has built its name and cult following.
Razer’s mechanical keyboards have been always in the upper field of quality and trust from users and Huntsman is no different.
When it comes to computer peripherals first thing that comes to people's minds is probably Mouse and Keyboard. Also when discussing peripherals brands, Razer is not a stranger and over the years it has built its name and cult following.
Razer’s mechanical keyboards have been always in the upper field of quality and trust from users and Huntsman is no different.