Fix DISM Error: The scratch directory size ...

One of the most useful and powerful built-in utility in Windows 10 is the DISM tool. This tool can be used with the Command Prompt command line as well as for other purposes. However, it is not without flaws and there are times when you may encounter some issues while using it.

One of the problems you can get while using the DISM tool is the following error:

“The scratch directory size might be insufficient to perform this operation”

This kind of error in DISM occurs when the DISM command is executed from the Windows Recovery Environment due to the limited size permissions of a delivery where the operating is being performed. To fix this DISM error, you need to follow the instructions laid out below.

Step 1: First, tap the Win + R keys to open the Run utility and then type “cmd” in the field and tap Enter to open Command Prompt.

Step 2: Next, you have to specify a scratch directory that contains the Windows folder and to do that, you can either use the DIR command or the BCEDIT command. So in the elevated command prompt type and enter “dir” or “bcedit”.

Step 3: After that, you will see a list of folders inside the C: partition. Now you have to create a folder named “scratch” inside the partition. To do so, execute the following command:

mkdir C:Scratch

Note: The command you just entered will create a directory inside the root of the C: partition named Scratch.

Step 4: Now that you’ve created the Scratch folder, note that each time you run any of the DISM commands, you have to enter the following code snippet in them:

/ScratchDir:C:Scratch

 Note: For instance, if you are using the DISM tool to repair the offline Windows image, instead of executing the “Dism /Online /Cleanup-Image /RestoreHealth” command, you now have to execute the “DISM /Image:C: /ScratchDir:C: Scratch /Cleanup-Image /Restorehealth” command. And if you want to remove a selected installed update package, you can use the “DISM /image:C: /ScratchDir:C:Scratch /Remove-Package /PackageName:Package_for_RollupFix~31bf3856ad364e75~amd64~~16299.196.4.9” command. Keep in mind that the mentioned package is only an example. And lastly, you also have to replace the drive letter in the new code snippet when you execute the commands given above.

Do You Need Help with Your Device?

Our Team of Experts May Help
Troubleshoot.Tech Experts are There for You!
Replace damaged files
Restore performance
Free disk space
Remove Malware
Protects WEB browser
Remove Viruses
Stop PC freezing
GET HELP
Troubleshoot.Tech experts work with all versions of Microsoft Windows including Windows 11, with Android, Mac, and more.

Share this article:

You might also like

Diablo 2 is trending after launch looking good
Finally, some good news for Blizzard entertainment after tons of bad stuff happening around it regarding lawsuits and people layoffs. Diablo 2 has become the most-watched game on Twitch after its official release and sold copies are on a satisfactory level. Diablo 2 resurrectedFor people not familiar with recent events, the state of California has sued Blizzard for various things including discrimination and offensive behavior. Later Blizzard executives were caught shredding some evidence and things just started to go to worse from there. After much drama, many people believed that this is the end for Blizzard entertainment and that they would not be able to recover from this since the community has sided with California and Blizzard has received a large punch as many subscribed WOW players have left the game. Things are not so grim as they were looking as their Diablo 2 remake has made moderate success despite being released in these troubling times and there are rumors of Overwatch 2 planned release date as of the first quarter of 2022. overwatch 2
Read More
Fix The group or resource is not in the ...
A couple of Windows 10 users recently reported getting an error that says, “The group or resource is not in the correct state to perform the requested operation” while opening UWP Applications as well as accessing the File Explorer. You can encounter this kind of error mostly on File Explorer, Microsoft Store application, and other UWP applications. This indicates that this error occurs during both the Windows Classic Application and the Universal Windows Platform Applications. There are several ways to fix this error. You can try to run a System File Checker scan, or run the DISM tool or the Program Compatibility troubleshooter or Windows Store Apps troubleshooter or try to reset or reinstall Windows 10 or the affected application that's not working. However, before you do any of these troubleshooting tips, you can try to perform System Restore first as it could undo the changes you’ve made in the system which might have caused the error.
  • Tap the Win + R keys to open the Run dialog box.
  • After that, type in “sysdm.cpl” in the field and tap Enter.
  • Next, go to the System Protection tab then click the System Restore button. This will open a new window where you have to select your preferred System Restore point.
  • After that, follow the on-screen instructions to finish the process and then restart your computer and check if the problem is fixed or not.
If System Restore wasn’t able to fix the error, then you can refer to each one of the following options.

Option 1 – Try to use the DISM tool

You might want to repair potentially corrupted files in your system as having them could also trigger the “The group or resource is not in the correct state to perform the requested operation”. To repair these corrupted system files, you can run the DISM commands:
  • Tap the Win + X keys and click on the “Command Prompt (Admin)” option.
  • After that, input each one of the commands listed below sequentially to execute them:
    • Dism /Online /Cleanup-Image /CheckHealth
    • Dism /Online /Cleanup-Image /ScanHealth
    • Dism /Online /Cleanup-Image /RestoreHealth
  • Once you’ve executed the commands given above, restart your computer and check if the DCOM error is now fixed.

Option 2 – Run the System File Checker Scan

Aside from the DISM tool, you can also run a System File Checker scan. It is another built-in command utility that helps in restoring corrupted files as well as missing files. It replaces bad and corrupted system files to good system files that might be the cause why you’re getting the error. To run the SFC command, follow the steps given below.
  • Tap Win + R to launch Run.
  • Type in cmd in the field and tap Enter.
  • After opening Command Prompt, type in sfc /scannow
The command will start a system scan which will take a few whiles before it finishes. Once it’s done, you could get the following results:
  1. Windows Resource Protection did not find any integrity violations.
  2. Windows Resource Protection found corrupt files and successfully repaired them.
  3. Windows Resource Protection found corrupt files but was unable to fix some of them.
  • Reboot your computer.

Option 3 – Try to run the Program Compatibility Troubleshooter

You might also want to run the Program Compatibility Troubleshooter. This built-in troubleshooter is available in the Windows Update & Security section. From there, select Troubleshoot. This will find a list of programs for you and since you have already downloaded the driver files, just click on Not Listed located at the top of the program list. After that, browse and select the driver files and then let the program do its job. In addition, you can try to run the Windows Store apps troubleshooter as it can also help you resolve the problem.

Option 4 – Reset your computer

  • Tap the Win key or click on the Start button located in the Taskbar.
  • Then click on the Power button at the bottom right portion of the screen.
  • Next, press and hold the Shift key on your keyboard and then click on Restart. This will restart your Pc into the Advanced Startup options.
Note: Once you have access to the Advanced Startup options, you have to go to the setting which allows you to Reset your Windows 10 PC. All you have to do is select Troubleshoot > Reset this PC to reach the following screen
  • Afterward, select either the “Keep my files” option and then proceed to the next on-screen instructions that follow to reset your Windows 10 computer without losing your files.
Read More
The executable program that ...
If you are trying to start a service using the Windows Services Manager but you got an error message stating, “The executable program that this service is configured to run in does not implement the service”, then you’ve come to the right place as this post will provide you instructions on how you can fix this error. Since almost all program requires service to run on your computer, if the service is not listed in the corresponding registry key, then you will most likely encounter this error on your Windows 10 computer. Here’s the entire content of the error message:
“Windows could not start the service on Local Computer. Error 1083: The executable program that this service is configured to run in does not implement the service.”
To fix this error, you have to add the service name in the respective host in the Registry Editor, and to do that, here are some steps you need to take on. Step 1: The first thing you have to do is to take note of the service name that’s given in the error message. For instance, you get the “Windows Management Service. Step 2: Next, you need to open the Services Manager by tapping the Win + R keys and typing “services.msc” in the Run dialog box, and then tapping Enter. Step 3: After opening the Services Manager, look for the Windows Management Service and once you see it, double click on it. This will open a new mini window. Step 4: From the newly opened window, copy the Service name and the Path to executable under the General tab. If the path to the executable is displayed as “C:/Windows/system32/svchost.exe -k netsvcs –p”, you need the “netsvcs” part only. Note that it can be different for different services and you need the part that comes after “-k”. Step 5: Now tap the Win + R keys again to open Run utility and type “Regedit” in the field and click OK to open the Registry Editor. Step 6: After that, navigate to the following registry path:
ComputerHKEY_LOCAL_MACHINESOFTWAREMicrosoftWindows NTCurrentVersionSvchost
Step 7: From the given registry path, look for a key named “REG_MULTI_SZ” located on your right-hand side. This key is named after the “Path to executable” part. For instance, you should see “netsvcs”. Step 8: Double click on the REG_MULTI_SZ key and enter the Service name that you’ve copied earlier and then write it down at the end of the preset list. Step 9: Now save the changes you’ve made and try to open the program or run the service again.
Read More
Change Legacy to UEFI without reinstalling
There are some new generation motherboards for laptops and PCs that bring in support for both the Unified Extensible Firmware Interface or UEFI as well as the Basic Input Output System or BIOS. The main advantage of UEFI over the traditional BIOS is the fact that UEFI supports a hard drive that has a capacity of more than 2 terabytes. However, the disadvantage of UEFI is that it only supports the x64 Windows operating system versions and that the hard drive is supposed to use the GPT structure. So if your PC is compatible with and supports UEFI and you want to change from Legacy to UEFI, then you’ve come to the right place as this post will guide you on how you can exactly do that without having to reinstall it. There are two ways to change Legacy to UEFI. You can convert MBR to GPT using either the built-in utilities in Windows or using the Recovery Environment. Before you proceed, make sure that your computer fulfills the following prerequisites:
  • Your PC’s motherboard should support both Legacy and UEFI.
  • Your PC should be running at least the 1703 Windows 10 version or newer on an MBR partition.
Once you’ve made sure that your computer covers the aforementioned prerequisites, refer to the given options below.

Option 1 – Convert MBR to GPT via Windows built-in utilities

  • In the Windows Search box, type “command prompt” and from the search results that appear, right-click on Command Prompt and select the “Run as administrator” option.
  • After that, execute this command: exe /convert /allowfullOS
  • Now, wait until the process is completed since you can track its process on your screen.
  • Once it’s done, go to Settings > Update & Security > Advanced Startup options and from there, click on Restart Now. This will restart your computer and give you advanced options.
  • Next, select Troubleshoot > Advanced Options where you will see further options including System Restore, Startup Repair, Go back to the previous version, Command Prompt, System Image Recovery, and UEFI Firmware Settings.
  • Now select the UEFI Firmware Settings. This will take you to the BIOS. Boot Mode is typically available under Boot > Boot Configuration. Once you’re there, set it to UEFI and then save the changes you’ve made. After that, your computer will restart.

Option 2 – Convert MBR to GPT via the Recovery Environment

  • When the message appears on your screen while running Windows Setup, you need to tap the Shift + F10 keys to open Command Prompt.
  • Make sure to run Command Prompt as admin and then execute this command: exe /convert
  • After that, wait until the process is completed. When it’s done, you have to go to the BIOS just like in the first given option above.
  • As mentioned, you can usually find the Boot Mode under Boot > Boot Configuration. Once you’re there, set it to UEFI.
  • Now save the changes made and exit as your computer will restart.
Read More
Windows PC advantages over Apple Mac

In the last article, we have covered various advantages of Apple hardware over Windows PC, however, PC has their own strengths and advantages over MACs as well. Join us as we explore why would you choose Windows PC over MAC.

Windows PC

Hardware customization

If you like to customize and build your own hardware and customize your existing computer then MACs are out of the picture, on other hand, computers based on Windows operating system are much more flexible in terms of customization.

While Apple hardware is locked and only allows small changes to it, computers running on Windows are free and open to various upgrades and modifications so if you like to play with hardware Windows is your platform.

Gaming

There are games on MAC true but their numbers can not compare to games available for the Windows platform. On top of that, most latest and best gaming hardware is not even available on Apple platforms so if you plan to game in high resolutions and play the latest games there really is no option other than Windows.

Windows Platforms also has multiple emulators that you can use to play games from other older platforms and Microsoft since it owns Xbox has some great plans for both PC and Xbox gaming.

Software back compatibility

Since the introduction of the new MAC OS X, apple really lost a lot of application back compatibility, and a lot of old legacy software can not be run on modern Apple computers. Windows on the other hand have always tried and succeeded in keeping maximum compatibility with older and legacy software.

Also on the Windows platform, there is a lot of community support for old and legacy software so even if it is not officially supported it is backed up by the community.

Software variability

In terms of where can you find the most different software, you need to look no further than the Windows platform. How Windows itself has great backward compatibility and a lot of developers are using it to create new software thanks to Visual Studio and .NET Windows has cemented itself as a platform with the most available software.

The popularity of Windows as the home operating system and as a gaming platform has made it quite interesting in eyes of various developers and tons of small applications are made daily for it. Windows 11 has also brought native android support to it and that has just expanded its already impressive catalog of applications.

Freedom of choice

Overall Windows PC is most appealing for users that like to be able to choose everything, from hardware components to software they would like to use. No other platform will give you larger freedom of choice and better personalization options.

Read More
Remove or join a Domain from Windows
As you know, networks that are domain-based are common in organizations and companies. These domain-based networks require multiple computers to be controlled through a single node known as a server. And the one that sets certain policies and restrictions on every system that is joined to the domain is the server administrator. So if you want to add your computer to a domain, you need to have the following information available:
  • The domain name
  • A user account name that’s registered in the active directory associated with the server
  • Windows Enterprise, Pro, or education version
In this post, you will be guided on how you can join or remove a domain. To get started, follow the given instructions below.

Option 1 – Joining a domain

  • First, you need to connect your computer to the network associated with the server since your computer and the server have to be on the same network.
  • Next, click the Start button and then click on the gear-like icon for Settings to open it.
  • After that, navigate to this path: Accounts > Access work or school.
  • Then click on Connect. This will open a new dialog box and from there, select the “Join this device to a local Active Directory domain” option.
  • Afterward, you will be asked to enter the username and password of your domain account.
  • Now select your Account type and when you proceed, you have to restart your computer. Your domain account should now be created.

Option 2 – Removing a domain

  • You need to open the Windows 10 Settings app.
  • And from there, go to this path: Accounts > Access work and school.
  • Next, select the account you want to remove from the domain and then click on Disconnect.
  • A prompt will then appear that says, “Are you sure you want to remove this account? This will remove your access to resources like email, apps, network, and all content associated with it. Your organization might also remove some data stored on this device”. Just click on Yes.
  • This will give you a Disconnect from the organization prompt.
  • Now click on Disconnect and select Restart now to restart your computer. This will complete the removal process of the domain.
Read More
Switch audio devices in Windows 11 taskbar
windows 11 audio settings
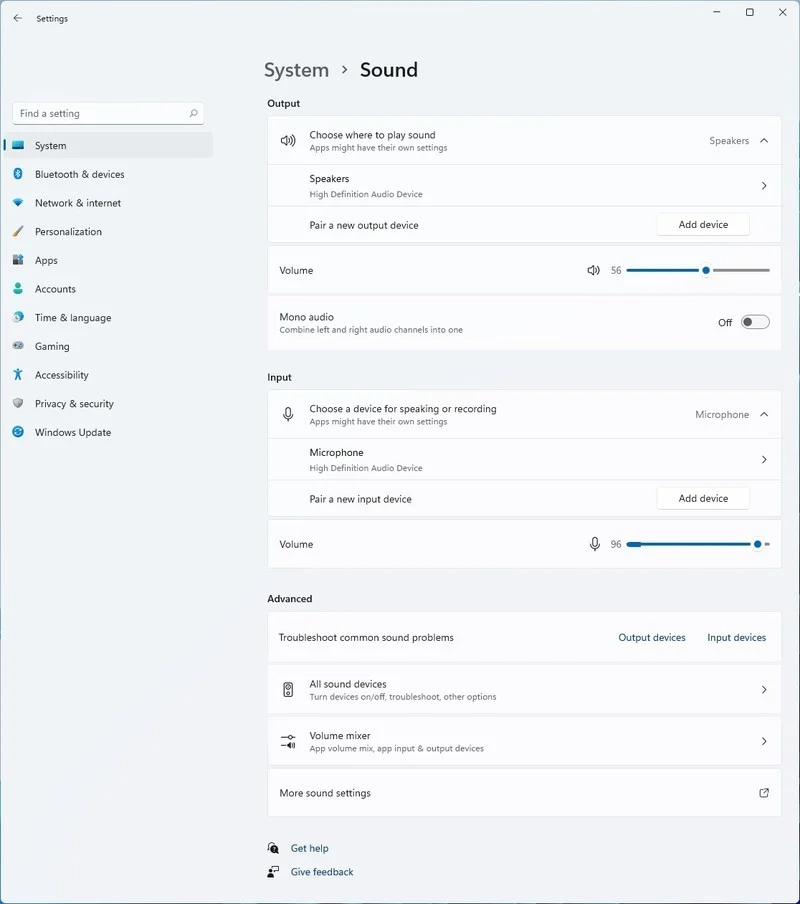
Windows 11 has brought some new features and changed some of the existing ones. One of these changes includes quick switching of audio devices which will play audio. Audio switching can still be done under the taskbar, it is just a little different and one could say even hidden. Follow this quick guide and you will be switching from your headphones to speakers as an example in a matter of seconds.
  1. Click on the speaker icon located in the far-right part of the taskbar.
  2. After the quick settings menu appears click on the right arrow located right of the volume slider. If the arrow is not present, instead of click on the pencil icon, then on add, and finally select Volume from the list.
  3. After clicking on the arrow icon, a list of all enabled audio devices on the system will replace the volume slider. Click on the desired audio device in order to make it active.
  4. Click anywhere outside the quick setting menu to save changes and close it.
Note: in the Quick settings menu if you choose More Volume Settings it will bring you to System > Sound where you can access more sound input and output options.
Read More
Server certificate revoked ERR_CERT_REVOKED!
While browsing the internet, if you suddenly encounter a warning with an error message saying, “Server certificate has been revoked ERR CERT REVOKED” then it indicates that the SSL certificate used by the website has been revoked by its issuer. This kind of problem can only be fixed by the website owner but that does not mean that you can’t do anything about it. In fact, you have the option to bypass this error as well as contact the certificate issuer – all this and more. Just a reminder, if a website that accepts payment, its passwords don’t have SSL or has some certification issue, you should never trust it. For instance, if you are trying to purchase something online and you’re on the payment stage but you encounter the “Server certificate has been revoked ERR CERT REVOKED” error, you must not proceed. To resolve the “Server certificate has been revoked ERR CERT REVOKED” error, here are some things you can do.

Option 1 – Try contacting the Certificate Issuer

If you are the website owner, of course, the best thing you can is to get in touch with the Certificate Issuer in order to resolve the problem.

Option 2 – Try fixing the Date and Time

You have to check your computer’s Date and Time. There are cases when this simple setting causes a connection problem. So if your computer Date and Time is set to date or time that this after the certificate expiration date, then you have to make sure that you set it to automatically configure time. To do so, just open Settings > Time and Language. From there, turn on the toggle for “Set time automatically” and “Set time zone automatically” options. After that, check if it fixes the error, if not, you need to check if the manual selection is correctly set or not.

Option 3 – Bypass the Certificate Revocation Check

As pointed out earlier, you have the option to bypass the Certificate Revocation check. All you have to do is follow the steps below.
  • In the search box of your browser, type “internet options” and open it once it appears.
  • After that, go to the Advanced tab and navigate to the Security subheading.
  • Next, uncheck the “Check for publisher’s certificate revocation” option as well as the “Check for server certificate revocation” option.
  • Now restart your computer. Upon the next startup, try opening the website again. This time, your browser will stop checking it for certificate issues. However, it’s not safe to leave those options unchecked so make sure that once the website’s SSL certificate is fixed or once you no longer have to visit that website, you recheck those options.
Read More
Delete Downloaded, Failed and Pending Windows Updates in Windows 10
There are instances when instead of fixing problems the Windows Update brings you problems on your Windows 10 computer. You might even see some pending Windows Updates which for some reason, refuse to install no matter what you do. The good thing is you won’t have to deal with those failed and pending updates that are incompletely downloaded to your PC as you can actually delete them. Follow the instructions prepared below to delete the failed and pending Windows Updates.

Step 1: The first thing you have to do is delete all the contents in the Temporary folder

  • Tap the Win + R keys to open the Run dialog box.
  • Next, type in “%temp%” in the field and hit Enter or click OK to open the Temporary folder.
  • From there, select all the folders and files within the Temporary folder and then delete them all.
Note: %temp% is one of the many environment variables in Windows that could open the designated folder by Windows as the Temporary folder which is usually located at C:\Users[username]AppDataLocalTemp.

Step 2: Next, remove the pending.xml file

  • Go to the C:\Windows WinSxS folder.
  • Once you’ve opened the folder, look for a file named “pending.xml” file and right-click on it and you can either rename it or delete it.
  • After that, the Windows Update should delete the pending tasks and build a fresh new update.

Step 3: Delete all the contents of the SoftwareDistribution folder

The Software Distribution folder in the Windows operating system is a folder that can be found in the Windows directory and is used to store files temporarily which might be required to install the Windows Update on your PC. Thus, it is required by the Windows Update and maintained by WUAgent. Aside from that, it also contains all the Windows Update History files and once you delete them, you will most likely lose the Update history. As a result, the next time you run the Windows Update, it may result in a longer detection time.
  • Open the WinX Menu.
  • From there, open Command Prompt as admin.
  • Then type in the following command – don’t forget to hit Enter right after typing each one of them.
net stop wuauserv net stop bits
  • After entering these commands, it will stop the Windows Update Service and the Background Intelligent Transfer Service.
  • Next, got to the C:\Windows\Software\Distribution folder and get rid of all the folders and files thereby tapping the Ctrl + A keys to select them all and then click on Delete. Note that if the files are in use, you won’t be able to delete them.
  • Once all the contents in the Software Distribution folder are deleted, restart your PC and then go back to Command Prompt and input the following commands again.
net start wuauserv net start bits
Since the folder has already been flushed, it will be populated afresh the instant your restart your computer and open Windows Update.

Step 4: Try resetting the catroot2 folder

You can also try resetting the catroort2 folder as it is known to fix tons of Windows Update issues. Both the Catroot and catroot2 are Windows operating system folders that are required for the Windows update process.  So when you run the Windows Update, the catroort2 folders stores the signatures of the Windows Update package and helps it in the installation. It makes use of the “%windir%System32catroot2edb.log” file in the updating process. Afterward, the updates are stored in the SoftwareDistribution folder which is used then by the Automatic Updates in order to execute the updating process. Keep in mind that you must not rename or delete the Catroot folder. Although the Catroot2 folder is recreated automatically by Windows, the Catroot folder isn’t.
Read More
Fix Windows Update Error 0x80240034
There are cases when you encounter some issues while updating your Windows 10 computer. One of these issues is the error 0x80240034. This particular error is a Windows Update Error that appears on the Windows Update pane every time an update fails to install. When this happens, your Windows Update will only get stuck at 1% and nothing happens afterward and eventually fails. If you click on the View Installed Update History, you will see the error code 0x80240034 for the failed updates. You will see this error each time you try to update your Windows PC. Take note that this issue doesn’t only happen to a specific version of the Windows Update but on various different Windows builds based on many users. What’s more, is that some users are also seeing a different error code when their Windows Update fails but they still end up seeing the error code 0x80240034 when they check the Windows Update history. At the time of writing, it isn’t determined yet what really causes this error but it’s most likely due to some corrupted files in the computer which is why the most common solution you can try is resetting the Windows Update cache. On the other hand, other users also resolved the issue by using the ISO and selecting the “Do not keep previous settings” option during the Windows Update so it might be something to do with transferring the previous settings through the update client. For clear instructions in fixing this issue, refer to the two options provided below.

Option 1 – Try to clear the Windows Update Cache/Distribution Folder

As mentioned earlier, a lot of users tried clearing the Windows Update cache to fix the problem and so far it has worked. Like them, you can try clearing the Windows Update cache by simply deleting the contents of the folder named “SoftwareDistribution” since Windows apparently can’t clear and re-download the update contents once they are corrupted. Thus, deleting the contents of this folder will make Windows download the contents again which will fix the problem. To do that, follow the steps below.
  • Step 1: Tap the Windows key once.
  • Step 2: Next, type in “command prompt” in the Windows Start Search, and from the search results that appear, right-click on Command Prompt and select the “Run as administrator” option from the context menu.
  • Step 3: After opening Command Prompt, type in “net start wuauserv” and hit Enter.
  • Step 4: Then type in “rmdir %windir%SoftwareDistribution /S /Q” and hit Enter.
  • Step 5: Now type in “net start wuauserv” and hit Enter. Once it’s done, try updating your Windows PC again, it should now work just fine.

Option 2 – Update Windows via ISO file

If option 1 didn’t work for you, you can try this second option of updating your Windows 10 computer using an ISO file which means that you will have to create a Windows 10 bootable media and use it to install the latest Windows 10 version. The most user reported that this option works and the reason why it does have something to do with the Windows Update client since the Windows Updates downloaded from the regular Windows Update client seems to create issues such as the error 0x80240034. However, issues like this one don’t occur when the very same Windows Updates are downloaded and installed via an ISO file. Take note that when using a Windows ISO file, you will be asked to choose what you want to do with the previous settings and apps. A lot of users opted for the “Not to keep the old Windows settings” option which has resolved the issue. So if you want to keep the previous settings then you must try to update Windows first while keeping the old settings. However, if it doesn’t work, you have to try installing the latest version of Windows without keeping the previous settings.
  • Step 1: Click this link and then click the Download Tool Now button.
  • Step 2: Next, click the “Use the tool to create installation media (USB flash drive, DVD, or ISO file)…” option and follow the next given instructions on the screen.
  • Step 3: Now select the ISO file option in step 5.
  • Step 4: After that, you should now have an ISO file.
  • Step 5: Next, go to the location where you’ve downloaded the ISO file.
  • Step 6: Then right-click on the Windows 10 ISO file and select the Open with an option and then select File Explorer.
  • Step 7: Now click on “setup.exe” and follow the next instructions that appear on the screen. When asked, you have to select either: Nothing (clean install) or Keep personal files only option. Take note that you must not select the “Keep personal files, apps, and Windows settings since it doesn’t really work.
Read More
1 2 3 171
Logo
Copyright © 2023, ErrorTools. All Rights Reserved
Trademark: Microsoft Windows logos are registered trademarks of Microsoft. Disclaimer: ErrorTools.com is not affiliated with Microsoft, nor claims direct affiliation.
The information on this page is provided for information purposes only.
DMCA.com Protection Status