Logo

How to Fix Error 118

Error 118 - What is it?

Error 118 is a typical Google Chrome error. It pops up when Google Chrome fails to load websites like Facebook. It is usually displayed in the following format:

‘Error Message: Error 118 (net::ERR_CONNECTION_TIMED_OUT): The operation timed out.’

Solution

Restoro box imageError Causes

Error 118 may be triggered due to several reasons. This includes:

  • Problems with DNS setting
  • IP Address is filtering websites
  • Cookies and invalid registry entries

Further Information and Manual Repair

To ensure smooth internet browsing on Google Chrome, it is advisable to repair the error 118. If error 118 is not resolved you will be unable to load and access your desired websites.

To avoid inconvenience and resolve the issue immediately, try the methods suggested below. These are easy and effective do-it-yourself methods that require no technical skills.

Method 1 - Change Proxy Settings

If your IP address is filtering websites, then you might experience error 118 while using Google Chrome. When this is the error cause, then it is advisable to add a proxy for your PC.

To change proxy settings and add a new proxy, simply click on Customize and Control Google Chrome menu. Now click the options button. Under the Google Chrome Options window select the Under the Hood tab.

After that in the Network, section click the change proxy settings button.

Check Show Suggestions for navigation errors and Use DNS pre-fetching to improve page load performance boxes. Now under Internet Properties, click LAN Settings.

Under LAN settings you will see the Proxy Server box, check it, and enter your new proxy settings. Click OK to confirm and save settings. This will hopefully resolve the issue.

Method 2 - Change to Google DNS

When the error is related to DNS settings then try this method to resolve it. Simply set DNS to use Google DNS. Here’s how it’s done:

  1. Go to the start menu, click Windows Control Panel, Network and Internet, and change adapter settings. Here you will see Local Area Connection.
  2. Right click to select properties at the bottom.
  3. Check Internet Protocol Version 4 and click properties.
  4. Now check the ‘Obtain an IP address automatically’ box and also select the option that says ‘Use the following DNS server addresses’.
  5. Change Preferred DNS to 8.8.4.4 and Alternate DNS server to 8.8.8.8 now click OK to confirm.

Method 3 - Remove the Bad Entries and Cookies Damaging the Registry

Bad entries and cookies saved in the registry can also trigger error 118.

To fix the issue immediately download Restoro. This is PC Fixer with multiple utilities including a registry cleaner. The registry cleaner removes all bad entries and cookies in seconds and repairs the damaged registry.

Click here to download Restoro and resolve error 118.
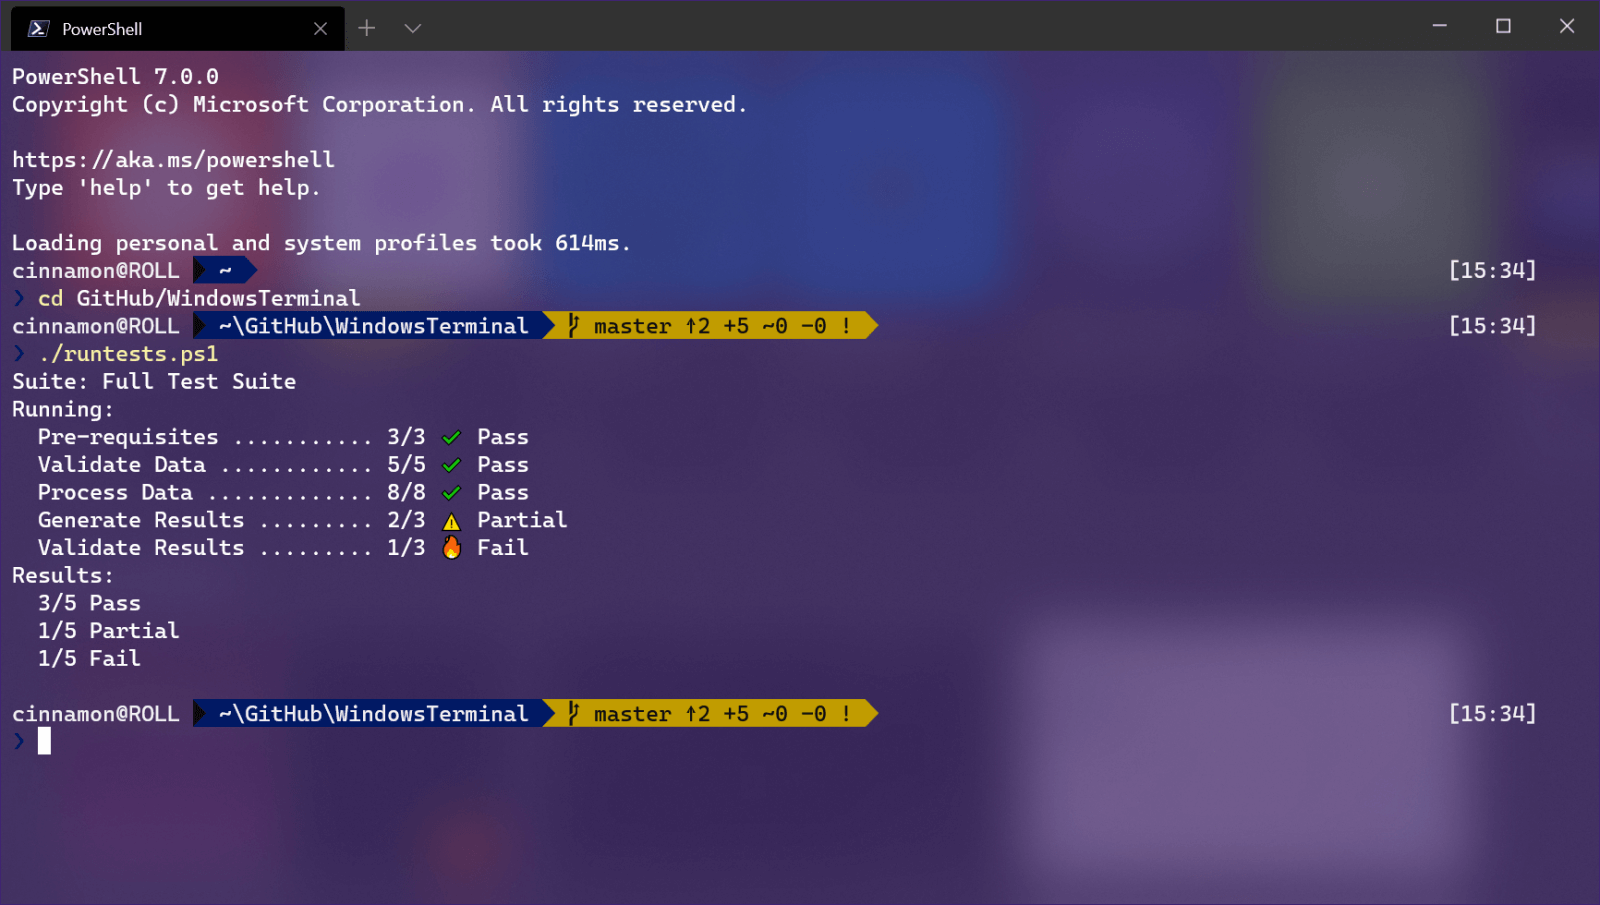
Do You Need Help with Your Device?

Our Team of Experts May Help
Troubleshoot.Tech Experts are There for You!
Replace damaged files
Restore performance
Free disk space
Remove Malware
Protects WEB browser
Remove Viruses
Stop PC freezing
GET HELP
Troubleshoot.Tech experts work with all versions of Microsoft Windows including Windows 11, with Android, Mac, and more.

Share this article:

You might also like

A Guide to Fixing Error Code 39

Code 39 - What is it?

Code 39 is a device driver error code that pops up when the Windows operating system cannot load the driver for the hardware you want to use.

This hampers your ability to use the hardware properly. The error code is almost always presented in the following format:

“Windows cannot load the device driver for this hardware. The driver may be corrupted or missing.” Code 39

Error Causes

A device driver is a software program that tells the operating system how to control a particular hardware device. Each hardware device has a different driver.

There are separate device drivers for printers, CD-ROM readers, and keyboards, to name a few.

Many device drivers are already built into the operating system. But sometimes you will need to install a new device driver when you want to use a new piece of hardware device that the operating system is not familiar with, or does not anticipate.

Regardless of whether or not the drivers are already integrated into the operating system, you may still experience code 39, typically because of the corrupted or outdated drivers.

Outdated and corrupted drivers cause hardware malfunction and failure, which trigger device driver error codes like code 39. Other causes include incorrect registry values.

Further Information and Manual Repair

Below are some of the easiest and most effective methods to resolve Device Manager error code 39 on your PC.

To follow and implement these methods, you don’t require any technical knowledge or expertise. Simply follow these instructions to fix the error right away.

Method 1 - Fix with a Simple Reboot

There is a possibility that the error code 39 is caused by some fluke within the Device Manager or your BIOS.

If that’s the reason, then a simple PC reboot can resolve the issue immediately. Therefore, before you try anything, it is advisable to restart your system.

If it works, then that is great, but if it doesn’t, then don’t worry, try other methods given below to fix this problem successfully.

Method 2 - Uninstall and Reinstall Drivers

If the error code 39 is generated due to faulty or outdated drivers, then simply uninstall and remove them and then reinstall new driver versions. There are two ways to remove faulty drivers.

Method One

  • One is, to go to the start menu, click on Control Panel, and then Add/Remove Programs.
  • Remove the program and the driver you think is causing problems. This will thoroughly remove all traces of the faulty driver.
  • To reinstall, follow the same steps but this time install the new device driver version.

Method Two

  • The other way is to go to the start menu, type Device Manager in the search bar, and then press enter to continue.
  • In the Device Manager, find and locate the problematic device.
  • After that, double-click the category of device that you wish to uninstall. Let’s say, Windows is unable to load the graphics card driver.
  • This means you will have to click on the Display Adapter category in the Device Manager to uninstall the graphics card.
  • After you have successfully uninstalled, Windows will prompt you to confirm device removal.
  • Simply click OK to confirm and proceed. To activate the changes, restart your PC.
  • To reinstall, go to the Device Manager, click on the Action tab and then select the option ‘Scan for Hardware Changes.’

This method, although effective in resolving error code 39,  can be time-consuming. To avoid the hassle and save time, try method 3.

Method 3 - Update Drivers Automatically with DRIVERFIX

If you would like to read more helpful articles and tips about various software and hardware visit errortools.com daily.
Read More
The application was unable to start 0xc00007b
As you know, Windows programs depend on several operations to get executed and at the same time, there are also numerous parameters that have to be fulfilled for a program to get executed. However, based on some reports, there was an error when some users tried to run a program. This error says, “The application was unable to start correctly (0xc00007b)”. There could be various reasons why this error occurs but the main one is most likely due to an x86 application that is not compatible with the x64-based operating system. To fix this problem, you can run the Check Disk utility or reinstall the application or the Microsoft .NET Framework. You can also try reinstalling DirectX or replace the corrupted DLL file(s). For more details, refer to the given options below.

Option 1 – Try running the Check Disk utility

  • In the Windows Search box, type “command prompt” and from the search results, right-click on Command Prompt and select “Run as administrator”.
  • After opening Command Prompt, type this command and tap Enter: chkdsk <Partition Letter>: /f
  • The command you entered will start to check for errors and fix them automatically. Else, it will throw an error message saying, “Chkdsk cannot run because the volume is in use by another process. Would you like the schedule this volume to be checked the next time the system restarts? (Y/N)”.
  • Tap the Y key to schedule Disk Check the next time your computer restarts.

Option 2 – Re-enable the Microsoft .NET Framework

You could also try to disable the Microsoft .NET Framework then enable the latest version of the .NET Framework on your PC and check if the error is fixed

Option 3 – Try to reinstall the program

There are times when some supporting module for your application under the hood could have messed up the application where you get the error. To fix this, you have to uninstall the program and then download its latest version from its official site and then install it again. Once you’re done, run the application and see if the error is fixed.

Option 4 – Run System File Checker scan

If reinstalling the program didn’t work, you can also try running the System File Checker or SFC scan to fix the error. System File Checker is a command utility built into your computer that helps restore corrupted files and missing files. Refer to the following steps to run it:
  • Hit the Win + R keys to launch Run.
  • Type in cmd in the field and tap Enter.
  • After opening Command Prompt, type in sfc /scannow
The command will start a system scan which will take a few whiles before it finishes. Once it’s done, you could get the following results:
  1. Windows Resource Protection did not find any integrity violations.
  2. Windows Resource Protection found corrupt files and successfully repaired them.
  3. Windows Resource Protection found corrupt files but was unable to fix some of them.
  • Reboot your computer.

Option 5 – Try running the DirectX Diagnostic Tool

Since the error has something to do with the DirectX Graphics APIs, you can run the DirectX Diagnostic tool to resolve the problem.

Option 6 – Try updating or re-installing DirectX

If the DirectX Diagnostic tool didn’t work, you can try to update or reinstall DirectX instead. This can help in fixing the problem because when you reinstall or update DirectX, it will replace the incompatible or corrupted components of DirectX from your computer.
Read More
Win Update enables itself after turning it off
Windows Updates are important and though it is not recommended for any user to turn it off completely, there are just some remote cases where you might have to keep it off. Such are the cases when you want to use your Windows 10 computer just for gaming and you don’t want Windows Update to interrupt it because of some messy driver update. A lot of users have in fact want to disable Windows 10 updates completely. Although you can always use the built-in option to delay Windows Updates or make Windows 10 inform you before downloading the updates, however, there are instances when Windows 10 Update may enable itself even after you turn it off or delay it. To resolve this issue, read on. You may have to disable the Windows Update Medic Service if Windows Update just keeps on starting and turning itself back on even after turning it off in Windows 10 on top of turning off the Automatic Windows Update Service or wuauserv and setting a Guest Log on. To get started, refer to the instructions prepared below.

Option 1 – Change the Log on account of the Windows Update Service

It appears that one of the major upgrades in Windows 10 has made sure that Windows 10 enables back the Windows Update Service all on its own even if the service has been set to disable by the administrator. And that’s the important thing here, Windows 10 uses admin credentials in order to ensure that it can re-enable the Windows Update Service each time it is in a disabled state. So in this fix, you can prevent the Windows Update Service from changing the account credentials used to run it.
  • Tap the Win + R keys to open the Run prompt with admin privileges.
  • Then type “services.msc” and click OK or hit Enter to open Services.
  • After that, locate the Windows Update Service from the list. Once you see it, double-click on it to open its Properties.
  • From there, click the Stop button to stop the service.
  • Next, go to the Log On tab and select the “Log on as ‘Guest” option which is the Guest account.
  • Just leave the password blank and then click Apply to save the changes made.
Note: After you made the changes, every time the Windows 10 Update Service attempts to run, you might get an error message that states, “Windows could not start the Service” or “The account specified for this service is different from the account specified for other services running in the same process”. This is what makes this fix a lot better compared to other software or batch file to keep turning off the Windows Update Service. You did not exactly disable the service but you just changed the account used to run the Windows Update service and since there is a password, the service never really works. On the other hand, Windows Defender can’t be stopped using this trick as it will keep getting an update.

Option 2 – Try to disable the Windows Update Medic Service using the Windows Update Blocker

Aside from changing the Log on account of the Windows Update Service, there is also another way you can prevent the service from enabling itself after you disable it. This alternative you can use is the Windows Update Blocker. This is a new Windows Service that was introduced in the recent Windows 10 versions. You can use this service to disable the service.
Read More
Steam proton to run Windows games on Linux
Steam protonDespite popular belief, there are a lot of users running Linux OS. Linux offers great security and working environment and 96.3% of the world's top 1 million servers run on Linux. 90% of all cloud infrastructure operates on Linux and practically all the best cloud hosts use it. But gaming on Linux is limited, enter Steam proton a Valve’s gaming solution.

What is Steam proton?

Proton is a WINE fork with some extra capabilities, to play games and run applications not native and not made to run natively under Linux OS. It is supposed to bridge the Gaming issues for PC users and let them more freedom in choosing an operating system to game on.

Find out if your game supports Proton

Although there are a lot of titles that nowadays run natively on Linux some will still need proton in order to run at all and sadly some of them will not be able to run on Linux even via proton but seeing how Valve is busy and it is trying to push its ideas and technology slowly this gap is closing. In order to see how the game you want to play performs and behaves on Linux and proton environment visit https://www.protondb.com/ and find out. As soon as the site loads you will be greeted with statistics and a search option to find out the status of the desired game with one of the given statuses: Borked, Bronze, Silver, Gold, Platinum, and Native. As you probably guessed native means that the game will work on Linux out of the box and borked will probably not work at all. Platinum and gold status means that game will run on proton without any input or tweaks from the user while silver and bronze means that it will work but might need some tweaks in order to make it work.

How to get Steam proton?

In order to run games under proton inside Linux, you will need firstly a Steam client which luckily works naturally on Linux. Unlocking/activating Steam Proton on your Linux-based system is easy. Just head over to Steam > Settings > Steam Play and toggle the option “Enable Steam Play for Supported Titles”. Valve has tested and fixed some Steam titles and you will now be able to play those titles. However, if you wish to go even further beyond, and play titles that even Valve has not tested, toggle the option “Enable Steam Play for all titles”.

Conclusion

Even we are not there yet, native gaming on Linux is gaining a foothold each day. Will Steam’s OS with proton technology be one that will turn the tide from Windows or some other tech we cannot tell but one thing is for sure, more choices mean better products so I am hopeful for a bright future.
Read More
Upcoming Windows 11 features

22H2 update for Windows 11 will arrive later this year and although Microsoft is not releasing anything big there will be some interesting improvements and fixes. We take a look at some that caught our attention.

windows 11 new fetures full screen widgets

Phishing protection

One of the most interesting upcoming features is enhanced phishing protection. Microsoft Defender SmartScreen will be upgraded to alert users when they try to store passwords in plain text files and also if they accidentally type in a Microsoft account password on phishing sites.

"These enhancements will make Windows the world's first operating system with phishing safeguards built directly into the platform and shipped out of the box to help users stay productive and secure without having to learn to be their own IT department,"

Microsoft

File Explorer gets tabs, a modern sidebar, and contextual suggestions

Finally, Windows File explorer is getting tabs that will allow much easier management of folders and files inside it.

It is confirmed that Microsoft is also working on a new 'HOME' sidebar that should be modern in design and in features including OneDrive so you can find everything in one place.

Pinning of favorite files was also mentioned so you can easily pin favorites for quick access.

Full-screen widgets

Windows 11 has brought back widgets in a new way and from all the feedback users are loving them. Currently, you have a widget sidebar on the left part of the screen where you have your chosen store widgets but from the Microsoft teaser, we will have soon the option to have them in full screen.

If you are using a widget for reading news, blogs, etc. this feature will be very good since you will be able to use your whole screen for information and not just a part of it.

Suggested actions

Another new feature is 'suggested actions' which is going to be particularly useful in apps like Microsoft Teams. With this new feature, you can highlight a date in a Teams message and Windows will suggest actions.

For example, if you highlight a date, you'll see a recommendation to create an event in Microsoft Calendar for that day.

Read More
The server did not register with DCOM
There are times when after you upgrade your Windows operating system, the System Logs under the Event Viewer will display an error message saying, “Event ID 10010 error – The server did not register with DCOM within the required timeout”. What is DCOM? DCOM stands for “Distributed Component Object Model”. It is a proprietary Microsoft technology that allows the Component Object Model or COM software to communicate across a network. You can consider it as an extension of COM which is equipped with the capability of solving a couple of inherent problems related to the COM model to the better use over a network. COM is a tool that’s used for advanced configuration and troubleshooting in Windows 10. Developers usually use it to configure routine components and application behavior like participation in transactions and object pooling and so on. The Component Services needs the DCOM wire protocol in order to communicate with the Component Object Model components on other computers. By default, in a Windows-based system, the network computers are configured initially to enable DCOM. There are also some components in Windows that might require registering themselves with DCOM. However, if they fail to do so, you will encounter the “The server did not register with DCOM within the required timeout” error. To fix this, here are some suggestions you can check out.

Option 1 – Try to use the Component Services

  • Tap the Win + R keys to open the Run dialog box.
  • Then type “dcomcnfg” in the field and tap Enter to pull up Component Services.
  • Next, double click on the Computers folder located in the right pane and right-click on My Computer, and select the Properties option.
  • After that, switch to the COM Security tab under My Computer Properties and then go to the Access Permissions section.
  • From there, click the Edit Default button and in the new window that appears, apply the correct permission to objects under the Group or user names section.
  • Once you’re done, click OK and exit. This should fix the error.

Option 2 – Make sure that Function Discovery Resource Publication Properties Services is running

  • In the Cortana search box, type “services” and click on the Services icon to open the Services Manager. Alternatively, you can also tap the Win + R keys to launch the Run prompt and then type “services.msc” in the field and hit Enter to open the Services Manager.
  • Next, scroll down and look for the “Function Discovery Resource Publication” entry and double click on it.
  • Then switch to the General tab and from there, make sure that the Startup Type is set to “Manual (Triggered).
  • You also have to make sure that the service is running so if it’s not, just click on the Start button to start the service.
  • Now click on Apply to save the changes made.

Option 3 – Try resetting the default DCOM permissions

  • Tap the Win + R keys to open the Run dialog box.
  • Then type “dcomcnfg” in the field and tap Enter to pull up Component Services.
  • After that, expand Component Services > Computers and right-click on My Computer, and then select Properties.
  • Next, go to the Default Properties tab, and in the Default Distributed COM Communication Properties section, make sure that:
    • Default Authentication Level is set to Connect
    • Default Impersonation Level is set to Identify.
Read More
Lock folder with password in Windows 10
Hello and welcome everyone. In today's article, you will learn how to lock folder and content in it. Please be aware of few things:
  1. The method is shown here works, but you need to be careful and follow step by step or you will damage your files permanently,
  2. If you forget your password, you can not access your files anymore
  3. Your files altho protected can still show up in recent files of some applications
All of that being said, let us start with locking the local folder on the computer with the password. Go to the folder where you have files that you would like to hide and lock with a password. Enter the folder and create the new text file inside it. Skip the name for now and go inside it. Copy and paste the following code inside the file:
cls @ECHO OFF title Folder Locker if EXIST "Control Panel.{21EC2020-3AEA-1069-A2DD-08002B30309D}" goto UNLOCK if NOT EXIST Locker goto MDLOCKER :CONFIRM echo Are you sure u want to Lock the folder(Y/N) set/p "cho=>" if %cho%==Y goto LOCK if %cho%==y goto LOCK if %cho%==n goto END if %cho%==N goto END echo Invalid choice. goto CONFIRM :LOCK ren Locker "Control Panel.{21EC2020-3AEA-1069-A2DD-08002B30309D}" attrib +h +s "Control Panel.{21EC2020-3AEA-1069-A2DD-08002B30309D}" echo Folder locked goto End :UNLOCK echo Enter password to Unlock folder set/p "pass=>" if NOT %pass%==Your-Password-Here goto FAIL attrib -h -s "Control Panel.{21EC2020-3AEA-1069-A2DD-08002B30309D}" ren "Control Panel.{21EC2020-3AEA-1069-A2DD-08002B30309D}" Locker echo Folder Unlocked successfully goto End :FAIL echo Invalid password goto end :MDLOCKER md Locker echo Locker created successfully goto End :End
Now locate this line of code in the document: if NOT %pass%==Your-Password-Here goto FAIL and replace Your-Password-Here with your password. !!! Write down somewhere your password, if you lose it you will lock the folder even for you !!! Save the file as FolderLocker.bat and double-click on it to execute it. If everything was done correctly, a new folder with the name: Locker Move files that you want to hide and protect inside that folder. Double click again on FolderLocker.bat The command prompt will appear with the question do you want to lock the folder, press Y, and press ENTER. The command prompt will close and the Locker folder will disappear. In order to unhide and access the folder, you will need to double click on FolderLocker.bat again but this time command prompt with ENTER your password will appear. Type in your chosen password and the folder is back. If you wish to hide and lock it again just double click on FolderLocker.bat again, confirm with Y and it is hidden again.
Read More
Antivirus software review 2022

As we near the end of 2022 we look at the current best antivirus software for popular platforms, why they are the best, and why you should get them.

Avira, a great free Antivirus

Avira has been around a long time with its free antivirus version of the larger protection suite. It had its ups and downs but the latest versions are really great. With high-speed scans and low system impact, Avira antivirus is really one of the best free antivirus software currently on the market.

Avira screen

The software itself has also received UI & UX updates making it straightforward and easy to use. The virus scanning engine is the same as in paid version that ranks among the top engines in the world for this type of work. The package also gives you some great browser protection and a good firewall as well, there is really no excuse to skip on this if you want a free solution.

The only thing that we would say is not so great in Avira is reporting some false positives, sometimes even for MS updates, it is rare but it can happen.

Malwarebytes, a powerful Windows antivirus

Malwarebytes Premium is easy to use, simple antivirus solution that shies away from complicated UI, and simply put, it just works. Its scanning engine is well-known and places among the top and best in the world often finding some malware that other can miss.

malwarebytes screen

Another great thing is its integration with Windows itself, it is one of the rare applications that can and will work incredibly well beside your typical Windows protection tools so you can have both of them running at the same time.

Installation and running are really simple and every typical PC user will find it as easy as walking in the park. On the other hand, sadly system impact is a little high and it will have issues running on lower-end systems due to its memory requirements.

Intego MAC Internet Security X9, the best Mac antivirus

Gone are the days when MAC had no virus issues, since MAC rose in popularity among the users, also rose the number of viruses and malware. The system itself has some great protection built it inside but for more security and better control of it, you will need a third-party dedicated solution.

Intego was made by Mac antivirus experts who have been building this kind of software last 25 years. The interface is easy to use and premade presets are really helpful, but the security suite can also be customized to fit your needs and desires.

intego screen

Since this is only available as a security suite, you are getting a firewall and some other security tools along with your antivirus that will run as a part of it.

The bad side is that scans can sometimes run slow, most of the time they are OK in terms of speed but occasionally they can switch to slower speeds and impact scanning time to some annoying times. Also, there is no webcam protection nor VPN service included where others on this list have them.

Bitdefender mobile security: best Android protection

While protection is not only needed for your gaming or workstation, software suites that are dealing with mobile and tablet security exist. The best of them is the Bitdefender antivirus mobile suite. Low on system resources and low on performance impact with the really great virus detection rate Bitdefender is at the top of suites for your phone.

bitdefender mobile

Consistent high virus detection packed with low battery impact is great but the suite comes with tons of other tools as well like browser security tools, email protection, and real-time link and notification protection.

The application will always scan each file and newly installed application in the background and alert and cut off any found threat. App itself is easy to install and use and most of the time it will do everything in the background for you but offer you customization if you need it.

The package also includes VPN and application lock that will let you protect the critical applications from being accessed as well as an online account scanner. Anti-theft and anti-loss tools, which allow you to find, remotely lock or wipe a stolen or lost device, add yet another layer of protection.

One thing that is missing from this great package is fraudulent call protection. Newer Android phones have this feature inside but it would be nice if Bitdefender had it as well.

Bitdefender, the best antivirus software

Now that we have covered specific cases of each platform, there is one player that has all of them covered and with a quality product, that player is BitDefender and it is great. Personally, this is my protection suite of choice and as I type this it is running in the background.

Bitdefender has it all, low system impact, as a matter of fact, it is one, if not, the lowest performance impact engine on the market currently and that is packed with a great and highly consistent virus & malware detection suite. Along with real-time malware protection, browser security, and anti-spam tools, you also get anti-phishing defenses, ransomware protection, and a strong firewall.

bitdefender screen

Bitdefender scores are very high in both the zero-day threat and real-world protection tests at AV-Test, an established organization that tests antivirus software. Despite being tested against tens of thousands of well-known and widespread malware threats, the software consistently achieves a 100% blocking rate.

The suite also comes with a restricted free VPN and with parental controls as well. Webcam and microphone protection are also included in the suite and on top of all, it has great pricing plans and constant discounts.

BitDefender is really a great package and it might sound too good, but after years and years of personally using it I have not had single malware or virus issue, the only thing that I would put as a negative is that system is severely slowed down when system scans are performed so be sure to run or schedule them when you are not using your computer. This, of course, can put some people off and I will admit it is a serious drawback but for me, the security of my workstation is more important than leaving the computer for 20 or so minutes in order to perform a full scan of the system.

Read More
Windows 10 exploit using App installer
Scammers have decided to target Windows’s 10 App installer process in order to infect your computer and steal your data. windows 10 mail exploitAs in most usual online scams, everything starts with a strange email containing threats and other poorly written and composed speech. At the end of the given email, there would be a link claiming that you, of course, need to read it and follow instructions about the threat, if you click the link it will open a web page where you will have an innocent-looking PDF file with more information about the threat itself. If you click on a seemingly innocent PDF file it will summon Windows 10's AppInstaller.exe tool, kickstarting a download-and-run process that'll put you in a bad place very quickly. From there, you'll have to deal with the dangers of malware BazarBackdoor, including data and credential theft. This kind of scam is nothing new but the interesting thing here is that it uses App installer and by clicking on a link you are opening and giving permission for a malicious crook to use it. So, stay safe and do not click on any links from unknown emails no matter what.
Read More
Turn off animations in Windows11

Windows 11 has come a long way from its infant stage. Today it is incredibly good and stable operating system that also looks good and modern. Unfortunately, fancy animations and good graphics come with a price, in this case, slower performance on some little older and weaker computers.

windows 11 animations

Animations itself which include also fading effects can sometimes feel slugging and laggy and have a general overall feeling of delay. For a more old-school instant experience, you can turn off animations.

In order to turn animations inside Windows 11 follow this simple guide:

First thing is to open Settings by pressing Windows + i key combination or you could open Start and in the search box type in Settings and then click on its icon.

Once inside settings on the left side find Accessibility and click on it to select it. Once it is selected on the right side choose Visual effects. Inside the visual effects section click on the switch next to Animation effects to OFF. You can also turn off transparency effects in this section if you wish if you have an older GPU in order to speed it up a little.

That is all you need to do, settings will be automatically saved and all animations will be turned off for a quicker and more responsive feeling when working inside W11

Read More
1 2 3 171
Logo
Copyright © 2023, ErrorTools. All Rights Reserved
Trademark: Microsoft Windows logos are registered trademarks of Microsoft. Disclaimer: ErrorTools.com is not affiliated with Microsoft, nor claims direct affiliation.
The information on this page is provided for information purposes only.
DMCA.com Protection Status