Error 0x00000024 can be seen when you start up and a screen comes up asking which mode you would startup in.
Regardless of the mode you select, it leads up to the Windows screen with the loading bar and your computer crashes from there onwards. When you press F8 in order to select the “Disable Automatic Restart On System Failure” option, that is when this error shows up:
Due to this error, both Safe and Normal modes become inaccessible.
Solution
Error Causes
If you’re having this error then it is the indication of an issue with the file NTFS.sys. Further, there might also be problems with the IRP (Interrupt Request Packet) or the disk may have been corrupted.
There are multiple other causes of this error, including heavy fragmentation of your hard drive or problems caused by your antivirus software.
Further Information and Manual Repair
First and foremost, you are suggested to run Chkdsk. In order to do this, you have to enter your BIOS and select CDROM as your primary booting device. Now follow the below-mentioned steps:
Insert your Windows XP installation CD into the CDROM and reboot your PC.
Press any key to proceed with the boot from CD when you are prompted to do so.
When the Windows XP setup menu shows up, hit the “R” key to proceed with repairing Windows.
If there is only one Windows installed on your computer then hit the “1” key and proceed by pressing enter. If there are more than two Windows then hit the number which is associated (according to the screen you are viewing) to the Windows you want to repair. Usually, this is C:/Windows and associated with “1” but if that is not the case then you should simply press the number that corresponds with the windows you want to repair and proceed.
Now, you will see a screen that prompts you to enter your administrator password. Most people don’t have an admin password and in that case, you should simply hit enter and you’d be good to go. If you do have an administrator password, however, then you should type it in, hit enter, and proceed.
When the DOS prompt shows up, type in chkdsk/f and hit return.
If you see no improvement in solving Error 0x00000024, and the problem keeps persisting, then you should start over. But this time you should type sfc/scannow instead of chkdsk/f and hit return.
There are a few other complex methods that you can try as well but this is the most recommended procedure as it is easier, quicker, and most likely to fix the error.
Error 0x8007005 is a typical Windows Error Code.
This error occurs during installation or Windows update. The error 0x8007005 is prompted as an ‘Access Denied’ message. It is typically generated when you either lack file or registry permission to perform the installation.
Solution
Error Causes
Narrowing down the ultimate reason for the error 0x8007005 can be difficult because there are multiple causes for this error occurrence.
However, some of the common causes include:
Administrative issues
Viral Infection
To perform a successful Windows update, it is vital to resolve this error on your system. Furthermore, you must also hurry in fixing this issue on your PC especially if the underlying cause of this error is malware or viruses.
Malware can damage your PC badly. It can expose your computer to serious threats like privacy issues, data breaches, cyber crimes and identity thefts.
Further Information and Manual Repair
To fix the error 0x8007005 on your PC, you don’t have to hire a professional and pay hundreds of dollars. In fact, you can resolve it all by yourself even if you are not technically sound.
Here are some easy DIY methods for you to try:
Solution 1: The error may occur if you don’t have administrator’s permission and there are many user accounts to access the PC. The easiest way to fix the error and perform a successful Windows update is to log on from the administrators account.
Once you log on as the administrator, then try installing the updates again.
Solution 2: Sometimes the file and registry permissions may get changed by malware. Therefore, to fix the error, it is advisable to download an antivirus and perform an entire PC scan.
The antivirus will help remove all sorts of viruses infecting your system and fix the issue.
However, please note anti-viruses are known for slowing down PC performance so you might have to compromise on your system’s speed once to install this software.
Solution 3: Download Restoro.
Downloading Restoro is perhaps the best and the fastest way to resolve error 0x8007005 without compromising on your PC’s speed. Plus this software also resolves all registry issues too.
Restoro is an advanced and multi-functional PC Fixer.
It is deployed with powerful utilities including an antivirus that detects and removes all kinds of malicious software including viruses, Trojans, spyware and malware. To ensure your PC speed is not affected, it also features a system optimizer. The system optimizer boosts the speed of your PC significantly.
Other Restoro Features
In addition to this, it also includes a registry cleaner.
The registry cleaner simultaneously detects all registry-related issues and resolves them instantly. It cleans the registry, fixes the damaged files, and restores the registry back to normal.
It is safe, bug-free, and efficient. You can install it on any Windows version. It has a user-friendly interface and simple navigation making it easy for all levels of users to operate.
Click here to download Restoro on your PC and resolve error 0x8007005 now!
Error code 0x80070057 occurs when Windows users are having problems installing updates on their machines. The error code may result due to issues affecting Windows Update, for instance, problems with system files or settings that can be accessed or modified using the registry in Windows. Error code 0x80070057affects multiple versions of the Windows operating system including Windows 10. Common symptoms manifested when this error code and other update error codes occur include the following:
Inability to complete the installation of updates via Windows Update
Presence of error code message box
Error Causes
Update error codes like error code 0x80070057 occur when there are issues related to system files, programs or malicious software is present on one’s machine. To combat these issues, users may need to implement manual repair procedures, depending on the specific error code present on their device.
Solution
Further Information and Manual Repair
Windows users can fix error code 0x80070057 by manually repairing or deleting subkeys and values within the Windows registry. This enables Windows Update to function as the proper modification of settings and other information present in the registry can fix problems associated with certain error codes.
The manual repair procedures also enable users to address specific problems on the devices that may not be fixed through the use of other methods.
Method One: Back-Up Registry in Windows
The Windows registry contains information regarding applications installed on the version of Windows you use on your device. This information as well as settings related to hardware are all accessible to users and can be useful when combating problems like error code 0x80070057.
However, users will need to be very careful when making modifications within the registry in Windows. This is due to the fact that errors made while accessing the registry can lead to serious issues on your PC. Backing up your registry before you modify it is crucial since it will provide protection against any problems that may arise if you make an error. This is the first step in resolving error code 0x80070057. Follow the steps below to back up your registry properly.
Step one: Type regedit.exe in the search box near the Start button.
Step two: Type the appropriate password or provide confirmation if you are prompted to do so
Step three: Locate Registry Editor
Step four: Select registry key or subkey that you want to back up
Step five: Click File > Export
Step six: In the Export Registry File dialog box, choose a location where you will save the backup copy
Step seven: Name the backup file then select Save.
In the case of fixing error code 0x80070057, the registry file or subkey you will need to back up relates to this: HKEY_LOCAL_MACHINE. This contains configuration details or information related to your machine regardless of the user. Also note that the registry, once you have created a backup file, will be protected, thus enabling you to move to the manual method mentioned below.
Method Two: Make Changes to the Windows Registry
The execution of modifications to the registry can be a complex procedure, especially if you are an average Windows 10 user who lacks technical knowledge. Thankfully, even non-technical users can access the solutions they need by simply following the instructions provided in this article.
You may also contact a Windows repair technician as well, in case you have trouble implementing the steps mentioned for modifying your Windows registry or if other problems arise while you are proceeding with these instructions.
Step one: Access the Windows Registry Editor by typing regedit.exe in the search box near the Start button.
Step two: Type the appropriate password or provide confirmation if you are prompted to do so
After making these modifications in the Windows registry, restart your machine. You can then check Windows Update to see if the problem has been resolved. If the modifications to the registry have proven successful, you will no longer see the error code 0x80070057 message box. You will also be able to complete all updates via Windows Update.
Method Three: Download an Automated Tool
If you wish to always have at your disposal a utility tool to fix these Windows 8 and other related issues when they do arise, download and install a powerful automated tool.
If you are using a couple of graphics-intensive applications like video rendering software or some games, then something in the background of the system could get messed up and you might encounter the “LoadLibrary failed with error 1114, A dynamic link library (DLL) initialization routine failed” error message. This kind of error can usually get fixed by twerking some graphic settings, fixing and updating the drivers, and allowing your PC to work by leveraging the maximum use of the resources it’s got. Thus, in this post, you will be guided on some measures you can apply to resolve this kind of error message as soon as possible.
Before you go over the options given below, if you have made any changes to any software component in your computer or installed new software recently, then you might want to undo them and then check if it fixes the “LoadLibrary failed with error 1114 “ error. Once you have that covered but you’re still getting the error, use the options given below as a reference to fix the error.
Option 1 – Try to modify the Dynamic Graphics Settings
You might want to modify the Dynamic Graphics Settings in order to fix the error. To do so, follow the steps below.
Open Control Panel and then Power Options.
From there, click on the Change plan settings option for your chosen power plan.
After that, click on Change advanced power settings.
Then look for the Switchable Dynamic Graphics option and then click on it to expand it.
Afterward, expand the Global Settings option and then select Maximize Performance for both the “On battery” and “Plugged in” options.
Now click on the Apply button and then OK to save the changes made.
Note: If the Switchable Dynamic Graphics option is not available on your computer, you can try the next given option below.
Option 2 – Try switching the Graphics card to High-Performance mode
Note that this second option varies from computer to computer since most computers use the Graphics card made by NVIDIA, while some by AMD and others use Intel HD Graphics. Thus, depending on which graphics card your computer uses, pick one of the three fixes below.
NVIDIA Graphics Drivers:
If your computer uses a graphics card made by NVIDIA and has the drivers are properly installed and updated, then follow the steps below.
Right-click on any empty space on your desktop and then click on the NVIDIA Control Panel.
After that, expand the 3D Settings on the left-hand side tree-structured list and then click on Manage 3D Settings.
Next, select your preferred GPU on the right-side panel and then set it to the High-Performance NVIDIA Card from the drop-down menu.
As an alternative, you can also go to the Program Settings tab,
From there, select the program that you are trying to run from the drop-down menu and click on Add.
Now set the graphics processor to a High-performing processor and then restart your computer to apply the changes made.
AMD Graphics card:
If your computer uses a graphics card made by AMD and has the drivers are properly installed and updated, then follow the steps below.
Right-click on any empty space on your desktop.
Click on AMD Control or Configure Switchable Graphics.
Next, click on Browse and select the program where you encounter the error.
Finally, click on High Performance for the selected program and then restart your computer to successfully apply the changes made.
Intel HD graphics:
If your computer uses the Intel HD graphics and then its drivers are properly installed and updated, then follow these steps:
Right-click on any empty space on your desktop and then click on the Intel Graphics Settings.
Next, click on the Power menu.
After that, select a Graphics Power Plan for both the “On battery” and “Plugged in” options to High-Performance Power Plan.
Then click on the Apply button and restart your computer.
Having an eMail in today's modern world is no longer a privilege or being geeky, it has surely become a necessity. From Facebook to LinkedIn or Steam many services today require you to have an account in order to use them, and in order to create an account, you need working eMail.
That being said many people today have several eMail accounts, one for social media, one for work, maybe even one for very close friends and family. How creating eMail today is completely free we might end up with several eMail accounts.
eMail clients have also evolved much since their first days and became more than just applications for receiving eMails, today they can take various different tasks having additional features built into them like calendar, batch eMail processing, etc.
Taking all of said into account I am presenting to you within my personal opinion some of the best eMail clients starting with free ones.
Best free eMail clients
Google Gmail
https://gmail.comIt would be very difficult to even start a free eMail list without mentioning Google's Gmail. Introduced all the way back in 2004 as an invite-only service it became over time the most popular email platform largely due to the fact Google is offering free eMail accounts.
There are a lot of good things to be said about Gmail itself, most of the area is clutter-free and the largest space is reserved for eMail itself letting users focus on what is important. WEB client itself means that you do not need to have any application installed on your device, altho via Google chrome, you can use Gmail offline offering you flexibility if needed.
The ability to connect and manage other accounts like Outlook, Yahoo, etc is just making Gmail even more attractive, and the snooze feature is a really neat little detail that will pause eMail notifications if you need to focus on other things.
Lack of organizing messages into folders is a little confusing since Gmail offers its own unique label system but sometimes I need to have old reliable save eMail to folder.
All in all, Gmail is a great service and it offers a great eMail on the go experience.
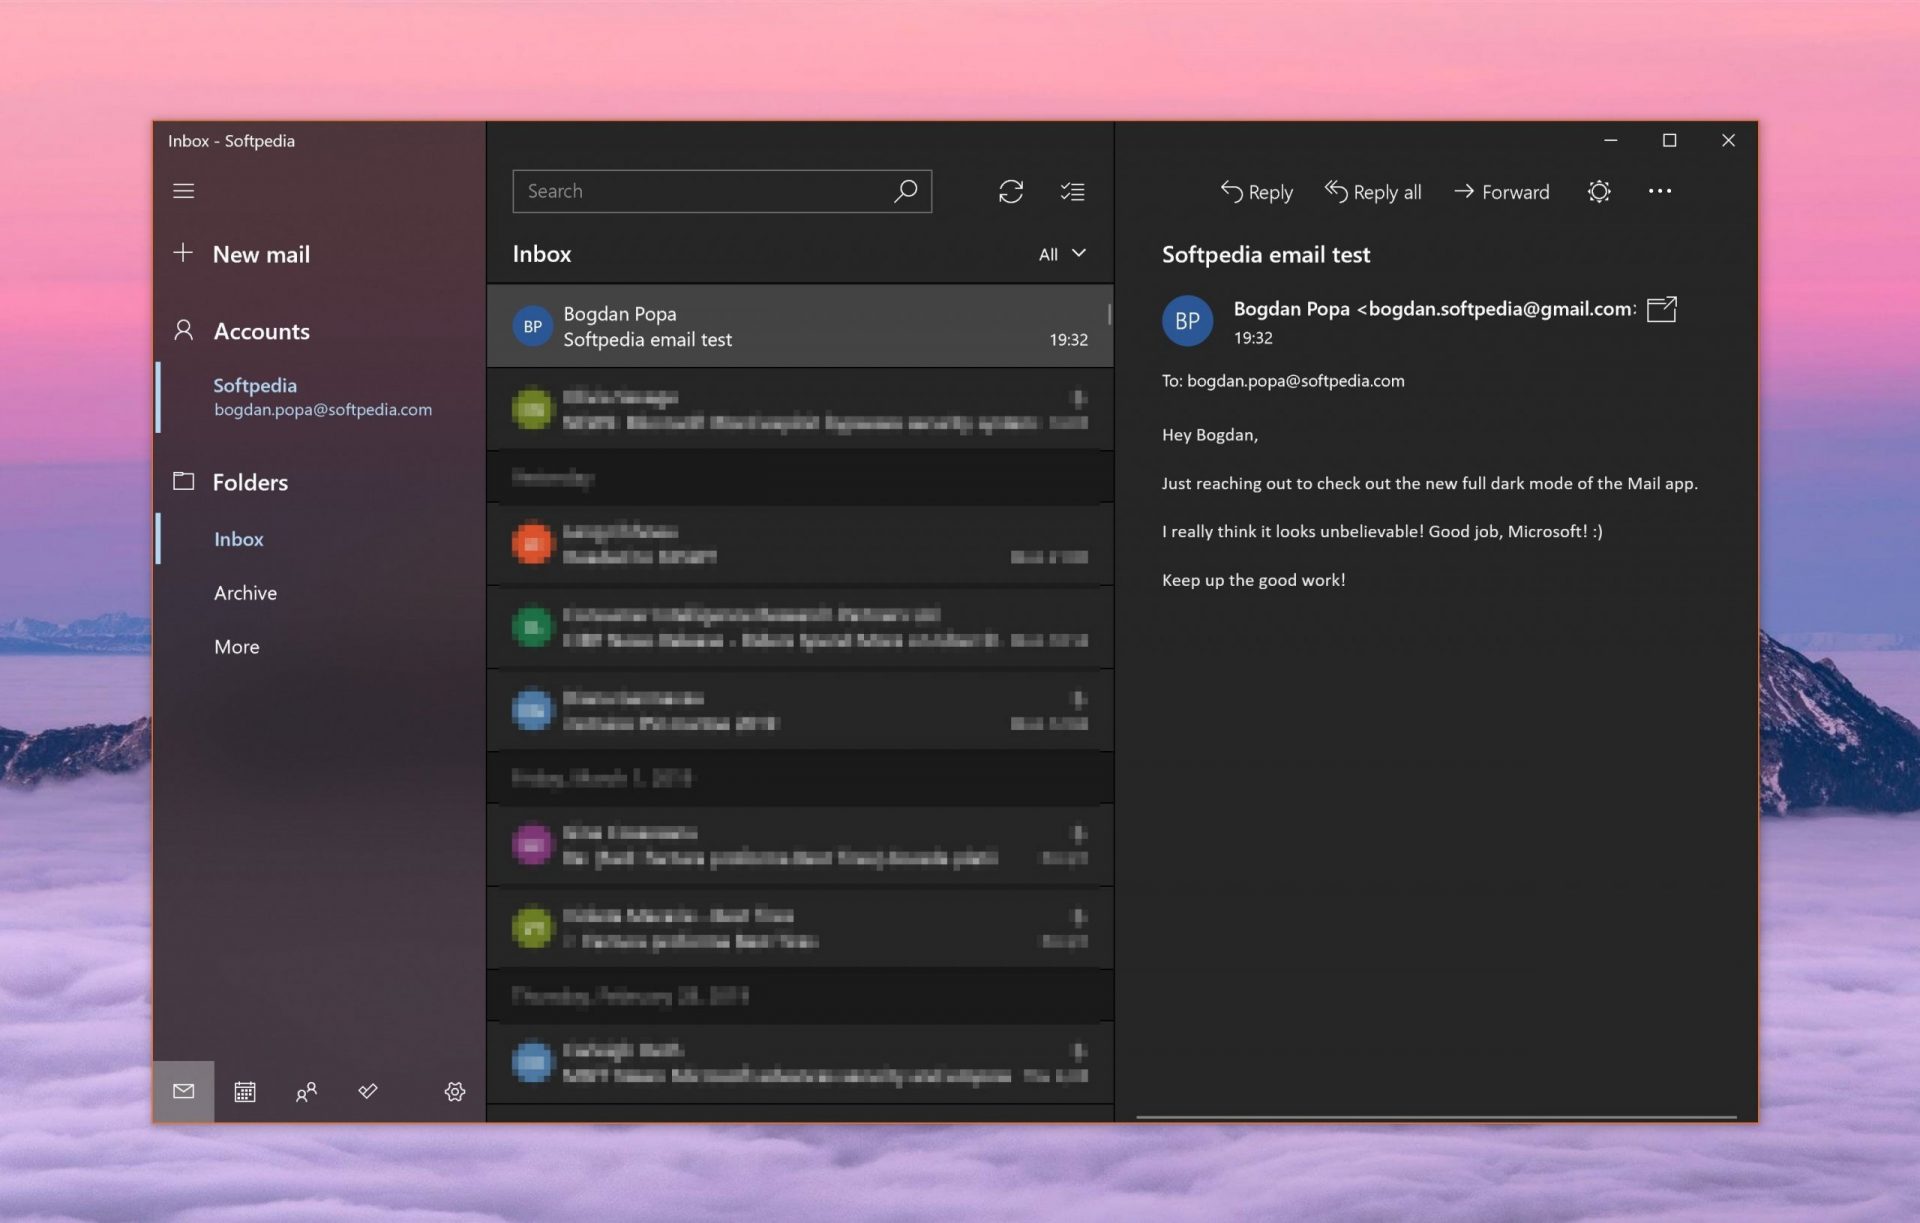
Mail eMail client
https://www.microsoft.com/en-us/p/mail-and-calendar/Free Windows eMail client simply called Mail is what was once outlook express. Mail itself has the ability to work with other popular accounts like Google Gmail account, Yahoo, iCloud etc. How it comes with Windows OS and it integrates very well with Microsoft Calendar, this eMail client is for many the first choice.
On the negative side, I might say this is a strip-down version of Outlook which is paid solution so some features are missing if we would compare the two.
Overall, a simple and nice eMail client worth your time, especially if you are on the Windows platform.
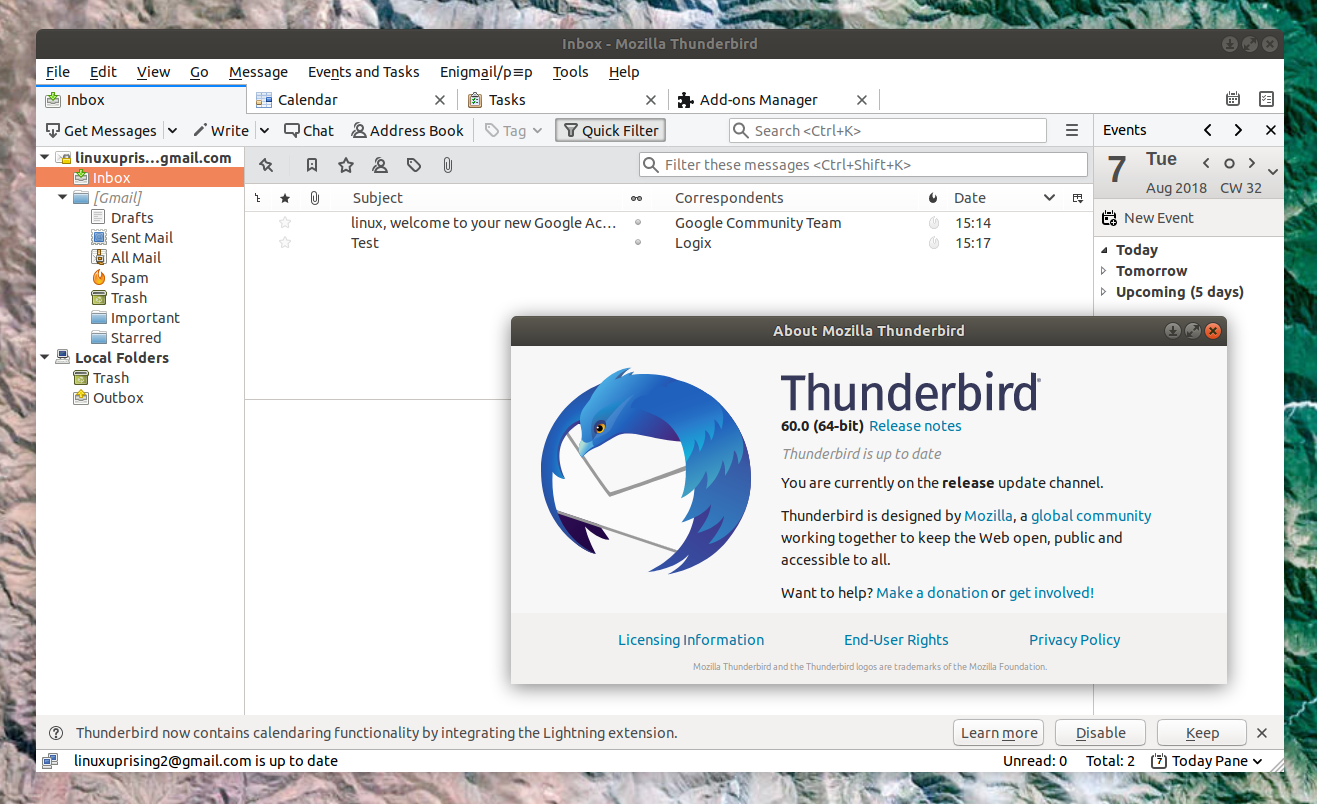
Mozilla Thunderbird
https://www.thunderbird.netGreat eMail client matching in functions against paid and premium solutions of big tech companies. Fueled with plenty of customization options and reskinning ones this eMail client offers a lot for its free price tag.
It is also fueled by Mozilla community focusing on privacy and security. It can work with any mail service and it is lightweight with a clean look, altho the look itself can be heavily customized.
The bad side is that client itself relies on email services to provide cloud-based emails, so if you are receiving your email via a service that does not have a cloud-based service in itself all of your received emails will be locked to the computer where you have received them. Also customizing it can be sometimes a little too technical for the average computer user.
All in all, Thunderbird is one great eMail client and it would be a shame not to use it because of its technical side, if you need a reliable and secure eMail client on a single machine, look no further than Thunderbird.
Paid eMail clients
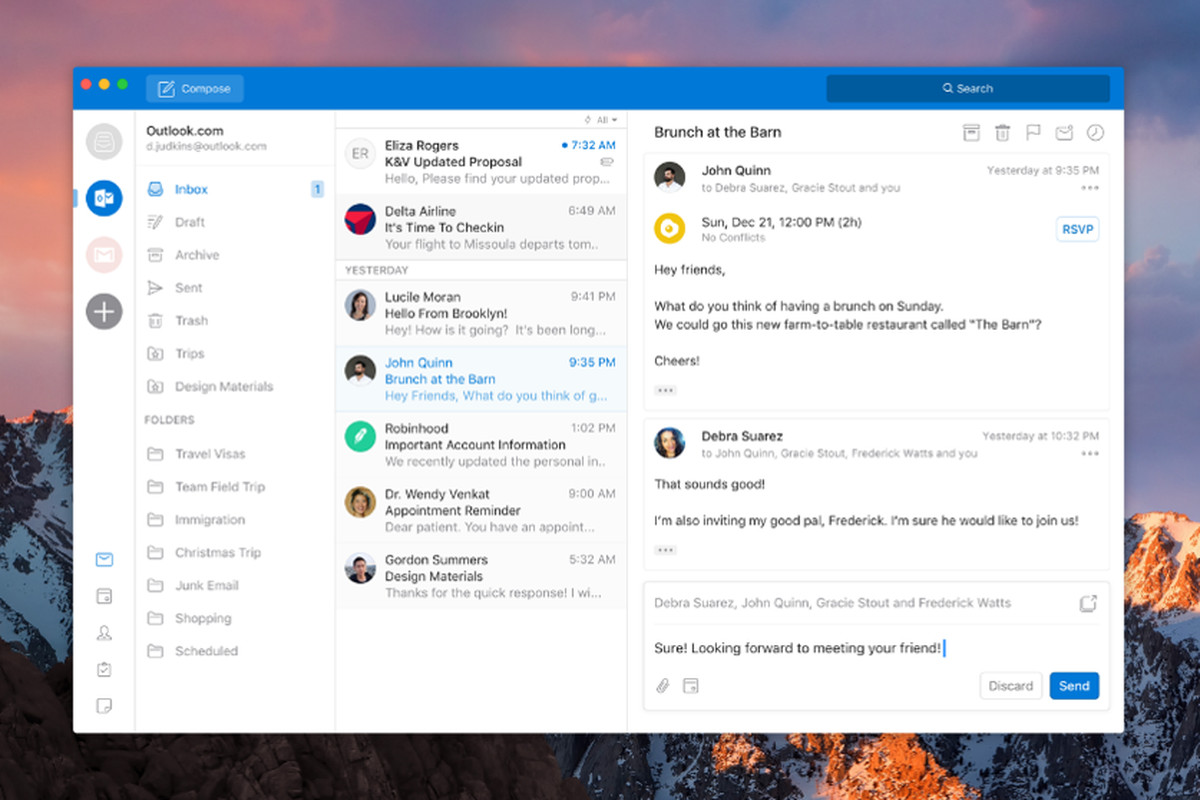
Microsoft Outlook
https://www.microsoft.com/en-us/microsoft-365/Outlook comes as a part of the Microsoft Office suite and as one of the oldest eMail clients, it is still widely popular and adopted through many users and businesses. It has tight integration with all Microsoft services and full integration with Calendar making it one of the if not the best eMail client out there.
Outlook also has a free online service completely free for personal use as well.
The downside is that you can not get it as a separate product if you want a business version other than as a part of the Office suite.
The final verdict would be that this is perhaps the best eMail client out but the big downside is that there is no desktop version outside the Office suite.
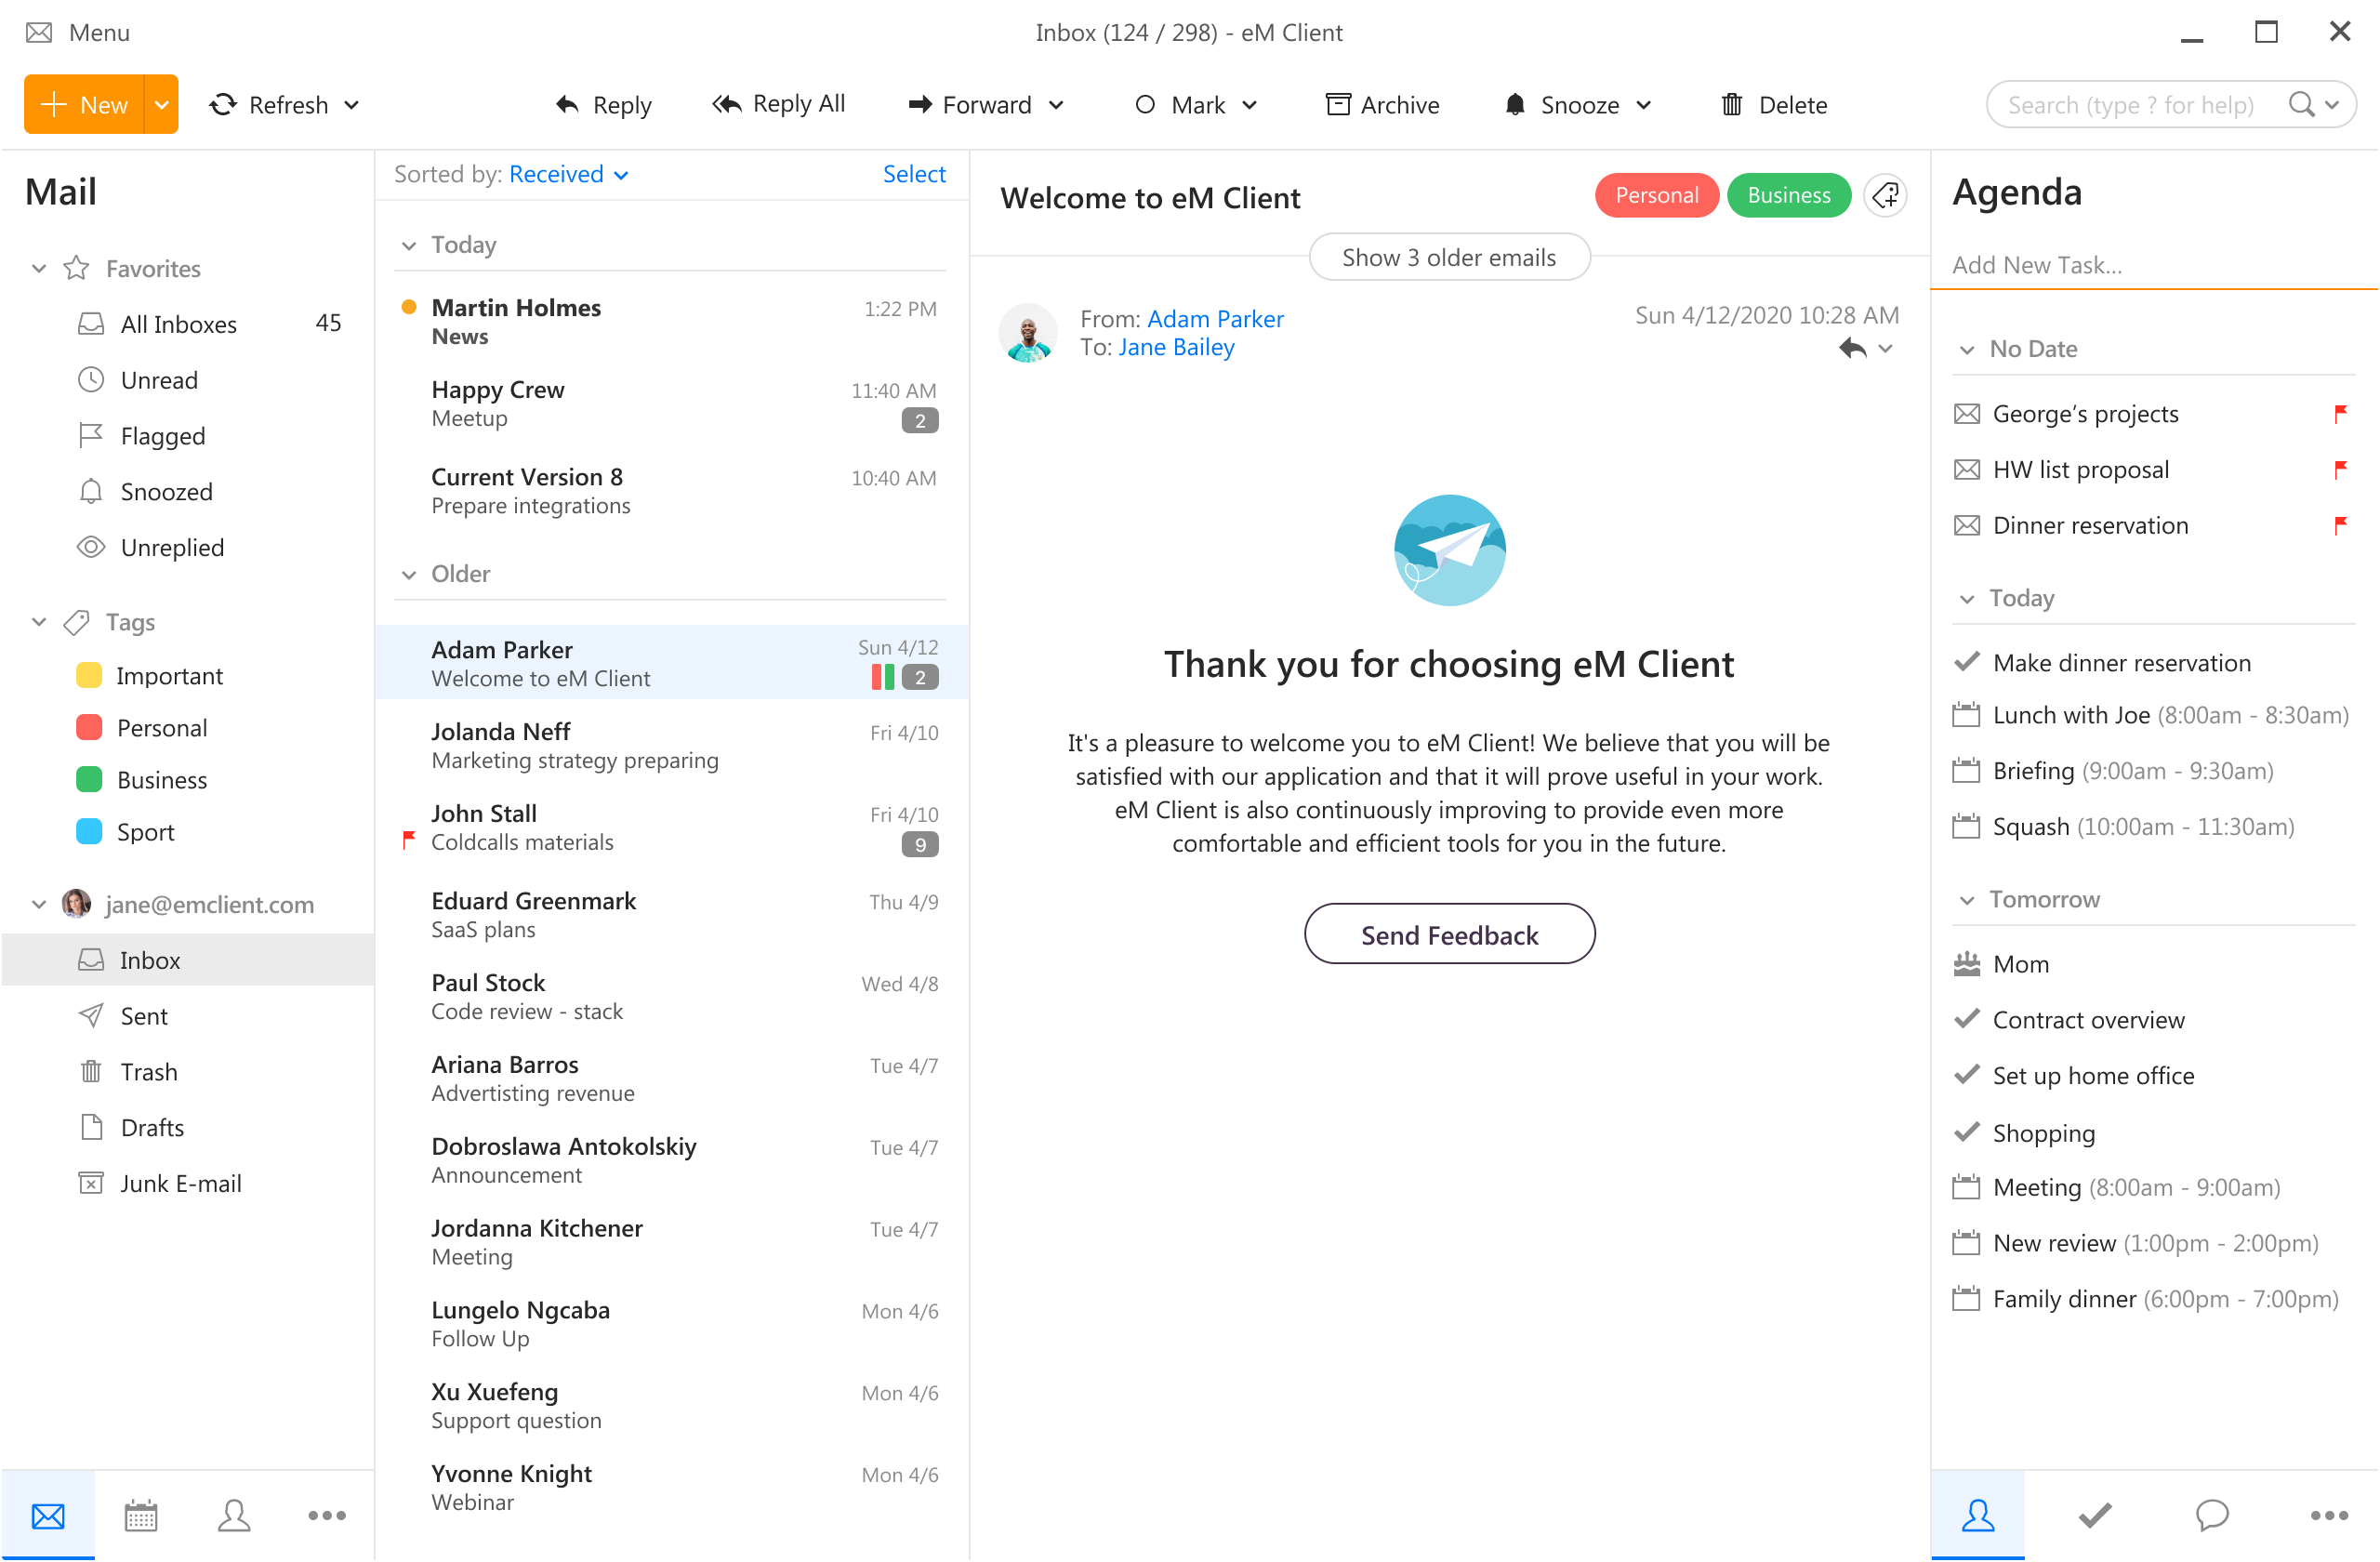
eM Client
https://www.emclient.com/eM Client offers a wide array of features, including a calendar, contacts, and chat. Support is provided for all the major email services including Gmail, Yahoo, iCloud, and Outlook.com. The latest version also offers PGP encryption, live backup, basic image editing capabilities, and auto-replies for Gmail.
Its automatic system makes it very easy to get emails from other services since there is no manual setting, all that is needed is to type in your email and eM Client will do everything else automatically.
A one-time purchase is not pricy and it could offer some features that some free clients are missing. Go check it out with a free trial and see if it is for you.
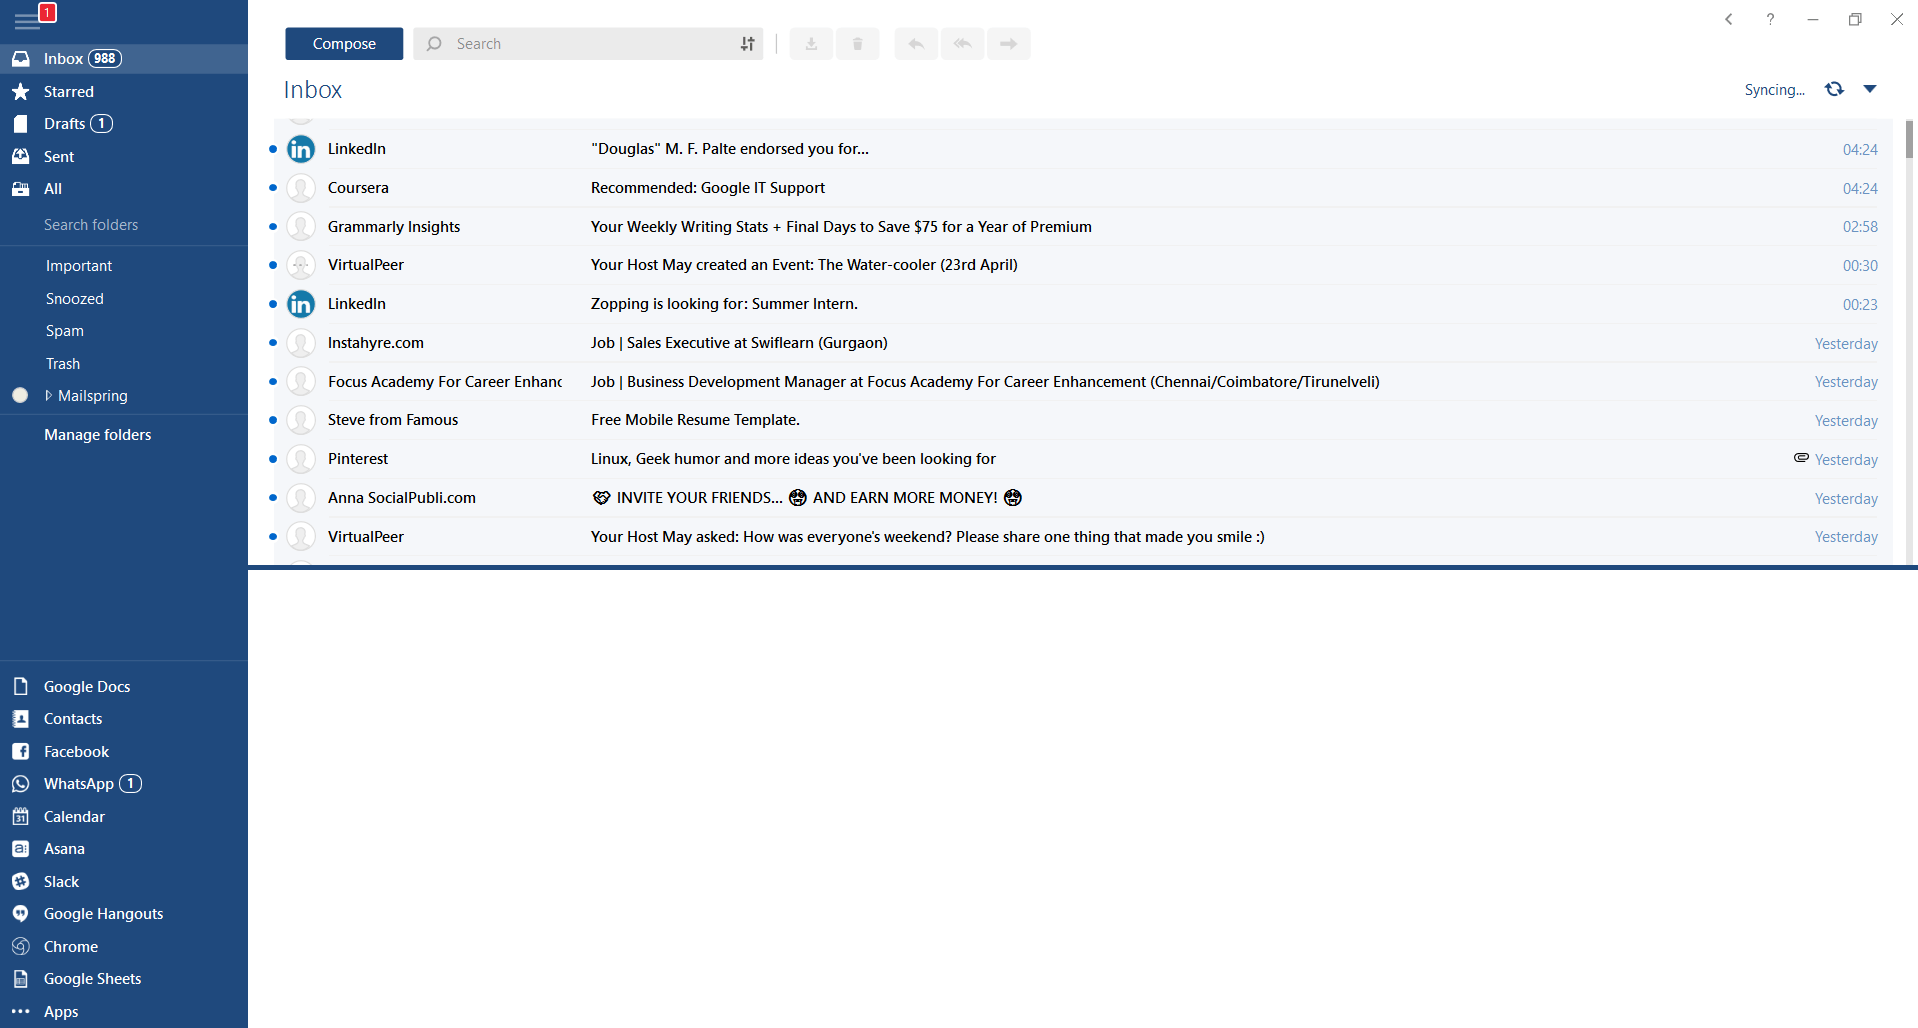
Mailbird
https://www.getmailbird.comThis eMail client's main focus is the simplicity of use with visual appeal while tackling multiple eMail accounts. It has many built-in apps along with a customizable interface. Unlike some more Microsoft-centric email clients, Mailbird Business supports a diverse range of integrated apps, including WhatsApp, Google Docs, Google Calendar, Facebook, Twitter, Dropbox, and Slack, all making for a better-streamlined workflow.
The downside of this client is the yearly subscription plan. I think people, in general, want to get away from software subscription plans so I will include this as a downside but bear in mind it is downside just in terms of a business plan not in the client itself.
Inky
https://www.inky.com/Inky is eMail client if you are looking for security. It uses AI along with machine learning in order to block all types of phishing attacks that can get through to other clients. The proprietary machine learning technology can literally read an email to determine if it has phishing content, and then is able to quarantine the email or deliver it with the malicious links disabled. It also takes things a step further and offers an analytics dashboard, which allows an administrator to see patterns of attacks based on dates, or targeted users.
The downside is that client itself is so much focused on security that sometimes some nonsecurity features get overlooked and provide a poor experience but if you need a good and greatly secured eMail client Inky is one to check out.
From the various report, it is now clear that no one is prone to Ransomware attacks. Cyber-criminals never target any specific field of the user workgroup for this Ransomware attack. But in past few years, it has hugely affected home users, businesses, organizations.
We can say, Ransomware victims come in all shapes & sizes. Many business owners think that they will never be attacked by Ransomware crooks because their business is not so big. But that’s not true.
A huge proportion of Ransomware attacks happened in small sector businesses because of their weak security resistances.
Some leading negative consequences of Ransomware attacks faced by almost every victim are:
Permanent or temporary loss of proprietary or sensitive information.
Lots of trouble in performing regular operations.
Huge financial losses sustain for restoring up your files and systems.
Latent harm to the reputation of an organization.
Even making the Ransom payment doesn’t guarantee the safe releasing of your encrypted files.
Attackers get the victim’s money along with their banking details.
Getting the decrypting files doesn’t mean malware infection has completely been removed.
Ransomware put a tremendous impact on disturbing business operations and in the end, leads to data loss situations.
Here are some huge impacts of Ransomware attacks on business are:
Damage or loss of all the crucial information
In the Ransomware post-attack period Business disrupts a lot.
Destruction of hostage data, file, and system.
Business downtime
Victimized company’s reputation dropdown
Productivity loss
Apart from the ransom, the cost of downtime because of restricted system access will bring major concerns.
It’s a fact that due to downtime victims may has to pay a cost of ten thousand dollars daily.
As, Ransomware is becoming more and more widespread, so all companies require to brush up on their annual cyber-security goals. Moreover, approach for some appropriate implementations of Ransomware recovery plans and commit sufficient funds in their IT budgets for cyber-security resources.
Among the most effective impact of Ransomware, “data encryption” is very hard to deal with.
Meanwhile, this victim is completely restricted to access any of their encrypted data.
The only way for unlocking these encrypted files is through the decryption key which only belongs to hackers.
Many times, the decryption key is given to the organization, after the payment of the ransom. But there are also some cases when data is not handover to the victim, even after the ransom payment.
The main risk that generates with “operational impact of Ransomware” is on the businesses. Can you just imagine, what will happen if all of a sudden entire services or processes of your business halt down?
Well, this dreadful Ransomware threat is so impactful that it can:
Close down the entire plant
Freeze manufacturing control system
Make other backlogs
All the damages that occur due to downtime can be a major one and can have so many consequences.
A well-organized strategy of backup and recovery will not certainly make the Ransomware attack painless.
As this takes an extensive amount of money and time for data restoration.
Apart from that, the decision of recovering your system using the backup moreover depends on three things:
First the amount of data loss that is considered acceptable by your business or organization.
Up to how extent, the impact of Ransomware has spread
How fast the Ransomware attack was spotted.
However, in many cases, data gets so encrypted that you can’t revert back to the restore point. At that time external backup is considered the best option.
Among the wide-reaching impact of Ransomware “Data loss” is the most effective one. As it starts from little disruption and leads to permanent business failure.
Sometimes data loss in a Ransomware attack leads to disclosure of all your confidential information which ends up in fines and lawsuits.
Attackers always look for backup files and folders after encrypting your system data. So that user can’t retrieve their corrupted file from the backup. Such dreadful activities make this Ransomware threat so profitable and effective.
Victims don’t have any choice left either they have to pay the ransom or they have to face their risk of data loss.
The docking station was promised upon release of the Deck but it was pushed back and now the official statement is that it is delayed again.
Valve said in an announcement on June 1:
“Due to parts shortages and COVID closures at our manufacturing facilities, the official Steam Deck Docking Station is delayed. We’re working on improving the situation and will share more info when we have it.”
Valve
The docking station was presented at the same time as Deck itself and the whole idea was to make Steam Deck work like a laptop docking station. It has ports for USB devices, displays, and network connections that became functional the moment Deck is placed on it. Docking supports a mouse, keyboard, and external display making it an almost full PC station if needed.
Valve confirmed that its official dock station will not improve performance so while you wait for its release you can use another docking station with a USB Type-C connector.
The error code 0x800CCC0E is an Outlook error that appears while using either Microsoft Outlook or Outlook Express. The error message hampers your ability to send and receive emails.
Solution
Error Causes
0x800CCC0E Outlook error code is triggered by multiple reasons including:
Improper connection with SMTP (Simple Mail Transfer Protocol) server
Damaged files
Registry corruption
In most cases, it’s the registry that gets corrupted which leads to the occurrence of 0x800CCC0E error code display. This typically happens when you try to update your Outlook/Outlook Express version.
When updating, you need to remove all the software files of the previous Outlook version which includes the registry too. If the files are not removed from the registry, the new version update will often fail. The junk files of the old version are likely to damage and corrupt the registry.
Further Information and Manual Repair
It is advisable to repair the error code 0x800CC0E right away to avoid inconvenience and system failure and fatal crashes which can lead to valuable data loss.
Cause: Improper connection with SMTP (Simple Mail Transfer Protocol) server
Solution: If the cause of the 0x800CCC0E is SMTP server connection failure, then the best way to resolve the error is to reconfigure your email account settings. Make sure that port 25 is being used in the SMTP area. Port 25 is the standard outgoing mail port.
If the SMTP setting is on port 25 then another reason for the error 0x800CCC0E can be your anti-virus or firewall software enabled on your PC. Turn it off for a moment and then try sending emails from your Outlook.
Cause: Damaged Files and Registry Corruption
Solution: If the error code is triggered due to registry corruption and file damage, then the best way to resolve it is to download Restoro.
Restoro is a safe, efficient, and highly functional inbox cleaner and a system optimizer embedded with numerous powerful utilities designed to repair multiple PC-related errors including the error code 0x800CCC0E when triggered by registry corruption.
This cutting inbox cleaner scans your PC entirely and detects all the unnecessary and malicious files saved in your system’s registry like junk files, internet history, invalid entries, and files of the uninstalled programs. These files take up most of the registry disk space thus causing the registry files to get damaged and corrupt and triggering error codes like 0x800CCC0E.
With the help of Restoro, you can easily wipe out all such files from your system in just one click. After scanning for errors all you need to do is click the repair tab to make your registry disk clutter-free.
Once the clutter is removed, update the new version of the Outlook/ Outlook Express again on your system and then try sending emails. You’ll see two noticeable differences after repairing your PC with Restoro.
One is that you will be able to install the new version and send emails smoothly from your Outlook account without any 0x800CCC0E error pop-ups. And the second difference you’ll see is the change in your PC performance. This tool optimizing your PC speed and reduces boot time.
This tool is very simple and easy to use. It has a neat design layout and a user-friendly interface which makes it easy for all levels of users to use Restoro smoothly with zero complexity. In just a few clicks the error message 0x800CCC0E is resolved. What makes this tool a favorite among users is that it does not require any skills or technical know-how.
To get started here’s what you need to do:
Click here to download Restoro software on your PC
Once the download is complete, run it to scan for 0x800CC0E error
After the scanning is successfully complete, click on the Repair button to fix the error right away.
Then install the new version of Outlook/ Outlook Express again on your system
Both the Windows 10 and Windows Server operating systems have a number of common system files that vary from the ones that support the installation, boot process, and other operations or tasks in the system. However, if any of these files get corrupted, it might cause some errors during the setup of the Windows 10 operating system. One of these errors is the “Windows cannot find the Microsoft Software License Terms” error.
“Windows cannot find the Microsoft Software License Terms. Make sure the installation sources are valid and restart the installation.”
The only option given when you encounter this error is to click on the OK button and nothing else and then the setup gets interrupted and won’t push through. To fix this error and proceed with the installation, you can try to get a new installation image or switch ports, or fix the CFG file. For more details, follow each one of the potential fixes provided below.
Option 1 – Try to get a new installation image
It is possible that there might be some issues with the installation image. It could be corrupted or was modified illegally. Or it could be that the bootable storage device created might have damaged sectors or installation. To resolve this problem, you need to download a fresh copy of the Windows 10 installation image using the Windows Media Creation tool or simply use the ISO image separately and then build a bootable USB.
Option 2 – Try to switch Ports
The error might be caused by the connection to the USB port. It could be that the port is unstable due to a number of factors that resulted in the interruption of the installation process. To fix this problem, you can try switching the USB port or if you are using an optical drive, you can get an external USB optical drive or connect it to another port internally and see if it fixes the problem.
Option 3 – Try to fix the CFG file
If none of the first two options worked, then you might want to fix the CFG file. This file is a configuration file format used for storing settings. All you have to do is download the CFG file. Once you’ve downloaded this file, copy this file to the root of your bootable drive and then check if it fixes the error. If not, then try to copy the same file inside the “/sources/” folder inside the root of the drive. This should fix the error.
Finally upgraded to Microsoft’s newest OS, but the performance is a bit sluggish? Here are a few useful tips you may not have thought about that could significantly transform your experience!
How to speed up Windows 11?
1. Disable startup programs
There are many programs that launch right on startup that really aren’t essential. This, in turn, causes your PC to launch and run more slowly.
To check which programs are enabled on startup, go into the Task Manager and select the Startup tab. Find every program that doesn’t need to launch immediately, right-click on it and press ‘Disable’.
This will not shut down the program in that instant. It’ll just prevent it from running automatically as you turn on your PC. You can always launch it manually when you need it.
2. Expand your memory and storage
If you want your PC to run super smoothly, you need to have enough memory to support that. This is especially significant for those of you who love to multitask. Upgrading your RAM gives your PC more space to store the temporary data it needs to complete processing tasks. In other words, processing takes a lot less time.
Your long-term storage is equally important. Hopefully at this point you’re already using SSD over HDD, since this type of storage offers a faster boot time.
Credit: Marc Pezin on Unsplash
In any case, we recommend expanding your storage capacity. The more files and data you store, the more there is to load, significantly influencing your PC’s speed. Larger storage capacity means new data and essential updates can be stored comfortably, preventing any strain on your PC’s performance.
3. Clean up disk space
If you aren’t willing to upgrade your storage just yet, the least you can do is clean up your storage right now.
Aside from manually deleting stuff you no longer need, you can also get rid of temporary files that clutter up your storage and eat up performance for no reason. To get to them, click Windows + X and select ‘Run’ (or just type it in the search bar).
A small window will pop up, where you need to type %temp%. This will take you to a whole folder full of all the temporary files you can remove without thinking twice.
For those who upgraded from Windows 10, there’s a neat trick to get rid of potential leftover files you don’t need on your brand new iteration. Only do this if you’re 100% sticking with Windows 11, though. Go to System > Storage > Temporary files. Make sure to only leave ‘Previous Windows Installation’ and ‘Windows Update Clean-up’ checked and click on ‘Remove files’.
Lastly, make use of Windows 11’s fantastic Storage Sense feature. Turning it on will enable your PC to constantly watch out for junk or unused files to optimize your PC’s performance to the maximum.
4. Install pending updates
This one should go without saying, but pending updates can be detrimental to your Windows 11 performance. The longer you leave them untouched, the more bugs the outdated programs and patches can cause. So, make sure to regularly check for updates and install them as soon as they’re available.
5. Disable visual effects
As cool as visual effects, animations, shadows and transparency are, they can also put quite a toll on your computer’s speed. On a newer setup this generally shouldn’t be a problem, but if you do notice a drop in performance, definitely consider turning off some of these settings.
To do this you can go to the Control Panel, System Properties and click the ‘Advanced’ tab. In the Performance section, choose Settings. If you’d like a quicker way to get to the dialog (Performance Options) with Visual Effects, you can also type sysdm.cpl in the search bar.
Once there, you can either have your PC choose what’s best, choose the best appearance or the best performance. The other option is to manually toggle the effects off and on. The biggest obstacles to speed are taskbar animations, window shadows, control/element animations and animations upon minimizing/maximizing.
Credit: Windows on Unsplash
In the same vein, you should go to Settings > Personalization > Colors and disable Transparency, to prevent your computer from doing overtime just to hit the aesthetic appeal.
6. Get rid of bloatware
Bloatware is one of the biggest culprits of slow computer speed.
Pre-installed software that’s pretty much useless but takes up valuable system resources has been around since day one. No matter which device or platform you’re talking about. Luckily, a lot of it is removable, making it easy to lighten the load on your device.
To boost your Windows 11 computer, go to Settings > Apps > Installed apps.You’ll probably see a bunch of apps you don’t want or need. Click on the three dots next to each one you want to remove and press ‘Uninstall’.
Aside from helping optimize performance, removing bloatware has another great benefit. Unfortunately, often this pre-installed software is quite vulnerable, exposing you to great risk of cyberattacks. So, removing it definitely improves your device’s security and gives you at least some peace of mind.
Summary
These are a few of our fastest tips for boosting performance. There are other, more complex and time-consuming ways, of course. If you’ve tried these quick ones and still need advice on how to improve your PC’s speed, feel free to reach out!
As you know, networks that are domain-based are common in organizations and companies. These domain-based networks require multiple computers to be controlled through a single node known as a server. And the one that sets certain policies and restrictions on every system that is joined to the domain is the server administrator.
So if you want to add your computer to a domain, you need to have the following information available:
The domain name
A user account name that’s registered in the active directory associated with the server
Windows Enterprise, Pro, or education version
In this post, you will be guided on how you can join or remove a domain. To get started, follow the given instructions below.
Option 1 – Joining a domain
First, you need to connect your computer to the network associated with the server since your computer and the server have to be on the same network.
Next, click the Start button and then click on the gear-like icon for Settings to open it.
After that, navigate to this path: Accounts > Access work or school.
Then click on Connect. This will open a new dialog box and from there, select the “Join this device to a local Active Directory domain” option.
Afterward, you will be asked to enter the username and password of your domain account.
Now select your Account type and when you proceed, you have to restart your computer. Your domain account should now be created.
Option 2 – Removing a domain
You need to open the Windows 10 Settings app.
And from there, go to this path: Accounts > Access work and school.
Next, select the account you want to remove from the domain and then click on Disconnect.
A prompt will then appear that says, “Are you sure you want to remove this account? This will remove your access to resources like email, apps, network, and all content associated with it. Your organization might also remove some data stored on this device”. Just click on Yes.
This will give you a Disconnect from the organization prompt.
Now click on Disconnect and select Restart now to restart your computer. This will complete the removal process of the domain.

 Error Causes
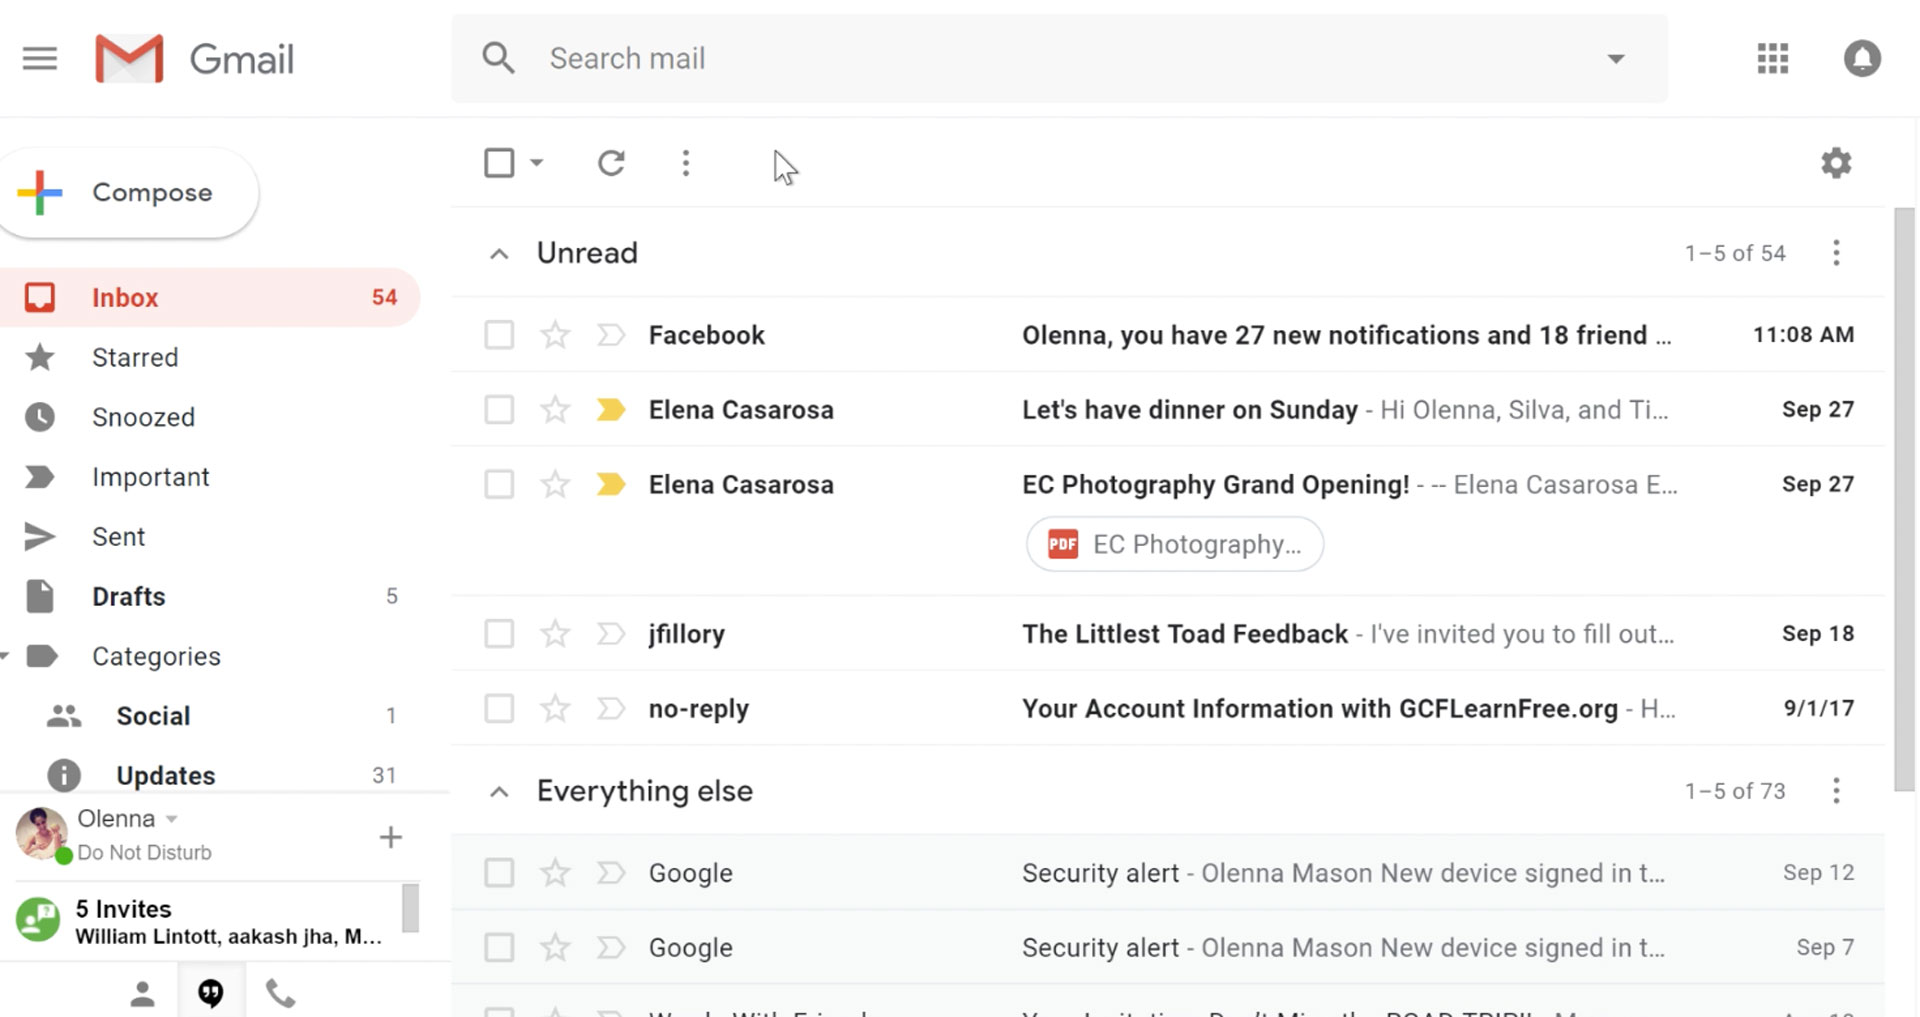 It would be very difficult to even start a free eMail list without mentioning Google's Gmail. Introduced all the way back in 2004 as an invite-only service it became over time the most popular email platform largely due to the fact Google is offering free eMail accounts.
There are a lot of good things to be said about Gmail itself, most of the area is clutter-free and the largest space is reserved for eMail itself letting users focus on what is important. WEB client itself means that you do not need to have any application installed on your device, altho via Google chrome, you can use Gmail offline offering you flexibility if needed.
The ability to connect and manage other accounts like Outlook, Yahoo, etc is just making Gmail even more attractive, and the snooze feature is a really neat little detail that will pause eMail notifications if you need to focus on other things.
Lack of organizing messages into folders is a little confusing since Gmail offers its own unique label system but sometimes I need to have old reliable save eMail to folder.
All in all, Gmail is a great service and it offers a great eMail on the go experience.
It would be very difficult to even start a free eMail list without mentioning Google's Gmail. Introduced all the way back in 2004 as an invite-only service it became over time the most popular email platform largely due to the fact Google is offering free eMail accounts.
There are a lot of good things to be said about Gmail itself, most of the area is clutter-free and the largest space is reserved for eMail itself letting users focus on what is important. WEB client itself means that you do not need to have any application installed on your device, altho via Google chrome, you can use Gmail offline offering you flexibility if needed.
The ability to connect and manage other accounts like Outlook, Yahoo, etc is just making Gmail even more attractive, and the snooze feature is a really neat little detail that will pause eMail notifications if you need to focus on other things.
Lack of organizing messages into folders is a little confusing since Gmail offers its own unique label system but sometimes I need to have old reliable save eMail to folder.
All in all, Gmail is a great service and it offers a great eMail on the go experience.
 Free Windows eMail client simply called Mail is what was once outlook express. Mail itself has the ability to work with other popular accounts like Google Gmail account, Yahoo, iCloud etc. How it comes with Windows OS and it integrates very well with Microsoft Calendar, this eMail client is for many the first choice.
On the negative side, I might say this is a strip-down version of Outlook which is paid solution so some features are missing if we would compare the two.
Overall, a simple and nice eMail client worth your time, especially if you are on the Windows platform.
Free Windows eMail client simply called Mail is what was once outlook express. Mail itself has the ability to work with other popular accounts like Google Gmail account, Yahoo, iCloud etc. How it comes with Windows OS and it integrates very well with Microsoft Calendar, this eMail client is for many the first choice.
On the negative side, I might say this is a strip-down version of Outlook which is paid solution so some features are missing if we would compare the two.
Overall, a simple and nice eMail client worth your time, especially if you are on the Windows platform.
 Great eMail client matching in functions against paid and premium solutions of big tech companies. Fueled with plenty of customization options and reskinning ones this eMail client offers a lot for its free price tag.
It is also fueled by Mozilla community focusing on privacy and security. It can work with any mail service and it is lightweight with a clean look, altho the look itself can be heavily customized.
The bad side is that client itself relies on email services to provide cloud-based emails, so if you are receiving your email via a service that does not have a cloud-based service in itself all of your received emails will be locked to the computer where you have received them. Also customizing it can be sometimes a little too technical for the average computer user.
All in all, Thunderbird is one great eMail client and it would be a shame not to use it because of its technical side, if you need a reliable and secure eMail client on a single machine, look no further than Thunderbird.
Great eMail client matching in functions against paid and premium solutions of big tech companies. Fueled with plenty of customization options and reskinning ones this eMail client offers a lot for its free price tag.
It is also fueled by Mozilla community focusing on privacy and security. It can work with any mail service and it is lightweight with a clean look, altho the look itself can be heavily customized.
The bad side is that client itself relies on email services to provide cloud-based emails, so if you are receiving your email via a service that does not have a cloud-based service in itself all of your received emails will be locked to the computer where you have received them. Also customizing it can be sometimes a little too technical for the average computer user.
All in all, Thunderbird is one great eMail client and it would be a shame not to use it because of its technical side, if you need a reliable and secure eMail client on a single machine, look no further than Thunderbird.
 Outlook comes as a part of the Microsoft Office suite and as one of the oldest eMail clients, it is still widely popular and adopted through many users and businesses. It has tight integration with all Microsoft services and full integration with Calendar making it one of the if not the best eMail client out there.
Outlook also has a free online service completely free for personal use as well.
The downside is that you can not get it as a separate product if you want a business version other than as a part of the Office suite.
The final verdict would be that this is perhaps the best eMail client out but the big downside is that there is no desktop version outside the Office suite.
Outlook comes as a part of the Microsoft Office suite and as one of the oldest eMail clients, it is still widely popular and adopted through many users and businesses. It has tight integration with all Microsoft services and full integration with Calendar making it one of the if not the best eMail client out there.
Outlook also has a free online service completely free for personal use as well.
The downside is that you can not get it as a separate product if you want a business version other than as a part of the Office suite.
The final verdict would be that this is perhaps the best eMail client out but the big downside is that there is no desktop version outside the Office suite.
 eM Client offers a wide array of features, including a calendar, contacts, and chat. Support is provided for all the major email services including Gmail, Yahoo, iCloud, and Outlook.com. The latest version also offers PGP encryption, live backup, basic image editing capabilities, and auto-replies for Gmail.
Its automatic system makes it very easy to get emails from other services since there is no manual setting, all that is needed is to type in your email and eM Client will do everything else automatically.
A one-time purchase is not pricy and it could offer some features that some free clients are missing. Go check it out with a free trial and see if it is for you.
eM Client offers a wide array of features, including a calendar, contacts, and chat. Support is provided for all the major email services including Gmail, Yahoo, iCloud, and Outlook.com. The latest version also offers PGP encryption, live backup, basic image editing capabilities, and auto-replies for Gmail.
Its automatic system makes it very easy to get emails from other services since there is no manual setting, all that is needed is to type in your email and eM Client will do everything else automatically.
A one-time purchase is not pricy and it could offer some features that some free clients are missing. Go check it out with a free trial and see if it is for you.
 This eMail client's main focus is the simplicity of use with visual appeal while tackling multiple eMail accounts. It has many built-in apps along with a customizable interface. Unlike some more Microsoft-centric email clients, Mailbird Business supports a diverse range of integrated apps, including WhatsApp, Google Docs, Google Calendar, Facebook, Twitter, Dropbox, and Slack, all making for a better-streamlined workflow.
The downside of this client is the yearly subscription plan. I think people, in general, want to get away from software subscription plans so I will include this as a downside but bear in mind it is downside just in terms of a business plan not in the client itself.
This eMail client's main focus is the simplicity of use with visual appeal while tackling multiple eMail accounts. It has many built-in apps along with a customizable interface. Unlike some more Microsoft-centric email clients, Mailbird Business supports a diverse range of integrated apps, including WhatsApp, Google Docs, Google Calendar, Facebook, Twitter, Dropbox, and Slack, all making for a better-streamlined workflow.
The downside of this client is the yearly subscription plan. I think people, in general, want to get away from software subscription plans so I will include this as a downside but bear in mind it is downside just in terms of a business plan not in the client itself.
 Inky is eMail client if you are looking for security. It uses AI along with machine learning in order to block all types of phishing attacks that can get through to other clients. The proprietary machine learning technology can literally read an email to determine if it has phishing content, and then is able to quarantine the email or deliver it with the malicious links disabled. It also takes things a step further and offers an analytics dashboard, which allows an administrator to see patterns of attacks based on dates, or targeted users.
The downside is that client itself is so much focused on security that sometimes some nonsecurity features get overlooked and provide a poor experience but if you need a good and greatly secured eMail client Inky is one to check out.
Inky is eMail client if you are looking for security. It uses AI along with machine learning in order to block all types of phishing attacks that can get through to other clients. The proprietary machine learning technology can literally read an email to determine if it has phishing content, and then is able to quarantine the email or deliver it with the malicious links disabled. It also takes things a step further and offers an analytics dashboard, which allows an administrator to see patterns of attacks based on dates, or targeted users.
The downside is that client itself is so much focused on security that sometimes some nonsecurity features get overlooked and provide a poor experience but if you need a good and greatly secured eMail client Inky is one to check out. 

