How to Fix Error Code HPQTRA08.exe

HPQTRA08.exe - What is it?

HPQTRA08.exe (Hewlett Packard Tray 08) is the Hewlett Packard Digital Imaging Monitor task. It is installed with the drivers of HP imaging products like PhotoSmart Printers.

It incessantly monitors and indicates the connectivity status with any recognizable HP product.

Simply put, HPQTRA08.exe is an exe (executable) file that contains step-by-step instructions that a computer follows to carry out a function.

HPQTRA08.exe error code is displayed in any of the following formats:

  • "Hpqtra08.exe Application Error."
  • "Cannot find hpqtra08.exe."
  • "Hpqtra08.exe not found."
  • "Error starting program: hpqtra08.exe."
  • "Hpqtra08.exe is not a valid Win32 application."
  • "Hpqtra08.exe failed."
  • "Faulting Application Path: hpqtra08.exe."
  • "Hpqtra08.exe has encountered a problem and needs to close. We are sorry for the inconvenience."
  • "Hpqtra08.exe is not running."

Solution

Restoro box imageError Causes

Error code HPQTRA08.exe can be triggered for several reasons. However, some of the most common causes include:

  • Corrupt Windows registry keys
  • Virus infection
  • Deleted, damaged, or corrupted HPQTRA08.exe file
  • HPQTRA08.exe file conflict
  • Corrupt or incomplete installation of Hp Digital Imaging

It is advisable to repair the error code HPQTRA08.exe on your PC immediately. Delays can lead to serious problems especially if the underlying cause of the error is related to registry corruption.

Further Information and Manual Repair

To resolve this error on your PC, you don’t need to hire a professional and pay hundreds of dollars for the repair. Simply try the DIY methods listed below to fix the problem right away.

Method 1 - Download and Install HPQTRA08.exe File

If the error cause is related to deleted, corrupted, or damaged HPQTRA08.exe file, then the best way to fix the problem is to install the HPQTRA08.exe file on your PC.

However, first, make sure the site you select to download the file from is reliable and trusted.

By downloading from an unreliable website you can expose your PC to potential malicious programs and risk your data security.

Method 2 - Remove all Viruses

Sometimes viruses and malware tend to disguise in the form of exe files such as the HPQTRA08.exe file.

In such a situation scan your entire PC for viruses and malware using a powerful antivirus. Remove all the malicious programs found to fix the issue.

Method 3 - Clean and Repair the Registry

The registry saves all PC-related activities and information including both important and obsolete files such as cookies, bad registry entries, invalid keys, internet history, and junk files.

If these files are not removed from the registry frequently, these accumulate in the registry and corrupt thereby triggering error codes. Error code HPQTRA08.exe is generated when the corrupt Windows registry keys are associated with the HPQTRA08.exe file.

To resolve, clean the registry and repair it. Although this can be done manually it can be time-consuming and tricky especially if you are not technically sound, therefore it is advisable to download Restoro.

Click here to download Restoro and resolve error HPQTRA08.exe.

Method 4 - Locate and Install the Driver

As was pointed out, you might need to reinstall the printer driver again. Using DriverFIX, you’ll be able to automatically update your computer system and install the drivers your computer needs to operate smoothly.
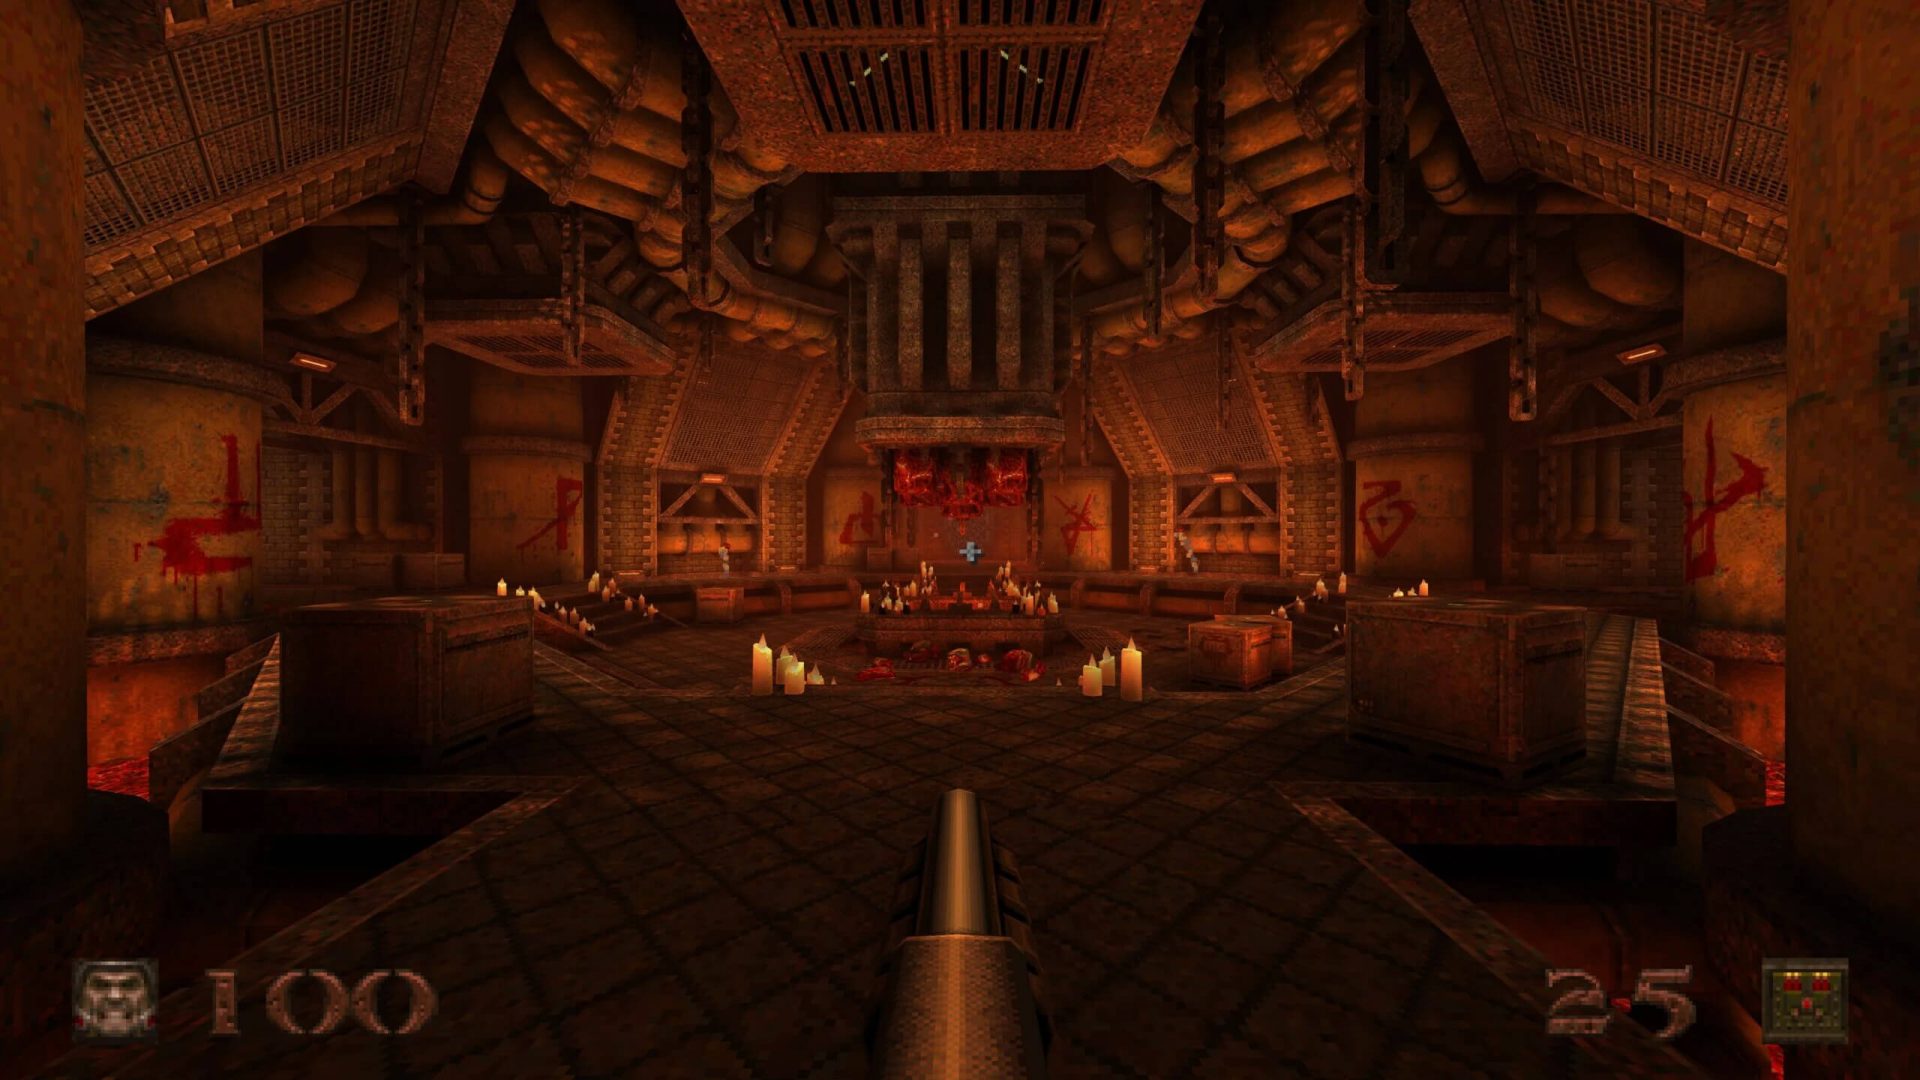
Do You Need Help with Your Device?

Our Team of Experts May Help
Troubleshoot.Tech Experts are There for You!
Replace damaged files
Restore performance
Free disk space
Remove Malware
Protects WEB browser
Remove Viruses
Stop PC freezing
GET HELP
Troubleshoot.Tech experts work with all versions of Microsoft Windows including Windows 11, with Android, Mac, and more.

Share this article:

You might also like

How to Fix UNEXPECTED_KERNEL_MODE_TRAP error
It is a fact that Blue Screen of Death errors can give you a headache for you will have a hard time fixing it as it is one of the most difficult errors you can encounter on your Windows computer. One of these BSOD errors is the UNEXPECTED KERNEL MODE TRAP error. If you receive this kind of error then it means that the operating system was not able to catch a trap or an exception generated by the CPU. This BSOD error has an error code 0x00000007F and indicates that the Intel CPU generated a trap that the kernel failed to catch. One of the most likely causes is hardware failure due to faulty memory. Aside from this cause, you also have to track down other probable causes for this problem like corrupted system files, incompatible drivers or programs, faulty hardware, and even dusty components, and so on. To fix the UNEXPECTED KERNEL MODE TRAP BSOD error, here are some suggestions that might help.

Option 1 – Uninstall the programs you installed recently

Chances are, some programs that you just installed might be the one that’s causing the BSOD error. Thus, you need to uninstall the program to resolve the problem.
  • In the search box, type in “control” and then click on Control Panel (desktop app) among the search results.
  • After that, select Programs and Features from the list which will give you a list of all the programs installed on your computer.
  • From there, look for the concerned program and select it and then uninstall it.
Note: If you have downloaded the app from the Windows Store, you can simply right-click on it from the application list and then uninstall it. In addition, you might also want to check the hardware components of your computer that might not support the operating system itself. You can disconnect all the external devices like USB drives, scanners, printers, etc., and then reboot your PC. After that, add the devices again one after the other and check if the BSOD error is now fixed or not. Moreover, you can also perform a clean boot to make things easier for you.
  • Log onto your PC as an administrator.
  • Type in MSConfig in the Start Search to open the System Configuration utility.
  • From there, go to the General tab and click “Selective startup”.
  • Clear the “Load Startup items” checkbox and make sure that the “Load System Services” and “Use Original boot configuration” options are checked.
  • Next, click the Services tab and select the “Hide All Microsoft Services” checkbox.
  • Click Disable all.
  • Click on Apply/OK and restart your PC. (This will put your PC into a Clean Boot State. And configure Windows to use the usual startup, just simply undo the changes.)

Option 2 – Update your device drivers

  • Tap the Win + R keys to launch Run.
  • Type in devmgmt.msc into the box and tap Enter or click OK to open the Device Manager.
  • After that, a list of device drivers will be displayed. Look for the device driver you and then select either “Update driver” or “Uninstall device”. And if you find any “Unknown device”, you need to update it as well.
  • Select the “Search automatically for updated driver software” option and then follow the instructions to complete the process.
  • If you have chosen to uninstall the driver, follow the screen options to complete the process and then restart your PC.
  • Connect the device and Scan for hardware changes – you can see this option under Device Manager > Action.

Option 3 – Use the Blue Screen Troubleshooter

The Blue Screen troubleshooter is a built-in tool in Windows 10 that helps users in fixing BSOD errors like UNEXPECTED KERNEL MODE TRAP. It can be found on the Settings Troubleshooters page. To use it, refer to these steps:
  • Tap the Win + I keys to open the Settings panel.
  • Then go to Update & Security > Troubleshoot.
  • From there, look for the option called “Blue Screen” on your right-hand side and then click the “Run the troubleshooter” button to run the Blue Screen Troubleshooter and then follow the next on-screen options. Note that you might have to boot your PC into Safe Mode.

Option 4 – Run the Windows Memory Diagnostic tool

You can use the Memory Diagnostic tool in Windows to check RAM. Before you use this tool, make sure you save all your important work.
  • Tap the Win + R keys to open the Run dialog box.
  • Next, type in “mdsched.exe” in the field and hit Enter to open Memory Diagnostic.
  • After that, the Windows Memory Diagnostic will give out two options such as:
  1. Restart now and check for problems (recommended)
  2. Check for problems the next time I start my computer
  • Select any of the given options. After that, your computer will restart and check for memory-based issues upon the restart. If there are any issues, it will automatically them.

Option 5 – Disable Memory caching in the BIOS

You can also disable memory caching in the BIOS to fix the UNEXPECTED KERNEL MODE TRAP error.
  • Open the BIOS Setup screen.
  • Next, go to Advanced > Cache Memory and then disable it.
  • Tap the F10 key to save the changes made and restart your computer.

Option 6 – Run System File Checker

  • Tap Win + R to launch Run.
  • Type in cmd in the field and tap Enter.
  • After opening Command Prompt, type in sfc /scannow
  • Restart your computer once the scan is completed.

Option 7 – Clean your hardware components for dust

Cleaning your computer’s hardware components for dust might also help in resolving the UNEXPECTED KERNEL MODE TRAP error. Make sure to use a soft cloth in cleaning the hardware as well as a small blower. Moreover, ensure that you do not damage any parts with moisture or cause harm to any circuits while you’re at it.
Read More
Repair Windows 10 Error Code 0xC1900200, 0x20008

Code 0xC1900200, 0x20008, What is it?

Error Code 0xC1900200, 0x20008 (Code 0xC1900202 – 0x20008)  is an error that occurs when you attempt to upgrade to Microsoft Windows 10, but the minimum requirements have not been met by your computer. You will therefore be unable to upgrade to Microsoft Windows 10 until your computer is updated or upgraded to meet those requirements. Common symptoms include:
  • When attempting to upgrade a dialog box with Code 0xC1900200 – 0x20008 (Code 0xC1900202 – 0x20008) is displayed.
  • Your computer is unable to begin the Microsoft Windows 10 upgrade process.

Solution

Restoro box imageError Causes

Error Code 0xC1900200 – 0x20008 (Code 0xC1900202 – 0x20008)  occurs when you are unable to begin the Microsoft Windows 10 upgrade because your computer does not meet the minimum requirements to run Microsoft Windows 10.
  • You are unable to begin the upgrade because your computer does not meet the required system or hardware specifications.
  • You are not running the correct version of Microsoft Windows to be able to begin the upgrade.
  • You are not running the latest updated version of Microsoft Windows 7 SP1 or Microsoft Windows 8.1. Error Code 0xC1900200 – 0x20008 (Code 0xC1900202 – 0x20008) as stated, simply means your computer does not meet the requirements to update and does not indicate a permanent problem or inability to continue to use your computer. This error only means that you will not be able to upgrade to Microsoft Windows 10 until your computer is made to meet these requirements.

Further Information and Manual Repair

There are several solutions that the user can complete at home that should fix the problem resulting in a manifestation of Error Code 0xC1900200 – 0x20008 (Code 0xC1900202 – 0x20008). Below are several options that should resolve this error.

Method 1:

Verify what version of Microsoft Windows you are currently running, older, outdated, or no longer supported versions of Microsoft Windows are not able to upgrade to Microsoft Windows 10. If you are not running one of the following versions you will have to update before being able to upgrade.
  • The most current version of Microsoft Windows 7 SP1
  • The most current version of Microsoft Windows 8.1

Method 2:

Your computer's system specifications do not meet the requirements to be able to upgrade to and run Microsoft Windows 10. To check your system specifications do the following.
  • Click on the start button in the bottom left corner, then locate the control panel on the menu, click on it to open.
  • Once it opens, locate system and security on the menu and click to open, click on system and this will show you your amount of RAM and processor speed.
  • Find device manager on the left-hand side click this then select display adapter, and it will show you your current video card.
  • Click on the start button again, then click on the computer in the menu, this will show you your hard drive size, and available space.
If you have the option available you can simply run the get Microsoft Windows 10 app to check compatibility. Once you have your system specs make sure they meet or exceed the following.
  • 1 GHz or higher processor or SoC
  • 1 gig of RAM for 32 bit and 2 gigs of RAM for 64 bit
  • 16 GB available hard drive space for 32 bit, 20 GB for 64 bit
  • Minimum of DirectX9 that has 1.0 WDDM
  • At least an 800x600 display
If your computer does not meet these minimum requirements, upgrade the components necessary to meet them. If you do not possess the technical expertise required to accomplish this yourself or do not feel comfortable doing so, download and install a powerful automated tool to get the job done.

Method 3:

Your computer might not meet the aforementioned requirements to make an upgrade because of insufficient hard drive space or resources. Learn how to create space on your computer.

Method 4:

Many people hold on to and use the same computer for a very long time. It is possible that your computer cannot be upgraded to meet the requirements, or that the cost to do so would be so high that a new computer would be cheaper. If that is the case, your only option may be to replace your computer.
Read More
What you should not share and post on Facebook
Recent Facebook, Instagram, WhatsApp, Messenger & Oculus fiasco and downtime reminded us that even big IT tech behemoth is vulnerable and can go offline. The situation has been resolve in not so fast manner but not long also, let’s say it was resolved in time that people have not left and switched to another platform. What you should not share and post on FacebookThat being said, now when services are back we stopped and reflected on the platform itself and on its users. If Facebook is vulnerable so are its users, but sometimes users themselves are responsible for being a target. We step back and take a look at posts that manifest on Facebook and have come with some advice on what things you should never post on Facebook and on other social platforms.

Pictures of any kind of ID, bill, vaccine cards or similar document

This should be a no-brainer at all but we see people posting this kind of information. They go on a rant about how the bill is too high and place a picture of it, or they took their vaccine shot and posted a vaccine card as proof. Why this is a bad idea is that any of these documents contain certain things like birthdays, names, and even more like addresses and other information that can be used against users.

Information about where you live

This could be tied to the previous point but it is very crucial that a living address is not something that you wish to share publicly. A lot of burglars are stalking social media for exactly this kind of information so they can then analyze when and how to strike and this time you have done all work for them providing them with the information on where to find your flat.

Daily routines and vacation plans

The most burglary happens to believe it or not during the day, in hours when people are at work. So by providing the world with your daily routines and when you are not at home you are putting your home at risk of being broken into. Posting vacation plans are even worse or posting pictures and status when you are on vacation will send a clear message to anyone that your home is empty and unattended.

Pictures of your home interior

This can also sadly disclosure more information that you wish like maybe some interesting facts like address or birthday on certificates, diplomas, or other documents accidentally caught in the taken picture. Also, these kinds of pictures can show much about your home security, alarm positions if you have some, how is your front door secured, etc.

Content that can get you fired

We hear all the time, famous star or director has some tweets that have resurfaced and now it is fired. I know that many of us are not famous stars but we can also be fired. Sharing some offensive opinions, inappropriate content or just plain pure lies like took sick leave to play this new game can have not so great resolution for your working relationship with your employer. We do not support lies nor do any kind of inappropriate content but posting it online on social media will just make things worse for you personally.

Your login info or sites and services that you are using

It is fairly safe to say hey we are chilling with Netflix or watching the new season of Mandalorian on Disney plus but speaking of things like made a new account on freelancer service of got my new e-banking in this cool new bank, etc. is not very wise. Cyber crooks are always on the lookout for identity theft and will use available information to steal data and money. You are risking also losing provided accounts this way leaving you with tons of work to explain that you got mugged to service providers.

Conclusion

We know that this article seems paranoid and maybe assumes that among your friends there are some crocks and people trying to take advantage of you. As this certainly was not our attention nor goal, we had to point to extremes in order to protect you the most.
Read More
How to Repair Windows 10 Upgrade Error Code 0x80070070 – 0x50011

Code 0x80070070 – 0x50011 – What is it?

If you’ve recently tried installing Windows 10, you might have encountered error code 0x80070070 – 0x50011 or its alternatives (error code 0x80070070 – 0x50012 and 0x80070070 – 0x60000). Whatever formats this error code presents itself in, it's usually accompanied by a barrage of other errors, as underscored on Microsoft’s official site. If you’ve encountered this error code, it simply means that your computer system might not have the required or required space to install the upgrade.

Likely, if you’ve experienced error code 0x80070070 – 0x50011, it’ll likely appear in the formats highlighted below:

  • 0x80070070 – 0x50011
  • 0x80070070 – 0x50012
  • 0x80070070 – 0x60000

Solution

Restoro box imageError Causes

At present, this Windows 10 upgrade error is triggered or caused by various factors:

  • Lack of computer resources or space
  • Virus/malware infestation
  • A clogged registry

Further Information and Manual Repair

Whilst new, not much information has been propagated regarding this error. However, there are some manual / practical steps you can take to have your Windows 10 upgrade up and running. Since the primary aspect of solving this problem is to make space on your computer system, here are some ways in which you can do so manually.

Method 1: Get more space

  • Check the current space on your computer  

Before making attempts to create space on your computer, it’s vital that you check to decipher how much free space you have available.

  • Make use of Disk Clean-up 

Since there’s a free service available on your computer to create space, why not use it and save time? If the Disk Cleanup tool is employed regularly, this will free up hard drive space and optimize your computer to work better.

  • Remove unwanted desktop apps 

There are several apps lying around on your computer that you simply don’t use, uninstall those and make space to elude error code 0x80070070 – 0x50011 or its alternatives (Code 0x80070070 – 0x50012, Code 0x80070070 – 0x60000)

  • Remove or archive files  

If you have lots of photos, media, documents (files), videos, etc, that you don’t use or will only need in the future, try cloud storage. You’ll still have those files within your possession but just not in a physical location. However, they’re still accessible. Another suggestion: If you use programs such as One Drive or Google Drive for desktop, limit your use to only the online application.

  • Add more storage

If you’re not able to implement the above steps to clear some space to accommodate your Windows 10 upgrade due to error code 0x80070070 – 0x50011, acquire more storage. This can be expanded by incorporating storage devices such as USB flash drives, CDs, cloud storage, and SD Cards.

Method 2: Scan your computer for virus/malware

If you regularly download stuff, especially software on the Internet from ‘not so secured’ sites, you might have picked up something. You might have downloaded malware or virus (along with other legit programs).

To resolve this issue, it’s advised and very important that you download a powerful antivirus and perform a complete scan of your computer system. After you’ve detected and removed the suspected malware/virus, you’ll then be able to eliminate error code 0x80070070 – 0x50011 and resume with your Windows 10 upgrade.

Method 3: Clean up your computer’s registry

If you do not clean your computer’s registry often, it could become congested or clogged by .XML files, junk files, and cookies. To resolve this problem, clean your registry by using a powerful and user-friendly tool to clean up the problem.

Click here to download Restoro.

Read More
A Quick Guide to Fixing the Stop C00002lA Fatal System Error

Stop C00002lA Fatal System Error- What is it?

C00002lA Fatal System Error is a blue screen of death error that may occur when you start your Windows NT 4.0 based computer. This error causes the screen to turn blue and the system also shuts down. The stop C000021A error message is displayed in the following format:

Stop c000021a {Fatal System Error} The session manager initialization system process terminated unexpectedly with a status of 0xc0000017 (0x00000000, 0x0000000) The system has been shut down.

Error Causes

The stop C000021A error occurs when either Crsrss.exe or Winlogon.exe fails. When the Windows NT kernel identifies that either of these processes has failed, it stops and the error code stop C000021A appears on the computer screen. Here are some of the underlying causes for the stop C0000021A error:
  • The incompatible third-party program
  • Hard disk issues
  • Service pack installation has failed
  • Mismatched system files have been installed
  • Bad and invalid registry keys

Further Information and Manual Repair

To resolve the stop C000021A Fatal System Error on your PC try the following solutions:
  • Remove Incompatible Third Party Programs

If the error occurred after you recently installed a new program, then it is advisable to remove that program. The error occurs due to the incompatibility of the program. To remove the program go to the start menu and click on the control panel. Now click on Add/Remove Program tab and double click on the program name that you recently installed and remove it from the list. Once removed, not reboot your PC. Reinstall a compatible program and run it. It is most likely to resolve the issue. However, if the stop C000021A error still occurs, then it means the problem is critical. It is related to the registry.
  • Repair and Restore the Registry

This procedure is slightly long and tricky. To try it, you need to be technically sound. Here’s what you have to do: first create a parallel installation of Windows NT. Start your PC to the parallel installation and then open the Registry Editor. On the Registry Editor’s Windows menu click HKEY_LOCAL_MACHINE on Local Machine and then click Load Hive. Now type the path %systemroot%system32configsystem into the System hive of the prior installation. Then click open. Here you will be prompted to enter the name of the key, type TEST. Note the setting for the current DWord value in the preceding registry key. This is 0x1 and is denoted by CURRENT:Reg_Dword: 0x1. This value indicated that the Current Control Set for your original Windows NT installation corresponds to ControlSet001 in this window. Now if the value is 2, it indicated that the Current Control Set corresponds to ControlSet002. Now locate the following registry key: HKEY_LOCAL_MACHINETESTControlSetXXXControlSession Manager. XXX is the Current Control Set Value. And delete any pending file rename operation entries. Then click TEST hive and then click Unload Hive. After that again repeat the process, open the registry menu and click load hive, here type the path %systemroot%system32configSoftware to the Software hive of the prior installation and then click open. Now you type TEST 2 when you are prompted for the name of the key. Remove any pending file rename operations entries in the following registry keys: HKEY_LOCAL_MACHINETEST2MicrosoftWindowsCurrentVersionRunOnce HKEY_LOCAL_MACHINETEST2MicrosoftWindowsCurrentVersionRunOnceEx Now click TEST2 hive and then click unload hive. Quit the Registry Editor and then restart your original installation. This will resolve the stop C000021A error.
Read More
Windows could not start Update service
If you got an error message saying, “Windows could not start the Windows Update service on Local Computer, Error 87. The parameter is incorrect” while you were trying to start the Windows update service on your computer, then this post could help you resolve the problem. Along with this error, you might also get any of these error codes such as 0x80240034, 0x80244019, 0x80070643, and so on. Aside from these error codes, you will also notice that the Windows Update service has been stopped. To fix this issue, here are a couple of suggestions that might help but before you go on, you need to create a System Restore point first.

Option 1 – Try checking Services Dependencies

Dependencies of a Windows Service in Windows 10 are when windows services depend on other services. Such is the case with the Windows Update service – it also depends on three different services such as the Remote Procedure Call or RPC service, DCOM Server Process Launcher, and the RPC Endpoint Mapper. Meaning to say, if two of these services are not working as expected, then the dependant service will also be affected. This could be the reason why the Windows Update service could not start.
  • Tap the Win + R keys to open the Run dialog box.
  • Next, type “services.msc” in the field and hit Enter to open Windows Services.
  • From the list of Services, look for the following services:
    • Remote Procedure Call (RPC) Service
    • DCOM Server Process Launcher
    • RPC Endpoint Mapper
  • After you find these services, double click on each one of them and check whether the Startup type for all is set to Automatic and the Service status is set to Running or not.
  • If the service status is not running, then click the Start button. Afterward, check if you can now run the Windows Update service.

Option 2 – Check the Background Intelligent Service and the Cryptographic Service

  • Tap the Win + R keys to open the Run dialog box.
  • Next, type “services.msc” in the field and hit Enter or click OK to open Services.
  • From the list of Services, look for the following services and make sure that their Startup type is as follows:
    • Background Intelligent Transfer Service – Manual
    • Cryptographic Service ­– Automatic
  • After that, check if the Service status of the listed services above is set to Running. If they’re not, click on the Start button to start these services and then check if you can now enable the Windows Update service or not.

Option 3 – Reset Windows Update components

If the first two options did not work then you might want to reset the Windows Update components manually. Follow the steps below to reset them.
  • Open Command Prompt with admin privileges.
  • After that, type each one of the following commands and hit Enter after you key in one after the other.
    • net stop wuauserv
    • net stop cryptsvc
    • net stop bits
    • net stop msiserver
Note: The commands you entered will stop the Windows Update components such as Windows Update service, Cryptographic services, BITS, and MSI Installer.
  • After disabling WU components, you need to rename both the SoftwareDistribution and Catroot2 folders. To do that, type each one of the following commands below, and don’t forget to hit Enter after you type one command after the other.
    • ren C:WindowsSoftwareDistribution SoftwareDistribution.old
    • ren C:WindowsSystem32catroot2 Catroot2.old
  • Next, restart the services you’ve stopped by entering another series of commands. Don’t forget to hit Enter after you key in one command after the other.
    • net start wuauserv
    • net start cryptsvc
    • net start bits
    • net start msiserver
  • Close Command Prompt and reboot your PC.

Option 4 – Run the Windows Update Troubleshooter

If resetting the Windows Update components didn’t work, you could also try running the Windows Update Troubleshooter as it could also help in fixing any issues related to Windows Update including this one. To run it, go to Settings and then select Troubleshoot from the options. From there, click on Windows Update and then click the “Run the troubleshooter” button. After that, follow the next on-screen instructions and you should be good to go.

Option 5 – Try removing a value from the Windows Registry

If running the Windows Update troubleshooter didn’t help and you receive a message instead saying, “Service Registration is Missing or Corrupt”, you can try to remove a value from the Windows Registry.
  • Tap the Win + R keys to open the Run dialog box.
  • Then type “Regedit” in the field and hit Enter to open the Windows Registry.
  • Next, navigate to this path: HKEY_LOCAL_MACHINESOFTWAREMicrosoftWindowsSelfHostApplicability
  • From this path, look for a value named “ThresholdOptedIn” and if you find it, delete it.
  • Exit the Registry Editor and see if you can now enable the Windows Update service.
Read More
Fix 0x0000007c (ERROR_INVALID_LEVEL) in W11
0x0000007c error inside Windows 11 is a printer error that is manifested when Windows users are trying to connect to a shared network remote printer. Error is displayed by the message:
Windows cannot connect to the printer. Operation failed with error 0x0000007c.
If you are experiencing this type of annoyance, fear now we are providing you with several solutions to this problem.

0x0000007c (ERROR_INVALID_LEVEL)Update Windows 11

  1. Open the Start menu, click on the settings app
  2. Select Windows update tab
  3. Click on Check for updates
  4. Click on Advanced options
  5. Inside select Optional updates
  6. If there are optional updates click on Download & Install

Run the printer troubleshooter

  1. Press ⊞ WINDOWS + I to open settings
  2. Click on Troubleshoot navigation on the system tab
  3. Select Other trouble-shooters
  4. Click on the Run for printer troubleshooter
  5. If the error is found click on Apply this fix

Restart the Print Spooler Service

  1. Right-click on the Start button
  2. Click on RUN
  3. Type in services.msc and press OK
  4. Right-click on Printer Spooler service and select Restart

Clear the Print Spooler

  1. Open services like in the previous step
  2. Right-click Print Spooler and select STOP
  3. Open File explorer
  4. Navigate to: C:\Windows\System32\spool\drivers\x64\3 (64-bit Platform) C:\Windows\System32\spool\drivers\W32X86\3 (32-bit Platform)
  5. Delete everything inside folders
  6. Go back to services, right-click on Print Spooler and select RESTART

Reinstall Driver for printer

  1. Right-click on Start and select device manager
  2. Double click on the Print queues category
  3. Right-click on the printer and select Uninstall device
  4. Click on Uninstall on prompt
  5. Right-click on the Print queues category and select Scan for hardware Changes
Read More
Razer Hazel, an RGB mask for max protection
Razer HazelThe world today is still sadly under pandemic and by the looks of it, COVID-19 is here to stay, well at least for some time in the near future. Razer seems to think so as well since their upcoming gear is not really what you would expect. Enter Hazel, a new and upcoming Razer smart mask.

Protection

Hazel mask has a high bacterial surgical N95 filter with fluid resistance that will protect you against large droplets and splashes. A detachable active ventilator regulates airflow and is capable of filtering around 95% of airborne particles. Mask comes with a special charging case that has an auto sterilization UV light that will kill bacteria and viruses inside the case interior while it charges. When the mask is recharging it will change color from red to green visually showing the level of the current charge. Mask of course has easy to replace filters inside ventilators and Razer is standing by that fully charged mask will last enough for full-day use. An active ventilation system brings cool air while releasing breathing heat at the same time drastically reducing CO2 inside the mask that could produce dizziness and headache. Silicon guard is on its edge gluing to around your face in order to prevent exterior air sneaking inside the mask and positioning it firmly so it does not rest on your lips in order for easier and clearer communication.

Hazel personalization and technical features

Hazel has a clear and transparent design making it better for social interaction since other people will be able to see your lips and smiles thus making it more natural. A low light mode that turns on automatically when it is dark outside is also aimed for easier communication. Speaking of communication, the mask comes with voice Amp technology that has a built-in mic and amplifier thus making your voice lines clear so you are not muffled when wearing the mask itself. Your friends and other people will be able to hear you like you are not wearing a mask at all. Thicker air loops apply less pressure on ears and can be adjusted for a more secure fit, while the mask itself can be custom-made to fit your face shape. And of course Hazel comes with 16.8 million colors and a suite of effects with Razer Chroma RBG
Read More
How to Disable Restart in Firefox
Mozilla Firefox has introduced a new feature known as Restart with Windows which allows the browser to automatically start when your Windows 10 computer boots. This means that if you leave the Firefox browser opened while shutting down your computer, Firefox will re-open automatically along with the tabs that were opened right before you shut down your computer. Although some users may find this feature convenient, there are others who do not approve at all as it could be a nuisance. So if you’re one of the latter, then read on as this post will show you how you can disable the Restart with Windows feature in the Firefox browser on your Windows 10 computer. Refer to the instructions laid out below to get started.
  • Step 1: Open Mozilla Firefox and if it’s opened already, just open a new tab and then type the following text in the address bar:
about:config
  • Step 2: After typing the text given above, hit Enter and if a prompt with a warning message pops up, simply click on the “I accept the risk!” button to proceed.
  • Step 3: Next, type “Restart” in the search filter which should display the following preference in the window:
“toolkit.winRegisterApplicationRestart”
  • Step 4: After that, check for the preference value and then see if it’s set to true or not. If it is set to true, then it means that the Restart with Windows feature is enabled so obviously, to disable it, you need to set its value to false.
  • Step 5: Now restart your computer without closing Firefox. After restarting your computer, you should no longer see Firefox starting automatically.
The Restart with Windows feature by default is disabled for most users. On the other hand, Mozilla will have this feature enabled as the default configuration in the coming weeks so it’s best that you now know what to do when that time comes since the newer versions of Mozilla Firefox are already being shipped with the Restart with Windows feature. However, if this post did not help you, then you might want to check if the feature has been added to the Startup folder, and from there, you can disable this startup program using the Task Manager > Startup tab.
Read More
How to Fix Slow file copy speed in Windows 10
We tend to move and copy tons of files on our PCs and mostly, the process of copying or moving files, especially if the file has the size of 1GB or up, tends to take quite long. This may be caused by some issues which is why you face slow copy or move speed. So if you are experiencing this issue on your Windows 10 computer, then read on as this post will give you a couple of solutions you can try to increase the speed in copying or moving files. Follow the given instructions below.

Option 1 – Try to change the USB port

You might want to change the USB port since modern computers have a variety of USB ports. So if your USB drive supports USB 3.0 or 3.1, make sure that you plug it inside a USB 3.0 or 3.1 ports. If you’re not sure which port, just keep in mind that the USB 3 port is usually blue or you can also use your computer’s documentation or manual as a reference to locate it. It may sound nothing but changing the USB port can actually improve the copying or moving speeds drastically so this should be the first thing you can try to speed up the process of copying or moving files.

Option 2 – Update the USB Controller Drivers

  • First, click the Start button and type “device manager”.
  • Then click on the “Device Manager” from the search results to open it.
  • From there, look for the “Universal Serial Bus controllers” option and then right-click on each one of the USB drivers and select the Update Driver from the menu.
  • Restart your PC and then click the “Search automatically for updated driver software” option.
You also have the option to update the motherboard and the USB driver from the manufacturer’s official website.

Option 3 – Check for any hard disk errors

  • On your desktop, right-click on the “This PC” or computer icon and then select Manage to open the Disk Management. Here you get to check your drive’s health.
  • Next, click on Disk Management on the left side panel.
  • From there, check the state of your drives. If it shows that all your partitions are healthy then it means all is good and that the problem may have something to do with some physical issues with your hard drive.
You might also want to run the CHKDSK utility to help you fix any issues with your hard disk. If your hard drive has issues with integrity, the update will really fail as the system will think that it’s not healthy and that’s where the CHKDSK utility comes in. The CHKDSK utility repairs hard drive errors that might be causing the problem.
  • Open Command Prompt with admin privileges.
  • After opening Command Prompt, execute the following command and hit Enter:
chkdsk /f /r
  • Wait for the process to be completed and then restart your computer.

Option 4 – Try to disable Windows Auto Tuning

Disabling Windows Auto-Tuning can also help in increasing the copying or moving of files in your computer. It is said that this feature improves the performance of programs that receive TCP data over a network by adjusting the receive buffer size dynamically throughput and latency of the link. Thus, if you are trying to copy some data over the network, then the Auto Tuning feature is playing a role here. And in some cases, disabling this feature completely resulted in a lot faster copy speeds over the network.

Option 5 – Try changing the USB Removal Policy

  • First, plug your USB drive or external device into your PC and then open This PC.
  • Next, right-click on your device and select Properties.
  • After that, go to the hardware tab and select the storage media that you want to enhance and then click on the Properties button.
  • From there, you can select the Better performance option if you wish for your device to have a better performance. Once you select this option, it will enable write caching in your Windows 10 computer but you need to use the “Safely Remove Hardware” option from the notification area to safely disconnect the device otherwise it may result in data corruption.

Option 6 – Format your drive

  • To get started formatting your drive, tap the Win + E keys and then go to the access page of the drive.
  • Next, right-click on the drive and select Format.
  • After that, uncheck the “Quick Format” option and then format your drive properly.
  • Now once the formatting process is finished, unplug the drive and plug it back in afterward.
  • Check if the error is already fixed. If the drive is not initialized, tap the Win + R keys and hit Enter.
  • After opening the Run dialog box, type “diskmgmt.msc” and hit Enter to open Disk Management.
  • From there, right-click on the drive volume and select initialize disk.
  • Next, select the correct partition type and proceed.
Read More
1 2 3 171
Logo
Copyright © 2023, ErrorTools. All Rights Reserved
Trademark: Microsoft Windows logos are registered trademarks of Microsoft. Disclaimer: ErrorTools.com is not affiliated with Microsoft, nor claims direct affiliation.
The information on this page is provided for information purposes only.
DMCA.com Protection Status