The world today is still sadly under pandemic and by the looks of it, COVID-19 is here to stay, well at least for some time in the near future. Razer seems to think so as well since their upcoming gear is not really what you would expect.
Enter Hazel, a new and upcoming Razer smart mask.
Protection
Hazel mask has a high bacterial surgical N95 filter with fluid resistance that will protect you against large droplets and splashes. A detachable active ventilator regulates airflow and is capable of filtering around 95% of airborne particles. Mask comes with a special charging case that has an auto sterilization UV light that will kill bacteria and viruses inside the case interior while it charges.
When the mask is recharging it will change color from red to green visually showing the level of the current charge. Mask of course has easy to replace filters inside ventilators and Razer is standing by that fully charged mask will last enough for full-day use.
An active ventilation system brings cool air while releasing breathing heat at the same time drastically reducing CO2 inside the mask that could produce dizziness and headache.
Silicon guard is on its edge gluing to around your face in order to prevent exterior air sneaking inside the mask and positioning it firmly so it does not rest on your lips in order for easier and clearer communication.
Hazel personalization and technical features
Hazel has a clear and transparent design making it better for social interaction since other people will be able to see your lips and smiles thus making it more natural. A low light mode that turns on automatically when it is dark outside is also aimed for easier communication.
Speaking of communication, the mask comes with voice Amp technology that has a built-in mic and amplifier thus making your voice lines clear so you are not muffled when wearing the mask itself. Your friends and other people will be able to hear you like you are not wearing a mask at all.
Thicker air loops apply less pressure on ears and can be adjusted for a more secure fit, while the mask itself can be custom-made to fit your face shape.
And of course Hazel comes with 16.8 million colors and a suite of effects with Razer Chroma RBG
Ieframe.dll is a Dynamic Link Library, a collection of small programs. It is stored in C:\WINDOWS\SYSTEM32. The function of this dll file is to convert Html code into web pages on IE (Internet Explorer). When this file gets corrupt, you start experiencing ieframe.dll errors on your system.
Ieframe.dll error is displayed in either of the following formats:
"Res://ieframe.dll/dnserror.htm#"
"Cannot find the file ieframe.dll"
"File Not Found C:WINDOWSSYSTEM32IEFRAME.DLL"
Solution
Error Causes
The Ieframe dll error code may occur due to multiple reasons. These include:
Incorrect Firewall settings
Ieframe.dll corruption and damage
Missing Ieframe.dll file
Internet Explorer issues
Viruses and malware attack
Outdated security software applications
If you wish to continue browsing on Internet Explorer, then it is important for you to resolve this error right away.
Further Information and Manual Repair
Here are some of the best solutions to resolve the Ieframe dll error on your PC:
Cause: Missing Ieframe.dll file
Solution: If Ieframe dll error file is missing, this means you have either accidentally deleted it while uninstalling a certain program that also shared this file.
Therefore the best way to resolve the issue is to restore the missing Ieframe.dll file. To do this check the recycle bin. If you find the file, simply restore it in the following path C:\Windows\System32.
However, if you are unable to find it, then download it from a reliable website.
Cause: Incorrect Firewall Settings
Solution: In case the error is generated due to incorrect Firewall settings, then try disabling this software. See if this works and resolves the error.
Cause: Internet Explorer Issues
Solution: Sometimes the Ieframe dll error can occur due to Internet Explorer issues. Here it is recommended to reinstall and update the latest version of IE on your system. This can be done by removing the program from the system.
Go to the Control Panel, click Add/remove programs, and uninstall the program. After uninstalling the old version, install a new and updated version of IE on your system and try running it again.
If it works, great the error is resolved. However, if it persists, then this means the problem is deeper and bigger than you think. The reason can be severe viral infection and malware attack not just damaging Ieframe.dll file but also exposing your system to privacy errors and threats.
Cause: Damaged and Corrupt Ieframe.dll files
Solution: The files can get corrupt when the registry overloads with data. It stores important and unnecessary files like junk files, cookies, internet history, temporary files, and invalid registry entries.
Such files take up a lot of disk space and damages dll files. To resolve this issue it is advisable to download Restoro. This is a powerful registry cleaner, that detects and resolves all registry issues in seconds. It wipes out unnecessary and obsolete files cluttering the registry and restores the damaged Ieframe.dll files.
It is efficient, safe, and compatible with all Windows versions. It has an intuitive interface and easy navigation which makes it simple and easy to use.
Cause: Viral Infection
Solution: If the underlying cause is a viral infection, Restoro takes care of that too. It is more than a registry cleaner.
It is embedded with a powerful antivirus that removes all malicious software from your PC including viruses, Trojans, spyware, malware, and adware. And unlike a typical antivirus, it does not reduce the speed of your system. Its system optimizer utility boosts your PC speed dramatically.
Click here to download Restoro on your PC today and resolve Ieframe dll error today!
Anxiety from all these digital threats lurking everywhere? An antivirus program can help put your mind at ease.
What can a virus do to your device?
A virus is malicious software that can affect pretty much any device and does so in a variety of ways. Be it your computer, your phone or your smart lightbulb - as long as there’s access to the internet, malware can get to it.
How exactly does this kind of attack manifest itself? Well, there’s a wide variety of effects ranging from mild to severe. Among other things, they depend on which type of malware attacks your device - a virus, spyware, ransomware, adware or something else.
These are some of the things you can expect to happen:
Slow performance
System crashes
Theft of data and sensitive information
Connectivity issues
Constant browser redirects
Strange messages sent to your contacts
Interference with files
It really can be the stuff of nightmares. So, if you want to sleep peacefully knowing that your devices are completely safe, you should definitely consider getting an antivirus.
P.S. don’t let its name fool you - an antivirus does indeed protect your devices against more than just viruses.
What is antivirus software exactly?
Antivirus software is designed to help you battle and ward off malware. Basically, it scans your device to detect any suspicious activity and offers tools to get rid of the culprit.
At first, antiviruses were developed to fight against viruses only, but nowadays they cover a lot more ground. Here are some of the biggest benefits of getting yourself a powerful defender.
Advantages of antivirus software
1. It fights those pesky ads
Look, constant ads that pop up everywhere aren’t the absolute worst thing that can happen on your computer. If anything, they are annoying, like when you’re trying to sleep but that one fly in your room just won’t stop buzzing.
Now, there’s a free, well-established solution for that - installing an ad blocker. And we’re about a hundred and ten percent sure you’ve already done that on each and every browser you use.
However, “if I can’t see it, it doesn’t exist” isn’t the most ideal approach for your online safety. Ad blockers can’t block everything and they won’t protect you from potential adware. An antivirus on the other hand offers that layer of protection against malware snuck into pop-ups and spammy websites.
2. It protects you from hackers
Hackers don’t target government institutions only. They’ll target regular people too if they have something to gain.
Credit: Clint Patteron (Unsplash)
There are different types of hacking, such as phishing e-mails, transmission of malicious programs, credential reuse, denial of service and more. In any case, they take control of your device and hijack your data.
The good thing is that, as threats evolve, antiviruses evolve too and there are tons of quality programs on the market that can keep you secure for an affordable price.
3. It keeps your files and data safe
When malware enters your device, it can target pretty much any file and get access to any and all data.
Installing an antivirus program will make sure that every single file, new or old, is monitored at all times, warning you against threats immediately. That way, you can make sure to react before your other files become infected and data is lost or stolen.
Another great thing for data protection is that the best antivirus software normally comes with a password manager, so no one can use malware to steal your passwords.
4. It blocks all kinds of malware
As we already stated, malicious attacks can be performed in many ways and malware comes in in different shapes an sizes, such as:
Trojan horse
Spyware
Ransomware
Adware
Rootkit
RAT (remote access Trojan)
Keyloggers
Worms
Botnets
Credit: Growtika (Unsplash)
Nowadays, antivirus software is designed to fight against all of these types. That’s why more often than not we hear the term 'antivirus' used interchangeably with 'anti-malware,' like in this article.
5. It keeps your children protected
You can’t keep your eyes on your kid every second of the day and you can’t protect them from everything. But at least you can limit their exposure to the threats they can encounter at every corner of the digital world.
An antivirus program will block harmful or suspicious websites and ads, which is great both for you and your children. To take it a step further, though, many such programs come with special parental controls and offer monitoring as well. It’s a great solution for keeping your kids safe online without sounding like the irritating, overbearing, controlling parent who “just doesn’t get it!”
How to pick one
There are definitely lots of different antivirus programs out there, both free and paid. We recommend you look for a paid option, since free ones are unfortunately a lot more susceptible to being compromised through malicious attacks.
Now, there are a few factors to consider when choosing the right software. If you use your PC for basic things then a basic antivirus will suffice. However, the more complex your use and the more sensitive the data you deal with, the stronger it needs to be.
It’s also crucial that you take into account the features it includes. As we already mentioned, some programs have additional security options. For example, depending on the package you select, Bitdefender provides:
Some are included in plans and some are separate products, so make sure to check out all the offers.
And don’t worry if you have multiple PCs or you’re looking for protection for your smartphone or tablet as well; Bitdefender has suitable solutions for your needs. Of course, you can also just pick their classic antivirus software if you’re not in need of advanced protection.
Another important point is how regularly the software is updated and enhanced. The more frequent the updates the better, as bugs can make the program more vulnerable. Other things we advise you consider are user-friendliness, impact on performance, reputation (user reviews especially) and, of course, price.
The bottom line
Fact is: anyone can be a malware victim. Don’t let it be you.
You can’t put a price on peace and security, so don’t be reluctant to pay for yours - especially since a lot of options out there are extremely affordable. Is $159.00 a year really too much to pay for cross-platform protection for up to 10 devices? We don’t think so.
Explore your options and protect your files and data before it’s too late.
As you already know, the Windows Update mechanism in Windows 10 is a bit complex as it depends on thousands of files and services in order to properly function. There are DLL files and services that support this mechanism’s proper functioning. And so if there is any malfunction with any of these files or services, it will result in some errors when running Windows Update. One of these errors is the error code 0x8e5e0147 which has the following error message:
“There was a problem installing some updates, but we’ll try again later. If you keep seeing this and want to search the web or contact support for information, this may help – Error 0x8e5e0147”
To fix this error, there are several methods you can try. You can run the Windows Update troubleshooter or reset the Windows Update components manually or clear the SoftwareDistribution folder and install the update manually. You could also reset the Windows Update Agent to default using a command in PowerShell.
Option 1 – Try to run the Windows Update troubleshooter
The first thing you can do to fix the Windows Update error code 0x8e5e0147 is to run the Windows Update Troubleshooter. To run it, go to Settings and then select Troubleshoot from the options. From there, click on Windows Update and then click the “Run the troubleshooter” button. After that, follow the next on-screen instructions and you should be good to go.
Option 2 – Try to reset the Windows Update components
If by any chance that the third option didn’t work, you can also try resetting the Windows Update components as it could also help you resolve the Windows Update error. How? Refer to the following steps:
Open Command Prompt with admin privileges.
After that, type each one of the following commands and hit Enter after you key in one after the other.
net stop wuauserv
net stop cryptsvc
net stop bits
net stop msiserver
Note: The commands you entered will stop the Windows Update components such as Windows Update service, Cryptographic services, BITS and MSI Installer.
After disabling WU components, you need to rename both the SoftwareDistribution and Catroot2 folders. To do that, type each one of the following commands below and don’t forget to hit Enter after you type one command after the other.
Next, restart the services you’ve stopped by entering another series of commands. Don’t forget to hit Enter after you key in one command after the other.
net start wuauserv
net start cryptsvc
net start bits
net start msiserver
Close Command Prompt and reboot your PC.
Option 3 – Try downloading and installing the Windows Updates manually
Windows Update error code 0x8e5e0147 might be due to a Windows Update that has failed. So if it is not a feature update and only a cumulative update, you can download the Windows Update and install it manually. But first, you need to find out which update has failed, and to do so, refer to the following steps:
Go to Settings and from there go to Update and Security > View Update History.
Next, check which particular update has failed. Note that Updates that have failed to install will be displayed under the Status column which has a label of “Failed”.
After that, go to the Microsoft Download Center and look for that update using its KB number and once you find it, download and then install it manually.
Note: You can also use the Microsoft Update Catalog, a service from Microsoft that provides a list of software updates that can be distributed over a corporate network. With the help of this service, it can be easier for you to find Microsoft software updates, drivers as well as fixes.
Option 4 – Try to reset the Windows Update Agent
Since you can’t update the Windows Update Agent on your Windows 10 computer manually, you can try resetting it instead and you can do it using the Reset Windows Update Agent tool which you can download from the official Microsoft website. This tool allows you to:
Scan all protected system file and replace the corrupted one’s (sfc /scannow)
Scan, detect, and repair corruptions in Windows system image
Clean up superseded components
Reset Windows Update components
Change invalid values in Windows Registry
Delete temporary files
Moreover, this tool also allows you to carry out these operations:
When you connect your TV via HDMI cable Windows will recognize it as another monitor and will control the display settings for your HDMI connection. In most cases using it as the extended desktop will work fine, issues will arise when you play video on it. Video playing applications can override Windows settings which can lead to strange results on the screen. Here in this guide, we will tackle with reasons and solutions to this particular issue. Solutions provided are not meant to be followed in the way they are presented but as a silent rule, they go from most common one to most rare so it is advisable to try them in the order presented.
FIXING RESOLUTION ISSUES
The first thing when experiencing resolution issues on your TV connected to a PC is to check TV settings. There is very likely a chance that you will need to manually adjust picture settings on the TV itself using TV controls.
On older models of TV, there is an overscan option which can lead to different resolutions and screen sizes. Overscan is a technology that was used in order to help content creators to deliver consistent pictures on different screen sizes and aspect ratios but how technology has advanced and everything including aspect ratio was standardized overscan itself has become a relic of the past. If you are unable to access or see edges of your desktop on the TV screen it is very likely that overscan is the issue. In order to fix this be sure to select HDTV's aspect ratio to fit the screen setting in the picture setting.
Sadly finding this option on your TV will be different from manufacturer to manufacturer and even from model to model of the same manufacturer so we can not cover all models but in most cases option is located under picture settings or advanced options. Sometimes you will face even different overscan settings instead of classic ft to screen options, in this case, experiment with the setting until you find one which will work. If you have it, find settings in the user manual of your TV.
Luckily you have managed to find the proper option on your TV set and have chosen the right aspect ratio for display. If everything works ok there is no need for the next step but if you experience a different resolution than desired on your TV follow this next guide on how to change the resolution of the TV on your PC.
Press the ⊞ Windows and type Change Display Settings. Click on the top result.
Once the Display Settings App opens, you’ll see two screens (or more if you’ve got multiple HDMI outputs connected). Make sure you select the right display for the HDMI TV before making any changes. You can do this by clicking on Identify.
You’ll see the number from the screenshot above displayed on the monitors for a brief period. Depending on which screen is set to your primary display, make sure you change the settings for the HDMI monitor.
Select the HDMI monitor from the available displays.
Scroll down until you see the current resolution settings for your HDMI monitor.
You can change the resolution settings and test different values that match your HDMI TV’s configuration.
Once you change the setting, Windows will apply the new resolution for a limited time and revert if you don’t accept the new setting.
Once you’ve found the best resolution for your TV, select Keep Changes to keep the new resolution.
You are all set now, make sure that you have the latest drivers on your system and enjoy using your TV as a second monitor.
A command is not recognized Error, what it is? If you are constantly using programs like CMD or DISM directly from the Run prompt, you might have wondered how they launched instantly and how is it that the Windows operating system is able to find them right away. For instance, when you create a shortcut of a program, the shortcut knows where exactly the program is located and launches it quickly.
The Windows operating system keeps a list of paths where the most common system programs are located so when you use the Run prompt, it opens easily. The list kept by Windows is called the Windows Environment Variables. If something goes wrong with this list, the programs won’t work. So in this guide, you will be guided on how you can troubleshoot the problem where any command you use is not recognized as an internal or external command, operable program, or batch file.
Before you start troubleshooting the problem, you need to make sure that the program you are trying to run really exists. In fact, this can also happen to the Run program which is pulled up using the Win + R shortcut. To check, go to C:\Windows\System32 and there, check if the program exists or not or you can also try searching for the EXE in the System 32 folder. After making sure that the program exists, refer to the instructions given below.
Modify the Windows Environment Variables:
Step 1: Tap the Win + X keys and then select System. After that, it will open the section where you can see all the properties on your computer.
Step 2: Next, select the Advanced system setting located on the left pane and click on the Environment Variables.
Step 3: After that, locate Path under the System Variables and select EDIT.
Step 4: Before you edit, you need to copy the entire string and paste it into the Notepad app so that in case something went wrong, you can paste it back.
Step 5: Next, look for the directory path, “C:\Windows\System32”. If you can’t find it, try adding a semi-colon at the end.
Step 6: Afterwards, click OK to save the changes made and then exit.
Step 7: Now restart your computer as all the paths are picked up when your computer restarts.
Note: Now all you have to do is to try executing the programs once again – the ones where you got the error, “ is not recognized as an internal or external command, operable program or batch file” every time you open them and then see if you can now open these programs or not.
Developed by Interesting Solutions, Webguard is a tool supposedly used for tracking those online who’ve developed a habit of tracking you. The application would provide logical analysis into a user’s website history, providing insight on what websites you’ve visited and also how persons are able to track your every move while browsing.
While Webguard is unable to dispose of who specifically is tracking your computer usage, they’re able to determine what computer installed tracking codes or cookies on your computer system. In this case, it’s then left up to the user’s discretion to determine who they want to allow or block from tracking their online use. Overall, this application allows the user some measure of freedom and control over their online experience. Like any other application, however, which has landed themselves a spot on Virus Total, Web guard has hidden agendas. At a distance, Webguard installs a service for Windows but later distributes advertisements.
Technical details about Webguard include:
Assessment of Webguard Potentially Unwanted Program
While Webguard claims to track your computer usage, information reported by the application isn’t sufficient for the common computer user. This brings us back to the ulterior motive or principal objective of developing Webguard – to advertise and generate revenue from clicks made by users on Ads displayed on Internet Browsers – namely Chrome, Internet Explorer and Firefox. Why should a computer user remove Webguard? Simply, it compromises one's Internet privacy and security and it keeps abreast of your Internet history.
If you’re online for an extended period, you’ll see what Webguard does. While the publishers behind the application did not alert users to the use of web beacons, cookies for tracking, and other related tracking technology, that’s not why Webguard is considered unwanted. The program is potentially unwanted because of the unpredictable advertisements it displays. Not all sites are trusted and so it’s difficult to determine, in some cases, what websites are legit for business.
Remove Webguard with Spyhunter
In most cases, at least from what I’ve seen, Webguard is installed as a single application. After it was installed for this assessment, it could be found in ‘All Programs”. This meant that one could manually delete the application from their computer system (see manual steps below). However, is that really sufficient to completely rid your PC of Webguard’s blueprints? While you might opt to remove Webguard manually – maybe because it’s more economical – an automated process is able to completely eradicate hidden threats from Webguard.
In comparison to manually removing Webguard, Spyhunter penetrates your computer system for all infections. In most cases, nasty threats are unable to be removed manually. Additionally, Spyhunter not only removes installed threats, but it detects incoming ones – hence, acting as a preventative tool. Furthermore, Spyhunter detects cookies placed on your computer by Webguard. These are all undetectable threats and so an automated tool, as Spyhunter, should be used to remove Spyhunter effectively from your computer.
Manual Steps for Removal of Webguard
I found this removal pretty simple. Depending on your Operating System, there will be slight discrepancies in the manual removal steps. Using the Windows 8 (8.1) OS on your computer:
Step 1: Locate the CONTROL PANEL on your computer using the SEARCH option.
Step 2: Once the search box appears , input 'CONTROL PANEL'.
Step 3: The Control Panel option will then appear. From the menu, choose the "Programs" option.
Step 4: Another menu will appear. Select "All Programs and Features".
Step 5: From the 'Programs list', search for the Webguard application.
Step 6: Right-click on Webguard when it's found.
Step 7: Choose the "Uninstall" option.
Step 8: Follow the uninstall wizard instructions until the Webguard application is fully removed.
To completely remove Bandoo from your computer, click here to download and install Spyhunter
In case you don’t know, the .Net Framework is a programming infrastructure introduced by Microsoft. You will need it to run on lots of services and applications. Note that most of the applications that require the .Net Framework are packed with their installation files which is why it will be installed automatically on your computer when you install an application. However, there are instances when you’ll get an error message saying, “The .NET Framework 4.7 is not supported on this operating system” while trying to install the .NET Framework as a standalone service.
The very reason why this error message appears is stated in the error message itself. Although the .Net Framework is supported on Windows 10, it is not actually compatible with some other Windows 10 versions. So it is most likely that you are seeing this error message because the .Net Framework in your computer is not compatible with the Windows 10 version you are running. Since that’s the case, you need to update Windows 10 to fix the problem.
Updating your Windows 10 computer is the only solution you can try to fix this problem. Thus, it is advised that you check for Windows Updates even if you are now using the latest version of Windows 10. And since the issue is caused by an incompatible operating system version, once you install the exact version of Windows 10 required by the .Net Framework, the problem will be fixed. Simply follow the steps given below to do so.
Step 1: Tap the Win + R keys to open the Run dialog box.
Step 2: After that, type in “winver” in the field and tap Enter.
Step 3: Next, your Windows 10 version should be given in the new window that appears. Take note that the number after the Version which is in the second line is your version number of Windows 10. And that the number must be 1507 or 1709. The first two digits in these numbers are the year while the second two represent the month when the update was released. So if you are running a 1709 version, this means that the Windows 10 version you are using was released in September 2017.
Step 4: The next thing you have to do is to make sure that you have the Windows 10 version that’s compatible with the .Net Framework. To verify, you need to click here and click on the System Requirements.
After opening the link, take a look at the Supported Operating System section where it says, “Windows 10 Anniversary Update” and “Windows 10 Creators Update”. Since there are users who are not familiar with the version numbers related to both the Anniversary and Creators updates, refer to the list given below.
November Update (1511)
Anniversary Update (14393)
Creators Update (1703)
Fall Creators Update (1709)
Spring Creators Update (1803)
As you can see, the Creators Update has version 1703 while the Anniversary Update has version number 14393 so if you are using a version lower than the 14393 version then it’s no wonder you aren’t able to install the .Net Framework 4.7 on your Windows 10 PC. Now all that’s left to do is to update your Windows 10 version and make sure that you will be updating it to the latest version available and then try installing the .Net Framework again.
One of the most useful tools you can use to repair bad or corrupted sectors in the hard disk of your computer is the CHKDSK utility. However, there are also instances when this Disk Checking tool could encounter some issues and one of them is the error that states, “The type of the file system are RAW, CHKDSK is not available for RAW drives”.
This kind of issue is due to the RAW file format which is not recognized by the Windows operating system that you’ve installed which explains why you’re getting this error when running the CHKDSK utility. You can also encounter this error in case there is something wrong with the drive encryption.
To fix this error, you have to change the File System of the drive. How? Refer to the steps given below.
Step 1: The first thing you need to do is create a bootable Windows 10 media.
Step 2: After that, click on Repair your computer on the first Windows 10 installation setup window.
Step 3: Next, you have to select the operating system partition from the given options and then click on Next.
Step 4: Now select Command Prompt from the System Recovery Options box and then type the following command and tap Enter to initiate the Diskpart utility inside Command Prompt.
diskpart
Step 5: Afterwards, type in either of the following commands to help you in either listing all the Disk connects or all the partitions on those disks formed.
diskpart or list volume
Step 6: Next, you need to select any of the two given commands below depending on the list you entered on the previous step.
select disk # or select volume #
Step 7: After you enter the command, it will select the Disk or the Partition you want to select. Now you have to type and enter the following command to clean your drive.
clean
Step 8: Now enter any of the two following commands.
list disk or list volume
Step 9: Then type the next command below to create a specified partition.
create partition primary
Step 10: Once done, type in the following command to select the newly created partition.
select partition 1
Step 11: Next, type the following command to mark the selected partition as active.
active
Step 12: Finally, restart your computer to successfully apply the changes made and then see if it has fixed the problem or not.
Modem Error 633 error is a dial-up error that usually occurs when using a USB modem with a Windows computer. The Modem Error 633 error message is displayed as the following:
“Error 633: The Modem is already in use or not configured properly.”
Solution
Error Causes
This error can be triggered due to several reasons such as:
A software program conflicts with the USB modem
The modem is not configured properly
The Telephon.ini file is missing or damaged
There is some issue with the way Windows is managing the communication (COM) ports on your computer.
Further Information and Manual Repair
If you experience the Modem Error 633 on your PC, you don’t have to panic. Though this error does not pose any major threats like data loss, it may hamper your ability to use the internet therefore it is advisable to resolve the error.
Repairing the Modem Error 633 is quite easy. There are a number of ways to fix this error. So, let’s get started:
Solution 1: Delete Incompatible Software and Non-Present Modems
Click on the start menu and go to the ‘Control Panel’. Now choose the option ‘Phone and Modem’.
Here you will see three tabs, the dialing rules, modems, and advanced. Choose the tab ‘Modems’. As you click on it, you will see modems installed on your PC. To repair the Modem Error 633, select and remove all the incompatible software and modems that are not present and click ‘OK’.
Now to bring the changes into effect, restart your system with the modem plugged in and try connecting to the internet again.
Solution 2: Change the Communication Ports
If the error occurs because the modem is not properly configured, then this solution is possibly the best way to resolve this error. Here’s what you need to do:
Click on the Start menu and choose My Computer.
Now click on the option ‘Manage’ to open the Computer Management Window.
Once it opens, click the option ‘Device Manager and then expand the option modems. Click on Properties, then the Advanced tab, and the Advanced Port Settings button.
As you click on the Advanced Port Settings, then click on the COM Port Number drop-down box.
Choose a new Communication Port. However, make sure it is not already in use.
Once you make changes, click ‘OK’ and then restart your PC.
Now Open Device Manager again. Open the Modern Properties Window and then Click the Diagnostics tab.
After that view the command response window to verify if the error is fixed. If yes, then create a new dial-up connection and connect to the internet with ease.
Solution 3: Disable the Startup items
Another way to resolve Modem Error 633 on your PC is to go to the start menu and type ‘msconfig’ into the search box and then press ‘enter’.
Open the misconfig.exe program. As you open it, you will see 4 tabs, General, Boot, Service, Start-up, and Tools.
Now click on the ‘Start-up’, ‘Disable All’, and then press Apply.
After you press Apply, a window will pop up asking to restart the computer.
Confirm it and click restart.
Once the computer restarts now try connecting to the internet again. This will hopefully resolve the Modem Error 633.
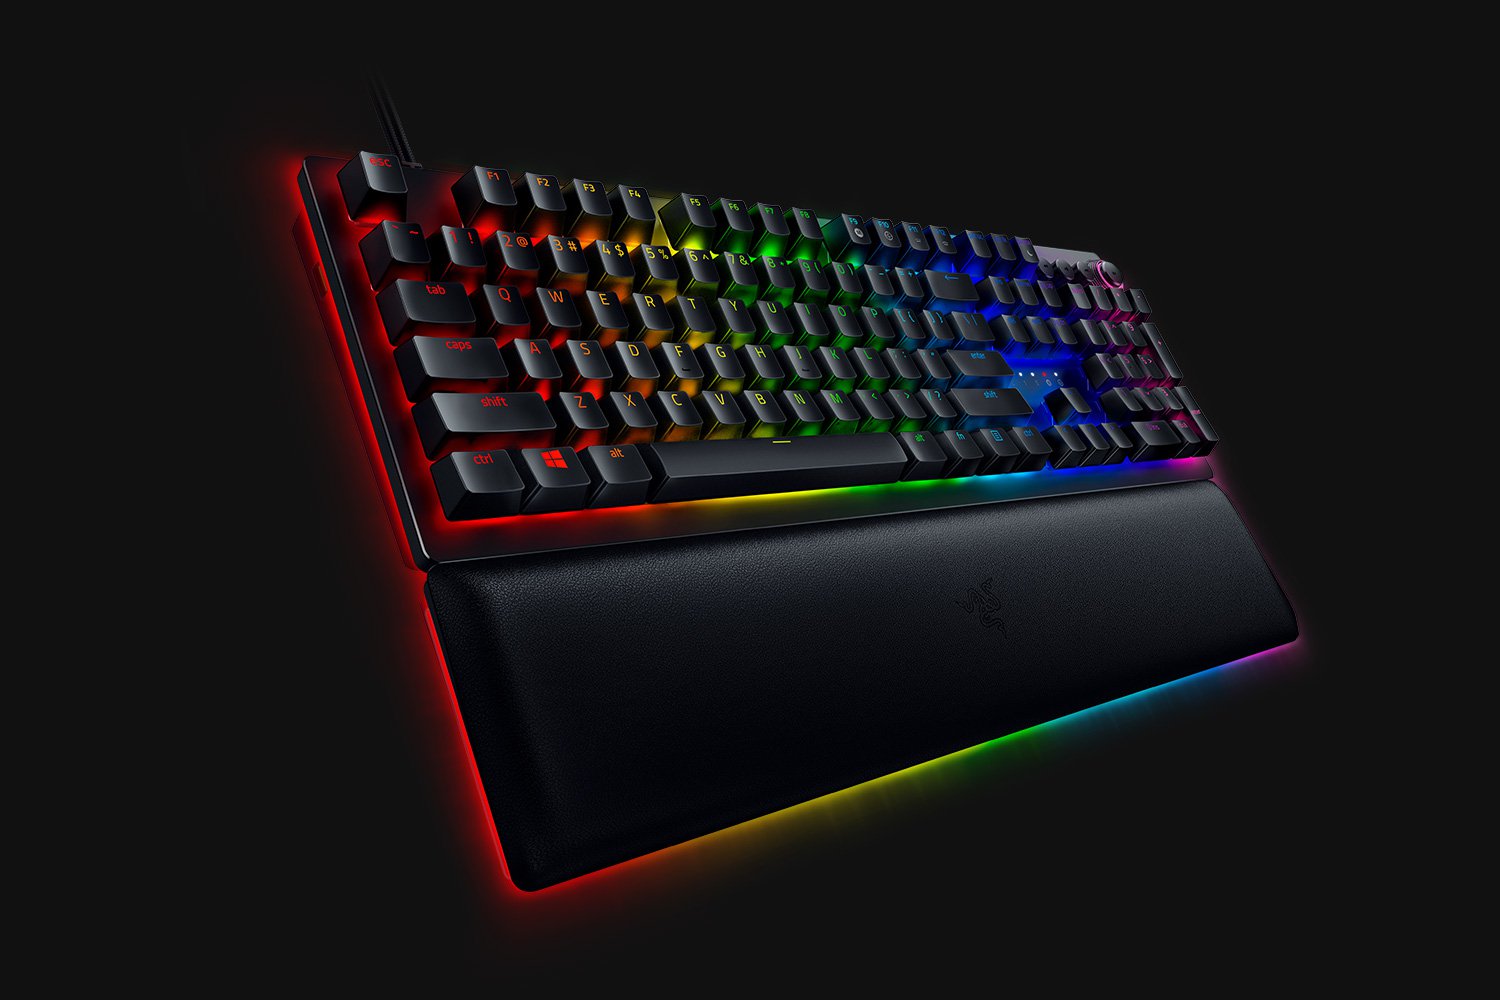
When it comes to computer peripherals first thing that comes to people's minds is probably Mouse and Keyboard. Also when discussing peripherals brands, Razer is not a stranger and over the years it has built its name and cult following.
Razer’s mechanical keyboards have been always in the upper field of quality and trust from users and Huntsman is no different.
Tech specifics of Huntsman keyboard
Mechanical optical switches
Razer has introduced their new optical technology switch with this keyboard. These switches are faster and more accurate than typical mechanical switches and if tests are to be believed this is the fastest keyboard currently on the market.
Multi-functional digital dial
A multi-function digital dial with three tactile media keys gives you instant access to everything from brightness to volume in seconds. All programmable and customizable through Synapse 3, so you can set your preferred configurations right at your fingertips.
10-key rollover
Anti-ghosting technology that enables 10-key simultaneous presses at the same time
4-side underglow with Razer chroma
Go crazy and personalize lighting effects any way you want with a full 4-side underglow and 38 customization zones. Powered by Razer Chroma
Feel and noise
In the department of noise, well it is the mechanical keyboard so naturally, it will be louder than membrane ones but in terms of comparing it to other mechanical keyboards it is within the same noise range, maybe just a tiny bit silenced.
The keyboard comes with 2 different types of switches, purple clicky ones that are louder and have that *click* sound for sound feedback, and red ones, that are not equipped with clicky sound but are linear providing slightly faster performance.
If you choose the Huntsman elite model of the keyboard it will come with a nice hand resting mat that is very comfortable and feels right. Using a keyboard feels like using a Razer keyboard, it is responsive and gives that superior mechanical feeling.
Conclusion
Razer Huntsman mechanical keyboard is not the cheapest nor the best on the market but it is the fastest one out. It is in the top tier of keyboards and worth the investment.
 The world today is still sadly under pandemic and by the looks of it, COVID-19 is here to stay, well at least for some time in the near future. Razer seems to think so as well since their upcoming gear is not really what you would expect.
 Error Causes

 When it comes to computer peripherals first thing that comes to people's minds is probably Mouse and Keyboard. Also when discussing peripherals brands, Razer is not a stranger and over the years it has built its name and cult following.
Razer’s mechanical keyboards have been always in the upper field of quality and trust from users and Huntsman is no different.
When it comes to computer peripherals first thing that comes to people's minds is probably Mouse and Keyboard. Also when discussing peripherals brands, Razer is not a stranger and over the years it has built its name and cult following.
Razer’s mechanical keyboards have been always in the upper field of quality and trust from users and Huntsman is no different.