If you wish to continue where you have left off when you signed out of Windows follow this guide and learn how to continue your work after signing in, restart apps in your Windows.
You can set Windows 10 to Automatically save your restartable apps when you sign out and restart them after you sign in. Here’s how:

 Guide
GuideEnter Cooler Master XG850 PLUS PLATINUM, a new, in-house designed power supply from Cooler Master. I will admit that in last years I was a big fan of Cooler Master and their components, well not all but power supply and PC cases were always products from them that I liked and used. The latest power supply from them does not disappoint and I must say that I like it very much, it is hi-quality, it is silent, it has a large LCD display where you can see its current state and also has some RGB lights so it looks cool in your case.

So without further detours here are the technical specifications and then we will talk a little about it.
| Model: MPG-8501-AFBAP-X |
| ATX Version: Intel ATX 12V Ver. 2.53 |
| PFC: Active PFC |
| Input Voltage: 100-240V |
| Input Current: 12-6A |
| Input Frequency: 50-60Hz |
| Dimensions (L x W x H): 160 x 150 x 86 mm |
| Fan Size: 135mm |
| Fan Speed: 1800 RPM |
| Noise Level @ 100%: ≤ 25 dBA |
| Efficiency: ≥ 92% @ Typical Load |
| 80 PLUS Rating: 80 PLUS Platinum |
| ErP 2014 Lot 3: Yes |
| Operating Temperature: 0-50°C |
| Power Good Signal: 100 - 150 ms |
| Hold Up Time: ≥ 16ms |
| MTBF: >100,000 Hours |
| Protections: OPP, OVP, OCP, UVP, SCP, OTP, Surge, and Inrush Protection |
| Regulatory: TUV, cTUVus, CE, BSMI, FCC, CCC, EAC, UKCA |
| ATX 24 Pin Connectors: 1 |
| EPS 4+4 Pin Connectors: 1 |
| EPS 8 Pin Connector: 1 |
| SATA Connectors: 12 |
| Peripheral 4 Pin Connectors: 4 |
| PCI-e 6+2 Pin Connectors: 6 |
| USB Protocol 10P: 1 |
| Series: XG Series |
| 80 Plus: Platinum |
| Modular: Full Modular |
| Wattage: Above 750W |
If we put aside the technical characteristics of the power supply itself we are left with visual and real working experience. Now real working experience will not be covered here since yea it is working great but it needs some time and a long period of testing in order to be able to say that it is indeed reliable and great but considering I have never had any issues personally with power supplies from Cooler Master I will assume that this one is also very reliable and hi-quality.
That leaves us basically with looks and feels of supply itself and I must say that I like it, and I mean I like it a lot. It feels hi-quality and it looks hi-quality. The LCD display is very good looking and it is very crisp and readable. With power supply some proprietary software so you can choose what you want on display on the screen and also you can control RGB and display colors with it.
I have not opened the power supply to see how it looks inside but from what I could see I think this would be my new power supply if I were building a new PC now. I recommend it and if you decide to get it I hope it will serve you long long time.
Thank you for reading and I hope to see you next time.
ChatZum is a Potentially Unwanted Program that installs a Toolbar into your browser. This program allegedly allows users to zoom in on photos without clicking on them, however, upon further research, it was discovered that this function does not work on the latest version of browsers.
From the Author: ChatZum is a Browser add-on (toolbar) that enables its users to hover over images in Major Social network's websites and view a larger version of an image.
While installing this toolbar will track user web browsing sessions and will record website visits, clicks, and sometimes even personal information. This information is later used to display targeted ads to the user. To allow easier user tracking, the program changes the browser home page and default search engine to Nation Search Advanced, which injects additional advertisements and tracks user activity.
Several anti-virus applications have marked this program as Potentially Unwanted, and it is not recommended to keep it on your computer, especially considering the fact it will most likely not work on your browser.
Administrators can download updates from the Microsoft Download Center or the Windows Update Catalog to deploy to multiple computers If you are running Windows Server Update Services (WSUS) 3.0, System Center Essentials (SCE), or System Center Configuration Manager (SCCM) you can import updates directly into these applications. Security updates, critical updates, service packs, update rollups, definition updates, and critical drivers can be configured to synchronize with your server automatically. You can still import these updates into your application by using Microsoft Update Catalog; however, depending on how you configure WSUS, SCE, and SCCM, you may not need to import the updates.
 Microsoft’s initial Windows 11 hardware requirements were not really well received by users and they were not really clearly represented from the start making a lot of potential customers slowly drift away from the hype.
It seems that Microsoft has acknowledged this since they have changed their tune about system hardware requirements for the upcoming Windows 11.
It seems that Windows 11 will be able to be officially installed on unsupported computers but with a little inconvenience.
Microsoft’s initial Windows 11 hardware requirements were not really well received by users and they were not really clearly represented from the start making a lot of potential customers slowly drift away from the hype.
It seems that Microsoft has acknowledged this since they have changed their tune about system hardware requirements for the upcoming Windows 11.
It seems that Windows 11 will be able to be officially installed on unsupported computers but with a little inconvenience.

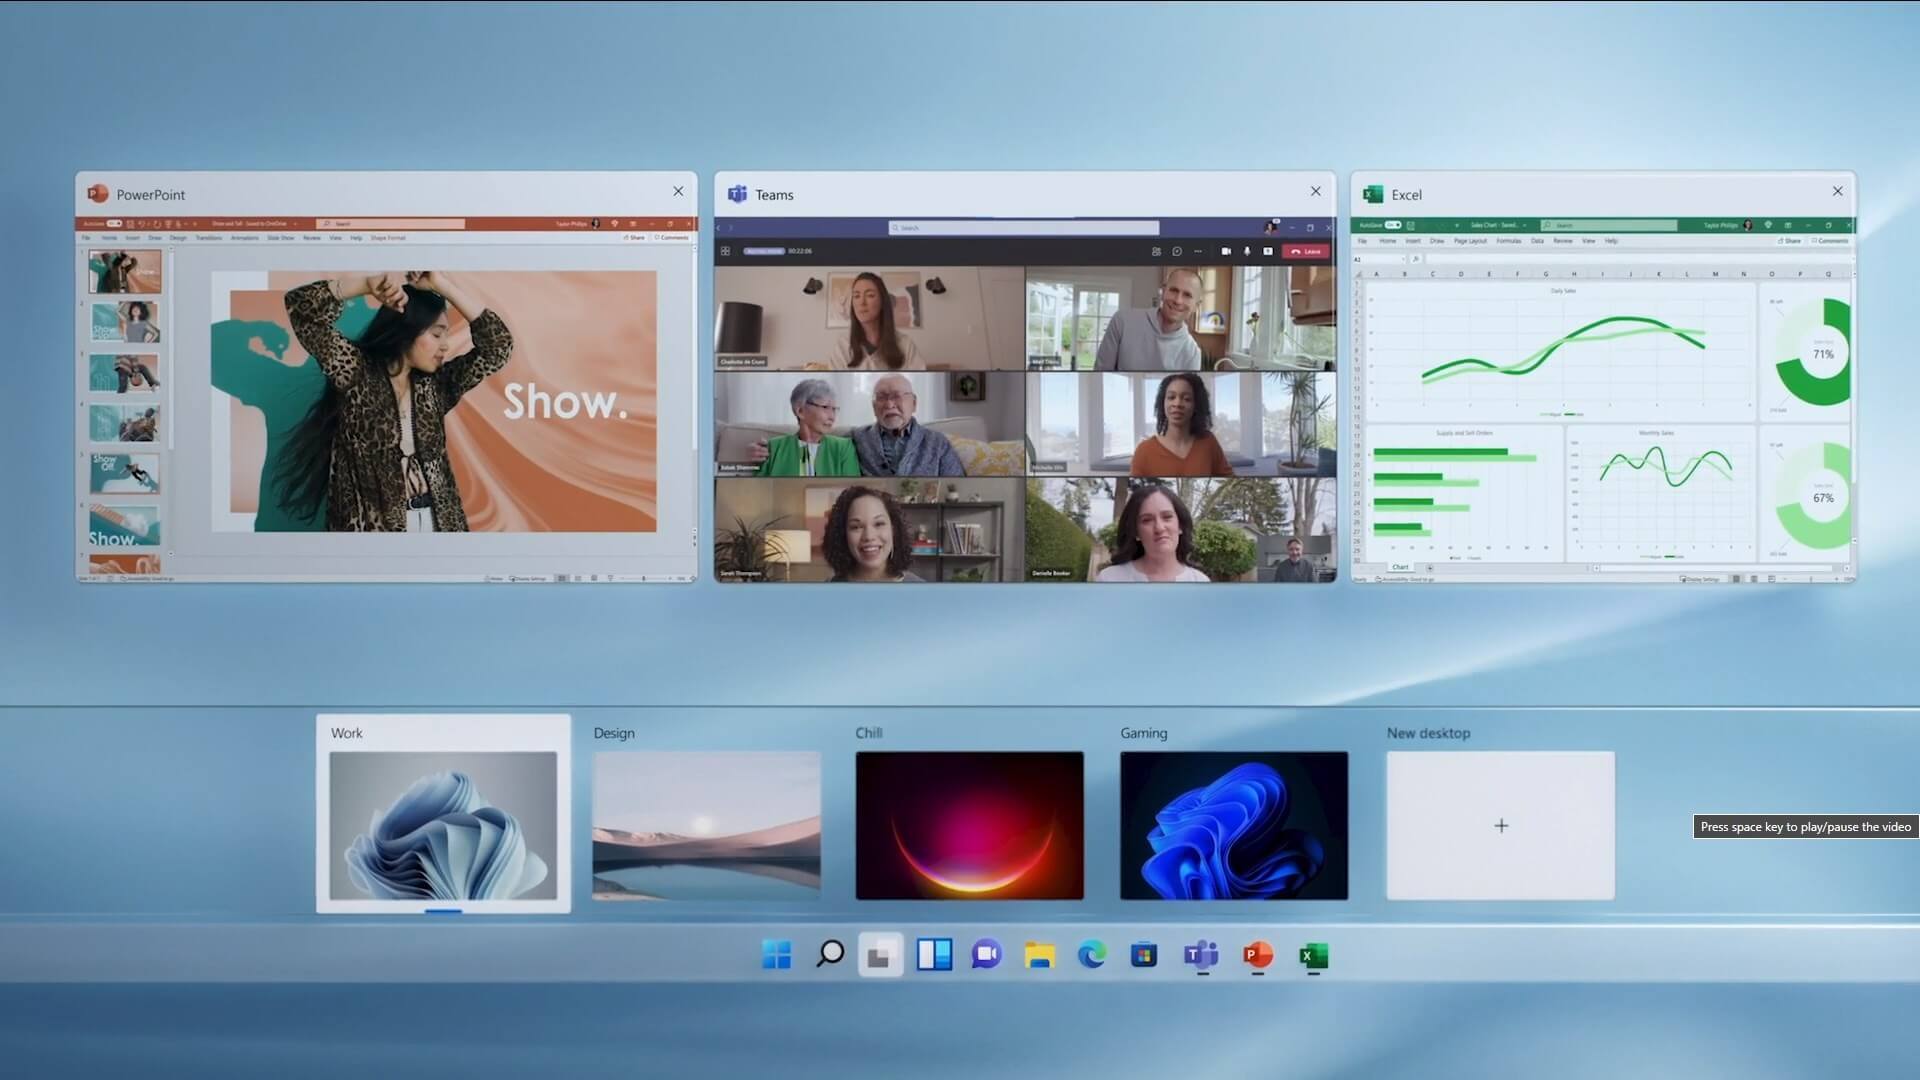 The feature that was originally planned for now scrapped Windows 10X is included in Windows 11. You will be able to customize your Virtual desktop with different wallpapers for each screen.
In order to fully customize your virtual desktops with different wallpapers follow this easy step-by-step guide.
The feature that was originally planned for now scrapped Windows 10X is included in Windows 11. You will be able to customize your Virtual desktop with different wallpapers for each screen.
In order to fully customize your virtual desktops with different wallpapers follow this easy step-by-step guide.
'Error 1603: A fatal error occurred during installation.'It indicates a problem occurred during the installation process and unsuccessful installation.
 Error Causes
wmic path SoftwareLicensingService get OA3xOriginalProductKeyTake note of the product key and then proceed to the options given below.