Still sitting on the fence about upgrading to Windows 11 because you don’t know what to expect? Interestingly, the new edition somehow manages to be both a total revamp and still very similar to its predecessor in many ways. It’s really something to experience for yourself.
We do want to give you a sneak peek, though. So here’s an overview of the biggest changes Windows 11 brings to the table.
What’s different in Windows 11?
1. Visual changes
The first thing anyone will notice after switching to Windows 11 is the striking visual difference. The entire interface is smoother, cleaner and more minimalistic than on Windows 10, even resembling the macOS in some instances. Perhaps the most obvious change in appearance is the Start menu and Taskbar location, which is now at the bottom center. It’s actually very neat, but if you’re someone who loves familiarity, don’t worry, you can move it back to the left.
Centralized Taskbar and Start menu
Moreover, you’ll notice that the Taskbar includes a Microsoft Teams icon by default (which you can, of course, remove) and that Live Tiles are gone. The News and Interests section has also been removed - or, shall we say, replaced. As opposed to Windows 10, news, weather forecasts and other information are now displayed as widgets.
To add to the cleanliness of the UI, Microsoft also enhanced the ‘Snap Layouts’ feature to help you better organize your windows and maximize screen real estate. It’s similar to app grouping on your smartphone. In Windows 10 this feature is slightly restricted, as it requires some manual resizing and dragging. In Windows 11, you can just hover over the minimize/maximize option on a window, select a layout and throw the windows in there.
Snap Layouts
2. New accessibility features
Microsoft has certainly paid attention to accessibility with Windows 10, but Windows 11 takes this to a whole new level.
One of the ways Windows 11 has taken things up a notch is by adding the long-awaited ‘Live Captions’ feature and advanced Narrator options.
Live Captions apply both to media played on your PC as well as your own speech when you’re using the microphone. Keep in mind that, as with almost all kinds of subtitles, you have to be prepared for a potential delay. However, it’s barely noticeable and doesn’t take away from the usefulness of this awesome new feature whatsoever.
As for the Narrator, there are three new voice packs to choose from. Microsoft has tried to put emphasis on a more natural voice than we are used to. So, now you can choose between Aria, Jenny and Guy, who will read pretty much anything off your screen out loud. Aside from this, Microsoft has also expanded the list of braille displays supported by the Narrator feature. For users with anxiety or trouble concentrating, a welcomed addition is the Focus app, which is no longer part of the Clock app. It’s now separate and called ‘Focus Sessions’, automatically triggering the Do Not Disturb mode when activated. It blocks all pop-ups and flashes and lets you work in peace until you’re ready to switch it off.
3. Android apps
Android users may rejoice! Windows 11 supports the use of your favorite applications now.
Microsoft has done this by integrating the Amazon Appstore to the Windows 11 Microsoft Store. From there, you can download your favorite Android apps and use them on your PC in a smartphone-like window.
Unfortunately not too many apps are supported at this time, but Microsoft is working on making the emulation possible for many more. Also, the option is only available in specific regions at this moment - check out if you’re one of the lucky ones.
4. Improved gaming performance
Avid gamers will be happy to hear that Microsoft has put some effort into streamlining Windows 11 for their gaming needs.
To give gamers a supreme visual experience, Windows 11 offers the ‘Auto HDR’ feature. As long as your monitor is HDR-compatible, this feature will automatically adjust the colors, brightness and contrast of games without any input from you.
Another update is DirectStorage, which we were introduced to in Windows 10 already. In Windows 11, it’s been improved to tweak loading times and overall gaming performance efficiency even better. The predisposition for it to work optimally is that your device has an NVMe SSD.
The Xbox Game Bar also helps gamers towards a smoother experience. It allows in-game screenshots, viewing processes that are running (similar to the Task Manager), monitoring the CPU and GPU performance and frame rate, integrating the Xbox App and more. There’s also a number of widgets you can now use with the Game Bar, for example the Spotify widget.
Xbox Game Bar
Another cool addition is the Xbox Game Pass, which unlocks hundreds of games to play on your Xbox App, with new additions coming in every month.
5. Smart App Control
Aside from a sleek new look and better accessibility for all users, Windows 11 also comes with a security power-up. Bear in mind that this feature is only available on clean Windows 11 installs.
Smart App Control (SAC) is an AI-powered new feature designed to protect your PC from potential threats. It blocks untrustworthy apps and adware and helps detect potentially unwanted apps, maintaining your PC’s performance and keeping your system safe.
It comes with an ‘Evaluation’ mode, which you should definitely select when running SAC for the first time. That way, the app monitors your usage and assesses whether you’re a candidate for SAC. Some users need it to be on all the time, for others it might be too distracting. Evaluation mode will turn SAC on or off based on your usage.
Don’t disable SAC again unless you’re absolutely sure you don’t need it, since reenabling it will require a fresh install. We recommend you don’t turn it off, as it is a neat feature protecting your data and files from malware at all times.
Summary
Have we piqued your interest in trying Microsoft’s latest OS? It’s a pretty exciting new iteration, but we’ll let you find out for yourself. We hope you like it!
When it comes to booting an operating system on a computer, one of the most essential pieces of software you can use is the UEFI. In fact, a lot of users now prefer to use UEFI instead of BIOS. It also depends on whether the UEFI or the BIOS is supported on the motherboard. Recently, a number of users reported an issue with UEFI where they were unable to find it under the Advanced Options screen where it’s supposed to be located.
The missing UEFI Firmware settings in the Advanced Options could be caused by several reasons. It is possible that the access to the UEFI menu is blocked or it could also be due to the Extra Fast Startup feature being enabled. It is also possible that the operating system is installed in Legacy mode.
There are several options to try to fix this issue. You need to check if your computer supports UEFI or you could also try to disable Fast Startup or bypass the Extra Fast Startup feature. You can also use a boot to UEFI shortcut as well as check the CMOS battery.
Option 1 – Try checking if your computer supports UEFI
The first thing you have to do is to verify if your computer supports UEFI. If your computer does not support UEFI, then it’s no wonder why you don’t see the UEFI Firmware settings in the Advanced Options.
Option 2 – Try turning off Fast Startup
First, boot your computer in Safe Mode.
Once your computer is booted in Safe Mode, tap the Win + R keys to open the Run dialog box and type in “control” to open the Control Panel.
Next, click on the Hardware and Sound section and click on Power Options.
Afterward, select the “Choose what the power buttons do” option from the left side menu pane.
Now click on Change settings that are currently unavailable and uncheck the entry that says, “Turn on fast startup (Recommended)”.
Then click on Save Changes and restart your computer and see if it has fixed the problem or not.
Option 3 – Try bypassing the Extra Fast Startup feature
As mentioned, the missing UEFI Firmware settings could be due to the Extra Fast Startup feature. To fix it, you have to disable this feature. All you have to do is tap and hold the Shift key and click on the Shutdown button from the Start button. This will boot your PC with the UEFI booting from the beginning and then use the hotkey for your motherboard to boot into the UEFI setup.
Option 4 – Try using a boot to UEFI shortcut
Right-click on any empty space on your Desktop and select New > Shortcut.
This will open a new mini window. And here, you have to type this in the text field: shutdown /r /fw
After that, click on Next and name the desktop shortcut and then click on Finish.
Next, right-click on the newly created shortcut and select Properties.
Click on the Advanced button and select the “Run as administrator” option.
Now click OK to save the changes made. Each time you execute this shortcut, your computer will automatically be booted to the UEFI Firmware Settings.
Option 5 – Try to check the CMOS battery
Another thing you can do is check the CMOS battery physically on the motherboard and see if it has to be replaced since a damaged CMOS battery can also cause the issue with the missing UEFI Firmware settings.
Option 6 – Set your computer from Legacy to UEFI
If applicable, you can try to set your computer from Legacy to UEFI to resolve the problem.
In the Windows Search box, type “command prompt” and from the search results that appear, right-click on Command Prompt and select the “Run as administrator” option.
After that, execute this command: mbr2gpt.exe /convert /allowfullOS
Now, wait until the process is completed since you can track its process on your screen.
Once it’s done, go to Settings > Update & Security > Advanced Startup options and from there, click on Restart Now. This will restart your computer and give you advanced options.
Next, select Troubleshoot > Advanced Options where you will see further options including System Restore, Startup Repair, Go back to the previous version, Command Prompt, System Image Recovery, and UEFI Firmware Settings.
Now select the UEFI Firmware Settings. This will take you to the BIOS. Boot Mode is typically available under Boot > Boot Configuration. Once you’re there, set it to UEFI and then save the changes you’ve made. After that, your computer will restart.
Microsoft has started building a unified store with Windows 8 and later with Windows 10 in order to make it easier for users to get safer and more modern applications for their Windows 10 devices. This unified store is called the Microsoft Store which is tied up with the Windows Update. The delivery for them both are quite similar which is why they also have some common errors as well as fixes for them. So in this post, you will be guided on how you can fix error 0x80246019 for both Microsoft Store and Windows Update in your Windows 10 computer.
The error 0x80246019 might be caused by corrupted system files or missing ones or be due to some glitch in the component services and other possible causes but whatever the cause is, you can fix it with the help of the following fixes, make sure to follow each one of them carefully.
Option 1 – Reset Windows Update components
Open Command Prompt with admin privileges.
After that, type each one of the following commands and hit Enter after you key in one after the other.
net stop wuauserv
net stop cryptsvc
net stop bits
net stop msiserver
Note: The commands you entered will stop the Windows Update components such as Windows Update service, Cryptographic services, BITS, and MSI Installer.
After disabling WU components, you need to rename both the SoftwareDistribution and Catroot2 folders. To do that, type each one of the following commands below, and don’t forget to hit Enter after you type one command after the other.
Next, restart the services you’ve stopped by entering another series of commands. Don’t forget to hit Enter after you key in one command after the other.
net start wuauserv
net start cryptsvc
net start bits
net start msiserver
Close Command Prompt and reboot your PC.
Option 2 – Toggle the Windows Insider Program settings
This option is only applicable to you if you are a part of the Windows Insider Program. If you are, then follow the steps below.
First, you have to open Settings and go to the Update & Security section.
From there select the Windows Insider Program.
After that, select the “Stop Insider Preview builds” option and then restart your computer.
Now open the Windows Insider Program again and check if it fixes error 0x80246019 or not.
Option 3 – Run the System File Checker Scan
System File Checker or SFC is a built-in command utility that helps in restoring corrupted files as well as missing files. It replaces bad and corrupted system files with good system files that might be the cause why you’re getting error 0x80246019. To run the SFC command, follow the steps given below.
Tap Win + R to launch Run.
Type in cmd in the field and tap Enter.
After opening Command Prompt, type in sfc /scannow
The command will start a system scan which will take a few whiles before it finishes. Once it’s done, you could get the following results:
Windows Resource Protection did not find any integrity violations.
Windows Resource Protection found corrupt files and successfully repaired them.
Windows Resource Protection found corrupt files but was unable to fix some of them.
Reboot your computer.
Option 4 – Run the DISM tool
You can also run the DISM Tool as it helps in repairing the Windows System Image as well as the Windows Component Store in Windows 10. Using this built-in tool, you have various options such as the “/ScanHealth”, “/CheckHealth”, and “/RestoreHealth” which could help in fixing error 0x80246019.
Open the Command Prompt with admin privileges.
Then type in the following commands and make sure to hit Enter right after you type each one of them:
Dism /Online /Cleanup-Image /CheckHealth
Dism /Online /Cleanup-Image /ScanHealth
exe /Online /Cleanup-image /Restorehealth
Do not close the window if the process takes a while as it will probably take a few minutes to finish.
Option 5 – Try to reset the Microsoft Store cache
Just like browsers, Microsoft Store also caches as you view apps and games so it is most likely that the cache is no longer valid and must be removed. To do so, follow the steps below.
Right-click on the start button and click on Command Prompt (administrator).
Next, type in the command, “wsreset.exe” and tap Enter. Once you do, the command will clear the cache for the Windows Store app.
Now restart your PC and afterward, try opening Microsoft Store again and then try to install your app or update your computer again.
Option 6 – Run the Windows Update Troubleshooter
You might also want to run the Windows Update Troubleshooter as it could also help in fixing error 0x80246019. To run it, go to Settings and then select Troubleshoot from the options. From there, click on Windows Update and then click the “Run the troubleshooter” button. After that, follow the next on-screen instructions and you should be good to go.
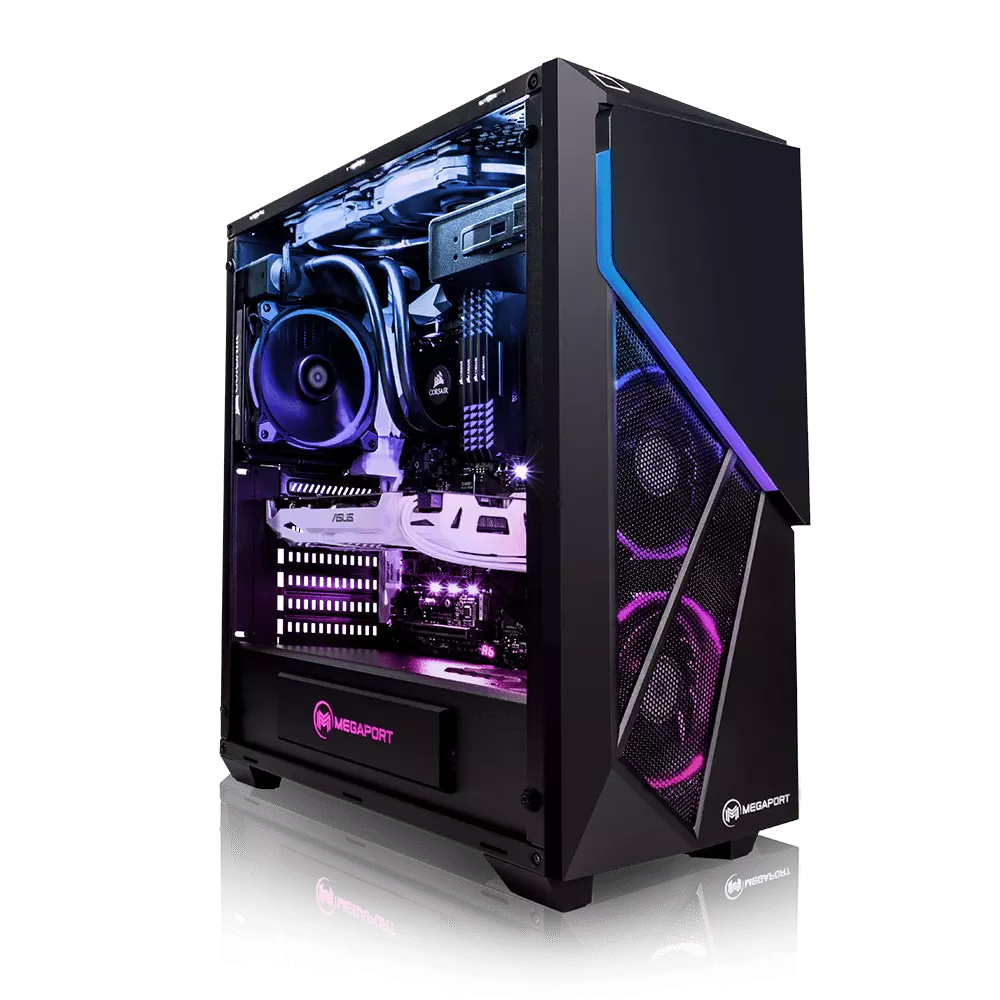
Building your own custom PC system can be one of the greatest things you can do to your budget. Instead of going for a rebuild, we will go into detail about why building your own PC is a much better option. Also, note that if you do not possess enough technical knowledge about a topic there are plenty of stores that will offer you advice on components and after all, you can always get help from a friend.
So without further diversion from the topic, let us explore all the benefits of building a custom computer.
Building a custom PC is cheaper
At the first look, this statement does not feel right since when you look at the prebuilt systems you get a feeling that it is much cheaper than do it yourself variant and although CPU and GPU seem like a great deal I beg you to look under the hood on other components. Usually to lower price compromise would be made on other crucial components like SD or power supply, a PC case, or motherboard so even if you have a good CPU and GPU that will not matter much since other components would not be able to catch up with them. After all, prebuild computers will need to pay people who are building them and there is no way that will be cheaper if you just plain went and bought the same components yourself and install them.
When you are in control in choosing each component there is not only being cheaper online, it is flexibility with building itself. You choose which components you want to be stronger and which to be normal. Also, you can choose the exact model of the given component leaving you more in control and open to future upgrades.
More flexibility
Also, it may sound irrelevant but when building your own custom PC you can also choose which company you would like to purchase for each model, yes considering the CPU it is AMD or Intel but when you are buying a case, SSD, GPU, and other components choosing the right company for your needs is also the thing that should not be overlooked.
You can customize it the way you want
Not really a quality argument but with a custom PC build, you can choose would you like that RGB component or not, you choose do you like white or black fans, and many more things. You really can place a personal stamp on the computer making it indeed a personal computer.
You choose OS and applications
When you buy an already prebuilt PC, usually it comes with some sort of OS on it, sometimes it is freedos, Linux and sometimes it is Windows Home. When you get your hands dirty you can place whichever system you want on it and install applications that you use and know and some preinstalled typical apps.
DuckGoGo a popular private search engine is releasing its first browser soon that is focused on privacy like its search engine.
From the recent blog, Gabriel Weinberg, CEO of DuckDuckGo, has stated:
“Like we’ve done on mobile, DuckDuckGo for desktop will redefine user expectations of everyday online privacy,”
From everything that we have learned so far, the browser will be focused on making privacy super easy and simple, eliminating tons of different settings about privacy, and making the whole environment robust privacy protection all set by default. Settings will be applied in all fields, across search, browsing, email, and more. Gabriel also said that aim of the browser is not just a privacy browser, it is meant to be built and used as your everyday browser, for everyday use that protects your privacy as a bonus.
One interesting thing that was stated is that browser itself is built upon OS-provided rendering engines instead of typical Chromium. DuckDuckGo says this approach will strip away a lot of the unnecessary cruft and clutter that's accumulated over the years in major browsers. Also, the company stated that when compared to Chrome, the DuckDuckGo app desktop is cleaner, way more private and that early tests have found out that it is significantly faster as well.
Is this just corporate advertising or reality? We will see once the browser is released, or once it is released for public testing. Until then take care and happy holidays.
As a digital creation of Blueis, the DownloadAdmin application peruses your computer system for programs/applications that are outdated. This program then makes the necessary updates/installation on your computer, as if it were the Administrator. While most people might consider this application harmful, scrutinizing the Digital Publisher/Creator of the application should be reason enough to remove DownloadAdmin (and any other associated program) from your computer. Why? Blueis is infamous for producing/distributing “adware type software”, according to herdProtect Anti-Malware. Is that not a plausible reason for you to remove applications associated with that publisher? Additionally, DownloadAdmin not only updates your outdated applications, but it installs additional programs - usually utility tools and search toolbars. This is a sly way to promote third-party software and to get ads loaded onto your computer system.
Technical details about DownloadAdmin include:
Digital Publisher: Blueis
Product Version: 4.0.0.1
Original File Name: DownloadAdmin
Entry Point: 0x0000234A
Assessment of DownloadAdmin
For this assessment, the DownloadAdmin file was obtained and installed on a test computer. After the DownloadAdmin/Updateadmin application was installed, it made several modifications to the computer system. These modifications may class the newly installed file as a PUP (potentially unwanted program). Outlined below is what took place after the file was installed.
Updated an outdated application installed on the computer
Subsequent to the update made by Updateadmin, I thought the PUP had run its course. However, it was not quite finished. It was after scanning the contents/programs of my Local Drive, I stumbled on an additional program, one that I did not download or install, at least not intentionally. As predicted, the DownloadAdmin application scanned through the computer system (in the blink of an eye), during installation and made adjustments to an application already installed. This program was the Mozilla Firefox. Since Mozilla Firefox was rarely used on the PC in question, the DownloadAdmin application thought it quite appropriate to revive the Mozilla Firefox browser, by replacing it with the latest or more contemporary version.
Installed a search toolbar
While DownloadAdmin did request permission to install an updated version of my Browser, it provided no warning about installing a search toolbar. This is quite shady and deceptive. In addition to updating the Internet Browser, DownloadAmin also installed the SearchProtect toolbar (Conduit). This toolbar is no stranger to the market as I’ve encountered it on several occasions during my assessment of malware.
Should you remove DownloadAmin?
That decision is totally yours to make. However, here are some reasons why most people would consider that program unwanted
It updates your outdated programs
In most cases, at least those I’ve seen, if a user has a program installed, they don’t necessarily want a new version of that program. In fact, this PUP could spell trouble since some programs, especially paid, require a license to use the software. When that program is updated/ upgraded, you might have to acquire a new license to get it to work.
Unnecessary program
If you’re totally lackadaisical and loathe the idea of doing work yourself, this program might come in handy. Many users will update their computers manually by using Microsoft’s preinstalled/pre-programmed updater in their computer’s Control Panel. This option searches for and installs all the necessary programs to keep your computer safe and secure. The DownloadAdmin program only occupies needed space and resources on your computer. However, what’s good about this program is that it doesn’t operate at the start time so it doesn’t necessarily cause unnecessary lags on your computer.
Modifies your search experience
By installing a search toolbar called SearchProtect, Updateadmin modifies or changes the browsing experience you’re accustomed to. SearchProtect hijacks your browser and changes your homepage to their choice while removing yours. This is often hard to reverse since the publisher created this software to remain once installed.
To completely remove DownloadAdmin from your computer, click here to download and install Spyhunter
If you got the Microsoft Store error code 0x80072F30 while trying to open Microsoft Store, then it indicates that the Store fails to connect to the internet or is not able to launch successfully for some reason. It could be that the Windows Update Service has stopped or the Windows Store cache might be corrupted or it could just be due to a poor internet connection. Whichever the cause is, you have to fix this error so that you can use Microsoft Store again and you won’t be getting the following error message every time you open the app:
“Check your connection, Microsoft Store needs to be online, It looks like you are not, error code 0x80072f30.”
The error code 0x80072F30 is related to the Windows Store which prevents it from opening properly. To resolve this problem, you can try fixing the problem with the help of the options given below. Follow each one of them carefully.
Option 1 – Check your internet connection
The first and most obvious thing you can do is to check your internet connection. This may only be a basic tip but it sure works like a charm in most cases. And if you have another internet connection available, you can also try connecting to that and see if you can pull up Microsoft Store or not.
1] Change your internet connection:
A basic tip, but sometimes works like a charm. You may want to check if your internet connection has an issue, or you can also try opening a website and see if you can open it and if possible try connecting to a different internet connection and see if the Microsoft Store opens for you. We also suggest you try changing your DNS and see if it helps.
Option 2 – Check the date and time as well as the time zone of your PC
A lot of services and apps rely on the Date, Time, and Time Zone of your PC which is why if they are not configured correctly, a request from the client machine will be rejected from the server and the same thing happens with the Microsoft Store.
First, go to Settings > Time and Language.
From there, check if it is set to Automatic or not – if it is, switch the toggle button off to set the Time and Time zone manually.
Then select the right time zone manually.
On the other hand, if the Time and Time zone is set manually, you have to switch the toggle button on to set Time and Time zone automatically.
Restart your PC and afterward try opening Microsoft Store again and check if the problem’s fixed or not.
Option 3 – Run the Network Adapter Troubleshooter
Since Windows 10 is packed with various troubleshooters – one of which is the Network Adapter Troubleshooter – you can use it to troubleshoot the problem. To use it, follow these steps:
Open the Search bar on your computer and type in “troubleshoot” to open the Troubleshoot settings.
Next, scroll down and select the “Network Adapter” option from the right pane.
Then click on the Run Troubleshooter” button.
After that, your computer will check for any possible errors and will pinpoint the root cause of the problem if possible.
Option 4 – Try to reset the Microsoft Store cache
Just like browsers, Microsoft Store also caches as you view apps and games so it is most likely that the cache is no longer valid and must be removed. To do so, follow the steps below.
Right-click on the start button and click on Command Prompt (administrator).
Next, type in the command, “exe” and tap Enter. Once you do, the command will clear the cache for the Windows Store app.
Now restart your PC and afterward, try opening Microsoft Store again.
Option 5 – Check the Windows Update Service status
You might also want to check the status of the Windows Update Service since the proper functioning of this app depends on the Windows Update Service. It could be that there is some issue with the service which is why you’re getting the error code 0x80072F30 while trying to open Microsoft Store.
Tap the Win + R keys to open the Run dialog box.
Then type “services.msc” in the field and hit Enter to open Services.
Next, look for Windows Update Service from the list of available services in Windows.
Once you see it, check if its status is STOP or Pause and then change the status to Automatic.
Microsoft store is ready and prepared for Windows 11 official release on October 5th and it is coming with some surprises.
It has officially confirmed that many open source and free applications will be in it like Opera, VLC, discord, Libre office, etc. It seems that Microsoft wants to place its store as one place to go for all of your software needs.
Another great surprise is the coming of Epic games store implementation. It was officially confirmed but not explained in detail, will we have Epic store opened in Windows store or we will only get installer as a package we will see but this is some great news.
As for how it states now, it seems that the Windows store aims to eliminate searching the web for applications and bring them all into one environment with reviews and ratings so you know which one to install and use. It also features a great search engine to find proper applications for your needs.
The new store will come to Windows 10 as well but after all Windows 11 has been mostly released and adopted. So expect it via update in two or three months' time.
It would be great if some larger companies decide to join MS stores like Autodesk, Adobe, the Foundry, etc so you can install everything you need from it but one can only hope.
If you don’t have the required drivers installed in your computer, the hardware that you try to connect to your computer will most likely fail. In order to keep the operating system running on your computer, manufacturers develop drivers that can work harmoniously with your devices and applications. However, internet Wi-Fi connections can fail if suitable drivers are not installed. Worry not though for this post will guide you in installing Wi-Fi drivers on your Windows 10 computer.
As you know, a driver is an essential piece of software designed for a specific operating system like Windows 10, Linux, and many more. The operating system uses it to communicate with other hardware devices such as printers and mice. Most hardware manufacturers feature a support page of their own product where you can look for the necessary drivers available for download.
You will see that the Windows operating system has a set of drivers that are already installed and you do not have to do anything except plug in the device. So if the driver is not locally available, it will pull it down from its web server and automatically install it for you after you connect the device. However, there are instances when you might encounter some issues while using your Wi-Fi and during these times, you might have to reinstall your Wi-Fi drivers so read on as this post will provide you guidelines in installing Wi-Fi drivers in Windows 10. Refer to the steps below to do so.
Step 1: First, go to your manufacturer’s website and look for the right driver you want to install to download your Wi-Fi driver.
Step 2: After that, you have to download the correct Wi-Fi driver if it’s available. You have to know the exact name and version of the driver so that you can download it and this information can be found from the Device Manager. Just make sure that you have the right wireless adapter driver downloaded.
Step 3: Once done, open the setup of the new driver that you’ve downloaded earlier and run the file and then follow the next on-screen instructions that appear right after.
Step 4: You’re not done yet as you need to verify if you have downloaded and installed the correct Wi-Fi driver. Refer to the sub-steps below to do so:
First, right-click on the Start button and select the Device Manager to open it.
From there, look for the Network Adapters and expand its category to make all the network adapters visible including the wireless adapter.
You can easily spot the wireless adapter as it has the “wireless” term in its entry.
Next, right-click on the wireless driver entry in the Device Manager and select Network adapters, and then click on Properties to check the version number of the driver.
Now select the Driver tab and view the details. If it looks well then it means that you have the right version of the driver installed.
The Windows Update service, just like other services in Windows 10 may sometimes experience some issues and stop behaving properly. One of the issues you might encounter as you use the Windows Update service is the Windows Update error 0x8024A10A. This kind of error code signifies that the Windows Update service is shutting down. So if you encounter this error, read on as this post will guide you on how you can fix it.
When you receive the Windows Update error 0x8024A10A, you may see this error message on your screen:
“USO_E_SERVICE_SHUTTING_DOWN indicates that the WU Service is shutting down. This may happen due to a very long period of time of inactivity, a system hang leading to the service being idle and leading to the shutdown of the service. Ensure that the system remains active and the connections remain established to complete the upgrade.”
You could try to restart your computer to resolve the problem since there are instances when a simple restart can fix errors. However, if it does not work, you might find the options provided below useful.
Option 1 – Try to restart the Windows Update Service
The first thing you can do to fix Windows Update error 0x8024A10A is to restart the Windows Update Service from the Services Manager. To do so, follow these steps:
In the Cortana search box, type “services” and click on the Services icon to open the Services Manager. Alternatively, you can also tap the Win + R keys to launch the Run prompt and then type “services.msc” in the field and hit Enter to open the Services Manager.
After opening the Services Manager, look for the Windows Update Service.
Once you found it, right-click on it and check if the Service is stopped. If it is, then select the Start option. On the other hand, if the Windows Update Service is already started, just select the Restart option.
After that, try to run the Windows Update again and see if the error 0x8024A10A is now fixed.
Option 2 – Run the Windows Update Troubleshooter
Since the Windows Update troubleshooter reviews the status of the services that support the process, it would prompt and fix it if there is anything that’s not right. Thus, you might want to run a built-in Windows Update troubleshooter to resolve the Windows Update error. It is one of the things you can check out as it is known to automatically resolve any Windows Update errors like error 0x8024A10A. To run this troubleshooter, go to Settings and then select Troubleshoot from the options. From there, click on Windows Update and then click the “Run the troubleshooter” button. After that, follow the next on-screen instructions and you should be good to go.
Option 3 – Run Microsoft’s online troubleshooter
Aside from the Windows Update troubleshooter, running Microsoft’s online troubleshooter might also help you fix the Windows Update Error 0x8024A10A. This online troubleshooter is known to help in fixing Windows Update errors, it scans your computer for issues that might be causing the problem and then fixes them automatically.
Option 4 – Try to run the Windows Update Service in a Clean Boot State
There are some instances that some conflicting programs installed in your computer might be the one that’s causing Windows Update error code 0x8024A10A. To identify which program is causing the problem, you need to put your computer in a Clean Boot State. To do so, follow the steps below.
Log onto your PC as an administrator.
Type in MSConfig in the Start Search to open the System Configuration utility.
From there, go to the General tab and click “Selective startup”.
Clear the “Load Startup items” check box and make sure that the “Load System Services” and “Use Original boot configuration” options are checked.
Next, click the Services tab and select the “Hide All Microsoft Services” check box.
Click Disable all.
Click on Apply/OK and restart your PC. (This will put your PC into a Clean Boot State. And configure Windows to use the usual startup, just simply undo the changes.)
Now try to run the Windows Update Service again and see if Windows Update error 0x8024A10A is now gone.
New Windows brings new keyboard shortcuts, most of them are tied to new features and we are presenting you some new ones that are worth remembering.
⊞ WINDOWS + N - notification panel
⊞ WINDOWS + W - News and Interests feed
With the News and Interests feed, Windows 11 offers users the ability to check the latest news, the weather, and more without opening a browser window.
⊞ WINDOWS + Z - Snap Layout
Instead of the usual two windows snapping capability, Windows 11 allow users to snap their windows in a three-column layout. Users can access this by pressing Windows Key and Z to access the Snap layout.
⊞ WINDOWS + PRT SCN - taking screenshots
This one isn’t exactly new, but pressing the Windows Key and Print Screen will automatically capture the entire screen and save a copy of the image on your PC. Once the screen flashes, you will know that the screenshot has been taken, after which you can find the file saved under your Pictures folder in a subfolder called Screenshot.
⊞ WINDOWS + C - Microsoft Teams chat
Microsoft Teams app, the service allows anyone with a Microsoft account to quickly start a chat using the Windows + C shortcut.


 From the recent blog, Gabriel Weinberg, CEO of DuckDuckGo, has stated:
 It has officially confirmed that many open source and free applications will be in it like Opera, VLC, discord, Libre office, etc. It seems that Microsoft wants to place its store as one place to go for all of your software needs.
Another great surprise is the coming of Epic games store implementation. It was officially confirmed but not explained in detail, will we have Epic store opened in Windows store or we will only get installer as a package we will see but this is some great news.
As for how it states now, it seems that the Windows store aims to eliminate searching the web for applications and bring them all into one environment with reviews and ratings so you know which one to install and use. It also features a great search engine to find proper applications for your needs.
The new store will come to Windows 10 as well but after all Windows 11 has been mostly released and adopted. So expect it via update in two or three months' time.
It would be great if some larger companies decide to join MS stores like Autodesk, Adobe, the Foundry, etc so you can install everything you need from it but one can only hope.
It has officially confirmed that many open source and free applications will be in it like Opera, VLC, discord, Libre office, etc. It seems that Microsoft wants to place its store as one place to go for all of your software needs.
Another great surprise is the coming of Epic games store implementation. It was officially confirmed but not explained in detail, will we have Epic store opened in Windows store or we will only get installer as a package we will see but this is some great news.
As for how it states now, it seems that the Windows store aims to eliminate searching the web for applications and bring them all into one environment with reviews and ratings so you know which one to install and use. It also features a great search engine to find proper applications for your needs.
The new store will come to Windows 10 as well but after all Windows 11 has been mostly released and adopted. So expect it via update in two or three months' time.
It would be great if some larger companies decide to join MS stores like Autodesk, Adobe, the Foundry, etc so you can install everything you need from it but one can only hope.  ⊞ WINDOWS + N - notification panel
⊞ WINDOWS + W - News and Interests feed
With the News and Interests feed, Windows 11 offers users the ability to check the latest news, the weather, and more without opening a browser window.
⊞ WINDOWS + Z - Snap Layout
Instead of the usual two windows snapping capability, Windows 11 allow users to snap their windows in a three-column layout. Users can access this by pressing Windows Key and Z to access the Snap layout.
⊞ WINDOWS + PRT SCN - taking screenshots
This one isn’t exactly new, but pressing the Windows Key and Print Screen will automatically capture the entire screen and save a copy of the image on your PC. Once the screen flashes, you will know that the screenshot has been taken, after which you can find the file saved under your Pictures folder in a subfolder called Screenshot.
⊞ WINDOWS + C - Microsoft Teams chat
Microsoft Teams app, the service allows anyone with a Microsoft account to quickly start a chat using the Windows + C shortcut.
⊞ WINDOWS + N - notification panel
⊞ WINDOWS + W - News and Interests feed
With the News and Interests feed, Windows 11 offers users the ability to check the latest news, the weather, and more without opening a browser window.
⊞ WINDOWS + Z - Snap Layout
Instead of the usual two windows snapping capability, Windows 11 allow users to snap their windows in a three-column layout. Users can access this by pressing Windows Key and Z to access the Snap layout.
⊞ WINDOWS + PRT SCN - taking screenshots
This one isn’t exactly new, but pressing the Windows Key and Print Screen will automatically capture the entire screen and save a copy of the image on your PC. Once the screen flashes, you will know that the screenshot has been taken, after which you can find the file saved under your Pictures folder in a subfolder called Screenshot.
⊞ WINDOWS + C - Microsoft Teams chat
Microsoft Teams app, the service allows anyone with a Microsoft account to quickly start a chat using the Windows + C shortcut.