If there are any third-party add-ons or proxy settings that interfere with your Windows 10 computer’s internet connection, then you will most likely encounter a problem where you see an error message saying, “Website is online but isn’t responding to connection attempts” when you try to run the Network Adapter troubleshooter.
Like pointed out, this kind of error can be caused by some proxy settings that prevent the connection. On the other hand, it could also be caused by some third-party add-ons. To fix this error, read on as this post will guide you on what you can do to fix it. You can try to turn off the proxy settings or disable the add-ons on your browser. You can also try resetting both the TCP/IP and DNS as well as reset the network. For more details, refer to the options provided below.
Option 1 – Try to turn off the proxy settings
There are some users who reported that they’ve fixed the problem after they’ve disabled the use of a proxy server using the built-in way. Follow the steps below to disable the proxy server.
Tap the Win + R keys to open the Run dialog box.
Then type “inetcpl.cpl” in the field and hit Enter to pull up the Internet Properties.
After that, go to the Connections tab and select the LAN settings.
From there. Uncheck the “Use a Proxy Server” option for your LAN and then make sure that the “Automatically detect settings” option is checked.
Now click the OK and the Apply buttons.
Restart your PC.
Note: If you are using a third-party proxy service, you have to disable it.
Option 2 – Try disabling the add-ons or browser extensions
The next thing you can do to fix the problem is to disable any extensions or add-ons on your browser. For instance, if you are using Chrome, here’s what you have to do:
Open Chrome and press Alt + F keys.
Go to More tools and click Extensions to look for any suspicious browser extensions or toolbars.
Click the Recycle bin and select Remove.
Restart Chrome and press Alt + F keys again.
Proceed to On Startup and mark Open a specific page or set of pages.
To check if the browser hijacker is still active, click Set pages, if it is active, overwrite the URL.
Option 3 – Try to update the Network Adapter Driver
Follow the steps below to update your Network Adapter Driver:
Tap the Win + R keys to launch the Run window and then type in the “MSC” command and hit Enter to open the Device Manager window.
From there, expand the list of all the network drives and update each one of them.
Note: If updating the network drivers didn’t help in fixing the problem, you can also try to uninstall the very same drivers and restart your Windows 10 PC. After that, the system itself will reinstall the drivers you just uninstalled. Alternatively, you can also download and install the drivers from the manufacturer’s website directly.
Option 4 – Try to reset the TCP/IP and the DNS cache
As you know, the TCP/IP or the Internet Protocol is the most important thing if you want to use the internet on your computer. That’s why if it ends up getting corrupted, you need to reset the TCP/IP to fix the problem. To reset TCP/IP, refer to these steps:
In the Windows start to search, type “command prompt” and right-click on Command Prompt from the search results.
Then select the “Run as administrator” option to open Command Prompt with admin privileges.
After that, execute this command: netsh int ip reset resettcpip.txt
Next, execute this second command: ipconfig /flushdns
Once it’s done, exit Command Prompt and restart your computer and then check if the error is now fixed.
Option 5 – Try to reset the Network
You can also try to perform a Network Reset to resolve the problem. This will reset the entire network configuration including your IP address. To perform Network Reset, follow these steps:
Tap the Win + I keys to open Settings.
From there, go to the Network and Internet section.
Next, scroll down and look for “Network Reset” under the status pane.
After that, click on Network Reset and then on Reset now to start resetting the network configuration. Once done, check if it is able to fix the error or not.
NVIDIA is undeniably the market leader as a Graphics Card manufacturer. Recently, NVIDIA came about a feature known as NVIDIA Share. This feature allows users to carry out a number of tasks such as streaming, recording, and sharing their gameplay with other users. NVIDIA Share allows users to take multiple snapshots of the gameplay which brings in capabilities to get the memories of the moments that happen during an awesome game. However, as of late, there were reports that NVIDIA Share is not working or responding. So if you are one of the users who are currently facing this issue, then read on as this post will guide you in resolving it. Make sure to follow the options given below carefully for a successful result.
Option 1 – Try to update the drivers from the official site of NVIDIA
The first thing you can do is to update the drivers from the official site of NVIDIA. And in case you don’t know the type of Nvidia graphics card that your computer is on, follow the steps below:
Tap the Win + R keys to open the Run dialog box.
Next type in “dxdiag” in the field and click OK or hit Enter to open the DirectX Diagnostic Tool.
From there, you can see what type of Nvidia graphics card that your system is on.
Take note of your graphics card information and then look for the best drivers for your operating system. Once you’ve downloaded and installed the file, restart your PC.
Option 2 – Try to roll back the driver to the previous version
If the first option didn’t work for you, then it’s time to roll back the device drivers. It is most likely that after you updated your Windows computer that your driver also needs a refresh.
Tap the Win + R keys to launch the Run window and then type in the “msc” command and hit Enter to open the Device Manager window.
Under the Device Manager, you will see a list of drivers. From there, look for the NVIDIA Drivers and expand them.
Next, select the driver entries that are labeled appropriately.
Then select each one of them and double click to open a new mini window.
After that, make sure that you’re on the Driver tab and if you are not, just navigate to it then click the Roll Back Driver button to switch back to the previous version of the NVIDIA Drivers.
Now restart your computer to successfully apply the changes made.
Option 3 – Try disabling NVIDIA Share
If the first two options given above didn’t work then you might want to try disabling NVIDIA Share. In case you didn’t make any modifications to the driver, chances are either your driver is out of date or there are some issues with the installation of the drivers. For you to find out, you need to first check if your NVIDIA drivers are really up to date. Once you’ve confirmed it, you can now disable the NVIDIA Share feature. Just refer to the steps below to do that.
Search for the NVIDIA GeForce Experience in the search box and then click on the appropriate result to open it.
After you open the NVIDIA GeForce Experience, go to the General tab.
Next, scroll down to the NVIDIA Share section and then select the toggle to turn off this feature.
Now restart your computer and try to check if there are any updates available for the NVIDIA Graphics card and install them again if there are any.
It seems that Microsoft is going to offer subscription and sales of individual office applications in the Windows Store. The office package will still be available as a package but for the first time, we will get single applications as standalone ones available for purchase.
This is a very interesting decision by Microsoft and I fully support it, this time users will be able to pay less and to choose only applications that they need instead of paying for the whole package and not using it.
Steam Autumn sale is still raging and other storefronts like EPIC and GOG have also had their go, and as the year slowly closes we reflect on the best games released this year.
The games presented are not in any particular order and as sales are still raging pick one for you for a good time.
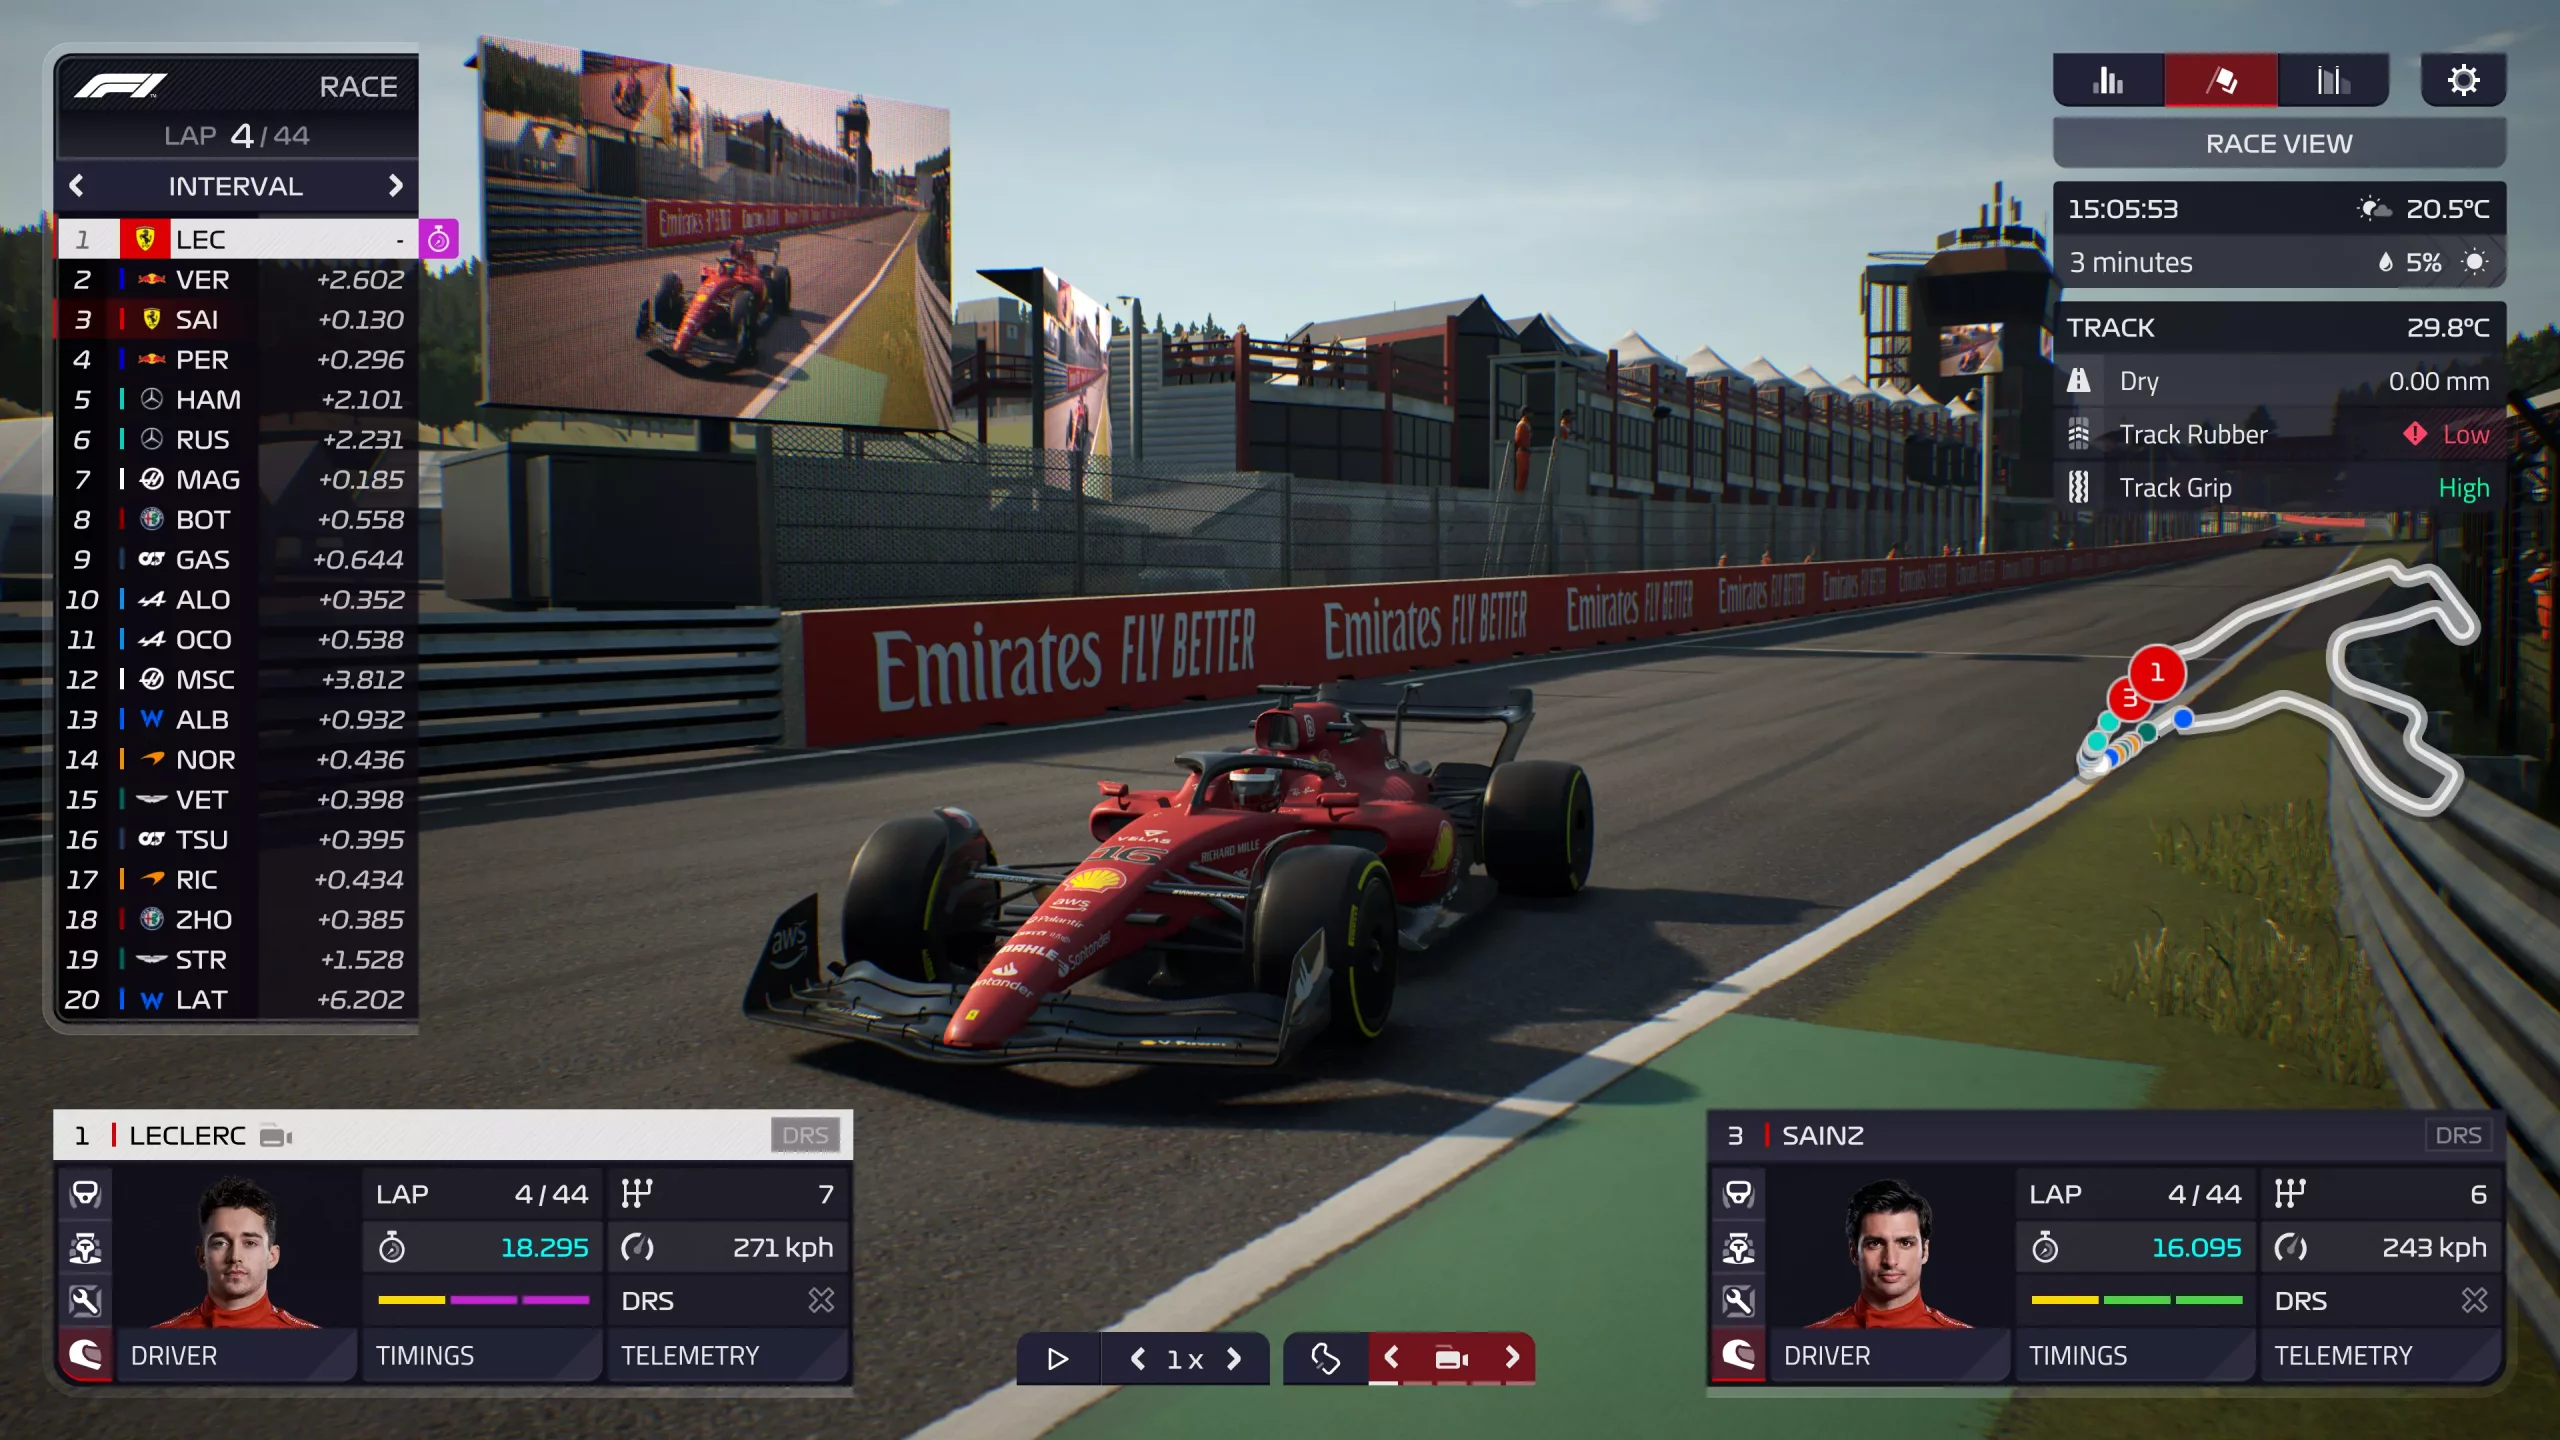
F1 Manager 22
If you are into formula racing this new manager is something we will wholeheartedly recommend. How it has been a very long time since a good F1 manager has been released this one is breath of fresh air. Masterfully done and fun to play, also licensed with real teams and cars get it here: https://store.steampowered.com/app/1708520/F1_Manager_2022/
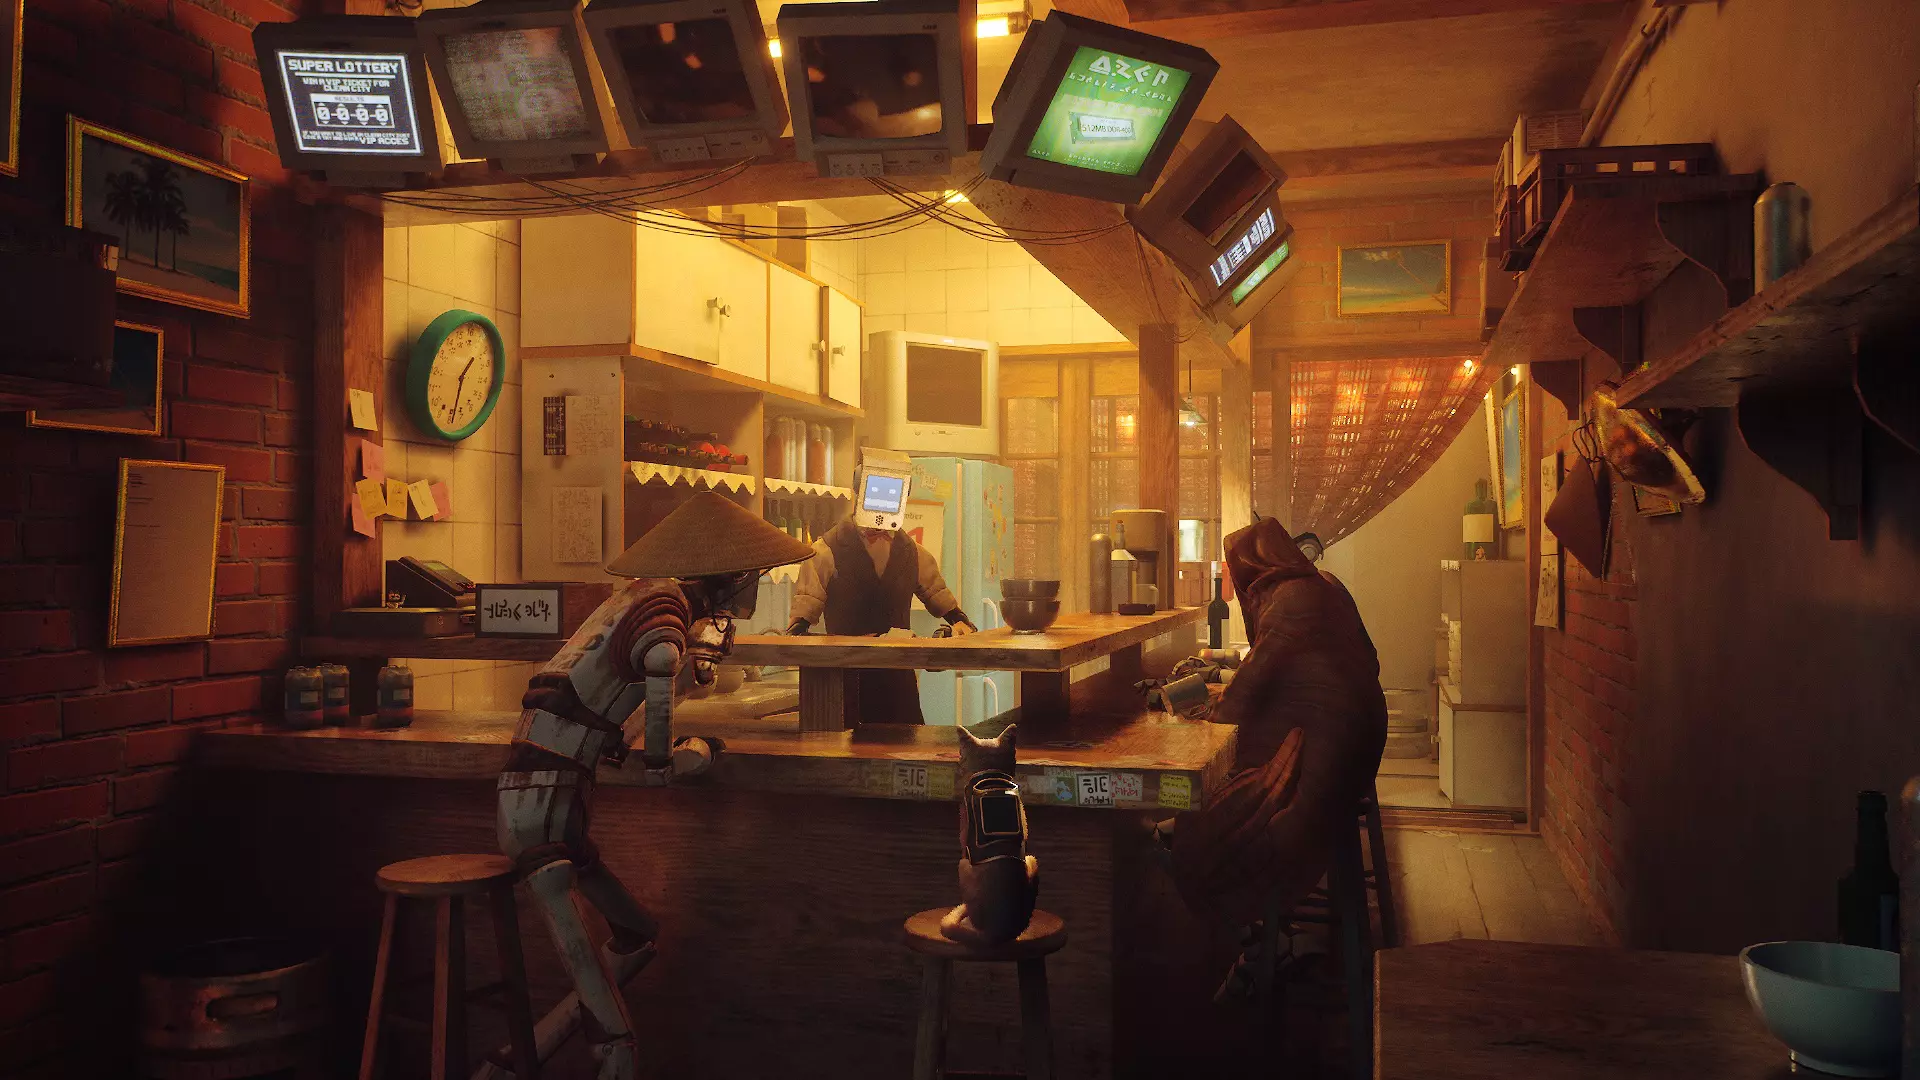
Stray
I like cats, but this game is on another level from its competitors. Unique approach, great storyline, and of course orange cat as the main character! Set in a cyberpunk environment following the story of some unfortunate androids you can do most cat things like playing in boxes, etc but essentially the game is a puzzle platformer which in my opinion is a great thing. Meow your things and get the game while it is discounted: https://store.steampowered.com/app/1332010/Stray/
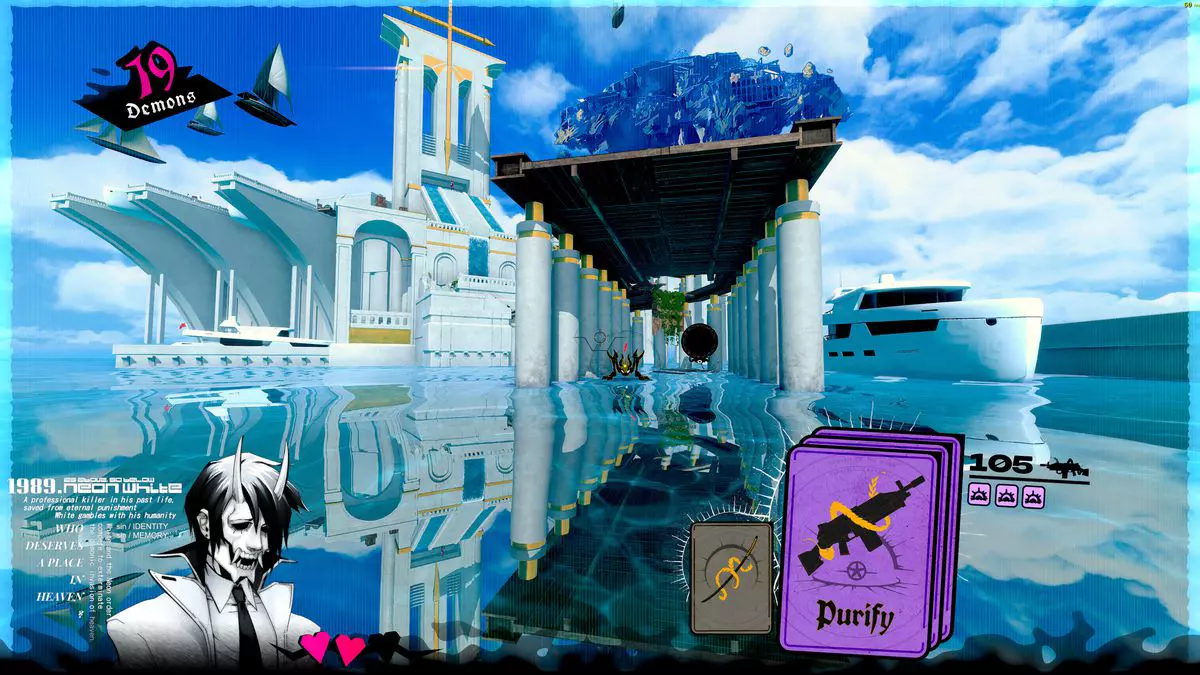
Neon White
Mirror's Edge was the very unique game when it was released introducing parkour into the gaming world, and Neon white brings it one level up. With competitive parkour FPS gameplay this game is great for killing some time and competing with your friends but most of all it is fun to play experience. Get it here: https://store.steampowered.com/app/1533420/Neon_White/
This game needs to be experienced in order to fully grasp its magnitude and quirkiness. From the creators of borderlands comes a new IP fusion of fantasy, guns, and crazy ideas all wrapped into an action RPG looter shooter with a recognizable borderlands style of graphics. https://store.steampowered.com/app/1286680/Tiny_Tinas_Wonderlands/
Norco
Winner of multiple awards, Norco is a classic point-and-click adventure game with a great sci-fi story with a lot of environmental focus. Story and atmosphere are the main selling points for the game and if you enjoy good stories with interesting characters give this one a go: https://store.steampowered.com/app/1221250/NORCO/
Final Fantasy 14: Endwalker
Expansion for Massive multiplayer online roleplaying game brings so much to the table that we just could not oversee it and place it aside. Technically not full standing game since it is the expansion it still delivers on many fronts and since it is supposedly the last expansion now is the best time to pick it up and give a final fantasy 14 a go: https://store.steampowered.com/app/1592500/FINAL_FANTASY_XIV_Endwalker/
Elden Ring
Of course, the list would not be complete if we did not include Elden ring, a great example of how a difficult but well-executed game can go over and beyond. With a story on par with great epics and compact as in dark souls, this title will provide you with many hours of gameplay and content. https://store.steampowered.com/app/1245620/ELDEN_RING/
PFN_LIST_CORRUPT is a blue screen of death error code. It occurs when the PFN (Page Frame Number) list becomes corrupt. The Page Frame Number is basically used by your hard drive to determine your location of each one of your files on the disk.
This error may occur when starting up the program or while using it. Blue screen of death errors occurs without any warnings. The program disrupts all of a sudden and the computer screen turns blue.
Solution
Error Causes
PFN_LIST_CORRUPT Blue Screen error may occur due to multiple reasons. Some of the common reasons include:
Hardware problems
Device driver issues
Registry problems
Viral Infection
It is recommended to resolve the PFN_LIST_CORRUPT Blue Screen of Death error immediately without any delay virtually because this error can be quite fatal to your PC.
It can pose serious threats to your system like system freeze, crash, failure, and valuable data loss. Furthermore, if the error is related to viral infection, it can expose you to privacy issues, data breaches, and cybercrime too.
Further Information and Manual Repair
This is a critical PC error but easy to resolve. You don’t need any technical expertise to fix this error on your PC. Here are some quick and easy methods to resolve PFN_LIST_CORRUPT Blue Screen error:
Method 1: Install Compatible Device Drivers
Sometimes when new hardware is added to the PC, you need to install updated versions of the device drivers to ensure there are no incompatibility issues.
Incompatibility between the hardware and device drivers may generate PFN_LIST_CORRUPT Blue Screen of death error on your screen. To resolve, it is advisable to download and install the latest updated versions of the device drivers from the manufacturer’s website.
Method 2: Scan for Viruses
PFN_LIST_CORRUPT Blue Screen of Death error may occur due to viral infection too. Viruses and spyware enter your PC when you log on to unreliable websites and download programs from there or open phishing emails on your PC.
These viruses corrupt and damage programs and files resulting in such errors. To fix the issue, you need to install a powerful antivirus and ensure all kinds of viruses and spyware are detected and removed from your system.
Method 3: Clean and Restore the Registry
PFN_LIST_CORRUPT Blue Screen error indicates poor PC maintenance. When you don’t clean and remove unnecessary and obsolete files like junk files, bad registry keys, cookies, internet history, temporary files, and invalid entries from the registry, the registry overloads and gets damaged.
These files accumulate taking up a lot of disk space and also corrupt system files. If these files are not removed timely, it results in registry issues like a blue screen of death errors and run-time errors. To remove these files and clean the registry, you need to install a powerful registry cleaner.
Whether the underlying cause for PFN_LIST_CORRUPT Blue Screen of Death error on your PC is viral infection or registry issues, to resolve the BSOD error code in seconds download Restoro.
This is a cutting-edge and multi-functional PC fixer deployed with both an antivirus and a registry cleaner. Additional features include a system optimizer too. It is user-friendly and easy to operate. You can download it on all Windows versions without any hassle. It is safe and bug-free.
The registry cleaner feature scans and removes all unnecessary files, cleans and repairs the registry while the antivirus utility simultaneously removes all kinds of malicious software including spyware, viruses, Trojans, and malware.
Click here to download Restoro now and resolve the PFN_LIST_CORRUPT Blue Screen of Death error immediately!
When we initiate the copy or move files command we get a dialog that shows us the progress of the current operation, under that bar we can click on the little arrow to expand the bar into so-called more details view where we get more information like which file is being copied, more detailed graph, etc.
Windows will remember the last option we had and next time when we start the same process it will open the last view.
But what if we want to only have one view always open as default, even if we change it? Let's say that we always want to have a detailed view opened always as our default even if we switch to a minimal one? Well with some tweaks in the registry of Windows we can.
Note that this guide will require changing things in the registry of Windows itself, it is always smart and recommended to make a safe backup of your registry, just in case.
FOR ALWAYS SHOW MORE DETAILS FOLLOW THIS GUIDE:
open notepad and paste the following code inside:
Windows Registry Editor Version 5.00[HKEY_CURRENT_USER\Software\Microsoft\Windows\CurrentVersion\Explorer\OperationStatusManager]"EnthusiastMode"=dword:00000001
Go to File > Save as... and once the file save dialog opens choose at the bottom all files under file type. Save the file with extension .REG naming it whatever you want.
Right-click on file and choose Merge, confirm with YES and you are done, now each time when you start copy or move operation details view will be open.
FOR ALWAYS SHOW FEWER DETAILS FOLLOW THIS GUIDE:
open notepad and paste the following code inside:
Windows Registry Editor Version 5.00[HKEY_CURRENT_USER\Software\Microsoft\Windows\CurrentVersion\Explorer\OperationStatusManager]"EnthusiastMode"=dword:00000000
Go to File > Save as... and once the file save dialog opens choose at the bottom all files under file type. Save the file with extension .REG naming it whatever you want.
Right-click on file and choose Merge, confirm with YES and you are done, now each time when you start copy or move operation minimal details view will be open.
If you are trying to update or upgrade your Windows 10 computer using the Windows Update and suddenly an “Error 0x800f0900” appears, then you’ve come to the right place as this post will help you resolve this Windows Update issue. When you encounter this error, you will see the following error message on your screen:
“There were problems installing some updates, but we’ll try again later. If you keep seeing this and you want to search the web or contact support for information, this may help:2018-03 Cumulative Update for Windows 10 Version 1709 for x64-based Systems (KB4088776) – Error 0X800F0900”
This kind of Windows Update error is most likely caused by some corrupted files in the system. It is also possible that the Windows Database might have become corrupted as well. So if you are currently experiencing this problem, refer to the options given below and see which one of them works best for you.
Option 1 – Try running the DISM Tool
Running the DISM Tool helps in repairing the Windows System Image as well as the Windows Component Store in Windows 10. Using this built-in tool, you have various options such as the “/ScanHealth”, “/CheckHealth”, and “/RestoreHealth”.
Open the Command Prompt as admin.
Then type in this command: exe /Online /Cleanup-image /Restorehealth
Do not close the window if the process takes a while as it will probably take a few minutes to finish.
After you run this tool, a log file is created at C:WindowsLogsCBSCBS.log. On the other hand, if the Windows Update client is already broken, you will be prompted to use a running Windows installation as the repair source or use a Windows side-by-side folder from a network share, as the source of the files. Although the chances of this happening are less, if it turns out to be the case, you need to run an advanced command in the DISM tool to repair a broken Windows Update. Just repeat the process above but use the following command instead:
Option 2 – Try running the System File Checker or SFC scan
The SFC scan or System File Checker is a built-in command utility in Windows that helps in restoring corrupted files as well as missing files that cause several issues in the computer like the Windows Update Error 0x800f0900. It replaces bad and corrupted system files with good system files. To run the SFC command, follow the steps given below.
Tap Win + R to launch Run.
Type in cmd in the field and tap Enter.
After opening Command Prompt, type in sfc /scannow
The command will start a system scan which will take a few whiles before it finishes. Once it’s done, you could get the following results:
Windows Resource Protection did not find any integrity violations.
Windows Resource Protection found corrupt files and successfully repaired them.
Windows Resource Protection found corrupt files but was unable to fix some of them.
Option 3 – Try running the Windows Update Troubleshooter
Running the built-in Windows Update troubleshooter could also help you resolve the Windows Update error 0x80073712. To run it, go to Settings and then select Troubleshoot from the options. From there, click on Windows Update and then click the “Run the troubleshooter” button. After that, follow the next on-screen instructions and you should be good to go.
Option 4 – Perform a System Restore
You can also try to perform a System Restore as it can also help you fix the Windows Update Error 0x800f0900. You can do this option either by booting into Safe Mode or in System Restore. If you are already in the Advanced Startup Options, just directly select System Restore and proceed with the next steps. And if you have just booted your PC into Safe Mode, refer to the steps below.
Tap the Win + R keys to open the Run dialog box.
After that, type in “sysdm.cpl” in the field and tap Enter.
Next, go to the System Protection tab then click the System Restore button. This will open a new window where you have to select your preferred System Restore point.
After that, follow the on-screen instructions to finish the process and then restart your computer and check if the problem is fixed or not.
Option 5 – Reset both the SoftwareDistribution and Catroot2 folders
You have to stop a couple of services such as BITS, Cryptographic, MSI Installer, and Windows Update Services. And to do that, you need to flush the contents in the SoftwareDistribution folder. The Software Distribution folder in the Windows operating system is a folder that can be found in the Windows directory and is used to store files temporarily which might be required to install the Windows Update on your PC. Thus, it is required by the Windows Update and maintained by WUAgent. Aside from that, it also contains all the Windows Update History files and once you delete them, you will most likely lose the Update history. As a result, the next time you run the Windows Update, it may result in a longer detection time.
Open the WinX Menu.
From there, open Command Prompt as admin.
Then type in the following command – don’t forget to hit Enter right after typing each one of them.
net stop wuauservnet start cryptSvcnet start bitsnet start msiserver
After entering these commands, it will stop the Windows Update Service, Background Intelligent Transfer Service (BITS), Cryptographic, and the MSI Installer
Next, go to the C:/Windows/SoftwareDistribution folder and get rid of all the folders and files thereby tapping the Ctrl + A keys to select them all and then click on Delete. Note that if the files are in use, you won’t be able to delete them.
After resetting the SoftwareDistribution folder, you need to reset the Catroot2 folder to restart the services you just stopped. To do that, follow these steps:
Type each one of the following commands.
net start wuauservnet start cryptSvcnet start bitsnet start msiserver
After that, exit Command Prompt and restart your computer, and then try to run Windows Update once more.
This is a typical Outlook Express error code. Outlook Express is email software by Microsoft. This error may pop up when sending or receiving emails on your Outlook Express.
It cancels email sending and receiving operations. In other others, the 0x800ccc17 error code hampers your email communication via Outlook Express account.
This error message is displayed in the following format:
0x800CCC17 - User cancelled operation
Solution
Error Causes
0x800ccc17 error code may appear on your PC due to multiple reasons. These include:
Issues with Pop3uid.dbx file (this file supports Outlook Express software on Windows Vista)
Viral infection
Registry corruption
No matter what the underlying reason for this error code may be, it is advisable to resolve the issue right away without any delay. This error may cause great deal of inconvenience.
It may lower your office productivity badly especially if you interact and communicate with people of other office departments via your Outlook Express account.
Further Information and Manual Repair
Here are some of the best and efficient do-it-yourself methods to resolve the 0x800ccc17 error code on your system. These methods are very easy to work around and do not require any kind of technical expertise.
Method 1 - Restart Your PC
Sometimes this might error can be resolved by simply rebooting your system. So, restart your PC and try using your Outlook Express account again. If it works, the error is resolved. However, if it persists then try other methods given below.
Method 2 - Rename pop3uid.dbx File on Your System
If the underlying cause of error 0x800ccc17 is related to pop3uid.dbx file damage, then simply rename it to resolve. This can be done by searching for the file pop3uid.dbx.
After locating it rename it to ‘pop3uid.bak’. Now reopen Outlook Express and try sending or receiving emails again. If the operations are executed successfully then the error is resolved.
Method 3 - Remove Viruses
Viruses can infect your PC without you knowing about it. These malicious programs usually enter your system through phishing emails and file downloads.
If the error 0x800ccc17 is triggered due to viral infection then it is advisable to install a powerful antivirus and remove all viruses from your PC.
Method 4 - Repair the Registry
If you don’t clean the registry frequently it fills up with unnecessary and obsolete files like junk files, cookies, internet history, and bad registry entries. These files then corrupt and damage the registry thereby generating codes like error 0x800ccc17.
To resolve this, you first need to remove all these unnecessary files and repair the registry. Though this can be done manually if you are not technically sound, it may be time-consuming and slightly tricky.
Therefore it is advisable to download Restoro. This is a powerful registry cleaner that wipes away all obsolete files instantly, cleans the registry, and repairs it in seconds.
Click here to download Restoro and fix error 0x800ccc17 on your PC today.
What is Error 0x8024a11a or 0x8024a112 ? If you are trying to update your Windows 10 computer and just when you were done downloading the feature update and about to install it, you encounter an error message saying:
“We’re having trouble restarting to finish the install, Error 0x8024a11a, 0x8024a112, 0x80070005 or 0x80070032”
And so to fix this problem, this post will give you a couple of possible solutions. Refer to the options given below to get started.
Option 1 – Restart your computer many times
This is the first thing you can try since there are instances when the Windows Update process gets stuck for a minor thing and restarting the computer usually helps in resolving the issue. All you have to do is click the Restart now button. However, if it does not work, you can use the Power buttons from the Start Menu or WinX Menu. Aside from that, you can also use your power buttons such as Alt + Ctrl + Del to restart your computer. And during the boot process, it is recommended that you restart your computer in Safe Mode or even in a Clean Boot State. After that, you can restart your computer in normal mode. This will make sure that no third-party processes will be able to interfere with the Windows Update process. To put your PC in a Clean Boot State, here’s what you have to do:
Log onto your PC as an administrator.
Type in MSConfig in the Start Search to open the System Configuration utility.
From there, go to the General tab and click “Selective startup”.
Clear the “Load Startup items” check box and make sure that the “Load System Services” and “Use Original boot configuration” options are checked.
Next, click the Services tab and select the “Hide All Microsoft Services” check box.
Click Disable all.
Click on Apply/OK and restart your PC. (This will put your PC into a Clean Boot State. And configure Windows to use the usual startup, just simply undo the changes.)
After that, try to install the Windows Updates or upgrade again.
Option 2 – Try running the Windows Module Installer
The Windows Module Installer is a built-in service in the Windows operating system that could help you resolve the Windows update error 0x8024a11a or 0x8024a112. You need to make sure that this service is Started and that its Startup type is set to Automatic – you can do this via Services Manager or by executing the command given below in an elevated Command Prompt.
Tap the Win + R keys to open the Run dialog box.
Then type “command prompt” in the field and hit Enter to open Command Prompt.
And in the elevated Command Prompt type in the following command and hit Enter:
SC config trustedinstaller start=auto
After executing the command successfully, you should see the “[SC] ChangeServiceConfig SUCCESS” message on the Command Prompt window.
Option 3 – Run the DISM tool
You can also run the DISM Tool as it helps in repairing the Windows System Image as well as the Windows Component Store in Windows 10. Using this built-in tool, you have various options such as the “/ScanHealth”, “/CheckHealth”, and “/RestoreHealth” which could help in fixing the Windows update error 0x8024a11a or 0x8024a112.
Open the Command Prompt with admin privileges.
Then type in the following commands and make sure to hit Enter right after you type each one of them:
Dism /Online /Cleanup-Image /CheckHealth
Dism /Online /Cleanup-Image /ScanHealth
exe /Online /Cleanup-image /Restorehealth
Do not close the window if the process takes a while as it will probably take a few minutes to finish.
Option 4 – Run the System File Checker
System File Checker or SFC is a built-in command utility that helps in restoring corrupted files as well as missing files. It replaces bad and corrupted system files to good system files that might be the cause why you’re getting the errors 0x8024a11a and 0x8024a112. To run the SFC command, follow the steps given below.
Tap Win + R to launch Run.
Type in cmd in the field and tap Enter.
After opening Command Prompt, type in sfc /scannow
The command will start a system scan which will take a few whiles before it finishes. Once it’s done, you could get the following results:
Windows Resource Protection did not find any integrity violations.
Windows Resource Protection found corrupt files and successfully repaired them.
Windows Resource Protection found corrupt files but was unable to fix some of them.
Option 5 – Run the Windows Update Troubleshooter
Running the built-in Windows Update troubleshooter could also help you resolve the Windows update error 0xca00a000. To run it, go to Settings and then select Troubleshoot from the options. From there, click on Windows Update and then click the “Run the troubleshooter” button. After that, follow the next on-screen instructions and you should be good to go.
Option 6 – Run Microsoft’s online troubleshooter
Running Microsoft’s online troubleshooter might also help you fix the Windows update error 0x8024a11a or 0x8024a112. This online troubleshooter is known to help in fixing Windows Update errors, it scans your computer for issues that might be causing the problem and then fixes them automatically.
We have all experienced Windows errors over time and that can range from simple ones that will do very little to no harm and can be even system breaking making us lose our work or completely making the PC unusable. No one likes them but they happen, and usually, they happen once we least expect them.
No matter how frequent and unpleasant they might be there are ways to keep them at the minimum and even avoid them.
We will discuss steps that you can take in order to do this, simple tips and guides on how to keep your computer in top form and eliminate not just Windows, but any kind of errors altogether.
Keep your hardware clean
Believe it or not, some serious Windows errors like the dreaded blue screen of death can come from hardware issues not from the software at all. It is very important to keep your computer clean and with enough air flow so it can function properly.
Keeping applications on the drive might seem harmless but sadly that is not the case. Some applications have a certain impact on the system itself after all most of them are tweaking registry entries in Windows and sometimes having too many applications means an increased possibility of conflict over certain resources even when they are not running.
Some applications like adobe creative suite, for example, will have certain services always running in the background, and more of these kinds of applications you have, more services, more places for unexpected errors when they collide. Some of them will also install certain dependencies that could be problematic.
The general idea is: if you are not using it, uninstall it and you will be safer and more resilient to errors inside OS.
Do not use pirated or cracked software
Besides moral and law implications that using pirated or cracked software might bring you there are also certain other things that might be problematic. Certain "free" software might come packet with some problematic malware, for example, it is not uncommon for attackers to use some popular software to pack their malicious application with it.
Other things might be wrong and incomplete tweaking with application in order to bypass security and thus bringing some instability due to scripts needed to run in order to achieve this goal.
Keep your drivers updated
Errors can also come from old drivers or bad drivers, device manufacturers are not all-knowing and perfect, and sometimes drivers can wreak havoc on the system. Having updated drivers can minimize any kind of unexpected behaviors inside the operating system making it more stable and reliable.
You can check your driver version in the control panel inside the Windows OS and then compare it to the ones found on the manufacturer's site, if there are newer available it is recommended to download and install them,
Keep software updated
Applications can have bugs, and bugs can lead to certain errors both in the system and when using the app as well. It is in your best interest to get the latest patch or newer version of the software in order to avoid these unpleasant experiences.
Also, certain codecs and extensions that are installed directly in Windows can also have some unpredictable behavior, updating is the best solution to keep them in line.
Keep Windows updated
Same as with drivers and applications, Windows itself is not immune from bugs and some unpredictable issues. Luckily Microsoft is always working on fixes and features of Windows but in order to actually have benefited from that work, you will need to keep Windows updated. Sometimes a bad update can introduce some errors but you can always roll back to the previous and wait for them to fix everything and then download them all.
Check the health of your hardware regularly
Hardware components have their life cycle, more quality ones tend to last longer but eventually, they will reach the end of their lifecycle. There are a lot of testers for various components in your computer that can check different things and provide you with information about the state of your components.
If you are on Windows 11, Microsoft has included a basic health app inside OS, just type PC health check in search and start the app. For some more detailed information and advanced checks, you will have to use a custom application. There are plenty of them specialized for single components like RAM, SSD, etc. A simple google search with providing you with top results and most of them are free for personal use.
Remember, a faulty component or component that is reaching its life cycle can produce many errors inside the operating system.
In the past, CDs, DVDs, and floppy drivers used to be the primary sources of external storage for many users – that is until the USB storage devices took over. These days, a lot of devices no longer have a built-in CD or DVD writer or reader as it contributes to the thickness of the device. On the other hand, there are still various devices that still come with a built-in CD or DVD writer or reader. However, recently, users who still use CD or DVD on their devices reported a problem where the CD or DVD icon is not visible in the File Explorer as well as in “This PC” or the My Computer page. The cause of this issue is still unknown at the time of writing, but there are still some potential fixes you can try to fix it. You can try to update or roll back the device drivers or apply some tweaks in the Registry Editor. For more details, refer to the given options below.
Option 1 – Try to update or rollback device drivers
The first thing you can try to fix the missing CD or DVD icon is to either update or roll back the device drivers. It is most likely that after you updated your Windows computer that your driver also needs a refresh. On the other hand, if you have just updated your device drivers then you need to roll back the drivers to their previous versions. Whichever applies to you, refer to the steps below.
Open the Devices Manager from the Win X Menu.
Then locate the device drivers and right-click on them to open the Properties. Note that the concerned drivers will be listed under the DVD/CD-ROM drives section as well as the IDE/ATAPI Controllers section.
From there, look for the following drivers:
ATA Channel 0.
ATA Channel 1.
Standard Dual Channel PCI IDE Controller.
Now, right-click on each one of the listed drivers and update them all. You could also try to roll them back to their previous versions.
Note: You can also directly download the relevant drivers of your computer from the manufacturers’ website. So if you have an SSD, the issue might be due to an old storage driver.
Option 2 – Try to use the Registry Editor
Tap the Win + R keys to open the Run dialog box and type “Regedit” in the field and then tap Enter to open the Registry Editor.
Next, navigate to this registry key: HKEY_LOCAL_MACHINESYSTEMCurrentControlSetControlClass{4D36E965-E325-11CE-BFC1-08002BE10318}
After that, look for the DWORD values named “UpperFilters” and “LowerFilters”.
Right-click on each one of these DWORD values and select Delete.
Now restart your computer and see if it fixes the problem.
Option 3 – Try creating a new Registry entry
There is another option you can try in the Windows Registry to fix the missing icon of the CD/DVD. You can try adding a new entry. How? Refer to these steps:
Tap the Win + R keys to open the Run dialog box and type “Regedit” in the field and hit Enter to open the Registry Editor.
After that, navigate to this registry path: HKEY_LOCAL_MACHINESYSTEMCurrentControlSetServicesatapi
From there, right-click on “ATAPI” and select New > Key.
After that, name it is “Controller0” and right-click on the sub-key and then select New > DWORD (32-bit) Value.
Now name it as “EnumDevice1” and double click on it and then set its value data to “1”.
Click OK and restart your computer to apply the changes made successfully.

 This is a very interesting decision by Microsoft and I fully support it, this time users will be able to pay less and to choose only applications that they need instead of paying for the whole package and not using it.