How to Fix the Blue Screen Locale ID 1033 Error Code
What is the Blue Screen Locale ID 1033 Error?
Blue screen locale id 1033 error as the name suggests, is a type of BSoD error. This error may occur during Windows startup, program load, or while the program is running. The error indicates poor PC maintenance and occurs without any warning.
The error message is prompted in the following format:
Problem signature: Problem Event Name: BlueScreen OS Version: 6.0.6002.2.2.0.16.7 Locale ID: 1033
When the error occurs, the computer screen turns blue and the user is unable to view or access the program. It is advisable to fix the error right away, virtually because BSoD is a critical PC error, it can pose serious threats to your system.
Error Causes
The two most common causes of the occurrence of the Blue Screen Locale ID1033 error code are:
Registry issues
Viral infection
Further Information and Manual Repair
You don’t need to hire a technician or be a computer whiz to resolve Blue Screen Locale ID1033 error code. Here are some methods that you can try to resolve this error on your PC. These methods are easy to perform and result-driven.
Method 1: Perform a PC Scan by Downloading an Anti-Virus
Since this error is indicative of a viral infection, it is suggested you perform a PC scan by installing an antivirus on your system. Make sure you download an antivirus that is powerful and has the ability to scan all kinds of viruses.
Method 2: Clean and Repair the Registry
Another alternative method is to clean and repair the registry.
The Registry is a component of the PC that stores all information and activities performed on the PC. This includes both important and unnecessary files like junk files, cookies, internet history, temporary files, invalid entries, bad registry keys, and more.
These files not only accumulate in the registry but also damage and corrupt it thereby generating error codes like the Blue Screen Locale ID1033 error code.
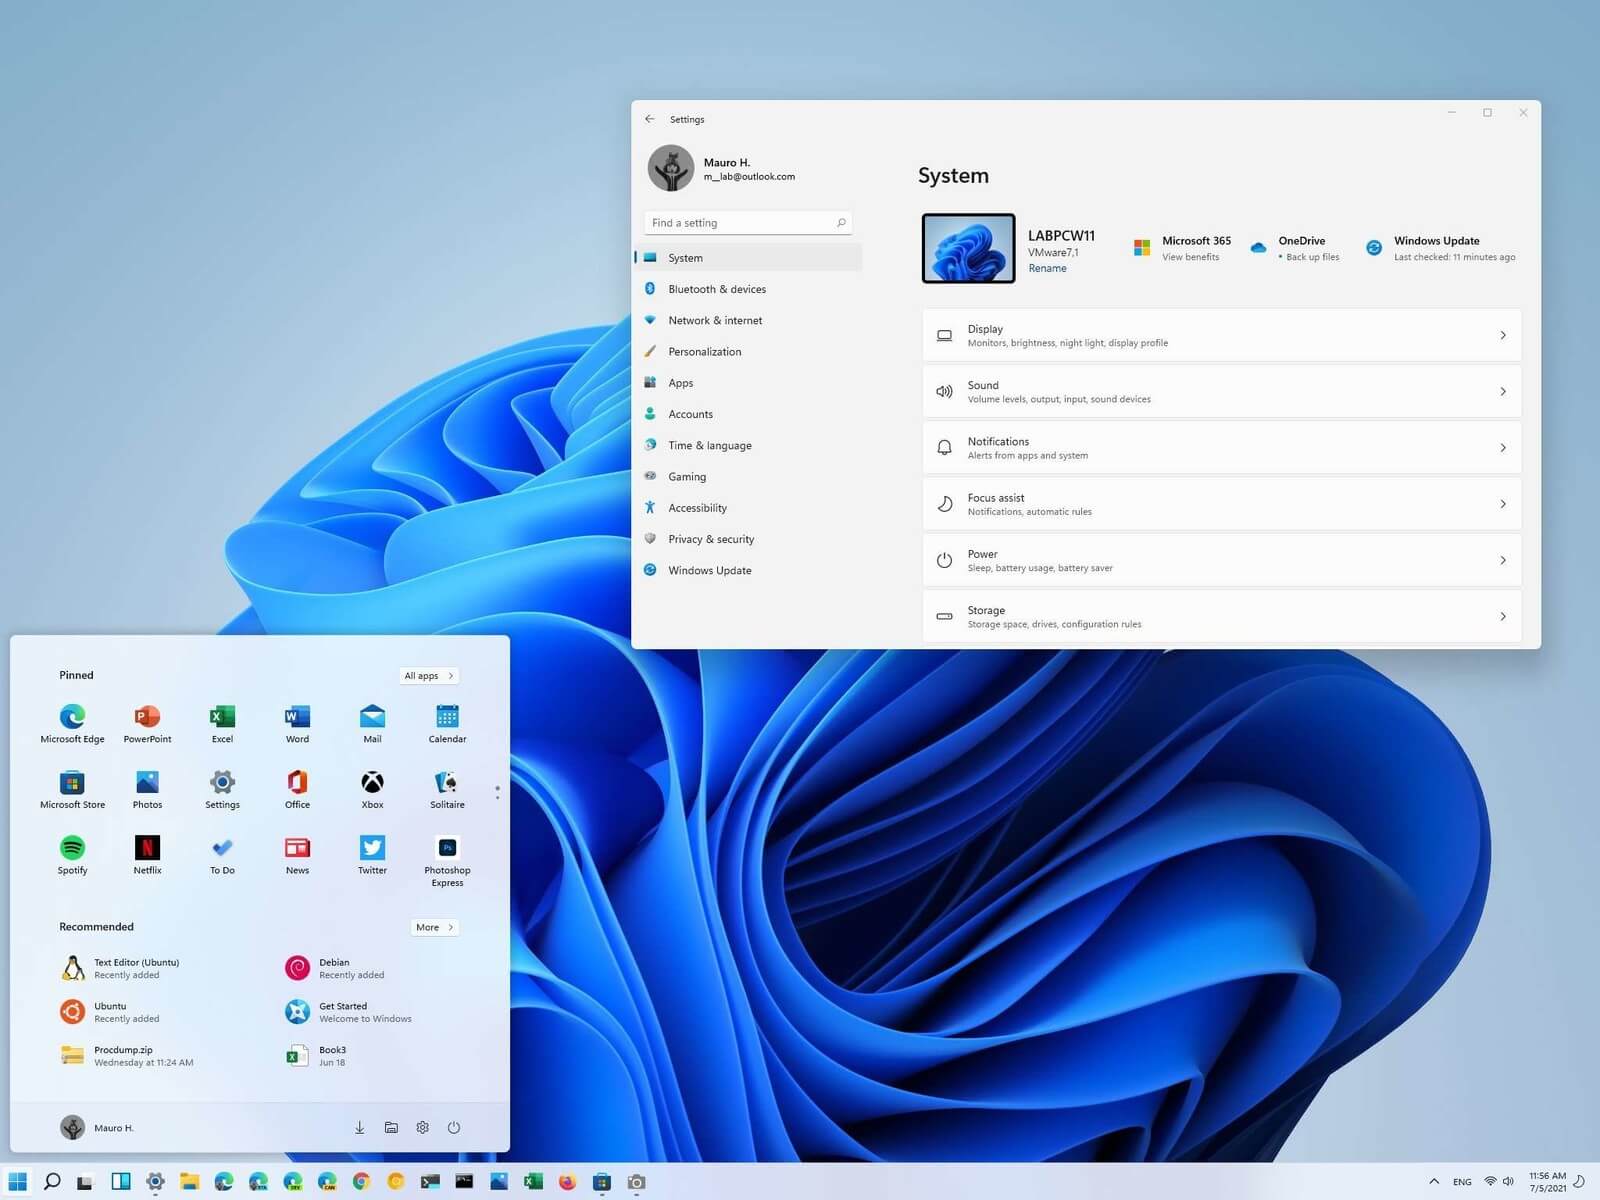
Most scrollbars are hidden by default if they are not used in Windows 11. If you are not ok with this feature and want scrollbars to be always visible and available do not worry, turning them ON is very easy.
Press ⊞ WINDOWS + I to open Windows settings
Click on Accessibility in the sidebar
Select Visual Effects
Inside visual effects settings find Always show scrollbars and switch it ON
Windows 11 will save settings automatically and apply setting right away. Close settings and continue with work.
Interrupts are designed so that the resource requests don’t get into a headlock when it comes to the hardware level. To simply put it, it is used to break a loop that never ends. Aside from that, developers also designed levels in order to prioritize interrupts. It is also known as “Interrupt Request Level” or IRQL. And if you suddenly encounter a “Bugcode 0xA –IRQL_NOT_LESS_OR_EQUAL” error, this means that a driver has accessed a memory location illegally while NT is operating at a specific IRQL.
The Bugcode 0xA –IRQL_NOT_LESS_OR_EQUAL is a fatal driver coding error and as an end-user, there isn’t much that you can do to resolve it but if you’re a developer, then this means that your code is trying to access an invalid memory location. You could check on different parameters such as memory location that was referenced and code addressed which referenced memory. The technical parameters are:
a memory location that was referenced
IRQL at time of reference
0 = read, 1 = write
code addressed which referenced memory
As mentioned earlier, if you are an end-user, there is nothing much that you can do to resolve this problem, but worry not for there are still possible solutions that could help you in fixing it. Refer to the suggestions laid out below to fix Bugcode 0xA –IRQL_NOT_LESS_OR_EQUAL error.
Option 1 – Try running the Hardware and Devices Troubleshooter
The first thing you can do to fix the problem is by running the Hardware Troubleshooter. Although it won’t make much of a difference, there’s still a possibility that it could automatically fix the problem. To use it, refer to these steps:
The first thing you need to do is click on Start and then on the gear-like icon to pull up the window for Settings.
After opening Settings, look for the Update and Security option and select it.
From there, go to the Troubleshoot option located on the left-hand side of the list.
Next, select Hardware and Devices from the list and open the Troubleshooter and run it. Once it is doing its job, wait for it to complete the process and then restart the system.
After the system restarts, check if the problem’s now fixed. If not, refer to the next option given below.
Option 2 – Try to update or rollback your device drivers
If the first option didn’t work for you, then it’s time to either update or roll back the device drivers. It is most likely that after you updated your Windows computer that your driver also needs a refresh. On the other hand, if you have just updated your device drivers then you need to roll back the drivers to their previous versions. Whichever applies to you, refer to the steps below.
Open the Devices Manager from the Win X Menu.
Then locate the device drivers and right-click on them to open the Properties.
After that, switch to the Driver tab and click on the Uninstall Device button.
Follow the screen option to completely uninstall it.
Finally, restart your computer. It will just reinstall the device drivers automatically.
Note: You can install a dedicated driver on your computer in case you have it or you could also look for it directly from the website of the manufacturer.
Option 3 – Run the Memory Diagnostic Tool to check for Memory leaks
Tap the Win + R keys to open Run and type exe and hit Enter to open the Windows Memory Diagnostic Tool.
After that, it will give two options such as:
Restart now and check for problems (Recommended)
Check for problems the next time I start my computer
Once your computer has restarted, perform a basic scan or you could also go for the “Advanced” options such as “Test mix” or “Pass count”. Simply tap the F10 key to start the test.
Note: After you select the option, your PC will restart and check for memory-based issues. If it finds any issues, it will automatically fix them and if there’s no issue found, then it’s most likely not a memory-based issue so you should try the other options given below.
If you encounter an error message that states, “Your computer has lost the lease to its IP Address <IP ADDRESS> on the Network Card with network address <NETWORK ADDRESS>”, then this post might be of help to you. This kind of error due to the timeout caused by the DHCPv6 address which is used to connect the client to the user network as an independent client or a part of a domain.
There are a lot of potential fixes you can try to fix this error and we will be discussing each one of them below. You can try to reboot your router, flush the DNS cache, reset the Network adapter, toggle the DHCPv6 Lease time or disable IPv6 in the Network Center. For more details, refer to the following options.
Option 1 – Try rebooting your router
The first thing you can try to do to fix the error is to simply restart your router. All you need to do is reboot the router from its Admin panel or you can also turn it off manually and turn it back on after a couple of seconds so that it can completely reboot. Once you’re done, try accessing your server again and see if the error is now fixed.
Option 2 – Try to flush the DNS configuration
You could also try to flush the DNS configuration in your computer to fix the error. How? Refer to these steps:
Tap the Win + X key combination and click on the Command Prompt (Admin) option or you could also search “cmd” in the Cortana search box and right-click on Command Prompt from the search results and select the “Run as administrator” option.
After opening Command Prompt with admin privileges, enter each one of the commands given below sequentially in order to flush the DNS cache.
ipconfig/release
ipconfig/renew
ipconfig/flushdns
Now type the exit command to close Command Prompt and then restart your computer and see if the problem is fixed.
One the other hand, you could also try to reset Winsock as well as the TCP/IP.
Once done, just exit the Command Prompt and check if that fixes your issue.
You may want to reset Winsock & reset TCP/IP as well.
Option 3 – Try to toggle the DHCPv6 Lease time
First, you need to log in to the Admin panel of your router.
Next, navigate to the DHCPv6 settings inside it and look for a field for Lease Time.
After you’ve found it, increase the Lease Time value to something greater than what is already entered depending on your preference.
Now apply the configuration and reboot your router to apply the modified settings. Just remember that if things didn’t work out, you can just change back the Lease Time value to what it was before.
Option 4 – Try disabling the IPv6 in the Network Center
Tap the Win + X key combination and click on Network Connections.
This will open the Settings app on a specific page. Now on the right-side panel, click on the Network and Sharing Center link.
After that, it will open the Control Panel and from there, click on the network that your computer is connected to and then click on Properties.
Next, uncheck the entry that says, “Internet Protocol Version 6 (TCP/IPv6)” in the list that populates.
Now click on OK and close all other windows and see if the error is fixed.
Option 5 – Run the Network Adapter troubleshooter
To run the Network Troubleshooter, refer to these steps:
Open the Search bar on your computer and type in “troubleshoot” to open the Troubleshoot settings.
Next, scroll down and select the “Network Adapter” option from the right pane.
Then click on the Run Troubleshooter” button.
After that, your computer will check for any possible errors and will pinpoint the root cause of the problem if possible.
Restart your computer.
Option 6 – Try to perform Network Reset
You can also try to perform a Network Reset to resolve the problem. This will reset the entire network configuration including your IP address. To perform Network Reset, follow these steps:
Tap the Win + I keys to open Settings.
From there, go to the Network and Internet section.
Next, scroll down and look for “Network Reset” under the status pane.
After that, click on Network Reset and then on Reset now to start resetting the network configuration. Once done, check if it is able to fix the error or not.
The newest piece of hardware for PC or console users is not really what anyone has expected and for sure not from a company like Cooler Master.
I going to admit right here that I am a big fan of Cooler Master PC cases, I like them and they are always one of the things that I consider when building a new PC, overall I like their ideas and quality so personal for me it was quite a surprise to see that they are one that is making a new generation gaming chair.
Now truth to be told Orb X is not your typical gaming chair as you can clearly see from the pictures. The chair itself will come in two colors: white or black and RGB lighting looks to be prominently featured throughout.
The chair itself is advertised as both meant and aimed for professional and gaming crowds but I believe the gaming crowd is in general more interested in this hardware piece.
Hardware is enclosed in a fully motorized shuttle dome which aims to maximize your privacy, it supports a single 49inch display or three 27inch monitors along with surround speakers if you do not wish to use headphones.
It offers an adjustable headrest, lumbar support, and footrest so you can spend some time in it and be comfortable. Controls on the chair itself allow you to raise or lower the dome for easier getting in and out of it.
Orb X also has a compartment in its backside, it folds out and has a sliding tray designed to hold your PC or console. Everything is enclosed so wiring is not the issue.
Overall Orb X seems really like the computer chair of the future, Cooler Master expects to release the Orb X by December 2021, priced around $12,000-$14,000.
Error C00D11B1 is a type of Windows Media Player error code.
The error C00D11B1 hampers your ability to play videos, MP3 files and songs on Windows Media Player. The error is displayed in the following format:
Error C00D11B1:’Windows Media Player can’t play the file.’
Solution
Error Causes
The cause of error C00D11B1 message pop up on your computer can be narrowed down to one particular reason virtually because this error may be triggered due to several reasons, these include:
Corrupt DRM license
Enabled codec of the video in Windows Media Player codecs section
Registry Corruption
The good news is that this error is not fatal and does not pose serious PC threats like runtime and BSoD error codes.
However, it is still advisable to resolve to ensure you are able to watch movies and listen to songs on Windows Media Player without any difficulty.
Further Information and Manual Repair
Here are some of the best and effective do it yourself methods to resolve the error C00D11B1 on your PC right away:
Method 1- Disable the codec of the video option in the Codecs Section
If you are unable to play downloaded movie files on your PC on Windows Media Player, then try this method to resolve the issue. Simply open Windows Media Player, Go to Tools, Options, DVD and then click Advanced Tab.
Here find the codecs section, scroll down to the codec of the video you are trying to play and see if it says enabled. If it does, then disable it and then select a decorder for the codec. Now try running the video again on your Windows Media Player. This will hopefully resolve the issue.
Nonetheless if the error still persists, try method 2.
Method 2- Delete DRM Licenses & cache and Download it Again
Sometimes the error C00D11B1 can also be trigged by corrupt DRM licenses & cache.
To resolve the issue, simply delete all files. First open Windows Explorer (Windows key + E) and then go to C:ProgramDataMicrosoftWindowsDRM. Now delete all files in this folder. Once deleted, Let Windows Media Player download your license again.
After downloading the DRM license again, run the Windows Media Player to see if it works.
Method 3- Disable Firewall Temporarily
Firewall can also be responsible for blocking the Windows Media Player streaming. Firewalls often block important ports that are required in order to run some programs. If this is the cause, then simply disable Firewall temporarily to resolve the issue.
Method 4- Repair the Registry
Registry is that part of your computer that saves all the activities performed on the PC and all the files too including both important and unimportant files like cookies, junk files and bad registry entries.
If these unimportant and obsolete files are not removed frequently, the registry gets corrupt and damaged. And due to this reason you may experience error code C00D11B1 on your system.
To resolve this issue, simply repair the damaged registry by downloading Restoro. This is a powerful PC Fixer integrated with a registry cleaner. The registry cleaner removes all unnecessary files, cleans and repairs the registry in seconds.
Click here to download Restoro and fix error C00D11B1 on your PC right now!
User32.dll is a Dynamic Link Library file. Windows stores instructions for graphical elements such as dialog boxes and Windows in this file.
This file is a crucial file, necessary to run Windows operations.
If this file is damaged, deleted, or removed from the system you may not be able to run the programs on your system that use and share the User32.dll file thereby causing you inconvenience.
The User32.dll file error is displayed in the following format:
“This application has failed to start because USER32.dll was not found. Reinstalling the application may fix this problem.”
Or
“[Program] illegal system DLL relocation”
Program here refers to the name of a program that caused the User32.dll error message.
Solution
Error Causes
User32.dll errors are triggered by the following reasons:
Missing and damaged .dll files
Viral infection
Registry corruption
User32.dll error is also referred to as C0000135 blue screen of death error. When the User32.dll error occurs it not only locks you out of your desired program but also turns your computer screen blue.
If the error is not repaired timely it may expose your PC to serious threats such as abrupt system shutdowns, system failure, and crash.
Further Information and Manual Repair
To resolve the User32.dll error on your PC, try the following solutions:
1. Reinstall Programs Causing User32.dll errors
Sometimes User32.dll error may occur due to missing DLL files. This happens when you delete a program from your PC and accidentally the DLL file also gets deleted which is shared by other programs on your system.
Therefore to resolve this first find out what programs on your system use User32.dll to load and run on your system. To do this use the Tasklist command-line tool. It displays the names of all the programs that currently use the User32.dll file.
After this, reinstall the programs that use User32.dll files on your system. This will hopefully resolve the error.
2. Install and Run Restoro
If it doesn’t, then this probably means that the damage is deep-rooted. It is related to the damaged DLL files, registry corruption, or viral infection.
To resolve all of these causes in one go, it is best to download Restoro instead of downloading 3 different software to resolve each cause for the error separately.
This is basically an advanced, innovative, and multi-functional PC repair tool embedded with multiple powerful utilities including a registry cleaner, and a system optimizer. It is a one-stop solution for all your PC-related problems including the User32.dll error.
The registry cleaner wipes the clutter and obsolete files damaging the hard disk and simultaneously repairs the DLL files and the registry. The antivirus feature removes all the viruses on your system while the system stability utility boosts the PC speed significantly.
It is safe, user-friendly, and compatible with all Windows versions including Windows Vista, XP, Windows 7, 8, 8.1, and 10.
Click here to download Total System Care to resolve the User32.dll error right away.
As you know, NVIDIA is one of the topmost graphics cards used and it has been that way for several years already. And in those years, the company has managed to release the best cards on the market. However, there are still times when some things fail and don’t work as expected due to some NVIDIA driver issues.
As of late, one of the issues users reported about NVIDIA drivers is that it keeps on crashing on a daily basis. It gets to the point where they aren’t able to play games anymore while some users experience lag and rendering issues. In addition, some users also reported that their computer display tends to freeze sometimes, and then things would seem to go back to normal but only for a short span of time as the crash seems to happen every 10 minutes. This can be extremely annoying as you won’t be able to use your computer properly. If you are one of these users, worry not for there are several ways you can try to resolve the problem in your Windows 10 computer. Make sure to carefully follow the options given below.
Option 1 – Try checking if the NVIDIA graphics card is enabled
Although the problem is quite massive, the fix could be as simple as enabling the NVIDIA graphics card if it turns out to be disabled. There might be some strange reason why your graphics card disables itself. Thus, the best and first option you can try is to check if the NVIDIA graphics card is enabled or not. To do so, follow these steps:
Tap the Win + R keys to open the Run dialog box.
Then type “devmgmt.msc” in the field and hit Enter to open the Device Manager.
After opening the Device Manager, look for the Nvidia graphics card option among the list of device drivers. Once you found it, check if it is enabled or not. If it’s not enabled, you should see a gray arrow pointing downwards. Right-click on the card and select Enabled.
Next, right-click on the graphics card once more and click on the Update Driver Software option and then click on the “Search automatically for updated driver software” option.
Option 2 – Try to choose Maximum Performance and disable Vsync
If the first option didn’t work out for you, then you might want to try turning off Vsync and adjust the performance to the maximum. Refer to these steps to disable Vsync and adjust performance to the maximum.
The first thing you have to do is right-click on your desktop and select the NVIDIA Control Panel among the options.
After opening the NVIDIA Control Panel, select Manage 3D Settings.
After that, set Vsync to off, and then in the Power Management Mode, set it to Maximum Performance. That should fix the problem.
Option 3 – Try updating the drivers from the official site of NVIDIA
If both the first and second given options didn’t work, you can also try updating the drivers from the official NVIDIA website. And in case you don’t know the type of Nvidia graphics card that your computer is on, follow the steps below:
Tap the Win + R keys to open the Run dialog box.
Next type in “dxdiag” in the field and click OK or hit Enter to open the DirectX Diagnostic Tool.
From there, you can see what type of Nvidia graphics card that your system is on.
Take note of your graphics card information and then look for the best drivers for your operating system. Once you’ve downloaded and installed the file, restart your PC.
There are several kinds of errors you could encounter when you are running Windows 10 on a virtual machine. The Windows OS knows the difference between booting up in a standalone computer or in a virtual machine. This is why some specific drivers and system capabilities are used while emulating the Windows OS on software and during this phase, there are times when the System Preparation may throw up an error that says, “A fatal error occurred while trying to sysprep the machine”.
This kind of error arises due to a race condition wherein the Sysprep command tries to stop the Microsoft Distributed Transaction Coordinator or MSDTC service and the VMware tool tries to start the MSDTC service. You may also see the following messages logged in the Setuperr.log file:
[0x0f0082] SYSPRP LaunchDll:Failure occurred while executing ‘C:Windowssystem32msdtcprx.dll,SysPrepDtcCleanup’, returned error code -2146434815[gle=0x000000b7]
To fix the 0x0f0082, 0x0f0070, 0x0f00a8 Sysprep errors, you can check out two potential fixes. First, you have to check the status of the MSDTC service and the second one is to check the settings in the Windows Registry. Note that these fixes are proven to be effective on many users and apply to several versions of Windows, including Windows 10.
Option 1 – Check the status of the MSDTC service via Command Prompt
As mentioned, the error could be caused by the malfunctioning of the MSDTC service or it. Thus, you have to uninstall and reinstall the MSDTC service to resolve the problem and you can do that using Command Prompt. Follow the steps below.
In the Start Search, type “command prompt” and from the results, right-click on Command Prompt and then select the “Run as administrator” option to open it with admin privileges.
If a User Account Control or UAC prompt appears, just click on Yes to proceed.
Once you’ve opened Command Prompt, execute this command: msdtc –uninstall
The command you just entered will uninstall the MSDTC service. After that, you need to execute this second command to reinstall the service: msdtc –install
Now exit Command Prompt and check if the error is now fixed.
Option 2 – Check the Registry settings
Tap the Win + R keys to open the Run dialog box and type “Regedit” in the field and click OK or hit Enter to open the Registry Editor.
After opening the Registry Editor, navigate to this registry path: HKEY_LOCAL_MACHINESOFTWAREMicrosoftWindows NTCurrentVersionSoftwareProtectionPlatform
From there, look for a DWORD value that’s named “SkipRearm” and double click on it.
Then change its value data to “1”.
Restart your computer to apply successfully apply the changes made and check if it was able to fix the error.
The 0x80073b01 is an error message that often pops up on the screen when you run Windows Defender. Windows Defender is an antispyware by Microsoft integrated into Windows Vista and Windows 7. The error code 0x80073b01 is considered to be a critical Windows error which must be fixed immediately.
This error code locks you out of Windows Defender thus putting your computer at risk potential security loopholes in the Windows environment such as notorious software like spyware, adware, and viruses.
This is dangerous especially if you have confidential data saved on your PC as it can be exploited easily if you don’t remove such malicious software the right way. This can lead to data breaches, cybercrime, and the worst-case scenario can be identity theft.
Error code 0x80073b01 symptoms include:
Sluggish pc performance,
Problems during software installations
Beeping sounds
Unexpected shutdowns
Screen freeze
Solution
Error Causes
The error code 0x80073b01 occurs when Windows Defender gets damaged due to misconfigured files and registry corruption. It is advisable to fix this error right away to avoid serious damages.
How to Resolve the Error Code 0x80073b01?
To repair the error code 0x80073b01 on your PC you don’t necessarily have to call a professional; you can fix it on your own with the help of Restoro.
It’s very easy to use and does not require you to be technically sound. Besides, it can be downloaded for free thus helping you save hundreds of dollars that you are likely to spend on hiring a technician for the error code repair job.
Restoro is the latest and a multi-functional system optimizer and a repair tool. This software is integrated with highly functional features that enable you to resolve almost all types of PC-related errors including the error code 0x80073b01.
It includes powerful and value-adding features like registry cleaner, system stability detector, privacy error finder with anti-virus properties, and Active X and Class issues detector.
With the help of its ‘registry cleaner’, you can easily scan for 0x80073b01 error codes on your PC. It offers in-depth registry cleaning scanning all the underlying causes of registry corruption that triggers 0x80073b01 error.
The underlying cause for registry corruption is the accumulation of unnecessary and malicious files in the registry like junk files, temporary internet files, and invalid entries.
Restoro with the help of its registry cleaning utility clears the clutter in seconds, frees up your disk space, and repairs the registry.
And since the error 0x80073b01 hampered your ability to scan for viruses and spyware with Windows Defender, your computer may be exposed to serious data security threats by such malware. However, with Restoro you can remove malware from your system too.
Restoro also functions as a powerful anti-virus. With the help of its privacy error detector, it scans for malicious viruses, adware and spyware on your PC ensuring that you are safe and protected from data breaches and cybercrime.
This tool resolves the error 0x80073b01 successfully while repairing your registry and simultaneously optimizing the speed of your PC.
It has a user-friendly interface and a simple design. There is absolutely nothing complex about it. All you have to do is download and install Restoro on your system and run it to scan for errors.
After the scanning is complete, you will see a comprehensive and detailed error report specifying the number and the types of errors your PC is inflicted with. Now all you have to do is click on the Repair button to fix the issues on your PC including the error 0x80073b01 right away. Restoro is a safe and efficient tool that helps you resolve PC issues in seconds.
For optimum results, it is advisable to run it on your PC regularly. This will help you keep the registry clean, PC error-free, reduce boot time, and ensure speedy PC performance.
Click here to download Restoro on your PC today!
Windows 11 is a good-looking operating system but people love to make things personal and to their liking so we decided to help you in this mission with small customization of changing default system fonts inside Windows 11.
Since there is no really easy way to just switch the font windows is using for itself we will have to tweak a registry a little so before we start please do make a backup of the registry file and follow the steps as they are presented in order to avoid any errors and break the system.
So, if all precautions are made and you are ready to change your Windows appearance let's dive right into it:
Find and/or install the font that you wish to use
There are vast free font sites on the internet where you can find fonts that you like and wish to use but be very careful with your desired font selection. The font that you choose needs to be a complete typeface, meaning that it has to contain all glyphs, large and small font sizes, all special characters, etc or you will experience that in certain areas nothing will be displayed.
Once you have found the font that you like and made sure it is a complete font, install it on your system (you can skip this step if you just want to change the system font with one already installed on your system)
Create REG file
Open notepad or a similar plain text editor in order to create a file that will apply changes directly into the registry and create a new file. Inside the file paste this text:
All the way to the bottom where it says: "Segoe UI"="NEW-FONT", change NEW-FONT with the font name that you have chosen or installed in the previous step. For example: "Segoe UI"="Ubuntu".
Now go to File > Save As and name your file however you want but give it REG extension so it looks like: my_new_windows_font.REG
Apply changes
Now that you have your registry entry saved, locate it and double-click on it, at this stage Windows warning will probably pop up, you can just ignore it and click on YES since you wrote the file and know what it is. After registry entry is applied reboot your PC in order for changes to take effect.
Rolling back
If you want to change the font to another one, just repeat this procedure again. If you want to roll back to using the default Windows font, repeat the process but with this code instead of the one provided in the REG file:

 Most scrollbars are hidden by default if they are not used in Windows 11. If you are not ok with this feature and want scrollbars to be always visible and available do not worry, turning them ON is very easy.
 I going to admit right here that I am a big fan of Cooler Master PC cases, I like them and they are always one of the things that I consider when building a new PC, overall I like their ideas and quality so personal for me it was quite a surprise to see that they are one that is making a new generation gaming chair.
Now truth to be told Orb X is not your typical gaming chair as you can clearly see from the pictures. The chair itself will come in two colors: white or black and RGB lighting looks to be prominently featured throughout.
I going to admit right here that I am a big fan of Cooler Master PC cases, I like them and they are always one of the things that I consider when building a new PC, overall I like their ideas and quality so personal for me it was quite a surprise to see that they are one that is making a new generation gaming chair.
Now truth to be told Orb X is not your typical gaming chair as you can clearly see from the pictures. The chair itself will come in two colors: white or black and RGB lighting looks to be prominently featured throughout.
 The chair itself is advertised as both meant and aimed for professional and gaming crowds but I believe the gaming crowd is in general more interested in this hardware piece.
Hardware is enclosed in a fully motorized shuttle dome which aims to maximize your privacy, it supports a single 49inch display or three 27inch monitors along with surround speakers if you do not wish to use headphones.
The chair itself is advertised as both meant and aimed for professional and gaming crowds but I believe the gaming crowd is in general more interested in this hardware piece.
Hardware is enclosed in a fully motorized shuttle dome which aims to maximize your privacy, it supports a single 49inch display or three 27inch monitors along with surround speakers if you do not wish to use headphones.
 It offers an adjustable headrest, lumbar support, and footrest so you can spend some time in it and be comfortable. Controls on the chair itself allow you to raise or lower the dome for easier getting in and out of it.
Orb X also has a compartment in its backside, it folds out and has a sliding tray designed to hold your PC or console. Everything is enclosed so wiring is not the issue.
Overall Orb X seems really like the computer chair of the future, Cooler Master expects to release the Orb X by December 2021, priced around $12,000-$14,000.
It offers an adjustable headrest, lumbar support, and footrest so you can spend some time in it and be comfortable. Controls on the chair itself allow you to raise or lower the dome for easier getting in and out of it.
Orb X also has a compartment in its backside, it folds out and has a sliding tray designed to hold your PC or console. Everything is enclosed so wiring is not the issue.
Overall Orb X seems really like the computer chair of the future, Cooler Master expects to release the Orb X by December 2021, priced around $12,000-$14,000. 
