 You can it here: https://sourceforge.net/projects/freeplane/files/latest/download
The Error Code 0x80200056 will appear in a few different instances, though always applies to an interrupted download. Windows 10 will quickly discover that their upgrade and/or download did not work correctly. Not every user who upgrades to Microsoft Windows 10 will face this issue, only a select few random instances will occur.
Common symptoms include:
 Error Causes
This error can be caused by a number of common problems, the first of which is the easiest to diagnose.
None of these causes should overtly affect the operation of your PC, but merely prevent the upgrade and/or download from functioning correctly. If your PC is exhibiting other operating system errors in addition to Error Code 0x80200056, it would be wise to contact Microsoft Support before the issues lead to a possible catastrophic failure.
With the very recent release of Microsoft Windows 10, we are seeing a number of users discuss Error Code 0x80200056. Luckily, there are three different methods that any home user can perform to alleviate the error and complete the Microsoft Windows 10 download successfully.
Use if your PC restarted accidentally during the upgrade, or if you accidentally signed out of Windows during the upgrade.
The following solution methods will apply if corrupted files, date/time changes, or third-party software interference is the issue causing Error Code 0x80200056.
The following solution methods will apply if corrupted files, date/time changes, or third-party software interference is the issue causing Error Code 0x80200056.
To use a powerful tool to resolve Windows 10 upgrade Error Code 0x80200056 issue, download a powerful tool.
Click here to download Restoro.
If any of these methods do not allow for the successful upgrading of your Windows system, contact the Microsoft Support team. Make sure to include in your message to support what fixes you have attempted, and what the outcomes were. As Microsoft Windows 10 is so incredibly new, there are bound to be issued while the program is in its infancy. Fortunately, a majority of these issues should be worked out by Microsoft relatively quickly.
 You can it here: https://sourceforge.net/projects/freeplane/files/latest/download
DISM.exe /Online /Cleanup-Image /RestoreHealth /Source:C:RepairSourceWindows /LimitAccess
net stop wuauserv net start cryptSvc net start bits net start msiserver
net start wuauserv net start cryptSvc net start bits net start msiserver
“This app wants to access your pictures” or “This app wants to access your account info”both of which are followed by two buttons that will ask you to Allow or Deny the action. You can always click on any of the given options. This will determine the permission of the application. Users in Windows 10 are given the option to either allow or deny applications in accessing their account information like name, picture and other account information. Thus, in this post, you will be guided on how you can change the Privacy settings of these apps to allow or deny them permission to access not just your account info but for all users, as well as specific apps in Windows 10. The user account information is part of the Privacy data in Windows 10 that you can control easily using the Settings app. In fact, you can revoke or grant access permission for your account information, all the users and specific applications to do that, follow each one of the instructions provided below carefully.
Disk Write Error in Steam is thrown at you while you try to download or update the game in your library. If you are an unfortunate user of Steam that has encountered this error do not sweat, the error is usually tied to permission in windows or file corruption and not to hardware issues and can be easily resolved.
In this guide, we will go through solutions for this specific error and it is advisable to go through solutions as they are presented since they go from the easiest and most common issues.

The easiest and quickest way of resolving this issue is just a simple restart of the Steam client. Just completely quit Steam and they run it again, if this has not solved the issue try rebooting your PC. In most cases, this can solve the issue since this error is known to be introduced with some communication issues with OS (Windows)
Disk write permissions could also cause this error because if by any chance the Steam library folder has been set or changed to the read-only client would be unable to write anything in it. To easily solve this issue completely exit the Steam client and rerun it as administrator. Just right-click on it and select Run as Administrator. If this has solved your issue run Steam always as an administrator.
To run always as an administrator right click on the steam executable, go to properties, and inside properties go to the compatibility tab. In the compatibility tab check run as administrator and click on OK.
If for any reason cache has become corrupted there is a big chance that this might be an issue why there is a disk drive error in Steam. To clear download, cache goes into your client, and on top drow down menu click on steam. Find and open settings and inside go to the downloads tab. Locate a clear download cache and immediately you will be prompted to restart Steam. After restart, you will be asked to login into steam and the issue with disk write should be gone.
Library folder issues can also be the source of disk write annoyance so let's repair them. Click steam in the top left and go to the settings. Locate and click on Downloads and then go to Steam library folders. You will be here shown all disk drivers you are using for steam games and all of the games that are downloaded.
Select the game you are getting errors with and click on three dots on the far right. From the menu choose the repair folder option. Take note that the more games you have installed, the more time the repair process will need.
Sometimes the issue is not at your end at all, servers can experience problems and outrages and this can directly reflect at your end with a disk write error. If any of the previous solutions have not resolved the issue this is the next logical step to try. If the server is facing issues then changing the download server will resolve the issue at your end.
Click on settings in the top drop-down menu and then click on the Steam library folder. Find the downloads page and then click on download region, Choose another server than one nearest to your location since that's what will Steam choose by default.
Customers will most likely encounter the “We couldn’t update system reserved partition” error when upgrading to Windows 10 from Windows 7 or Windows 8.1. This error may also come with error code 0xc1900104 or error code 0x800f0922.
Error Cause“We couldn’t update system reserved partition” Windows 10 upgrade error is normally caused by too little space on the System Reserved Partition (SRP). The System Reserve Partition is an additional small partition created by Windows, which stores boot files. The SRP can be filled up with security apps and third-party anti-virus. Once this partition has insufficient space, the system will not be able to upgrade to Windows 10.
Caution: The following steps are complex and need to be done by experienced users especially using the command line. Once an error is made in entering commands, there’s a chance that your device can be put in a no-boot situation, or data stored on the device can possibly get lost.
To upgrade to Windows 10, your device needs to have at least 15MB free space on the System Reserved Partition. Follow the procedure below and then try upgrading again.
NOTE: While in Admin mode, some apps like OneNote will not run.
Doing this method will make a permanent, but small increase in the free space of the device’s SRP.
a. Open the Run window by pressing the Windows key + R. Type diskmgmt.msc then hit Enter. b. Select System Reserve partition then right-click on it.
c. Choose Change Drive Letter and Paths then select Add.
d. Type Y for the drive letter then click OK.
e. Click on the Start button and search for cmd. In the results, right-click on Command Prompt then choose Run as administrator. The command prompt window will appear.
f. Type Y: at the command prompt then press Enter.
g. Once you’ve switched to drive Y, type takeown /d y /r /f . then hit Enter.
NOTE: Ensure that the space and period after “f” is included in order for the command to work properlyh. Type icacls Y:* /save %systemdrive%NTFSp.txt /c /t then hit Enter to back up the permission to the drive.
NOTE: Ensure that all files are marked as successful and that no files are marked as failed.
i. Type whoami then hit Enter. Record the username that appears. Afterwards, type icacls . /grant <username you got from whoami>:F /t then press Enter.
NOTE: Ensure that there’s no space between the username and “:F” or the command will not work.j. In the File Explorer, open the SRP drive and select the Boot folder. Choose the language folders you want to permanently delete. Language folders are named with four letters split with a hyphen. For example: de-DE is the German language while en-US is the U.S. English language.
2. Truncate the NTFS Log:
a. Open the Command Prompt then type chkdsk /L Y: to check the size of the NTFS Log. If the NTFS Log size is less than 5000KB, you need not truncate the file.
b. Type chkdsk /L:5000 /X /F then hit Enter to truncate the NTFS Log.
c. Return to Disk Management window. Select Action menu then select Check if the device’s SRP now has a larger amount of free space. Once there’s enough space, right click the System Reserve Partition then select Change Drive Letter and Paths. Choose Y: then select Remove.
3. If there’s still not enough available space after truncating the NTFS Log, resize the USN journal:
a. Open the command prompt then type fsutil usn queryjournal Y: to display the size in hex value. Convert the hex value to decimal then divide it by 1048576. The result you will get will be in MB. If the journal size is 30MB or more, proceed with truncating the file.
NOTE: To convert the Hex value to Decimal, open the Calculator app in Windows then choose View menu. Select Programmer then choose Hex. Type the Hex value then choose Dec.
b. Type fsutil usn deletejournal /D /N Y: then hit Enter to delete the journal. Type fsutil usn createjournal m=1500 a=1 Y: to recreate the journal having the new log size value.
a. Type icacls Y: /restore %systemdrive%NTFSp.txt /c /t in the Command Prompt. Check if the files were successfully processed before proceeding. If you see a message saying some files failed while processing, this is normal since some of the files have already been deleted before performing a backup. However, if there are no successful files indicated, the command was not properly executed.
b. Type icacls . /grant system:f /t then hit Enter to adjust the ACL back to System. Now, you can set the owner of the drive by typing icacls Y: /setowner “SYSTEM” /t /c then press Enter.
c. Check if the device’s SRP now has enough free space by going back to Disk Management and refreshing the data. If the SRP already has sufficient space, you can now remove the drive letter. Right-click on the System Reserved Partition then choose Change Drive Letter and Paths. Select the Y: drive then choose Confirm deleting the drive letter by clicking OK.
This method makes a larger, but temporary, increase in the SRP free space.
1. Be sure you have an external drive having at least 250 MB free space and formatted as NFTS.2. Open Run by pressing the Windows key + R. Type mscthen to choose the Recovery Partition. Right-click on it then choose Change Drive Letter and Paths.
3. Select Add then type Y for the drive letter, click
4. Click on the Start screen then type cmd in the search bar. In the results, right-click on Command Prompt then choose Run as administrator. The command prompt window will appear.
5. Switch to another drive by typing Y: in the command prompt. Once you’re in the drive Y, type takeown /d y /r /f .
NOTE: Ensure that space and period after “f” are included in order for the command to work properly.
DownSpeedTest is a Browser Toolbar Extension for Google Chrome that allows users to test their internet speed and convert files, however this speed test does not show proper values, nor even close.
Upon installation DownSpeedTest will replace your default New Tab page with its own Search Engine “MyWay.com” or “Search.MyWay.com”. This Search Engine camouflages itself as a “Enhanced Google Search Engine”, but all it does is allow more room for easier ad injection. In the background, this extension monitors user browsing behavior and records visited links, viewed products, clicked links and time spend on websites. This information is later used for Ad targeting.
While browsing the internet with this extension enabled you will experience additional ads, sponsored content, and even pop-up ads on some occasions. Due to its information mining behavior and aggressive ad placement, DownSpeedTest had been marked as a Browser Hijacker and it is recommended for removal.
Action Classic Games Toolbar is another product from Mindspark Interactive Network, Inc. that may claim to relieve users of their boredom with more than 500 online games. The Action Classic Games toolbar is available for download from its official web page and Google Web Store, though it is normally distributed via advertising directly from its website. When installed, it will change your home page and new tab to MyWay.com and start gathering user browsing information while active.
Browsing the internet with Action Classic Games enabled will result in the additional ad and sponsored content placement throughout the browsing sessions. This extension has been flagged as a Browser Hijacker by several top anti-virus applications and is therefore not recommended to keep on your computer.
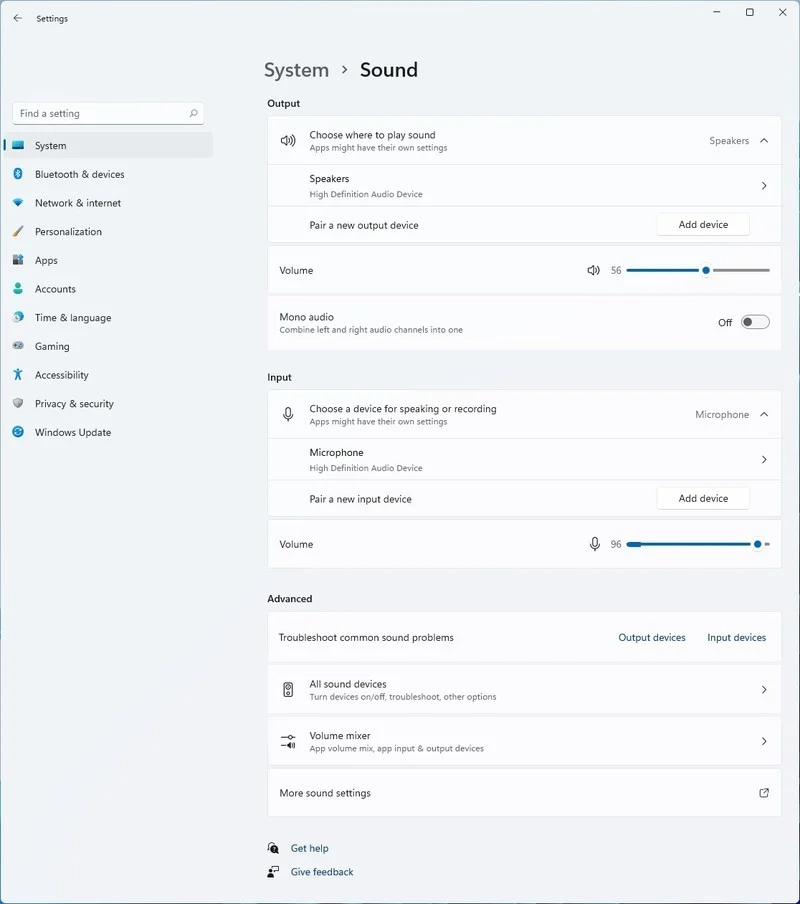 Windows 11 has brought some new features and changed some of the existing ones. One of these changes includes quick switching of audio devices which will play audio.
Audio switching can still be done under the taskbar, it is just a little different and one could say even hidden. Follow this quick guide and you will be switching from your headphones to speakers as an example in a matter of seconds.
Windows 11 has brought some new features and changed some of the existing ones. One of these changes includes quick switching of audio devices which will play audio.
Audio switching can still be done under the taskbar, it is just a little different and one could say even hidden. Follow this quick guide and you will be switching from your headphones to speakers as an example in a matter of seconds.