Logo

Fix PDC WATCHDOG TIMEOUT BSOD

If you suddenly encountered the PDC WATCHDOG TIMEOUT BSOD Blue Screen stop error with a bug check value of 0x0000014F, then it’s probably due to a system component that has failed to respond with the allocated period which prevents the system from exiting connected standby.

This kind of Blue Screen error could be caused by both hardware and software components. To fix this Stop error, here are some possible fixes you can try that might help but before you proceed, make sure that you create a System Restore point first and boot your computer into Safe Mode with Networking.

Option 1 – Try to rollback, update or disable drivers

The next thing you can do to fix the PDC_WATCHDOG_TIMEOUT Stop error is to roll back, or update, or disable device drivers. It is most likely that after you updated your Windows computer that your driver also needs a refresh. On the other hand, if you have just updated your device drivers then you need to roll back the drivers to their previous versions. Whichever applies to you, refer to the steps below.

  • Open the Devices Manager from the Win X Menu.
  • After opening the Device Manager, look for the device driver named “IDE ATA/ATAPI controllers” and expand it.
  • Then look for the SATA AHCI Controller entry and right-click on it. If you haven’t updated this driver in a while, select the “Update Driver” option. On the other hand, if you’ve just updated this driver, then select the Uninstall Device option.
  • Next, follow the screen option to update or uninstall it.
  • Finally, restart your computer. It will just reinstall the device drivers automatically if you have chosen to uninstall them.

Note: You can install a dedicated driver on your computer in case you have it or you could also look for it directly from the website of the manufacturer.

Option 2 – Try to disconnect or disable newly installed hardware

In this option, you will have to disable or remove the hardware you’ve just installed recently since external devices could be the one that’s causing the Blue Screen of Death error to appear. To do that, just disconnect any external device that’s connected to your computer physically and then check if it fixes the PDC_WATCHDOG_TIMEOUT Blue Screen error.

Option 3 – Try running the Memory Diagnostic Tool

The Memory Diagnostic tool in windows can help resolve the PDC_WATCHDOG_TIMEOUT Blue Screen error by checking and automatically fixing any memory-based issues. To run it, refer to these steps:

  • Tap the Win + R keys to open Run and type mdsched.exe and hit Enter to open the Windows Memory Diagnostic Tool.
  • After that, it will give two options such as:
    • Restart now and check for problems (Recommended)
    • Check for problems the next time I start my computer
  • Once your computer has restarted, perform a basic scan or you could also go for the “Advanced” options such as “Test mix” or “Pass count”. Simply tap the F10 key to start the test.

Option 4 – Try to update the BIOS

Updating the BIOS can help you fix the PDC_WATCHDOG_TIMEOUT BSOD error but as you know, BIOS is a sensitive part of a computer. Even though it is a software component, the functioning of the hardware depends on it largely. Thus, you must be careful when modifying something in the BIOS. So if you don’t know much about it, it’s best if you skip on this option and try the other ones instead. However, if you are well-versed in navigating the BIOS, then follow the steps below.

  • Tap the Win + R keys to open the Run dialog box.
  • Next, type “msinfo32” in the field and press Enter to open System Information.
  • From there, you should find a search field on the bottom where you have to search for the BIOS version and then press Enter.
  • After that, you should see the developer and version of the BIOS installed on your PC.
  • Go to your manufacturer’s website and then download the latest version of BIOS on your computer.
  • If you are using a laptop, make sure that you keep it plugged in until you have updated the BIOS.
  • Now double click on the downloaded file and install the new BIOS version on your computer.
  • Now restart your computer to apply the changes made.

Option 5 – Try running the Blue Screen Troubleshooter

The Blue Screen troubleshooter is a built-in tool in Windows 10 that helps users in fixing BSOD errors like PDC_WATCHDOG_TIMEOUT. It can be found in the Settings Troubleshooters page. To use it, refer to these steps:

  • Tap the Win + I keys to open the Settings panel.
  • Then go to Update & Security > Troubleshoot.
  • From there, look for the option called “Blue Screen” on your right-hand side and then click the “Run the troubleshooter” button to run the Blue Screen Troubleshooter and then follow the next on-screen options. Note that you might have to boot your PC into Safe Mode.

Do You Need Help with Your Device?

Our Team of Experts May Help
Troubleshoot.Tech Experts are There for You!
Replace damaged files
Restore performance
Free disk space
Remove Malware
Protects WEB browser
Remove Viruses
Stop PC freezing
GET HELP
Troubleshoot.Tech experts work with all versions of Microsoft Windows including Windows 11, with Android, Mac, and more.

Share this article:

You might also like

Why You Need Antivirus Software & How to Select the Right One

Anxiety from all these digital threats lurking everywhere? An antivirus program can help put your mind at ease.

What can a virus do to your device?

A virus is malicious software that can affect pretty much any device and does so in a variety of ways. Be it your computer, your phone or your smart lightbulb - as long as there’s access to the internet, malware can get to it.

How exactly does this kind of attack manifest itself? Well, there’s a wide variety of effects ranging from mild to severe. Among other things, they depend on which type of malware attacks your device - a virus, spyware, ransomware, adware or something else.

These are some of the things you can expect to happen:

  • Slow performance
  • System crashes
  • Theft of data and sensitive information
  • Connectivity issues
  • Constant browser redirects
  • Strange messages sent to your contacts 
  • Interference with files

It really can be the stuff of nightmares. So, if you want to sleep peacefully knowing that your devices are completely safe, you should definitely consider getting an antivirus.

P.S. don’t let its name fool you - an antivirus does indeed protect your devices against more than just viruses.

What is antivirus software exactly?

Antivirus software is designed to help you battle and ward off malware. Basically, it scans your device to detect any suspicious activity and offers tools to get rid of the culprit. 

At first, antiviruses were developed to fight against viruses only, but nowadays they cover a lot more ground. Here are some of the biggest benefits of getting yourself a powerful defender.

Advantages of antivirus software

1. It fights those pesky ads

Look, constant ads that pop up everywhere aren’t the absolute worst thing that can happen on your computer. If anything, they are annoying, like when you’re trying to sleep but that one fly in your room just won’t stop buzzing.

Now, there’s a free, well-established solution for that - installing an ad blocker. And we’re about a hundred and ten percent sure you’ve already done that on each and every browser you use.

However, “if I can’t see it, it doesn’t exist” isn’t the most ideal approach for your online safety. Ad blockers can’t block everything and they won’t protect you from potential adware. An antivirus on the other hand offers that layer of protection against malware snuck into pop-ups and spammy websites.

2. It protects you from hackers

Hackers don’t target government institutions only. They’ll target regular people too if they have something to gain.
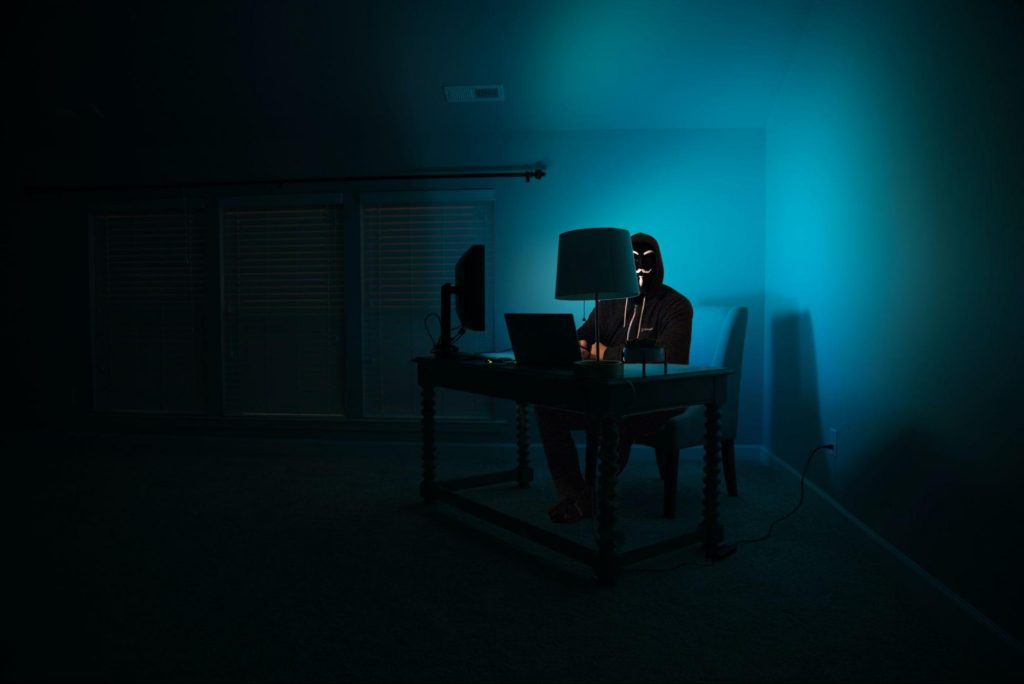
Antivirus can protect you from hackers
Credit: Clint Patteron (Unsplash)

There are different types of hacking, such as phishing e-mails, transmission of malicious programs, credential reuse, denial of service and more. In any case, they take control of your device and hijack your data.

The good thing is that, as threats evolve, antiviruses evolve too and there are tons of quality programs on the market that can keep you secure for an affordable price.

3. It keeps your files and data safe

When malware enters your device, it can target pretty much any file and get access to any and all data.

Installing an antivirus program will make sure that every single file, new or old, is monitored at all times, warning you against threats immediately. That way, you can make sure to react before your other files become infected and data is lost or stolen.

Another great thing for data protection is that the best antivirus software normally comes with a password manager, so no one can use malware to steal your passwords.

4. It blocks all kinds of malware

As we already stated, malicious attacks can be performed in many ways and malware comes in in different shapes an sizes, such as:

  • Trojan horse
  • Spyware
  • Ransomware
  • Adware
  • Rootkit
  • RAT (remote access Trojan)
  • Keyloggers
  • Worms
  • Botnets
Illustration of a computer worm
Credit: Growtika (Unsplash)

Nowadays, antivirus software is designed to fight against all of these types. That’s why more often than not we hear the term 'antivirus' used interchangeably with 'anti-malware,' like in this article.

5. It keeps your children protected

You can’t keep your eyes on your kid every second of the day and you can’t protect them from everything. But at least you can limit their exposure to the threats they can encounter at every corner of the digital world.

An antivirus program will block harmful or suspicious websites and ads, which is great both for you and your children. To take it a step further, though, many such programs come with special parental controls and offer monitoring as well. It’s a great solution for keeping your kids safe online without sounding like the irritating, overbearing, controlling parent who “just doesn’t get it!”

How to pick one

There are definitely lots of different antivirus programs out there, both free and paid. We recommend you look for a paid option, since free ones are unfortunately a lot more susceptible to being compromised through malicious attacks.

Now, there are a few factors to consider when choosing the right software. If you use your PC for basic things then a basic antivirus will suffice. However, the more complex your use and the more sensitive the data you deal with, the stronger it needs to be.

It’s also crucial that you take into account the features it includes. As we already mentioned, some programs have additional security options. For example, depending on the package you select, Bitdefender provides:

  • Webcam and mic monitoring
  • Parental control
  • Firewall
  • VPN
  • Password management
  • Identity theft protection

Some are included in plans and some are separate products, so make sure to check out all the offers.

And don’t worry if you have multiple PCs or you’re looking for protection for your smartphone or tablet as well; Bitdefender has suitable solutions for your needs. Of course, you can also just pick their classic antivirus software if you’re not in need of advanced protection.

Another important point is how regularly the software is updated and enhanced. The more frequent the updates the better, as bugs can make the program more vulnerable. Other things we advise you consider are user-friendliness, impact on performance, reputation (user reviews especially) and, of course, price.

The bottom line

Fact is: anyone can be a malware victim. Don’t let it be you.

You can’t put a price on peace and security, so don’t be reluctant to pay for yours - especially since a lot of options out there are extremely affordable. Is $159.00 a year really too much to pay for cross-platform protection for up to 10 devices? We don’t think so.

Explore your options and protect your files and data before it’s too late.

Read More
How to Fix Propsys.dll Error
Isn’t it annoying when you get an error message pop up stating ‘Cannot find propsys.dll” or “propsys.dll not found” when you start your computer or open a particular program? The propsys.dll file is crucial to the Windows operating system. This file is located in one of the following locations: "C:\Windows", C:\Program Files, C:\WINDOWS\system32, or C:\Program Files\Common Files". And the propsys.dll error indicates that the propsys digital library file is damaged and corrupt. The propsys.dll error may lead to a very unstable operating system. It may also hamper your ability to access many programs on your computer, lead to program and system crash and slow down the system’s performance. Therefore, to avoid these system threats, it is advisable to fix the error immediately.

Solution

Restoro box imageError Causes

The common causes of propsys.dll file error are:
  • Registry problem
  • The propsys.dll file is damaged due to a virus or spyware
  • Improper software removal
  • Hardware Failure
The propsys.dll error message is displayed in either of the following forms:
  • Propsys.dll not found
  • Cannot find [Path]propsys.dll
  • This application failed to start because propsys.dll was not found. Reinstalling the application may fix this problem
  • The propsys.dll file is missing

Further Information and Manual Repair

There are many ways to fix the propsys.dll error. However, for optimum results from the fix, you must first identify the cause of the error and then choose the solution accordingly.
  • Recommended Solution for Registry Issue
If you use your system daily the resulting wasted/invalid/junk entries may dilate the registries. This can result in registry malfunctioning which may result in a propsys.dll error on your screen. When this happens, it is advisable to use a registry cleaner to fix the problem. Registry cleaner helps clean up the junk entries and repairing the corrupted registries. For this, you will first have to download a registry cleaner repair tool. Download and install the software on your computer. After downloading it, click the start scan button to run. This helps scan and diagnose system errors on your computer in seconds. Once the scanning is complete, click on the fix button to repair the registry problem.
  • Recommended Solution for File Damage and Corruption
Use the ‘System Restore’ option to restore corrupt and damaged files.  The ‘System Restore’ function will help you get a fresh copy back and simultaneously help fix the error. Here’s how to use and access the ‘System Restore’ function on your computer: Simply go to the start menu and in the search box type restore. Once you type, it will show you the system restore option. Now select ‘choose a different restore point’. After this, you will be presented with a list of restore points. Choose a point that you believe happened before the propsys.dll error. Confirm your selection and restart. Another alternative solution for file damage is to run a virus scan of your entire system; the damage could be related to a virus or malware infection.
  • Recommended Solution for Hardware Failure
If a propsys.dll error occurs due to hardware failure, then it is advisable to update the drivers for hardware devices that you think are related to propsys.dll. For example, if you receive the propsys.dll error when you play a 3D video game, then try updating the driver for your video card.
Read More
A Guide to Fixing Corefoundation.dll Error on Your PC

Corefoundation.dll Error - What is it?

Corefoundation.dll error is a DLL error code associated with Apple software such as iTunes, MobileMe, QuickTime and etc. To understand this error better, first you need to understand what corefoundation.dll file is. Corefoundation.dll is a Dynamic Link Library file that is used by Apple software products. This file is created by Apple computer Inc and is designed to help open up some of the media files that you might have on your PC. DLLs help promote modularization of code, efficient memory usage, code reuse and reduced disk space allowing the operating system and the programs to load and run faster and take less disk space on the computer.

Error Messages

This error pops on the screen when there is an issue related to Apple software products on your system. Corefoundation.dll error is displayed on the computer screen in any one of the following formats:
“The program can not start because corefoundation.dll is missing from your computer. Try reinstalling the program to fix this problem”. "This application has failed to start because CoreFoundation.dll was not found. Re-installing the application may fix this problem." “The procedure entry point_CFBundleCopyFileTypeForFileData could not be located in the dynamic link library corefoundation.dll.” "MobileMe Control Panel cannot continue as Apple Application Support is missing or outdated. Please uninstall and reinstall the latest version of iTunes and MobileMe Control Panel to fix this issue.”
Though this error code is not fatal but if it is not fixed immediately it will hamper your ability to load and run Apple programs on your system.

Solution

Restoro box imageError Causes

Corefoundation.dll error can be triggered due to several reasons. Here are some of the most common corefoundation.dll error causes:
  • Outdated PC drivers
  • Viral infection
  • Damaged Windows registry files
  • Corrupted corefoundation.dll file
  • Missing corefoundation.dll file
  • Incorrectly installed third-party software

Further Information and Manual Repair

To fix this issue on your computer here are some of the best, easy and quick do it yourself methods that you can try:

Method 1: Download the Original Corefoundation.dll File

If the underlying reason for corefoundation.dll error is file corruption or it goes missing, then the best way to resolve is to download the original corefoundation.dll file. Once you download it, paste it to its exact location. DLL files are normally located in the following location C:\Windows\System32. Once you paste it, register the file by typing ‘regsvr corefoundation.dll’ at the command prompt. When the process is complete, restart your PC to activate changes. Alternatively, you can uninstall and re-install any Apple Software you may have on your Windows Computer. To do that, Open the Control Panel, navigate to "Install/Uninstall a Program", search for Apple software, and uninstall them.

Method 2: Update Window Drivers

If the error code is related to outdated drivers, then it is recommended that you update them promptly to resolve the corefoundation.dll error on your PC. This can be done by using a driver update wizard from within Device Manager. The driver update wizard walks you through the entire drive update process, making updating a hassle-free process.

Method 3: Download Restoro

If the error still persists, then try method 3. Sometimes the cause of corefoundation.dll can be viral infection or registry issues.  Viruses may enter your PC unknowingly through phishing emails and downloads which can corrupt and damage your dll files. Also, if you don’t clean your registry frequently, unnecessary and obsolete files may accumulate in the registry like cookies, junk files, internet history and temporary files. These files take up a lot of disk space corrupt DLL files and lead to disk fragmentation. Regardless of what the issue is, Restoro is your one-stop PC Fixer. It is a multi-functional and user-friendly repair tool embedded with 6 different scanners including a registry cleaner and an antivirus. It scans and removes all types of viruses and cleans and restores the registry too. Click here to download Restoro and resolve the corefoundation.dll error today!
Read More
Common Outlook Errors

Most Common Microsoft Outlook errors

When you have a program, you know before you even start to use it or even know how that you are going to have problems with it. There are always going to be error messages and things that don’t work on any program you buy or download; guaranteed. Even some of the most famous program developers in the world make mistakes from time to time and it is a small price to pay for the programs you get and that is a fact. Microsoft Outlook is like any other program; it has its errors. Here are some of the most common errors for Microsoft Outlook on your computer.

1. Problem receiving emails

Sometimes you can be waiting on really important emails. It is really infuriating when you know that they have been sent, however every time you check your email box, there is nothing there! Your inbox is empty and your patience is wearing thin, so could it possibly be an error with Microsoft Outlook? There is a high probability that this is the problem. The program can be a bit slow on receiving emails sometimes, often even by days. This can be caused by any number of things, from having too many emails coming through or having too many emails in your inbox. If you click ‘send and receive’ at the top, it should speed up your emails coming through, however, so give that a try if you’re waiting on anything to come through. If this doesn’t work, however, your inbox may be full. Try permanently deleting some useless messages and then click ‘send and receive’ again. All your emails should come through then!

2. General slow performance

Outlook, while it has its advantages, can often be very slow. It is probably slower than some other email programs that require a browser but it is quicker to access, which may make up for this fact. However, sometimes sluggish performance can be really irritating, so it may be wise to try and fix it if you can. One of the reasons it may be acting slow is if you have too many other Windows applications open. Applications that may interfere with your Outlook’s speed could be anything from Microsoft Word to Windows Live Messenger. If any of these are open, try closing them and see if that helps with the speed problem.

3. Corrupt files

.dbx files are not accessible by Microsoft Outlook. Therefore, they can cause problems with your emails if you have them within them. To solve this problem, you may have to delete all of your attached email accounts and then reattach them before you can open your emails again. These corrupt files can also cause you to be unable to delete emails. You will need to transfer these deleted corrupt files into a separate deletion folder as this is usually caused by the folder being corrupt. Of all the other most frequent problems with Microsoft Outlook, however, this is probably the least likely to happen, which shows how few problems there actually are with this application after all that!

Conclusion

So there are the most common problems with Microsoft Outlook! Not much wrong at all, is there?
Read More
Fix Google Chrome error “He’s dead, Jim!”
If you always use the Google Chrome browser in browsing the internet, then you might have come across an error message saying, “He’s dead, Jim!” along with a funny looking face that’s peeking its tongue out and another detailed message saying, “Either Chrome Ran out of memory or process for the webpage has terminated for some other reason. To continue, reload the webpage or go to another page”. This error message in Google Chrome is actually quite famous and it appears for various reasons but it may have something to do with a memory issue. The Google Chrome browser is known to consume a lot of memory and the more web pages you open and load, it takes up more resources. Thus, the first thing you need to do when you encounter this error is to simply click the Reload button to continue browsing the internet or close the browser and then open it again. On the other hand, if you keep seeing this error message, then that’s a whole different story as you have to take some action to prevent it from popping up again, for good. Follow the instructions given below to fix the error in Chrome.

Option 1 – Reduce Google Chrome’s memory usage

The first thing you can try is reducing the memory usage of the Chrome browser. However, this option has a bit of a disadvantage. If a website crashes, all the instances of that website will also crash although other open tabs and websites won’t be affected. This process is referred to as “Process-per-site” mode which you will have to launch Chrome within this parameter.

Option 2 – Run Google Chrome with Strict Site Isolation

Aside from reducing Chrome’s memory usage, you can also run the browser with the Strict Site Isolation which makes sure that the crashing of one tab in the browser won’t affect the entire Windows as this feature will run every website you open on its own isolated process.

Option 3 – Run the built-in Malware Scanner and Cleanup tool in Chrome

In case you don’t know, there is actually a built-in malware scanner and cleanup tool in Chrome that helps you get rid of any unwanted ads, pop-ups, and even malware, as well as unusual startup pages, toolbars, and other things that could affect the performance of the browser.

Option 4 – Reset Google Chrome

Resetting Chrome can also help you get rid of the “He’s dead, Jim!” error message for good. Resetting Chrome means restoring its default settings, disabling all the extensions, add-ons, and themes. Aside from that, the content settings will be reset as well and the cookies, cache, and site data will also be deleted. To reset Chrome, here’s what you have to do:
  • Open Google Chrome, then tap the Alt + F keys.
  • After that, click on Settings.
  • Next, scroll down until you see the Advanced option, once you see it, click on it.
  • After clicking the Advanced option, go to the “Restore and clean up the option and click on the “Restore settings to their original defaults” option to reset Google Chrome.
  • Now restart Google Chrome.

Option 5 – Perform a clean reinstall on the Chrome browser

Although reinstalling any program is easy, not so much for Google Chrome as you need to make sure that the User Data folder is deleted before you reinstall it.
  • Tap the Win + R keys to open the Run prompt.
  • Then type %LOCALAPPDATA%GoogleChromeUser Data in the field and hit Enter.
  • Next, rename the “Default” folder inside the path you were redirected to. For instance, you can rename it to “Default-old”.
  • After that, install the Chrome browser again.

Option 6 – Try to flush the DNS and reset the TCP/IP

There are instances when a network goes into haywire because of a bad DNS. Thus, a bad DNS might be the one that’s causing this headache so it’s time for you to reset the entire network to resolve the issue. To reset the network, here’s what you have to do:
  • Click the Start button and type in “command prompt” in the field.
  • From the search results that appear, right-click on Command Prompt and select the “Run as administrator” option.
  • After opening Command Prompt, you have to type each one of the commands listed below. Just make sure that after you type each command, you hit Enter
    • ipconfig /release
    • ipconfig /all
    • ipconfig /flushdns
    • ipconfig /renew
    • netsh int ip set dns
    • netsh winsock reset
After you key in the commands listed above, the DNS cache will be flushed and the Winsock, as well as the TCP/IP, will reset.
  • Now restart your computer and open Google Chrome then try opening the website you were trying to open earlier.
Note: You can also try changing the DNS server to the Google Server, i.e. 8.8.8.8, and then see if it works for you or not.

Option 7 – Disable both the antivirus and firewall temporarily

As you know, both the firewall and antivirus programs are there to protect the operating system from any malicious threats. So if they find that there is some malicious content in a website you are visiting, they will block the site right away. Thus, it could also be the reason why you’re getting the “He’s dead, Jim!” error so you need to disable both the firewall and antivirus program temporarily and then try opening the website again. If you are able to open the website, you need to add this site as an exception and then enable the firewall and antivirus program back.
Read More
How to Permanently Disable Active History
What is Active History? A new feature has been introduced in Windows 10 that allows users to stay connected to their tasks across their devices. This new feature is called “Windows Timeline” and using this feature, users could continue their tasks all over their Windows 10 computers as well as on devices that run Android and iOS as well. This new feature was included in Microsoft Launcher and Microsoft Edge on Android devices as well as in Microsoft Edge for iOS devices. In order for the feature to work, you have to send either Basic or Full data and diagnostics of your computer to Microsoft which would sync it all over your devices with the help of the cloud. And now since all your data is stored on your Windows 10 computer and with Microsoft under your account, it is easier for you to access the back and start where you left off. This kind of option is called Active History. In this post, you will be guided on how you can permanently disable Active History using either the Windows Registry or Group Policy. Before you go on further, it is recommended that you create a System Restore Point first in case anything goes wrong. This is a precautionary measure you must take so that you can easily undo the changes you’ve made. After creating a System Restore Point, proceed to the given instructions below.

Option 1 – Disable Active History via Registry Editor

  • Tap the Win + R keys to open the Run dialog box and type in “Regedit” in the field and hit Enter to open the Registry Editor.
  • Next, navigate to this registry key: ComputerHKEY_LOCAL_MACHINESOFTWAREPoliciesMicrosoftWindowsSystem
  • From there, check if you can find a DWORD named “PublishUserActivities”. If you can’t find this DWORD, just create one with the same name and make sure that the base is selected to Hexadecimal.
  • After that, double-click on the DWORD and change its value from 1 to 0 to disable Active History.
  • Restart your computer to apply the changes you’ve made successfully.

Option 2 – Disable Active History via Group Policy Editor

Note that this second option won’t work if you are using the Home edition of Windows 10. This is because the Group Policy Editor does not come with Windows 10 Home. So if you are not using Windows 10 Home, follow the given steps below.
  • Tap the Win + R keys to open the Run box.
  • Then type in “gpedit.msc” in the field and hit Enter to open the Group Policy Editor.
  • Next, navigate to this path: Computer ConfigurationAdministrative TemplatesSystemOS Policies
  • After that, double click on the configuration listing named “Allow publishing of User Activities” to open the configuration page which has the following description:
“This policy setting determines whether User Activities can be published. If you enable this policy setting, activities of type User Activity are allowed to be published. If you disable this policy setting, activities of type User Activity are not allowed to be published. Policy change takes effect immediately.”
  • Now you have to select Disabled or Not Configured if you want to disable Publishing of User Activities or Enabled to Enable Publishing of User Activities depending on your preferences.
  • Next, click OK and exit the Group Policy Editor and then restart your computer to successfully apply the changes made.
Read More
Connecting a Wireless Printer to a Windows PC
Although it’s easy to set up wired printers in most cases and they have their charm, you don’t have to be around the printer if you are connected to the same network. So in this post, you will be guided on how you can install and set up a wireless printer on your Windows 10 computer. The idea here is to ensure that your Wi-Fi printer and your Windows 10 computer are connected on the same network and to do that, you need to carry out the following steps:
  • You have to connect the printer to the Wi-Fi network.
  • You have to add the printer or scanner to Windows 10.
  • You have to install the printer software.
  • You have to change the default printer.
  • And troubleshoot the printer.

For more details, follow the instructions below.

Step 1: Connect your printer to the Wi-Fi network. In this step, you need to turn on your printer and look for the option to connect to a Wi-Fi network. Note that the step to connect to the Wi-Fi network depends on what kind of printer you use as well as its OEM since there will be a user interface or a Wi-Fi button that will get the job done for you. Once your printer is connected to the Wi-Fi network, you need to keep it turned on until the setup is completed. Step 2: Next, add a printer or scanner to Windows 10
  • Since you’re already connected to the Wi-Fi network, you now have to go to Settings > Devices > Printers & scanners.
  • From there, click on the Add a printer or scanner option.
  • After that, the scanning process will begin as Windows 10 looks for the printer and once it finds it, it will display the printer in the result.
  • Choose the Wi-Fi printer from the results and click on the Add device option. Once you click this option, Windows will install the drivers via Windows 10 update. Note that this process will apply to all the printers – connected, wireless, and so on.
Step 3: You have to install a printer software In this step, you need to use the driver software from the OEM even though the default printer software works since in most cases, the driver software from OEM works better compared to the default ones and offers much better functionality like ink-saving modes, and many more. Step 4: You now have to change the default printer After installing the printer software, you now have to set or change the default printer in your computer. If you have not installed any printer, the default printer in Windows is the one that saves the files. Now since you have already installed your printer, all that’s left for you to do is to change the default printer of Windows 10 to the one you installed earlier. To do that, follow these sub-steps:
  • Go to Settings and navigate to Devices > Printers & scanners.
  • From there, check the checkbox labeled, “Let Windows manage my default printer” if there are many printers. This will recommend you to use the most used printer. But if you don’t want to switch to the most used printer, then uncheck the checkbox.
  • Once done, click on the printer you want to set as the default one and go to Manage, and then click on the Set as default button.
Step 5: If you have any issues with your newly installed printer, then you need to troubleshoot it One of the first basic troubleshooting you can perform to resolve the printer issue is running the Printer Troubleshooter. This built-in troubleshooter can detect and automatically fix the problem for you. To use it, follow these steps:
  • Tap the Win + R keys to open the Run dialog box.
  • Next, type “exe /id PrinterDiagnostic” in the field and click OK or hit Enter to open the Printer Troubleshooter.
  • Then click the Next button and follow the next on-screen instructions to fix the issue with the printer.
Read More
Fix Black background behind Folder icons
The File Explorer in Windows 10 provides several ways to organize the contents of folders and files in the system. Windows users can utilize some efficient styles to view the contents of the file system as per the user’s requirement. A user may opt to display the file picture in large size thumbnails while the other one could opt to set the icons of folder and files in a small or medium size list. On the other hand, while setting up several styles for the folder and file icons, some Windows 10 users have experienced some unusual issues where there is the Black background showing up behind folder icons. They tried refreshing the File Explorer a couple of times but it didn’t help in fixing the problem and the black squares are still visible on some folder icons. The black squares behind the folder icons might look disturbing though it’s not really a big problem and is merely a graphical glitch that does not cause any damage or whatsoever to the content of the folder and files. The most likely cause of this glitch might have something to do with the corrupted system files or it could also be caused by outdated thumbnail caches. In addition, graphical glitches like this one could also occur if you are using out outdated graphics drivers. To fix this problem, you need to follow the options laid out below.

Option 1 – Try using the Disk Cleanup to remove Thumbnail files

The Disk Cleanup tool is one of the options you can try to fix the black squares behind the folder icons. Through this tool, you can delete all the Thumbnail files on your disk. To use it, refer to these steps:
  • Open the Search bar and type “disk cleanup” in the field.
  • After opening Disk Cleanup from the search results, then from the drop-down menu select the C: drive to clean up and click OK.
  • Wait for the scanning process to complete. Once it’s done, select the files you want to delete.
  • Ensure that you select the box labeled “Thumbnails” under the Files to Delete section then click on OK.
  • After that, a confirmation box will appear, just click on Delete files to delete the files permanently.
  • Restart your PC.

Option 2 – Try resetting the Thumbnail cache

You have the option to manually delete the Thumbnail Cache to resolve the black square background behind the folder icons issue. Follow the steps given below to reset the Thumbnail cache.
  • Open the File Explorer.
  • Next, navigate to the View tab and select the option with Hidden items to display all the hidden folders and files.
  • Next, go to this path: C:Users<username>AppDataLocal
  • In the given path, make sure that you put your actual username in the username field. Then look for a file named “IconCache.db”. Right-click on this file and click on Delete.
  • After that, go to this path: C:Users<username>AppDataLocalMicrosoftWindowsExplorer
  • From there, select all the files and delete them.
Note: If a prompt appears saying, “The files are in use and cannot be deleted”, simply select the “Do this for all current items” option and then click on Try Again. If you get an error message, click on Cancel to close the window and restart your computer.

Option 3 – Try updating or reinstalling the Graphics driver

  • Tap the Win + R keys to open the Run dialog box and then type in devmgmt.msc and tap Enter or click OK to open the Device Manager.
  • Expand the section for the outdated device drivers.
  • And then select the outdated driver(s) and right-click on it/them.
  • From the drop-down menu, select the Update Driver option if you wish to update the driver or select the Uninstall device if you want to uninstall the driver and then follow the on-screen instructions to install the latest version of the driver.
  • Restart your PC after the installation to allow the system to reinstall the driver.
Read More
How to Fix the AVFoundationCF.dll Error on Your PC
AVFoundationCF.dll is a type of Dynamic Link Library file. This DLL file is associated with AVFoundationCF and is developed by Apple Computer Inc. for Windows PC. This file functions similarly to any other DLL files. It comprises of small programs. This DLL file is typically needed to load and start the Apple iTunes utility. The inability to call this file or the files to load triggers the AVFoundationCF.dll error message on your system. The error message can be displayed in either of the formats on your PC:
“The program can’t start because AVFoundationCF.dll is missing from your computer. Try reinstalling the program to fix this problem.” "This application failed to start because avfoundationcf.dll was not found.” "Cannot find %COMMONFILES%AppleApple Application Supportavfoundationcf.dll." "Cannot start AVFoundationCF. A required component is missing: avfoundationcf.dll.” “Avfoundationcf.dll Access Violation." "Cannot register avfoundationcf.dll."

Solution

Restoro box imageError Causes

AVFoundationCF.dll error can occur due to numerous reasons. However, the most common reasons for this error code include:
  • Viral infection
  • Corrupt or invalid registry entries
  • Apple Computer Inc. hardware failure such as bad hard drive
  • Missing or deleted Avfoundationcf.dll file
It is recommended to resolve the error as soon as you experience it virtually because if the error code is related to viral infection on your system, it can expose your PC to privacy errors and data security risk. And if the error is triggered by registry issues, it can lead to serious threats like system crash, failure, and data loss. Therefore, the AVFoundationCF.dll error not only hampers your ability to access and start Apple iTunes program but it also puts your PC at serious risk.

Further Information and Manual Repair

To fix the error AVFoundationCF.dll on your PC, here are some of the best and easy to do solutions that you can try:

Check your Recycle Bin

Since dll files are shared files, there is a possibility that this file accidentally got deleted when you were uninstalling some other program on your system. If you experience missing AVFoundationCF dll file error message after performing any program on your PC, then chances are that it got deleted and maybe in your recycle bin. So, first, check your recycle bin and search for the dll file. If you find it, restore it to fix the error.

Update Device Driver

To resolve the issue, try performing a driver update. This can be done by downloading the latest drivers from the hardware manufacturer’s website. Now open Device Manager from the Control Panel and locate the hardware device that you want to update the driver for. Once you find the hardware you are updating the driver for, right-click on the hardware icon and choose properties. In the properties windows, click the driver tab. Now click the update driver button. To activate changes, restart your PC. To automatically update your computer's drivers when necessary, download and install DriverFIX.

Try Re-installing Apple iTunes Program

To do this, simply go to the control panel, select programs and then uninstall a program and then select iTunes.  Uninstall it and then repeat the same program and install the Apple iTunes program again on your PC by downloading the program from Apple’s official website.

Scan for Viruses

If the error still persists, then it is advisable to scan your PC for viruses. This can be easily done by running a powerful antivirus on your PC. However, please note anti-viruses are notorious for slowing down PC performance. So, may have to compromise on the speed of your system.

Clean and Repair the Registry

If the error is caused by invalid and corrupt registry entries and damaged Avfoundationcf dll file, then the best way to resolve is to download a powerful registry cleaner. We advise you to install Restoro on your PC. This is an advanced and a multi-functional PC Fixer integrated with multiple powerful utilities including a high functional registry cleaner, an antivirus and a system optimizer. The registry cleaning utility scans all the registry issues and removes all errors triggered by the registry immediately. It cleans the registry by wiping out all the unnecessary, obsolete and redundant files including invalid entries and bad registry keys. Furthermore, it also fixes the damaged and corrupt dll files including Avfoundationcf dll file. Thereby resolving the error right away. Furthermore, the antivirus deployed in this software scans for all types of malicious codes like viruses, Trojans, spyware, and malware and removes them. To ensure you don’t compromise on your PC performance, it is deployed with a system optimizer utility that boosts the speed of your computer dramatically. This tool is bug free, has a user-friendly interface and compatible with all Windows versions. Click here to download Restoro and resolve Avfoundationcf.dll error on your PC today!
Read More
How to Fix Error Code 0x80072EE2 in Windows 10

Error Code 0x80072EE2 – What is it?

Windows 10 error code 0x80072EE2 usually occurs as a result of a disruption during the upgrade process when users attempt to upgrade their operating system using Windows Update. The disruption may be caused by a loss of Internet connection. Error code 0x80072EE2 may also occur due to problems related to one’s firewall. Common symptoms of this error code include the following:

  • Upgrade process fails to complete
  • A message box pops up highlighting the presence of error code 0x80072EE2

Solution

Restoro box imageError Causes

Upgrade error codes like error code 0x80072EE2 usually occur when disruptions or problems related to system files, or third-party apps prevent Windows Update from completing an upgrade. In the case of error code 0x80072EE2, the most likely cause is a bad Internet connection.

Further Information and Manual Repair

Windows 10 error codes are numerous and so are the solutions to fixing these problems. In most cases, Windows users have access to several manual repair solutions depending on the error code present on their device. These manual repair methods are usually easy to implement, with the exception of a few solutions that require technical knowledge and skills. In such cases, you may need to consider using an effective automated tool or you may contact a Windows repair technician to assist you.

In terms of error code 0x80072EE2, however, no technical skills are required. Manual repair solutions for this error code involve checking and troubleshoot network problems if your connection was disrupted. Also, you may need to check your firewall settings and disable it temporarily to verify whether or not your firewall is preventing you from accessing the upgrade. Further details are provided below.

Method One: Verify Internet Connection

If for whatever reason you lost Internet connection while attempting to upgrade your operating system via Windows Update, your upgrade will time out and error code 0x80072EE2 in Windows 10 may occur. For this reason, it is important for you to check your connection once you notice the presence of error code 0x80072EE2 on your device.

There are many ways you can verify your Internet connection but one of the simplest ways is to first open your preferred Internet browser and type the web address of a site you normally visit. Once you are able to access the website, you will know for sure that your connection is not an issue. Simply restart your PC and reattempt the upgrade.

If you are unable to complete the upgrade process, however, this simply means that there is another issue causing error code 0x80072EE2 to occur. Proceed to the next manual repair method. This method may also apply if you were unable to connect to the Internet.

Method Two: Troubleshoot Network Problems

Though you may be able to access a website or open your Internet browser, there may be other issues affecting your network that are causing the error code to occur. To verify for certain whether or not the issue causing error code 0x80072EE2 in Windows 10 is related to your network, troubleshoot your network using the Network Troubleshooter tool found on your PC.

  • Step one: Type Network Troubleshooter in the search box near the Start button
  • Step two: Select Identify and repair network problems
  • Step three: Wait until the troubleshooter has verified and fixed problems related to the network
  • Step four: Restart PC

Once the issue has been resolved, it is time to verify if the error code is fixed. Open Windows Update then select the option which enables you to access the latest upgrades to your machine. Wait to see if the error code reoccurs or if you can now access the upgrade to your operating system. If the error code reoccurs, move to the next manual repair method.

Method Three: Disable Firewall Settings

Another issue that may be causing an error code to occur is your firewall. To verify if your firewall is preventing you from accessing the upgrade, disable your firewall. If you are using third-party security software, simply open the security app and check its firewall settings. Select disable or turn off the firewall.

Restart your computer, then open Windows Update to reattempt to upgrade your device. If this proves successful, you will be able to access the upgrade. Error code 0x80072EE2 in Windows 10 will no longer be present.

Method Four: Download an Automated Tool

If you wish to always have at your disposal a utility tool to fix these Windows 10 and other related issues when they do arise, download and install a powerful automated tool.

Read More
1 2 3 171
Logo
Copyright © 2023, ErrorTools. All Rights Reserved
Trademark: Microsoft Windows logos are registered trademarks of Microsoft. Disclaimer: ErrorTools.com is not affiliated with Microsoft, nor claims direct affiliation.
The information on this page is provided for information purposes only.
DMCA.com Protection Status