 You can it here: https://sourceforge.net/projects/freeplane/files/latest/download
If you got the FAULTY_HARDWARE_CORRUPTED_PAGE Blue Screen error on your Windows 10 computer then it is most likely caused by various factors. It could be caused by an incomplete installation or uninstallation of some applications or program, or it could also be caused by some exploit that intervenes with the normal functioning of the computer, as well as bad sectors on the hard disk, damaged system files, malfunctioned system drivers, modified Windows Registry files, or a Blue Screen occurrence during a Windows Update and many more. Getting this bug check means that a single-bit error was found on this page. It also indicates that this is a hardware memory error and to resolve it, you need to follow the suggestions laid out below but before that, it is recommended for you to create a System Restore Point first so that if anything goes wrong, you can always go back to the previous state.
Since the problem might have something to do with hardware memory, you need to test RAM by running a Memory Check using the Windows Memory Diagnostic. Refer to these steps to do so.
System File Checker or SFC is a built-in command utility that helps in restoring corrupted files as well as missing files. It replaces bad and corrupted system files with good system files that might be the cause why you’re getting the FAULTY_HARDWARE_CORRUPTED_PAGE Blue Screen error. To run the SFC command, follow the steps given below.
The command will start a system scan which will take a few whiles before it finishes. Once it’s done, you could get the following results:
As mentioned, the FAULTY_HARDWARE_CORRUPTED_PAGE Blue Screen error might be caused by some problematic programs that clash with your existing operating system. Several users reported that numerous programs that are supposedly designed to enhance computer performance are causing conflict in the system instead. To identify which program is causing the problem, you need to put your computer in a Clean Boot State. To do so, follow the steps below.
If the first few options didn’t work for you, then it’s time to either update or roll back the device drivers. It is most likely that after you updated your Windows computer that your driver also needs a refresh. On the other hand, if you have just updated your device drivers then you need to roll back the drivers to their previous versions. Whichever applies to you, refer to the steps below.
Note: You can install a dedicated driver on your computer in case you have it or you could also look for it directly from the website of the manufacturer.
 You can it here: https://sourceforge.net/projects/freeplane/files/latest/download
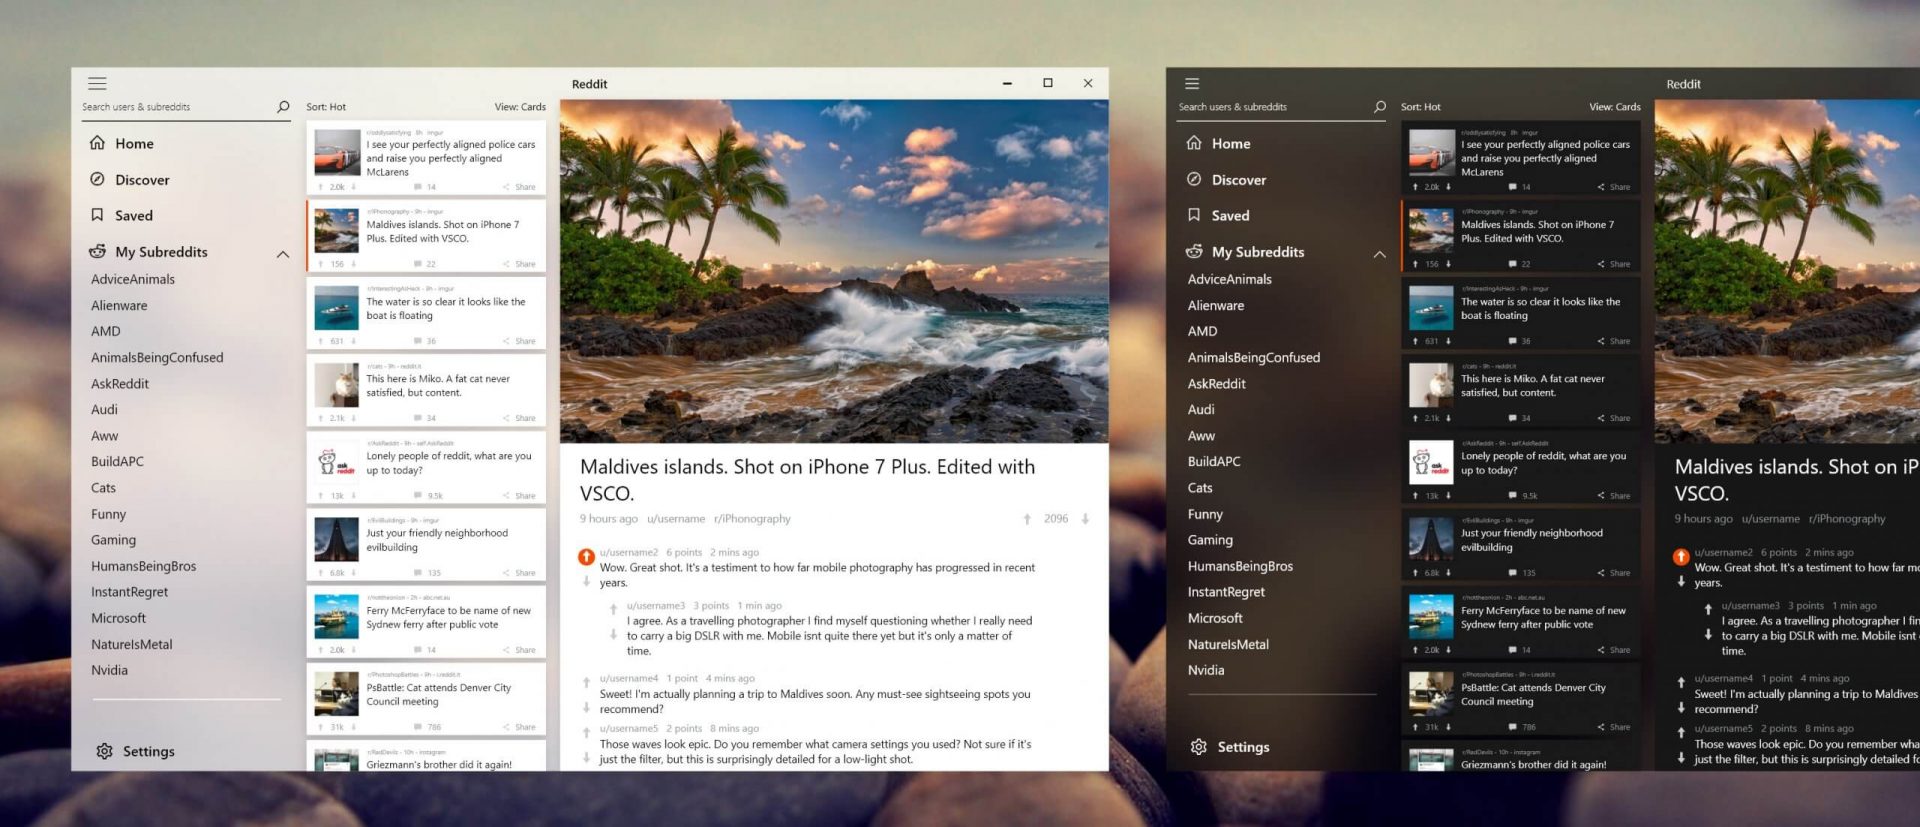 Reddit is one of the most popular websites in the world and how Microsoft is opening doors to everyone in its new store Reddit took a logical step and made a Progressive web application and placed it in it.
Being a Progressive web app makes it more familiar and feels like a home experience using it for a lot of Reddit users.
Reddit itself has a large community and active topics discussions all the time about anything. Bringing it to Windows as an application is, in my opinion, a great move since as an application it is independent, more light-weighted, and offering some other advantages specifically tied to being a standalone windows application.
Everyone familiar with and using the Reddit website will feel right at home in this app and you can start using it right away.
Reddit is one of the most popular websites in the world and how Microsoft is opening doors to everyone in its new store Reddit took a logical step and made a Progressive web application and placed it in it.
Being a Progressive web app makes it more familiar and feels like a home experience using it for a lot of Reddit users.
Reddit itself has a large community and active topics discussions all the time about anything. Bringing it to Windows as an application is, in my opinion, a great move since as an application it is independent, more light-weighted, and offering some other advantages specifically tied to being a standalone windows application.
Everyone familiar with and using the Reddit website will feel right at home in this app and you can start using it right away.  Inside personalization, click on the Lock Screen tab.
 On the right screen, under the picture, you will find Windows spotlight, click on it to bring a drop-down menu up.
 Your choice is presented as a single picture for background or slideshow, a series of pictures that are going to be looped in a given time interval.
If you would like just a single picture for your background, choose that and click on it.
Your choice is presented as a single picture for background or slideshow, a series of pictures that are going to be looped in a given time interval.
If you would like just a single picture for your background, choose that and click on it.
 Once you are in choose picture dialog, click on the browse button and navigate to the picture on your storage which you would like to have as a background.
If however, you fancy slideshow as your lock screen background, click on the background drop-down menu and choose the slideshow. Next, click on add a folder and navigate to a folder where you have pictures that you would like to have as a slideshow for your Windows lock screen.
Once you are in choose picture dialog, click on the browse button and navigate to the picture on your storage which you would like to have as a background.
If however, you fancy slideshow as your lock screen background, click on the background drop-down menu and choose the slideshow. Next, click on add a folder and navigate to a folder where you have pictures that you would like to have as a slideshow for your Windows lock screen.


Microsoft has cut out Russia from downloading ISO files for Windows 10 and Windows 11 as well as installation tools without any explanation or reason behind this.
If you connect via VPN to a Russian server and try to download either ISO files or installation tools you will be greeted with the error 404 and an explanation of File or Directory not found or There was a problem with your request.
At this time you can still download Windows 11 Media creation tool but once you run it will throw a 0x80072F8F-0x20000 error with text: For some unknown reason, this tool failed to run on your computer.
People in Russia can still download files if they connect via VPN and go to a server located outside Russia.
Microsoft has not published any explanation why is this happening, it might be technical difficulty or it could be on purpose.
Since the beginning of the Russian military operation in Ukraine Microsoft has been putting restrictions on Russia starting with a suspension of all sales in March, next month in April Microsoft started suspending developer's accounts on GitHub linked to sanctioned companies and the suspension was even if the developer is not working for a given company or left it.
At the beginning of this month, Microsft laid off 400 employees inside Russia as they began scaling back operations in the country but has also stated that they would continue to provide services to all contractors and customers inside Russia so this sudden blocking of downloads is unexpected and it goes against their statement.
TCI/IP or as known as Internet protocol is one that controls packets that are sent over the internet and makes sure that each one has reached its destination so you can pleasantly browse your favorite websites. The setting for the given protocol is stored locally on your machine and most of the time, everything works fine and good, but sometimes, these settings can get corrupted.

Malware or other software can temper with setting making TCP/IP making it wrong and throwing nondescript connection errors in your face. If you are faced with this issue worry not because fixing this issue is really easy.
Before we actually go and fix the issue please do scan your system with your protection suite just to be sure that if there is any kind of malware on the system it is properly removed from it.
First thing is to open search and find PowerShell, press the Windows key on the keyboard, and type in PowerShell so search results are shown. Click on Run as administrator to open PowerShell in elevated mode.
Once PowerShell is opened type indie it:
netsh IP reset and press ENTER. The task will start executing and at this point you will see a lot of Resetting, OK! messages. Once everything is finished restart your PC and you are good to go.
Stop running this script?A Script on this page is causing your web browser to run slowly. If it continues to run, your computer might become unresponsive. This occurs when some scripts take an excessive amount of time to run. To be precise, there are some websites that use JavaScript, JQuery, and Active X scripts to run. These scripts are notorious for taking too much time to run. So, if you use the Internet Explorer as your web browser, then by default if the website takes a long time to load, the ‘Stop running this script error will be triggered. Other than this, if you are scripting an Active X control on the web page to transfer a very heavy file or run a huge database query, this may cause delays and lead to the error display. However, if you use Firefox, then the ‘Stop running this script error code will be promoted as ‘Unresponsive Script’ error.
 Error Causes