FunPopularGames is a browser extension developed by Mindspark Inc. that lets you play popular, best-rated, and other games via popular websites, it also allows you to bookmark your favorite games for faster and easier access.
When installed it changes your default new tab page and default search engine to Search by MyWay. While browsing the internet with this extension enabled you will see additional injected ads, sponsored content, and pop-up ads throughout your browsing sessions.
While active this extension monitors user activity and browsing sessions, enabling it to track visited websites, clicked links, and other useful information that it later forwards to Mindspark to be used/sold for better ad placement.
About Browser Hijackers
Browser hijacking is amongst the internet’s constant risks that target internet browsers. It’s a kind of malicious software that alters your web browser’s configuration settings so that you are redirected to sites or web pages you had no intention of visiting. Browser hijackers could do a variety of things on your PC. These are generally used to force hits to predetermined sites, manipulating web traffic to generate ad revenue. Although it may seem naive, all browser hijackers are harmful and therefore always classified as security threats. Browser hijackers could also allow other destructive programs without your knowledge to further damage your PC.
How to determine if your internet browser has been hijacked
The following are some signs and symptoms that indicate you’ve been hijacked:
1. the home page of your browser is changed suddenly
2. you find new unwanted bookmarks or favorites added, usually directed to ad-filled or porn sites
3. the default online search engine and the default browser settings are altered
4. you see unsolicited new toolbars added
5. unstoppable flurries of popup ads show up on your computer screen
6. your browser has become unstable or starts running sluggishly
7. you can’t navigate to certain web pages, such as security software-related sites.
Exactly how browser hijacker finds its way onto your PC
There are several ways your computer or laptop can become infected with a browser hijacker. They typically arrive by way of spam email, via file sharing websites, or by a drive-by download. They can also originate from any BHO, extension, add-on, toolbar, or plug-in with malicious intent. Sometimes you might have accidentally accepted a browser hijacker as part of an application bundle (usually freeware or shareware).
Browser hijacking can cause serious privacy problems and also identity theft, disrupt your browsing experience by taking control of outbound traffic, drastically slows down your computer by consuming lots of resources, and lead to system instability at the same time.
Browser Hijacker Malware – Removal
Certain browser hijacking can be simply reversed by discovering and removing the corresponding malware application from your control panel. But, the majority of hijacking codes are not easy to get rid of manually, since they go deeper into the operating system. Moreover, manual removals require in-depth system understanding and therefore could be a very difficult job for beginner computer users.
Anti-malware software is really effective with regards to discovering and removing browser hijackers that standard anti-virus program has overlooked. To eradicate any type of browser hijacker from your personal computer, you should download this certified malware removal application – SafeBytes Anti-Malware.
What To Do When You Cannot Install Any Anti-virus?
Malware can cause all sorts of damage if they invade your PC, ranging from stealing your private information to deleting data files on your computer. Some malware is created to interfere with or prevent things that you want to do on your computer system. It may not allow you to download anything from the web or it will stop you from accessing a few or all internet sites, especially the anti-malware websites. If you’re reading this, you may have got affected by malware that stops you from downloading a security program such as Safebytes Anti-Malware. Although this type of issue will be difficult to circumvent, there are a few steps you can take.
Get rid of malware in Safe Mode
In Safe Mode, you are able to modify Windows settings, un-install or install some software, and eradicate hard-to-delete viruses. In the event the malware is obstructing internet access and affecting your PC, launching it in Safe Mode allows you to download antivirus and run a scan while limiting potential damage. To start the computer into Safe Mode, press the “F8” key on the keyboard just before the Windows logo screen comes up; Or right after normal Windows boot up, run MSConfig, look over “Safe Boot” under the Boot tab, and then click Apply. As soon as you reboot into Safe Mode with Networking, you can download, install, as well as update the anti-malware program from there. At this point, you can run the anti-malware scan to get rid of computer viruses and malware without any hindrance from another application.
Switch over to an alternate browser
Malicious program code may exploit vulnerabilities in a particular web browser and block access to all anti-malware software sites. If you are not able to download the security program using Internet Explorer, this means malware is targeting IE’s vulnerabilities. Here, you must switch to a different web browser like Chrome or Firefox to download the Safebytes application.
Create a portable antivirus for removing malware
Another method is to download and transfer anti-malware software from a clean PC to run a scan on the affected computer. Follow these steps to employ a flash drive to clean your corrupted system.
1) On a clean PC, install Safebytes Anti-Malware.
2) Plug the Thumb drive into the clean computer.
3) Double-click the Setup icon of the anti-malware software to run the Installation Wizard.
4) Choose the flash drive as the location for saving the file. Follow the directions to finish the installation process.
5) Remove the USB drive. You can now use this portable antivirus on the infected computer system.
6) Double-click the antivirus program EXE file on the USB flash drive.
7) Run Full System Scan to identify and clean-up up all kinds of malware.
SafeBytes Security Suite Benefits
In order to protect your laptop or computer from a variety of internet-based threats, it’s very important to install an anti-malware program on your PC. But with so many anti-malware companies out there, nowadays it’s difficult to decide which one you should obtain for your computer. A few of them do a good job in removing malware threats while some will ruin your computer by themselves. You have to pick one that is dependable, practical, and has a good reputation for its malware protection. Among few good applications, SafeBytes Anti-Malware is the strongly recommended software program for the security-conscious end user.
SafeBytes anti-malware is a powerful, highly effective protection tool designed to help end-users of all levels of IT literacy in finding and removing harmful threats out of their personal computers. With its cutting-edge technology, this application will allow you to eradicate several types of malware which include viruses, PUPs, trojans, worms, ransomware, adware, and browser hijackers.
SafeBytes has got a plethora of wonderful features that can help you protect your computer from malware attacks and damage. A few of them are listed as below:
World-class AntiMalware Protection: With its advanced and sophisticated algorithm, this malware elimination tool can detect and remove the malware threats hiding in the computer effectively.
Real-time Active Protection: SafeBytes offers an entirely hands-free active protection that is set to check, block and destroy all computer threats at its first encounter. They’re very efficient in screening and removing various threats since they’re continuously revised with new updates and safety measures.
Internet Security: SafeBytes gives an instant safety rating to the pages you’re about to visit, automatically blocking dangerous sites and ensuring that you are certain of your online safety while browsing the web.
Lowest CPU and Memory Usage: SafeBytes is a lightweight and easy-of-use anti-virus and antimalware solution. Since it utilizes minimum computer resources, this software leaves the computer’s power exactly where it belongs: with you.
24/7 Online Support: For any technical concerns or product assistance, you could get 24/7 professional assistance via chat and email.
SafeBytes has come up with an excellent anti-malware solution that can help you conquer the latest malware threats and virus attacks. Malware trouble can become a thing of the past when you put this software program to use. You will get the very best all-around protection for the money you pay on SafeBytes Anti-Malware subscription, there isn’t any doubt about it.
Technical Details and Manual Removal (Advanced Users)
If you do not wish to use an automated tool and like to get rid of FunPopularGames manually, you could possibly do so by going to the Windows Add/Remove Programs menu in the Control Panel and delete the offending program; in cases of browser extensions, you may remove it by going to the browser’s Add-on/Extension manager. You will probably also want to reset your web browser to its default configuration settings.
To be certain of complete removal, find the following registry entries on your computer and remove them or reset the values accordingly. However, editing the registry is usually a hard task that only advanced users and professionals should try to fix the problem. Moreover, some malicious programs have the capability to defend against its removal. Completing this task in Safe Mode is advised.
Files:
Search and delete:
AppIntegrator.exe
AppIntegrator64.exe
AppIntegratorStub.dll
AppIntegratorStub64.dll
AssistMonitor.dll
AssistMonitor64.dll
BAT.dll
CrExt.dll
CrExtPdu.exe
DpnMngr.dll
dubar.dll
dubarsvc.exe
dubprtct.dll
dudatact.dll
dudlghk.dll
dudlghk64.dll
dufeedmg.dll
duhighin.exe
duhtmlmu.dll
duhttpct.dll
duidle.dll
dumedint.exe
dumlbtn.dll
duPlugin.dll
duregiet.dll
duscript.dll
duskin.dll
duskplay.exe
duSrcAs.dll
HiddenToolbarReminder.dll
HkFxMgr.dll
HkFxMgr64.dll
InstallEnabler.dll
t8EPMSup.dll
T8EXTEX.DLL
T8EXTPEX.DLL
T8HTML.DLL
t8Res.dll
T8TICKER.DLL
ToolbarGuard.dll
ToolbarGuard64.dll
Verify.dll
TPIManagerConsole.exe


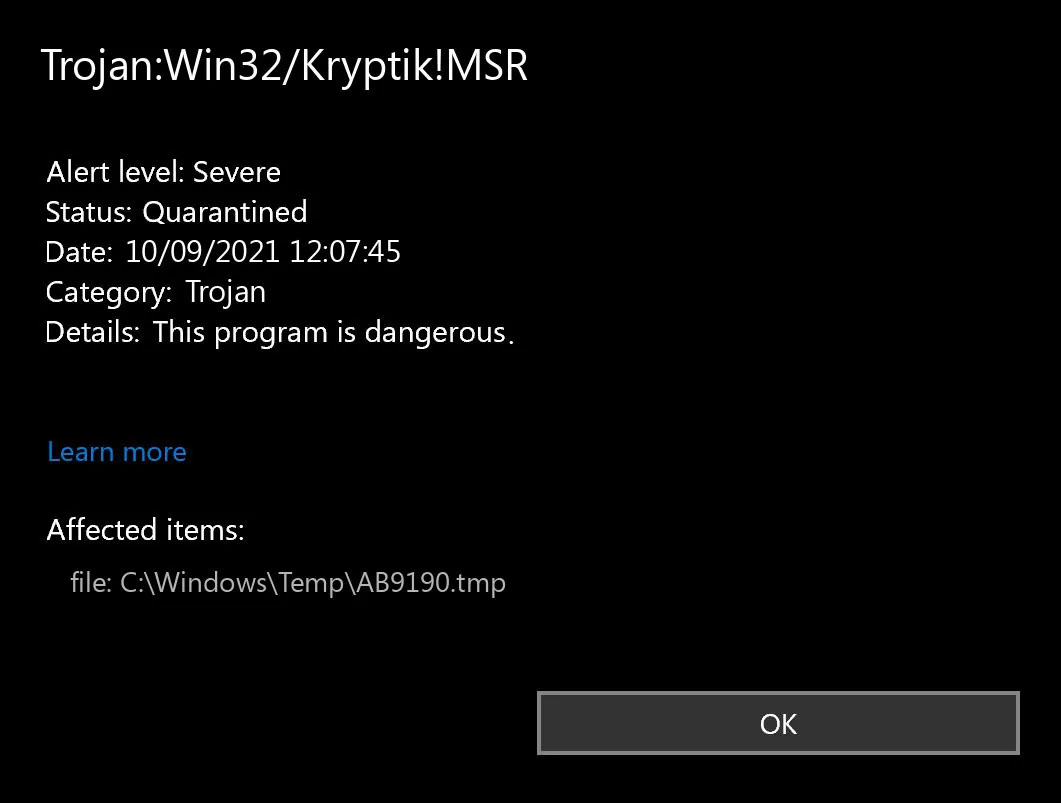 Trojan.Kryptik creates the following registry entry or registry entries:
 As previously announced by Google feature to quickly delete the last 15min of browsing history via one button is rolling out now.
For now, only Apple users will be available to use this feature but the Android update is scheduled for later this year, a strange move by Google but it is what it is.
For anyone who is unfamiliar with this feature, basically, Google wants a quick way to remove the last 15min of browsing history as a supposedly stated request to make deleting browsing history much easier.
Google came up with this idea so you can keep the previous history intact but remove just 15min time frame, no additional explanation was given on why 15 but I presume it is some round number that came up as the middle one with research, read telemetry info.
Using quick delete requires being signed into Search with a Google account. Users can access the option by simply tapping on the avatar icon to access the settings then choosing "Delete last 15 minutes."
As previously announced by Google feature to quickly delete the last 15min of browsing history via one button is rolling out now.
For now, only Apple users will be available to use this feature but the Android update is scheduled for later this year, a strange move by Google but it is what it is.
For anyone who is unfamiliar with this feature, basically, Google wants a quick way to remove the last 15min of browsing history as a supposedly stated request to make deleting browsing history much easier.
Google came up with this idea so you can keep the previous history intact but remove just 15min time frame, no additional explanation was given on why 15 but I presume it is some round number that came up as the middle one with research, read telemetry info.
Using quick delete requires being signed into Search with a Google account. Users can access the option by simply tapping on the avatar icon to access the settings then choosing "Delete last 15 minutes."  Skinning of applications is not new to PC users, but did you knew you could skin Steam?
With skin, you can customize the UI and style of the client to what you want making it more personal and to your liking. First thing is to find the skin that you would like to install. There are a lot of sites where you could find custom made Steam skins but we would recommend
Skinning of applications is not new to PC users, but did you knew you could skin Steam?
With skin, you can customize the UI and style of the client to what you want making it more personal and to your liking. First thing is to find the skin that you would like to install. There are a lot of sites where you could find custom made Steam skins but we would recommend