Protestware, what it is, and why it is a bad thing
The author of the famous software library mode-ipc that gets over a million downloads per week found that it has some questionable code inside. The code itself behaves like this: if it finds out that your location is within Russia or Belarus it will try to replace the contents of all files on the computer with a heart emoji.
One important thing is that we here are not supporting the current Ukrainian situation and are against any type of violence or war but we also do not support this kind of behavior as well. If we look at this only from a technical perspective, we would then classify the mode-ipc library as malware and a harmful piece of code no matter the motivation behind it.
So this so-called protestware is well basically malware, but not always, it will protest when certain conditions are met. The issue with this is that companies and users should not be placed under harm if they do not share the personal view of the code author. Imagine if, for example, I would publish code to delete all pictures from your computer if my code found out that you do not like metal music. I guess you not liking metal music and war in Ukraine are two very different things but the source is the same, unreliable code that invades your privacy in order to serve one purpose, punishment for disagreeing with my personal views and that should not be allowed.
Not all protestware are equal, some will not harm your computer on purpose, they will just annoy you with some messages like viruses did in their infancy stages, others might place some developer sanctions but no matter the outcome basic principle is the same, it does something without user consent and without informing the user that something like that might happen.
On the internet, many blog posts and discussions were open about this issue and its morality. Discussion is still active with different takes on the situation and how to prevent it. Our take on this matter is that professional developers should have standards and not submit to doing harm for the sake of personal views and feelings.
In the long run, this kind of behavior and practice can only harm developers involved in this kind of entanglement. Infected libraries will in time stop being used since people would not trust them and authors will have a stain on their name as impulsive or not trustworthy.
This post will guide you through fixing the INTERNAL_POWER_ERROR Blue Screen Error on your Windows 10 computer. If you encounter this kind of Blue Screen of Death error, this means that the policy manager experienced a fatal error which in turn means that it can happen because of Drivers or Software or even due to external hardware. And so to resolve the issue, here are some suggestions that might be of help.
Option 1 – Update the Device drivers
As mentioned, the INTERNAL_POWER_ERROR BSOD error might have something to do with the drivers. It could be that the drivers are outdated so you need to update them in order to resolve the issue.
Tap the Win + R keys to launch Run.
Type in devmgmt.msc into the box and tap Enter or click OK to open the Device Manager.
After that, a list of device drivers will be displayed. If you see a red or yellow sign that shows up against the driver, right-click on the driver’s name and select “Update Driver Software” or “Uninstall”. And if you find any drivers with a label saying, “Unknown device”, you need to update them as well.
Select the “Search automatically for updated driver software” option and then follow the instructions to complete the process.
Restart your PC.
Option 2 – Check the Device performance and health
You can also try checking the device's performance and health in the Windows Defender Security Center.
Open the Windows Defender Security Center.
From there, check if there is a yellow exclamation icon in the Device performance and health section.
After that, click on the View report option and you might see Health Report that points towards Storage Capacity, Device Drivers, or Apps and Software which should give you an idea of what the root cause of the problem really is.
Option 3 – Try to run the Chkdsk utility
Running the CHKDSK utility might also help you resolve the INTERNAL_POWER_ERROR Blue Screen error. If your hard drive has issues with integrity, the update will really fail as the system will think that it’s not healthy and that’s where the CHKDSK utility comes in. The CHKDSK utility repairs hard drive errors that might be causing the problem.
Open Command Prompt with admin privileges.
After opening Command Prompt, execute the following command and hit Enter:
chkdsk /f /r
Wait for the process to be completed and then restart your computer.
Option 4 – Try increasing the size of the Hibernation file
In the Cortana search box, type “command prompt” in the field, and from the search results that appear, right-click on Command Prompt and select “Run as administrator”.
Next, type in the following command and hit Enter to execute it:
powercfg /hibernate /size 100
Note that the default size of the Hibernation file is 75% and after executing the command, it should increase to 100%. Now exit Command Prompt and check if the problem’s now fixed or not.
Option 5 – Try to run the troubleshooters
Blue Screen Troubleshooter:
Tap the Win + I keys to open the Settings panel.
Then go to Update & Security > Troubleshoot.
From there, look for the option called “Blue Screen” on your right-hand side and then click the “Run the troubleshooter” button to run the Blue Screen Troubleshooter and then follow the next on-screen options. Note that you might have to boot your PC into Safe Mode.
Performance Troubleshooter:
Tap the Win + R keys to open the Run dialog box.
Type “msdt.exe /id PerformanceDiagnostic” in the field and hit Enter to open the Performance troubleshooter.
Then click on Next to get started. Wait until the process is completed.
System Maintenance Troubleshooter:
Tap the Win + R keys to open the Run dialog box.
Type “msdt.exe /id MaintenanceDiagnostic” in the field and hit Enter to open the System Maintenance Troubleshooter.
After that, click on Next to start troubleshooting the problem and wait until it’s done then check if it fixes the problem or not.
Option 6 – Uninstall the programs you installed recently
Chances are, some programs that you just installed might be the one that’s causing the BSOD error. Thus, you need to uninstall the program to resolve the problem.
In the search box, type in “control” and then click on Control Panel (desktop app) among the search results.
After that, select Programs and Features from the list which will give you a list of all the programs installed on your computer.
From there, look for the concerned program and select it and then uninstall it.
Note: If you have downloaded the app from the Windows Store, you can simply right-click on it from the application list and then uninstall it.
Option 7 – Run Windows Defender offline
You also have the option to run Windows Defender offline and scan your computer to see if any malware has infected the computer and the one that’s causing the INTERNAL_POWER_ERROR Blue Screen Error.
Intel announced that Pat Gelsinger (CEO) and Dr. Ann Kelleher (technology Department head) will discuss Intel’s process and packaging innovations on an upcoming webcast that will happen on July 26th.
The spokesman will talk and provide a deeper look at the process and packaging roadmaps for Intel. As we know Intel is planning to expand its production capabilities, outsource some of its technologies and offer foundry services to other chip design companies.
The strategy will also include a shift to a 7nm process and Intel’s effort to set itself again as leader of CPU performance by 2024.
There is also a chance that we will hear exact plans for Intel in the next three or four years.
Intel didn't reveal much else about what Gelsinger and Kelleher plan to discuss during the webcast. The event will be streamed on July 26 at 2 pm PT via the Intel Newsroom; it will also be available to watch on-demand after the stream ends.
There is one service in the Windows operating system that is responsible for managing all the print jobs as well as handles the interaction with the printer. This service is known as the Print Spooler service. However, if it stops running, then you won’t be able to print anything on your computer. In such a case, you can try to restart the Print Spooler service, and to do that, you have to open the Windows Services Manager and look for the Print Spooler Service. Once you found it, right-click on it and select Restart. If it isn’t running, select Start and if the Service starts working again, then good but if not and you got an error message instead that says, “Windows could not start the Print Spooler service on Local Computer, Error 1068, The dependency service or group failed to start”, then read on as this post will give you a couple of suggestions you can try to resolve the issue.
The reason why you could not start the service is most likely because the Print Spooler service is dependent on other services which might not be properly running. If the following services are not running then it’s no wonder why you’re getting the error.
HTTP Service
Remote Procedure Control (RPC) Service
You might not see the RPC service which means that the Print Spooler Service does not recognize its dependency on the RPC service. In such a case, you have to manually configure the dependency by following the options given below.
Option 1 – Try configuring the dependency via CMD
The first thing you have to do is to configure the dependency using CMD. Refer to the steps below to do so:
Open an elevated Command Prompt.
Then type in “sc config spooler depend= RPCSS” and hit Enter.
After the command has been executed, restart your computer and then check if it fixed the problem. If not, proceed to the next given option below.
Option 2 – Fix dependency via the Registry Editor
You can also resolve dependency using the Registry Editor. How? Refer to these steps:
Tap the Win + R keys to open the Run dialog box.
Then type “Regedit” in the field and hit Enter to open the Registry Editor.
After that, navigate to this key: HKEY_LOCAL_MACHINESYSTEMCurrentControlSetServicesSpooler
Next, right-click on the “DependOnService” entry located on the right pane and select Modify.
Now change its value data to “RPCSS” and click OK to save the changes made and then exit the Registry Editor.
Reboot your computer and see if the issue is resolved.
Option 3 – Try running the Printer Troubleshooter
Another option you can check out is the Printer Troubleshooter. This built-in troubleshooter in Windows 10 can help you fix most print issues. It checks if you have the latest printer drivers and then tries to fix and update them automatically. Aside from that, it also checks if you have connectivity issues or if the Print Spooler and the required Services are running fine. To run it, follow the steps below.
Tap the Win + R keys to open the Run dialog box.
Next, type “exe /id PrinterDiagnostic” in the field and click OK or hit Enter to open the Printer Troubleshooter.
Then click the Next button and follow the next on-screen instructions to fix the issue with the printer.
Windows 11 is a good-looking operating system but people love to make things personal and to their liking so we decided to help you in this mission with small customization of changing default system fonts inside Windows 11.
Since there is no really easy way to just switch the font windows is using for itself we will have to tweak a registry a little so before we start please do make a backup of the registry file and follow the steps as they are presented in order to avoid any errors and break the system.
So, if all precautions are made and you are ready to change your Windows appearance let's dive right into it:
Find and/or install the font that you wish to use
There are vast free font sites on the internet where you can find fonts that you like and wish to use but be very careful with your desired font selection. The font that you choose needs to be a complete typeface, meaning that it has to contain all glyphs, large and small font sizes, all special characters, etc or you will experience that in certain areas nothing will be displayed.
Once you have found the font that you like and made sure it is a complete font, install it on your system (you can skip this step if you just want to change the system font with one already installed on your system)
Create REG file
Open notepad or a similar plain text editor in order to create a file that will apply changes directly into the registry and create a new file. Inside the file paste this text:
All the way to the bottom where it says: "Segoe UI"="NEW-FONT", change NEW-FONT with the font name that you have chosen or installed in the previous step. For example: "Segoe UI"="Ubuntu".
Now go to File > Save As and name your file however you want but give it REG extension so it looks like: my_new_windows_font.REG
Apply changes
Now that you have your registry entry saved, locate it and double-click on it, at this stage Windows warning will probably pop up, you can just ignore it and click on YES since you wrote the file and know what it is. After registry entry is applied reboot your PC in order for changes to take effect.
Rolling back
If you want to change the font to another one, just repeat this procedure again. If you want to roll back to using the default Windows font, repeat the process but with this code instead of the one provided in the REG file:
For PC users that are blind or have low vision, the Narrator accessibility feature in Windows 10, lets you use your PC without a display or mouse to complete common tasks – it reads and interacts with things on the screen, like text and buttons. The narrator can be used to read and write an email, browse the internet, and work with documents.
In Windows 10, there are a lot of options for Narrator that you can customize. You can change its keyboard shortcuts, personalize Narrator’s voice, enable Caps Lock warnings, and more. You can choose the voice for the Narrator, adjust the speaking rate, pitch, and volume.
To change the default audio output device used to play the voice of the Narrator in Windows 10:
Press the ⊞ WINDOWS + I
From the Settings menu, click Ease of Access.
Click Narrator on the left pane.
In the Narrator window, on the right pane, toggle the button to On to enable Narrator if required.
Scroll down to the Personalize Narrator’s voice section.
For the Select where you hear Narrator’s voice option, click the drop-down and select the audio output device you want from the list. Please know that you will not be able to choose if you do not have multiple audio output devices connected to your Windows 10 computer.
Exit Settings when done.
If you would like to read more helpful articles and tips about various software and hardware visit errortools.com daily.
If your printer has been working just fine and you suddenly get an error message saying, Printer not activated, error code 30”, then something is definitely wrong and it’s not good especially if you have lots of things to do. Worry not, as this post will help you resolve the printer issue. Simply follow each one of the given options below carefully.
Option 1 – Try running the Printer Troubleshooter
The first thing you can to resolve the printer issue is running the Printer Troubleshooter. This built-in troubleshooter can detect and automatically fix the problem for you. To use it, follow these steps:
Tap the Win + R keys to open the Run dialog box.
Next, type “msdt.exe /id PrinterDiagnostic” in the field and click OK or hit Enter to open the Printer Troubleshooter.
Then click the Next button and follow the next on-screen instructions to fix the issue with the printer.
Option 2 – Check if the concerned printer is set as the default one
It could be that the printer you are trying to use is not set as the default printer. This is mostly the case so to fix the issue, you need to set the concerned printer as default. To do that, follow the steps below.
Tap the Win + I keys to open the Settings app.
After opening Settings, select Devices from the menu and then click the Printers and scanners option.
From there, look for the printer you are using among the list of options. After you find it, click on it and select the Manage option.
Now click on the “Set as Default” option to set the printer as default.
Option 3 – Try updating the driver for USB Composite Device
The problem with your printer might also be caused by the USB Composite Device. It could be that the USB Composite Device is acting up. Thus, you need to remove and reinstall it. How? Follow the steps below.
First, click the Start button and type “device manager”.
Then click on the “Device Manager” from the search results to open it.
From there, look for the USB Composite Device option and right-click on it, and select the Update Driver from the options.
Restart your PC and then click the “Search automatically for updated driver software” option.
Now uninstall and remove the printer driver software and reinstall it then refresh.
Option 4 – Try updating all the drivers for your Printer
Tap the Win + R keys to launch Run.
Type in devmgmt.msc into the box and tap Enter or click OK to open the Device Manager.
After that, a list of device drivers will be displayed. Look for Print queues from the list of drivers displayed and click on it to see all the Printer drivers.
Next, right-click on each one of the drivers and select “Update driver” to update the driver. Do it for all the Printer drivers
After that, select the “Search automatically for updated driver software” option and then follow the instructions to complete the process.
Restart your PC and try printing a document again and see if the “Printer not activated, error code -30” no longer pops up.
Note: You also have the option to go directly to the website of your printer manufacturer and check if there’s a new update – if there is, download it.
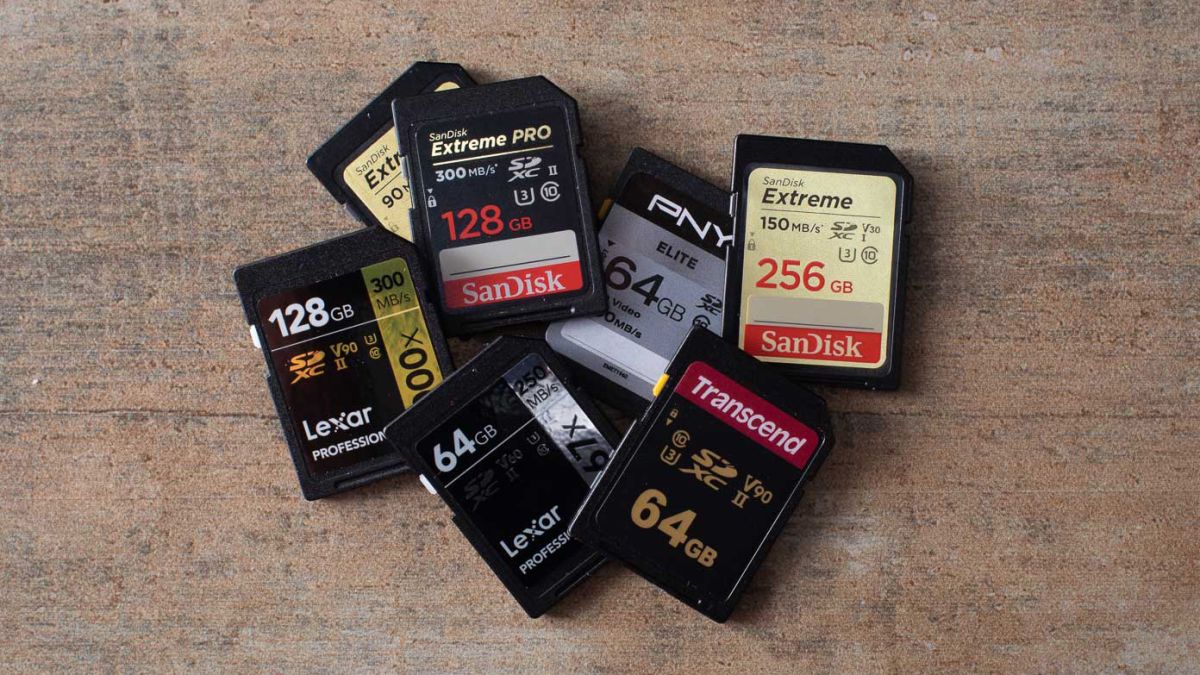
SD memory cards have surfaced as standard cards for digital cameras and microSD as phone standard memory cards. Most people have and use at least one daily, so naturally copying files and even formatting SD cards is a natural thing to do, but what if you cannot copy files or format SD cards?
Fear not because we had this issue and tried several things in order to overcome the problem and after some time here is a list of what can you do if you are facing this exact issue. The list is written from most simple solutions to more complex ones and it is advisable to follow it as presented. That being said, let's dive into solving the problem.
1. Remove Write Protection on SD card
First and in my experience the most usual thing preventing deleting, copying files, and formating SD card is due to write protection. Take an SD card out of the laptop, camera, or card reader and visually inspect it. On side of almost every SD card, there is a hardware lock switch and mark where it needs to be positioned in order to be locked. Even if the switch is positioned on unlocked state, switch it to locked and then back to unlocked. Sometimes this easy moving of switch can resolve some contact issues and the card will start working normally.
Another type of lock that could be turned ON is a software one. If for any kind of reason data protection has been turned ON, you will need to turn it off in order to be able to format an SD card. In order to do this follow this guide:
Press ⊞ WINDOWS + R to open the Run dialog
In run dialog type in diskpart and press ENTER
Once diskpart is opened in command prompt type in: list disk and press ENTER
Locate your SD card and type in select disk x, where x is disk number followed by ENTER
After the SD card is selected type in: attributes disk clear read-only and press ENTER
This process will clear the software lock on the SD card, after following this method try to format the card again, if the problem still exists go to the next solution.
2. Format SD card using Command prompt
Command prompt is a great tool and can perform some commands that are not been able to be completed using file explorer or another tool inside Windows.
In the taskbar search box, search for cmd and select the Command prompt
On the right part select run as administrator
If needed click on YES on UAC prompt
Inside command prompt type in diskpart and press ENTER
type in list disk followed by ENTER
Select your SD card by locating its number in the list and typing select disk X, where is X SD cards number in list and press ENTER
Once SD card is selected type in format fs=ntfs quick and press ENTER
This should format SD card but if for reason even this step is provided as unproductive, go to the next solution.
3. Format your card with the Disk Management tool
Go into the taskbar and search for Disk Management and open it
Select SD card partition that you wish to format
Right-click on the partition and select format
After the format is done, enter the volume label, file system, and allocation unit size. Confirm with OK
Press OK again to confirm the formatting process.
If you have not managed to format your SD card even with this method go to the next solution.
4. Repartition card with Disk part
If all previous solutions have failed there is a chance that the SD card has bad sectors on it. If this is the case that we will need to partition cards in order to isolate bad sectors and use healthy ones.
Press ⊞ WINDOWS + R to open the Run dialog
In run dialog type in diskpart and press ENTER
Once diskpart is opened in command prompt type in: list disk and press ENTER
Locate your SD card and type in select disk x, where x is disk number followed by ENTER
Type in Clean and press ENTER
Type in Create partition primary and press ENTER
To select a new partition type select partition 1 followed by ENTER
Make partition active by typing active and pressing ENTER
Format the drive by typing format fs=ntfs label=SDCard quick followed with ENTER
Assign a letter to drive by typing assign letter=h followed with ENTER
Type exit to close Command prompt followed again by ENTER and open File Explorer to check if the drive is active
5. Try a dedicated SD card formating fool
If anything failed so far, one last thing you could do is to download and try a dedicated SD card formatting tool. One that I would recommend is SD Memory Card Formatter, which is free software make specifically for formatting SD memory cards.
Error Code 0xC1900200, 0x20008 (Code 0xC1900202 – 0x20008) – What is it?
Error Code 0xC1900200, 0x20008 (Code 0xC1900202 – 0x20008) is an error that occurs when you attempt to upgrade to Microsoft Windows 10, but the minimum requirements have not been met by your computer. You will therefore be unable to upgrade to Microsoft Windows 10 until your computer is updated or upgraded to meet those requirements.
Common symptoms include:
When attempting to upgrade a dialog box with Code 0xC1900200 – 0x20008 (Code 0xC1900202 – 0x20008) is displayed.
Your computer is unable to begin the Microsoft Windows 10 upgrade process.
Solution
Error Causes
Error Code 0xC1900200 – 0x20008 (Code 0xC1900202 – 0x20008) occurs when you are unable to begin the Microsoft Windows 10 upgrade because your computer does not meet the minimum requirements to run Microsoft Windows 10.
You are unable to begin the upgrade because your computer does not meet the required system or hardware specifications.
You are not running the correct version of Microsoft Windows to be able to begin the upgrade.
You are not running the latest updated version of Microsoft Windows 7 SP1 or Microsoft Windows 8.1.
Error Code 0xC1900200 – 0x20008 (Code 0xC1900202 – 0x20008) as stated, simply means your computer does not meet the requirements to update and does not indicate a permanent problem or inability to continue to use your computer. This error only means that you will not be able to upgrade to Microsoft Windows 10 until your computer is made to meet these requirements.
Further Information and Manual Repair
There are several solutions that the user can complete at home that should fix the problem resulting in a manifestation of Error Code 0xC1900200 – 0x20008 (Code 0xC1900202 – 0x20008). Below are several options that should resolve this error.
Method 1:
Verify what version of Microsoft Windows you are currently running, older, outdated, or no longer supported versions of Microsoft Windows are not able to upgrade to Microsoft Windows 10. If you are not running one of the following versions you will have to update before being able to upgrade.
The most current version of Microsoft Windows 7 SP1
The most current version of Microsoft Windows 8.1
Method 2:
Your computer's system specifications do not meet the requirements to be able to upgrade to and run Microsoft Windows 10. To check your system specifications do the following.
Click on the start button in the bottom left corner, then locate the control panel on the menu, click on it to open.
Once it opens, locate system and security on the menu and click to open, click on system and this will show you your amount of RAM and processor speed.
Find device manager on the left-hand side click this then select display adapter, and it will show you your current video card.
Click on the start button again, then click on the computer in the menu, this will show you your hard drive size, and available space.
If you have the option available you can simply run the get Microsoft Windows 10 app to check compatibility. Once you have your system specs make sure they meet or exceed the following.
1 GHz or higher processor or SoC
1 gig of RAM for 32 bit and 2 gigs of RAM for 64 bit
16 GB available hard drive space for 32 bit, 20 GB for 64 bit
Minimum of DirectX9 that has 1.0 WDDM
At least an 800x600display
If your computer does not meet these minimum requirements, upgrade the components necessary to meet them. If you do not possess the technical expertise required to accomplish this yourself or do not feel comfortable doing so, download and install a powerful automated tool to get the job done.
Method 3:
Your computer might not meet the aforementioned requirements to make an upgrade because of insufficient hard drive space or resources. Learn how to create or make space on your computer here.
Method 4:
Many people hold on to and use the same computer for a very long time. It is possible that your computer cannot be upgraded to meet the requirements, or that the cost to do so would be so high that a new computer would be cheaper. If that is the case, your only option may be to replace your computer.
In case you don’t know, new support has been added by Microsoft to Windows 10 that now allows users to turn off or on the Mobile Hotspot remotely. The Mobile Hotspot feature, known earlier as “Virtual Networks”, was first introduced with the initial release of Windows 10. With this new feature to remotely turn on or off the Mobile Hotspot in Windows 10, users can just use the Bluetooth on their mobile phones to turn off or on the Mobile Hotspot even when their Windows 10 computers are out of their reach.
To turn off or on the Mobile Hotspot feature in your Windows 10 computer remotely, there are two options you can try. First, you can do it using the Windows 10 settings app or using the Registry Editor. To get started, refer to the following options.
Option 1 – Turn off or on the Mobile Hotspot remotely via Windows 10 Settings app
First, you need to open the Windows 10 Settings app and from there go to Network & Internet and then go to the Mobile Hotspot section.
After that, scroll down to the “Turn on remotely” section.
Once done, make sure that the toggle button is set to ON and that the Bluetooth of both devices is turned on and paired as well. This should enable the feature to turn on or off the mobile hotspot remotely.
Option 2 – Turn off or on the Mobile Hotspot remotely via Registry Editor
Before you get started with the second option, make sure that you create a System Restore point first. Once done, proceed to the following steps:
Tap the Win + R keys to open the Run dialog box and type “Regedit” in the field and then hit Enter to open the Registry Editor.
Next, navigate to this registry path: ComputerHKEY_LOCAL_MACHINESOFTWAREMicrosoftWcmSvcTethering
From there, look for the DWORD named “RemoteStartupDisabled” and set its Value data to be “0”. This will enable the feature that will allow you to remotely turn on or off the mobile hotspot in your Windows 10 computer. To disable it, just set its Value data to “1”.
If you are trying to install a Windows 10 upgrade but was interrupted with an error saying, “0x80070003 – 0x2000D, The installation failed in the SAFE_OS phase with an error during MIGRATE_DATA operation”, then you’ve come to the right place as this post will help you sort this problem out.
When you get this kind of error while trying to upgrade your computer, although there could be various reasons for this, the primary one is that when you upgrade from one update to another, something stopped the upgrade process to migrate the user data. To fix this error, you can try to run both the DISM tool and the System File Checker to automatically repair any corrupted system files. You could also try checking the free storage space of your primary drive and if you have any file lock apps like BitLocker, consider disabling them for they could also be the reason why you’re getting the error.
Option 1 – Run the DISM tool
Running the DISM Tool helps in repairing the Windows System Image as well as the Windows Component Store in Windows 10 which might be the reason behind the Windows Upgrade error 0x80070003 – 0x2000D. Using this built-in tool, you have various options such as the “/ScanHealth”, “/CheckHealth”, and “/RestoreHealth”.
Open the Command Prompt as admin.
Then type in this command: exe /Online /Cleanup-image /Restorehealth
Do not close the window if the process takes a while as it will probably take a few minutes to finish.
Once it’s done, restart your computer and then check if the issue is resolved or not on the next startup.
Option 2 – Run the SFC scan
The SFC or System File Checker scan could detect and automatically repair damaged system files that could be causing the Windows Upgrade error to appear. SFC is a built-in command utility that helps in restoring corrupted files as well as missing files. It replaces bad and corrupted system files to good system files. To run the SFC command, follow the steps given below.
Tap Win + R to launch Run.
Type in cmd in the field and tap Enter.
After opening Command Prompt, type in sfc /scannow and hit Enter.
The command will start a system scan which will take a few whiles before it finishes. Once it’s done, you could get the following results:
Windows Resource Protection did not find any integrity violations.
Windows Resource Protection found corrupt files and successfully repaired them.
Windows Resource Protection found corrupt files but was unable to fix some of them.
Reboot your PC.
Option 3 – Try checking the free storage space on your primary drive
The next option you can try to resolve the error is to see if you have enough free storage space on the primary drive because if you don’t then it’s probably the reason why you’re getting this error. To fix it, you need to free up some storage space by following these steps:
Open Setting > System > Storage from the WinX Menu.
From there, you will see a list of all the local and connected storage devices along with the details on the free space.
Now make sure that the Storage Sense feature is turned On then go find a link that says “Free Up Space” and click it to open.
After that, a screen which is the built-in program in Windows 10 will appear and will scan your computer for the following junk files so you can free up disk space:
Windows Upgrade Log Files
System created Windows Error Reporting Files
Thumbnails
Temporary Internet Files
Previous Windows Installation Files
Delivery Optimisation Files
DirectX Shader Cache
Note: Once you’re done freeing up space on your drive, try to run the setup file again.
Option 4 – Try disabling BitLocker and other file lock apps
If you are using BitLocker or other file lock apps, then it could be the reason why you’re getting the error. Usually, file lock apps don’t cause any kind of issue, however, if you have something that works on file level like BitLocker, you can try to disable it. Once you’ve disabled it, try to install the Windows 10 Upgrade again and after you do, enable BitLocker again. This should fix the problem.


 Intel announced that Pat Gelsinger (CEO) and Dr. Ann Kelleher (technology Department head) will discuss Intel’s process and packaging innovations on an upcoming webcast that will happen on July 26th.
The spokesman will talk and provide a deeper look at the process and packaging roadmaps for Intel. As we know Intel is planning to expand its production capabilities, outsource some of its technologies and offer foundry services to other chip design companies.
The strategy will also include a shift to a 7nm process and Intel’s effort to set itself again as leader of CPU performance by 2024.
There is also a chance that we will hear exact plans for Intel in the next three or four years.
Intel didn't reveal much else about what Gelsinger and Kelleher plan to discuss during the webcast. The event will be streamed on July 26 at 2 pm PT via the
Intel announced that Pat Gelsinger (CEO) and Dr. Ann Kelleher (technology Department head) will discuss Intel’s process and packaging innovations on an upcoming webcast that will happen on July 26th.
The spokesman will talk and provide a deeper look at the process and packaging roadmaps for Intel. As we know Intel is planning to expand its production capabilities, outsource some of its technologies and offer foundry services to other chip design companies.
The strategy will also include a shift to a 7nm process and Intel’s effort to set itself again as leader of CPU performance by 2024.
There is also a chance that we will hear exact plans for Intel in the next three or four years.
Intel didn't reveal much else about what Gelsinger and Kelleher plan to discuss during the webcast. The event will be streamed on July 26 at 2 pm PT via the 
 Fear not because we had this issue and tried several things in order to overcome the problem and after some time here is a list of what can you do if you are facing this exact issue. The list is written from most simple solutions to more complex ones and it is advisable to follow it as presented. That being said, let's dive into solving the problem.
