 This is a very interesting decision by Microsoft and I fully support it, this time users will be able to pay less and to choose only applications that they need instead of paying for the whole package and not using it.
 Jp2klib.dll is a type of Dynamic Link Library. This file is developed by Adobe Systems Inc and associated with CS2 (Creative Suite 2 Premium).
Like all DLL files, this file also contains small programs that support programs developed by Adobe Systems on your PC. The function of Jp2klib.dll is to load and run programs. Jp2klib.dll error occurs when it fails to do so.
It occurs during program startup.
Jp2klib.dll error is displayed in several different formats depending on the cause of the error. Here are some common error messages that you may come across:
 Error Causes
There are several causes for the Jp2klib.dll error code pop-up. These include:
The good news is that this is not a fatal error code like the blue screen of death errors. However, it is still advisable to resolve it right away to avoid inconvenience. This error may limit your ability to access your desired program.
Follow these methods to resolve Jp2klib.dll error code on your PC in a few minutes without any professional assistance or technical know-how:
Sometimes Jp2klib.dll error may occur if the DLL file is not registered properly. In such a situation "JP2KLib.dll not registered" error message will pop on your computer screen.
To resolve, all you need to do is register this file. Follow these steps to register the Jp2klib.dll file on your PC:
If you come across this error message "JP2KLib.dll not found”, this indicates a missing Jp2klib.dll file.
This usually happens if you recently uninstalled a program on your system which was also supported by the Jp2klib.dll file due to which the file was also deleted. But don’t worry!
Check your recycle bin to retrieve the accidentally deleted file on your system. If you find it restore, but if you don’t then simply download it from a reliable DLL website.
Install and run an antivirus to detect viruses. Viruses are malicious programs that damage and corrupt DLL files like the Jp2klib.dll file. Scan for all viruses on your PC and remove them to fix the problem.
If you don’t clean the registry often it becomes accumulated with obsolete files like bad and broken entries, cookies, and junk files.
These files corrupt the registry and damage system and DLL files also stored in the same location. It then leads to such error message pop-ups.
To resolve, download Restoro. This is an advanced PC Fixer deployed with a registry cleaner. It is easy to use and in just a few clicks can repair the Jp2klib.dll error on your PC. The registry cleaner scans and removes all obsolete files. It cleans the registry and repairs the damaged system and DLL files.
Click here to download Total System Care and fix the Jp2klib.dll error.
 This is a very interesting decision by Microsoft and I fully support it, this time users will be able to pay less and to choose only applications that they need instead of paying for the whole package and not using it.
 Regsvr32 is basically a command-line utility.
This command is used to register and unregister OLE controls for example the digital link library files and ActiveX controls in the Windows Registry. This command appears as the Regsvr32.exe file and is installed in the Microsoft Windows system file in the %systemroot%System32 folder.
The Regsvr32 command loads the library and tries to call the DllRegister Server and DllUnregister Server. In other words, it helps to register COM-based digital link library files to run different programs on your PC.
However, when the Regsvr32.exe file gets corrupt, you get the Regsvr32 to troubleshoot the error message on your computer screen. It can be displayed in various ways including the following:
“To register a module, you must provide a binary name.”
Generally, Regsvr32.exe becomes corrupt because either the load library, DllRegister Server or DllUnregister Server function fails. This indicates that the dll specified path was missing, incorrect, or couldn’t be found.
Here’s how the error messages are often displayed while registering a dll using Regsvr32.exe:
If this error message is displayed, it typically means that you entered an invalid combination of command-line arguments or switches when calling upon the Regsvr32.exe application.
The cause of this error message is that you called the Regsvr32.exe function with no modules to register located in the command line arguments.
You must re-run the Regsvr32 command from an elevated command prompt. For this, go to the start menu and type Command Prompt in the search box.
Now right-click the Command Prompt and click the option that says Run as Administrator to run the command on your PC. If it prompts you to enter an administrator password, type the password and then click Allow to run the command.
This may sound tricky but it is even simpler than the first solution discussed above. To register a 32-bit DLL using a 32-bit version of Regsvr32 on a 64-bit version of Windows, open an elevated command prompt.
After it’s opened, if you see the 32-bit DLL is located in the following path: %systemroot%System32 folder, move it to %systemroot%SysWoW64 folder. Once you change paths, run this command: %systemroot%SysWoW64regsvr32 <full path of the DLL>
Try following these 2 recommended solutions to immediately fix and repair this error on your computer.
The solutions should eliminate the occurrence of error messages such as “To register a module, you must provide a binary name.” It is so easy and effective and you can do it on your own without calling over a professional.
Congratulations, you have just fixed the Regsvr32 Error in Windows 10 all by yourself. If you would like to read more helpful articles and tips about various software and hardware visit errortools.com daily. Now that’s how you fix Regsvr32 Error in Windows 10 on a computer. On the other hand, if your computer is going through some system-related issues that have to get fixed, there is a one-click solution known as Restoro you could check out to resolve them. This program is a useful tool that could repair corrupted registries and optimize your PC’s overall performance. Aside from that, it also cleans out your computer for any junk or corrupted files that help you eliminate any unwanted files from your system. This is basically a solution that’s within your grasp with just a click. It’s easy to use as it is user-friendly. For a complete set of instructions in downloading and using it, refer to the steps below Perform a full system scan using Restoro. To do so, follow the instructions below.dism.exe /online /remove-package /packagename:Package_for_RollupFix_Wrapper~31bf3856ad364e35~amd64~~16299.248.1.17 /packagename:Package_for_RollupFix~31bf3856ad364e35~amd64~~16299.125.1.6 /packagename:Package_for_RollupFix_Wrapper~31bf3856ad364e35~amd64~~16299.192.1.9 /packagename:Package_for_RollupFix~31bf3856ad364e35~amd64~~16299.192.1.9 /norestart
Dism.exe /online /Cleanup-Image /StartComponentCleanup
net stop wuauserv net start cryptSvc net start bits net start msiserver
net start wuauserv net start cryptSvc net start bits net start msiserver
Error Causesnet stop wuauserv net stop bits
net start wuauserv net start bitsSince the folder has already been flushed, it will be populated afresh the instant your restart your computer and open Windows Update.
Portable small Bluetooth speakers are nothing new on the market, most of the time they have given the opportunity for music listening during picnics and walks in nature and also replaced some car speaker systems. The latest star in small portable speakers in JBL Clip 4, small in size, waterproof, and with an incredible high-quality sound.
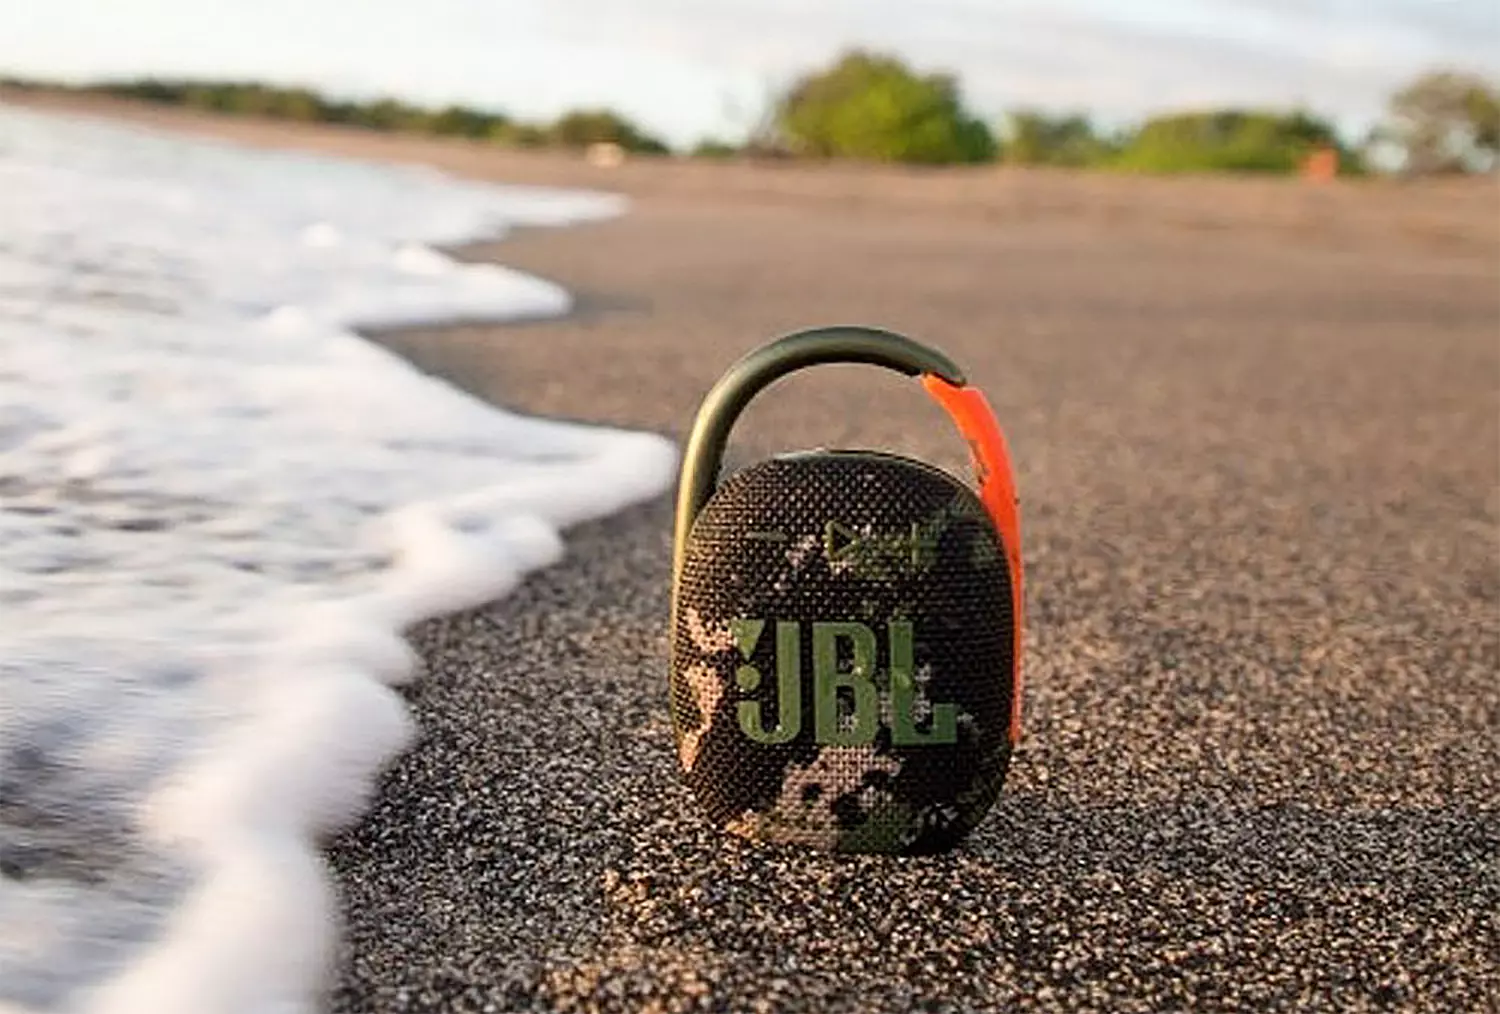
Out of the box and after first look speaker looks great, it has excellent design and is very intuitive to work with. Everything is laid out logically and you can start using it right away without reading instructions.
The sound quality is surprisingly very good and clear. I must say I have not expected this clarity and power from a speaker of this size. The volume range is also incredibly good and will fill most needs even on small picnics outdoors where you can hear it loud enough. One thing to mention is that even on their loudness levels sound is still clear without distortion which, to be honest, is to be expected from someone like JBL.
You can take it where ever you want, Its size and clip make it perfect for beach and pool trips. Speaker is waterproof and gas IP67 rating, meaning that sand and dirt will not affect it either. Do not take this speaker to your diving adventures since that will break it but a depth around 1 meter underwater should be safe. After your trip do not forget to wash Clip 4 with clean water so all dirt, salt, and other stuff are properly cleaned for longer life of the device.
JBL claims that the battery will last 10 hours of continuous play. Note that this is meant probably on the largest volume setting so when you use it on lower settings battery is lasting longer. Playing of course on low volumes will extend playback time even longer but here we come at one feature that I do not like, there is no indication of any kind how much battery is left in the speaker, the only indication is a red light when the battery is almost empty which means you could be outside at that point and did not know that low battery was there in the first place when you were packing. Some battery indication would be a great addon.
The clip itself has been improved from the previous Clip 3 model, it is wider, it goes all the way around the casing, and feels overall better and more stable. Since the clip is now all around casing this means a wider opening can be made making it fit around stuff Clip 3 was not able to.
All in all, Clip 4 is an incredible speaker and one that would highly recommend, the price goes around 79 USD but it can be found even as low as 50 USD on discounts and promotions and if you manage to get one at that price it is a great buy. Sound is good, portability is great, dirt and waterproof are excellent and battery life is really good.
chkdsk /f /r
Polimva is a Browser Extension for Google Chrome. This extension offers users the ability to search for any recipe on the web.
From the Author:
Polimva will help you discover new content! You will be exposed to cool and fun content every day! You can search and find new articles, videos, and reviews on daily basis.
-Amazing search experience. -Access to new interesting articles and videos every hour. -Polimva Changes the default search. -Updated content every day. -Follow any channel and topic that you like. -Choose the interface and the design of the results you get every time.This extension changes your default search engine to Yahoo, and while active it changes the displayed ads on your browser, allowing it to make revenue on every ad you click. While this is not malicious, the extension redirects your search to its servers first before forwarding it to yahoo and displaying search results. The information that is sent back to the servers contains your browsing data & visited web pages. As a result, Polimva is considered a potentially unwanted browser hijacker and if flagged for optional removal.