If you are a laptop or a notebook user and you are trying to install Windows XP on it, you might come across 0x0000007B (0xF78524) error message. This error is a popular blue screen of death error and very similar to the error 0x0000007B.
Solution
Error Causes
The common causes of 0x0000007B (0xF78524) error code on your laptop might be:
File Corruption
Device Configuration Issues
Adware/spyware invasion
Incomplete Installations
Problem with your computer’s hard drive controller
Further Information and Manual Repair
Many people panic when they experience 0x0000007B (0xF78524) error on their laptops and notebooks simply because it is a blue screen of death error. The BSoD has this whole persona of being deadly computer errors that can almost cripple systems.
If you have also experienced this error on your laptop, remain calm and follow the solutions given below to ensure you fix the error quickly without any hassle.
Here are various ways to fix and resolve the BSOD error code 0x0000007B (0xF78524):
Whether you have Lenovo IdeaPad Y550 or Dell Latitude E4300 or any other laptop for that matter, if device driver configuration is the cause of the error 0x0000007B (0xF78524), then all you need to do is start up your laptop and press F2 to enter BIOS. Now expand the ‘Drives’ section. After doing so, go to ‘SATA Operation’. SATA is the abbreviation for Serial Advanced Technology Attachment which enables mass storage devices like hard drives and optical drives to communicate with the motherboard by using a high-speed serial cable. For successful communication between devices, you need to configure SATA controller mode. Once you go to the ‘SATA Operation’ mode, change this from RAID AHCI to RAID ATA. Save changes and exit BIOS. This helps resolve the error 0x0000007B (0xF78524) in no time.
Another way to fix this error is to download and install the 0x0000007B (0xF78524) repair tool. Once this tool is installed on your laptop, click the scan button. Once the scan is complete, you will see a list of errors; click the ‘Repair’ button to fix the errors found and then restart.
The 0x0000007B (0xF78524) error may also occur due to the boot volume corruption. In such an event, it is advisable to run chkdsk command on the hard drive. This is recovery console command is used to check the hard drive, repair and recover data on the drive successfully.
Windows updates have become a regular occurrence in our digital lives. They are frequent and have become quite necessary. Most of the time they bring us quality content like fixed security, resolved bugs, and even new features but from time to time update itself can be not downloaded properly or it can have some issues when installing. Windows Update Error 0x800F0825 is one of these update errors that will be reported seemingly after applying the update.
Altho annoying error it is nothing system breaking and can be easily resolved.
Hello and welcome everyone, today we will provide you with solutions on how to resolve error 0x800F0825 when trying to complete a Windows update.
Run Windows troubleshooter
Built-in Windows troubleshooter can help a lot in resolving these issues and we will try it as a first solution because of its simplicity and ease of use.
Click on START
Click on settings
Navigate to Update & Security > Troubleshoot > Additional Troubleshooter > Windows Update
Click on Run the troubleshooter
Follow onscreen instructions and let the troubleshooter try to solve the issue
Clear contents of SoftwareDistribution & Catroot2 folders
Altho SoftwareDistribution and Catroot2 folders are essential for the update process it can happen that badly downloaded updates or similar corruption can be stored there and thus producing this error.
Open file explorer and locate these two folders, go inside and delete content inside them
Try updating again to see if corruption inside folders was the issue.
Update manually
If the previous two solutions have not produced a result and the error is still present then go to the official Microsoft Update Catalog and download the update manually
The catalog is here.
Search for updates from the Windows Update Catalog In the Search box, type your search terms. You can carry out a full-text search, using a keyword, KB article, MSRC bulletin, driver manufacturer, driver model, driver version, product, and a classification. Select the appropriate version of Windows. Search or click on Advanced Search if you want to refine your search. A list will be displayed. Select the updates that you want to download. Click Add for each selection to add it to the download basket.
Download the updates. You may be asked to install an Active-X download control to be able to download files from this site
Double-click on the downloaded updates to install them
Administrators can download updates from the Microsoft Download Center or the Windows Update Catalog to deploy to multiple computersIf you are running Windows Server Update Services (WSUS) 3.0, System Center Essentials (SCE), or System Center Configuration Manager (SCCM) you can import updates directly into these applications. Security updates, critical updates, service packs, update rollups, definition updates, and critical drivers can be configured to synchronize with your server automatically. You can still import these updates into your application by using Microsoft Update Catalog; however, depending on how you configure WSUS, SCE, and SCCM, you may not need to import the updates.
Disable system protection
In some rare cases, antivirus or firewall could interfere with both downloads and execution of certain files. If each previous solution failed disable temporarily your security software and try executing the update again.
Windows 7 was an operating system that had one thing which no other Windows had, even today. Official Microsoft desktop widgets.
With an attractive design, users loved to exploit the adequacy and neatness of these gadgets. However, Microsoft had to discontinue these gadgets as they posed a serious security threat to the Operating System. It was believed that a potential attacker could even use a gadget to take complete control of your PC.
With Windows 10, things have changed big time. You have all the fantastic apps and live tiles at your disposal providing a more native experience.
Despite all this, if you still have a fondness for fancy gadgets, we have just the right tool for you to get started with similar “Widgets” on Windows 10. Win10 Widgets is a tool that places the most important information right in front of you, on your desktop.
Win10 Widgets
Win10 Widgets is a desktop app package provided by Rainmeter which is an effective system customization engine for Windows. It brings some informative widgets to Windows 10 which look almost native with their intuitive and sleek design. You can pin them on your desktop to keep an eye on various system figures like CPU usage, data storage, battery usage, detailed computer performance, etc.
Native looking Widgets for Windows 10
These widgets are designed in such a way that it looks totally indigenous to the Windows 10 UI. With a similar design language, visual style, accent color, and even font settings, these widgets almost look like an inseparable system component.
You can choose between different size variants to pin on your desktop and arrange them in an orderly fashion to make the most of it.
Highly customizable desktop gadgets
Apart from the default size variants, you can configure several other parameters pertaining to the look and appearance of any widget. As Rainmeter is an open-source program, you are provided with the .ini configuration files which you can customize as per your wish. You can make adjustments to the widget coordinates, position and transparency as well. You can even create your own skins (.rmskin package) using the built-in Skin Packager and publish them for general usage through Rainmeter.
Illustro Skins
Over and above the cool widgets, Rainmeter also contains Illustro, a simple collection of skins that shows the range of Rainmeter’s capabilities. You can load the skins on your desktop for a brief look at your system internals. You can also start editing these skins to make them yours by taking advantage of the Rainmeter manual and forum link provided on the Welcome screen.
Win10 Widgets is a great tool if you like widgets or gadgets on your Desktop. It blends into the background and puts the important piece of information right on your desktop without you having to look somewhere else. If you already have the Rainmeter application, you can download the Win10 Widgets .rmskin file from here, else you can download the combined bundle for both Rainmeter and Win10 Widgets from here.
What software are you using to keep your information and all your files and memories safe?
None? Yikes. Let’s hope no damage has been done to your data yet then. Because with how the digital world has evolved, your data might be getting leaked and you have no idea.
Why do you need to invest in security software?
There’s really no good excuse not to purchase a quality platform for PC protection. Especially since top security solutions are available at such affordable prices nowadays, your wallet would barely even notice it.
At this point, only people who barely use their PCs and have zero sensitive information on them can get away with simply using the built-in Windows 10/11 security software. But we guarantee that those people are extremely hard to find and that you’re not one of them, and here’s why.
Even if you don’t use your computer for things that are very obviously sensitive, such as internet banking, you still have some personal data at risk of being stolen. How so? Well, think about the data you enter into your social media profiles, for example. How devastating would it be if somebody got a hold of any of it? Yep, that’s what we thought.
Credit: FLY:D on Unsplash
In the hands of a skilled cybercriminal, your phone number alone could put you at risk of scams, ransomware, identity theft and more. Also think about the stuff you share in texts and social media chats. Think about the websites you visit and how many times you may have accidentally clicked on an ad, which could very well contain malicious software. Those all seem harmless until someone’s actually used them against you.
Now imagine the dangers involved when you actually store truly confidential data on your PC and browsers. Sends shivers down your spine, doesn’t it?
In the case of a successful cyberattack of whatever type (virus, phishing, worms, etc.), there’s so much that is at stake. Businesses/legal persons will suffer from financial loss and damaged reputation, at the very least. Natural persons may be threatened or exploited, get their banking or medical information and even their identity stolen, etc. And that’s just the tip of the iceberg.
These are our biggest reasons for investing in Windows PC protection software:
Cyberthreats are constantly evolving to the point where built-in or free software won’t cut it anymore.
Those working remotely can have peace of mind knowing both personal and business data is completely secure.
Businesses using top security solutions ensure their customers trust them.
Data breaches are a pain in the you-know-what to handle. Fighting a cyberattack and going back to normal is a demanding process, and not to mention the stress it’ll cause. We’d rather prevent all that by using trustworthy security products!
It helps parents worry a little less about their children’s safety in the online world.
Added bonus: with most products, you get an ad-free browsing experience!
Obviously, there are a lot more reasons to get your PC secured. But we think you get it. So let’s cut to the chase and take a look at our 6 favorite protection solutions and the wonders they can do for you.
*Note that in this article we’re looking at products primarily suited for households and home offices, some for small businesses. No enterprise solutions will make the list today, but stay tuned for a future article on those.
Top 6 best PC protection solutions
1. Bitdefender Total & Internet Security\
One of the biggest security product vendors out there, Bitdefender offers several awesome solutions. We want to introduce two of our favorites, Bitdefender Total Security and Bitdefender Internet Security.
Bitdefender Total Security is great for both households and smaller offices. You can choose to protect 5 or 10 devices, and not necessarily just Windows devices. It also works for macOS, Android and iOS. It offers a range of powerful features, such as:
Real-time data protection
Webcam and microphone protection
Device optimization options
Anti-phishing/-fraud/-spam technology
Ransomware protection
Anti-loss and anti-theft tools
VPN and privacy firewall
Anti-tracking technology
Parental controls
24/7 support
Bitdefender Internet Security shares almost all of these features, but there are a few important differences to note. Unlike Total Security, Internet Security has more options in terms of the number of protected devices: 1, 3, 5 or 10. However it’s only compatible with the Windows platform and it doesn’t offer device optimization tools or anti-theft options. Whether or not this is a deal-breaker depends on your needs alone - we still find it a great security tool.
Credit: Firmbee.com on Unsplash
2. ESET Internet Security
An award-winning Windows security product, ESET Internet Security is essential on this list. It has an outstanding protection rate of 99.9% and a range of amazing options you’ll definitely want to make use of. It can be installed on up to 10 devices, making it an awesome tool for your household, home office or a small business. It’s also compatible with macOS and Android.
These are ESET Internet Security’s best features:
Protection against ransomware and spyware
Protection against malware specifically designed to avoid detection
In-depth scans when the computer is not in use
Firewall to prevent unauthorized access to your PC
Anti-spam tool
Anti-phishing and botnet protection technologies
Tool to scan your router and smart devices for vulnerabilities
Special browser for secure internet banking
Parental controls
Prevention of unauthorized webcam access
If you ask us, ESET has it all!
Credit: rupixen.com on Unsplash
3. Kaspersky Total & Internet Security
Having a deja vu? Didn’t you just read Total Security and Internet Security somewhere? Oh, that’s right - the first entry on our list! But here we’re talking about Kaspersky, a vendor you’ve also definitely heard about before.
Just like Bitdefender, Kaspersky is another one of those renowned names in the cybersecurity world that always make it to every ‘best of’ list. And for good reason - its products really fulfill their purpose. So let’s take a closer look at the two we chose.
These are the features both Kaspersky Total Security and Kaspersky Internet Security have in common:
Real-time virus and spyware blocking
Webcam protection
Wi-Fi security notifications
Advanced identity theft protection
Free technical support on several channels
Remote security management
Multiple devices (up to 10)
The main difference between Kaspersky Total Security and Internet Security is that the former offers more capabilities. These are the features KTS offers that KIS does not:
System cleanup
File shredding
Password management
Data backup and encryption
Both are excellent security tools, though we do prefer KTS a little more because of these additional options.
4. Norton 360 Deluxe
Of course one of the industry-leading solutions makes the list. Norton 360 Deluxe can protect up to 5 devices, be it Windows, iOS, macOS or Android. It’s worth noting that its features are best developed for Windows. Here’s what you get with Norton 360 Deluxe:
Protection against viruses, hackers, malware
100% virus protection promise
VPN included for all devices
Unlimited VPN on Windows
Password manager
Parental controls
So is there anything aside from these standard protection features that makes it such a favorite among us techies? Let us tell you! Norton added a little bit of spice here with two really powerful capabilities. The Deluxe product offers 50GB of cloud backup and dark web monitoring. The latter means the software notifies you if any of your personal information is found on the dark web, which helps protect you against identity theft.
Credit: Luke Peters on Unsplash
5. McAfee Antivirus
Don’t be misled by the name of this product. Antivirus software may have started as protection against viruses only, but it’s developed quite a lot. The name simply stuck. All that to say that McAfee Antivirus - another award-winning security solution - protects you against several different threats.
The basic and essential plan allow 1 and 5 devices respectively, while McAfee+ Premium and Advanced work on an unlimited number of devices. The latter two also offer more capabilities, as you can imagine. Here’s what you can expect from all of them:
Secure unlimited VPN
File shredder to delete sensitive files completely
Ultimate safety while browsing
Protection against hackers
100% virus protection promise
Advanced firewall to block dangerous traffic
Online support from specialists
Protection score (shows how safe you are and detects vulnerabilities)
Identity monitoring (notifies you if any of your information is on the dark web)
Password management
Unlike the previous products, McAfee Antivirus does not offer parental controls. Otherwise it’s a pretty strong and comprehensive protection tool and might just be the right choice for you!
6. Trend Micro Maximum Security
Last but definitely not least, we’ve got Maximum Security by Trend Micro. And yes, you guessed it, Trend Micro is also an award winner in terms of cybersecurity. Its products have been recognized as industry-leading security solutions by AV-Test since 2003. Among all its fantastic solutions, our favorite for households or small offices is Maximum Security.
You can use Trend Micro Maximum Security to protect 3-5 devices for a year or two years before needing to renew your license. Aside from Windows, it’s compatible with iOS, Android, Mac and Chromebook devices. Here’s what you can expect from this protection software:
Powerful malware protection
Phishing detection and prevention (email)
Password management and protection
Maximum security for online banking and shopping
System optimization
Social media privacy protection
Parental controls
24/7 technical support
No notifications during gaming
It’s truly one of the most effective platforms out there dedicated to protecting your digital life. Using this product, ransomware, identity thieves and malicious websites don’t stand a chance.
The bottom line
If you’ve made it all the way here, congratulations, you’ve made the right choice: to invest in securing your valuable data! Now the question is: which one of these 6 awesome antivirus/antimalware products to select?
The paradox of choice is a very real thing - we feel you. As mentioned, it comes down to what your specific needs are. So before you go ahead and purchase your security software, make sure to explore all options.
And if you really can’t handle the decision-making anxiety, feel free to reach out. We’ll happily assist you in finding the right product to keep your digital life secure!
If you were having some problems with your internet connection and you tried to run the Internet Connections troubleshooter but it displays an error message instead that says, “The default gateway is not available”, read on as this post will show you what you can do to fix this error.
The first thing you can do to fix this error is to restart your computer and then try to run the Internet Connections troubleshooter again. However, if you still see the same error message, then you might want to troubleshoot the problem further. You can try to install the Network driver or reinstall the Network adapter drivers. You could also verify the power saving mode or reset TCP/IP as well as disable the Firewall temporarily.
Option 1 – Try installing the Network driver
The very first thing you can do to resolve the error is to install the network driver. It is a common solution to this kind of problem and most users encounter it right after a fresh installation of Windows 10. So if you have done this, then you need to install the network driver so that the network adapters can start working. You can find the network driver in the motherboard CD. On the other hand, if you are using a laptop, you might have to use another computer or mobile to download the network driver from the manufacturer’s website.
Option 2 – Update the Network Adapter drivers
If the first option is not applicable to you since you already have network drivers in your computer, you might want to update the Network Adapter drivers by following these steps:
Tap the Win + R keys to launch the Run window and then type in the “msc” command and hit Enter to open the Device Manager window.
Under the Device Manager, you will see a list of drivers. From there, look for the Network Adapters and expand them.
Then right-click on each one of the Network drivers and update them all.
Restart your PC and see if it helped in fixing the BSOD error.
Note: If updating the network drivers didn’t help in fixing the “Windows could not find a driver for your network adapter” error, you can also try to uninstall the very same drivers and restart your Windows 10 PC. After that, the system itself will reinstall the drivers you just uninstalled. Alternatively, you can also download and install the drivers from the manufacturer’s website directly.
You could also try to reinstall the network adapter driver, refer to these steps:
Open the Devices Manager from the Win X Menu.
Then locate the device drivers and right-click on them to open the Properties.
After that, switch to the Driver tab and click on the Uninstall Device button.
Follow the screen option to completely uninstall it.
Finally, restart your computer. It will just reinstall the device drivers automatically.
Option 3 – Try to verify power-saving mode
If you are using a Windows 10 laptop, then you should know that the Power Options panel plays an important role. So if you’re getting an error in your laptop, you have to check some settings that are related to the Power Saving mode. To do so, follow these steps:
Open Control Panel and go to Hardware and Sound and click on Power Options.
Next, click on the “Change plan settings” option of your selected plan and then click the “Change advanced power settings” option.
After that, you should see the Power Options window, and here, expand the Wireless Adapter Settings and Power Saving Mode.
Now make sure that the Maximum Performance option is selected. If it’s not, select it and save the changes you’ve made.
Option 4 – Try to reset the TCP/IP
As you know, the TCP/IP or the Internet Protocol is the most important thing if you want to use the internet on your computer. That’s why if it ends up getting corrupted, you need to reset the TCP/IP to fix the problem. To reset TCP/IP, refer to these steps:
In the Windows start the search, type “command prompt” and right-click on Command Prompt from the search results.
Then select the “Run as administrator” option to open Command Prompt with admin privileges.
After that, execute this command: netsh int ip reset resettcpip.txt
Once it’s done, exit Command Prompt and restart your computer and then check if the error is now fixed.
Option 5 – Temporarily disable Firewall
On the other hand, the error could also be due to the Firewall software installed on your computer. Thus, disabling them or any security software installed on your computer is always a good idea you can try when you’re not able to access the shared drive on your computer. There are times when you encounter problems like the error “The default gateway is not available” due to interference of antivirus or security programs. Thus, you have to disable both your antivirus program and Windows Defender Firewall for the meantime and check if it fixes the error or not
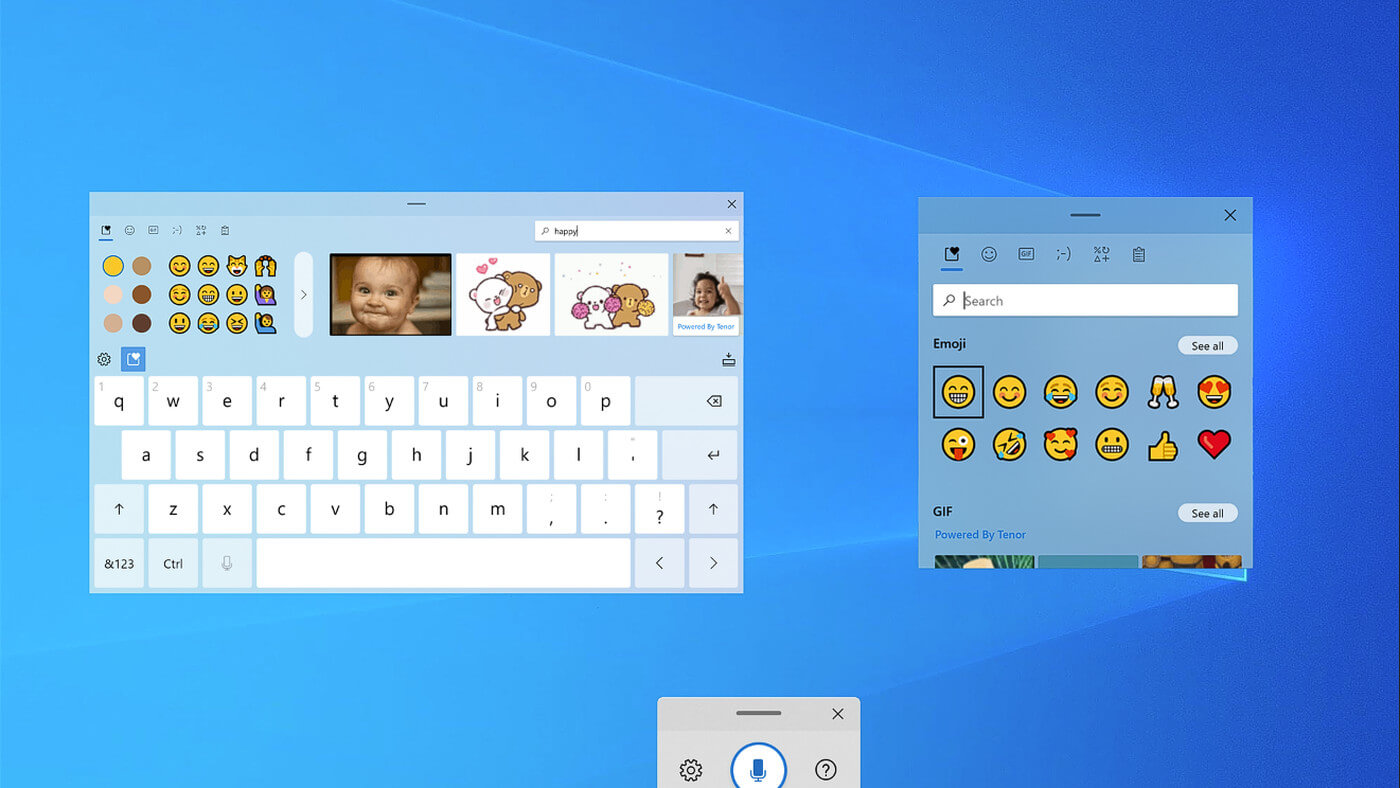
If by any chance you are working on a touchscreen PC, tablet, or any similar device and have no access to a hardware keyboard there is a way to place Touch Keyboard on your screen for easy typing, and you can enable icon on the taskbar for easy access.
Enabling the Touch Keyboard
Right-click on the Taskbar
Select Taskbar Settings
Go to Personalization > Taskbar
Click on Taskbar Corner Icons to expand it
Click on the switch next to Touch Keyboard to turn it ON
Close settings
The icon will immediately appear on the Taskbar in the lower right corner. Clicking the icon virtual keyboard will appear on the lower part of the screen.
You can use this keyboard to type in applications the same as you were typing on hardware one.
By taping on X in the upper right corner, you will hide the keyboard. Tap on the icon in Taskbar to bring it up again.
Hide the Taskbar icon
If you do not want to use Touch Keyboard anymore you can easily hide the icon:
Right-click on the Taskbar
Select Taskbar Settings
Go to Personalization > Taskbar
Click on Taskbar Corner Icons to expand it
Click on the switch next to Touch Keyboard to turn it OFF
DuckGoGo a popular private search engine is releasing its first browser soon that is focused on privacy like its search engine.
From the recent blog, Gabriel Weinberg, CEO of DuckDuckGo, has stated:
“Like we’ve done on mobile, DuckDuckGo for desktop will redefine user expectations of everyday online privacy,”
From everything that we have learned so far, the browser will be focused on making privacy super easy and simple, eliminating tons of different settings about privacy, and making the whole environment robust privacy protection all set by default. Settings will be applied in all fields, across search, browsing, email, and more. Gabriel also said that aim of the browser is not just a privacy browser, it is meant to be built and used as your everyday browser, for everyday use that protects your privacy as a bonus.
One interesting thing that was stated is that browser itself is built upon OS-provided rendering engines instead of typical Chromium. DuckDuckGo says this approach will strip away a lot of the unnecessary cruft and clutter that's accumulated over the years in major browsers. Also, the company stated that when compared to Chrome, the DuckDuckGo app desktop is cleaner, way more private and that early tests have found out that it is significantly faster as well.
Is this just corporate advertising or reality? We will see once the browser is released, or once it is released for public testing. Until then take care and happy holidays.
There are various complex tasks that take place under the hood while you upgrade or clean install the Windows operating system on a computer. Because of its complexity, there are times when you might encounter some errors when you upgrade or clean install Windows 10. One of the errors you could encounter is the error that states, “Windows could not prepare the computer to boot into the next phase of installation. To install Windows, restart the installation”.
This error does not only occur in Windows 10 as it could also occur on the other versions of Windows. There are a lot of possible causes for this error. It could be due to incompatible BIOS, corrupted system files, improper installation media or it could also be due to excessive hardware plugged into your computer and so on. Whatever the cause is, here are some potential fixes you need to check out to fix the problem.
Option 1 – Try to disconnect or disable newly installed hardware
In this option, you will have to disable or remove the hardware you’ve just installed recently since external devices could be the one that’s causing the Blue Screen of Death error to appear. To do that, just disconnect any external device that’s connected to your computer physically and then check if it fixes the error.
Option 2 – Try to update the BIOS
As you know, the BIOS is a sensitive part of a computer. Even though it is a software component, the functioning of the hardware depends on it largely. Thus, you must be careful when modifying something in the BIOS. So if you don’t know much about it, it’s best if you skip on this option and try the other ones instead. However, if you are well-versed in navigating the BIOS, then follow the steps below.
Tap the Win + R keys to open the Run dialog box.
Next, type “msinfo32” in the field and press Enter to open System Information.
From there, you should find a search field on the bottom where you have to search for the BIOS version and then press Enter.
After that, you should see the developer and version of the BIOS installed on your PC.
Go to your manufacturer’s website and then download the latest version of BIOS on your computer.
If you are using a laptop, make sure that you keep it plugged in until you have updated the BIOS.
Now double click on the downloaded file and install the new BIOS version in your computer.
Now restart your computer to apply the changes made.
Option 3 – Try to reconfigure all the created partitions
You could also try to reconfigure the partitions by deleting and recreating all the available partitions on your computer and then see if it fixes the problem.
Option 4 – Make a proper bootable USB Drive/Stick
To make a proper bootable USB drive, you need to use the Windows Media Creation tool. The Media Creation tool in Windows allows you to use the ISO installation file to make a bootable device that you can use to install Windows on your PC. Note that this is kind of different from the usual installation process as it could erase your computer’s current settings and data on the primary drive. Thus, before you proceed, you need to backup all your data into some removable drive and then use the Media Creation Tool to make a bootable drive.
After making the bootable drive, you need to plug it into your computer and then reboot.
Next, tap the F10 or Esc key to open the boot options.
Now set the boot priority of the removable drive the highest. Once the setup comes forth, follow the next onscreen instructions and install Windows without any problems.
We have all been there, unfortunately, the application freezes, and sometimes it can even freeze whole windows.
Well if the whole Windows freezes because of the application there is not much we can do except hard reset but if only the application freezes we can still kill it and return the PC in working condition.
The first thing you can try is to press ALT + F4, this shortcut is for closing the program, if the application is frozen Windows will try to close it when using this shortcut, and if it succeeds you will find yourself on the desktop environment in Windows with non-responsive application taken care of.
If however, this fails and the application is not closed, try ending it in the task manager. To open task manager press CTRL + SHIFT + ESC, locate unresponsive application select it, and click on the end task button on the bottom right.
If you encounter an error code of 0xa0000400 while trying to upgrade your Windows 10 computer using the Windows 10 Upgrade Assistant or the Windows 10 Media Creation Tool, then you might find this post useful as it will guide you in resolving this problem. When you get this error, you will see the following error message:
“Something went wrongYou can contact Microsoft support for help with this error. Here is the error code 0xa0000400.”
As you know, keeping your computer up to date with all the Windows Updates is important and is imperative especially if you are experiencing a couple of issues like the Windows Upgrade error 0xa0000400. At the time of writing, there is no specific cause that has been found for this error. However, there are some potential fixes that might help you. You can try to recreate the Windows 10 installation USB and get the ISO files or you could also get a newer version of the Windows Media Creation Tool, or turn off your internet connection at a specific time or run the Windows Update troubleshooter. For more details, refer to the options given below.
Option 1 – Try to recreate the Windows 10 installation USB
Recreating the Windows 10 installation USB might help in fixing the problem. You can use a USB drive to do so but make sure that it has a great read-write speed. Follow the steps below to recreate Windows 10 installation USB”
Click this link and then click the Download Tool Now button.
Next, click the “Use the tool to create installation media (USB flash drive, DVD, or ISO file)…” option and follow the next given instructions on the screen.
Now select the ISO file option in step 5.
After that, you should now have an ISO file.
Next, go to the location where you’ve downloaded the ISO file.
Then right-click on the Windows 10 ISO file and select the Open with option and then select File Explorer.
Now click on “setup.exe” and follow the next instructions that appear on the screen. When asked, you have to select either Nothing (clean install) or Keep personal files only option. Take note that you must not select the “Keep personal files, apps, and Windows settings since it doesn’t really work.
Option 2 – Try turning off the Internet connection at a specific time
You might want to turn off your internet connection at a specific time. This option can be quite tricky so what you need to do is to disconnect the internet connection when the update is downloaded using the Windows Upgrade tool. It’s actually okay since all the files you need would be downloaded safely and the Windows Upgrade tool will be the one to install the newer updates using those files.
Option 3 – Try to get a newer version of the Windows Media Creation tool
You can also fix the Windows Upgrade error 0xa0000400 by using the latest version of the Windows Media Creation tool. And so if what you have is an older version, you need to update it in order to resolve the error and upgrade your Windows 10 computer.
Option 4 – Run the Windows Update Troubleshooter
Running the built-in Windows Update troubleshooter is one of the things you can first check out as it is known to automatically resolve any Windows Update or upgrade errors like error code 0x800701E3. To run it, go to Settings and then select Troubleshoot from the options. From there, click on Windows Update and then click the “Run the troubleshooter” button. After that, follow the next on-screen instructions and you should be good to go.
Option 5 – Try running Disk Cleanup
You might want to run the Disk Cleanup utility as it is a useful tool that could delete temporary and useless files in your computer.
Tap the Win + R keys to open the Run dialog box and then type “cleanmgr” in the field and hit Enter to open the Disk Cleanup window.
After that, select the drive you want to clean.
Now click OK to clean the disk and restart your computer.
You may experience error code 24 when you try to use a device on your PC that is not properly installed or its driver is corrupted. Code 24 is a Device Manager error and it pops up on your computer screen in the following format:
“This device is not present, is not working properly, or does not have all its drivers installed. (Code 24)”
Solution
Error Causes
Error code 24 may be triggered due to several reasons. However, the most common causes for this error code include:
Incorrect device installation
Hardware failure/ conflict
Corrupted or outdated driver
Device prepared for removal
It is recommended to resolve the error code to ensure your PC works at its optimal performance. Error code 24 can lower the device functionality and PC performance dramatically.
Further Information and Manual Repair
Since this error code can mean several different things, troubleshooting it can be quite tricky but to make it simple to resolve, we have listed down some easy methods to repair error code 24.
Try these methods to fix error 24 on your PC and ensure your system works at its optimal pace.
Let’s get started….
Method 1 - Update the BIOS on Your Motherboard
Problems with BIOS, the controlling software in the PC motherboard, can sometimes trigger hardware conflicts resulting in Device Manager error code pop-ups.
In such a scenario, it is advisable to update BIOS. To update, go to your PC motherboard manufacturer’s website. Here you will be able to find instructions on updating BIOS.
Follow the instructions carefully to resolve error code 24 on your system. If the error code still persists, then try other methods discussed below.
Method 2 - Remove New Devices
If you experienced code 24 on your PC after installing new devices, then it is advisable to remove them to resolve the error code.
If the device is attached to your computer, then simply disconnect and remove it immediately. Once you disconnect it, reboot your system to activate changes.
Method 3 - Update Drivers
If device removal does not resolve the problem, then consider updating the device driver. Code 24 is also related to driver problems.
It can occur if a device driver is corrupted or outdated. In such an event, it is advisable to update the driver by installing the new and latest device driver version on your PC.
For doing this, simply download the latest device driver version from the manufacturer’s website and update it.
Method 4 - Install DriverFIX for Both Device Driver Update and Safe Device Removal
Finding problematic drivers and the latest device driver versions to update them, however, can be time-consuming and sometimes even frustrating. To avoid being in this situation, it is advisable to download DriverFIX.
DriverFIX is a cutting-edge, user-friendly and an innovative program exclusively designed to resolve device driver related issues and problems on computer systems
It is integrated with the newest technology and intelligent programming system that enables and empowers PC users like you to repair device driver error codes in seconds.
Once you install this software on your PC, simply run it. The software program instantly detects all problematic drivers and updates them with their latest versions available on the internet.
All this is done in mere seconds and it’s not time-consuming at all. Moreover, device driver updates are performed frequently to ensure that you don’t experience any driver problems again.
With this software on your PC, you don’t have to worry about updating drivers regularly.
In addition to this, as we discussed above, driver code 24 can also occur due to new plugged-in devices. If that’s the reason, then DriverFIX can help you resolve this problem too.
It can help you manage and unplug USB devices safely from your PC. After installing DriverFIX, unplugging USB devices is easy and you don’t have to worry about data corruption or drive damage.
DriverFIX manages USB devices smoothly by making the ejecting process easy and safely removes hardware from your PC, thereby resolving error code 24 in no time.
DriverFIX is easy to install and use and is compatible with all Windows versions.
Click here to download DriverFIX and repair Device Manager error code 24 right away.


 If by any chance you are working on a touchscreen PC, tablet, or any similar device and have no access to a hardware keyboard there is a way to place Touch Keyboard on your screen for easy typing, and you can enable icon on the taskbar for easy access.
 From the recent blog, Gabriel Weinberg, CEO of DuckDuckGo, has stated:
