There is no doubt that the VLC media player is one of the best kinds of media players available today. However, it is not without any issues and one of the common issues encountered by users is VLC’s inability to be updated. And when you try to update VLC, you only get an error message saying, “An error occurred while checking for updates”.
This inability to update VLC can be quite a headache for many users especially the ones who are facing other issues in VLC and has to update it in order to resolve them. So how will you update VLC and fix its issues when you can’t even update it in the first place? Worry not as this post will help you out. Refer to the suggestions laid out below to resolve the issue in updating VLC.
Option 1 – Check if VLC is not being blocked by the Firewall
There are instances when the Firewall like the Windows Defender Firewall blocks VLC for some unknown reason without your knowledge. Thus, you need to allow VLC to get past the Firewall in order for you to fix the issue else you won’t be able to send out a network communication. To do that, follow the steps below.
Tap the Windows key + I to open the Settings app.
Then click on the Update & Security option.
After that, click on Windows Security and click the Open Windows Defender Security Center option. This will open the Windows Defender antivirus and antimalware program.
From there, click on Firewall & network protection.
Next, click on Allow an app through Firewall. You should see a list of programs. Scroll down until you see VLC and make sure that all the boxes are ticked including the Public and Private ones.
Once you’re done, restart your PC and then try updating VLC again.
Just open VLC and select the Help menu and click on Check for Updates.
Option 2 – Try running the VLC media player as an administrator
There are programs designed for Windows 10 that won’t work fully unless some parameters are met. In most cases, starting the program as an admin should resolve the problem, thus, that’s what you have to do to try and fix the “An error occurred while checking for updates” in VLC.
First, right-click on the VLC Media Player desktop icon and then select the “Run as administrator” option or you could also right-click on the icon and click on Properties.
After that, click the Compatibility tab and then tick the box labeled “Run this program as an administrator”.
Next, click the OK button and then open VLC again and try updating it. That should fix the problem.
The STOP Code 0x0000008E is essentially an error code that is displayed on the STOP message. This STOP message is also commonly known as Blue Screen of Death or BSOD for short. When this error occurs, usually messages like,
“STOP: 0x0000008E” or “KERNEL_MODE_EXCEPTION_NOT_HANDLED”
are displayed to the user.
Solution
Download Available to Completely Repair Error 0x0000008e
Error Causes
These errors are commonly caused by failures of memory hardware. However, viruses, hardware failures or issues with the device drivers may also trigger them.
If this error code appears but Windows is successfully able to recover from it, then the message ‘Windows has recovered from an unexpected shutdown’ is displayed to the users.
Regardless of what causes these errors, it is of paramount importance that counteractive measures are taken as soon as the error appears.
Further Information and Manual Repair
While this error can be removed in many ways, the most effective ones are listed below as follows.
The screen might be a fluke. Restart your system; the blue screen that appears to you may not be what it seems.
Have you just modified or installed new hardware or driver? If yes, it is highly likely that the change you have made has triggered the error. If this is the case, it is strongly recommended that you revert back to the original settings and check whether the blue screen appears again or not. If it does, you can fix it by reconfiguring or removing the hardware you have recently installed. You can perform System Restore or you can go back to the previous versions if you have installed a new driver.
To keep this error from occurring in the future, it is strongly advised that you test your RAM. Damaged memory or one that’s unable to perform in the usual manner is often the reason this error occurs.
Ensure appropriate installation of your system memory. If you have installed memory in a way other than advised by your memory manufacturer that it may lead to STOP 0x0000008E error or other problems.
Misconfigured or over-clocked memory settings can cause STOP 0x0000008E errors as well. To remedy this situation, it is best advised to return the BIOS settings to their default level.
If you haven’t updated your Windows, apply all the updates you come across. Patches and service packs specifically address such issues.
As you know, “JPEG” is one of the commonly used formats for image files which is a compression of digital images. It is one of the topmost used file formats by mobile phones and digital cameras and usually achieves a 10:1 compression with little visible loss in the quality of the image.
There are tons of cases as of late, most particularly after the latest Windows 10 update where users were not able to open JPEG files on their PCs. Every time they try to open any JPEG file, they either get an error or nothing happens at all. This issue could be due to the default handler application for JPEG applications not being set or there could be some third-party image viewer not working properly. To fix this issue with JPEG files, refer to the troubleshooting options below.
Option 1 – Try to change the file type association
You need to check if the file type association of the JPEG files are correctly set or not since there are tons of third party programs that change the file type association automatically to themselves without your permission the instant they are installed and so if any of these third-party programs are broken, then naturally, your JPEG files won’t really open. That’s why you can try changing the setting to the default photo viewer instead of the third-party one. To do so, follow the steps below.
Tap the Win + R keys to open the Run dialog box.
Then type in “control panel” in the field and hit Enter to open the Control Panel.
After opening Control Panel, click on the Programs category and select the “Default Programs” option from the menu.
Next, select the second option “Associate a file type or protocol with a program” and then select the “Choose default apps by file type” option.
After that, click on the .jpg file extension and choose the option from the pop-up.
Now restart your PC to refresh all your programs and then see if it has fixed the problem or not.
Option 2 – Try to update your computer
Microsoft frequently releases updates to target bugs and improve users’ experience. And this particular error where JPEG files won’t open is already acknowledged by Microsoft so you need to make sure that your Windows 10 PC is updated to the latest released update and that there are no pending updates.
Tap the Win + S keys to open Search and then type in “update” in the field and open the system setting from the search results.
After that, check for updates and then download and install them if needed.
Now restart your PC once the update is done and check if you can now open JPEG files.
Option 3 – Try to reset the Photos app via Settings
Resetting the Photos app could also help you in fixing the problem. Note that this option will reset all the configurations and your data associated with your Photos and makes the application go into a state when you first started using it and that this option will fix any discrepancies that your application might be experiencing right now.
Tap the Win + S keys to open the search bar.
Then type in “settings” in the field to open the Settings application.
After opening Settings, click the “Apps” category.
From there, a list of applications installed on your computer will appear.
Navigate through these applications until you find the Photos app and then click on the Advanced options.
Afterward, click the Reset button that appears on the next screen. Then a new pop-up comes up and will warn you that all the preferences, as well as sign-in information, will be lost. Click on “Reset” anyway to proceed in resetting the Photos app.
Restart your PC once the reset is done.
Option 4 – Try to reinstall the Photos app
Before you start using other third-party image viewers just yet, you can try to reinstall the Photos app first. Thus, if there is something wrong with it, it will instantly get fixed right after it reinstalls. Just take note that this option requires administrative privileges so you need to be logged in as an administrator.
The first thing you have to do is tap the Windows + S keys and type in “PowerShell”.
Next, right-click on the file and click on the “Run as administrator” option from the context menu.
Once PowerShell is opened, execute this command: get-appxpackage *Microsoft.Windows.Photos* | remove-appxpackage
The command you just entered will remove the Photos app. After the process is done, go to the Microsoft Store and look for Microsoft Photos then download and install it again.
If you have been stuck on allocating disk space on steam you know how annoying this error could be. Here you are, with your new game eager to play it and relax a little and all of the sudden steam gets stuck on allocating disc space.
Luckily this error is fixable, follow provided guide to fix the error and continue with installing the game.
Restart computer
An old age solution of turning it off and turning it back on but in this case, it works 90% of the time.
Run Steam as administrator
Allocating disk space when done by a third-party application can be a task that requires privileges higher than the normal user. Find the steam executable file in the installation folder, right-click on it and run it as an administrator
Clear Steam cache
Launch Steam in admin mode.
Once in the client, click on Steam at the top left corner of the screen.
From the drop-down box, click on Settings.
Once in the Settings, navigate to the Downloads tab.
Click the Clear Download Cache option.
Click OK on the prompt to confirm your action. Wait for the process to complete.
When done, save changes and exit the client.
Change download server
Launch Steam client in admin mode.
Once in the client, click on Steam at the top left corner of the screen.
From the drop-down box, click on Settings.
Once in the Settings, navigate to the Downloads tab.
Click the drop-down menu under the Download Region.
Choose a different server to download from.
Exit the Steam client.
Refresh installation files
Kill a Steam process in Task Manager.
Navigate to your Steam folder
Inside the Steam folder, select everything except the steamapps folder and the Steam.exe executable file.
Tap the Delete key on your keyboard.
Turn off firewall
Firewall can prevent steam and cut access to system operations, disable firewall to fix this issue.
Stop overclocking
If you have overclocked your PC, you can simply reverse the change. The steps you will need to take depends on the overclocking software. Launch the software and look for the option to stop the overclocking. Once done, restart your computer, rerun the game installation.
One of the worst problems users can encounter on their computers is Blue Screen of Death errors as some of them are quite hard to fix. One of them is the “The driver detected a controller error” Blue Screen error. It could be followed by “DeviceIdeIdeport0 OR”, “on deviceharddisk0dr0”, or “DR3” or the name of the drive or port that’s causing the problem. If you are one of the users who encountered this error, then the suggestions provided in this post would definitely help you in fixing the problem.
Option 1 – Try to disconnect and reconnect all hardware and cables
A lot of users reported that they were able to fix the problem by disconnecting and reconnecting cables and hardware like scanners, printers, cameras can help in fixing the problem. In addition, you can also boot your computer in a Clean Boot State so that you can find the problematic hardware by hit and trial method. Refer to the steps below to do so:
Log onto your PC as an administrator.
Type in MSConfig in the Start Search to open the System Configuration utility.
From there, go to the General tab and click “Selective startup”.
Clear the “Load Startup items” check box and make sure that the “Load System Services” and “Use Original boot configuration” options are checked.
Next, click the Services tab and select the “Hide All Microsoft Services” check box.
Click Disable all.
Click on Apply/OK and restart your PC. (This will put your PC into a Clean Boot State. And configure Windows to use the usual startup, just simply undo the changes.)
Option 2 – Update the device drivers
Updating the outdated device drivers in your computer can also help in fixing the problem. To do so, refer to these steps:
First, boot your computer into Safe Mode.
After that, tap the Win + R keys to launch Run.
Type in devmgmt.msc into the box and tap Enter or click OK to open the Device Manager.
After that, a list of device drivers will be displayed. From there, look for any outdated device drivers and click on each one of them.
After that, right-click on each entry of the device drivers and select the “Uninstall Device” option from the menu.
Now restart your computer.
After restarting your computer, go to the Settings app and Check for Updates in the Windows Update section.
Option 3 – Try to update the BIOS
Updating the BIOS can help you fix the ATTEMPTED_WRITE_TO_READONLY_MEMORY BSOD error but as you know, BIOS is a sensitive part of a computer. Even though it is a software component, the functioning of the hardware depends on it largely. Thus, you must be careful when modifying something in the BIOS. So if you don’t know much about it, it’s best if you skip on this option and try the other ones instead. However, if you are well-versed in navigating the BIOS, then follow the steps below.
Tap the Win + R keys to open the Run dialog box.
Next, type “msinfo32” in the field and press Enter to open System Information.
From there, you should find a search field on the bottom where you have to search for the BIOS version and then press Enter.
After that, you should see the developer and version of the BIOS installed on your PC.
Go to your manufacturer’s website and then download the latest version of BIOS on your computer.
If you are using a laptop, make sure that you keep it plugged in until you have updated the BIOS.
Now double click on the downloaded file and install the new BIOS version on your computer.
Now restart your computer to apply the changes made.
Option 4 – Try running the Blue Screen Troubleshooter
You might also want to run the Blue Screen troubleshooter. It is one of the built-in tools in Windows 10 that helps users in fixing system issues including Blue Screen errors. It can be found in the Settings Troubleshooters page. To use it, refer to these steps:
Tap the Win + I keys to open the Settings panel.
Then go to Update & Security > Troubleshoot.
From there, look for the option called “Blue Screen” on your right-hand side and then click the “Run the troubleshooter” button to run the Blue Screen Troubleshooter and then follow the next on-screen options. Note that you might have to boot your PC into Safe Mode.
Option 5 – Try running the Memory Diagnostic Tool
The Memory Diagnostic tool in windows can help resolve the “The driver detected a controller error” Blue Screen error by checking and automatically fixing any memory-based issues. To run it, refer to these steps:
Tap the Win + R keys to open Run and type mdsched.exe and hit Enter to open the Windows Memory Diagnostic Tool.
After that, it will give two options such as:
Restart now and check for problems (Recommended)
Check for problems the next time I start my computer
Once your computer has restarted, perform a basic scan or you could also go for the “Advanced” options such as “Test mix” or “Pass count”. Simply tap the F10 key to start the test.
Note: After you select your preferred option, your computer will restart and check for memory-based issues. If it finds any issues, it will automatically fix them and if there’s no issue found, then it’s most likely not a memory-based issue so you should try the other options given below.
Option 6 – Replace your motherboard
If your computer is still under warranty, you should consider replacing your computer’s motherboard in case the options given above failed to work in fixing the Blue Screen error.
If by any chance you are working on a touchscreen PC, tablet, or any similar device and have no access to a hardware keyboard there is a way to place Touch Keyboard on your screen for easy typing, and you can enable icon on the taskbar for easy access.
Enabling the Touch Keyboard
Right-click on the Taskbar
Select Taskbar Settings
Go to Personalization > Taskbar
Click on Taskbar Corner Icons to expand it
Click on the switch next to Touch Keyboard to turn it ON
Close settings
The icon will immediately appear on the Taskbar in the lower right corner. Clicking the icon virtual keyboard will appear on the lower part of the screen.
You can use this keyboard to type in applications the same as you were typing on hardware one.
By taping on X in the upper right corner, you will hide the keyboard. Tap on the icon in Taskbar to bring it up again.
Hide the Taskbar icon
If you do not want to use Touch Keyboard anymore you can easily hide the icon:
Right-click on the Taskbar
Select Taskbar Settings
Go to Personalization > Taskbar
Click on Taskbar Corner Icons to expand it
Click on the switch next to Touch Keyboard to turn it OFF
To turn password login in Windows 10 you will need approximately one minute of your time.
So let's do it fast and efficient
Press ⊞ WINDOWS + X to open the secret menu
Click on command prompt (admin)Type in command prompt following:
As you know, each time you log out of your Windows 10 computer, it will take you to the login screen where you can switch users or log back in. But there are instances where Windows 10 remains stuck on the signing out screen, along with a blue spinning circle and all you can see is the process of your computer signing out, however, it does not progress and only gets stuck there. Thus, in this post, you will be guided on how you can resolve such an issue on your Windows 10 computer.
So if you are one of the users who experience the same problem, there are several fixes you can check out if your computer is stuck on the signing out screen with a blue spinning circle. You can try to force shutdown your computer or troubleshoot the problem in a Clean Boot State. You could also try to check the status of the User Profile Service or repair User Profile, as well as run System Restore. For more details, refer to each one of the suggestions provided below. But before you troubleshoot the problem, make sure that you are logged in to your computer as an administrator.
Option 1 – Try to force shutdown your computer
The first thing you can do is to force reboot your computer as this simple fix could help in fixing the problem. This option is quite simple, just make sure that before you do it, you have to save all your work.
First, turn on your computer and press and hold the power button for at least 30 seconds. You might notice the screen flashing or making any changes, just ignore it.
After that, plug out and plug in your computer and automatically turn it on.
Once done, check if the issue is now fixed or not.
Option 2 – Put your computer in a Clean Boot State
It is possible that some third-party application is causing your computer to get stuck in the signing out screen. So you can try putting your computer in a Clean Boot State and see if it fixes the problem.
Log onto your PC as an administrator.
Type in MSConfig in the Start Search to open the System Configuration utility.
From there, go to the General tab and click “Selective startup”.
Clear the “Load Startup items” checkbox and make sure that the “Load System Services” and “Use Original boot configuration” options are checked.
Next, click the Services tab and select the “Hide All Microsoft Services” checkbox.
Click Disable all.
Click on Apply/OK and restart your PC. (This will put your PC into a Clean Boot State. And configure Windows to use the usual startup, just simply undo the changes.)
Once your computer is in a Clean Boot State, you should now be able to sign out or sign in without any problem.
Option 3 – Try checking the status of the User Profile Service
If forcing your computer to shut down or putting your computer in a Clean Boot State didn’t fix the problem, you can try to check the status of the User Profile Service since it is the one responsible for loading and unloading user profiles. Thus, if this service is disabled or stopped, you will no longer be able to sign out or sign in successfully.
Tap the Win + R keys to launch the Run utility and type “services.msc” in the field and hit Enter to open the Services Manager.
From there, look for the User Profile Service and make sure that its Startup Type is set to Automatic and that its status is “Started”.
Once done, exit the Services Manager and see if the issue is resolved.
Option 4 – Try to repair your corrupted profile via Registry
In this second option, you can try to repair the corrupted profile using the Registry but before you proceed, make sure to create a System Restore Point and then follow the steps below.
Tap the Win + R keys to open the Run dialog box.
Then type “regedit” in the field and hit Enter or click OK to open the Registry Editor.
Next, go to this registry key: ComputerHKEY_LOCAL_MACHINESOFTWAREMicrosoftWindows NTCurrentVersionProfileList
Once you’ve opened the registry key, you should see a list of all the user profiles on your computer. Now click on each S-1-5 folder and look for the “ProfileImagePath” entry and double click on it to check which user account it is related to. You will see a path like “CUsersACK” where “ACK” is the username.
You should know which of the user account is corrupted. Just look for a key named “RefCount” and change its Value data to “0” and click OK. And if it isn’t available, simply right-click on the right pane and create it.
After that, double click on the key named “State” and make sure that the Value data is “0” and click OK.
Exit the Registry Editor and restart your computer to apply the changes made and then check if it fixed the problem or not.
Option 5 – Run System Restore
Tap the Win + R keys to open the Run dialog box.
After that, type in “sysdm.cpl” in the field and tap Enter.
Next, go to the System Protection tab then click the System Restore button. This will open a new window where you have to select your preferred System Restore point.
After that, follow the on-screen instructions to finish the process and then restart your computer and check if the problem is fixed or not.
A surprisingly large amount of things present at your home can and do interfere with your wi-fi signal making it weak so devices are dropping it, having trouble connecting, or being slow.
Hello and welcome to our latest article where we will take a look at all things that are present in a lot of homes but are very bad for your WI-Fi signal.
Bad router placement
Having a router in a bad position can have some really large effects on WI-Fi signal strength and its availability. Usually, we do not give great attention to where we are placing our router but it has been proved over and over again that being close to certain objects does indeed have a great influence on the wireless signal strength and performance.
So, what are these objects and bad positions where we could place the router and effectively kill his Wi-Fi capabilities?
Fish Tanks
Water will block all radio waves including Wi-FI signals and waves themselves, so having a router next to the aquarium or any large source of water is a bad idea. You should always look at water as something bad for your Wi-Fi and move your router away from it as far as possible.
Bookshelves
Paper is another story and example of the dampening effect on radio waves. Did you know that various patterns of paper are used in silent rooms and recording studios in order to eliminate sound reflection from surfaces? Well besides absorbing sound waves, the paper also absorbs Wi-Fi signals and if you have a large bookshelf with a lot of books packed one beside another you just have a great wall of signal absorbing.
Mirrors
The problem with mirrors is in their coating that goes over the glass in order to turn it into the mirror, that coating is metal and as such, it is absorbing signals in large amounts. If you have an old or high-quality mirror that has a silver coating things are even worse since silver will absorb even more waves than modern cheap ones.
TV
Yup, TV is also on this list and for a similar reason as a mirror, although TV does not have coatings of metal, they have something even worse: a large metal plating on the back. Metal plating is there to produce structural integrity of the TV set and provide it with shielding from electromagnetic waves and as such it will prevent Wi-Fi waves as well. Do not place the router behind your TV.
Things that influence signals in homes
Any kind of metal decoration
Now when we covered mirrors and TV because of the metal they have, we must take a look at the metal itself. Any kind of metal stuff that you might have like baskets, figures, statues, frames, etc will effectively block your signal.
Kitchen appliances and Home utilities
Kitchen appliances like refrigerators, microwaves, ovens, stoves, etc. along with home appliances and utilities like dishwashers, washing machines, dryers, etc are large metal objects enclosed in a metal cage that will block signals from spreading further and it is no secret that most kitchens have weaker Wi-Fi because of this reason.
Home gyms
This is a logical conclusion as to everything explained so far if you have a workout room or small gym at home it is probably filled with weights that are metal and have mirrors inside, all of that will interfere and block signals.
Things blocking your Wi-Fi that you have no easy control over
Walls
Thick walls will dampen signals, thick walls from bricks will dampen even more and concrete walls will kill it almost completely. Any kind of metal reinforcement wiring inside walls will reduce and kill signals as well.
Floors and ceiling
This is somewhat important if you have a floor beneath or under the room where is your router located, but for the same reason how walls are blocking your signal floor and ceiling can do it as well, especially since most of the time they are made of some stronger material like concrete with metal fence inside.
Heating systems
If you have a heating system that is composed of metal radiators with water inside, then in terms of Wi-Fi signal strength you have an aquarium but in a metal box, and as such it will greatly reduce signal strength.
When downloading a Windows update, it is important to remember that these updates are what keeps your computer safe. Some users have reported seeing error code 0x80070490 when allowing updates for their Windows PC. This error code may appear when the user is trying to connect to the update site for Windows and maybe a result of a corrupted CBS manifest. Having this error code will not only stop the update of the system, but it will also certainly halt any work being done with the computer. Quite a few Windows users have written in complaints about this error while updating from any prior Windows update to Windows 10.
Common symptoms include:
While a user is performing the updates, the Windows computer will stop running the updates, and it will show the error code 0x80070490.
Windows updates will not install any new features and will not install security patches.
The computer will not continue with the Windows update, and it may revert back to the previous state that the computer was in, prior to attempting the updates.
Error Causes
There is not a lot known about what exactly causes the error code 0x80070490, but it is something critical that makes Windows abruptly stop its updates. It could be caused by a simple glitch in the computer system, or it could be caused by a larger problem. One thought is that the CBS (Component-Based Servicing) manifest can be corrupt. Another thought is that the computer's anti-virus software may be interfering with the computer's ability to perform the necessary updates.
Further Information and Manual Repair
There is very little information known about error code 0x80070490 and why it exists, but there are a few methods in which to correct it. Users should be careful when trying to fix this error themselves. If the user feels that the methods are too complicated or they are uncomfortable taking it on themselves, they should contact a Windows repair technician to fix the problem. Not all methods listed will suit the user's needs, but it is dependent upon the problem at hand as to which method will be the best fit to fix the error code. If these steps are taken and the error is not corrected, it is vital to contact the Windows repair technician.
Method One: Creating a new local account
Create a new local account on the computer, and allow administrator privileges on it. Next, move all of your documents and personal files to the new account. Delete the old account (you will no longer be using this) and switch over to the new one. After switching to the new local account, add the Microsoft account to it.
Method Two: Delete user ID, Store cache from the registry
You will need to open the Registry Editor. Do this by pressing the Windows Key and R, then typing in “Regedit”. After this is typed in, press Enter or click the OK button to start the registry editor.
When this starts, you will need to navigate all the way to the following key on the left pane:
HKEY_LOCAL_MACHINESOFTWAREMicrosoftWindowsCurrentVersionAppxAppxAllUserStoreAfter this, find the key that is similar to this: S-1-5-21-1505978256-3813739684-4272618129-1016
NOTE: this is just an example. The keys will be in a similar format but will not look exactly like this.
Select all the keys that look like this, and then delete them. After these keys are deleted, close the Registry Editor and restart the computer.
Method Three: Check to see if BITS, MSI Installer, Cryptographic, and Windows Update Services are running
Press the Windows key and R. Then, type in services.msc. After the Services window starts up, find the following services: BITS, MSI Installer, Cryptographic, and Windows Update Services. When these services are found, make sure that they are up and running. If one or more of these services is not running, make sure that they are started. To do this, select the service and then click on Start the Service.
Method Four: Windows Update Troubleshooting
Press the Windows key plus W and then type in “troubleshooting”. Select Troubleshooting. On the top left corner, select View All. Click on Windows Update troubleshooter. After this, follow the on-screen instructions in order to run the troubleshooter. After the troubleshooter has run, the issue should be fixed.
Although the Google Chrome browser is one of the most used browsers, a lot of things could still go wrong when browsing the web using it. One of the errors you might encounter is the “ NETWORK_FAILED ” error. This kind of error in Chrome indicates that Chrome wasn’t able to send your request through the network connection. It could be that your computer has trouble connecting to a stable internet connection or there is some plugin in your Chrome browser that is causing the issue. The worst-case would be malware. But worry not for this post will guide you on what you can do when you encounter the NETWORK_FAILED error in Google Chrome. Make sure to follow each one of the options given below and see which one of them worked best for you.
Option 1 – Disable or remove any unwanted extensions in Chrome
As you know, browser extensions help in enhancing the browsing experience but there are also times when it does exactly the opposite, and such is the case with the NETWORK_FAILED error in Chrome. It could be that one of the extensions in your browser is the one that’s causing the trouble. To disable or remove these unwanted extensions, here’s what you have to do:
Launch Google Chrome, press Alt + F, move to More tools, and click Extensions.
Look for Search.tb.ask.com or any other unwanted add-ons, click the Recycle Bin button, and choose Remove.
Restart Google Chrome, then tap Alt + F, and select Settings.
Navigate to the On Startup section at the bottom.
Select “Open a specific page or set of pages”.
Click the More actions button next to the hijacker and click Remove.
Option 2 – Run the Malware Scanner and Cleanup tool in Chrome
If removing or disabling the unwanted extension didn’t help in fixing the error, you can try using the built-in malware scanner and cleanup tool in Google Chrome. These tools help you get rid of any unwanted pop-ups, ads, unusual Startup pages, toolbars, and even malware.
Option 2 – Run the Malware Scanner and Cleanup tool in Chrome
Launch Google Chrome and then tap the Alt + F keys.
After that, click on Settings.
Next, scroll down until you see the Advanced option, once you see it, click on it.
After clicking the Advanced option, go to the “Restore and clean up the option and click on the “Restore settings to their original defaults” option to reset Google Chrome.
Now restart Google Chrome.
Option 3 – Try to disable the Proxy
If you are using a proxy, you might want to consider disabling it as it could have something to do with the NETWORK_FAILED error.
Tap the Win + R keys to open the Run dialog box.
Then type “cpl” and hit Enter or click OK to open the Internet Properties.
After that, go to the Connections tab where you should see the LAN settings. Click on it.
Next, uncheck the “Use a Proxy Server for your LAN” and ensure that the “Automatically detect settings” option is checked as well.
Then click Ok and then Apply to save the changes made.
Restart your PC.
Option 4 – Flush DNS and reset TCP/IP
Click the Start button and type in “command prompt” in the field.
From the search results that appear, right click on Command Prompt and select the “Run as administrator” option.
After opening Command Prompt, you have to type each one of the commands listed below. Just make sure that after you type each command, you hit Enter
ipconfig /release
ipconfig /all
ipconfig /flushdns
ipconfig /renew
netsh int ip set dns
netsh winsock reset
After you key in the commands listed above, the DNS cache will be flushed and the Winsock, as well as the TCP/IP, will reset.
Now restart your computer and open Google Chrome then try opening the website you were trying to open earlier.
Option 5 – Delete the WLAN Profiles
Deleting the WLAN Profiles might be a good idea if you are not able to connect to the internet on your computer and if you’re using Wi-Fi. It could be that the networks that were connected previously have gone rogue which is why it is not connecting properly. And so deleting the WLAN profiles would be for the best.
That should do it.

 Error Causes
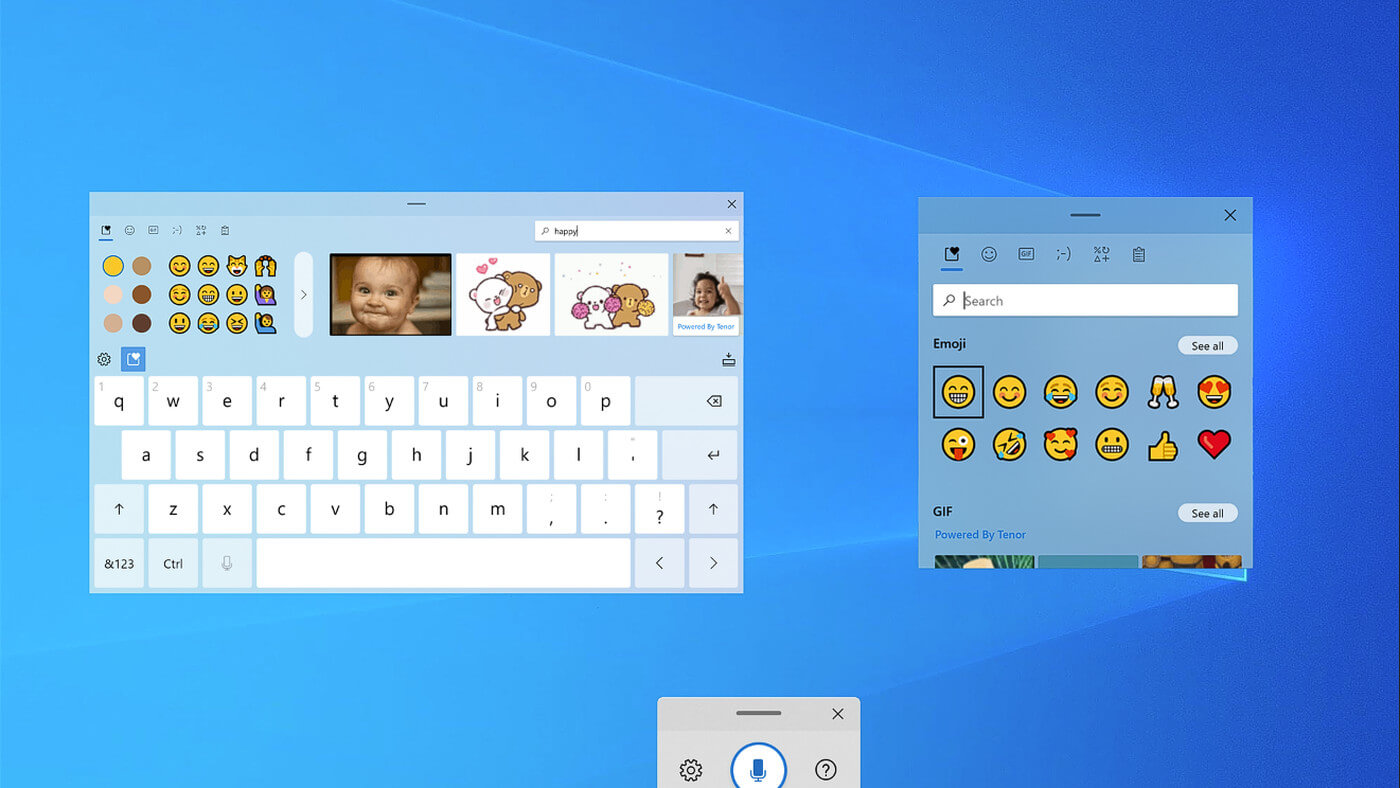 If by any chance you are working on a touchscreen PC, tablet, or any similar device and have no access to a hardware keyboard there is a way to place Touch Keyboard on your screen for easy typing, and you can enable icon on the taskbar for easy access.
 Click on command prompt (admin)
 Type in command prompt following:
