Error Code 0x8007041d is an error that arises during the Windows 10 Update process. In some cases, this error code can also arise during the Windows 10 Activation process. It is an error code that has been present in multiple versions of the software but usually arises when antivirus or registry issues interfere with the Windows Update or Activation software.
Common symptoms include:
Inability to download the needed Windows 10 updates
Inability to complete the Windows 10 Update process
If you are experiencing the Error Code 0x8007041d on your machine, there are several methods that you can use to attempt to resolve the problem. Several of the steps that are most successful for the resolution of this error require familiarity with registry and antivirus tools, so if you are unsure of your ability to complete these steps on your own, contact a qualified computer repair technician to assist you.
Solution
Error Causes
In most cases, Error Code 0x8007041d arises when there is a conflict between multiple antivirus or malware tools on the computer, if there is an issue in the Windows registry, or if your Windows Defender software is out of date. During the Windows Update process, the system checks to ensure that there are not any factors that are present that could introduce viruses to the system, so if there are any indicators that could present issues to the software, Error Code 0x8007041d will often arise.
Further Information and Manual Repair
For users who experience Error Code 0x8007041d, there are several steps that can be taken to resolve the issue. If the following methods are not successful for you or if you are unsure of your ability to undertake them on your own, contact a qualified Windows 10 computer technician.
Here are the best ways to attempt to fix Error Code 0x8007041d on your computer:
Method 1: Remove Additional Security Software Apart from Windows Defender
In some cases, having multiple versions of malware or antivirus software installed on your computer can cause the Windows system to create conflicts between them, which can interfere with your ability to update. During the update process, the system may attempt to determine if there is any malware present, and having multiple kinds of antivirus software present on the same machine may return mixed results.
If you currently are running antivirus software that is separate from Windows Defender, consider removing it from your computer prior to running the update software. This may allow you to successfully complete your update process without conflict. Additional software can be reinstalled after the update is complete, but make sure to keep both sets of software up to date in order to lessen the chances of encountering this error code again during future updates.
Method 2: Update Your Windows Defender Software
If you currently have Windows Defender as your primary antivirus software, check to see whether it is fully up to date. Out of date antivirus software can cause conflicts with the Windows Update process since the update to Windows 10 will not be able to be completed unless the system is free from viruses or malware.
If you are unsure of whether or not your Windows Defender is up to date, open it and run the process to check for updates, then re-attempt to run Windows Update. In some cases, you may want to restart your computer before running the Windows 10 Update process a second time.
Method 3: Run the Registry Repair Tool
Another issue that could cause Error Code 0x8007041d is a problem in the system registry. If you believe that this may be the case, run the Windows Registry Repair Tool on your machine to check for and resolve any issues. This is a fairly simple and straightforward tool to use, but it can help you to resolve any number of problems that may interfere with your ability to update your Windows 10 software.
If you have taken the steps listed above, restart your computer before attempting to proceed with the Windows Update process. If the three methods listed above are not successful in completely resolving Error Code 0x8007041d on your machine or if you are not comfortable in your ability to implement these steps on your own, contact a qualified Windows repair technician who is familiar with the Windows Update process to assist you.
If you wish to always have at your disposal a utility tool to fix these Windows 10 and other related issues when they do arise, download and install a powerful automated tool.
As you know, Airplane mode is the one that gets devices in such a state where all the wireless connections are turned off. However, recently, there are some reports from users claiming that the Airplane Mode turns on by itself in their Windows 10 computers. This kind of problem could be due to an error with the Network driver, third-party applications, and many other factors. Other users also reported that the Airplane Mode automatically flickers, while some stated that they aren’t able to toggle the option for Airplane mode.
There are several options you can try to resolve this problem. You can try to configure the Power Management settings for the driver or run the Network troubleshooter. You could also roll back, reinstall or update the Network driver, as well as troubleshoot the problem in a Clean Boot State. For more details, follow each one of the given options below.
Option 1 – Try configuring the Power Management settings for the driver
The first thing you can do to fix the problem is to try configuring the Power Management settings for the driver. How? Refer to these steps:
Tap the Win + X keys to open the WinX menu and from there, select the Device Manager to open it.
Next, expand the Network adapters and select the entry for your Wi-Fi hardware.
After that, right-click on it and select Properties.
From there, go to the Power Management tab and uncheck the “Allow the computer to turn off this device to save power” option.
Once done, restart your computer and see if it has fixed the problem.
Option 2 – Try to run the Network troubleshooter
To run the Network Troubleshooter, refer to these steps:
Open the Search bar on your computer and type in “troubleshoot” to open the Troubleshoot settings.
Next, scroll down and select the “Network Adapter” option from the right pane.
Then click on the Run Troubleshooter” button.
After that, your computer will check for any possible errors and will pinpoint the root cause of the problem if possible.
Restart your computer.
Option 3 – Try to update, rollback or reinstall the Network adapter drivers
The next thing you can do to resolve the problem is to update the Network Adapter drivers by following these steps:
Tap the Win + R keys to launch the Run window and then type in the “devmgmt.msc” command and hit Enter to open the Device Manager window.
Under the Device Manager, you will see a list of drivers. From there, look for the Network Adapters and expand them.
Look for the Broadcom Network Adapter and right-click on it, as well as other network adapters that have an exclamation icon, and update them all.
Restart your PC and see if it helped in fixing the problem.
Note: If updating the network drivers didn’t help in fixing the problem, you can also try to roll back the very same drivers from their previous versions and restart your Windows 10 PC. After that, the system itself will reinstall the drivers you just uninstalled. Alternatively, you can also download and install the drivers from the manufacturer’s website directly.
To reinstall the network adapter drivers, refer to these steps:
Open the Devices Manager from the Win X Menu.
Then locate the device drivers and right-click on them to open the Properties.
After that, switch to the Driver tab and click on the Uninstall Device button.
Follow the screen option to completely uninstall it.
Finally, restart your computer. It will just reinstall the device drivers automatically.
Option 4 – Try to reset the Network Adapter
You can also try to perform a Network Reset to resolve the problem. This will reset the entire network configuration including your IP address. To perform Network Reset, follow these steps:
Tap the Win + I keys to open Settings.
From there, go to the Network and Internet section.
Next, scroll down and look for “Network Reset” under the status pane.
After that, click on Network Reset and then on Reset now to start resetting the network configuration. Once done, check if it is able to fix the error or not.
Option 5 – Try putting your computer in a Clean Boot State
You can also troubleshoot the problem in a Clean Boot state. It could be that there are some third-party applications in your computer that are causing the Airplane Mode to behave in a strange way. So, to isolate this possibility, you need to boot your computer in a Clean Boot State be using these steps:
Log onto your PC as an administrator.
Type in MSConfig in the Start Search to open the System Configuration utility.
From there, go to the General tab and click “Selective startup”.
Clear the “Load Startup items” check box and make sure that the “Load System Services” and “Use Original boot configuration” options are checked.
Next, click the Services tab and select the “Hide All Microsoft Services” check box.
Click Disable all.
Click on Apply/OK and restart your PC. (This will put your PC into a Clean Boot State. And configure Windows to use the usual startup, just simply undo the changes.)
After you’ve set your computer into a Clean Boot State, try to observe if the Airplane mode is now back to normal or not.
Recently on errortools.com, we were talking about Cooler Master’s Orb X gaming chair that is an absolute beast and an amazing product. One downside of Orb X is its price. IW product line is somewhat competing with Orb X with a much more affordable price aiming to probably take customer base with lower income but offering them a great experience as well.
The first thing you will notice is a different design and somewhat feeling of cheaper quality if you compare it to Orb X but that is quite reasonable considering the chair itself is around 3.5 times cheaper than Orb X which really puts it in range of everyone can get it.
But does a much cheaper price means low quality? Let’s explore.
IW Unicorn
The 2021 CLUVENS BRAND newly issued model UNICORN has fully electrical tilting capabilities to 160 degrees, Reading light-two LED & RGB illumination lighting, manual open/close keyboard tray, and armrests. This model is suitable for home and office, and also gaming computer work environments.
It offers functions that enable the user to experience unprecedented comfort and quasi total immersion through strategically positioned 1-3 monitors, audio systems, and accessories. The result is a complete computer office, ergonomically optimized, with a minimal footprint that improves overall performance and productivity and health and comfort.
Sitting on a chair can help a lot for relieving health problems like lower back pain, herniated discs, sciatica, and neck pain and also enhance performance and viewing effects.
More Luxury and More comfortable:
Equipped with Luxury feeling reclining Gaming chair made with high-density Mold Shaping Foam and superior quality PU leather with very comfortable texture, electrical recline to 128 degrees, and more to 160 degrees for the flat position for the user.
More High-End Setting and more High-tech:
Manual push for open / close of big sized (87x34cm) Self-Balancing Keyboard tray, adjustable with 20cm distance range with Electrical control for the height of roof arm & monitors. Electrical control for reclining Zero Gravity position or even flat position, Manual adjusted Feet pedal for a more comfortable position for feet. Using a High-Quality PU leather Gaming chair that has Heat/Massage functions with it!
The IW-Unicorn monitor mounts allow the use of a single monitor up to Ultra-wide 49” or 43” in size or triple monitor setups up to 3 x 29” other monitors configurations are available upon request. (VESA standard)
IW Scorpion
Scorpion is basically a premium version of Unicorn with being able to hold more weight, having cup holders on the armrest, etc.
The look is also similar with Scorpion being more sinister-looking but overall Steel frame and chair are the same.
Conclusion
Sadly I have not personally experienced neither of these products including Orb X but from all information I have found and looked over, I would say these products are not trying to compete with each other.
Although Products are similar in nature, Orb X is aimed at hi end-users focusing on privacy and robustness while IW is filling the gap of users that would like an advanced chair but are not willing or ready to shell hi amount of money for it offering advanced chairs with advanced features in somewhat affordable price.
Stable Diffusion is a machine learning model developed by Stability AI to generate digital images from natural language descriptions. The model can be used for different tasks like generating image-to-image translations guided by text prompts and upscaling images.
Unlike competing models like DALL-E, Stable Diffusion is open source and does not artificially limit the images it produces. Stable diffusion was trained on a subset of the LAION-Aesthetics V2 data set. It can run on most consumer hardware equipped with a modest GPU and was hailed by PC World as "the next killer app for your PC".
Since Stable Diffusion is run locally and not in the cloud, as mentioned there is no limit to the number of images that you can produce but in order to use it you will have to get down a little dirty with setting your PC environment for it since it is not really an application, it is a command line text based descriptor that will use python to generate your images, so there is no install nor GUI.
In this guide, we will show you how to both install and run Stable Diffusion on your local PC so you can start producing some cool images all by yourself.
Hardware and software requirements
Make no mistake, Stable Diffusion will not run on a potato PC, in order to harvest the power of AI-generated imagery this is what you will need:
A GPU with at least 4GB of VRAM
10GB of hard disk space
Python and libraries (Miniconda3 installer will install everything you need)
The Stable Diffusion files
Git
Any OS (Windows, Linux, macOS)
Installing components
For this tutorial, we are covering the installation and running of Stable Diffusion on Windows PC. The steps presented here are presented in a way that installation can be performed on any operating system but precise instructions will be for Windows OS.
GIT
The first thing to do is to install GIT. It is a tool that will let you easily maintain and install repos from the internet. to install it go to: https://git-scm.com/ and click on download. Follow the instructions for your version of the operating system. If you are a developer you are familiar with GIT and if you already have it installed you can skip this step.
One thing that is important when installing GIT locally is to select to use it via the command line (the second option that says "Git from the command line and also from 3rd-party software").
Miniconda3
Now when we have GIT installed, next thing is to use Miniconda3 to install python and all required libraries that are needed. Get the installer at: https://docs.conda.io/en/latest/miniconda.html
Miniconda3 is basically an easy installer so you do not have to install tons of stuff manually from different websites and sources, it is nicely packaged in the installer that will take care of everything.
Stable Diffusion
After the previous two steps, we are ready now to actually install Stable Diffusion. Go to https://huggingface.co/CompVis/stable-diffusion#model-access and install the latest library (as of the writing of this article currently it is stable-diffusion-v1-4-original, the last one on the right), the library is almost 5GB in size so be prepared for big download.
Once downloaded click on the Windows start button and type in Miniconda3 and click on open. Create a folder and name it how you want on a drive of your choice. For this example, we will install it all in disk C under folder AI_art, follow the instructions below but use your own names and destination instead. Do not close Minicoda3 after typing commands!!!
cd c:/
mkdir AI_art
cd AI_art
Extract GitHub files that you have downloaded into your new folder and get back to Minicoda3 and type the next commands:
Let the whole process finish, some files are large and it might take a while. After the whole process is finished and completed, copy the checkpoint file that you have downloaded into: C:\AI_art\stable-diffusion-main\models\ldm\stable-diffusion-v1
After the file is copied rename it to model.ckpt and you are finished.
Running Stable Diffusion
The created environment is needed in order to actually use Stable Diffusion to create images. Each time you want to use it you will have to run it, so go into Miniconda3, and inside it type:
conda activate ldm
cd C:\AI_art\stable-diffusion-main
after we are inside the folder call the script with the parameters:
python scripts/txt2img.py --prompt "TXT DESCRIPTION OF IMAGE THAT YOU WANT TO CREATE" --plms --n_iter 5 --n_samples 1
and that's it, your image is created and it is located in C:\AI_art\stable-diffusion-main\outputs\txt2img-samples\samples
‘R6025 pure virtual function call’ is a runtime error that occurs suddenly on the screen and disrupts the program being run prior to it. This error display indicates that the program has been corrupted. R6025 runtime error usually occurs with the Visual C++ framework.
Solution
Error Causes
This error occurs when the C++ program crashes which is usually because of the malfunctioning or missing of the device driver or incomplete device driver files.
It happens because your application indirectly calls a pure virtual member function in a context where a call to the function is invalid. Most of the time, the compiler detects it and reports it as an error when building the application. R6025 error is usually detected at run time.
Further Information and Manual Repair
To fix the R6025 pure virtual function call error, you need to find the call to the pure virtual function. After you find the call, you need to rewrite the code so that it is not called again.
There are 2 ways to do this:
Alternative 1
One way to fix the R6025 pure virtual function call is to replace the function with an implementation that calls the Windows API function DebugBreak. The DebugBreak causes a hard-coded breakpoint.
Once the code stops running at this breakpoint, it is easy for you to view the call stack. By viewing the call stack you can identify the place where the function was actually called.
Alternative 2
Another quick way to find a call to a pure virtual function to fix the R6025 error is to set a breakpoint on the _purecall function that is usually found in PureVirt.c.
By breaking this function you can trace the problem occurring and rewrite the call to ensure the error does not occur and the program you are trying to develop on the Visual C++ framework is easily developed.
If R6025 Error is related to Windows Registry Problem Then here’s how you can fix the problem:
To fix the runtime error R6025, run registry cleaner software to scan and fix all errors. This alternative is suitable if the R6025 error is related to the Windows registry problem and where the error has occurred due to corrupted or malicious registry entries.
You can download the registry cleaner repair tool for free. Run it to scan errors and then click the fix error button to repair the problem immediately.
To develop a good understanding of the Sysdata.xml error code, it is first important to learn what is sysdata.xml file and its function. Sysdata.xml is a type of XML file. The .XML file extension is an Extensible Markup Language file.
XML-based formats have now become the default for many office productivity tools including Microsoft Office and LibreOffice. Furthermore, it has also come into common use for the interchange of data over the internet.
Sysdata.xml error code usually pops up when .XML based applications are unable to run and crash while loading. This is a type of BSoD (Blue Screen of Death) error code.
Common symptoms include:
System freeze
The screen turns blue
Sudden system shut down
Solution
Error Causes
The Sysdata.xml error code is triggered due to multiple reasons such as:
Faulty hardware
Malware or viral infection
Registry issues
No matter what the reason may be, it is advisable to fix this error code right away without any delays. This is a fatal error and can result in a system crash and loss of data. And recovering valuable lost data is the hardest.
Further Information and Manual Repair
Here are some of the effective and easy do it yourself methods to resolve this error on your system:
Method 1: Fix Faulty Hardware
Hardware issues may arise due to many reasons like manufacturing issues or voltage fluctuations. Electrical storms can cause power surges which may affect the hardware causing it to fail.
The best way to resolve this is to download the latest drivers for the problematic devices or alter the device configuration in the BIOS setup program.
To reconfigure the BIOS simply restart your PC and before Windows starts, press Del Key to access your BIOS.
Now find the factory reset option.
Select the option and press the button to load your factory defaults.
After that save changes and confirm your selection.
Reboot your PC to activate the changes.
Method 2: Scan for Viruses
Sometimes viruses and malware can disguise themselves in the .XML files which can cause them to get corrupted.
To resolve the issue, it is advisable to download a powerful antivirus and scan your entire PC for viruses. Remove the detected viruses to resolve the Sysdata.xml error on your system.
Method 3: Repair the Registry
If the registry is not cleaned frequently, it loads with unnecessary and obsolete files like the junk files and cookies.
These files clutter and damage the registry and eventually corrupt it and the important files like .XML files stored in it. To resolve the issue it is recommended to download Restoro.
It is a user-friendly and powerful PC Fixer embedded with a registry cleaner. It scans your entire PC for registry-related errors and removes them immediately. It cleans the cluttered registry and restores the damaged files thereby repairing the issue right away.
Click here to download Restoro.
A slow PC startup can be pretty annoying. This usually results from various computer issues. If your computer is acting sluggishly, here are four ways to speed up your PC startup.
Blue Screen of Death or Stop errors are definitely one of the most difficult issues to face in your Windows computer. One of them is the UNEXPECTED STORE EXCEPTION BSOD error. When you encounter this Stop error on your Windows 10 computer, this means that the store component has caught an unexpected exception. There are many potential causes for this error, but we’ve narrowed it down to a few specific causes – for one, this error could be caused by your antivirus program installed on your computer, two, it could also be caused by outdated hardware drivers on your computer, it could also be an error in the file system as well as some issue with the lock screen app, or even output to an unexpected port. Whichever the cause may be, you can use a couple of fixes laid out below. Make sure to carefully follow them.
Option 1 – Try to update your Display driver
First, boot your computer into Safe Mode.
After that, tap the Win + R keys to launch Run.
Type in devmgmt.msc into the box and tap Enter or click OK to open the Device Manager.
After that, a list of device drivers will be displayed. From there, look for the Display Adapters and click on them.
After that, right-click on each entry under the Display Adapters and select the “Uninstall Device” option from the menu.
Now restart your computer.
After restarting your computer, go to the Settings app and Check for Updates in the Windows Update section.
Note: You also have the option to go directly to the website of your graphics card manufacturers like NVIDIA, Intel, or AMD and go to the section called Drivers then check if there’s a new available update – if there is, download and install it.
Option 2 – Run both the System File Checker scan and DISM tool
If the problem is caused by corrupted system files, then you can use both the System File Checker and the DISM tool. To use them, follow the instructions below.
Tap the Win + X keys or right-click on the Start button and click the “Command Prompt (Admin)” option. Alternatively, you can also search for “cmd” in the Cortana search box and right-click on Command Prompt from the search results, and select the “Run as administrator” option.
After that, if a User Account Control prompt pops up, click on Yes to proceed.
Once the Command Prompt window is pulled up, type the following command and hit Enter:
DISM.exe /Online /Cleanup-image /Restorehealth
Wait for the process to be completed. Once it’s done, type the following command and hit Enter:
sfc /scannow
The command will start a system scan which will take a few whiles before it finishes. Once it’s done, you could get the following results:
Windows Resource Protection did not find any integrity violations.
Windows Resource Protection found corrupt files and successfully repaired them.
Windows Resource Protection found corrupt files but was unable to fix some of them.
Restart your PC.
Note: You should see the “Windows Resource Protection found corrupt files and successfully repaired them. Details are included in the CBS.Log %WinDir%LogsCBSCBS.log” message on your screen.
On the other hand, if you see the “Windows Resource Protection found corrupt files but was unable to fix some of them. Details are included in the CBS.Log %WinDir%LogsCBSCBS.log” message instead, then you should run the following command in Command Prompt:
The command you entered will open up the logs on your Desktop where you can look for files that are causing the error on your computer manually.
Option 3 – Disable Fast Start-up
If you want your computer to boot faster, then you might have enabled Fast Start-up. This feature is ideal for computers that are using a hard disk drive. However, turning on this feature also means that when the computer boots, it might lag some drivers that are loaded when it initially boots up. Thus, it might be the potential cause of the UNEXPECTED STORE EXCEPTION BSOD error. Thus, you need to disable Fast Start-up. To do that, follow these steps:
Boot your PC into Safe Mode.
Then tap the Win + R keys to open the Run dialog box.
Next, type in “control” to open Control Panel.
After that, select Hardware and Sound and click on Power Options.
Select “Choose what the power buttons do” from the left side menu pane and click on Change settings that are currently unavailable.
Afterward, uncheck the “Turn on fast startup (Recommended)” entry and click on Save Changes.
Now restart your PC for the changes to take effect and then check if the problem’s fixed afterward.
Option 4 – Try to run the Chkdsk utility
You can also run the Chkdsk utility to resolve the UNEXPECTED STORE EXCEPTION BSOD error. If your hard drive has issues with integrity, the update will really fail as the system will think that it’s not healthy and that’s where the Chkdsk utility comes in. The Chkdsk utility repairs hard drive errors that might be causing the problem.
Open Command Prompt with admin privileges.
After opening Command Prompt, execute the following command and hit Enter:
chkdsk /f /r
Wait for the process to be completed and then restart your computer.
One of the most useful utilities on a Windows 10 computer is the Windows File Explorer. It is undeniably one of the File Managers out there full of features on all the platforms. However, it is not without its issues and one of the most common ones most users encounter is when you are trying to open a folder or a location on File Explorer and it displays a message saying, “Working on it…” as it tries to load the content of that location or folder. This kind of issue mainly occurs to computers that run on an HDD although that doesn’t mean that it can’t happen to other computers that run an SDD.
And so if the File Explorer on your Windows 10 computer keeps getting stuck on the “Working on it…” message along with a green animation bar moving very slowly while loading the contents of the folder, then it’s best if you follow the options given below to resolve this problem.
Option 1 – Try deleting the contents of the Automatic Destinations folder
Tap the Win + R keys on your keyboard to open the Run utility.
And then type “%AppData%MicrosoftWindowsRecentAutomaticDestinations” and hit Enter to open this location.
From there, select all the files and tap the Shift + Delete key combination.
After that, you will get a prompt that will ask you if you want to delete all the files permanently, just click on Yes. This will delete all the Quick Access cache.
Now check if you can now open a folder or a location without the “Working on it…” message.
Option 2 – Try to rebuild the Search Index
First, open the Indexing Options using the Search bar.
Next, click on the appropriate listing, e.g. Users folder.
After that, click on the Advanced button. This will open a mini-sized window and from there, go to the Index Settings tab.
Then click on the “Rebuild” option under the Troubleshooting section.
Now click on OK after the rebuilding is completed. This should rebuild the search index for all the files and thus, fix the File Explorer stuck on the “Working on it…” message.
Option 3 – Try to optimize the folder for General Items
You might also want to try optimizing the folder for General Items as it can help the File Explorer to load the contents faster.
Just right click on the folder that takes time to load the contents in it and is showing the “Working on it…” message.
After that, click on Properties to open the Properties mini window.
From there, go to the Customize tab and click on the drop-down menu to “Optimize this folder for” under the “What kind of folder do you want?” section and then select General Items.
Then check the checkbox with a label that says, “Also apply this template to all subfolders” and click on the OK button to save the changes.
Restart File Explorer and check if the problem is now fixed or not.
Option 4 – Try performing a System Restore
Running System Restore can also help you resolve whatever issue that’s causing the “Working on it…” message. You can do this option either by booting into Safe Mode or in System Restore. If you are already in the Advanced Startup Options, just directly select System Restore and proceed with the next steps. And if you have just booted your PC into Safe Mode, refer to the steps below.
Tap the Win + R keys to open the Run dialog box.
After that, type in “sysdm.cpl” in the field and tap Enter.
Next, go to the System Protection tab then click the System Restore button. This will open a new window where you have to select your preferred System Restore point.
After that, follow the on-screen instructions to finish the process and then restart your computer and check if the problem is fixed or not.
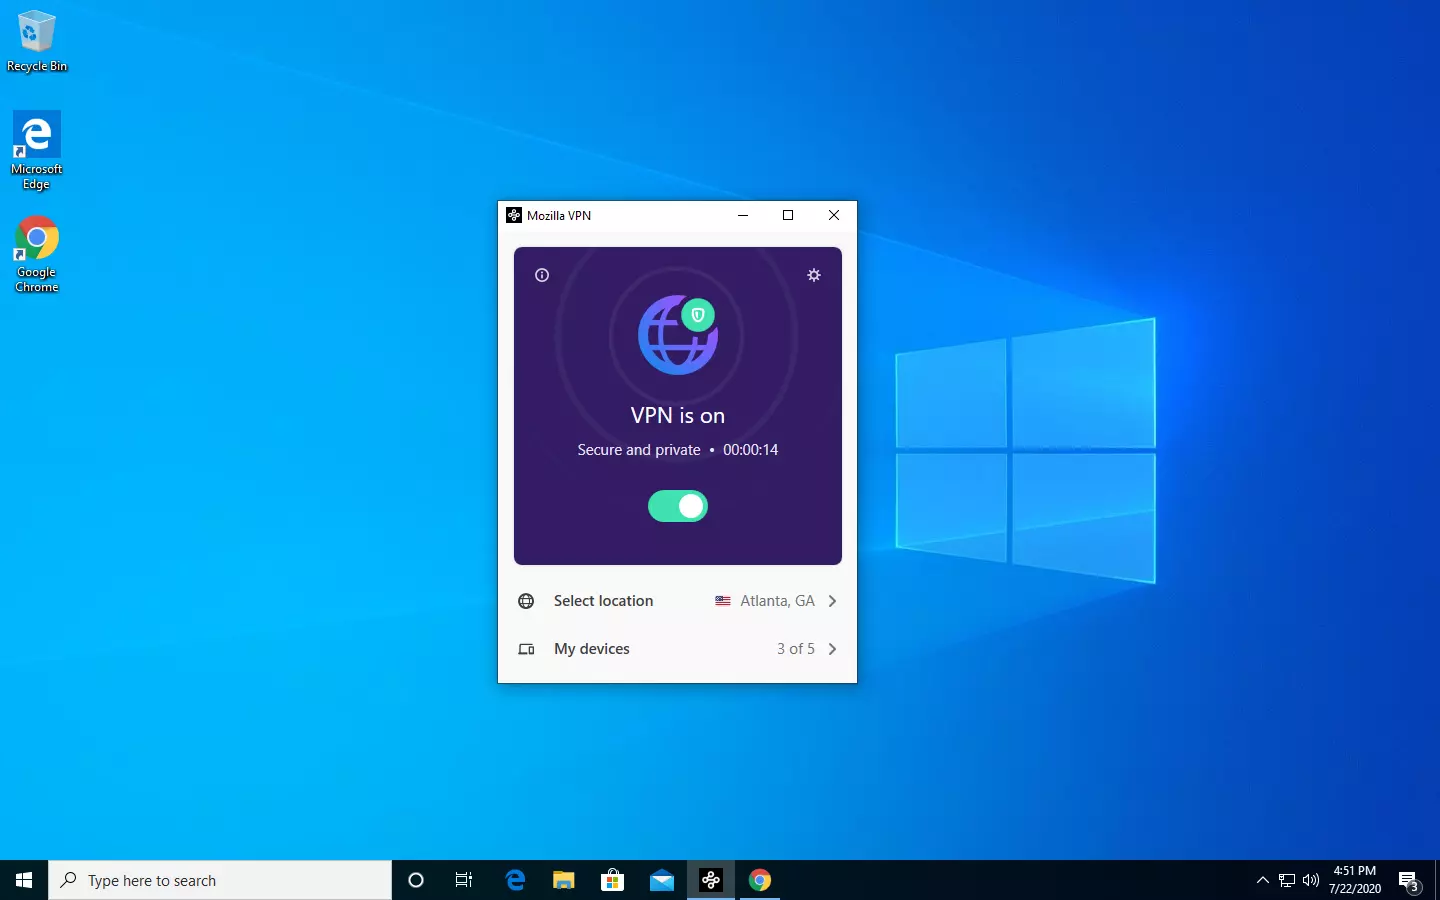
The new thing from Mozilla is not a browser, it is a VPN!
Besides Firefox, Mozilla offers now Firefox Relay, an app helping you to mask your email and phone number, and a new Mozilla VPN.
Mozilla has recently announced a new subscription model that will let you use all products together for $6.99 per month. Although this is a little more expensive than the competition that goes around for $5 per month note that with this subscription you are having access to all services, not just VPN.
VPN will not only hide your IP address but will also make sure websites cannot access your real location and it encrypts all of your network activity. Relay will give you protection against spam, serving as a shield for your email and limiting spammers from access to your real email address and phone number. With Mozilla subscription will let you use both services.
Steam is one of if not the largest online store for the digital distribution of games on the PC platform. The game gets downloaded to your PC when you are planning to play it and its saves are synched in the Steam cloud. They get automatically downloaded when you install the game but you can also get your saves by directly downloading them from Valve's website in your browser.
If Steam isn’t automatically downloading your old save games after you install a game, ensure Steam Cloud is enabled for that game within Steam.
Locate the game in your Steam library, right-click it, and then select Properties. Click the Updates tab and ensure the Enable Steam Cloud synchronization option is checked for the game. If this option isn’t checked, Steam won’t automatically download your cloud saves.
If you don’t see a Steam Cloud option for a game here, that game doesn’t support Steam Cloud. Not all games on Steam do, it’s up to each game developer.
Download the Files in Your Web Browser
Valve lets you download your Steam cloud save files via a web browser, too. You can download just your saved files without re-downloading the entire game.
To find your saved files, visit Valve’s View Steam Cloud page in your web browser and sign in with your Steam account. You’ll see a list of games using your Steam Cloud storage. Locate the game in the list and click Show Files to see all the files for a game. Each game has a page showing all the files it’s storing in Steam Cloud, as well as the date they were modified. To download a file, click Download. Download all the save files for your game, and you’ll have a copy of its save games. This feature is especially useful for multi-platform games that don’t automatically synchronize save files between platforms.


 The 2021 CLUVENS BRAND newly issued model UNICORN has fully electrical tilting capabilities to 160 degrees, Reading light-two LED & RGB illumination lighting, manual open/close keyboard tray, and armrests. This model is suitable for home and office, and also gaming computer work environments.
It offers functions that enable the user to experience unprecedented comfort and quasi total immersion through strategically positioned 1-3 monitors, audio systems, and accessories. The result is a complete computer office, ergonomically optimized, with a minimal footprint that improves overall performance and productivity and health and comfort.
Sitting on a chair can help a lot for relieving health problems like lower back pain, herniated discs, sciatica, and neck pain and also enhance performance and viewing effects.
The 2021 CLUVENS BRAND newly issued model UNICORN has fully electrical tilting capabilities to 160 degrees, Reading light-two LED & RGB illumination lighting, manual open/close keyboard tray, and armrests. This model is suitable for home and office, and also gaming computer work environments.
It offers functions that enable the user to experience unprecedented comfort and quasi total immersion through strategically positioned 1-3 monitors, audio systems, and accessories. The result is a complete computer office, ergonomically optimized, with a minimal footprint that improves overall performance and productivity and health and comfort.
Sitting on a chair can help a lot for relieving health problems like lower back pain, herniated discs, sciatica, and neck pain and also enhance performance and viewing effects.
 Scorpion is basically a premium version of Unicorn with being able to hold more weight, having cup holders on the armrest, etc.
The look is also similar with Scorpion being more sinister-looking but overall Steel frame and chair are the same.
Scorpion is basically a premium version of Unicorn with being able to hold more weight, having cup holders on the armrest, etc.
The look is also similar with Scorpion being more sinister-looking but overall Steel frame and chair are the same.