Computers viruses, worms, ransomware, etc. are kinds of malicious software that no user should take lightly. On several occasions, we have touched upon security steps that each user should take in order to protect its identity and data. Sadly sometimes even when all precautions are taken some malware can still slip through and wreak havoc. Today we are looking at some of the worst or the best, depending on your view that has indeed wreaked plenty of havoc.
10 worst computer viruses in history
In the list of the 10 most famous computer viruses below, we show the costs, dates, reach, and other key facts. First a note about terms: we use the words “virus” and “worm” interchangeably because most readers search for them that way. But there’s a subtle difference that we explain after the list.
1. Mydoom – $38 billion
The worst computer virus outbreak in history, Mydoom caused estimated damage of $38 billion in 2004, but its inflation-adjusted cost is actually $52.2 billion. Also known as Novarg, this malware is technically a “worm,” spread by mass emailing. At one point, the Mydoom virus was responsible for 25% of all emails sent.
Mydoom scraped addresses from infected machines, then sent copies of itself to those addresses. It also roped those infected machines into a web of computers called a botnet that performed distributed denial of service (DDoS) attacks. These attacks were intended to shut down a target website or server.
Mydoom is still around today, generating 1% of all phishing emails. That’s no small feat considering the 3.4 billion phishing emails sent each day. By that figure, Mydoom has taken on a life of its own, infecting enough poorly-protected machines to send 1.2 billion copies of itself per year, 16 years after its creation.
Though a $250,000 reward was offered, the developer of this dangerous computer worm was never caught.
Wondering what makes the world’s most secure computers so safe? See the Tech@Work guide: Upgrade to the World's Most Secure and Manageable PC
2. Sobig – $30 billion
The 2003 Sobig computer virus is actually another worm. It is second only to the Mydoom virus in its scope. The $30 billion figure is a worldwide total, including Canada, the U.K., the U.S., mainland Europe, and Asia. Several versions of the worm were released in quick succession, named Sobig.A through Sobig.F, with Sobig.F being the most damaging.
This cybercriminal program masqueraded as legitimate computer software attached to emails. It disrupted ticketing at Air Canada and interfered with countless other businesses. Despite its widespread damage, the creator of the successful bug was never caught.
3. Klez – $19.8 billion
Klez is a close third on the list of the worst computer viruses ever created. With nearly $20 billion in estimated damages, it infected about 7.2% of all computers in 2001, or 7 million PCs. The Klez worm sent fake emails, spoofed recognized senders and, among other things, attempted to deactivate other viruses.
As with other viruses and worms, Klez was released in several variants. It infected files, copied itself, and spread throughout each victim’s network. It hung around for years, with each version more destructive than the last.
Windows has come a long way since most of the computer viruses on this list hit the web. Thankfully, built-in protection with Microsoft Defender is always on the watch.
4. ILOVEYOU – $15 billion
The year 2000’s ILOVEYOU virus worked by sending a bogus “love letter” that looked like a harmless text file. Like Mydoom, this attacker sent copies of itself to every email address in the infected machine’s contact list. Shortly after its May 4 release, it had spread to more than 10 million PCs.
The virus was created by a college student in the Philippines named Onel de Guzman. Lacking funds, he wrote the virus to steal passwords so he could log into online services he wanted to use for free. He reportedly had no idea how far his creation would spread. This virus is also known as Loveletter.
Need to up your remote work security game before there’s another entry on the list of most deadly computer viruses? See our guide: How to Work Remotely and Securely
5. WannaCry – $4 billion
The 2017 WannaCry computer virus is ransomware, a virus that takes over your computer (or cloud files) and holds them hostage. The WannaCry ransomware ripped through computers in 150 countries, causing massive productivity losses as businesses, hospitals, and government organizations that didn’t pay were forced to rebuild systems from scratch.
The malware raged like wildfire through 200,000 computers worldwide. It stopped when a 22-year-old security researcher in the U.K. found a way to turn it off. Computers with out-of-date operating systems were hit especially hard. That’s why security experts always recommend updating your systems frequently.
Ransomware strikes again
In September 2020, one of the potentially largest computer virus attacks in medical history hit Universal Health Services. The U.S. hospital chain, which has more than 400 locations, was reportedly struck by damaging ransomware. The attack forced the cancellation of surgeries and made healthcare workers switch to paper records.
6. Zeus – $3 billion
The Zeus computer virus is an online theft tool that hit the web in 2007. A whitepaper by Unisys three years later estimated that it was behind 44% of all banking malware attacks. By then, it had breached 88% of all Fortune 500 companies, 2,500 organizations total, and 76,000 computers in 196 countries.
The Zeus botnet was a group of programs that worked together to take over machines for a remote “bot master.” It originated in Eastern Europe and was used to transfer money to secret bank accounts. More than 100 members of the crime ring behind the virus, mostly in the U.S., were arrested in 2010. It’s not as prominent today, but some of the virus’ source code lives on in newer botnet viruses and worms.
Zeus caused documented damage of $100 million. But the real cost in terms of lost productivity, removal, and undocumented theft is undoubtedly much higher. A $3 billion estimate, adjusted for inflation, puts this virus at a cost of $3.7 billion in today’s dollars.
7. Code Red – $2.4 billion
First observed in 2001, the Code Red computer virus was yet another worm that penetrated 975,000 hosts. It displayed the words “Hacked by Chinese!” across infected web pages, and it ran entirely in each machine’s memory. In most cases it left no trace in hard drives or other storage.
Financial costs are pegged at $2.4 billion. The virus attacked websites of infected computers and delivered a distributed denial of service (DDoS) attack on the U.S. White House’s website, www.whitehouse.gov. In fact, the White House had to change its IP address to defend against Cod Red.
Can your printer get a virus? See our cool infographic: The State of Printer Security
8. Slammer – $1.2 billion
The SQL Slammer worm cost an estimated $750 million across 200,000 computer users in 2003. This computer virus randomly selected IP addresses, exploiting vulnerabilities and sending itself on to other machines. It used these victim machines to launch a DDoS attack on several internet hosts, significantly slowing internet traffic.
The Slammer worm hit banks in the U.S. and Canada especially hard, taking ATMs offline in many locations. Customers of Toronto’s Imperial Bank of Commerce found themselves unable to access funds. The attack reared its ugly head again in 2016, launching from IP addresses in Ukraine, China, and Mexico.
9. CryptoLocker – $665 million
Thankfully, ransomware attacks like the 2013 CryptoLocker virus have dipped since their 2017 peak. This malware attacked upwards of 250,000 machines by encrypting their files. It displayed a red ransom note informing users that “your important files encryption produced on this computer.” A payment window accompanied the note.
The virus’ creators used a worm called the Gameover Zeus botnet to make and send copies of the CryptoLocker virus. According to a report by security firm Sophos, the average ransomware attack costs a business $133,000. If we estimate that CryptoLocker hit 5,000 companies, that would put its total cost at $665 million.
Where will cybersecurity go next? See our guide: The Future of Cybersecurity
10. Sasser – $500 million
The Sasser worm was written by a 17-year-old German computer science student named Sven Jaschan. He was arrested at the age of 18 in 2004 after a $250,000 bounty was posted for the computer virus’ creator. A friend of Jaschan’s tipped authorities that the youth had penned not only the Sasser worm but also the damaging Netsky.AC attack.
Jaschan was given a suspended sentence after it was found he was a minor when he wrote the malware. The Sasser worm crashed millions of PCs, and though some reports put damages at $18 billion, the relatively low infection rate suggests a more likely cost of $500 million.
Other notable viruses
The top 10 worst computer viruses above are just the ugly tip of a gargantuan digital iceberg. With a million new malware programs popping up every 3 years, we may miss the forest for a few outstanding trees. Here are just a few more viruses that have wreaked havoc over the years:
Mimail: This worm tried to harvest data from infected machines to launch a string of DDoS attacks, but was relatively easy to remove.
Yaha: Yet another worm with several variants, thought to be the result of a cyber-war between Pakistan and India.
Swen: Written in C++, the Swen computer worm disguised itself to look like a 2003 OS update. Its financial cost has been pegged at $10.4 billion, but not reliably.
Storm Worm: This worm showed up in 2007 and attacked millions of computers with an email about approaching bad weather.
Tanatos/Bugbear: A 2002 keylogger virus that targeted financial institutions and spread to 150 countries.
Sircam: A computer worm from 2001 that used counterfeit emails with the subject line, “I send you this file in order to have your advice.”
Explorezip: This worm used fake emails to spread to every machine on thousands of local networks.
Melissa: The most dangerous computer virus in 1999, Melissa sent copies of itself that looked like NSFW pics. The U.S. FBI estimated cleanup and repair costs at $80 million.
Flashback: A Mac-only virus, Flashback infected over 600,000 Macs in 2012 and even infected Apple’s home base in Cupertino, Calif. In 2020, there’s now more malware on Macs than on PCs.
Conficker: This 2009 virus still infects many legacy systems and could do significant damage if it ever activates.
Stuxnet: This worm is reported to have destroyed Iranian nuclear centrifuges by sending damaging instructions.
If you encounter the ERR_SSL_VERSION_INTERFERENCE error on your Google Chrome browser then this means that the browser is trying to load a website with SSL protocol but is not able to do so. This error can occur for many reasons and in this post, you will be given potential fixes that could help you in resolving the problem. But bear in mind that these potential fixes are not that straightforward forward so if you encounter an option you don’t understand much, just skip to the options you have the knowledge of.
There is no direct fault in the browser for the ERR_SSL_VERSION_INTERFERENCE error as there are issues with caching the website data locally on your computer. Moreover, this kind of error can also appear when a website is coded incorrectly or if there are conflicting browser extensions installed in the browser that prevents the website to function properly.
Refer to the suggestions given below to fix the ERR_SSL_VERSION_INTERFERENCE error in Chrome on Windows 10.
Option 1 – Try clearing browser data
There are times when some data in the browser is conflicting with the loading of the website and triggers errors like ERR_CACHE_MISS. And so you can try to clear your browser’s data. This might be a very basic solution but oftentimes it works in fixing this kind of error in Google Chrome. Follow the steps below to clear the data in your browser.
Open your Google Chrome browser.
After that, tap the Ctrl + H keys. Doing so will open a new panel that allows you to delete the browsing history and other data in your browser.
Now select every checkbox that you see and click on the Clear browsing data button.
Then restart your Chrome browser and check if you can now open any website or not.
Option 2 – Try disabling TSL 1.3
If clearing the browser data didn’t fix the problem, you can also try to disable TSL 1.3 in Chrome. To do so, refer to these steps:
Open Google Chrome.
Next, type in “chrome://flags/#tls13-variant” in the address bar and tap Enter.
After that, you should see the experimental features page for Google Chrome where you can set TSL 1.3 to disabled.
After disabling TSL 1.3, restart your computer and check if the problem is fixed or not.
Option 3 – Reset Winsock, TCP/IP & Flush DNS cache
Resetting Winsock, TCP/IP, and flushing DNS might help in resolving the ERR_SSL_VERSION_INTERFERENCE error just follow these steps:
Right-click on the Start button and click on Command Prompt (administrator) so you can pull up an elevated Command Prompt.
After that, execute each one of the commands listed below. And after you typed in one after the other, you have to hit Enter.
netsh winsock reset – type in this command to reset Winsock
netsh int ip reset resettcpip.txt – type in this command to reset TCP/IP
ipconfig /flushdns – type in this command to flush the DNS cache
Next, restart your PC and check if the problem’s fixed.
Option 4 – Get rid of any conflicting browser extensions
Open Chrome and press Alt + F keys.
Go to More tools and click Extensions to look for any suspicious browser extensions or toolbars.
Click the Recycle bin and select Remove.
Restart Chrome and press Alt + F keys again.
Proceed to On Startup and mark Open a specific page or set of pages.
To check if the browser hijacker is still active, click Set pages, if it is active, overwrite the URL.
Option 5 – Reset Google Chrome
Resetting Chrome can also help you get rid of the error. Resetting Chrome will restore its default settings, disabling all the extensions, add-ons, and themes. Aside from that, the content settings will be reset as well and the cookies, cache, and site data will also be deleted. To reset Chrome, here’s what you have to do:
Open Google Chrome, then tap the Alt + F keys.
After that, click on Settings.
Next, scroll down until you see the Advanced option, once you see it, click on it.
After clicking the Advanced option, go to the “Restore and clean up option and click on the “Restore settings to their original defaults” option to reset Google Chrome.
Having an eMail in today's modern world is no longer a privilege or being geeky, it has surely become a necessity. From Facebook to LinkedIn or Steam many services today require you to have an account in order to use them, and in order to create an account, you need working eMail.
That being said many people today have several eMail accounts, one for social media, one for work, maybe even one for very close friends and family. How creating eMail today is completely free we might end up with several eMail accounts.
eMail clients have also evolved much since their first days and became more than just applications for receiving eMails, today they can take various different tasks having additional features built into them like calendar, batch eMail processing, etc.
Taking all of said into account I am presenting to you within my personal opinion some of the best eMail clients starting with free ones.
Best free eMail clients
Google Gmail
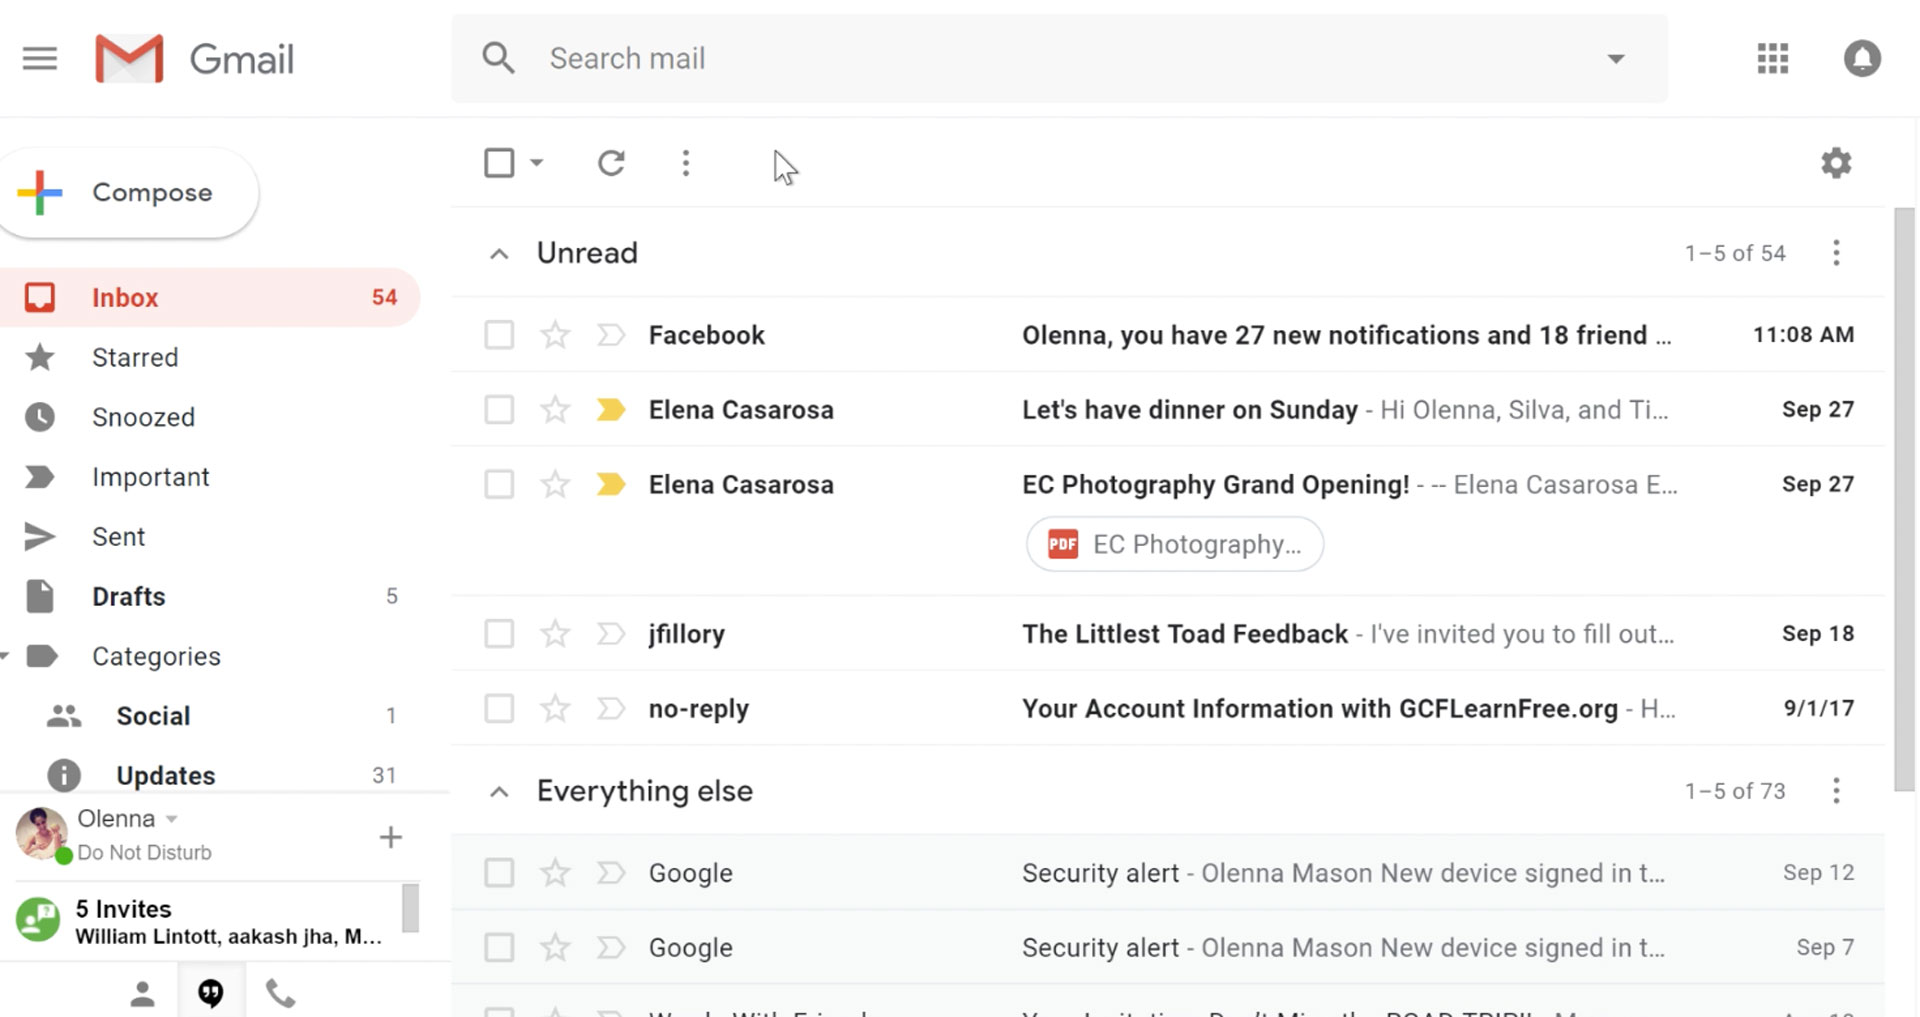
https://gmail.comIt would be very difficult to even start a free eMail list without mentioning Google's Gmail. Introduced all the way back in 2004 as an invite-only service it became over time the most popular email platform largely due to the fact Google is offering free eMail accounts.
There are a lot of good things to be said about Gmail itself, most of the area is clutter-free and the largest space is reserved for eMail itself letting users focus on what is important. WEB client itself means that you do not need to have any application installed on your device, altho via Google chrome, you can use Gmail offline offering you flexibility if needed.
The ability to connect and manage other accounts like Outlook, Yahoo, etc is just making Gmail even more attractive, and the snooze feature is a really neat little detail that will pause eMail notifications if you need to focus on other things.
Lack of organizing messages into folders is a little confusing since Gmail offers its own unique label system but sometimes I need to have old reliable save eMail to folder.
All in all, Gmail is a great service and it offers a great eMail on the go experience.
Mail eMail client
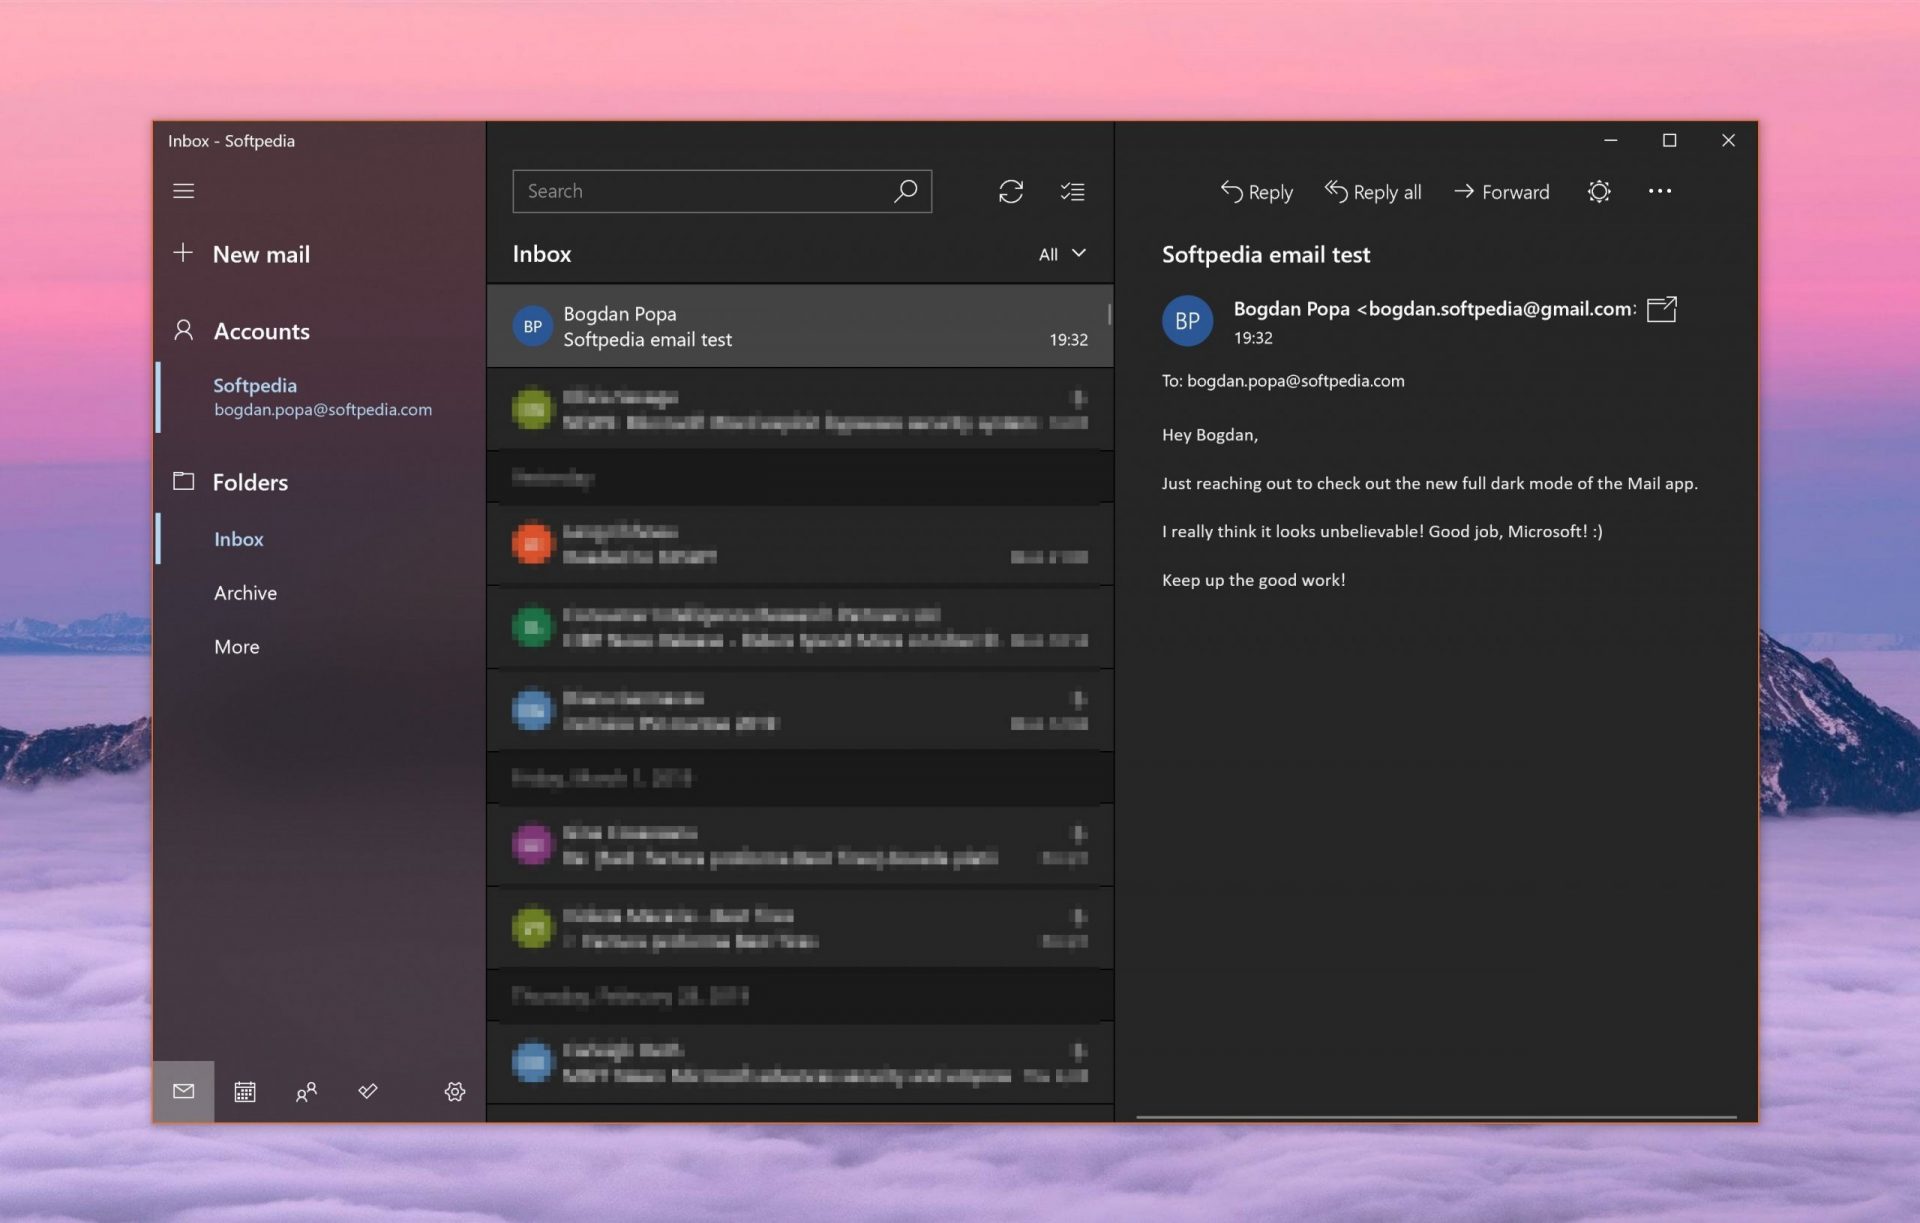
https://www.microsoft.com/en-us/p/mail-and-calendar/Free Windows eMail client simply called Mail is what was once outlook express. Mail itself has the ability to work with other popular accounts like Google Gmail account, Yahoo, iCloud etc. How it comes with Windows OS and it integrates very well with Microsoft Calendar, this eMail client is for many the first choice.
On the negative side, I might say this is a strip-down version of Outlook which is paid solution so some features are missing if we would compare the two.
Overall, a simple and nice eMail client worth your time, especially if you are on the Windows platform.
Mozilla Thunderbird
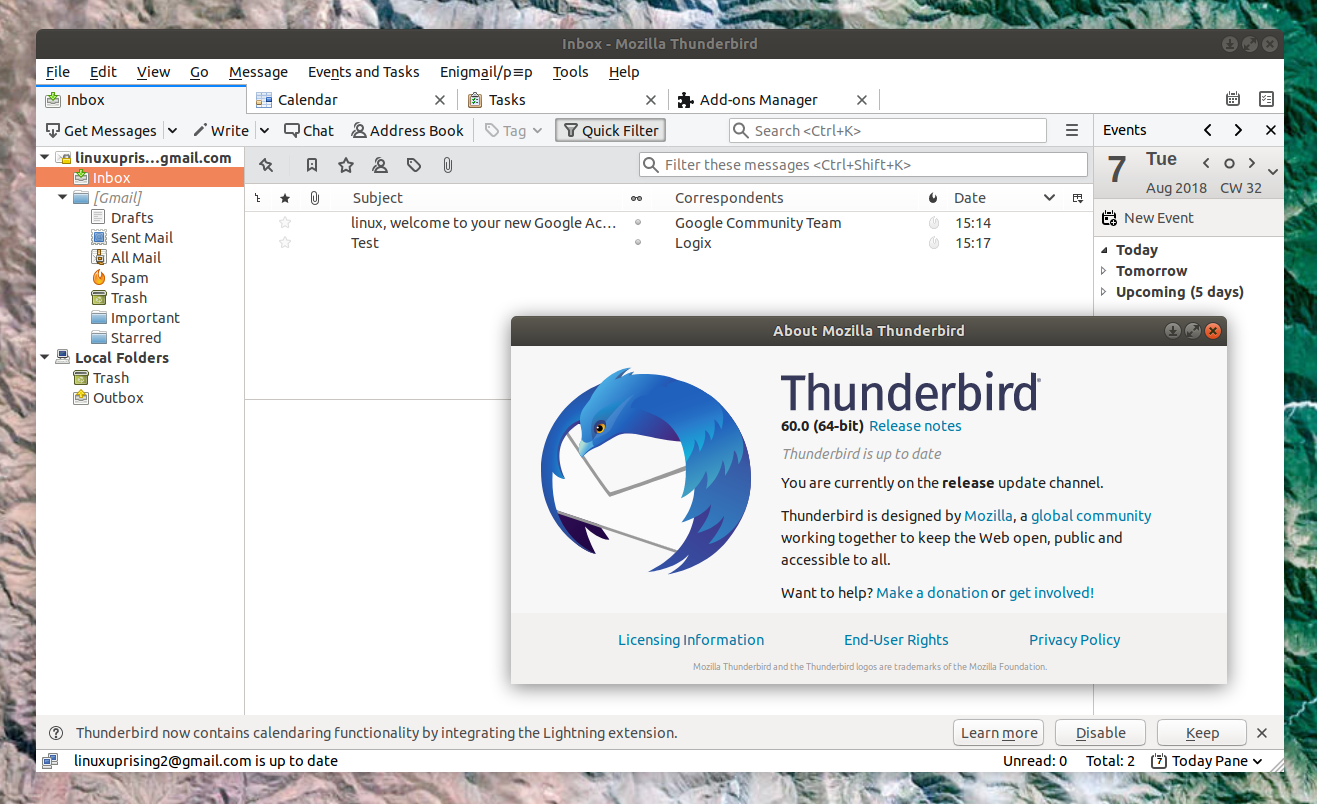
https://www.thunderbird.netGreat eMail client matching in functions against paid and premium solutions of big tech companies. Fueled with plenty of customization options and reskinning ones this eMail client offers a lot for its free price tag.
It is also fueled by Mozilla community focusing on privacy and security. It can work with any mail service and it is lightweight with a clean look, altho the look itself can be heavily customized.
The bad side is that client itself relies on email services to provide cloud-based emails, so if you are receiving your email via a service that does not have a cloud-based service in itself all of your received emails will be locked to the computer where you have received them. Also customizing it can be sometimes a little too technical for the average computer user.
All in all, Thunderbird is one great eMail client and it would be a shame not to use it because of its technical side, if you need a reliable and secure eMail client on a single machine, look no further than Thunderbird.
Paid eMail clients
Microsoft Outlook
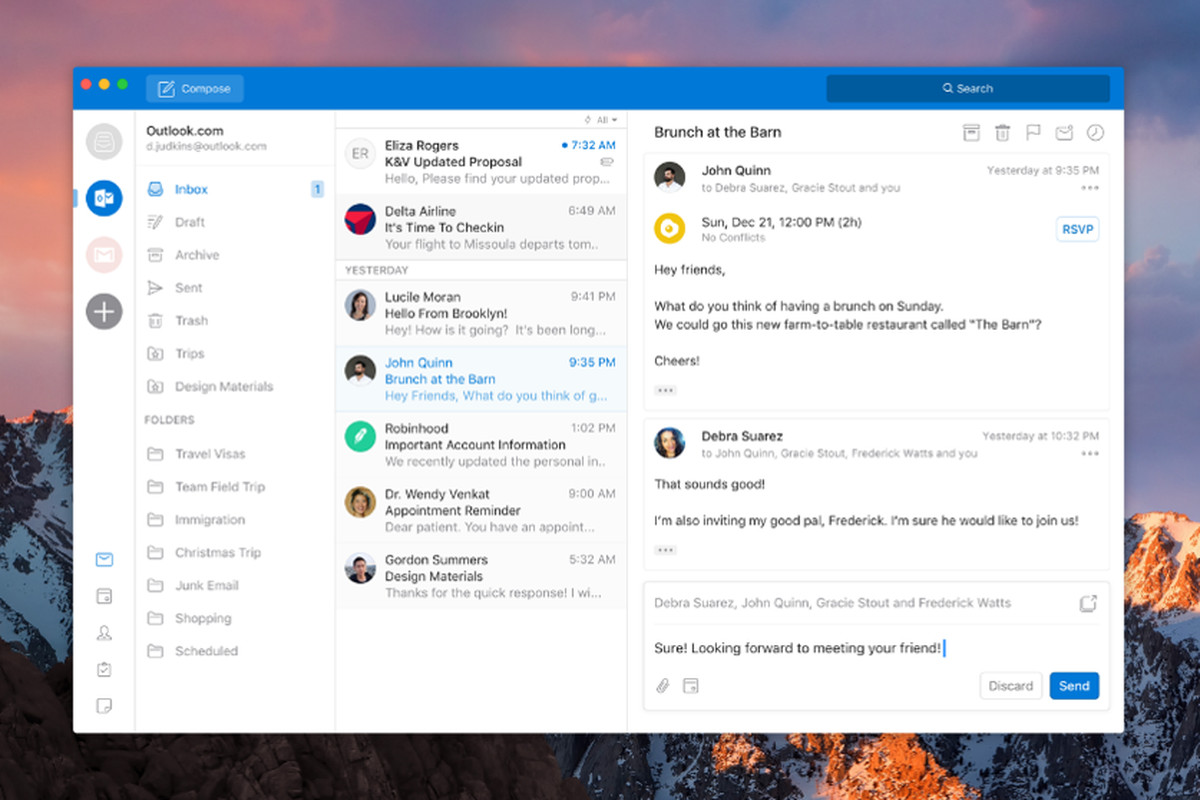
https://www.microsoft.com/en-us/microsoft-365/Outlook comes as a part of the Microsoft Office suite and as one of the oldest eMail clients, it is still widely popular and adopted through many users and businesses. It has tight integration with all Microsoft services and full integration with Calendar making it one of the if not the best eMail client out there.
Outlook also has a free online service completely free for personal use as well.
The downside is that you can not get it as a separate product if you want a business version other than as a part of the Office suite.
The final verdict would be that this is perhaps the best eMail client out but the big downside is that there is no desktop version outside the Office suite.
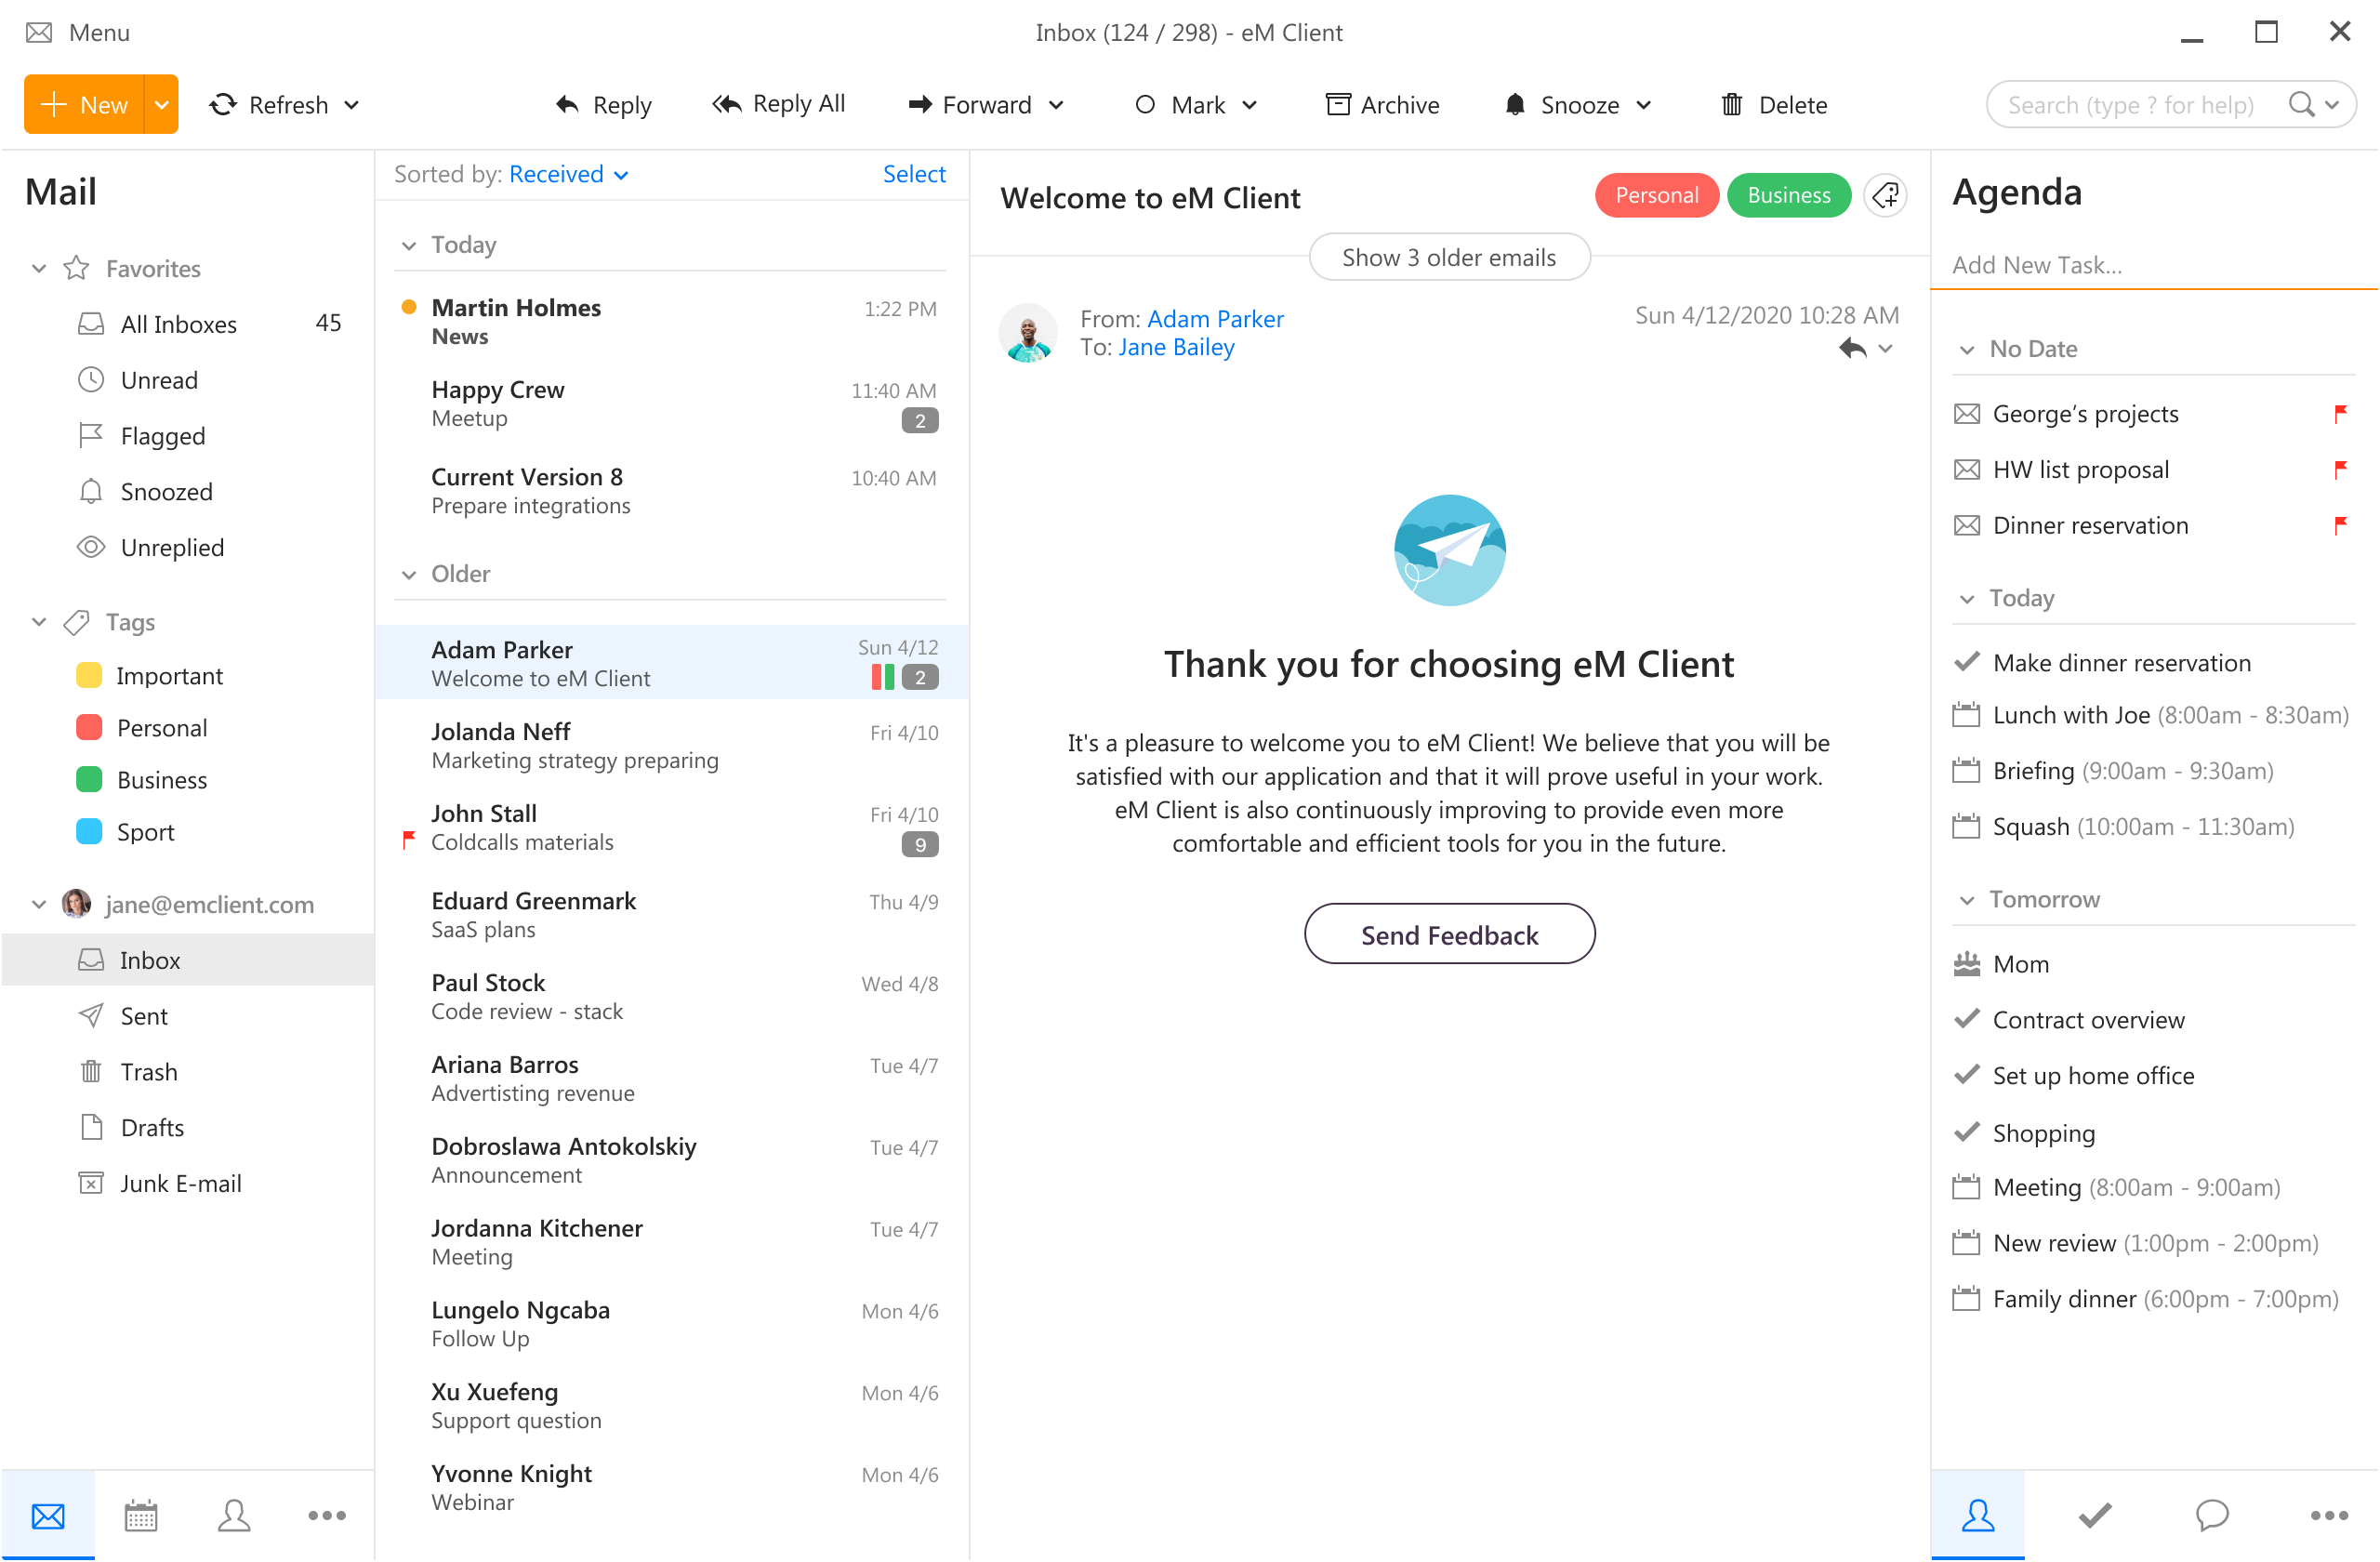
eM Client
https://www.emclient.com/eM Client offers a wide array of features, including a calendar, contacts, and chat. Support is provided for all the major email services including Gmail, Yahoo, iCloud, and Outlook.com. The latest version also offers PGP encryption, live backup, basic image editing capabilities, and auto-replies for Gmail.
Its automatic system makes it very easy to get emails from other services since there is no manual setting, all that is needed is to type in your email and eM Client will do everything else automatically.
A one-time purchase is not pricy and it could offer some features that some free clients are missing. Go check it out with a free trial and see if it is for you.
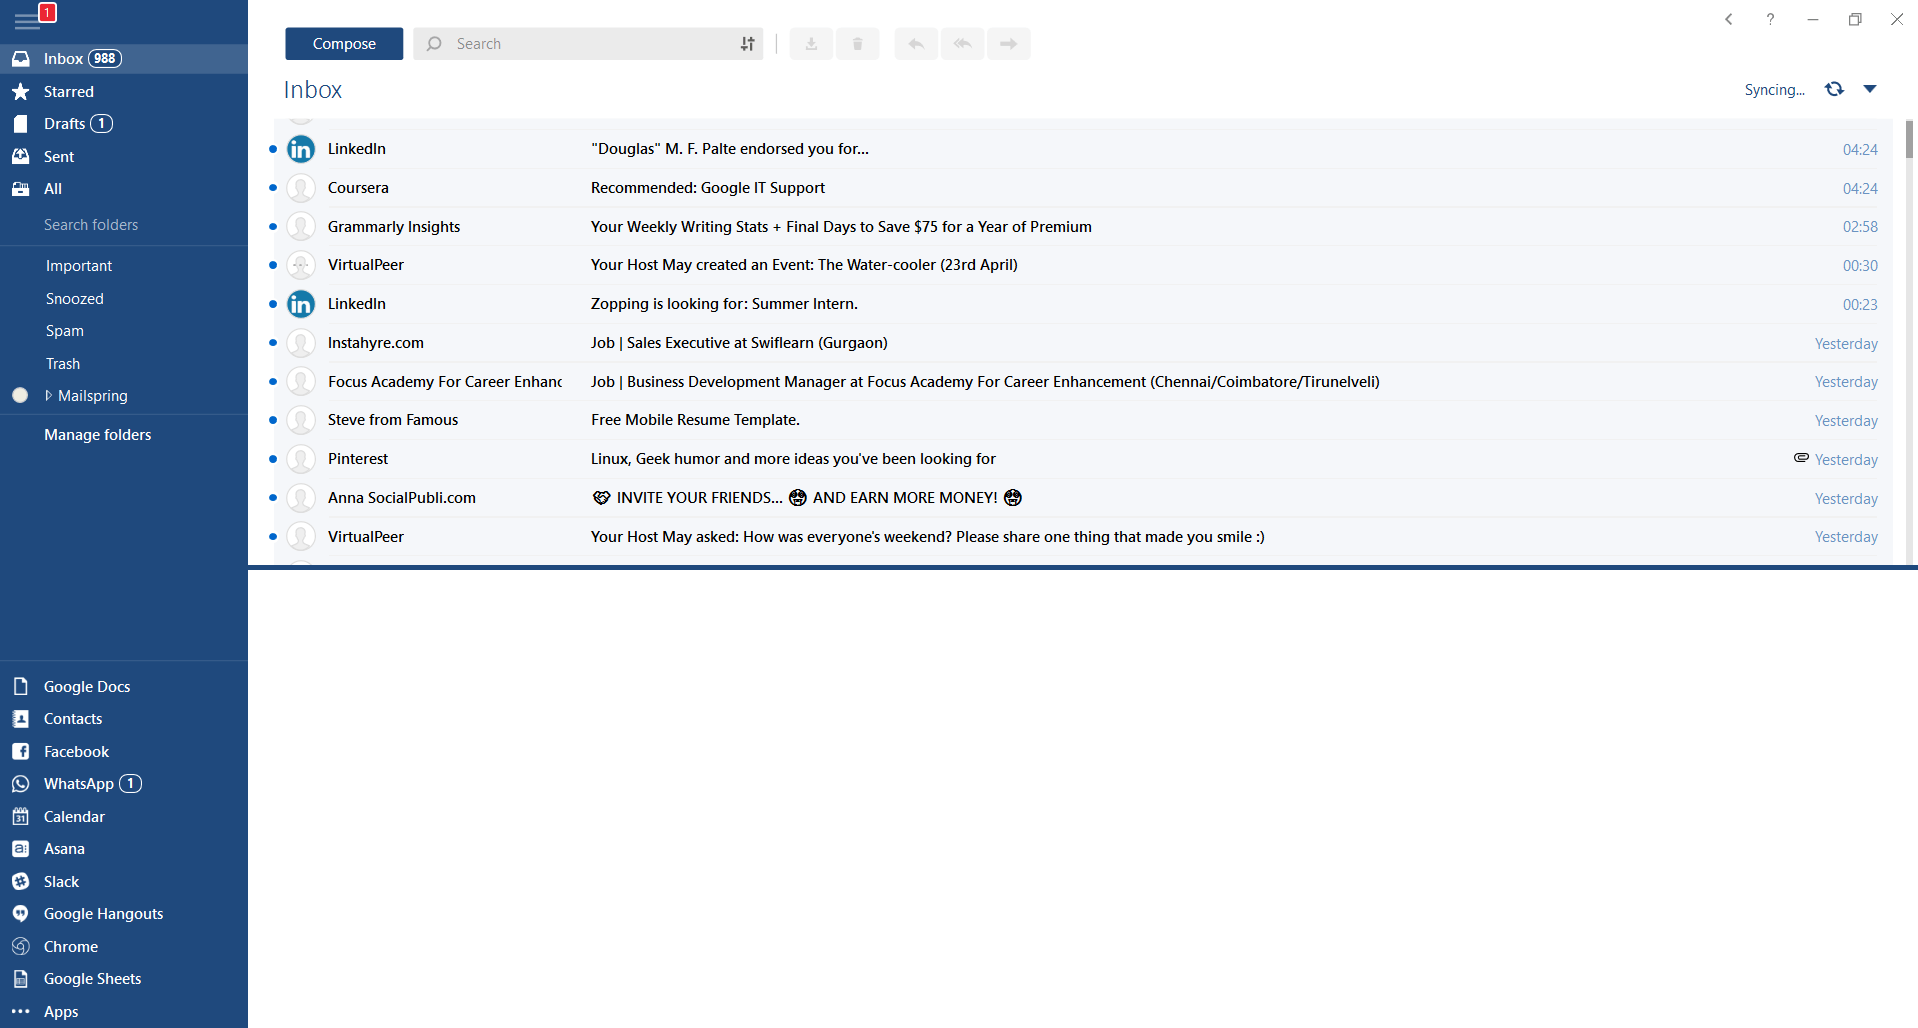
Mailbird
https://www.getmailbird.comThis eMail client's main focus is the simplicity of use with visual appeal while tackling multiple eMail accounts. It has many built-in apps along with a customizable interface. Unlike some more Microsoft-centric email clients, Mailbird Business supports a diverse range of integrated apps, including WhatsApp, Google Docs, Google Calendar, Facebook, Twitter, Dropbox, and Slack, all making for a better-streamlined workflow.
The downside of this client is the yearly subscription plan. I think people, in general, want to get away from software subscription plans so I will include this as a downside but bear in mind it is downside just in terms of a business plan not in the client itself.
Inky
https://www.inky.com/Inky is eMail client if you are looking for security. It uses AI along with machine learning in order to block all types of phishing attacks that can get through to other clients. The proprietary machine learning technology can literally read an email to determine if it has phishing content, and then is able to quarantine the email or deliver it with the malicious links disabled. It also takes things a step further and offers an analytics dashboard, which allows an administrator to see patterns of attacks based on dates, or targeted users.
The downside is that client itself is so much focused on security that sometimes some nonsecurity features get overlooked and provide a poor experience but if you need a good and greatly secured eMail client Inky is one to check out.
One of themost common errors encountered by Microsoft users upgrading from Windows 7 or Windows 8/8.1 to Windows 10 is the Error Code 0xc1900106. Microsoft users experience a failure in the installation process. Either they will be notified that the installation process was ended but failed or that Windows is not able to install the update.
Solution
Error Causes
More and more Windows users are having trouble upgrading their operating system to Windows 10. There are a lot of errors being encountered by users and one of them is the Error Code 0xc1900106. This error is normally due to the misconfigured system files. If a Windows user encounters this error, most likely their device has some registry problems.
Further Information and Manual Repair
Fixing error code-related issues could be best resolved to do manual repair methods. Applying repair methods manually can help Windows users address the root causes of the errors they encounter, as well as apply definite solutions to rectify the issue.
Most Windows users can be able to implement manual repair methods themselves but there are some cases where help from a Windows professional is needed. If you’re not a very tech-savvy person and not confident performing the manual repair methods yourself, it would be advisable to seek help from a professional Windows technician who is knowledgeable enough to address the errors or problems you are encountering. However, if you don’t want to resort to seeking help from a professional, you can also consider using a powerful automated tool.
In trying to fix Error Code 0xc1900106, here are the following manual repair methods you can take:
Method One: Custom Installation
Make a backup of your personal files
Users of Windows 8/8.1 should Refresh first then proceed to upgrade.
If the Refresh process does not work, reset your device then try again.
If resetting your device still does not work, you can proceed with a custom installation.
When your Windows installation media is ready, you need to choose to boot from CD, DVD, or USB drive to begin setup. (For example purposes, this article will discuss booting from DVD).
When your device is all set to boot from DVD, you will be prompted to Press any key to boot from CD or DVD…
Once you’ve pressed any key, the screen will show the Windows logo which might take a while. No need to worry though, as long as you can see the indicator, you’re good.
Choose your Language, Time, and Keyboard method from the drop-down menu then hit Next.
Click on the Install Now button then wait until Setup begins.
Tick on the I accept the license terms check box then select Next.
Choose Custom: Install Windows only (advanced)
Choose the Primary partition then select Next. You will be prompted by the following warning: The partition you selected might contain files from a previous Windows Installation. If it does, these files and folders will be moved to a folder named Windows.old. You will be able to access the information in Windows.old, but you will be able to use your previous version of Windows. Just click the OK button then wait as the Windows continue to install. Windows will restart once this phase of the setup completes and will reboot into setup once again.
At this point, Windows will detect and install your hardware. Once this finishes, Windows will restart again.
Method Two: Reset Windows Update Components
From your device’s desktop, hit Windows key + X to open the command prompt as admin.
Once the command prompt window appears, you can type or copy and paste the following commands (all at once):
net stop wuauserv
net stop cryptSvc
net stop bits
net stop msiserver
ren C:WindowsSoftwareDistribution SoftwareDistribution.old
ren C:WindowsSystem32catroot2 catroot2.old
net start wuauserv
net start cryptSvc
net start bits
net start msiserver
pause
Exit the command prompt.
After you reset the Windows Update components, see if you receive Windows Updates which includes the firmware updates for your computer.
Method Three: Ensure Windows is Updated
If you have an antivirus, make sure to disable it during the upgrade process.
Run Windows Update to check if the system is updated.
Ensure that the latest firmware and drivers are installed. To be able to do this, go to the computer manufacturer’s website or you can also try contacting company support.
This is a typical system error code. It stops your ability to run or load programs on your PC. The error message is displayed in the following format:
‘Windows cannot verify the digital signature for this file.
A recent hardware or software change might have installed a file that is signed incorrectly or damaged, or that might be malicious software from an unknown source.’
Solution
Error Causes
Error 577 may be triggered due to several reasons. However, the most common causes of this error include:
Device Driver Conflicts
Hardware Malfunction
Viral Infection
Windows Registry Corruption or Damage
Software File Corruption or Damage
Error 577 can prove to be fatal if the underlying causes are related to viral infection or registry corruption.
Further Information and Manual Repair
To resolve error 577 on your PC, you don’t have to hire a professional and spend hundreds of dollars on repair. The process for fixing this error is simple and easy.
Here are some of the best and efficient methods to repair error 577 - no technical expertise is required.
Method 1 - Check and Update Device Drivers
If the problem is triggered by the outdated or corrupted driver for the device reporting the error then it is advisable to update the driver.
To do this, first, uninstall the corrupted driver and then reinstall the latest version.
For this simply click the start menu, go to the control panel and then click Performance and Maintenance, and then System. In the new window, you will then see a tab called Hardware and the Device Manager.
Double click on the device whose driver you need to uninstall. Click on the properties window with a tab marked driver. Then click on the driver you want to uninstall. To activate changes reboot your PC.
Now reinstall the latest and updated version of the driver uninstalled using the Plug and Play feature.
Method 2 - Scan For Viruses
System error codes like 577 can also pop up if your PC is infected by viruses. Viruses enter through phishing emails and downloadable files from unreliable websites.
If the reason for error 577 is a viral infection, then simply install a powerful antivirus, run it to scan your entire PC. Remove all the viruses and malicious programs immediately to resolve.
If the issue still persists, then try method 3.
Method 3 - Repair the Registry
Sometimes registry corruption can be the underlying cause for error 577. The registry is the part that saves all activities performed on the system.
It stores both important and unnecessary files like junk files, cookies, and bad registry entries. If these files are not removed from the registry frequently, they accumulate and corrupt the registry which then generates system error codes.
To resolve and repair the registry in seconds, simply download Restoro. This is a user-friendly PC Repair Tool embedded with a registry cleaner. It wipes away all unnecessary files corrupting the registry and repairs it.
Click here to download Restoro.
Disk partitioning is a concept that’s been around for so long, but is still only familiar to few. If done right, it can help get your computer in perfect order.
Today we bring you a simple definition of disk partitioning, its pros and cons, and a quick tip on how to do it properly to reap its full benefit!
Definition and purpose
The simplest way to define disk partitioning would be: it’s exactly what it sounds like. It means taking a hard disk drive and separating it into different segments. These segments are called partitions. You can visualize it as cutting a cake into smaller pieces - not necessarily of the same size, though.
So what is the purpose of these pieces?
Well, when you first get a hard drive, it’s basically just a bunch of unallocated storage space. Until there’s at least one partition, this space is unusable to your operating system. Once you create a partition, your OS will recognize it as usable storage space.
You can choose to create a single partition and use it for all your files, from program files to personal data. A lot of off-the-shelf computers come with one primary partition like this and a small secondary one reserved for recovery purposes.
Whether or not you want to split your disk into more than one segment is up to you. We would generally recommend it, though. The whole point of partitioning is for each segment to have its own purpose.
So treating all your storage space as a single unit containing different file types would be like constructing an office building with only one massive room for everything - day-to-day work, conferences, interviews, etc. And all of this for different departments of the company. You can see how this might get a little messy.
Creating multiple partitions eliminates the task of running several different types of files from the same place. This takes a heavy load off the entire process of accessing data.
Disk partitioning also brings a ton of other benefits to the table. An important disclaimer, though: there are disadvantages too. We will walk you through both sides to help you get an objective idea and make an informed decision.
Source: Kina on Unsplash
What are the benefits of disk partitioning?
1. Better file organization
This is the most obvious and perhaps the biggest advantage of partitioning your hard drive.
As we already mentioned, partitioning allows you to create separate segments for different file and data types. You wouldn’t want to use the same partition for your system files and for games, would you?
If organization and time management are important to you, then multiple partitions are the right solution. Searching for specific files will be much easier overall. Say you have one hard drive, but three partitions: C for the system files alone, D for multimedia files and documents, and E for games and apps. Your computer loads the system from C without interference from the other two, and you know exactly where to look when searching for a file.
2. Easy reinstallation
File management isn’t the only thing made faster and simpler thanks to partitioning. If you opt for creating multiple segments on your drive, reinstalling Windows will be easy peasy.
That’s because all you need to do is format the partition your system is on. Then you reinstall the OS on it, and there you go. Now you have a clean installation, with all your files saved on other partitions intact. You can even make a copy of your system partition, so you can revisit the exact same installation in the future if you want. And the whole time your pictures, music, documents stay exactly where you left them.
Source: Andrew M on Unsplash
3. Possibility of using multiple file systems
By now you’ve understood that partitions function completely separately. This means that, if for some reason you need multiple file system capabilities, partitioning will allow that.
One segment could be used for, say, an NTFS file system, while another could run ext or APFS.
4. Running different OSes
You’re an avid Windows user but need to use Linux on the side? No problem. You don’t need to buy a separate computer or anything. The possibility of running different file systems also means you can use partitioning to run multiple operating systems.
Doesn’t that sound enticing? One machine for multiple totally different uses!
5. Backup and recovery made simple
Data loss can happen on any disk, partitioned or not. However, it’s much easier to get it back on a partitioned one. You know where you stored what, and each partition can be backed up exactly as it is. It’s also a lot faster to back up single partitions than entire hard drives.
Ultimately this also means a faster path to recovery. If you lose or accidentally delete important files and data, you might want to use a recovery tool like Recuva to scan for them and get them back. Recuva is even powerful enough to recover data from damaged hard drives. But no matter how powerful, scanning a whole drive is strenuous for any recovery tool. Scanning independent partitions is a lot more convenient than that, and will get you to your goal more efficiently.
6. Optimized performance
Now, let’s keep in mind that computer performance is influenced by a number of factors. Partitioning alone isn’t what makes it better or worse. However, it can contribute to optimization. It’s easier for your computer to scan, say, a 40 GB partition to fetch the system file it needs than scanning the entire capacity of your drive.
7. Improved security (possibly*)
Separate partitions can help make your system more secure. Firstly, they minimize file corruption. If one partition gets corrupted, the others should remain unaffected. And keeping in mind the previous point about backup and recovery, ‘fixing’ the damaged partition would be much easier than fixing the entire hard drive.
Partitioning also improves security in terms of malware protection. A malicious attack on one partition is easier to deal with than malware on the whole drive. If your system partition gets infected, you can simply reinstall your OS and that should do the trick.
*Do keep in mind that partitioning can’t defend you against more advanced attacks. So make sure not to give in to a false sense of security.
What are the disadvantages of partitioning?
1. Data is still vulnerable
Yes, it’s easier to back up and recover data from independent partitions. And yes, partitioning may help protect separated files and data to a higher degree. But remember: everything is still on a single physical drive. So while digital errors and issues may be easier to deal with on partitioned drives, physical damage obviously won’t be.
If your hard drive is destroyed in some way, all data on it will be gone. That’s why, if you have crucial files on your PC, it’s important to give them the proper backup treatment before it’s too late.
2. Disbalance of space
Allocating storage space on separate partitions may be a little more tricky than you think. You may fill up one partition a lot faster than another. So on one side you’re struggling with space, and on another you have too much of it to spare. Imagine nearly filling up your system partition and then it turns out you need a lot more space for its updates than you thought.
That’s why you really have to be sure you actually have enough files of different types that you need help managing efficiently. Otherwise you’ll just create a struggle and disbalance in terms of storage.
3. Increased risk of error
If done incorrectly, partitioning can lead to more harm than good. Aside from space disbalance, there is an increased risk of incorrect partition sizes and formatting. Plus, human error is also a factor: in a moment of distraction, you may erase one partition when you meant another. Undoing such mistakes will definitely be tedious and time-consuming.
4. SSDs eliminate the need of partitioning
SSDs (solid-state drives) don’t function in the same way that HDDs do. They have faster read times and can organize files on their own. This quite literally eliminates the need for organization on your part.
Partitioning: yes or no?
The bottom line is that multiple partitions might not be necessary for the average user. But if you’re planning on storing many file types or different file and operating systems on the same PC, then you should give it a shot. It’s also an excellent solution for businesses, of course.
And if our pros and cons list isn’t enough to help you decide, you can always send us a message and we’ll help you make the right choice.
Decided to partition your hard drive?
If you’ve decided to give it a go, you definitely should make sure to do it right.
The two most effective and reliable ways to partition are using the built-in options on Windows or investing in a dedicated partitioning tool, like the EaseUS Partition Master. Which one you'll opt for depends on your specific needs.
Option 1 may be more suitable for users with at least some level of experience. In this case, you’d have to know exactly which steps to take without making errors. This is done in Disk Management on Windows 10/11. From there, you can select the partitions you’d like to split into different volumes of selected sizes.
If this is your first time partitioning, we highly suggest you either consult professionals for this or move on to option 2. The EaseUS partitioning software is specifically designed for beginners, with an intuitive interface helping you succeed in the process. All you need to do is pick the Partition Master package tailored to your needs and follow their guide.
Each package offers technical support as well, and even free upgrades (to varying degrees based on your subscription). Plus, all of this is valid for not one, but two PCs.
It’s the perfect solution for a smooth and error-free partitioning process. If you want to organize your hard drives efficiently and make the most of all your space without doing irreparable damage, it’s definitely worth the investment.
If you encounter an error message saying, “The connection was denied because the user account is not authorized for remote login” when you try to establish a remote connection, read on as this post will help you resolve the problem. This kind of error occurs when the targeted host does not allow you to access that system remotely. Based on the error, you are not authorized to log in remotely which means that you need to obtain the correct permission.
There are several potential fixes you can try for this error. You can try to check the Remote Desktop Users group or add users to the Security group or check the Remote Desktop Service itself.
Refer to the options provided below for more detailed instructions to fix the “The connection was denied because the user account is not authorized for remote login” error.
Option 1 – Try checking the Remote Desktop Users group
You can encounter this error when the Remote Desktop Users group does not have any permission for your user account that you are using to establish a remote connection. Thus, you need to make sure that your user account is a member of the Remote Desktop Users group. How? Refer to these steps:
Tap the Win + R keys on your keyboard and then type “cmd” in the field and tap Enter or click OK to open Command Prompt.
After opening Command Prompt, type the “lusrmgr.msc” command and tap Enter to execute it.
Alternatively, you can also search for “lusrmgr.msc” in the Start Search and once you’ve opened it, select Users and then double click on your user name to open its Properties.
From there, switch from the “General” tab to the “Member Of” tab.
Next, if you can’t see any Remote Desktop Users group under the Administrator, you have to add it. To do that, just click on the Add button.
After that, on the newly opened window, click on the Advanced and Find Now buttons, respectively.
And in the Search results box, double click on Remote Desktop Users.
Now click on the OK button to save the changes made and check if you can now connect to a remote host or not.
Option 2 – Try to add a user to the Security group
You can actually block or allow a user from logging on through the Remote Desktop Services. However, if you do not have the right setting, you won’t be able to use this functionality. Thus, you need to confirm this setting. To do that, follow the steps below.
In the Start Search, type “secpol.msc” in the field and tap Enter to open the Local Security Policy panel.
From there, go to User Rights Assignment.
Next, look for a policy named “Allow log on through Remote Desktop Services” located on your right-hand side and then double click on it to open its Properties.
If you were not able to find the Remote Desktop Users under Administrator, then you have to add it by simply clicking on the Add User or Group button.
After that, enter “Remote Desktop Users” in the blank field and click the OK button to save the changes made.
Now restart your computer and try connecting again to the remote host.
Option 3 – Try checking the Remote Desktop Users group
There is a service that’s supposed to be running and needs to be set up correctly for you to connect to the remote host. And so you need to ensure that this service is up and running. To do so, follow these steps:
Tap the Win + R keys to launch the Run utility.
Then type “services.msc” in the field and hit Enter or click OK to open the Services Manager.
Next, look for the Remote Desktop Services and double click on it to open its Properties.
After that, go to the “Log On” tab and select the “This account” option and then click on the Browse button.
On the next screen that appears, look for the Advanced button and click on it and use the Find Now button to search.
You will see “NETWORK SERVICE”. Double click on it and then save the changes you’ve made to the settings.
Finally, restart your PC and see if the problem is now fixed.
In this post, you will be guided on what to do if the Recent Items are no longer visible in the Taskbar icons in Windows 10. This can be quite inconvenient especially if you work simultaneously on many files and documents together and would require you to visit them regularly to incorporate changes. Thus, if you find that the Recent items are not visible in the Windows Taskbar, read on.
In order for the Recent Items to appear on the taskbar icons in Windows 10 again, there are four potential fixes you can check out. You can try to show the recently opened items via Settings or clear the cache of the recent items. You could also make some changes in the Windows Registry or use the Group Policy Editor.
But before you proceed with these potential fixes, it’s best if you create a System Restore Point first just in case something goes wrong after you made changes in the system. The System Restore Point allows you to undo these changes and bring back the previous state of your computer. Thus, you need to create one and then carefully follow the given options below.
Option 1 – Show the recently opened items via Settings
The first thing you can do to fix the problem is to show the recently opened items through the Settings app.
Open the Settings app and select Personalization.
From there, select the Start option and scroll down until you see the “Show recently opened items in Jump Lists on Start or the taskbar” option.
Make sure that its toggle button is turned on.
Option 2 – Try to clear the Recent Items cache
Tap the Win + E keys to open File Explorer.
Next, copy and paste this link on the address bar: %AppData%Microsoftwindowsrecentautomaticdestinations
Once you’re in the given location, you should see multiple files. Now select all these files and completely delete them.
Note: These files are automatically recreated when you interact with the system like performing tasks such as opening apps or accessing files.
After that, go to this next location: %AppData%Microsoftwindowsrecentcustomdestinations
Once there, delete all of its files and restart your computer. This should resolve the problem.
Option 3 – Try making changes via Registry Editor
The next thing you can do to fix the problem is to apply some tweaks in the Registry by following these steps:
Tap the Win + R keys to open the Run dialog box and type “Regedit” in the field and hit Enter to open the Registry Editor.
Next, navigate to this registry sub-path: HKEY_CURRENT_USERSoftwareMicrosoftWindowsCurrentVersion
From there, select the Policies Explorer folder located in the left pane.
Then move to the right pane and look for the “NoRecentDocsHistory” entry and right-click on it.
Now delete this entry.
Note: This entry is the one that stores the Group Policy setting for “Do not keep the history of recently opened documents. The Group Policy adds this entry to the registry with a value of 1 if you enable the “Do not keep the history of recently opened documents” policy. On the other hand, if you disable the policy by setting it to “Not configured” or deleting it, the Group Policy will delete the entry from the registry, and the system will act as though the value is 0 – for instance, it keeps the history of the recently opened files in your computer.
Option 4 – Try to use the Group Policy Editor
Tap the Win + R keys to open the Run utility and type “gpedit.msc” in the field and tap Enter to launch the Group Policy Editor.
Next, navigate to User Configuration > Administrative Templates > Start Menu and Taskbar.
Afterward, double click on the “Do not keep a history of recently opened documents” policy located on the right panel. This is the policy that lets you enable or disable recent items and frequent places.
Now to enable the recent items, as well as the frequent places, feature, click on the “Disabled” or the “Not Configured” option.
Once you’re done, close the Group Policy Editor and restart your PC.
Note: If you choose to enable this setting, the system and Windows programs will not create shortcuts to documents opened while the setting is in effect. Aside from that, they also stay but won’t display the existing document shortcuts and the system will empty the Recent Items menu on the Start menu and the Windows programs won’t also display shortcuts in the Start Menu. In addition, the Taskbar won’t also show the recently opened or frequently used folders, files, or websites.
Mail and Calendar not working with Cortana? As you know, Cortana was first launched way back in 2014 with an emphasis on its tight integration with both the Windows Mail and Calendar apps. This integration has been one of the highlighting features of this Personal Digital Assistant. However, there are some users who reported that the Calendar and Mail integration with Cortana is not working on their Windows 10 computers. This kind of problem could be due to several factors like the loose integration between the services, incompatible versions of the components, and many more.
According to the users who experienced the issue, the features affected are the syncing of calendar appointments, sending emails via Cortana, and so on. To fix this problem, there are several options you can try. You can try to restart Cortana’s processor run the Windows Store Apps troubleshooter. You could also try to relink your Microsoft account or reinstall the Mail and Calendar apps, as well as reinstall Cortana. For more details, follow the suggestions given below.
Option 1 – Restart Cortana’s process in the Task Manager
Restarting Cortana’s process in the Task Manager could also help you resolve the problem. Refer to the steps given below to do so.
Tap the Ctrl + Alt + Del keys to open the Security options window.
From there, look for the Task Manager in the given list and open it.
Next, look for the process of Cortana and right-click on it, and then select the End Task option to end its process.
After that, the Cortana process will restart by itself and re-initialize.
Option 2 – Run the Windows Store App troubleshooter
The Windows 10 Store Apps Troubleshooter will help you in fixing the Web Preview problem in Cortana. This is a great built-in tool from Microsoft that helps users fix any app issues. To use the Windows Store Apps Troubleshooter, follow the steps below.
Tap Win + I keys again to open the Windows Settings panel.
Go to Update & Security and then go to Troubleshoot.
Under the Troubleshoot section, on your left-hand side, scroll down to find Window Store Apps.
Then click on the Run the troubleshooter option and follow the on-screen instructions and then see if it fixes the problem.
Option 3 – Try to relink your Microsoft Account
You might also want to relink your account in Microsoft using the Windows 10 Settings app.
Open the Windows 10 Settings app.
Next, navigate to Accounts > Email & Accounts and from there, go to the section of Accounts used by Email, Calendar, and Contacts.
After that, select your email account and select Manage.
Once done, a new panel will come up where you have to click on the “Delete account from this device” link.
Once you get a confirmation, select Delete and then relink the same account. This should resolve the problem.
Option 4 – Try to reinstall or update the Mail and Calendar apps
Open Windows PowerShell as admin.
Next, execute this command: Get-AppxPackage *windowscommunicationsapps* | Remove-AppxPackage
Once done, restart your computer and go to the Microsoft Store page to get the latest updates for both Windows Mail and Calendar apps.
Option 5 – Try to reset Cortana via Settings
Launch the Windows 10 Settings app and go to Apps > Apps & Features.
Next, look for the entry of Cortana on the right-side panel and select it.
After that, select the Advanced options and then select the Terminate button under the Terminate section.
Once done, click on the Reset button under the Reset section.
Restart your PC.
After your computer boots, launch Cortana again and check.
Option 6 – Try to reinstall Cortana
If none of the options given above works, you must consider reinstalling Cortana.
First, right-click on the Taskbar and select the Task Manager.
Next, select File menu > Run new task and type “Powershell” in the field and then select the “Create this task with administrative privileges” option.
Click on OK to open the PowerShell console.
After that, type the following command and hit Enter to execute it:
The latest update from Panos Panay on Twitter is including New and redesigned Snipping tool inside Windows 11. From the shared video, we can see that it includes modern Windows 11 UI redesign and it looks and feels like a part of Windows 11.
More things that can be seen from the shared video is that it looks like the new snipping tool is a merged version of the old with snip & sketch.
It is good to see that it is still possible to capture screen with easier way natively inside Windows 11 but some more functionality would be more welcome I guess.
Users were asking for added functions for a long time like adding simple text for example but from shared video, no new features were presented so for some users 3rd party solutions will still be the way to go.
The new and redesigned Snipping tool will roll out with the next update and we will see then about all new features inside it firsthand. Until then, take care.
The DailyProductivityTools Toolbar is packed as a browser extension that claims to increase your productivity with access to free online tools and developed by Mindspark Inc. This extension may seem handy at first, however, while browsing the internet with it active you will experience additional ads, sponsored content, and pop-up ads throughout your browsing sessions and search results.
When installed DailyProductivityTools changed your default new tab page to Search.MyWay.com disguising as a ‘Enhanced Google Search Engine’. This extension monitors your browsing activity, visited websites and links, then uses this information to better target Ads.
DailyProductivityTools has been marked as a Potentially Unwanted Program, and is recommended for removal by many anti-virus applications.
About Browser Hijackers
Browser hijacking is a type of unwanted software, often a web browser add-on or extension, which causes modifications in the browser’s settings. Browser hijacker malware is designed for a variety of reasons. Generally, the idea is to force users visit certain sites that are aiming to increase their site visitor traffic and produce higher ad revenue. Many people believe that the browser hijacker is only a harmless website but that is incorrect. Almost every browser hijacker pose an actual threat to your on-line safety and it is important to classify them under privacy risks. What’s more, hijackers can make the entire infected system vulnerable – other harmful malware and viruses will grab these opportunities to intrude into your computer system very easily.
How one can identify a browser hijack
The following are some symptoms that suggest you have been hijacked: you find unauthorized modifications to your internet browser’s homepage; your internet browser is constantly being redirected to adult sites; the default web browser configurations have been modified and/or your default search engine is altered; you find many toolbars on the web browser; you see lots of pop-ups on your computer screen; your browser has become unstable or starts running slowly; you’re blocked to access those sites of antivirus solution providers.
So how does a PC get infected with a browser hijacker?
A browser hijacker can be installed on your computer if you check out an infected site, click on an email attachment, or download something from a file-sharing site. They could also come from add-on programs, also known as browser helper objects (BHO), browser plug-ins, or toolbars. Browser hijackers sneak into your pc along with free software downloads also that you unwittingly install alongside the original. Examples of popular browser hijackers are Fireball, Ask Toolbar, GoSave, CoolWebSearch, RocketTab and Babylon Toolbar.
Browser hijacking can lead to severe privacy problems and even identity theft, disrupt your browsing experience by taking control of outbound traffic, considerably slows down your PC by consuming lots of resources, and lead to system instability also.
Browser Hijacker Malware – Removal
Certain browser hijacking can be easily corrected by finding and removing the corresponding malware program through your control panel. But, many hijackers will be more difficult to locate or remove since it might get itself connected with certain important computer files that enable it to operate as a necessary operating system process. Novice PC users shouldn’t ever attempt for the manual form of removal, as it demands comprehensive system knowledge to do repairs on the system registry and HOSTS file.
Professionals always recommend users remove any malicious software including browser hijacker by using an automatic malware removal tool, which is better, safer, and faster than the manual removal method. Among the best tools for repairing browser hijacker malware is SafeBytes Anti-Malware. It can help you eliminate any pre-existing malware on your computer and provides you real-time monitoring and protection against new internet threats. Along with anti-virus software, a system optimizer program, similar to Total System Care, can help you repair Windows registry errors, eliminate unwanted toolbars, secure your internet privacy, and stabilize software programs installed on your computer.
Malware Blocking Access To Safebytes Site And Anti-Malware Downloads - What To Do?
Malware can cause many kinds of damage to computer systems, networks, and data. Some malware types modify internet browser settings by including a proxy server or modify the PC’s DNS settings. In such cases, you’ll be unable to visit certain or all of the websites, and therefore unable to download or install the necessary security software to eliminate the malware. If you are reading this article, chances are you’re stuck with a virus infection that is preventing you to download and install Safebytes Anti-Malware program on your PC. Although this kind of issue will be tougher to get around, there are a few actions you can take.
Install in Safe Mode
In the event the malware is set to run at Windows start-up, then booting in Safe Mode should prevent it. Since only the minimum applications and services start-up in safe mode, there are hardly any reasons for conflicts to take place. The following are the steps you should follow to remove viruses in Safemode.
1) After switching on the computer, hit the F8 key while the Windows splash screen begins to load. This would invoke the “Advanced Boot Options” menu.2) Select Safe Mode with Networking with arrow keys and press ENTER.3) When this mode loads, you should have the internet. Now, utilize your internet browser normally and go to https://safebytes.com/products/anti-malware/ to download Safebytes Anti-Malware.4) Immediately after installation, run a full scan and allow the software to get rid of the threats it detects.
Switch over to an alternate internet browser
Certain viruses may target vulnerabilities of a specific browser that block the downloading process. In case you suspect that your Internet Explorer has been hijacked by a virus or otherwise compromised by online hackers, the best course of action is to switch over to a different web browser like Firefox, Chrome, or Safari to download your favorite security software – Safebytes Anti-Malware.
Run anti-malware from your USB drive
Here’s yet another solution which is using a portable USB antivirus software that can scan your system for malicious software without needing installation. Follow these steps to run the anti-malware on the infected computer.
1) On a clean computer, download and install Safebytes Anti-Malware.2) Plug in the USB flash drive to a USB slot on the clean computer.3) Run the setup program by double-clicking the executable file of the downloaded application, with an .exe file extension.4) When asked, choose the location of the USB drive as the place where you would like to store the software files. Follow the instructions on the screen to finish off the installation process.5) Now, transfer the flash drive to the infected PC.6) Run the Safebytes Anti-malware directly from the pen drive by double-clicking the icon.7) Run Full System Scan to detect and clean-up up all kinds of malware.
SafeBytes Anti-Malware: Light-weight Malware Protection for Windows Computer
Nowadays, anti-malware software can protect your computer from different types of online threats. But how to select the best one amongst many malware protection application that’s available in the market? Perhaps you might be aware, there are many anti-malware companies and tools for you to consider. Some of them are good, some are ok types, while some will affect your PC themselves! It is important to choose a company that creates industry-best anti-malware and it has attained a reputation as reliable. On the list of highly recommended software programs is SafeBytes Anti-Malware. SafeBytes carries a superb reputation for quality service, and clients seem to be happy with it.
SafeBytes antimalware is a highly effective and user-friendly protection tool which is suitable for users of all levels of computer literacy. Using its cutting-edge technology, this software will help you eradicate several types of malware including computer viruses, PUPs, trojans, worms, adware, ransomware, and browser hijackers.
SafeBytes has got a variety of wonderful features that can help you protect your PC from malware attack and damage. Some of them are listed as below:
Antimalware Protection: This deep-cleaning antimalware software goes much deeper than most antivirus tools to clean your computer system. Its critically acclaimed virus engine finds and disables hard to remove malware that hides deep inside your personal computer.
Real-time Active Protection: SafeBytes gives round the clock protection for your computer restricting the malware attacks instantly. This software will continuously monitor your PC for suspicious activity and updates itself continuously to keep current with the latest threats.
Web Filtering: SafeBytes gives instant safety rating about the pages you’re going to check out, automatically blocking harmful sites and make sure that you’re certain of your online safety while browsing the internet.
Low CPU Usage: SafeBytes is well known for its low influence on computer resources and great detection rate of diverse threats. It runs silently and efficiently in the background so you are free to use your computer at full power all the time.
24/7 Customer Support: SafeBytes provides you with 24/7 technical support, automatic maintenance and updates for best user experience.
SafeBytes has come up with a wonderful anti-malware solution that can help you conquer the latest computer threats and virus attacks. There is no doubt that your computer system will be protected in real-time as soon as you put this software to use. So if you’re searching for the very best malware removal application out there, and if you don’t mind paying out some dollars for it, opt for SafeBytes Anti-Malware.
Technical Details and Manual Removal (Advanced Users)
If you’d like to carry out the removal of DailyProductivityTools manually instead of using an automated tool, you may follow these simple steps: Navigate to the Windows Control Panel, click the “Add/Remove Programs” and there, choose the offending program to uninstall. In case of suspicious versions of web browser plug-ins, you can actually get rid of it through your web browser’s extension manager. You will likely also want to reset your internet browser.
If you opt to manually delete the system files and Windows registry entries, utilize the following checklist to make sure you know exactly what files to remove before carrying out any actions. But bear in mind, this can be a difficult task and only computer experts can perform it safely. Furthermore, certain malicious programs have the capability to defend against its removal. It is advisable that you carry out the removal procedure in Safe Mode.
 10 worst computer viruses in history
 It would be very difficult to even start a free eMail list without mentioning Google's Gmail. Introduced all the way back in 2004 as an invite-only service it became over time the most popular email platform largely due to the fact Google is offering free eMail accounts.
There are a lot of good things to be said about Gmail itself, most of the area is clutter-free and the largest space is reserved for eMail itself letting users focus on what is important. WEB client itself means that you do not need to have any application installed on your device, altho via Google chrome, you can use Gmail offline offering you flexibility if needed.
The ability to connect and manage other accounts like Outlook, Yahoo, etc is just making Gmail even more attractive, and the snooze feature is a really neat little detail that will pause eMail notifications if you need to focus on other things.
Lack of organizing messages into folders is a little confusing since Gmail offers its own unique label system but sometimes I need to have old reliable save eMail to folder.
All in all, Gmail is a great service and it offers a great eMail on the go experience.
It would be very difficult to even start a free eMail list without mentioning Google's Gmail. Introduced all the way back in 2004 as an invite-only service it became over time the most popular email platform largely due to the fact Google is offering free eMail accounts.
There are a lot of good things to be said about Gmail itself, most of the area is clutter-free and the largest space is reserved for eMail itself letting users focus on what is important. WEB client itself means that you do not need to have any application installed on your device, altho via Google chrome, you can use Gmail offline offering you flexibility if needed.
The ability to connect and manage other accounts like Outlook, Yahoo, etc is just making Gmail even more attractive, and the snooze feature is a really neat little detail that will pause eMail notifications if you need to focus on other things.
Lack of organizing messages into folders is a little confusing since Gmail offers its own unique label system but sometimes I need to have old reliable save eMail to folder.
All in all, Gmail is a great service and it offers a great eMail on the go experience.
 Free Windows eMail client simply called Mail is what was once outlook express. Mail itself has the ability to work with other popular accounts like Google Gmail account, Yahoo, iCloud etc. How it comes with Windows OS and it integrates very well with Microsoft Calendar, this eMail client is for many the first choice.
On the negative side, I might say this is a strip-down version of Outlook which is paid solution so some features are missing if we would compare the two.
Overall, a simple and nice eMail client worth your time, especially if you are on the Windows platform.
Free Windows eMail client simply called Mail is what was once outlook express. Mail itself has the ability to work with other popular accounts like Google Gmail account, Yahoo, iCloud etc. How it comes with Windows OS and it integrates very well with Microsoft Calendar, this eMail client is for many the first choice.
On the negative side, I might say this is a strip-down version of Outlook which is paid solution so some features are missing if we would compare the two.
Overall, a simple and nice eMail client worth your time, especially if you are on the Windows platform.
 Great eMail client matching in functions against paid and premium solutions of big tech companies. Fueled with plenty of customization options and reskinning ones this eMail client offers a lot for its free price tag.
It is also fueled by Mozilla community focusing on privacy and security. It can work with any mail service and it is lightweight with a clean look, altho the look itself can be heavily customized.
The bad side is that client itself relies on email services to provide cloud-based emails, so if you are receiving your email via a service that does not have a cloud-based service in itself all of your received emails will be locked to the computer where you have received them. Also customizing it can be sometimes a little too technical for the average computer user.
All in all, Thunderbird is one great eMail client and it would be a shame not to use it because of its technical side, if you need a reliable and secure eMail client on a single machine, look no further than Thunderbird.
Great eMail client matching in functions against paid and premium solutions of big tech companies. Fueled with plenty of customization options and reskinning ones this eMail client offers a lot for its free price tag.
It is also fueled by Mozilla community focusing on privacy and security. It can work with any mail service and it is lightweight with a clean look, altho the look itself can be heavily customized.
The bad side is that client itself relies on email services to provide cloud-based emails, so if you are receiving your email via a service that does not have a cloud-based service in itself all of your received emails will be locked to the computer where you have received them. Also customizing it can be sometimes a little too technical for the average computer user.
All in all, Thunderbird is one great eMail client and it would be a shame not to use it because of its technical side, if you need a reliable and secure eMail client on a single machine, look no further than Thunderbird.
 Outlook comes as a part of the Microsoft Office suite and as one of the oldest eMail clients, it is still widely popular and adopted through many users and businesses. It has tight integration with all Microsoft services and full integration with Calendar making it one of the if not the best eMail client out there.
Outlook also has a free online service completely free for personal use as well.
The downside is that you can not get it as a separate product if you want a business version other than as a part of the Office suite.
The final verdict would be that this is perhaps the best eMail client out but the big downside is that there is no desktop version outside the Office suite.
Outlook comes as a part of the Microsoft Office suite and as one of the oldest eMail clients, it is still widely popular and adopted through many users and businesses. It has tight integration with all Microsoft services and full integration with Calendar making it one of the if not the best eMail client out there.
Outlook also has a free online service completely free for personal use as well.
The downside is that you can not get it as a separate product if you want a business version other than as a part of the Office suite.
The final verdict would be that this is perhaps the best eMail client out but the big downside is that there is no desktop version outside the Office suite.
 eM Client offers a wide array of features, including a calendar, contacts, and chat. Support is provided for all the major email services including Gmail, Yahoo, iCloud, and Outlook.com. The latest version also offers PGP encryption, live backup, basic image editing capabilities, and auto-replies for Gmail.
Its automatic system makes it very easy to get emails from other services since there is no manual setting, all that is needed is to type in your email and eM Client will do everything else automatically.
A one-time purchase is not pricy and it could offer some features that some free clients are missing. Go check it out with a free trial and see if it is for you.
eM Client offers a wide array of features, including a calendar, contacts, and chat. Support is provided for all the major email services including Gmail, Yahoo, iCloud, and Outlook.com. The latest version also offers PGP encryption, live backup, basic image editing capabilities, and auto-replies for Gmail.
Its automatic system makes it very easy to get emails from other services since there is no manual setting, all that is needed is to type in your email and eM Client will do everything else automatically.
A one-time purchase is not pricy and it could offer some features that some free clients are missing. Go check it out with a free trial and see if it is for you.
 This eMail client's main focus is the simplicity of use with visual appeal while tackling multiple eMail accounts. It has many built-in apps along with a customizable interface. Unlike some more Microsoft-centric email clients, Mailbird Business supports a diverse range of integrated apps, including WhatsApp, Google Docs, Google Calendar, Facebook, Twitter, Dropbox, and Slack, all making for a better-streamlined workflow.
The downside of this client is the yearly subscription plan. I think people, in general, want to get away from software subscription plans so I will include this as a downside but bear in mind it is downside just in terms of a business plan not in the client itself.
This eMail client's main focus is the simplicity of use with visual appeal while tackling multiple eMail accounts. It has many built-in apps along with a customizable interface. Unlike some more Microsoft-centric email clients, Mailbird Business supports a diverse range of integrated apps, including WhatsApp, Google Docs, Google Calendar, Facebook, Twitter, Dropbox, and Slack, all making for a better-streamlined workflow.
The downside of this client is the yearly subscription plan. I think people, in general, want to get away from software subscription plans so I will include this as a downside but bear in mind it is downside just in terms of a business plan not in the client itself.
 Inky is eMail client if you are looking for security. It uses AI along with machine learning in order to block all types of phishing attacks that can get through to other clients. The proprietary machine learning technology can literally read an email to determine if it has phishing content, and then is able to quarantine the email or deliver it with the malicious links disabled. It also takes things a step further and offers an analytics dashboard, which allows an administrator to see patterns of attacks based on dates, or targeted users.
The downside is that client itself is so much focused on security that sometimes some nonsecurity features get overlooked and provide a poor experience but if you need a good and greatly secured eMail client Inky is one to check out.
Inky is eMail client if you are looking for security. It uses AI along with machine learning in order to block all types of phishing attacks that can get through to other clients. The proprietary machine learning technology can literally read an email to determine if it has phishing content, and then is able to quarantine the email or deliver it with the malicious links disabled. It also takes things a step further and offers an analytics dashboard, which allows an administrator to see patterns of attacks based on dates, or targeted users.
The downside is that client itself is so much focused on security that sometimes some nonsecurity features get overlooked and provide a poor experience but if you need a good and greatly secured eMail client Inky is one to check out. 


 The latest update from Panos Panay on Twitter is including New and redesigned Snipping tool inside Windows 11. From the shared video, we can see that it includes modern Windows 11 UI redesign and it looks and feels like a part of Windows 11.
More things that can be seen from the shared video is that it looks like the new snipping tool is a merged version of the old with snip & sketch.
It is good to see that it is still possible to capture screen with easier way natively inside Windows 11 but some more functionality would be more welcome I guess.
Users were asking for added functions for a long time like adding simple text for example but from shared video, no new features were presented so for some users 3rd party solutions will still be the way to go.
The new and redesigned Snipping tool will roll out with the next update and we will see then about all new features inside it firsthand. Until then, take care.
The latest update from Panos Panay on Twitter is including New and redesigned Snipping tool inside Windows 11. From the shared video, we can see that it includes modern Windows 11 UI redesign and it looks and feels like a part of Windows 11.
More things that can be seen from the shared video is that it looks like the new snipping tool is a merged version of the old with snip & sketch.
It is good to see that it is still possible to capture screen with easier way natively inside Windows 11 but some more functionality would be more welcome I guess.
Users were asking for added functions for a long time like adding simple text for example but from shared video, no new features were presented so for some users 3rd party solutions will still be the way to go.
The new and redesigned Snipping tool will roll out with the next update and we will see then about all new features inside it firsthand. Until then, take care.