The Windows 10 operating system comes with a user-friendly interface as well as better security features compared to its previous versions. One of these new features is the “Recently Opened Files” feature which displays all the files you’ve opened recently in File Explorer. Although it might seem useful, some users see this as a privacy concern especially if there are other users that use the same computer. If you are one of these users, read on as this post will guide you on how you can disable the “Recently Opened Files” feature in Windows 10.
There are three ways you can disable the “Recently Opened Files” feature. You can manually clear the recent files, or disable the feature via Control Panel. You can also do it using the Group Policy Editor.
Option 1 – Manually clear the recent files
The first thing you can do is to clear the recent files manually. Since the information about the recently opened files is stored in the form of cached data, you can locate this data and delete it manually, from time to time. To do that, follow these steps:
Tap the Win + R keys to open the Run utility and copy this address in the field: %AppData%MicrosoftWindowsRecent
Next, tap the Ctrl + A keys to select all the items and then tap the Shift + Delete keys simultaneously.
After that, a prompt will appear where you have to click on Yes. This will delete all the recently opened files in the File Explorer the next time you open it.
Option 2 – Disable the feature via Control Panel
The next option you can try to disable the feature is via Control Panel. Refer to these steps to do so:
First, click on the Start Menu button and select the Settings icon.
After that, click on Personalization and then on Start located on the left pane.
Next, scroll down until you see the “Show recently opened items” in Jump Lists on the Start or the Taskbar and click on it and then toggle it off.
Option 3 – Disable the feature using the Group Policy Editor
If you are using the Windows 10 Pro version, then you have access to edit the functions in the Group Policy. The Group Policy function has the option that can disable all the default services of Windows 10. Note that in this step, you will permanently disable the “Recently Opened Files” feature. So before you proceed, make sure that you really want to disable this feature permanently and not in the meantime.
Tap the Win + R keys to open the Run dialog box and type “gpedit.msc” in the field and click OK or tap Enter to open the Group Policy Editor.
Next, on the left side pane, click on the “User Configuration” option and then click the “Administrative Templates” option.
After that, select the “Start Menu and Taskbar” option and select the “Don’t keep the history of recently opened documents” option in the right pane.
Now double click on this option and check the “Enabled” option and then click on Apply and OK buttons to save the changes made.
Internet connectivity issues like Can’t connect to this network present a complex problem with simple solutions for PC and laptop users. First, it is usually recommended that users rule out problems with the internet connection, router, and Wi-Fi settings before proceeding to troubleshoot settings on your PC/laptop. Once the rest are ruled out, we can then proceed with the following troubleshooting steps and guidelines to fix your wifi connection issue:
The first step is to update your windows network adapter driver. Connectivity problems may arise if your network driver is not updated or if it is incompatible with the network adapter. To do so, you may resort to any third-party driver scanning and installing programs found online. This solution should resort if users don’t want the hassle of perusing through windows settings that users may not be familiar with.
However, this solution requires a pre-existing internet connection other than wifi, so it is recommended you have a backup internet connection via ethernet.
The second step is to uninstall the driver for your network adapter. This solution is to resort if there is an issue with the driver as restarting the PC after the following steps let windows reinstall the driver again:
Open the quick access menu on your keyboard by pressing the Windows key and X key at the same time and select “Device Manager” from the menu list.
From the list of devices, select “Network Adapters”
Usually on the top of the list is the Wireless Network Adapter
Right-click the Wireless Network Adapter and select the option to “Uninstall device”
You will be given a confirmation in a new separate window to proceed. Click “Uninstall” to proceed.
After completing the previous steps, try rebooting your Windows PC and reconnecting to see if it works.
A third step is to disable the 802.1 1n modes of your network adapter by following the next steps:
First press the Windows logo key and the X key at the same time to bring up the quick-access menu. And like the previous step, select “Device Manager”
From the list of devices, select “Network Adapters”
Right-click the Wireless Network Adapter from the drop-down menu and select properties
Under properties, select the “Advanced” tab then select the 802.1 1n Mode. To the right drop-down menu change the option to “Disabled” and click “Ok”
After, try to re-establish the connection to see if the steps have worked.
In the event that any of the preceding did not fix your problem, it helps to take a second look at the router and network settings using the interface provided by your ISP. A simple reset to the back of your router often fixes the issue. Also, try to check if you have any other administrative capabilities over the network to determine whether your device, in particular, has been MAC filtered or if the frequency of your wireless adapter is not compatible with the broadcast frequency of your router.
This is a type of Google Chrome update error code. It indicates a failure to communicate with Google update. The error code is displayed in the following format:
‘Update server not available (error: 3)’
Solution
Error Causes
Error 3 may be triggered by several reasons. These include:
You are running Vista/ 7 and you have configured Google Chrome to run as an administrator
Google Update is not registered properly
Registry issues
Further Information and Manual Repair
Here are some of the best and effective DIY methods to resolve error 3 on your PC without any professional help. You don’t need to be a technical whiz to try these methods.
Method 1
If the reason for the error cause is related to Google Chrome configured as administrator on your PC, then simply run it as a normal user. This is a common issue with Google Chrome auto-updating mechanism.
Method 2
If the problem still persists, then it is advisable to try re-installing Google Chrome.
To do this, first, uninstall Google Chrome. Go to the start menu, control panel, and then program and features. Choose Add and Remove Programs and uninstall Google Chrome.
To activate changes, reboot your system. Now reinstall Google Chrome by downloading it from Google Chrome’s official website.
Method 3
If error 3 is triggered because Google Chrome is not registered properly, then try this method to fix the issue.
First, verify that GoogleUpdate.exe exists in the location specified in the Windows Registry Editor. For this, go to the Start Menu and then type Regedit in the search bar.
Now click OK. The registry editor will appear. Now in the tree view on the left, navigate to the following directory:
Make sure the default value corresponds to the location of your GoogleUpdate.exe or GoogleUpdateOnDemand.exe file. Also, verify that these files are located in the given path.
For instance, if they are located in different locations, then right-click the default value and select Modify.
Enter the correct file path and use double quotation marks for example "C:\Documents and Settings%USERNAME%Local SettingsApplication DataGoogleUpdateGoogleUpdate.exe(or GoogleUpdateOnDemand.exe)"
Method 4
Error 3 may also pop up because of registry issues.
These issues occur when the registry gets overloaded with obsolete and unnecessary files like cookies, internet history, bad entries, and junk files. In such an event, it is advisable to download Restoro
This is a user-friendly and cutting-edge PC Fixer embedded with a registry cleaner. The registry cleaner removes all the obsolete files instantly and repairs the damaged registry thereby resolving all errors including error 3.
Click here to download Restoro and resolve error 3.
Windows 11 provides several different ways to make your cursor stand out and be easier to spot inside it. You can make the mouse pointer larger, invert it, or change its color.
Press ⊞ WINDOWS + I to open settings
Click on Accessibility in the sidebar
Select Mouse Pointer and Touch
Adjust mouse cursor size with size slider by clicking on circle and dragging it left or right
Under Mouse Pointer Style pick desired style from White, Black, Inverted, and Custom
White: The cursor is white with a black outline (standard setting)
Black: Cursor is black with a white outline
Inverted: Cursor automatically changes color to an inverted version of the color it is currently hovering over
Custom: You can pick the color for the cursor that you want.
And that is all about it, once you are done with pointer customization just close settings, all changes are saved automatically.
Msvcr80.dll is a runtime dynamic link library file. This file is typically required to run programs written with Visual Studio.
Msvcr80.dll error messages might appear when using or installing certain programs on your PC, that are dependent on the Msvcr80.dll file to run and load.
This error message may appear on your computer screen in either of the following formats:
"Msvcr80.dll Not Found"
"This application failed to start because msvcr80.dll was not found. Re-installing the application may fix this problem."
"The file msvcr80.dll is missing."
"Cannot start [APPLICATION]. A required component is missing: msvcr80.dll. Please install [APPLICATION] again.
"APSDaemon.exe - System Error - MSVCR80.dll is missing from your computer."
"Cannot find [PATH]msvcr80.dll"
Solution
Error Causes
Msvcr80.dll error is a common Windows PC error. This error code may occur due to multiple reasons. These include:
Removal and corruption of Msvcr80.dll file
Registry issues
Viral infection
Hardware failure
Improper software installation
It is advisable to resolve this error code to avoid inconvenience. This error may hamper your ability to access and run your desired program.
Further Information and Manual Repair
Here are some of the best and easiest DIY solutions to fix the Msvcr80.dll error on your PC right away:
1. Check your Recycle Bin for the Missing Msvcr80.dll file or Download the Msvcr80.dll file from a Trusted Website
If you receive the error message ‘missing Msvcr80.dll file’ then first check the recycle bin. It is possible that you may have unknowingly deleted the Msvcr80.dll file while uninstalling a program from the PC.
Remember dll files are shared files. These files are used by a number of programs on your PC to run and load. There is a possibility that the program you uninstalled shared the same file to run on your PC. So, when removing that program from your PC it could have also deleted the Msvcr80.dll file.
Therefore, check your recycle bin to restore the missing file. Nonetheless, if in case you are unable to locate the missing Msvcr80.dll file, then try downloading it on your PC. However, when doing so, make sure you download the file from a reliable dll download website.
2. Uninstall and Reinstall Apple iTunes Program
This error commonly pops up when running Apple iTunes on your PC.
To resolve this issue, and ensure smooth access to Apple iTunes, here’s what you need to do: uninstall from Windows the following programs in this order: Apple iTunes, Software update, Apple Mobile device support, Bonjour, application support, iCloud and mobile me.
Skip over software that you haven’t installed already on your system. When uninstalling the programs, if you have two entries of the same software, then uninstall the older version first and then the newer one.
To do so, go to Applet in the Control Panel. It is called programs and features in Windows 7, 8, and Vista and add/remove programs in Windows XP. Once all Apple software is uninstalled, the next step is to download the latest version of iTunes from Apple. After the software is downloaded on your system successfully, run it. This is most likely to resolve the issue.
3. Scan for Viruses
If the issue still persists, then the underlying cause could be related to malware invasion. Therefore in such circumstances, it is advisable to scan for viruses and malware with a powerful antivirus on your PC and remove them right away.
Please note, using an antivirus may slow down your PC performance.
4. Perform Registry Scan and Repair
When the registry is overloaded with unnecessary and redundant files like junk files, cookies, invalid entries, and bad keys, it gets corrupted easily thereby generating errors like Msvcr80.dll errors. To resolve this issue, you must perform a registry scan and repair it with a powerful registry cleaner.
Whether the cause of the issue is a viral infection or the cause is related to registry problems, the best way to resolve the issue without compromising the speed of your system is to download Restoro.
This is an advanced, cutting-edge, and multi-functional PC repair tool. It is compatible with all Windows versions.
This software is embedded with multiple PC repair and performance-boosting utilities such as a registry cleaner, an antivirus, and a system optimizer. It has a high functional intuitive algorithm and a user-friendly interface.
The registry cleaning feature detects all registry issues, wipes unnecessary files, cleans and repairs the corrupt registry and damaged dll files.
The antivirus utility scans for all types of malware, viruses, Trojans, and spyware and removes them immediately. While the system optimizer module helps boost your computer’s performance to its optimal level. In just a few simple clicks, the Msvcr80.dll error is resolved.
To get started, click here to download Restoro on your PC today!
Error code 0x80070652 occurs when Windows users attempt to upgrade their operating system while another program is in the process of being downloaded. It may also occur due to problems related to previously failed update attempts within Window Update. When this Windows 10 upgrade occurs, Windows users fail to access the version of Windows they are attempting to download. Instead, a message box occurs stating that error code 0x80070652 has occurred on the device. If this error message is not rectified, it could give birth to other Windows 10 errors such as error code 0x80072EE2.
Solution
Error Causes
Error code 0x80070652 may result from Windows 10 users attempting to download another program while upgrading their operating system. It may also be caused by an issue related to previous installations of updates. For instance, in some cases, your previous installation of the Windows process may have been interrupted or it was simply not completed properly. This causes any other upgrade process that follows to result in error code 0x80070652.
Further Information and Manual Repair
But what can be done in such a situation to resolve the error code? Windows users have several options available. For instance, they can wait on any additional program that may be in the process of downloading to complete the process before attempting to upgrade Windows. They may also troubleshoot problems related to any failed updates or select a system restore point in which the error code was not present.
The manual repair methods Windows 10 users choose may involve any of the solutions mentioned previously. The choice is largely dependent on the user and his determination to fix the error code. However, note that automated tools or Windows repair technicians may also provide solutions to PC issues like error code 0x80070652.
Method One: Verify and Troubleshoot Failed Upgrades
Since previously failed updates within Windows Update can lead to the occurrence of error code 0x80070652, Windows 10 users will need to verify which of these failed updates occurred by checking the history section of the Windows Update tool. Once you’ve been able to verify that failed updates have occurred in the recent past, you’ll need to troubleshoot these problems to rectify the error code. Follow the instructions below to check for updates that have failed to install properly via Windows Update.
Step one: Type Windows Update in the Search box near Start Menu
Step two: Select Windows Update settings
Step three: Select Update history
Step four: Review updates from the most recent to least recent to see which updates have failed
Step five: Click failed updates for more details and troubleshoot accordingly.
Once you’ve completed the troubleshooting of any updates which failed, proceed by rebooting your device. You may then reattempt to upgrade to the latest version of Windows 10 once no other program is in the process of being downloaded.
If the problem causing error code 0x80070652 was related to failed updates of the past, these issues will likely be resolved once you successfully troubleshoot them. However, if the error code reoccurs, apply the next manual repair solution mentioned in this article.
Method Two: Download Updates Manually via Microsoft Download Center
Another option available to users is simply downloading updates manually by visiting the official Microsoft website, specifically the Windows section which provides downloads. To successfully complete this process, ensure you look for stand-alone packages of these downloads available on the website. You will need to know the Microsoft Knowledge Base (KB) article number related to the specific update(s) which failed.
Once a Windows user has verified the KB article number of the specific update, download it from the Microsoft website, then select Run to install the update. Reboot your PC, then check Windows Update to see if you are able to successfully complete the Windows 10 upgrade.
If the upgrade fails, you may need to implement the next manual repair method as is mentioned below.
Method Three: Use Windows System Restore
One of the best options for Windows 10 users facing certain PC problems is to apply System Restore. This allows them to reset their machine for a period of time in which the problem was not present. This is known as the restore point. To apply this manual repair method, follow the steps below.
Step one: In the search box beside the Start Menu, type System Restore
Step two: Select Create a restore point
Step three: Select the System Protection tab then Configure or Create
Step four: Provide details regarding a system restore point of your choice
Step five: Select Create, then OK.
Method Four: Download an Automated Tool
If you wish to always have at your disposal a utility tool to fix these Windows 10 and other related issues when they do arise, download and install a powerful automated tool.
Error code 0xd0000272 occurs when Windows users are unable to activate their operating system. This usually occurs due to activation servers being busy or unavailable and affects Windows 8, Windows 8.1, and Windows 10 users.
Common symptoms of the error code include the following:
Inability to activate Windows operating system
Message box with error code 0xd0000272
Solution
Error Causes
Windows users affected by error code 0xd0000272 usually receive a message stating that the “activation server is busy or unavailable”. Some users report the error is resolved on its own after a few hours, while others experience activation issues that resolve only after manual repair methods are implemented.
Further Information and Manual Repair
To improve your chances of resolving issues related to Windows activation error codes, use manual repair methods and procedures. These are often successful as they address the issues causing the error codes to occur, whether there be missing or corrupted system files, network connectivity issues, or invalid product keys.
Error code 0xd0000272 may be resolved by simply waiting until later – a few hours at most – to reattempt activation. If, however, the activation process fails, proceed with the methods suggested below or contact a Windows repair technician.
Method One: Verify Internet Connection to Activate Windows
Are network connectivity issues preventing your machine from activating Windows? Check for this issue by verifying whether or not you are connected. Once you’ve been able to check your connection via your Internet settings and troubleshoot your network where necessary, proceed to the Product Activation Wizard.
The Product Activation Wizard will check if you have permission or authorized access to the version of Windows you are attempting to activate. This process usually involves the use of a product key. Once you enter the 25-character code – in the correct order, of course – proceed by selecting the activation option.
If the process is successful, you will be able to complete the activation and access all the features of the Windows edition you have activated. You will also notice the absence of the error code 0xd0000272 message. In cases where this manual repair method is unable to successfully resolve the issue, however, move to the next manual repair procedure on this list.
Method Two: Run Windows Update Troubleshooter
Another tool available to Windows users is the Windows Update Troubleshooter. You may access the Windows Update Troubleshooter offered on Windows 8 since it does not require an internet connection and runs most of the functions required. To do so, follow the steps below.
Step one: Swipe to the right of the screen and click Search
Step two: Type Troubleshooting
Step three: Click Settings then select Troubleshooting
Step four: Under System & Security, click Fix Problems with Windows Update
Step five: Select Next
You can also visit Microsoft’s website to access a more comprehensive Windows Update Troubleshoot tool. Download the troubleshooter and run it to fix problems related to Windows Update. Afterward, restart your computer then check the Product Activation Wizard to verify whether or not you can activate Windows 8 or 8.1. If the problem persists, however, and error code 0xd0000272 reoccurs, proceed to the third manual repair method.
Method Three: Disable Proxy Settings
Your computer’s proxy settings may in some cases interfere with the activation process, resulting in issues like error code 0xd0000272. To fix this problem, first, disable your proxy setting then reattempt the activation process using the Product Activation Wizard.
Step one: Press Win + C keyboard combination
Step two: Select Settings
Step three: Click Change PC Settings
Step four: Select Network, then Proxy
Step six: Switch proxy server settings to Off
Open the Product Activation Wizard once you’ve disabled the proxy settings. Complete the activation process based on the instructions provided. If you are successful, you will no longer be bothered by error code 0xd0000272 as the symptoms of the error code will not occur.
If, however, this manual repair method fails to resolve the error code, you may need to consider other alternatives. These may include the use of a powerful automated tool. You can also consider getting help from a Windows repair technician as such professionals are able to assess your computer and provide solutions as needed.
Ever gotten an e-mail offer that seemed just a little bit too good to be true? Might’ve been a phishing attempt! These are everywhere and can come in many different forms.
So what’s phishing exactly, how can you detect it and how can you keep safe?
What is phishing?
Phishing (pronounced like fishing) is a type of cyberattack that tricks the user into trusting the source and revealing sensitive information. Fishing being the perfect analogy, the bait is a legitimate-looking site, e-mail or file and when you take a bite, your identity, banking information and much more can be revealed and stolen.
Credit: Anne Nygård on Unsplash
Some phishing attempts are incredibly obvious, others are super elaborate. Like with most types of malware, cybercriminals have become extremely well-versed in phishing and anyone can fall for it. To help you recognize and avoid it, we’ll take you through a couple of phishing types and give you tips on what to do if faced with them.
Phishing techniques
E-mail phishing
This is actually the most common type of phishing. A cybercriminal creates an e-mail containing stuff like attractive offers, legitimate-looking attachments or links and makes it appear as though it’s coming from a trusted source.
Credit: Justin Morgan on Unsplash
For example, it looks like it’s coming from your bank or your favorite retailer. The logo looks legit and the structure of the e-mail seems familiar, so you might get tricked into clicking on whatever clickable content is in it.
Unfortunately this exposes your device to malware that hands your data off to the hacker, who can decide what to do with it further.
SMS and social media phishing
Like the above example, you could be approached with lucrative offers or links via text messages or social media messages. Typically, the messages seem relevant to the user as they will be made to look like they’re related to apps or services you’re using.
Voice phishing
Voice phishing attacks are schemes that appear as though they’re coming from a credible number. Normally, you’ll get a call about something related to credit cards or taxes to get you into a state of worry, leading you to disclose personal information on the phone.
Spear phishing, whaling and BEC
Spear phishing normally targets specific individuals within a company who are likely to have access to sensitive data. Spear phishers spend time collecting information they can use to reach out to the individual looking as trustworthy as possible. They’ll typically lead with something relevant, for example mentioning an upcoming company event, and make a seemingly legitimate request.
Whaling is a more elaborate form of spear phishing, which targets people in even stronger positions such as executives or high-value individuals. The ultimate goal is to get them to transfer financial or other sensitive information that can be used to compromise the entire business.
Credit: Azamat E on Unsplash
BEC, or Business e-mail compromise, is a specific spear phishing technique carried out via e-mail. While there are many ways this is done, most commonly you’ll see instances where the phisher poses as a CEO or similar executive, or as a lower-level employee in specific positions (e.g. sales managers or financial controllers).
In the first situation, the impersonator reaches out to employees requesting them to transfer certain files or pay invoices. In the second situation, the phisher takes control of the employee’s e-mail account and sends false instructions to other employees in order to obtain data and information from them.
What can you do?
There are many ways you can be aware and spot a phishing attempt. Here are some tips:
Always check the sender’s address in your e-mails, even when they seem to come from a familiar source.
In any instance where payment information is requested, be very, very careful.
If you are receiving attachments you never asked for and definitely didn’t expect, better not click on them.
Beware of content that transmits a sense of urgency (sales deals, urgent updates to login credentials, etc.).
Bad spelling and grammar are usually a telltale sign of phishing.
Links that look shortened (e.g. Bit.ly) or just suspicious in general - if you have a bad feeling, do not click on them.
If you are receiving threats, you probably shouldn’t be clicking on anything in that message.
Always examine first-time senders in detail.
Block suspicious e-mail addresses, numbers and social media accounts.
If you are receiving a coupon for free stuff… You aren’t.
If you’re being asked to update your payment details by a service you use, such as Netflix, chances are it’s an impersonator.
Those are some of the ways to identify and prevent phishing attacks. However, sometimes phishers disguise themselves a little too well or a misclick happens and there you go - you’ve been exposed to malware.
Credit: FLY:D on Unsplash
This won’t happen if you invest in powerful protection software from the get-go, though. A good antivirus program like Bitdefender will keep you safe from becoming a victim of phishing scams. In fact, it will protect you from malicious attacks overall.
Be it your household or your business you’re concerned about, there are a bunch of different packages and options available, providing different kinds of cybersecurity services. That’s the only way you can ever really be sure you aren’t at risk of a digital attack.
Summary
Have you ever been targeted by phishers and didn’t know that’s what it was until you read this article? Many can relate. Protect yourself before it’s too late!
Among other things and innovations, Windows 11 brings to the table is the game mode. The game mode is a system designed to release some resources and optimize your system when Windows 11 detects that you are playing games. It also turns off automatic updates while the game is active.
The game mode is active at all times and usually, everything works great but in some instances, it can sadly cause some performance issues. If you are one of these unlucky people where game mode is not working as supposed to do, don’t panic, we have a quick guide for you on how to turn it off.
Press ⊞ WINDOWS + I to open settings
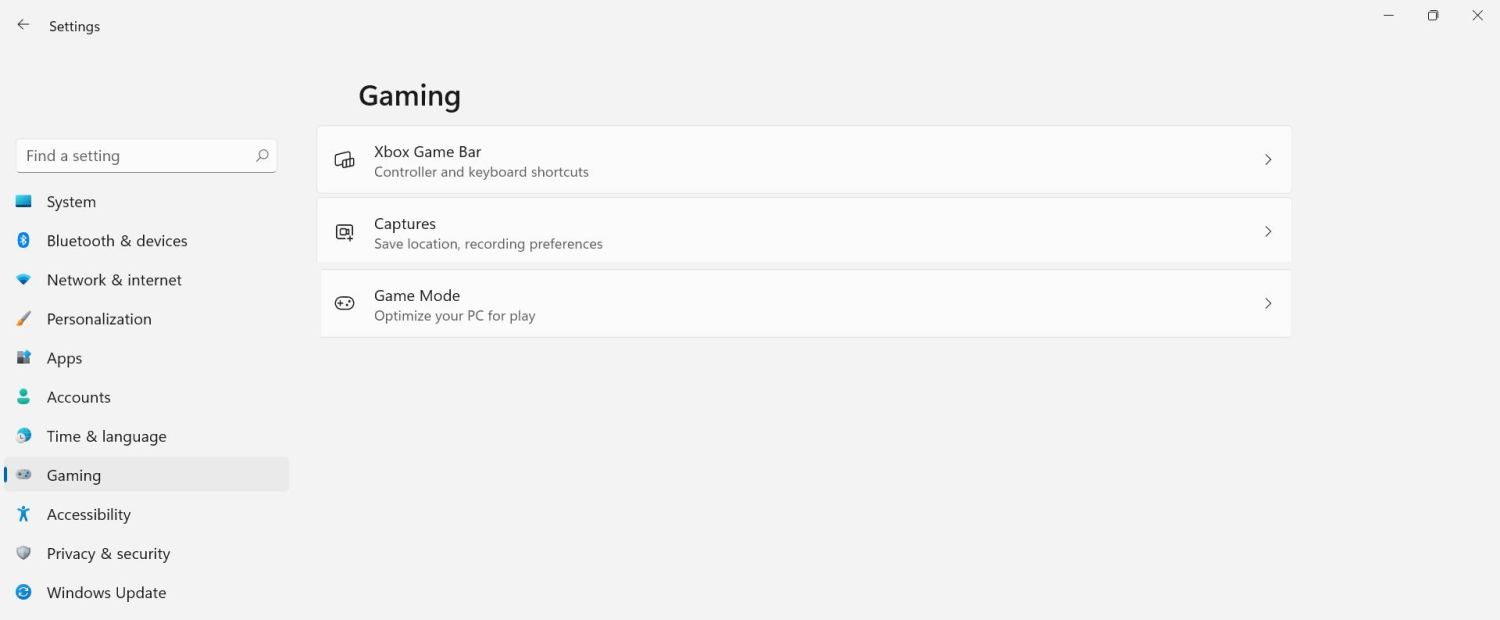
Inside click on Gaming
Select Game mode
Click switch beside Game mode to turn it off
Close settings
Everything will be automatically saved and applied and you should not have any issues from now on. If for any reason you wish to turn game mode back ON, just follow the same steps and turn the switch to ON.
Error Code 0x80070032 is a command that most often relates to codes or commands that have not been entered correctly or do not apply to the given program. It can also appear when mail folders in Windows Mail are not able to sync in the way that they should between the local device and the servers owned by Microsoft.
Common symptoms include:
Inability to access your emails
Emails not syncing between devices correctly
Inability to use certain commands in certain programs
The primary methods used to address Error Code 0x80070032 are fairly basic and easy to complete. Most users should be able to complete these methods on their own and they do not require a lot of time to do. However, if you don’t feel like you have the experience, skills, or knowledge necessary to complete the steps listed below, consider getting in touch with a qualified Windows repair technician to assist you.
Solution
Error Causes
The two main causes for Error Code 0x80070032 are commands entered into programs that cannot be completed or are incompatible with the program at hand and folders in Windows Mail that cannot sync properly.
Further Information and Manual Repair
There are three basic methods that users can try in order to resolve Error Code 0x80070032 on their machine. These are fairly simple and easy to complete. However, if the methods below aren’t successful in resolving the error code or if you do not feel confident in your ability to use them, get in touch with a certified Windows repair professional to assist you.
If you believe that you are seeing the error due to entering a command that didn’t work, use Method One first. If you believe it is due to a mail syncing error, use Methods Two or Three.
Here are the top methods for addressing Error Code 0x80070032:
Method One: Reinstall the Program in Question
If you believe that you are experiencing Error Code 0x80070032 because of a command that you have entered, the best solution is to reinstall the program in which you were entering the command. You may also want to try updating your program, if able, before reinstalling it. Remember to restart the computer before reattempting to enter in the command that caused the error.
Method Two: Download and Install Windows System Updates
For many users, Error Code 0x80070032 appears because of a bug in one of the versions of Windows 10. If you believe that this is the case, open up your Windows Updates and check to see if there are any updates that you can install.
For users who are only seeing Error Code 0x80070032 because of the bug mentioned above, Windows released an update that should address the error code on its own. If your computer is fully updated, the error may be resolved on its own. Always remember to restart your computer after installing updates so that the necessary changes can take effect.
Method Three: Change Your Windows Mail to Local Access
If the above methods did not resolve the problem successfully, you can switch to local access to your Windows Mail, rather than relying on Microsoft access. To do so, complete the following steps:
Go into your Windows settings and click on the option for “Accounts.”
Select the account that you wish to access and choose the option to sign in using a local account.
Enter your password to verify local access.
Add in your user name, password, and password hint.
Sign out of the local account to finish.
Once this is done, you can switch back to your Microsoft account, which should reset your syncing ability. Follow these steps to switch back:
Go back into your settings, selecting “Accounts” and choosing the proper account.
Change the option to sign in with a Microsoft account.
Enter your password, then your username and password again.
Select “Switch” to change back to the Microsoft account.
Method Four: Use An Automated Tool
If you wish to always have at your disposal a utility tool to fix these Windows 10 and other related issues when they do arise, download and install a powerful automated tool.
Some users wanting to upgrade to Windows 10 from Windows 7 or Windows 8.1 experienced errors with installation. One of these errors is CPU Not Compatible. When you click and run the “Get Windows 10” from your system tray bar, you’ll receive the “CPU is not compatible with Windows 10” error. When this happens, it might be good to check if there’s a bug or if your NX feature (a requirement for the Windows 10 installation) is enabled.
Solution
Error Causes
The “CPU is not compatible with Windows 10” error normally occurs when:
NX feature is not enabled
You experienced the Windows 10 bug
Further Information and Manual Repair
To successfully upgrade to Windows 10, your CPU must support Physical Address Extension (PAE), SSE2, and NX features. If any of these features are not activated on your system, it’ll cause the CPU not compatible error. However, some users still reported experiencing this error even though their CPU has these features activated. Normally, this is due to the bug that Windows acknowledged.
If any of these two scenarios apply to your computer, the following methods will help you fix the problem:
Method 1 – Check for bugs
The bug applies to some Windows 7 and Windows 8.1 systems. The bug occurs when the “Get Windows 10” app fails to recognize CPUs as being compatible. This produces a false negative result with a message, “Here’s why Windows 10 cannot be installed on this PC: The CPU isn’t supported”. To fix this bug, Microsoft released an update.
Unfortunately, the patch update (KB2976978 for Windows 8/8.1 and KB2952664 for Windows 7 SP1) to fix the bug may not be automatically downloaded to your computer. If this is the case, you need to verify first if the patch was installed correctly. To do this, follow the steps below:
Click ‘Start’ and type in View Installed Updates. The “View installed updates” icon should appear. Click the icon.
Go to the Search bar (Top right portion) then type the patch name for your system. Make sure that you type the correct patch name for your system since Windows 7 and Windows 8/8.1 have different names. If you find the patch, it means it’s already installed. You can now upgrade to Windows 10 without the CPU not-compatible error.
But, if you can’t find it you need to install the patch manually.
Go to Windows Update then click the “Check for Updates” button.
Browse through the available updates and look for KB2976978 for Windows 8/8.1 or KB2952664 for Windows 7 SP1
Download the right patch. You may need to reboot your system once it’s done.
The downloaded patch should be applied after a day or two with the Windows Task Scheduler. Once the patch is applied, you can now upgrade to Windows 10.
Method 2 – Check CPU features and activate them if needed
A major requirement for Windows 10 upgrade is for the CPU to have Physical Address Extension (PAE), SSE2, and NX features enabled on your system. If you receive the CPU not compatible error, one possible cause is that any of the mentioned features are not available OR not enabled on your system. Here’s how you can fix this:
Verify if your CPU supports the three instruction sets. You can use software that provides information like this. If all three are available, proceed to the next step.
Go to your computer’s BIOS. To do this, reboot your computer. You will need to press a key specific to your computer’s manufacturer (usually it’s F12, F8, F2, or DEL).
Look for the NX (No Execute Bit) settings. This is normally found in the “Advanced Configuration” menu, or something similar to this. Just take note that the NX setting can be named differently in BIOS. Some other names include EDB (Execute Disabled Bit), EVP (Enhanced Virus Protection), Execute Disabled Memory Protection or No Excuse Memory Protect.
Once you’re in the NX settings, make sure that it’s enabled.
Exit the BIOS and SAVE your changes.
Boot your computer normally, then try upgrading to Windows 10 again through the “Get Windows 10” app found in the system tray.
Method 3 – Force enabling NX Bit
If changing the settings in your BIOS doesn’t do the trick, your final option is to force enable the NX bit in your Windows system. However, this is only applicable IF and ONLY IF your CPU does support it. To force enable NX bit, do the following:
Click Start and go to command prompt (Type “cmd” – no quotes) and press enter.
Copy and paste the text below to the command prompt.bcdedit.exe /set {current} nx AlwaysOn
Execute the command. You will need to reboot your computer once this is done.
Download and install Windows 10
Method 4 – Use a trusted automated tool
If you still experience the error after doing the methods above, you might want to try a powerful and trusted automated tool to fix the job.


 Windows 11 provides several different ways to make your cursor stand out and be easier to spot inside it. You can make the mouse pointer larger, invert it, or change its color.


 The game mode is active at all times and usually, everything works great but in some instances, it can sadly cause some performance issues. If you are one of these unlucky people where game mode is not working as supposed to do, don’t panic, we have a quick guide for you on how to turn it off.