If you have multiple products with Windows on them, Copy & Paste text between them is easy as 1,2,3 and we will be happy to tell you how can you do it.
Hello and welcome everyone, today we will see how can we share text information between 2 devices using Windows 10 in instant. In order for you to be able to share text information between devices, there are two prerequisites that you must meet. The first is that all devices must be connected to the internet, the second is that you must have a Microsoft account.
If you have both of these things continue with the tutorial, if you do not have a Microsoft account go to Microsoft website and create one for free.
Also, know that this option needs to be turned ON on all devices in order to work. So steps we will explain will have to be done on each device, if you already have some device logged in and connected to Microsoft account, you can skip setting it up.
Click on ⊞ WINDOWS and click on settings.
Then click on System.
Once you are in the system, on the left tabs find and click on Clipboard.
If you are not logged in to your Microsoft account do so on the right panel by locating Sync across devices and click on sign in.
When you are signed in click on the option to turn it on.
One option is turned ON, you will be greeted with two choices, to copy everything from the clipboard automatically or to choose text which you want to sync and paste it with ⊞ WINDOWS + V. Choose whatever better suits your needs, and you are done.
Repeat these steps for other devices and you are done.
One of the most common brands of GPUs that comes in a large number of computers is AMD’s Radeon Graphics processing units. AMD included the Radeon Settings panel so that users can control how the hardware functions. However, as of late, a lot of users reported that the Radeon Settings panel throws an error that says, “Radeon Settings are currently not available. Please try again after connecting AMD graphics” when they try to use it.
This kind of error in the Radeon Settings panel is most likely caused by either corrupted drivers or incompatible drivers. If you are one of the users who are facing this problem, worry not for this post will guide you in fixing this error. You can either use the Device Driver Uninstaller or change the driver version. For more details, make use of the options provided below.
Option 1 – Try to use the Device Driver Uninstaller
The first thing you can do to fix the problem is to uninstall the AMD Radeon drivers by using the Device Driver Uninstaller software. After you’ve uninstalled the AMD Radeon drivers using this software, go to the official website of AMD to download the AMD Radeon drivers. Once you’ve downloaded them, you can install them by simply running the executable file. Once the installation of the new AMD Radeon drivers is done, try to open the Radeon Settings panel and see if the error is now fixed or not. If not, refer to the next given option below.
Option 2 – Try changing the Driver version
If you have followed the instructions in the first option then you can proceed to the next given steps below.
Now that you’ve completely uninstalled the AMD Radeon drivers and reinstalled their latest working versions, check if the drivers are still updating. If they are, you need to stop them.
To disable the drivers being automatically updated, you need to go to the Group Policy Editor by tapping the Win + R keys to open the Run utility and then type “gpedit.msc” in the field and tap Enter or click OK.
After opening the Group Policy Editor, navigate to this policy setting: Computer Configuration > Administrative Templates > System > Device Installation > Device Installation Restrictions
From there, double click on the “Prevent installation of devices that match any of these device IDs” policy setting to open a new window, and from this window, you will see the following description of the setting:
“This policy setting allows you to specify a list of Plug and Play hardware IDs and compatible IDs for devices that Windows is prevented from installing. This policy setting takes precedence over any other policy setting that allows Windows to install a device. If you enable this policy setting Windows is prevented from installing a device whose hardware ID or compatible ID appears in the list you create. If you enable this policy setting on a remote desktop server the policy setting affects the redirection of the specified devices from a remote desktop client to the remote desktop server. If you disable or do not configure this policy setting devices can be installed and updated as allowed or prevented by other policy settings.”
Now set the radio button of the policy setting to “Enabled”. This will turn off the delete confirmation prompt. Note that setting the radio button to either Not Configured or Disabled will turn off the driver being automatically updated.
Next, click on the Show button under the Options section. And in the field that pops up, type in the Hardware ID of your GPU and click OK. You can find the GPU’s Hardware ID under this location: Device Manager > <DEVICE NAME> Properties > Details > Hardware IDs
Once you’re done, click the Apply and OK buttons to save the changes made.
Close the Group Policy Editor and restart your PC and see if the “Radeon Settings are currently not available. Please try again after connecting AMD graphics” error is now fixed.
If you receive an error message saying, “File System Error 2147219196” when trying to open a picture, access a file or when moving a folder on your Windows 10 computer then read on as this post will help you resolve this error. According to experts, this error started to appear right after the Windows Update v1803 was released. Users who installed the new Windows version faced the same dilemma.
This error might be caused by a corrupted disk or it could be due to some broken Windows components or due to file system encryptions. Before you troubleshoot the problem, make sure that you are logged in as an administrator.
Option 1 – Update Windows
The first thing you can do to Resolve File System Error -2147219196 is to update Windows. Since Microsoft is already aware of this issue, they might have already released a fix for this in one of their new updates so make sure to check for any available updates on your computer and have it installed right away.
Tap Win + S to open Search then type “update” in the field and from the search results that appear, click on Windows Update.
After that, it will open Windows Update under Settings and from there click the Check for Updates button and let Windows check for any available updates.
And if there are any updates available, download and install them on your Windows 10 computer.
Restart your PC and check if the error is now fixed or not.
Option 2 – Run CHKDSK to check your disk for errors
When it comes to some issues concerning the hard drive or removable devices, there is a utility in Windows that might help which is called “chkdsk”. This error check utility can help with several issues in the system including File System Error -2147219196.
Tap the Win + S keys to open the Search box.
Then type “command prompt” in the field and from the search results that appear, right-click on Command Prompt and select “Run as administrator”.
After opening an elevated command prompt, copy and paste the following command and hit Enter:
chkdsk /r /f
Now if you are prompted to run CHKDSK after your reboot your PC, just tap Y and reboot your PC.
If CHKDSK is not able to find any errors, tap the Win + E keys and navigate the access window. From there, right-click on the concerned drive and click on Properties.
After opening Properties, click on the tab Tools and then click on the “Check” button under the Error-checking section.
Wait until the process is completed and then restart your computer.
Once your computer has restarted, try accessing the file and check if the error persists.
Option 3 – Disable the File System Encryption
File System Encryption allows you to encrypt drives to protect them from being accessed from another computer. This is the standard practice in various organizations in order to protect their data. However, there are times when the file encryption system caused issues for users in accessing files and throws the File System Error -2147219196 instead which is why you need to temporarily disable it to access your file. To do so, follow the steps below.
Tap the Win + R keys to open the Run dialog box.
Then type “control” in the field to open Control Panel.
From there, navigate to Security and select the BitLocker Drive Encryption option from the list.
After that, make sure that all your drives are not encrypted and if any of them are encrypted, turn off encryption by selecting Turn off BitLocker.
Reboot your computer for the changes to take effect.
Option 4 – Run SFC scan
Tap Win + R to launch Run.
Type in cmd in the field and tap Enter.
After opening Command Prompt, type in sfc /scannow
If you are trying to copy large files that are over 4GB to a USB flash drive or SD card, but you suddenly get an error message saying, “File Too Large, The file is too large for the destination file system”, read on as this post will help you fix this problem.
A user recently reported that while trying to copy a 4.8GB zipped file from a Windows 10 PC to a new 8GB USB drive but only got the File Too Large error message instead. If you share the same problem with this user and you know that there is more than enough available space for the file in your USB drive or SD card, continue reading until you get to the instructions provided in this post so that you will be able to copy the file successfully.
It is most likely that the USB drive has been FAT32 formatted which is why you’re unable to copy the file and got an error. The FAT32 file system has a built-in limitation on the size of the individual file that it may contain. For instance, it’s 4GB so even though collectively, it may have files or even 1TB individually it shouldn’t be more than 4GB. Thus, you need to change the file system from FAT32 to NTFS. To do that, carefully follow the instructions provided below.
Step 1: Connect the USB drive and open the Windows File Explorer.
Step 2: Afterwards, right-click on the USB drive letter and select Format from the context menu.
Step 3: Next, select NTFS instead of FAT32 the instant a dialog box appears from the drop-down menu for the file system.
Step 4: Now click on the Quick Format option and then click the Start button to reformat the USB drive.
Note: There is also another way you can change the file system. In this alternative way, you need to open an elevated Command Prompt and type the convert X: /fs:ntfs /nosecurity command, and hit Enter to execute it. Remember that in this command, “X” is the letter of your USB drive so whatever the letter of your drive is, you need to make sure to put it instead of “X”. Once the process is completed, try copying the file again.
You might be trying to play music files using the Windows Media Player, but were unable to do so since you encountered an error saying, “Windows Media Player Error – Server Execution Failed” error. If you encountered this error, worry not for this post will guide you on how to fix it using some potential fixes.
In the error message, the “Server execution failed” indicates that the “wmplayer.exe” is still running or shutting down at that point and it is possible that it is stuck which is not able to close properly. To fix this error, there are several potential fixes you can try. The first one is to run the Video Playback troubleshooter. While you could also try to disable the WMP Network Sharing Service or register both the jscript.dll and vbscript.dll files. For more information, refer to the options provided below.
Option 1 – Try to run the Video Playback troubleshooter
The first thing you can do to fix the problem, you can try to run the Video Playback troubleshooter instead. To run it, simply go to Settings > Update & security > Troubleshoot. From there, scroll down until you see the Video Playback option and then click on the “Run the troubleshooter” button to get started. This troubleshooter will detect and automatically fix any problems related to video playback so it should help fix the error.
Option 2 – Try to disable the WMP Network Sharing Service
If the Video Playback troubleshooter didn’t work in fixing the problem, the next thing you need to do is disable the Windows Media Player Network Sharing Service. The WMP Network Sharing Service is used to share the libraries of the Windows Media Player to other users on the network as well as media devices using the Universal Plug and Play. And since you are not using any network here, then you can disable this service to fix the problem. How? Refer to the given steps below.
Tap the Win + R keys to open the Run dialog box and type “services.msc” in the field and tap Enter to open the Services Manager.
Next, look for the Windows Media Player Network Sharing Service from the list of Services and right-click on it.
After that, click on the Stop option and see if it fixes the Windows Media Player error.
Option 3 – Try to register the jscript.dll and vbscript.dll files
Tap the Win + X keys and from the menu select the Windows PowerShell (Admin) option to open an elevated Command Prompt.
Next, type this command to register the jscript.dll file and click on the confirmation box: regsvr32 jscript.dll
After that, execute the regsvr32 vbscript.dll command to register the vbscript.dll file.
Once you’re done, these DLL files will be re-registered and should fix the Windows Media Player error.
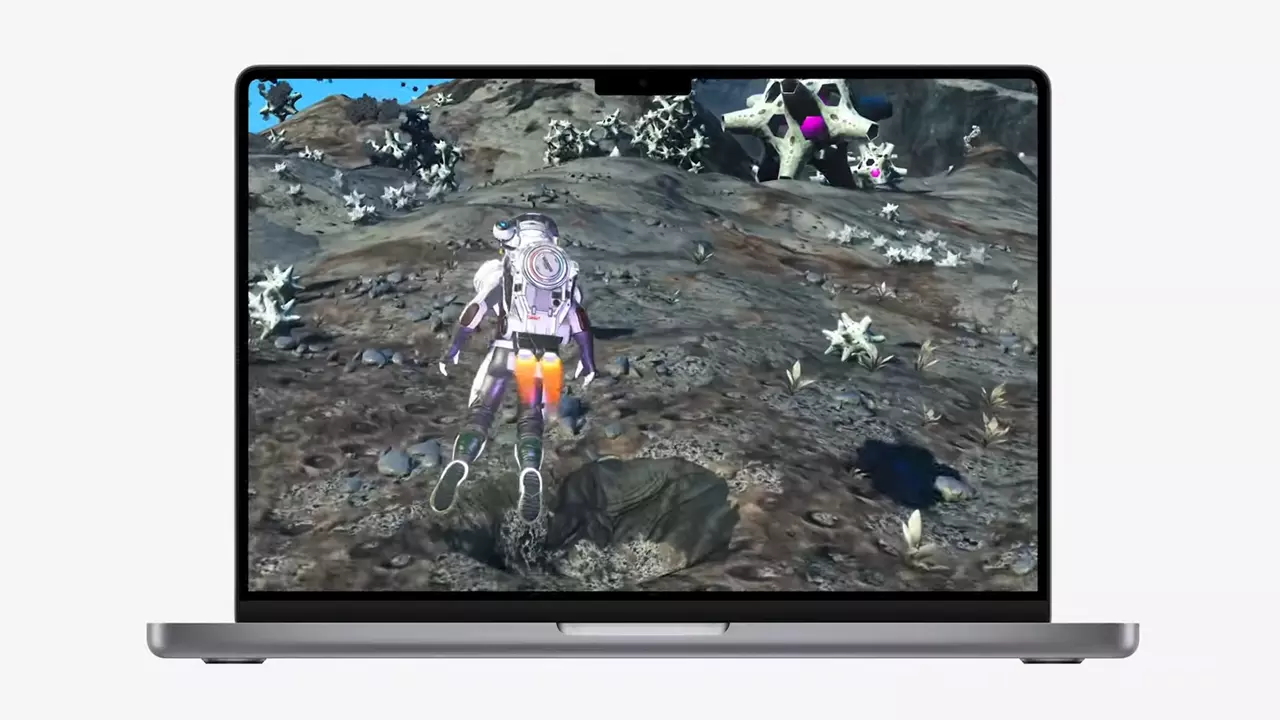
New Apple's upscaling technology called MetalFX will place iOS and macOS devices back into the gaming world. Apple had great games back in the old days and some all-time hits like the prince of Persia have been made first for apple but along the way, it just lost it.
Same as NVIDIA's DLSS and Intel's XeSS systems, Apple MetalFX also uses AI algorithms to upscale the resolution of output game frames. So, for example, the GPU inside your MAC might render the game at 1080p, but through MetalFX and AI upscaling it will look like a 4K image but have a good frame rate since it is rendered in base resolution.
The ability to make AI strike a good balance between performance and image quality is a key to technology in today's modern gaming and having this technology will help developers a ton to be able to achieve great results on Apple hardware.
The First MetalFX Games
So far three official games that will use this technology and be released natively for Appl hardware are Resident Evil 8 Village, GRID legends, and No Man's Sky. All three games have been confirmed and Resident Evil 8 Village is already sent for review people are impressed since the game can run smoothly on all Apple devices, even ones with an M1 CPU.
Apple is back into gaming
When you say Apple gaming is probably the last thing that comes to your mind but truth be told Apple makes more money from games than Microsoft, Nintendo and Sony combined. Also, Apple itself was a big player once regarding computer games as well, Myst and Prince of Persia are games that were made and have been released for Apple first. Bungie was also founded by Apple developers and Halo was originally announced as a Mac game.
Apple has been trying and pushing gaming on its platform since it kind of died down. Today all Sony, Nintendo, and Microsoft controllers work without any issues with all Apple products. Apple also has its own gaming subscription service, Apple Arcade, and its Apple TV is packed with GPU that can rival Xbox ones.
MetalFX API ties and brings it all together, it is designed to get the most performance from the hardware by minimizing overhead.
Now, computers and laptops do not hold any large numbers if we look at the user base, and that could deter developers but if we look at iPad and iPhone things are different there, much different. How same CPU power these devices and how MetalFX is available across all products it is clear that there is a market for games there. No Man's Sky is coming to iPad using these technologies and bringing full computer experience to tablets.
This is a typical system error. This error means the requested operation cannot be performed in full-screen mode. It hampers your ability to run your desired program on Windows PC. It is displayed on computer screens in the following format:
"ERROR_FULLSCREEN_MODE" and/or as the hexadecimal value 0x3EF.”
Solution
Error Causes
The system error code 1007 can be triggered due to several reasons. This includes but is not limited to:
Windows registry damage or corruption
Device driver conflicts
Spyware or viral infection
Hardware malfunction
Software file damage or corruption
Unlike the blue screen of death error codes, this error is not fatal. But it may hamper your ability to run and work on your desired program. To avoid the inconvenience, it is advisable to fix it immediately.
Further Information and Manual Repair
Try these easy and effective do it yourself methods to repair the system error code 1007 on your PC:
Method 1 - Scan Your System for Viruses
If the underlying cause of error 1007 on your system is viral and spyware infection, then it is advisable to download a powerful antivirus and scan your entire PC.
An antivirus not only detects but also removes all types of viruses including spyware, Trojans and adware. Once removed, try running your desired program again, if the program runs successfully, this means the error is resolved.
Method 2 - Update the Drivers
When the error code 1007 occurs due to driver conflict, then it is advisable to update the drivers. To do so simply use the driver update wizard from within Device Manager. The wizard will guide you through the entire driver update process, making it extremely simple for you to update the drivers in minutes.
Method 3 - Clean and Repair the Registry
You may experience the error 1077 because of registry damage or corruption. If this is the reason, then it is suggested you download Restoro.
This is a user-friendly and multi-functional PC Fixer deployed with a powerful registry cleaner. It scans your entire system for registry related errors and issues, removes all unnecessary and obsolete files like cookies, junk files and bad registry entries, notorious for registry corruption.
In addition to this, it also repairs the registry and damaged system files, thereby resolving the system error code 1007 immediately.
Click here to download Restoro on your PC and fix system error code 1007 today!
As you know, Windows Updates are essential for your operating system as it keeps it protected from potential threats, fixes bugs and improves your experience in using Windows 10. However, there are instances when Windows Updates also cause errors and one of them is the Windows Update Error 0x8024000B.
One of the causes of this particular Windows Update error is that Windows was not able to read the Update Manifest file which is needed to install the Windows Updates. This means that the operation was canceled by either the service or the user. On the other hand, this error could also occur if you are not able to filter the results. When you encounter this error, you will see an error message that says, “WU_E_CALL_CANCELLED: Operation was canceled”. This indicates that the operation was canceled by the operating system itself.
To resolve the Windows Update Error 0x8024000B, here are some suggestions you need to check out.
Option 1 – Try to run the Cleanup (Decline) Superseded updates PowerShell script
The first thing you can do to fix the Windows Update Error 0x8024000B is to run the Cleanup (Decline) Superseded updates PowerShell script. This is actually an easy fix since all you have to do is download and run it from the Microsoft Technet site. Once you’re done downloading and running the file, restart your computer and see if the error is fixed or not.
Option 2 – Try to rename the Spupdsvc.exe file
If the first option didn’t work, you can try renaming the Spupdsvc.exe file which is one of the reasons why you’re getting the Windows Update Error 0x8024000B.
First, tap the Win + R keys to launch the Run utility.
Next, type the following command and hit Enter to execute it in cmd:
Once you’ve entered all the commands given above, they will stop all the Windows Update services that are running on your computer as well as clear the SoftwareDistribution folder, and reset the Catroot2 folder. Now you have to start all these Windows Update services you’ve just stopped by executing the following commands:
net start wuauserv
net start bits
net start appidsvc
net start cryptsvc
After that, restart your computer and try to run the setup again, and see if the error is now fixed.
Option 4 – Try to run the Windows Update Troubleshooter
You should also try to run the built-in Windows Update troubleshooter as it could help you resolve the Windows Update Error 0x8024000B. To run it refer to these steps:
Go to Settings and then click on Windows Update from the given menu.
Next, click on the Troubleshoot option and select Windows Update from the given options to run the Windows Update troubleshooter.
After that, follow the next on-screen instructions and wait until the process is completed, and check if the Windows Update Error 0x8024000B is fixed or not.
There are times when you try to open a file, an executable file for instance, but were unable to do so since you encounter an error in an Open File – Security Warning dialog box that says, “This publisher has been blocked from running software on your machine, You must unblock this publisher to run this software”. This kind of error is most likely thrown by your operating system because it considers the file to be unsafe and could potentially harm your computer. However, if you’re certain that the file is harmless, read on as this post will walk you through fixing the error so you can open the file without getting an error.
There are various options you can check out to fix the error. You may run the program using Command Prompt or unblock it using File Properties. You could also try turning off SmartScreen or use the unblock file command in Windows PowerShell.
Option 1 – Try running the program via Command Prompt
Tap the Win + R keys to open the Run dialog box and type “cmd” in the field and hit Enter to open Command Prompt.
Next, tap the Shift key and right-click on the program or the executable file, and then select the “Copy as path” option.
After that, paste this path in the Command Prompt window and tap Enter to open the program.
Option 2 – Try to unblock the file using File Properties
Right-click on the file you were trying to open and select Properties.
Next, click the Unblock button and then click on the Apply and OK buttons.
You should now be able to open or access the file without getting the error.
Option 3 – Turn off SmartScreen
The next thing you can do is to turn off SmartScreen temporarily. All you have to do is open the Windows Defender Security Center and from there, go to the App & browser control section. After that, click on the radio button for Off under Check apps and files. Once you’re done, try opening the file again. Don’t forget to enable the SmartScreen back on.
Option 4 – Try to use the Unblock-File command in PowerShell
You might also want to utilize the Unblock-File command in Windows PowerShell as it will unblock the file so you can open it. To execute this command, follow these steps:
Tap the Win + X keys and then click on Windows PowerShell.
After opening PowerShell, type or copy and paste this command and tap Enter to execute it: Get-ChildItem -Path 'C:Users<username>Downloads' | Unblock-File
The command you entered will unblock all the files in the Downloads folder, assuming that’s where the file you were trying to open is stored. If it’s not, then replace the path with the path where the file is located. Take note to also replace “<username>” with your Username.
Now check if the file has been unblocked by accessing or opening it.
Windows comes with a built-in backup solution. However, if it failed because of an internal error, you will encounter an error message saying, “The backup application could not start due to an internal error, Server execution failed (0x80080005)”. When you get this kind of error, it means that it did not start and the process failed with a Server execution error. If you got this kind of error worries not for this post will guide you in fixing the problem in your Windows 10 computer.
The Windows Backup service is an excellent feature in Windows that only works on the NTFS file system and if you want to use this make sure that you have formatted your files system to NTFS. It is performed by the Volume Shadow Copy, all you have to do is right-click on any folder and if you see the “Previous versions” option, this means that a backup process runs from time to time and can bring back old files when needed.
To resolve the “The backup application could not start due to an internal error”, here are two suggestions you can check out.
Option 1 – Check if the Volume Shadow Copy service is running and restart it
The first thing you need to do is check if the Volume Shadow Copy service. To do that, refer to the following steps:
Click on Start and type “cmd” and right-click on Command Prompt from the search results.
Then select the “Run as administrator” option to open Command Prompt with admin privileges.
After that, type “net stop sdrsvc” and hit Enter to execute the command in stopping the Volume Shadow Copy service.
Next, type the “net start sdrsvc” command and hit Enter to start the service again.
Note: You can also restart the service using the Windows Services Manager.
In the Cortana search box, type “services” and click on the Services icon to open the Services Manager. Alternatively, you can also tap the Win + R keys to launch the Run prompt and then type “services.msc” in the field and hit Enter to open the Services Manager.
From there, look for the Volume Shadow Service (sdrsv) from the list of services. Its Startup type should be set to Manual by default.
Restart the service and if you don’t encounter any error while you turn it on, re-run the backup service and see if the backup process runs successfully.
Option 2 – Try to run the Volume Shadow Copy Service in a Clean Boot State
If the first option didn’t work and the service still keeps on failing even though the service is running, you can try putting your computer in a Clean Boot State and then try to run Windows Backup again.
Log onto your PC as an administrator.
Type in MSConfig in the Start Search to open the System Configuration utility.
From there, go to the General tab and click “Selective startup”.
Clear the “Load Startup items” check box and make sure that the “Load System Services” and “Use Original boot configuration” options are checked.
Next, click the Services tab and select the “Hide All Microsoft Services” check box.
Click Disable all.
Click on Apply/OK and restart your PC. (This will put your PC into a Clean Boot State. And configure Windows to use the usual startup, just simply undo the changes.)
Now try to run the Volume Shadow Copy service again and see if the process goes smoothly.
Note: You might also want to delete all the files in the backup solution if you want to start fresh with the backup solution. Just go to C:/System/Volume/Information/Windows Backup and take ownership of the folder. After that, make sure to stop the Volume Shadow Copy service and then delete all the files inside it.
In the Windows ecosystem, MS Surface laptops are among the best laptops on the market, they are regarded as equivalent to Apple MAC laptops but for Windows. Microsoft Fall 2022 Event will be held on October 12th at 10 AM. The event itself will be held right before it kicks off its annual, developer-focused Ignite event in Seattle from that same day through October 14.
This event is the first in-person event that Microsoft has held since the beginning of the pandemic. We expect the launch of the Surface Pro 9 and the Surface Laptop 5, and maybe Surface Studio 3 as well. There are also some rumors about products themselves like choices between an ARM or x86 CPU but nothing is confirmed so far, we can just wait and see.
 Once you are in the system, on the left tabs find and click on Clipboard.
 If you are not logged in to your Microsoft account do so on the right panel by locating Sync across devices and click on sign in.
 When you are signed in click on the option to turn it on.
 One option is turned ON, you will be greeted with two choices, to copy everything from the clipboard automatically or to choose text which you want to sync and paste it with ⊞ WINDOWS + V. Choose whatever better suits your needs, and you are done.