The latest steam beta update has introduced code that will prevent downloading and installing previous game versions via the steam client.
 For many people that are playing online games, this is not such a big deal since they always must have the latest version in order to play their games but for other ones, this has arrived as a bit of a problem. Many people preferred older game versions since often updates can change certain mechanics inside the game making it different as an experience or introduce some elements that not everyone likes.
So far, people could use the steamDB site to find depo of the game versions you would like to play and download it but if this beta code goes live that will not be an option anymore. Now, playing old games without updates could also be used for nostalgic reasons and these people have also been cut off with this update.
It is important to point that update is still in beta client only but users have already started to voice their opinions asking Valve not to place it live. In the end, it will all depend on Valve’s decision will they listen to their customers or decide to push updates on live service.

Hello all the wonderful people and welcome to our new article where we take a little different turn than usual and discuss why keeping old electronics around the house is not such a good idea. We all have some drawer or in some bag around the house and in the end of the day if that electronic has battery inside it is probably not the smart thing to keep it.
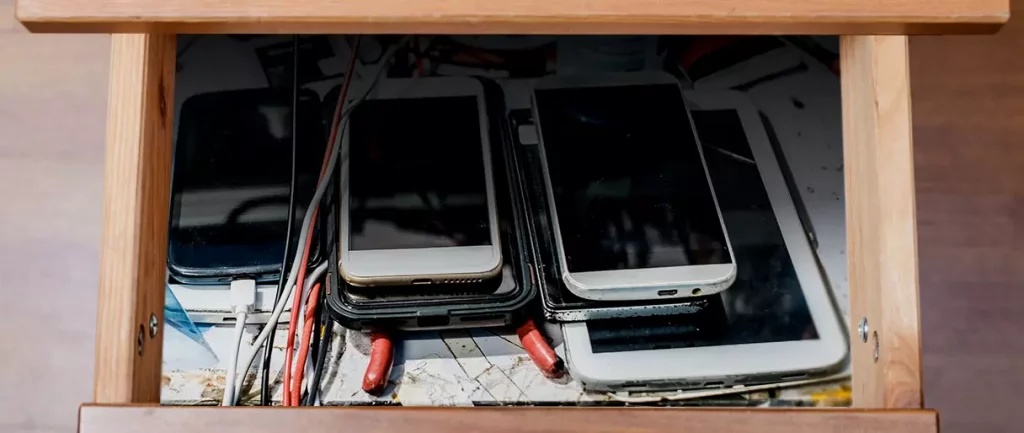
So naturally, the question comes why it is a bad idea to have old electronics with batteries in them? Well unlike a battery failure with, say, some AA batteries jammed in the back of an old toy, the risk with a lithium-ion battery failing isn’t just some leaking and corrosion in the battery compartment, it’s a potential fire as the battery swells up and the gases (combined with the stored energy) turn the battery into a potential fire hazard.
Good thing is that the battery will not explode just like that, it will swallow over time and get bigger and bigger until the breaking point is reached and all the fire breaks lose. So if by any chance you have some old gadgets lying around you can check up on them and see if has swelling process started, if yes, dispose properly of that piece of the old device immediately.
If you’re not ready to get rid of the gadget then it’s best to charge it properly for storage. Proper charging keeps the battery cells and circuits in optimum health.
While recommendations vary by manufacturer and application, the general consensus is that lithium-ion batteries should be charged to approximately 40%. (Some manufacturers recommend charging 50% or 60% instead.)
Really, the important part here isn’t the exact percentage. What’s important is ensuring that the battery is charged to roughly half capacity and not stored with a completely discharged or completely full battery.
Discharge rates on lithium-ion batteries in completely powered-off devices are very slow, but you should still plan to top off the charge every 12-18 months or so to keep it around 50%.
If you wanted to go above and beyond, a metal storage container with a snug lid on a basement shelf with a desiccant pack inside to control the moisture would offer optimum conditions.
 Error Causes
FormFetcherPro.com is a Browser Extension for Google Chrome developed by Mindspark Inc. This extension offers users quick and easy access to various forms required for visas and other documents. While this may seem appealing, all this extension does is point you to the most popular websites online that can easily be found by searching. When installed it hijacks your new tab page and changes it to search.myway.com, enabling it to better target ads.
While browsing the internet with this extension enabled you will see additional sponsored content, additional ads, and sometimes even pop-up ads displaying throughout your browsing sessions. Several anti-virus programs have marked this extension as Potentially Unwanted and as a Browser Hijacker and are therefore recommended to remove it from your computer.
0xC1900101 – 0x20017, The installation failed in the SAFE_OS phase error during Replicate_OC operationTo fix this issue, you need to follow the given options below. But before you do, you need to create a System Restore point first so that if anything goes wrong, you can always undo the changes you’ve made.
dism /Mount-Image /ImageFile:H:sourcesboot.wim /index:1 /MountDir:C:UsersUserDesktopmount
C:UsersUserDesktopmountWindowsSystem32mcupdate_GenuineIntel.dll
dism /Unmount-Image /MountDir:C:UsersUserDesktopmount /commit
PC Optimizer Pro is a PC optimizer utility developed by Xportsoft Technologies. It is classified as a potentially unwanted program, due to its aggressive scan and registration reminders, and that it is often distributed bundled with other programs in a manner that leads many users to not know how it got on their computer. While not inherently malicious, PC Optimizer Pro adds numerous registry keys, startup entries and while running consumes a relatively high amount of system resources, especially during its scans. The software installs from a .exe file that is around 5.20 MB or 5.453.240 Bytes (depending on the version). As of the publication of these videos, the current version of PC Optimizer Pro was detected as malicious or potentially unwanted by at least 21 AntiViruses.
“SYSTEM [DRIVER] USB AUDIO DEVICE An audio stream is currently in use [DRIVER] Legacy Kernel Caller.”Step 2: The next thing you have to do is remove all the external hardware connected to your computer. In this step, you have to disconnect external hardware from your computer. Based on reports from users who experienced the same issue, the “TV card” is the culprit so make sure you remove that one. Once you’ve removed it, open Command Prompt and run the “powercfg –requests” command again and you’ll see that the “Legacy Kernel Caller” will no longer be on the list. In addition, your computer will get into its regular sleep mode once the hardware is removed. Once you do that, the driver gets hung and won’t release the power request despite being used. Step 3: Try using the request override option The powercfg command also offers a request override option which allows users to disable the requests from applications and services to wake the computer from sleep mode. To run this command, simply open Command Prompt with admin privileges. After you open Command Prompt, type the following command and hit Enter to disable requests from applications and services that causes the computer to wake from sleep state.
Powercfg -requestsoverride Driver "Legacy Kernel Caller" SystemStep 4: Check the streaming and media applications You also have to check if your computer is running an audio or video service in the background. In such cases, your computer won’t be able to go to sleep mode if these services are running in the background. You might have noticed that when you play a video or audio, your computer never goes to sleep. And if you have put it to sleep in between watching the video, then it’s probably why your computer is waking up. Thus, you have to stop these services. Step 5: Check the devices that can wake your computer If you didn’t see the Legacy Kernel Caller in the result after you execute the ”powercfg –requests” command, then you can try to execute the following command instead.
powercfg –devicequery wake_armedAfter you enter this command, it will give you a list of all the devices that can wake your computer. So if there is anything other than the mouse, keyboard, touchpad, you have to check the power configuration of that device. To do that, go to the Device Manager and disable the device’s “Allow this device to wake the computer” option in its Properties Step 6: Check the Sleep Advanced Settings