Logo

Mastodon test and review

What is Mastodon? Mastodon is an open-source microblogging network very similar to Twitter. You can make 500 characters post messages called toot (tweet), share videos or images, and follow other people. But unlike Twitter, Mastodon is decentralized, meaning the entire Mastodon is not run by a single company pulling all strings.

mastodon

Mastodon can be used directly in your web browser or through a mobile client on a smartphone or tablet. It includes features that seem copied from Twitter-like replies, boosts (retweets), favorites (loves), a timeline view, blocking, and voluntary content warnings that hide sensitive content.

Mastodon also has some great features that Twitter does not have like automated post deletion for the older post of a certain age, requiring approval for follows without restricting your account, and opting out of search engine indexing.

Currently, there are also no ads on Mastodon meaning no ad tracking or ad network surveillance.

How Does Mastodon Work?

Mastodon is a social media network made of nodes called servers or instances each running special software meaning anyone can run their own Mastodon instance (if they have a proper dedicated server). When you have your own instance it can be linked in the federation or remain private, so individuals or companies can have control over individual Mastodon servers.

The software itself is open source based on the social networking protocol ActivityPub which was developed by WWW Consortium.

While using Mastodon, people sign up for accounts with specific instances. Once logged in, you can view a local timeline (of posts from that instance only) or, if the instance is federated with others, see a federated timeline comprised of toots from people in other instances. Mastodon users can send messages to each other using their Mastodon account names that are similar to email addresses in that they feature the server address as well as the user name.

Do You Need Help with Your Device?

Our Team of Experts May Help
Troubleshoot.Tech Experts are There for You!
Replace damaged files
Restore performance
Free disk space
Remove Malware
Protects WEB browser
Remove Viruses
Stop PC freezing
GET HELP
Troubleshoot.Tech experts work with all versions of Microsoft Windows including Windows 11, with Android, Mac, and more.

Share this article:

You might also like

Software review series: Adobe Photoshop
From photo editing and compositing to digital painting, animation, and graphic design you can do it all in Photoshop. Bring ideas to life across desktop and iPad. Magically transform images with the power of AI. Learn new skills and share your projects via Livestream. Started as a photo editing application, photoshop has surpassed the original ideas and designs in the following years growing with each release and including more tools and flexibility not matched in other applications. Photoshop was the first to introduce many new features and set standards for other applications. How years have passed product grew and innovation was pushed forward, it took some time but eventually, photoshop was able to set itself as the industry-standard application for pixel editing and it holds that position even today. Throughout the world artist all over the globe are using it to create digital art in various fields be that illustrations, film, photography, texturing, etc. Its vast majority of tools and possibilities as well as its extensibility with plugins, actions, brushes have cemented it in the highest place in any designer or artist toolkit. Today you can get it as a part of a creative suite for a monthly fee on the official adobe website and even if you do not need other creative suite applications photoshop is worth the fee alone. Simply you have to try it, learn it, and then harvest its power. If you would like to read more helpful articles and tips about various software and hardware visit errortools.com daily.
Read More
What is HEIF file format and how to use it?
High Efficiency Image File Format (HEIF) is a container format for individual images and image sequences. The standard covers multimedia files that can also include other media streams, such as timed text, audio, and video. A HEIF image using High-Efficiency Video Coding, HEVC, requires only about half the storage space as the equivalent quality JPEG. HEIF also supports animation and is capable of storing more information than an animated GIF or APNG at a small fraction of the size. HEIF files are a special case of the ISO Base Media File Format (ISOBMFF, ISO/IEC 14496-12), first defined in 2001 as a shared part of MP4 and JPEG 2000. Introduced in 2015, it was developed by the Moving Picture Experts Group (MPEG) and is defined as Part 12 within the MPEG-H media suite (ISO/IEC 23008-12). HEIF was adopted by Apple in 2017 with the introduction of iOS 11, and support on other platforms is growing.

HEIF files can store the following types of data:

Image items
Storage of individual images, image properties, and thumbnails.
Image derivations
Derived images enable non-destructive image editing and are created on the fly by the rendering software using editing instructions stored separately in the HEIF file. These instructions (rectangular cropping, rotation by one, two or three quarter-turns, timed graphic overlays, etc.) and images are stored separately in the HEIF file, and describe specific transformations to be applied to the input images. The storage overhead of derived images is small.
Image sequences
Storage of multiple time-related and/or temporally predicted images (like a burst-photo shot or cinemagraph animation), their properties, and thumbnails. Different prediction options can be used in order to exploit the temporal and spatial similarities between the images. Hence, file sizes can be drastically reduced when many images are stored in the same HEIF file.
Auxiliary image items
Storage of image data, such as an alpha plane or a depth map, which complements another image item. These data are not displayed as such but used in various forms to complement another image item.
Image metadata
Storage of EXIF, XMP and similar metadata which accompany the images stored in the HEIF file.
Read More
How to Fix Unable to contact your DHCP Server
If your IP address expires, you will most likely experience interruptions when browsing the web. In such cases, you have to release and renew the IP address by executing the following commands:
  • ipconfig /release
  • ipconfig /renew
So if you are trying to renew the IP address of your Windows 10 computer using the commands given above but you encounter an error message instead that says, “Unable to contact your DHCP Server”, then you’ve come to the right place as this post will guide you in fixing this error. This kind of error indicates that the NIC can’t communicate with the DHCP server which is why it’s not able to release new IP addresses. It could be due to many reasons. To fix this error, you can try to roll back, update or reinstall the Network Adapter drivers. You could also run the built-in Network Adapter troubleshooter, as well as start or restart the DHCP client service.

Option 1 – Try to rollback your Network driver

If you have updated the driver software as of late and you suddenly got this error, you might have to roll back the device driver – in other words, switch back to the previous working version. To do that, follow these steps:
  • Tap the Win + R keys to launch the Run window and then type in the “devmgmt.msc” command and hit Enter to open the Device Manager window.
  • Under the Device Manager, you will see a list of drivers. From there, look for the Network Adapters and expand it.
  • Next, select the driver entries that are labeled appropriately other than anything in the context of the WAN Miniport.
  • Then select each one of them and double click to open a new mini window.
  • After that, make sure that you’re on the Driver tab and if you are not, just navigate to it then click the Roll Back Driver button to switch back to the previous version of your Network adapters.
  • Now restart your computer to successfully apply the changes made.

Option 2 – Try to update the Network drivers

If rolling back to the previous version of the Network adapter drivers didn’t help, then you need to update them instead. To do so, here’s what you have to do:
  • Tap the Win + R keys to launch the Run window and then type in the “devmgmt.msc” command and hit Enter to open the Device Manager window.
  • Under the Device Manager, you will see a list of drivers. From there, look for the Network Adapters and expand them.
  • Then right-click on each one of the Network drivers and update them all.
  • Restart your PC and see if it helped in fixing the BSOD error.
Note: If updating the network drivers didn’t help in fixing the problem, you can also try to uninstall the very same drivers and restart your Windows 10 PC. After that, the system itself will reinstall the drivers you just uninstalled. Alternatively, you can also download and install the drivers from the manufacturer’s website directly.

Option 3 – Run the Network Adapter troubleshooter

Running the built-in Network Adapter troubleshooter can also help in fixing the “Unable to contact your DHCP Server” error. To run the Network Adapter Troubleshooter, refer to these steps:
  • Open the Search bar on your computer and type in “troubleshoot” to open the Troubleshoot settings.
  • Next, scroll down and select the “Network Adapter” option from the right pane.
  • Then click on the Run Troubleshooter” button.
  • After that, your computer will check for any possible errors and will pinpoint the root cause of the problem if possible.
  • Restart your computer.

Option 4 – Try disabling the IPv6 in the Network Center

  • Tap the Win + X key combination and click on Network Connections.
  • This will open the Settings app on a specific page. Now on the right-side panel, click on the Network and Sharing Center link.
  • After that, it will open the Control Panel and from there, click on the network that your computer is connected to and then click on Properties.
  • Next, uncheck the entry that says, “Internet Protocol Version 6 (TCP/IPv6)” in the list that populates.
  • Now click on OK and close all other windows.
  • Restart your computer and see if the error is now fixed.

Option 5 – Start or restart the DHCP client service

If the DHCP client service is either inactive or stopped, you can try to start or restart it to resolve the error. You can do this via the Services Manager.
  • Tap the Win + R keys to open the Run utility.
  • Then type “services.msc” in the field and tap Enter or click OK to open the Services Manager.
  • After that, look for the DHCP client service from the list of services displayed.
  • Once you found it, right-click on it and select the Start or Restart option.
Read More
How to remove FindYourMaps from Windows

FindYourMaps is a Google Chrome Browser Extension developed by Mindspark. This extension hijacks your home page and new tab page changing them to MyWebSearch.com in order to display ads more efficiently.

While using this extension you will see additional pop-up ads, sponsored content, and unwanted ads (that are sometimes not ever relative to your search query) displayed throughout your browsing sessions, cluttering up the pages and sometimes even going over page parts, making some pages unreadable.

Several anti-virus applications have marked this Extension as a Browser Hijacker due to its data mining behaviors and ad injections and were marked for removal by most of them.

About Browser Hijackers

Browser hijacking is a very common type of internet fraud where your web browser configurations are modified to allow it to do things you never intend. Practically most browser hijackers are made for advertising or marketing purposes. These are typically used to force visitors to a specific website, manipulating web traffic to generate ad revenue. However, it is not that innocent. Your web safety is jeopardized and it is extremely annoying. What’s more, hijackers will make the whole infected system fragile – other harmful malware and viruses would use these opportunities to get into your system very easily.

Indications of browser hijack

There are many symptoms that indicate the browser is highjacked: your home page is reset to some unknown site; you observe new unwanted favorites or bookmarks added, typically directed to ad-filled or porn websites; The default search page of your web browser is modified; you see many toolbars on the browser; you observe numerous ads show up on the browsers or display screen; your browser has instability issues or displays frequent errors; you cannot go to specific sites such as home pages of security software.

How it infects your computer

A browser hijacker could be installed on your PC when you check out an infected website, click an e-mail attachment, or download something from a file-sharing website. They also come from add-on programs, also known as browser helper objects (BHO), web browser plug-ins, or toolbars. A browser hijacker could also come bundled up with some free application which you inadvertently download and install the browser hijack, compromising your PC security. Browser hijackers can record user keystrokes to gather potentially invaluable information leading to privacy concerns, cause instability on computers, drastically disrupt user’s browsing experience, and ultimately slow down the system to a point where it will become unusable.

How to fix a browser hijack

The one thing you can try to remove a browser hijacker is to locate the malware inside the “Add or Remove Programs” list of the Windows Control Panel. It may or may not be there. When it is, uninstall it. But, many hijacking codes aren’t very easy to remove manually, as they go much deeper into your operating system. On top of that, manual removal demands you to carry out several time-consuming and tricky procedures that are very hard to carry out for novice computer users. Anti-malware application is incredibly efficient when it comes to picking up and eliminating browser hijackers that standard anti-virus software has overlooked. Safebytes Anti-Malware features a state-of-the-art anti-malware engine to help you avoid browser hijacking in the first place, and clean up any pre-existing problems. Along with the anti-virus tool, a system optimizer, like SafeBytes’s Total System Care, could help you in deleting all associated files and modifications in the computer registry automatically.

What you can do if Virus Stops You From Downloading Or Installing Anything?

Viruses may cause a great deal of damage to your computer. Certain malware goes to great lengths to stop you from downloading or installing anything on your computer system, particularly antivirus programs. If you’re reading this now, you have probably realized that a malware infection is a reason behind your blocked net connectivity. So how to proceed when you want to download and install an anti-virus application such as Safebytes? Do as instructed below to get rid of the malware by alternate methods.

Start Windows in Safe Mode

If any virus is set to load automatically when Windows starts, stepping into Safe Mode could very well block this attempt. Since only the minimum applications and services start-up in Safe Mode, there are seldom any reasons for conflicts to occur. Below are the steps you have to follow to remove malware in Safemode. 1) At power-on/startup, press the F8 key in one-second intervals. This should bring up the Advanced Boot Options menu. 2) Use the arrow keys to choose Safe Mode with Networking and hit ENTER. 3) When this mode loads, you should have an internet connection. Now, utilize your browser to download and install Safebytes. 4) As soon as the application is installed, allow the scan run to remove trojans and other threats automatically.

Obtain the anti-malware program in an alternate internet browser

Some malware might target vulnerabilities of a specific browser that obstruct the downloading process. If you are not able to download the security program using Internet Explorer, this means malware is targeting IE’s vulnerabilities. Here, you must switch to another internet browser like Chrome or Firefox to download the Safebytes application.

Run anti-virus from your pen drive

Another option would be to create a portable antivirus program onto your USB stick. Adopt these measures to employ a flash drive to fix your infected computer system. 1) Download the anti-malware program on a virus-free computer. 2) Plug the Flash drive into the uninfected computer. 3) Double-click the Setup icon of the anti-malware software to run the Installation Wizard. 4) Choose the USB flash drive as the location for saving the file. Follow the directions to finish the installation process. 5) Now, plug the thumb drive into the infected computer. 6) Double-click the Safebytes Anti-malware icon on the pen drive to run the program. 7) Click on “Scan Now” to run a complete scan on the affected computer for viruses.

Highlights of SafeBytes Anti-Malware

These days, an anti-malware program can protect your laptop or computer from different forms of online threats. But how do choose the right one amongst several malware protection software that’s available out there? Perhaps you might be aware, there are numerous anti-malware companies and tools for you to consider. A few of them are great and some are scamware applications that pretend as legitimate anti-malware programs waiting around to wreak havoc on your personal computer. You have to be careful not to pick the wrong application, particularly if you purchase a paid software. One of the highly recommended software by industry experts is SafeBytes Anti-Malware, well-known security software for Windows computers. Safebytes is among the well-established PC solutions firms, which offer this comprehensive anti-malware program. Through its cutting-edge technology, this software will help you protect your computer against infections caused by different types of malware and similar internet threats, including spyware, adware, trojans, worms, computer viruses, keyloggers, potentially unwanted program (PUPs), and ransomware.

SafeBytes has great features when compared with various other anti-malware programs. These are some of the great features included in the tool.

Real-time Threat Response: SafeBytes delivers complete and real-time security for your PC. They are extremely efficient in screening and getting rid of different threats because they are continuously revised with the latest updates and safety measures. World-class AntiMalware Protection: By using a critically acclaimed anti-malware engine, SafeBytes offers multilayered protection which is made to find and eliminate viruses and malware which are hidden deep in your computer’s operating system. Web Filtering: Safebytes allots all websites a unique safety rating that helps you to have an idea of whether the webpage you’re about to visit is safe to view or known to be a phishing site. Very Low CPU and RAM Usage: SafeBytes is a lightweight tool. It consumes a very small amount of processing power as it runs in the background so you are free to use your Windows-based computer the way you want. 24/7 Assistance: SafeBytes provides 24/7 technical support, automatic maintenance, and upgrades for the best user experience. To sum it up, SafeBytes Anti-Malware offers outstanding protection combined with very low system resource usage with great malware prevention and detection. You can rest assured that your PC will be protected in real-time once you put this software program to use. You will get the very best all-around protection for the money you pay on SafeBytes anti-malware subscription, there is no doubt about it.

Technical Details and Manual Removal (Advanced Users)

If you don’t wish to use an automated tool and prefer to eliminate FindYourMaps manually, you could do so by going to the Windows Add/Remove Programs menu in the control panel and deleting the offending software; in cases of web browser add-ons, you can remove it by visiting the browser’s Add-on/Extension manager. It’s also advised to factory reset your web browser settings to their default state. To ensure the complete removal, manually examine your hard drive and Windows registry for all of the following and remove or reset the values as needed. Please be aware that this is for experienced users only and might be challenging, with incorrect file removal causing additional PC errors. Furthermore, some malware is capable of replicating itself or preventing deletion. Completing this task in Safe Mode is recommended.
Read More
What is Windows Terminal and should you use it
Windows Terminal
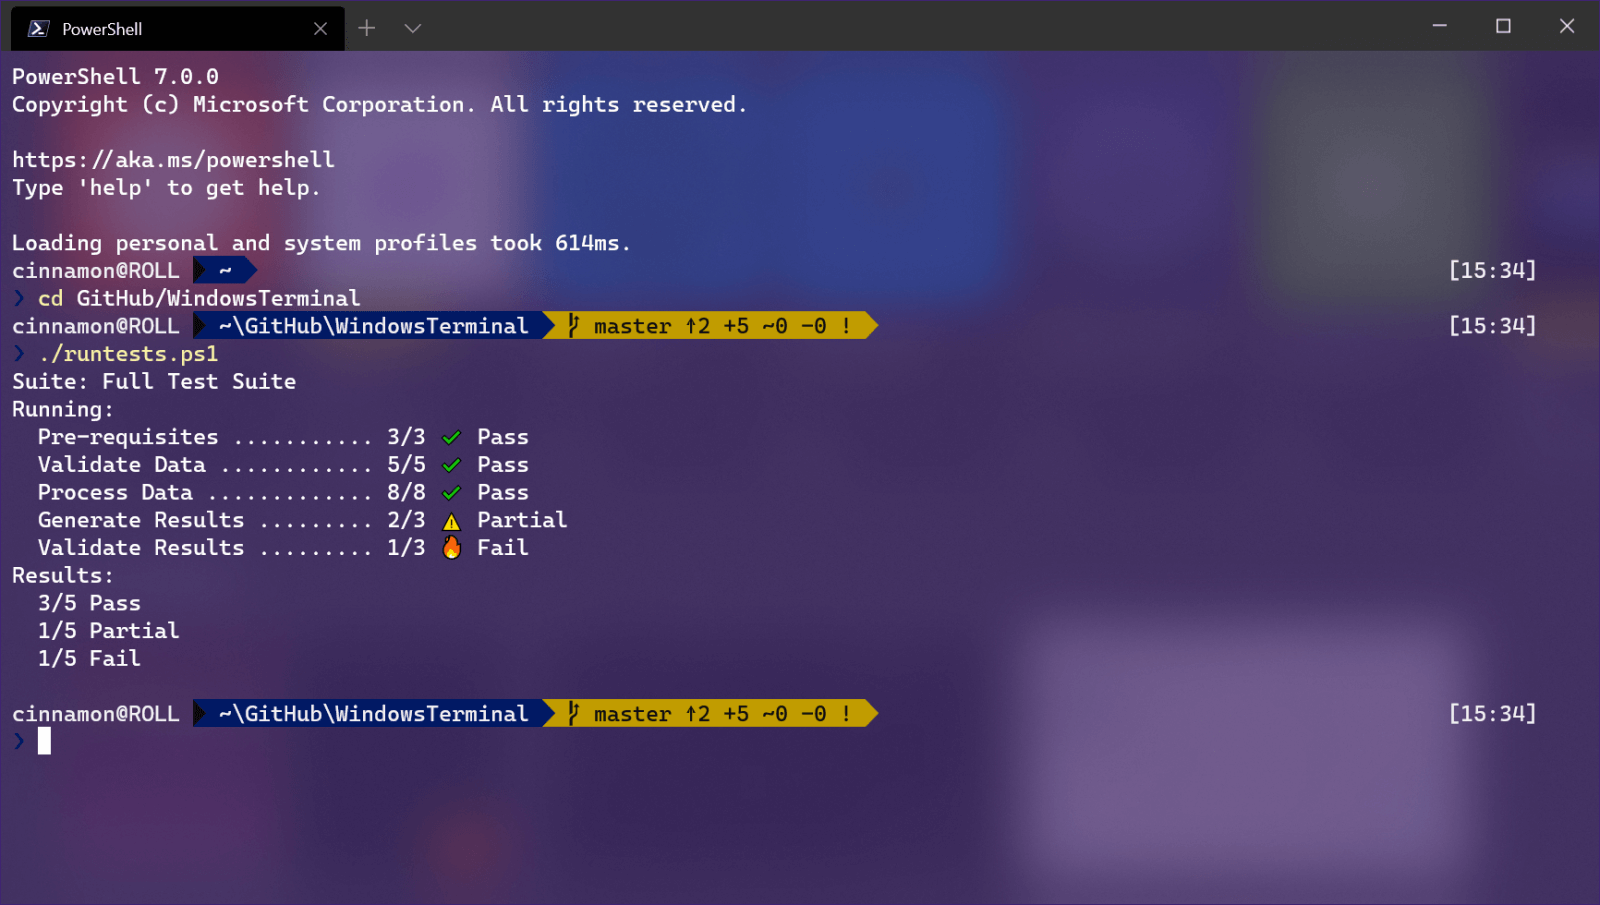
Windows Terminal is a new free Microsoft terminal sort of application. When you open either Power Shell or Command Prompt in Windows they will be opened in different windows, and if you want several of each you will have several windows of each on your screen. Windows Terminal fixes this by opening each of the Instances of Command Prompt and Power Shell as separate tabs inside itself making it much easier to manage multiple instances of named applications. You can also run both Power Shell and Command prompt tabs in the same Windows Terminal. Luckily running command prompt and power shell in different tabs is not the only thing you can do. Windows Terminal lets you choose your own theme, it has emoji support, GPU rendering, split panes, and many more customizable options. Windows 11 will have Terminal as the default command-line environment for opening Power Shell or Command prompt, even Windows Subsystem for Linux (WSL)

Setting Windows Terminal as the default application

If I was successful I have managed to show you that Windows Terminal is something that you should use even if you do not or cannot upgrade to Windows 11. You can use it inside Windows 10 also. First thing is to download and install it. You can get Windows Terminal from the official Microsoft website here: Windows Terminal page After download and installation are completed, open the Terminal app and select the down arrow menu, click Settings. Alternatively, you can use CTRL + + shortcut. Inside Settings by default Default Terminal application would be set to Windows Console Host Click on the Default Terminal application to bring a drop-down menu and choose Windows Terminal from the list. Now by default once opened Windows Terminal will use Power Shell as the default profile, however, you can change this by clicking on the drop-down for the default profile where you can choose between Command Prompt, Power Shell, Windows Power Shell, or Azure Cloud Shell. Pick one that you prefer, click on Save and it will be opened as default on the next run.
Read More
Not enough USB controller resources Error
As you know, USB is now being widely used in all devices with USB A as the leading type with most devices based on it. Peripheral devices such as Pen Drives, External Hard disks, and many more also use a USB port. On the other hand, USB C is also coming up to be the next big standard in the computing world because of its high transfer speeds, wider compatibility as well as support for external Graphics Processing Units. However, just recently, USB 3.0 ports have been reported to cause the following error to pop up on Windows 10 computers every time a USB device is plugged in.
“Not enough USB controller resources. The controller does not have enough resources for this device.”
To fix this error, here are some guidelines you can check out. Make sure to follow them carefully.

Option 1 – Try to use a lower generation USB port

The first thing you can do is to try using a lower generation USB port as this issue mostly occurs when a device is connected to a USB 3,0 port. This means that you have to plug in your device to a USB 2.0 port and then see if it fixes the error or not. You can easily decipher a USB 3.0 port from a USB 2.0 port as the former is in blue.

Option 2 – Try to use a dock

You could also try to use a dock to resolve the error. Note that when too much power on laptops and notebooks are drawn from the USB ports and as a USB 3.0 port draws more power compared to a USB 2.0 port. Thus, if you plug in your USB storage device into a USB 2.0 port with the help of a dock, it should fix the problem.

Option 3 – Try disabling the xHCI Mode option in the BIOS

  • First, boot your computer into the BIOS.
  • Once your computer has booted, go to the Advanced tab.
  • Next, make sure that the entry for “xHCI Pre-boot mode” is set to Disabled under the USB Configuration section.
  • Now save the changes you’ve made and then restart your computer to Windows 10 and see if the error is now fixed.

Option 4 – Update or reinstall the Universal Serial Bus Controller driver

Since it could be a driver issue, you can try to update or reinstall the Universal Serial Bus Controller drivers using the Device Manager. Refer to the following steps:
  • First, click the Start button and type “device manager”.
  • Then click on the “Device Manager” from the search results to open it.
  • From there, look for the “Universal Serial Bus controllers” option and then right click on each one of the USB drivers, especially the Generic USB Hub driver, and then select the Update Driver from the menu.
  • Restart your PC and then click the “Search automatically for updated driver software” option.
Note: If updating the USB Controller drivers didn’t work, you can try to reinstall them instead.

Option 5 – Run the Hardware and Devices Troubleshooter

You could also run the Hardware and device Troubleshooter to try and fix the “Not enough USB controller resources” error.
  • The first thing you need to do is click on Start and then on the gear-like icon to pull up the window for Settings.
  • After opening Settings, look for the Update and Security option and select it.
  • From there, go to the Troubleshoot option located on the left-hand side of the list.
  • Next, select Hardware and Devices from the list and open the Troubleshooter and run it. Once it is doing its job, wait for it to complete the process and then restart the system.
  • After the system restarts, check if the problem’s now fixed. If not, refer to the next option given below.
Read More
A Quick Guide to Fixing Error 0x80010108

What is Error 0x80010108?

Error 0x80010108 is a Windows Live Photo Gallery error. This error prevents the Windows PC user from viewing photos. The error code is often displayed in the following format:
‘An error is preventing the photo or video from being displayed’ Error code 0x80010108

Solution

Restoro box imageError Causes

The error 0x80010108 occurs due to multiple reasons including:
  • The issue in Windows Live Essential Settings
This error occurs while using Windows Photo Gallery but it is actually related to the Windows Live Photo Viewer within the Windows Live Essentials software.
  • Viral Infection
  • Registry Issues
To view the photos on your Windows PC, it is advisable to fix the problem right away. Furthermore, you should also not delay in fixing this problem especially if the underlying causes are related to the registry or viral infection. These can pose serious system and security threats including system failure, crash and data breaches.

Further Information and Manual Repair

To resolve this error on your system, you don’t always have to hire a technical expert or be a technical whiz yourself. Here are some easy and effective methods to resolve error 0x80010108 on your PC immediately:

Method #1

To repair Windows Live Essential Software Settings, go to the start menu and then click the control panel. Now in the control panel go the option Programs. In the programs click the tab programs and features and then select Windows Live Essentials and click repair tab. Once the settings are repaired, restart your PC to activate changes.

Method #2

Go to the start menu and type regedit.exe and then press enter. Type the following key: HKEY_CLASSES_ROOT WindowsLive.PhotoGallery.bmp.15.4 shell open DropTarget then right-click DropTarget and then Rename. Prefix a hyphen so that it becomes “-DropTarget”. Now type the following for each GIF/ICO/JPG/PNG/TIF file types: HKEY_CLASSES_ROOTWindowsLive.PhotoGallery.gif.15.4 shellopen DropTarget HKEY_CLASSES_ROOT WindowsLive.PhotoGallery.ico.15.4 shell open DropTarget HKEY_CLASSES_ROOT WindowsLive.PhotoGallery.jpg.15.4 shell open DropTarget HKEY_CLASSES_ROOT WindowsLive.PhotoGallery.png.15.4 shell open DropTarget HKEY_CLASSES_ROOT WindowsLive.PhotoGallery.tif.15.4 shell open DropTarget

Method #3

Download Restoro on your PC to scan for both registry issues and malware. Restoro is a multi-functional PC Fixer embedded with utilities like a powerful registry cleaner, an antivirus, and a system optimizer to name a few. The registry cleaner scans and detects all registry-related issues. It removes all unnecessary files damaging the registry and corrupting the registry settings. Simultaneously, the antivirus removes all kinds of malicious software affecting your PC including spyware, viruses, and Trojans. The system optimizer feature ensures that your PC works at the optimal level and does not slow down during and after the cleaning process. Restoro is efficient and safe. It has a user-friendly interface and simple navigations which makes it quite easy to operate. It can be downloaded on all Windows versions including. Click here to download Restoro to resolve error 0x80010108.
Read More
Telnet not recognized as internal/external
In case you don’t know, a teletype network, also known as Telnet, is a protocol that is meant for internet or LAN communication which is used primarily to control other computers effortlessly. And it is available as a command-line utility in Windows and helps users in opening a command-line interface for the remote computer. However, a lot of users have reported an error that states, “Telnet is not recognized as an internal or external command, operable program, or batch file” when you try to use it. If you are one of these users, then you’ve come to the right place as this post will guide you on how to fix this error in Windows 10. This kind of error means that the Telnet utility is not installed on your computer but Telnet is a default feature in Windows 10 so the protocol mainly is not enabled yet. The Telnet client is disabled by default in Windows 10 and to fix this error, you can try to enable the Telnet Client via Programs and Features or try to install Telnet using an elevated Command Prompt.

Option 1 – Try to enable the Telnet Client via Programs and Features

The first thing you can do is to enable the Telnet client using Programs and Features since it is disabled by default. To do that, follow the steps below.
  • Tap the Win + R keys to open the Run dialog box and type “appwiz.cpl” in the field and hit Enter to open the Programs and Features window.
  • Next, select the “Turn Windows features on or off” from the options given on the left-hand side.
  • After that, look for the Telnet client from the list and check the checkbox next to it and then click on OK to save the changes made.
  • Now restart your computer.

Option 2 – Try to install Telnet via an elevated Command Prompt

If enabling the Telnet client using Programs and Features didn’t work, then you can try to do it using Command Prompt instead. To get started, follow the steps given below.
  • In the Windows Search bar, type “command prompt” in the field and right-click on Command Prompt from the search results, and select the “Run as administrator” option.
  • Next, execute this command to enable the Telnet client: dism /online /Enable-Feature /FeatureName:TelnetClient
  • Once the command has been executed, close the Command Prompt and restart your computer.
Read More
Mastodon test and review

What is Mastodon? Mastodon is an open-source microblogging network very similar to Twitter. You can make 500 characters post messages called toot (tweet), share videos or images, and follow other people. But unlike Twitter, Mastodon is decentralized, meaning the entire Mastodon is not run by a single company pulling all strings.

mastodon

Mastodon can be used directly in your web browser or through a mobile client on a smartphone or tablet. It includes features that seem copied from Twitter-like replies, boosts (retweets), favorites (loves), a timeline view, blocking, and voluntary content warnings that hide sensitive content.

Mastodon also has some great features that Twitter does not have like automated post deletion for the older post of a certain age, requiring approval for follows without restricting your account, and opting out of search engine indexing.

Currently, there are also no ads on Mastodon meaning no ad tracking or ad network surveillance.

How Does Mastodon Work?

Mastodon is a social media network made of nodes called servers or instances each running special software meaning anyone can run their own Mastodon instance (if they have a proper dedicated server). When you have your own instance it can be linked in the federation or remain private, so individuals or companies can have control over individual Mastodon servers.

The software itself is open source based on the social networking protocol ActivityPub which was developed by WWW Consortium.

While using Mastodon, people sign up for accounts with specific instances. Once logged in, you can view a local timeline (of posts from that instance only) or, if the instance is federated with others, see a federated timeline comprised of toots from people in other instances. Mastodon users can send messages to each other using their Mastodon account names that are similar to email addresses in that they feature the server address as well as the user name.

Read More
InternetSpeedTracker Removal Guide

InternetSpeedTracker is a browser extension developed by MindSpark Inc. This browser add-on offer uses tips on how to boost their “bad” internet connection speed. It displays false internet speed in order to get you to open the sponsored links listed in the toolbar.

This extension also hijacks your browser home page and replaces your default search engine with MyWay. While browsing the internet you will see additional unwanted sponsored ads and links throughout your search results, and sometimes even pop-up ads might appear. While active this extension gathers personal information, website visits, links, and clicks and uses this data to serve ads.

InternetSpeedTracker has been flagged as a Browser Hijacker by several anti-virus scanners, and due to its data mining behavior, it is not recommended to keep it on your computer, especially because it gives false data about your internet speed.

About Browser Hijackers

Browser hijack is a very common type of online fraud where your internet browser settings are modified to allow it to carry out things you don’t intend. They’re created to disrupt browser functions for several purposes. It redirects you to the sponsored sites and inserts ads on the web browser which helps its developer generate earnings. Nevertheless, it’s not that naive. Your web safety is jeopardized and it is also extremely irritating. They don’t just ruin your web browsers, but browser hijackers could also modify the computer registry, making your PC vulnerable to other attacks.

How one can know if your web browser is hijacked

Signs that an internet browser is a hi-jacked include: the browser’s home-page is modified; you find yourself regularly directed to a different site than the one you meant; the default search engine is changed; unwanted new toolbars are added to your web browser; never-ending pop-up ads show up and/or your browser pop-up blocker is disabled; your web browser starts running sluggishly or displays frequent glitches; You simply can’t access specific sites, particularly anti-virus sites.

How they infect PCs

A browser hijacker can be installed on your computer when you check out an infected website, click an e-mail attachment, or download something from a file-sharing website. They are usually included with toolbars, BHO, add-ons, plugins, or browser extensions. A browser hijacker could also be installed as a part of freeware, shareware, demoware, and fake programs. A good example of a notorious browser hijacker is the most recent Chinese malware known as “Fireball”, which has attacked 250 million computer systems worldwide. It acts as a hijacker but can be turned into a fully functioning malware downloader afterward. Browser hijackers could affect the user’s browsing experience greatly, keep track of the websites visited by users and steal private information, cause difficulty in connecting to the internet, and ultimately create stability issues, making software programs and systems freeze.

How to repair a browser hijack

Some hijackers could be removed by uninstalling the freeware they came with or by eliminating any extension you have recently added to your system. But, many hijackers are hard to get rid of manually. No matter how much you attempt to eliminate it, it can keep coming back over and over again. And there’s no denying the fact that the manual fixes and removal methods can be quite a complicated job for a rookie PC user. Furthermore, there are several risks connected with fiddling around with the system registry files.

What you can do if Virus Stops You From Downloading Anything?

Malware could cause all kinds of damage after they invade your system, ranging from stealing your private information to deleting data files on your computer system. Certain malware variants modify web browser settings by adding a proxy server or modify the computer’s DNS configuration settings. In such cases, you’ll be unable to visit some or all of the websites, and thus not able to download or install the necessary security software to remove the infection. If you’re reading this article, chances are you’re stuck with a virus infection that is preventing you to download or install the Safebytes Anti-Malware program on your PC. There are some fixes you can try to get around with this issue.

Install antivirus in Safe Mode with Networking

If the malware is set to load at Windows startup, then booting in Safe Mode should prevent it. Since only the minimal programs and services start-up in safe mode, there are rarely any reasons for issues to take place. Listed below are the steps you should follow to start your computer into the Safe Mode of your Windows XP, Vista, or 7 computers (visit Microsoft site for instructions on Windows 8 and 10 PCs). 1) At power on/start-up, tap the F8 key in one-second intervals. This will bring up the Advanced Boot Options menu. 2) Select Safe Mode with Networking with arrow keys and hit Enter. 3) As soon as this mode loads, you will have an internet connection. Now, utilize your web browser normally and navigate to https://safebytes.com/products/anti-malware/ to download and install Safebytes Anti-Malware. 4) Right after the software program is installed, let the diagnostic scan run to remove trojans and other malware automatically.

Switch to an alternate web browser

Web-based viruses can be environment-specific, aiming for a particular internet browser or attacking specific versions of the browser. The best solution to avoid this issue is to opt for a browser that is known for its security features. Firefox comprises built-in Phishing and Malware Protection to keep you safe online.

Run anti-virus from a pen drive

Another technique is to download and transfer an anti-malware application from a clean PC to run a scan on the affected computer. Follow these steps to use a flash drive to clean your infected system. 1) Download Safebytes Anti-Malware or Microsoft Windows Defender Offline onto a clean PC. 2) Insert the pen drive on the same system. 3) Double-click the Setup icon of the anti-malware software package to run the Installation Wizard. 4) Pick a USB flash drive as the place when the wizard asks you exactly where you would like to install the application. Follow the instructions on the computer screen to complete the installation process. 5) Now, transfer the pen drive to the infected computer. 6) Run the Safebytes Anti-malware directly from the thumb drive by double-clicking the icon. 7) Click the “Scan” button to run a full system scan and remove malware automatically.

Let's Talk About SafeBytes Anti-Malware!

Want to install the best anti-malware application for your laptop or computer? There are many applications available in the market which comes in free and paid versions for Windows computers. Some of them are great and some are scamware applications that pretend as legitimate anti-malware programs waiting to wreak havoc on your PC. When looking for an antimalware program, pick one which gives reliable, efficient, and total protection against all known viruses and malware. One of the recommended tools by industry leaders is SafeBytes Anti-Malware, the most dependable program for Windows computers. SafeBytes anti-malware is a reliable tool that not only secures your system permanently but is also quite user-friendly for people of all ability levels. This application could easily identify, remove, and protect your personal computer from the most advanced malware attacks such as spyware, adware, trojan horses, ransomware, worms, PUPs, and other possibly damaging software applications. SafeBytes has excellent features when compared to other anti-malware programs. Below are a few of the great ones: World-class AntiMalware Protection: Built upon a greatly acclaimed anti-virus engine, this malware removal application can identify and remove numerous obstinate malware threats such as browser hijackers, PUPs, and ransomware that other common antivirus applications will miss. Live Protection: SafeBytes gives real-time active supervision and protection from all known viruses and malware. They’re very effective in screening and eliminating different threats because they are regularly improved with new updates and alerts. Web Security: SafeBytes provides an instant safety rating on the web pages you are going to visit, automatically blocking risky sites and making sure that you are certain of your safety while browsing the internet. Very Low CPU and Memory Usage: SafeBytes provides complete protection from online threats at a fraction of the CPU load due to its enhanced detection engine and algorithms. Premium Support: SafeBytes provides 24/7 technical support, automatic maintenance, and updates for the best user experience.

Technical Details and Manual Removal (Advanced Users)

If you wish to manually remove InternetSpeedTracker without the use of an automated tool, it may be possible to do so by removing the program from the Windows Add/Remove Programs menu, or in cases of browser extensions, going to the browsers AddOn/Extension manager and removing it. You will likely also want to reset your browser. To ensure the complete removal, manually check your hard drive and registry for all of the following and remove or reset the values accordingly. Please note that this is for advanced users only and may be difficult, with incorrect file removal causing additional PC errors. In addition, some malware is capable of replicating or preventing deletion. Doing this in Safe Mode is advised.

The following files, folders, and registry entries are created or modified by InternetSpeedTracker

Files: C:DOCUME1USER1LOCALS1Tempnsk1.tmp C:b418207fbd4b466002312b66521c390947518e9a0d787e4e059af0505f607f3e C:DOCUME1USER1LOCALS1Tempnsk2.tmp C:DOCUME1USER1LOCALS1Tempnsk2.tmpnsDialogs.dll C:DOCUME1USER1LOCALS1Tempnsk2.tmpSystem.dll C:DOCUME1USER1LOCALS1Tempnsk2.tmpnsDialogs.dll C:DOCUME1USER1LOCALS1Tempnsk2.tmpSystem.dll C:Program FilesInternetSpeedTracker_9tEIInstallr.binNP9tEISb.dl_ C:PROGRA1INTERN2Installr.binNP9tEISb.dl_ C:Program FilesInternetSpeedTracker_9tEIInstallr.binNP9tEISb.dll C:Program FilesInternetSpeedTracker_9tEIInstallr.bintEIPlug.dl_ C:PROGRA1INTERN2Installr.bintEIPlug.dl_ C:Program FilesInternetSpeedTracker_9tEIInstallr.bintEIPlug.dll C:Program FilesInternetSpeedTracker_9tEIInstallr.bintEZSETP.dl_ C:PROGRA1INTERN2Installr.bintEZSETP.dl_ C:Program FilesInternetSpeedTracker_9tEIInstallr.bintEZSETP.dll C:WINDOWSsystem32rundll32.exe C:Program FilesInternetSpeedTracker_9tEIInstallr.binNP9tEISb.dl_ C:Program FilesInternetSpeedTracker_9tEIInstallr.binNP9tEISb.dll C:Program FilesInternetSpeedTracker_9tEIInstallr.bintEIPlug.dl_ C:Program FilesInternetSpeedTracker_9tEIInstallr.bintEIPlug.dll C:Program FilesInternetSpeedTracker_9tEIInstallr.bintEZSETP.dl_ C:Program FilesInternetSpeedTracker_9tEIInstallr.bintEZSETP.dll Registry: HKLMSOFTWAREClassesInternetSpeedTracker_9t.HTMLMenu HKLMSOFTWAREClassesInternetSpeedTracker_9t.HTMLPanel HKLMSOFTWAREClassesInternetSpeedTracker_9t.SettingsPlugin HKLMSOFTWAREClassesInternetSpeedTracker_9t.ToolbarProtector HKLMSOFTWAREWow6432NodeMicrosoftWindowsCurrentVersionexplorerBrowser Helper Objects9e28b297-11d4-4293-aa6f-558658ee66ae HKLMSOFTWAREWow6432NodeMicrosoftWindowsCurrentVersionexplorerBrowser Helper Objectscc28794a-99d4-4b1b-bccf-b065ce5f9feb HKLMSOFTWAREWow6432NodeInternetSpeedTracker_9t HKLMSYSTEMControlSet001servicesInternetSpeedTracker_9tService HKLMSYSTEMCurrentControlSetservicesInternetSpeedTracker_9tService HKUS-1-5-21-1633355155-4214755471-2067616181-1000SoftwareAppDataLowSoftwareInternetSpeedTracker_9t HKLMSOFTWAREWow6432NodeMicrosoftWindowsCurrentVersionRunInternet Speed Tracker EPM Support
Read More
1 2 3 171
Logo
Copyright © 2023, ErrorTools. All Rights Reserved
Trademark: Microsoft Windows logos are registered trademarks of Microsoft. Disclaimer: ErrorTools.com is not affiliated with Microsoft, nor claims direct affiliation.
The information on this page is provided for information purposes only.
DMCA.com Protection Status