If your IP address expires, you will most likely experience interruptions when browsing the web. In such cases, you have to release and renew the IP address by executing the following commands:
ipconfig /release
ipconfig /renew
So if you are trying to renew the IP address of your Windows 10 computer using the commands given above but you encounter an error message instead that says, “Unable to contact your DHCP Server”, then you’ve come to the right place as this post will guide you in fixing this error.
This kind of error indicates that the NIC can’t communicate with the DHCP server which is why it’s not able to release new IP addresses. It could be due to many reasons. To fix this error, you can try to roll back, update or reinstall the Network Adapter drivers. You could also run the built-in Network Adapter troubleshooter, as well as start or restart the DHCP client service.
Option 1 – Try to rollback your Network driver
If you have updated the driver software as of late and you suddenly got this error, you might have to roll back the device driver – in other words, switch back to the previous working version. To do that, follow these steps:
Tap the Win + R keys to launch the Run window and then type in the “devmgmt.msc” command and hit Enter to open the Device Manager window.
Under the Device Manager, you will see a list of drivers. From there, look for the Network Adapters and expand it.
Next, select the driver entries that are labeled appropriately other than anything in the context of the WAN Miniport.
Then select each one of them and double click to open a new mini window.
After that, make sure that you’re on the Driver tab and if you are not, just navigate to it then click the Roll Back Driver button to switch back to the previous version of your Network adapters.
Now restart your computer to successfully apply the changes made.
Option 2 – Try to update the Network drivers
If rolling back to the previous version of the Network adapter drivers didn’t help, then you need to update them instead. To do so, here’s what you have to do:
Tap the Win + R keys to launch the Run window and then type in the “devmgmt.msc” command and hit Enter to open the Device Manager window.
Under the Device Manager, you will see a list of drivers. From there, look for the Network Adapters and expand them.
Then right-click on each one of the Network drivers and update them all.
Restart your PC and see if it helped in fixing the BSOD error.
Note: If updating the network drivers didn’t help in fixing the problem, you can also try to uninstall the very same drivers and restart your Windows 10 PC. After that, the system itself will reinstall the drivers you just uninstalled. Alternatively, you can also download and install the drivers from the manufacturer’s website directly.
Option 3 – Run the Network Adapter troubleshooter
Running the built-in Network Adapter troubleshooter can also help in fixing the “Unable to contact your DHCP Server” error. To run the Network Adapter Troubleshooter, refer to these steps:
Open the Search bar on your computer and type in “troubleshoot” to open the Troubleshoot settings.
Next, scroll down and select the “Network Adapter” option from the right pane.
Then click on the Run Troubleshooter” button.
After that, your computer will check for any possible errors and will pinpoint the root cause of the problem if possible.
Restart your computer.
Option 4 – Try disabling the IPv6 in the Network Center
Tap the Win + X key combination and click on Network Connections.
This will open the Settings app on a specific page. Now on the right-side panel, click on the Network and Sharing Center link.
After that, it will open the Control Panel and from there, click on the network that your computer is connected to and then click on Properties.
Next, uncheck the entry that says, “Internet Protocol Version 6 (TCP/IPv6)” in the list that populates.
Now click on OK and close all other windows.
Restart your computer and see if the error is now fixed.
Option 5 – Start or restart the DHCP client service
If the DHCP client service is either inactive or stopped, you can try to start or restart it to resolve the error. You can do this via the Services Manager.
Tap the Win + R keys to open the Run utility.
Then type “services.msc” in the field and tap Enter or click OK to open the Services Manager.
After that, look for the DHCP client service from the list of services displayed.
Once you found it, right-click on it and select the Start or Restart option.
If you suddenly receive an error saying, “Error 105 (net:: ERR NAME NOT RESOLVED): Unable to resolve the server’s DNS address” when browsing the web, then this means that the DNS lookup has failed. This kind of error is one of the most commons ones you can encounter while using the Chrome browser. And since it’s a pretty common error, the solutions for this one are pretty easy as well.
Option 1 – Disable both the Antivirus and Firewall temporarily
There are times when antivirus programs and the firewall blocks a website that they consider to be malicious or even because of false-positive effects. Thus, you need to disable these programs temporarily as it might be the reason why you’re getting the “Error 105 (net:: ERR NAME NOT RESOLVED): Unable to resolve the server’s DNS address” error in Chrome.
Option 2 – Check the Network Cables and restart the router then reconnect
Of course, the next thing you have to do is to check if the network cables connected to your computer or router are properly connected. And if your computer is connected via Wi-Fi, you need to make sure to restart your router once. In addition, you can also forget the Wi-Fi your computer is currently connected to and then try reconnecting again to see if it would work.
Option 3 – Try running the Chrome Cleanup tool
You might want to run Google Chrome’s built-in Malware Scanner & Cleanup tool as it could also help in getting rid of any unwanted ads, pop-ups, and even malware, as well as unusual startup pages, toolbars, and anything else that might overtake the network and could affect the performance of the browser.
Option 4 – Try removing the Proxy
Removing the Proxy might also help you in fixing the ERR_NAME_NOT_RESOLVED error in Chrome. Here’s how you can do it:
Tap the Win + R keys to open the Run dialog box.
Then type “inetcpl.cpl” in the field and hit Enter to pull up the Internet Properties.
After that, go to the Connections tab and select the LAN settings.
From there. Uncheck the “Use a Proxy Server” option for your LAN and then make sure that the “Automatically detect settings” option is checked.
Now click the OK and the Apply buttons.
Restart your PC.
Note: If you are using a third-party proxy service, you have to disable it.
Option 5 – Disable Prefetch in Chrome
In case you don’t know, Google makes use of a prediction service that helps users in completing searches and typing URLs in the address bar. This prediction service uses the already resolve IP address to connect to the website you’ve already visited. Thus, it would be better if you disable it in cases like this one.
Open Chrome’s Settings.
Next, go to Privacy and Security then look for “Prefetch”.
After finding Prefetch, toggle off the “Use a prediction service to help complete searches and URLs typed in the address bar” setting and then restart Chrome.
Option 6 – Flush the DNS, reset Winsock and then reset TCP/IP
Click the Start button and type in “command prompt” in the field.
From the search results that appear, right-click on Command Prompt and select the “Run as administrator” option.
After opening Command Prompt, you have to type each one of the commands listed below. Just make sure that after you type each command, you hit Enter
ipconfig /release
ipconfig /all
ipconfig /flushdns
ipconfig /renew
netsh int ip set dns
netsh winsock reset
After you key in the commands listed above, the DNS cache will be flushed and the Winsock, as well as the TCP/IP, will reset.
Option 7 – Try using the Google Public DNS
The first thing you have to do is right-click on the network icon in the Taskbar and select Network and Sharing Center.
Next, click on the “Change Adapter Settings” option.
After that, search for the network connection that you are using to connect to the internet. Note that the option might be “Wireless Connection” or “Local Area Connection”.
Right-click on your network connection and click on Properties.
Then select the new window to choose the “Internet Protocol 4 (TCP/IPv4)” option.
After that, click on the Properties button and click the checkbox in the new window for the option “Use the following DNS server addresses”.
Type in “8.8.8” and “8.8.4.4” and click OK and exit.
Option 8 – Reset Chrome
Resetting Chrome can also help you fix the error. Resetting Chrome means restoring its default settings, disabling all the extensions, add-ons, and themes. Aside from that, the content settings will be reset as well and the cookies, cache, and site data will also be deleted. To reset Chrome, here’s what you have to do:
Open Google Chrome, then tap the Alt + F keys.
After that, click on Settings.
Next, scroll down until you see the Advanced option, once you see it, click on it.
After clicking the Advanced option, go to the “Restore and clean up the option and click on the “Restore settings to their original defaults” option to reset Google Chrome.
Corsair is well known for RAM memory modules for PC but then it has expanded to PC peripherals and even selling some pre-build computers as well in past few years. New Corsair expansion now includes a laptop line, starting with their new gaming laptop Voyager.
Voyager laptop is packed with a mechanical keyboard and MacBook-like touch bar for your typing and pointing needs. It is built with a 16-inch QHD+ screen packing 240Hz that is run by Radeon 6800M GPU. Also inside lurks AMD 16 thread Ryzen 9 6900HS CPU, Wi-Fi 6E support, Dolby Atmos audio, and full HD 1080p WEB camera.
The keyboard has low-profile mechanical Cherry MX switches with per-key RGB lightning and above is what Corsair calls a macro bar, with 10 shortcut buttons and a small LCD in the center.
Corsair is also including a few features that tie in with its other products. Many of the company’s keyboards, mice, and other accessories use the ‘Slipstream’ USB wireless adapter, which is built into the Voyager laptop. The macro bar is also configured using the same software used for the Elgato Stream Deck, a popular product sold by Corsair.
When Windows evolved into Windows 10, the program known as Windows Security Essentials is no longer. It is now the program known as Windows Defender. When a computer is upgraded from a previous version of Windows up to Windows 10, the Windows Defender takes over and will replace the Security Essentials. In a small percentage of Windows 10 upgrades, something will go wrong and the new program will fail to replace Security Essentials. The result will be that the operating system has both of the programs installed. In this case, Windows Defender will not offer any protection and Security Essentials will not be able to defend either. This error code will also present itself when the Windows Mail App in Windows 10 fail to retrieve and sync email from the user's account.
Common symptoms include:
There will be an error message that says: “An error has occurred in the program initialization. If this problem does continue, contact your System Admin. Error code 0x80070426.”
The computer will be left completely vulnerable to spyware and viruses.
The Windows Mail App will not be able to retrieve mail and will not sync with the PC user's mail.
The user can be doing anything on their computer and the error code will show up unprompted.
The computer will lock up, become slow, crash, or even freeze when dealing with error code 0x80070426.
The programs from an older version of Windows do not replace the newer version from Windows 10.
Solution
Error Causes
Error code 0x80070426 will present itself when a PC user has upgraded their OS from a previous version of Windows to the new Windows 10 version. When this happens, a small portion of users will experience the disconnect between older versions of specific programs, namely the virus protection. When the previous version of the program under a different name is not completely removed and the new virus protection program is installed, the programs will cancel each other out and collectively offer no protection.
This error code may also be found when Windows 10 tries to sync the user's email with the Windows Mail App.
Further Information and Manual Repair
There are a few methods to repair this problem. It should be noted that should anyone feel that the instructions are too complicated, they should contact a Windows repair technician to ensure that the error is fixed properly.
Method One: Uninstall Microsoft Essentials
Hold down the Windows Key and press R. Type in taskmgr into the run dialogue. You should locate the Windows Defender Service (this may show up as Windefend). Right-click on it and then choose Stop.
This will stop the program, but the program will start back up automatically when the computer restarts. While this program is stopped, uninstall Essentials.
To do this: go to Control Panel, Programs, and Features, Uninstall a Program. Alternately, you may hold down the Windows Key and press R, type in appwiz.cpl, click OK, and then locate Microsoft Essentials. Uninstall it, and then restart your computer.
After this is done, go to Settings, Update, and Security. Choose Windows Defender and ensure that Real-time protection is on. Refer back to the Task Manager, Services. Make sure that Defender service is on and running.
Method Two: If the problem occurs in the Windows Mail App
When error code 0x80070426 presents itself in the form of an error with the Mail app, it may be necessary to run an SFC scan.
Right-click on the Start menu or Windows icon, and select Command prompt. The command prompt may be navigated by using shortcut keys Win and X and then select it.
Run the command prompt and then type in sfc /scannow and then press enter. The SFC scan will be run, and be careful not to abort the process before it has finished. This will scan for any files that are lost or corrupt on the PC.
If the scan has found any corrupt files, type in this code and then hit Enter: findstr /c:”[SR]” %windir%LogsCBSCBS.log >”%userprofile%Desktopsfcdetails.txt.
To skip the repair of corrupt or missing files, type in: Dism /Online /Cleanup-Image /RestoreHealth. The details of the scan can be found on the sfcdetails.txt file that will be on the desktop.
Method Three: Use An Automated Tool
If you wish to always have at your disposal a utility tool to fix these Windows 10 and other related issues when they do arise, download and install a powerful automated tool.
It really sucks when you can’t fully enjoy the newest version of your favorite OS.
Windows 11 is still relatively fresh and consequently has some annoying little bugs that really ruin our experience. The good news is that you’re not alone and most of them are easy to fix.
Here are 5 commonly reported Windows 11 issues and what you can do to get rid of them.
1. Windows 11 audio problems
One of the absolute most irritating things in the world is struggling with the sound on your computer. Windows 11 users have reported facing the issue of low or no sound. If you’re currently experiencing the same frustration, you can be relieved. Chances are fixing it will only take a few minutes.
The first thing to check would be whether you accidentally muted your device by pressing the mute button on your keyboard. Yes, we know it sounds a lot like the old “have you tried turning it off and on again?” But it’s important to leave no stone unturned, and the most obvious things are usually the ones we easily overlook.
Moreover, if you have several audio output sources, check whether the right one is selected. You can do this via the Action Center or through Settings. If you want to use the same source every time, we also recommend you set it as the default one.
It’s also important to have a good, up-to-date audio driver. More often than not, this will be the true cause of your audio struggles. Make sure to update your driver, and if that doesn’t work out, you can always un- and reinstall it or install a different one.
Lastly, if all attempts remain unsuccessful, run the audio troubleshooter to figure out what’s actually going wrong.
2. Unable to find files
Such a powerful new operating system, yet it can’t seem to do the simplest thing imaginable? The File Explorer not responding on Windows 11 is one of the most frustrating and most common problems with Microsoft’s newest iteration of its awesome OS.
However, 9/10 times it can be fixed by simply restarting your PC. You could also try killing the Windows Explorer process in the Task Manager and then rerunning it.
If these don’t help, check whether there are any pending Windows 11 updates. A single missing update can compromise your PC’s functionality, so always make sure to install them all on time.
Should none of that work, then there are other ways to solve the File Explorer problem. However, then the issue is probably a bit deeper and it’s no longer in the ‘easy fix’ territory.
3. Start menu not working
Just like the File Explorer, the Start menu is a fundamental element of your OS. So, it’s only natural that its malfunction grinds your gears. It may be more customizable than on previous Windows versions, but it doesn’t always work smoothly.
If you’re facing the so-called Start menu critical error, there are a few things this could be caused by. Usually it means you turned off your system while an important update was still being installed, there is a corrupt file on your PC, or Windows forcefully stopped a program.
Whatever the reason, the solution should be pretty simple. Try the basic steps: restarting your File Explorer (like we explained above) and signing out and back into your account. If that doesn’t do anything, you may want to try uninstalling third-party start menu apps (if you have any), since they can interfere with your default programs’ functionality.
Now, those are the easy fixes. If you get nowhere with them, you might need to identify the root cause and search for more complex solutions than that.
4. Snipping tool not working
Our beloved screenshot tool was introduced with Windows 10 and Microsoft decided to keep it. However, you were probably just as disappointed as us when you tried to run it and failed.
Normally, this can be fixed by installing the latest Out-of-band (OOB) update, or even pending updates in general. Even if your system appears to be up-to-date, run the checker just in case.
Another cool thing Windows 11 lets you do is ‘Repair’ and ‘Reset’, which is the easiest way to troubleshoot your Snipping tool. If this fails, you can also try the good old un- and reinstall method. Simply uninstall the tool through the Control Panel and reinstall it from the Microsoft Store.
Furthermore, in the case of an upgrade from Windows 10 to 11, it may be that the old Snipping tool version is interfering with the launch of the new one. If you don’t care that much about the additional options available with the enhanced screenshot tool, you can use the old version instead.
Simply go to your C Drive, find the Windows.old folder, search for the tool and open it from there. Make sure to pin it to your taskbar as well, if you know you’re going to use it often.
5. Can’t install the latest update
The latest Windows 11 version, 22H2, has brought tons of enhancements to our dearest operating system. Unfortunately, a lot of users still haven’t had the opportunity to experience it. A mere update of your OS version should be the one thing that goes smoothly, but sometimes that’s not the case.
Failure to install 22H2 can be caused by a few things. Most commonly, the issue is caused by lack of storage space or corrupted files, but there could be other culprits.
There are a couple of things you could try. For example, it’s crucial that your drivers be up-to-date and some important services be enabled. These are: Windows Modules Installer, Background Intelligent Transfer Service, Cryptographic Service, Windows Update services.
To enable them, search ‘Services’, find the service you need and right-click on it. Open ‘Properties’ and select the startup type ‘Automatic’.
It may also be necessary to unplug all peripherals that aren’t crucial and disable third-party antivirus tools until after the update is finished.
Ultimately, you can run the Windows Update troubleshooter to detect and fix other possible issues.
Summary
Tiny bugs like these are nothing out of the ordinary. That said, we still all hate when they happen.
Hopefully some of our solutions have helped you to a smoother Windows 11 experience. But if you’re still struggling, feel free to reach out to us. We’d be happy to help!
Error 2738 is associated with the VBScript engine. VBScript is the abbreviation for Visual Basic Scripting. It is an Active Scripting programming language developed by Microsoft and modeled on Visual Basic. It is used with a fast interpreter in a large variety of Microsoft environments.
Error 2738 indicates that the VBScript engine is not registered properly on your PC. It occurs when you try to install or uninstall VBScript-supported applications on your system. The error message is displayed in the following format:
"Error 2738. Could not access VBScript run time for custom action."
Solution
Error Causes
There are several reasons for the error 2738 message pop up. These include:
Incorrect or corrupt registry entries on your system. These entries interfere with VBScript support in Windows thereby generating such error codes.
Removal of McAfee Antivirus
Windows registry values are not updated accurately during the uninstallation of McAfee Software
The Visual Basic Script is registered in the registry under the local user instead of the local machine
No matter what the cause of the error may be, it is recommended that you resolve the issue immediately without any delay.
Further Information and Manual Repair
Here are some of the easy and proven DIY methods to repair error 2738 on your PC:
Method 1
If the error 2738 occurs because the VBScript is not registered correctly, then follow these steps to resolve.
Go to the start menu, open Run, and type RegEdit in the box and then press OK. This will open the Windows Registry Editor.
Now type KEY_LOCAL_MACHINESOFTWAREClassesCLSID{B54F3741-5B07-11cf-A4B0-00AA004A55E8}InprocServer32, if the key does not have a data value of C:\Windows\System32\vbscript.dll then simply add it.
Now go to the All programs option and then Accessories.
Here right-click on Command Prompt and then ‘Run as Administrator’.
Now type egsvr32 vbscript.dll then press enter. After that type regsvr32 jscript.dll and then press enter.
Restart your PC to activate changes.
Method 2
Sometimes error 2738 may occur when you uninstall preinstalled MacAfee antivirus software on your system. Un-installation usually leaves some trace components in the registry.
These components must be removed completely otherwise error codes like 2738 may keep occurring on your computer screen. In such an event, the best way to resolve it is to download the McAfee Consumer Product Removal utility from McAfee's official website.
Save this file on your desktop. Double click the file and follow the steps to remove this software completely and successfully from your PC. Proper removal of the McAfee program will resolve error 2738 right away.
But if the error still persists then try other methods illustrated below.
Method 3
Download Restoro to remove incorrect and corrupt registry entries on your system that may be interfering with VBScript support.
Restoro is a new and easy-to-use PC Repair Tool deployed with an intuitive interface and a powerful registry cleaner. The registry cleaner removes all entries corrupting the registry, cleans it, and resumes it to its normal state.
Click here to download Restoro.
Connecting to Microsoft’s Windows Update servers does not always go smoothly since you could run into a number of errors. One of these errors is the error code 0x8024402c. You can see this error code when you check for Windows Updates. This kind of Windows Update error occurs when the proxy or the firewall settings are incorrectly configured. As a result, the client’s connection to the Windows Update servers fails.
There are two things you can do to resolve error code 0x8024402c. First, you can try to fix the Proxy Settings. Second, you can set up Automatically Detect the connection settings. In addition, you can also try to perform System Restore as it could also help in fixing the problem. Performing System Restore might help you in fixing the error code 0x8024402C. Refer to the steps below to use System Restore.
Tap the Win + R keys to open the Run dialog box.
After that, type in “sysdm.cpl” in the field and tap Enter.
Next, go to the System Protection tab then click the System Restore button. This will open a new window where you have to select your preferred System Restore point.
After that, follow the on-screen instructions to finish the process and then restart your computer and check if the problem is fixed or not.
If performing System Restore didn’t help in fixing the problem, then try the two given options below.
Option 1 – Try fixing the Proxy Settings
In the Cortana search box, search for Internet Explorer and then click on the related search result.
After that, tap the Win + T keys on your keyboard and click on Internet Options.
Next, navigate to the Connections tab and click on LAN Settings.
Then click on the Advanced button and delete all the entries in the list generated in the Exceptions section. And if the Advanced button is disabled because the “Use a proxy server for your LAN (These settings will not apply to dial-up or VPN connections)” option is disabled then you are good to go. Now proceed to the next step.
Tap the Win + X keys or right-click on the Start button and select Command Prompt (Admin) or you could also search for “cmd” in the Cortana search box and right-click on Command Prompt from the search results and select the “Run as administrator” option.
If a User Account Control appears, click on Yes to proceed. After that, type each one of the commands listed below, and don’t forget to hit Enter after you type each one of them.
netsh winhttp reset proxy
net stop wuauserv
net start wuauserv
Now restart your computer and check if the problem is fixed or not by checking for Windows Updates again.
Option 2 – Try setting up Automatically Detect the connection settings
Type in “internet options” in the Cortana search box and then click on the related search result.
After that, navigate to the Connections tab.
Next, click on the LAN Settings button located under the Local Area Network (LAN) settings section.
Then uncheck the “Use a proxy server for your LAN (These settings will not apply to dial-up or VPN connections)” option under the Proxy Server section and click OK.
Now restart your computer to apply the changes made successfully.
The Windows Subsystem for Linus, also known as WSL, is a useful and excellent tool for developers. However, it isn’t without flaws as users can still encounter some errors when using it. One of these errors is the error code WslRegisterDistribution, 0x8007019e,0x8000000d. Although it seems like the error is have something to do with the installation of WSL, it could be a false positive since some users who’ve installed WSL still encountered the same problem. Here’s the context of the error:
“Installing, this may take a few minutes…WslRegisterDistribution failed with error: 0x8007019e/0x8000000dError: 0x8007019e/0x8000000d The parameter is incorrect.Press any key to continue.”
Error code 0x8007019e or 0x8000000d could be due to the absence of supporting Windows 10 features since the error does not even let one use the WSL-based command line. If you are one of the users facing this problem, then you’ve come to the right place as this post will provide you with a couple of suggestions to fix it.
There are two options you can check out to fix the problem, but before you do that, you need to make sure that the Windows Subsystem for Linux feature is enabled. The two options include enabling WSL using the “Turn Windows features on or off” option and using the Windows PowerShell.
Option 1 – Try to enable the WSL using the “Turn Windows features on or off” option
To get started, search for “Turn Windows Features on or off” in the Start Search and click on the appropriate result to open a dialog box.
After that, you will see a populated list in the dialog box and from there, look for the “Windows Subsystem for Linux” option.
Once you find it, select OK. This will search and install the system files needed and ask you to restart your computer.
Restart your computer. The Linux distro should now work without any trouble.
Option 2 – Try to use Windows PowerShell
The next thing you can do to fix the error code 0x8007019e or 0x8000000d is to use Windows PowerShell.
Tap the Win + X keys and click on the “Windows PowerShell (Admin)” option to open Windows PowerShell as admin.
After that, execute this command to enable the Windows Subsystem for Linux feature: Enable-WindowsOptionalFeature -Online -FeatureName Microsoft-Windows-Subsystem-Linux
The command you entered will start to search for the required system files and install them.
If prompted, type “Y” to restart your computer. This should fix the problem.
Windows 10X is a new version of Windows that has been built from the ground up for new PCs and will begin shipping on hardware in 2021. It's built on top of a new modern version of Windows called 'Windows Core OS' that guts legacy components and features in favor of contemporary user experiences and enhanced security. This means everything from the Windows Shell to the underlying OS has been rebuilt with modern technologies.
As a result, Windows 10X does not support legacy Win32 applications at launch. Windows 10X PCs in 2021 will be able to run Microsoft Edge, UWP, and web apps. Legacy Win32 application support will arrive at a later date, however. When it does, Win32 applications will run in a secure container by default, meaning those legacy applications cannot affect system performance and battery life when closed. Windows 10X is a much more secure and stable OS as a result of this, as there's no opportunity for legacy apps to cause bitrot.
Windows 10X features a new shell of the user interface that has been built with modern technologies. It's an adaptive user experience that can adjust depending on the "posture" of your device. For example, with a foldable PC, the user might want to use it in several different ways; as a laptop, or tablet, or in tent mode for movies. Because of this, the user interface must adapt to provide the best experience no matter which way your device is being used.
This also means that legacy shell elements, such as the Control Panel, File Explorer, and error dialogs and icons are gone on Windows 10X. As Microsoft has rebuilt the entire shell, it doesn't include any of the legacy things that make Windows 10 so inconsistent when it comes to UI. The Windows Shell on Windows 10X should be much more consistent. At launch, Windows 10X will only be available on traditional clamshell PCs aimed primarily at the education and enterprise markets. The platform will eventually ship on the new devices from factors such as foldable PCs, but that won't be happening in 2021.
Start menu
Microsoft is redesigning the Start menu experience on Windows 10X with a focus on productivity. It features a system-wide search bar along the top that can also search the web and a grid of installed apps below that in place of live tiles. It also has a "recent activities" area that dynamically updates with things the user might want to jump straight into, such as recent Office documents and visited websites. The apps list can be customized, with the ability for users to rearrange which apps show up in the first few rows.
Taskbar
Windows 10X also has a new adaptive Taskbar that features a centered design. The Start and Task View buttons appear in the center, with running and pinned apps appearing between the two. When you open an app, the Start and Task View buttons gently spread apart, giving the Taskbar a much more fluid appearance. There are some new animations; the Start and Task View buttons have their own animations when clicked on, and there's a subtle bounce to app icons when you minimize running apps to the Taskbar.
In addition to the new design, there are also up to three different Taskbar sizes: Small, medium, and large. Large is great for tablets, while medium and small mimic the usual sizes we already have today on Windows 10. On tablets, users can now swipe up anywhere on the Taskbar to access the Start menu, making it easier for touch users to access their apps list. You no longer have to hit the specific Start button to access your Start menu.
Action center
In addition to the new Start and Taskbar experiences, there's also a new Action Center to compliment them. This new Action Center puts more emphasis on quick actions, with the ability to jump into specific quick actions for further control without leaving the Action Center at all. It's also designed in such a way that mimics a control center, with notifications housed above it in a separate box. This new Action Center includes things like volume controls, power options, and battery percentage. There's also a new music control UI that appears in the Action Center when music is playing from a supported app.
State separation feature
Unlike Windows 10, Windows 10X features something called "state separation" which is how the OS lays itself out on a drive. Windows 10 today installs everything into a single partition, which means the user can access system files, as can apps and potential attackers. On Windows 10X, everything goes into its own read-only partition. So OS files are locked away, as are app files, as are drivers, and the registry. The only thing the user and applications can access is the user partition.
This means that malware or viruses can't get in and affect the system because those programs are only able to operate in a single partition, and that assumes they're able to get outside of the app container system Microsoft has built. All apps on Windows 10X run in a container and need explicit permissions to access things that are outside that container. This is already how UWP apps work on Windows 10, and Microsoft will be extending that to Win32 apps on Windows 10X when support for Win32 apps arrives.
Launch date and info
Windows 10X will launch this spring first for commercial markets. Commercial markets include education and enterprise industries looking for sub-$600 PCs for students in the classroom or first-line workers. Windows 10X won't be launching on consumer PCs in 2021, meaning you won't find it on a flagship Dell or HP device. It's also only for clamshell PCs, with foldable, tablets, and other form factor support coming in 2022 and beyond.
Windows 10X will launch without an in-box Mail and Calendar app. It's been removed from the first version of Windows 10X because the platform is aimed at commercial markets that will likely use Outlook Web or stream Outlook via Windows Virtual Desktop. Users can opt to reinstall the Mail and Calendar apps from the Microsoft Store if they wish.
Windows 10X for mainstream markets won't happen until 2022 when Win32 app support among other features comes to the OS as part of the Windows 10 "Nickel" release scheduled for the first half of 2022.
Because Windows 10X is a new operating system, it will not be released as an update for existing Windows 10 PCs. Users won't be able to install Windows 10X on a device that didn't come with Windows 10X, to begin with. There won't be any official ISO media and you won't be able to buy Windows 10X on its own to install on your existing device. It's for new PCs only.
If you would like to read more helpful articles and tips about various software and hardware visit errortools.com daily.
We have talked about gaming on old computers and have covered new and upcoming Steam deck handheld console. Today we are combining old gaming with a handheld console and our target of talk is Retroid pocket 2. This product is packed with really high-quality plastic and with some great features in it.
So let's dive into this cool handheld in more detail and find out why we like it so much.
Good manufacturing quality
Plastic and overall manufacturing quality are really, really good. The battery is great, packing 4000mAh that can hold over 3 hours of nonstop gaming, and all buttons and joysticks are great. The screen is a 640 x 480 60Hz 3.5″ IPS screen (4:3 aspect ratio) that performs really great for its purpose, retro gaming. There is a Digital D-Pad and dual analog joysticks. The right joystick is the lower profile to avoid being accidentally moved when pressing the four gaming buttons. There are three buttons at the bottom which are Home, Start, and Select. On either side are good-quality stereo speakers. On the bottom of the device are a Micro SD Card slot and a 3.5mm headphone port. On the top of the device are Left and Right shoulder and trigger buttons. There are the power button and volume adjustments. There are a USB Type-C OTG port and a Micro HDMI output for connection to a TV.
Good technical statistics
Good, not great but then again since this is retro handheld you cannot really expect some crazy stuff like alder lake inside. So the console is punching ARM Cortex A7 CPU with 2 cores and a clock of 1.5GHz paired with ARM Mali 400-MP2 500MHz GPU. The console has 1GB LPDDR3 RAM memory and 8GB eMMC Storage where 5GB is freely available, the rest is taken for OS. As mentioned before the display is 640x480 resolution with a size of 3.5″. The battery is Lithium-Ion with a power of 4000mAh and on the handheld, there is a USB Type-C connector, 3.5mm headphone jack, and Micro-HDMI. It also has Wifi/Bluetooth 4.0
Retroid Pocket 2 OS and support
Pocket 2 comes with Android 6 but you can update its firmware to the 8.1 version on the official site that I would highly recommend. New versions of the handheld will come with 8.1 on it from the box. Having Android as OS opens many possibilities like you can download Android apps such as Steam Link, allowing you to play actual PC games on your Retroid Pocket 2. Not just that, if it does get a newer version of Android it could even have the ability to use xCloud, Xbox’s cloud gaming service. Of course, hardware will not be able to handle modern games but the option is still there and for some old PC titles available on steam like Commander Keen, for example, this is a great option.
The console can emulate basically everything up to Dreamcast, including N64, PSP, and Playstation 1. It can emulate Nintendo DS also, but it can only do so with one screen. The only problem with this console is you will need to install and update Apps. You’ll need to learn about RetroArch, an app that lets you download emulators or cores to play games.
Retroid price
The last thing on the list is the price of the console itself. Going just under the 100$ mark this really makes it an affordable option for plenty of people that would like to experience retro handheld gaming or for ones like me, nostalgic gamers wanting to relive some era of playing games on the road.
Conclusion
Among Chinese handheld devices for retro gaming, Retroid Pocket 2 is really on top of what the market can offer. If you are looking for a great handheld retro console and are not afraid of little dive-ins into the OS and various configurations, Pocket 2 will reward you with plenty and wide emulation support.
Building your skill set could be a very important thing, especially in today’s world, and what’s the best way other than online learning classes. You are not exposing yourself to pandemics, staying safe in the warmth of your home and most of the courses are free.
Presented here are sites that I believe will and can help you with your goal of learning desired material whatever that might be. Sites are listed in no particular order with a description of what each has to offer.
Coursera
https://www.coursera.org/Coursera was one of the pioneers when it comes to college education online. When it started all courses were free and offered certificates if the taker has done tasks with a passing grade. Today not everything is free but still, there are tons of free courses that can help you to learn something new and to advance in your work or hobby.
Google is using the Coursera platform to deliver its courses to the audience and besides google a lot of academic professors from Princeton, Stanford, John Hopkins and many more are presently offering their course material.
edX
https://www.edx.org/edX has evolved from MITx, MIT’s free initiative to place some free academic lectures from its classrooms free into the world. Since it was rebranded into edX it started including other big university names like Berkeley, University of Texas System, Harvard, and many more.
Since its infant days, edX has expanded and included many areas that it offers coursework from arts to science. Certificated today are mostly not free but course videos are, so if you care to learn and not wave certificates around this is a great place to do it.
Udemy
https://www.udemy.com/Udemy has a little different approach to course material than previously mentioned websites. Teachers on Udemy are mostly people that are working in a given field. Programmers will teach programming, fitness instructors will teach training, etc.
There are vas variety of topics even on lifestyle, hobbies even gaming to more serious ones like software developing hardware, etc.
There are free courses but mostly are one-time purchases with unlimited access to course material and with frequent discounts udemy might be a good place to look if you can find anything interesting.
Alison
https://alison.com/Alison is kind of Udemy if we are talking about course material and who is teaching, the difference however is that it has more free content and it is one of the rare websites on this list that has Language courses.
Courses vary from beginner level to more advanced ones.
Udacity
https://www.udacity.com/Udacity was also one of the earlier websites to offer free courses, in today’s world it still has free material but there is also paying one.
The big difference from other competitors is that Udacity focuses mostly on programming, data science, and web development and it is very strong in this field. There are no courses about art. Music or similar, mostly IT stuff is covered here.
If this is something that interests you, make a free account and give it a go.
Codecademy
https://www.codecademy.com/Codecademy is a website mainly focused on teaching you how to code. Pro plan is there but there are a lot of basic and free courses on the mentioned subject.
The curriculum is really wide covering Python, R, Java, JavaScript, SQL, Ruby, C#, C++, Swift, PHP, HTML, CSS and more so I am sure that if you are interested in coding this would be a pretty good place to find things.
Besides pure language coding courses site offers also, Cybersecurity, Web design, Data science, web development, Game Development, Mobile Development, and many more courses on provided subjects.
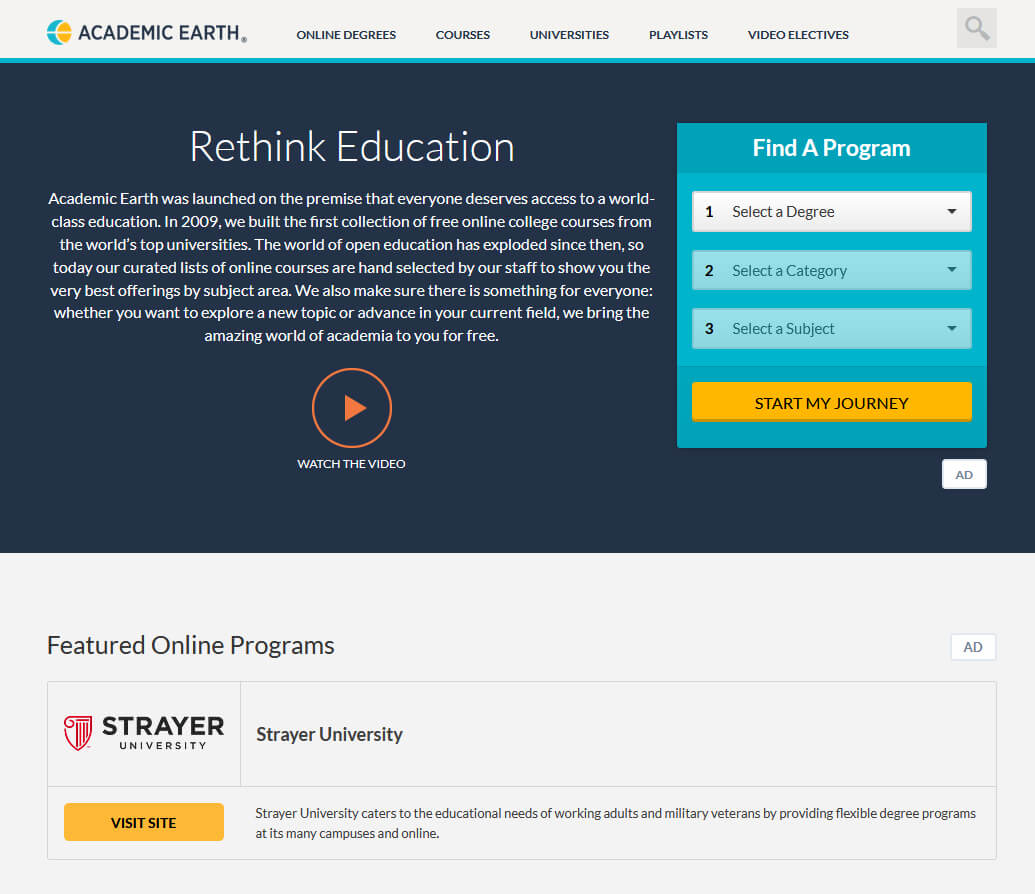
Academic Earth
https://academicearth.org/Academic Earth has been built with one simple premise: Everyone deserves access to education.
Lead by this kind of mindset on Academic Earth you will find well, academic courses similar to ones found on edX and Coursera, but from mentioned sites here all courses are free and you will find only academic ones, there are no entrepreneur or expert courses here, just pure academic ones.
If you wish to see and learn something the way it is taught in Harvard, Berkeley, MIT, etc this is the place for you.
Khan Academy
https://www.khanacademy.org/Khan academy is completely free and it is offering courses matching certain grades for children. It is offering courses for all 8 years of elementary school, math courses for high school and college with some coursework on topics like science, arts & humanities, reading, life skills, etc.
Despite not being on the same level as some university courses presented on other mentioned websites Khan Academy is a good place to learn a lot of basic skills that you could build upon later.
Conclusion
I hope that I have helped you in some way to expand your skill set and learn something new with provided sources and I hope to see you again on errortools.com


 Error Causes


 So let's dive into this cool handheld in more detail and find out why we like it so much.
 Coursera was one of the pioneers when it comes to college education online. When it started all courses were free and offered certificates if the taker has done tasks with a passing grade. Today not everything is free but still, there are tons of free courses that can help you to learn something new and to advance in your work or hobby.
Google is using the Coursera platform to deliver its courses to the audience and besides google a lot of academic professors from Princeton, Stanford, John Hopkins and many more are presently offering their course material.
Coursera was one of the pioneers when it comes to college education online. When it started all courses were free and offered certificates if the taker has done tasks with a passing grade. Today not everything is free but still, there are tons of free courses that can help you to learn something new and to advance in your work or hobby.
Google is using the Coursera platform to deliver its courses to the audience and besides google a lot of academic professors from Princeton, Stanford, John Hopkins and many more are presently offering their course material.
 edX has evolved from MITx, MIT’s free initiative to place some free academic lectures from its classrooms free into the world. Since it was rebranded into edX it started including other big university names like Berkeley, University of Texas System, Harvard, and many more.
Since its infant days, edX has expanded and included many areas that it offers coursework from arts to science. Certificated today are mostly not free but course videos are, so if you care to learn and not wave certificates around this is a great place to do it.
edX has evolved from MITx, MIT’s free initiative to place some free academic lectures from its classrooms free into the world. Since it was rebranded into edX it started including other big university names like Berkeley, University of Texas System, Harvard, and many more.
Since its infant days, edX has expanded and included many areas that it offers coursework from arts to science. Certificated today are mostly not free but course videos are, so if you care to learn and not wave certificates around this is a great place to do it.
 Udemy has a little different approach to course material than previously mentioned websites. Teachers on Udemy are mostly people that are working in a given field. Programmers will teach programming, fitness instructors will teach training, etc.
There are vas variety of topics even on lifestyle, hobbies even gaming to more serious ones like software developing hardware, etc.
There are free courses but mostly are one-time purchases with unlimited access to course material and with frequent discounts udemy might be a good place to look if you can find anything interesting.
Udemy has a little different approach to course material than previously mentioned websites. Teachers on Udemy are mostly people that are working in a given field. Programmers will teach programming, fitness instructors will teach training, etc.
There are vas variety of topics even on lifestyle, hobbies even gaming to more serious ones like software developing hardware, etc.
There are free courses but mostly are one-time purchases with unlimited access to course material and with frequent discounts udemy might be a good place to look if you can find anything interesting.
 Alison is kind of Udemy if we are talking about course material and who is teaching, the difference however is that it has more free content and it is one of the rare websites on this list that has Language courses.
Courses vary from beginner level to more advanced ones.
Alison is kind of Udemy if we are talking about course material and who is teaching, the difference however is that it has more free content and it is one of the rare websites on this list that has Language courses.
Courses vary from beginner level to more advanced ones.
 Udacity was also one of the earlier websites to offer free courses, in today’s world it still has free material but there is also paying one.
The big difference from other competitors is that Udacity focuses mostly on programming, data science, and web development and it is very strong in this field. There are no courses about art. Music or similar, mostly IT stuff is covered here.
If this is something that interests you, make a free account and give it a go.
Udacity was also one of the earlier websites to offer free courses, in today’s world it still has free material but there is also paying one.
The big difference from other competitors is that Udacity focuses mostly on programming, data science, and web development and it is very strong in this field. There are no courses about art. Music or similar, mostly IT stuff is covered here.
If this is something that interests you, make a free account and give it a go.
 Codecademy is a website mainly focused on teaching you how to code. Pro plan is there but there are a lot of basic and free courses on the mentioned subject.
The curriculum is really wide covering Python, R, Java, JavaScript, SQL, Ruby, C#, C++, Swift, PHP, HTML, CSS and more so I am sure that if you are interested in coding this would be a pretty good place to find things.
Besides pure language coding courses site offers also, Cybersecurity, Web design, Data science, web development, Game Development, Mobile Development, and many more courses on provided subjects.
Codecademy is a website mainly focused on teaching you how to code. Pro plan is there but there are a lot of basic and free courses on the mentioned subject.
The curriculum is really wide covering Python, R, Java, JavaScript, SQL, Ruby, C#, C++, Swift, PHP, HTML, CSS and more so I am sure that if you are interested in coding this would be a pretty good place to find things.
Besides pure language coding courses site offers also, Cybersecurity, Web design, Data science, web development, Game Development, Mobile Development, and many more courses on provided subjects.
 Academic Earth has been built with one simple premise: Everyone deserves access to education.
Lead by this kind of mindset on Academic Earth you will find well, academic courses similar to ones found on edX and Coursera, but from mentioned sites here all courses are free and you will find only academic ones, there are no entrepreneur or expert courses here, just pure academic ones.
If you wish to see and learn something the way it is taught in Harvard, Berkeley, MIT, etc this is the place for you.
Academic Earth has been built with one simple premise: Everyone deserves access to education.
Lead by this kind of mindset on Academic Earth you will find well, academic courses similar to ones found on edX and Coursera, but from mentioned sites here all courses are free and you will find only academic ones, there are no entrepreneur or expert courses here, just pure academic ones.
If you wish to see and learn something the way it is taught in Harvard, Berkeley, MIT, etc this is the place for you.
 Khan academy is completely free and it is offering courses matching certain grades for children. It is offering courses for all 8 years of elementary school, math courses for high school and college with some coursework on topics like science, arts & humanities, reading, life skills, etc.
Despite not being on the same level as some university courses presented on other mentioned websites Khan Academy is a good place to learn a lot of basic skills that you could build upon later.
Khan academy is completely free and it is offering courses matching certain grades for children. It is offering courses for all 8 years of elementary school, math courses for high school and college with some coursework on topics like science, arts & humanities, reading, life skills, etc.
Despite not being on the same level as some university courses presented on other mentioned websites Khan Academy is a good place to learn a lot of basic skills that you could build upon later.