If you always use Google Chrome when browsing the internet, then you might have come across an error saying, “This webpage is not available, DNS PROBE FINISHED BAD CONFIG”. If you do, then this problem certainly has something to do with the DNS since any error code which has “DNS” in it points out a network issue in the computer.
Getting the DNS_PROBE_FINISHED_BAD_CONFIG error indicates that your computer is not able to connect the website because the Domain Name Server or DNS wasn’t able to resolve the website name into IP address or it is not available at all. So in this guide, we’ll help you sort out this issue in Chrome on your Windows 10 PC.
Option 1 – Check the Network Cables and restart your router then reconnect
The most obvious thing you can do first is to try checking if the network cables connected to your computer or router are properly connected or not. If it turns out that some network cables are not connected properly, then it’s probably why you’re getting the DNS_PROBE_FINISHED_BAD_CONFIG error in Chrome.
And if your computer is connected via Wi-Fi, you need to make sure to restart your router once. In addition, you can also forget the Wi-Fi your computer is currently connected to and then try reconnecting again to see if it would work.
Option 2 – Flush the DNS and reset TCP/IP
Flushing the DNS and reset TCP/IP could also help in fixing the DNS_PROBE_FINISHED_BAD_CONFIG error in Chrome. To do so, refer to these steps:
Click the Start button and type in “command prompt” in the field.
From the search results that appear, right-click on Command Prompt and select the “Run as administrator” option.
After opening Command Prompt, you have to type each one of the commands listed below. Just make sure that after you type each command, you hit Enter
ipconfig /release
ipconfig /all
ipconfig /flushdns
ipconfig /renew
netsh int ip set dns
netsh winsock reset
After you key in the commands listed above, the DNS cache will be flushed and the Winsock, as well as the TCP/IP, will reset.
Option 3 – Try to remove the Proxy
You can also try to remove the Proxy as it might also help you in fixing the DNS_PROBE_FINISHED_BAD_CONFIG error. Here’s how you can do it:
Tap the Win + R keys to open the Run dialog box.
Then type “inetcpl.cpl” in the field and hit Enter to pull up the Internet Properties.
After that, go to the Connections tab and select the LAN settings.
From there. Uncheck the “Use a Proxy Server” option for your LAN and then make sure that the “Automatically detect settings” option is checked.
Now click the OK and the Apply buttons.
Restart your PC.
Note: If you are using a third-party proxy service, you have to disable it.
Option 4 – Change the DNS
Try to use the Google Public DNS
If the first option didn’t work, you can try to use the Public DNS by Google and see if it can help fix the DNS error. You have to modify the DNS settings in your system explicitly and use the DNS IP addresses.
The first thing you have to do is right-click on the network icon in the Taskbar and select Network and Sharing Center.
Next, click on the “Change Adapter Settings” option.
After that, search for the network connection that you are using to connect to the internet. Note that the option might be “Wireless Connection” or “Local Area Connection”.
Right-click on your network connection and click on Properties.
Then select the new window to choose the “Internet Protocol 4 (TCP/IPv4)” option.
After that, click on the Properties button and click the checkbox in the new window for the option “Use the following DNS server addresses”.
Type in “8.8.8” and “8.8.4.4” and click OK and exit.
Option 5 – Clear Chrome’s browsing data
If your browsing data in Chrome hasn’t been cleared for some time now then that might be the reason why you’re suddenly getting the DNS_PROBE_FINISHED_BAD_CONFIG error when you browse the web. To fix this error, you need to clear your web browsing data. Refer to the following steps to do so.
Tap the Ctrl + Shift + Delete buttons to go to the Clear browsing data section in Chrome.
Next, set the time range to “All time” and tick all the boxes and then click on the Clear data button.
After that, restart the Chrome browser and try to open the website you were trying to open earlier.
Option 6 – Try running the Chrome Cleanup tool
In case you don’t know, there is actually a built-in malware scanner and cleanup tool in Chrome that helps you get rid of any unwanted ads, pop-ups, and even malware, as well as unusual startup pages, toolbars, and other things that could affect the performance of the browser.
As you know, games with good graphics and fast play are definitely resource-intensive and can consume a lot of storage space on your computer. Because of that, they have to be compressed before it gets downloaded to your computer and then unpacked to the hard drive before it gets installed. However, if an error occurs in your computer’s RAM during the installation process or if your hard disk does not have enough memory to handle the process, then you might encounter the isDone.dll error which states:
“An error occurred when unpacking, Unarc.dll returned error code -1, ERROR: archive data corrupted (decompression fails).”
If you encounter the isDone.dll error message on your Windows 10 computer, then read on as this post will show you how you can fix it. This error has something to do with the incomplete installation of PC games or files of larger size.
The ISDone.dll error appears due to faulty
Unarc.dll file residing in the System32 folder on 32-bit operating systems and the SysWOW64 folder on 64-bit systems. So, if you see this error message, then, it means your computer was not able to read installation archive files.
What is Unarc.dll file?
Unarc.dll is a dynamic link library for Windows. Some applications or games require this file to function properly. So, if it goes missing or, an error occurs when you start a game or an application, you may get various kinds of errors.
ISDone.dll error while playing games on PC
Option 1 – Try to reinstall the game
The isDone.dll error could also be caused by the installation of an unknown application. Or it could also be caused by an outdated or corrupted application. In other words, if the game you are trying to install is broken or corrupted, then it’s no wonder why you’re getting the isDone.dll error. To fix this, make sure that you download the latest updated version of the game and then try to install it again and see if the problem is resolved or not.
Option 2 – Try to re-register the .dll file using the Regsvr32 tool
The first thing you have to do is to locate the DLL file named dll on your computer and rename it to Unarc-bak.dll.
Next, copy the Unarc.dll file from another well-functioning computer and save it on your desktop.
After that, move the DLL file you just copied to the System32 folder if you are using a 32-bit operating system, or the SysWOW64 folder if you are using a 64-bit operating system.
Now you have to register the new DLL file and you can do that using Windows PowerShell.
Open Windows PowerShell and then execute this command if you have placed the DLL file in the System32 folder: regsvr32 %systemroot%System32unarc.dll
On the other hand, if you have placed the DLL file in the SysWOW64 folder, then execute this command: regsvr32 %systemroot%SysWOW64unarc.dll
Once you’re done, a message will be displayed saying that the DLL file was registered.
Restart your computer and check if the problem is now fixed.
Option 3 – Troubleshoot the isDone.dll error in a Clean Boot State
You can also troubleshoot the isDone.dll error in a Clean Boot state. It could be that there are some third-party applications in your computer that're preventing the application from getting installed and to isolate this possibility, you need to boot your computer in a Clean Boot State and then try installing the program again. Putting your computer in this state can help you identify which program is the culprit and thus isolates the problem. In a Clean Boot state, your computer will start using only the pre-selected minimal set of drivers and startup programs. Note that you have to disable and enable one process at a time.
Log onto your PC as an administrator.
Type in MSConfig in the Start Search to open the System Configuration utility.
From there, go to the General tab and click “Selective startup”.
Clear the “Load Startup items” check box and make sure that the “Load System Services” and “Use Original boot configuration” options are checked.
Next, click the Services tab and select the “Hide All Microsoft Services” check box.
Click Disable all.
Click on Apply/OK and restart your PC. (This will put your PC into a Clean Boot State. And configure Windows to use the usual startup, just simply undo the changes.)
After you’ve set your computer into a Clean Boot State, make sure that you’re signed in as administrator and then try to install the application again.
Option 4 – Try updating or reinstalling your Graphics drivers
Updating or reinstalling the Graphics drivers in your computer can also help in resolving compatibility issues between the operating system and the driver that might have caused the isDone.dll error.
First, boot your computer into Safe Mode.
After that, tap the Win + R keys to launch Run.
Type in devmgmt.msc into the box and tap Enter or click OK to open the Device Manager.
After that, a list of device drivers will be displayed. From there, look for the Display Adapters and click on them.
After that, right-click on each entry under the Display Adapters and select the “Uninstall Device” option from the menu.
Now restart your computer.
After restarting your computer, go to the Settings app and Check for Updates in the Windows Update section.
Note: You also have the option to go directly to the website of your graphics card manufacturers like NVIDIA, Intel, or AMD and go to the section called Drivers then check if there’s a new available update – if there is, download and install it.
Option 5 – Try scanning your computer using Windows Defender
The isDone.dll error might also be infected with malware or virus and to eliminate it, you have to scan your computer using security programs like Windows Defender.
Tap the Win + I keys to open Update & Security.
Then click on the Windows Security option and open Windows Defender Security Center.
Next, click on Virus & threat protection > Run a new advanced scan.
Now make sure that Full Scan is selected from the menu and then click the Scan Now button to get started.
If an error suddenly pops up that states, “A problem prevented the document from being scanned” when you’re scanning a document in your computer, then you’ve come to the right place as this post will guide you on how exactly you can fix the problem.
A lot of users have reported that they receive a two-layer error message when they try to scan their documents – the first screen throws an error message that says, “Error applying Settings to Driver” while the next error message states, “A problem prevented the document from being scanned”. As a result, the scanning won’t be completed which defeats the whole process of buying a printer with a scanner. As you can see the two error messages point to two different situations, while the other one is pointing at the driver, the second one points to the scanning problem. To resolve these issues, there are several suggestions you need to check such as follows:
Option 1 – Run the Printer Troubleshooter
One of the first basic troubleshooting you can perform to resolve the printer issue is running the Printer Troubleshooter. This built-in troubleshooter can detect and automatically fix the problem for you. To use it, follow these steps:
Tap the Win + R keys to open the Run dialog box.
Next, type “msdt.exe /id PrinterDiagnostic” in the field and click OK or hit Enter to open the Printer Troubleshooter.
Then click the Next button and follow the next on-screen instructions to fix the issue with the printer.
Option 2 – Try updating the Printer drivers
You might also want to try updating your printer drivers. All you have to do is locate the USB Composite Device. For complete details, follow the steps below.
First, click the Start button and type “device manager”.
Then click on the “Device Manager” from the search results to open it.
From there, look for the USB Composite Device option and right-click on it, and select the Update Driver from the options.
Restart your PC and then click the “Search automatically for updated driver software” option.
Note: You also have the option to download the latest version of your Printer from the manufacturer’s website.
Option 3 – Try to reset the settings of the Printer or reinstall it
If none of the two options given above worked, you can try to either reset the printer settings or reinstall the printer so that it can go back to its default state. However, if it doesn’t work, you can try to uninstall the printer as well as its related drivers. To do so, follow these steps:
First, go to Settings > Devices > Printer and Scanners.
After that, select the printer and select the Remove Device option.
Once done, restart your computer and check again and see if the error is now fixed.
Option 4 – Try to modify the Registry settings for the Still Image devices
In case you don’t know, Windows has Registry settings for the Still Image devices like Scanners and Printers. And these devices have vendor-specific settings that if ended up getting corrupted or misconfigured then you will most likely encounter errors like “A problem prevented the document from being scanned”. Thus, to fix this error, you can try modifying the Still Image devices registry settings, and to do that, you need to follow the instructions below but before that, make sure that you create a System Restore Point first.
Once you’ve created a System Restore point, tap the Win + R keys to open the Run dialog box and type “Regedit” in the field, and then hit Enter to open the Registry Editor.
Next, navigate to this registry key: HKEY_LOCAL_MACHINESYSTEMCurrentControlSetControlStillImage
From there, right-click on the “StillImage” registry key and delete it.
After that, exit the Registry Editor and restart your computer.
Once your computer has restarted, Windows will recreate the settings of the Still Image devices back to their default settings.
Windows 10 has a UWP app for its Camera that you can use to take pictures and videos. However, if you suddenly encounter an error code 0xa00f4243 while using the Camera UWP app, then you’ve come to the right place as this post will provide some potential fixes that you can use to fix the problem.
This kind of error could be due to an outdated or corrupted driver or a third-party program. When this error appears on the Camera UWP app, you will see the following error message:
“Close other apps. It looks as though another app is already using the camera. If you need it, here’s the error code: 0xA00F4243 (0xC00D3704)”
To fix the error code: 0xA00F4243 (0xC00D3704) in the Camera UWP app, you can try to run the Windows Store Apps troubleshooter or reset the Camera app or update or reinstall the driver or apply some tweaks in the Registry Editor. In addition, you can also try checking the Windows Services or run the System File Checker.
Option 1 – Try to run the Windows Store Apps troubleshooter
The Windows 10 Store Apps Troubleshooter will help you in fixing the Camera UWP app error code: 0xA00F4243 (0xC00D3704). This is a great built-in tool from Microsoft that helps users fix any app installation issues. So this is worth a try to solve the problem. This built-in tool also helps you fix the Windows 10 Store if it isn’t working.
To use the Windows Store Apps Troubleshooter, follow the steps below.
Tap Win + I keys again to open the Windows Settings panel.
Go to Update & Security and then go to Troubleshoot.
Under the Troubleshoot section, on your left-hand side, scroll down to find Window Store Apps.
Then click on the Run the troubleshooter option and follow the on-screen instructions and then see if it fixes the problem.
Option 2 – Try to reset the Camera app to fix
As pointed out earlier, you can also reset the Camera app to fix the error. To do so, follow the steps below.
The first thing you have to do is go to the My Pictures folder under the C: drive of the File Explorer and then delete the Camera Roll folder.
Once you’re done, right-click on an empty area on your screen and create a new folder and name it “Camera Roll”.
Then from the Start menu open the Settings app and select System.
From there, navigate to the Apps and features section.
Now go to Camera and click on the Advanced Options and click the Reset button.
Option 3 – Try to reinstall the drivers for the Camera app
You might want to reinstall the Camera drivers as it could resolve the problem. To do so, refer to these steps:
First, boot your computer into Safe Mode.
After that, tap the Win + R keys to launch Run.
Type in devmgmt.msc into the box and tap Enter or click OK to open the Device Manager.
After that, a list of device drivers will be displayed. From there, look for the driver listed under the Camera section and then, right-click on each entry of the device drivers and select the “Uninstall Device” option from the menu.
Now restart your computer.
After restarting your computer, go to the Settings app and Check for Updates in the Windows Update section.
Option 4 – Try to use the Registry Editor
Tap the Win + R keys to open the Run utility and type “Regedit” in the field and hit Enter to open the Registry Editor.
After that, navigate to this registry key: ComputerHKEY_LOCAL_MACHINESOFTWAREWOW6432NodeMicrosoftWindows Media FoundationPlatform
Here, look for a DWORD named “EnableFrameServerMode” and if you can’t see it, just create a new DWORD by right-clicking on any empty space.
Then select New > DWORD (32-bit) Value and name it as “EnableFrameServerMode”.
Double click on the newly created DWORD and set its Value data to “0” and click on OK.
Restart your computer and see if it fixes the Camera UWP app error code: 0xA00F4243 (0xC00D3704).
Option 5 – Try checking the Windows Services
Note that this option only applies to computers with Intel Hardware for the Camera.
Tap the Win + R keys to open the Run dialog box and type “services.msc” and hit Enter to open the Services Manager.
Next, look for the “Intel(R) RealSense(TM) Depth” service from the list of services and double click on it to open its Properties.
After that, change its Startup Type to “Automatic” and make sure it’s running and then click on the Apply and OK buttons to save the changes made.
Restart your computer and check if the problem has been resolved.
Option 6 – Try running System File Checker or SFC scan
System File Checker or SFC is a built-in command utility that helps in restoring corrupted files as well as missing files. It replaces bad and corrupted system files to good system files. To run the SFC command, follow the steps given below.
Tap Win + R to launch Run.
Type in cmd in the field and tap Enter.
After opening Command Prompt, type in sfc /scannow
The command will start a system scan which will take a few whiles before it finishes. Once it’s done, you could get the following results:
Windows Resource Protection did not find any integrity violations.
Windows Resource Protection found corrupt files and successfully repaired them.
Windows Resource Protection found corrupt files but was unable to fix some of them.
Uncdms.dll is a Dynamic Link Library file and a crucial part of the Windows Desktop Search Software. It is used to search emails, documents, photos, videos, and folders instantly.
However, the Uncdms.dll error pops on the screen, when the Windows Desktop Search Software fails to start.
The error message is displayed in one of the following formats:
“Uncdms.dll cannot be found.”
“Windowssearch.exe – cannot find the component. This application has failed to start because uncdms.dll was not found. Reinstalling the application may fix the problem.”
“The file uncdms.dll is missing.”
Solution
Error Causes
Uncdms.dll error code may pop on your screen due to multiple reasons. These usually include but are not limited to:
Viral infection
Issues with Windows Desktop Search
Registry corruption
Uncdms.dll accidentally deleted during program un-installation
Further Information and Manual Repair
If you experience an Uncdms.dll error code on your system, fix it right away. This error is easy to resolve. You don’t have to be technically sound to resolve the uncdms.dll error code. Try the methods listed below to resolve without any hassle:
Method 1 - Check Your Recycle Bin and Restore the Deleted Uncdms.dll File
Since DLL files are shared files, there is a possibility that you accidentally deleted them while uninstalling some other program. To fix the issue, simply go to the recycle bin and look for the file. If you locate it, reinstall it. If you can’t, then it is advisable to download the Uncdms.dll file from a trusted DLL file website.
Method 2 - Uninstall and Then Re-install Windows Desktop Search
If the error code is related to issues with the Window Desktop Search application, then simply uninstall this software and re-install to resolve. To do this, click the start button, go to the control panel and then add/ remove programs.
Now choose Windows Desktop Search from the list of programs and click Remove. After that, reboot your PC to activate changes. Now download the software and follow the same process and reinstall the Windows Desktop Search program on your PC.
To activate changes, reboot. This will hopefully resolve the issue.
Method 3 - Update Windows
As this file is included in the service pack, try updating the Windows Utility to resolve the Uncdms.dll error code. To get started, click start and then go to the control panel, now choose Windows update. Follow the instructions to install Active X and then click install to update Windows Utility. Restart your system to bring the changes into effect.
Method 4 - Scan for Viruses and Repair the Registry
Whether the underlying cause of the Uncdms.dll error code is viral infection or registry corruption, it is advisable to download Restoro. It is an advanced and multi-functional PC Repair Tool integrated with 6 powerful utilities including antivirus and a registry cleaner.
It scans and removes all types of viruses. The registry cleaning utility works simultaneously and removes all the unnecessary files corrupting the registry including cookies, temporary files, internet history, and junk files, and repairs it in seconds, thereby resolving the Uncdms.dll error immediately.
Click here to download Restoro - PC Fixer
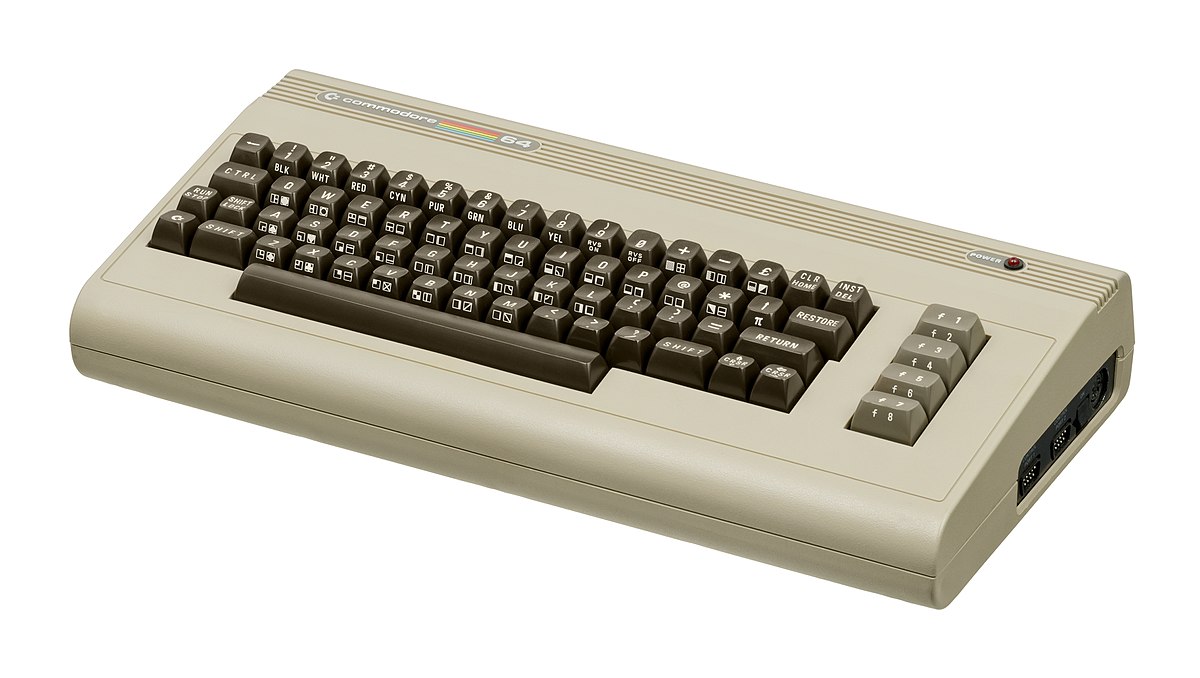
If you are a kid or in your teenage years you maybe will be not familiar with Commodore 64 but we are welcoming you anyway to go with us on this journey through time and find out about one of the most influential and beloved home computer of all time.
History of Commodore
Firstly shown to the world in January of 1982, at the Consumer Electronics Show, C64 caught attention right away with its low price of only $595. Although it had some issues like limited functionality in some fields and a non-wide range of use by 1984 its price dropped below $200 and it cemented itself as an affordable home computer for the middle class.
In as same year Apple has released their Apple II computer with far superior capabilities, commodore 64 remains a middle-class favorite due to its price.
Also, the company has decided to distribute its homemade computer via some other means including not only just electronics stores specialized in that kind of equipment but in general shops and big department stores, through toy stores and book shops as well as through specialized dealers. This has given C64 a more competitive edge and mixed with the affordable price it soon became a staple of home computing.
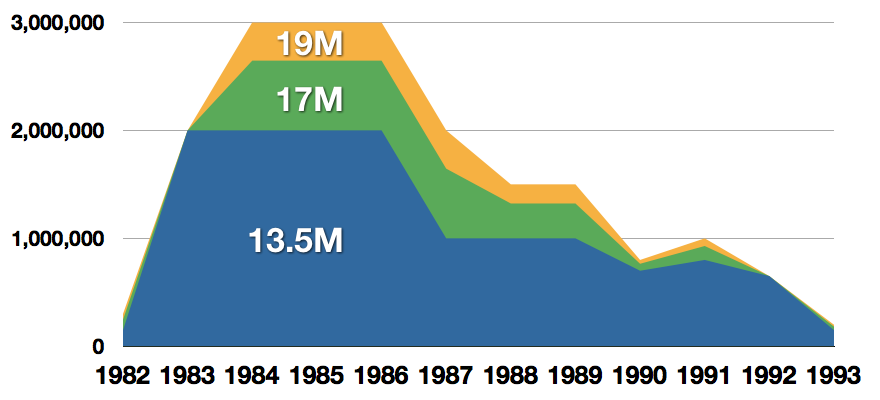
With sales booming and the early reliability issues with the hardware addressed, software for the C64 began to grow in size and ambition during 1984. This growth shifted to the primary focus of most US game developers. The two holdouts were Sierra, who largely skipped over the C64 in favor of Apple and PC compatible machines, and Broderbund, who was heavily invested in educational software and developed primarily around the Apple II. In the North American market, the disk format had become nearly universal while cassette and cartridge-based software all but disappeared. So most US-developed games by this point grew large enough to require multi-loading.
At a mid-1984 conference of game developers and experts at Origins Game Fair, Dan Bunten, Sid Meier, and a representative of Avalon Hill said that they were developing games for the C64 first as the most promising market. By 1985, games were an estimated 60 to 70% of Commodore 64 software. Over 35% of SSI's 1986 sales were for the C64, ten points higher than for the Apple II.
Everything was great for Commodore but the industry was moving forward and by the year 1988, PC compatible computers were stated to be the largest and fastest-growing home entertainment systems pushing C64 on to second place. Also, Nintendo’s gaming system has started to take hold in the world with amazing 7 million systems sold in 1988 only.
By the year 1991, many developers exited the gaming market for Commodore 64 home computer system and its popularity started to fall due to lack of software and not so many hardware changes.
Commodore announced that the C64 would be finally discontinued in 1995.
However, only one month later in April 1994, the company filed for bankruptcy. When Commodore went bankrupt, all production on their inventory, including the C64, was discontinued, thus ending the C64's 11 and a half year production.
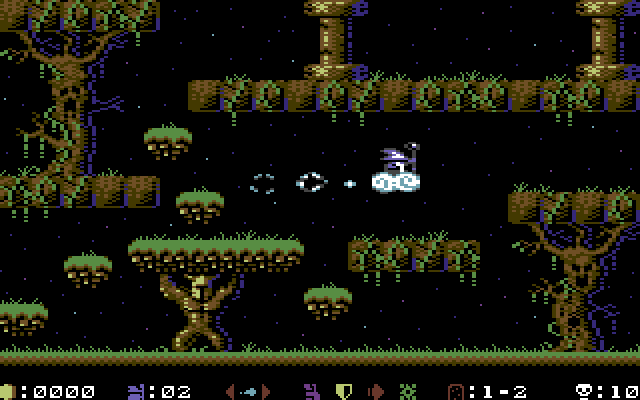
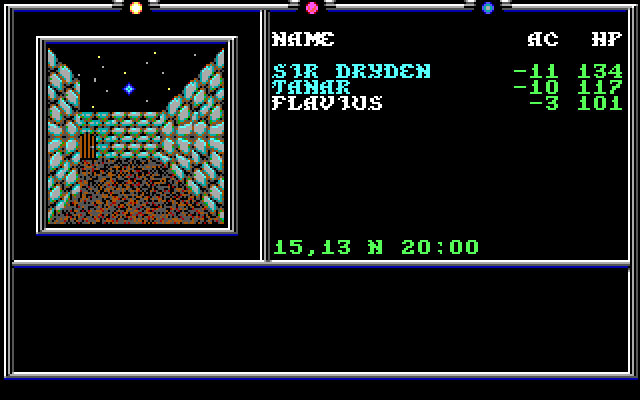
Legendary titles
The history of Commodore 64 is interesting ones and I believe that it has done much for computers in general, yes it ran 11 years and that seems like a small-time, but remember that it was 11 years of C64 alone, there were other computers released by the company but none except arguably AMIGA 500 has not reached that much popularity as Commodore 64.
That being said the system has left some of the great titles in its catalog that are great to be played even today and have been classic games on other platforms, even on PC itself. That being said I am giving you the top 100 games for Commodore 64:
Zak McKracken and the Alien Mindbenders
Pirates!
Maniac Mansion
IK+
Bubble Booble
Turrican II: The Final Fight
Last Ninja 2
Space Rogue
Ultima IV: Quest of the Avatar
Archon: The Light and the Dark
Turrican
Wasteland
Defender of the Crown
Elite
Ultima V: Warriors of Destiny
Laser Squad
Prince of Persia
Impossible Mission
U.L.E.
Pool of Radiance
Bruce Lee
Paradroid
Project Stealth Fighter
Curse of the Azure Bonds
Ultima III: Exodus
Legacy of the Ancients
Winter Games
Leaderboard Golf
Supremacy
Airborne Ranger
Exile
Last Ninja, The
World Class Leader Board
MicroProse Soccer
Project Firestart
Boulder Dash
Summer Games 2
Great Giana Sisters, The
Neuromancer
Mad Doctor
Mail Order Monsters
Zork I: The Great Underground Empire
Buck Rogers: Countdown to Doomsday
Katakis
Bard's Tale, The: Tales of the Unknown
WIzball
Times of Lore
Emlyn Hughes International Soccer
Ultimate Wizard
Alternate Reality: The Dungeon
World Games
Leaderboard Executive
California Games
Samurai Warrior: The Battles of Usagi Yojimbo
Summer Games
Creatures 2: Torture Trouble
Gunship
Space Taxi
International Karate
Silent Service
Bard's Tale III, The: Thief of Fate
Seven Cities of Gold
Armalyte
Raid on Bungeling Bay
Alter Ego: Male Version
Enforcer: Fullmetal Megablaster
Detective Game, The
Creatures
Skate or Die!
Heart of Africa
E.R.O. - Helicopter Emergency Rescue Operation
Way of the Exploding Fist, The
Stunt Car Racer
Wizard of Wor
Bard's Tale II, The: The Destiny Knight
Mayhem in Monsterland
Train, The: Escape to Normandy
Jumpman
Champions of Krynn
Pitstop II
Barry McGuigan World Championship Boxing
Montezuma's Revenge
Boulder Dash II: Rockford's Revenge
Spy vs Spy
Mercenary: Escape from Targ
Midnight Resistance
Lords of Midnight
Lode Runner
Castles of Doctor Creep, The
Boulder Dash Construction Kit
Buggy Boy
Racing Destruction Set
Dino Eggs
Realm of Impossibility
Rainbow Islands
Beach-Head II: The Dictator Strikes Back
Barbarian: The Ultimate Warrior
Grand Prix Circuit
Head Over Heels
Sentinel, The
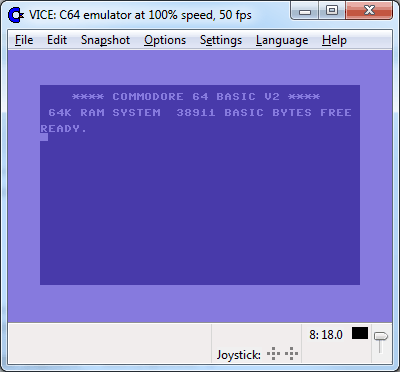
Commodore 64 emulator and game ROMs
Commodore 64 might be in the past but its legacy still lives on even today through emulators and ROMs for emulators. You can even purchase one in working condition if you want and relive the full experience as it once was.
If you are not keen on spending money for reliving and checking games or software of C64 here are some links to help you to at least experience part of it completely free.
Commodore 64 Emulator
C64 Game ROMs
Conclusion
It is without a doubt that the C64 home system has made a great mark on home computers echoing even today and I am very grateful that I have been part of it as a kid. Sometimes today I will still spin some old classic via emulator just for nostalgia and enjoy its simplicity.
Thank you for reading the article and I hope to see you soon again.
One of the great remote assistance software that helps you remotely access and control computers is TeamViewer. However, despite how efficient it is, there are still times when it throws up some errors and one of them is when TeamViewer is not able to connect and throws an error that says, “No connection to partner, Partner did not connect to router, Error Code WaitforConnectFailed”.
This kind of error in TeamViewer mostly occurs when the Partner computer is not connected to a network. On the other hand, it could also occur when they are connected to a network so there are various causes for this issue. It could also be that the installation of the program itself was at fault or there is an incompatibility between the TeamViewer versions installed on both the computers and so on.
Although there are several causes for this error, the potential fixes are still the same. You can try to restart the network or allow Full Access Control to TeamViewer or flush the DNS cache. For more information, refer to the following options but before you proceed, make sure that both your Windows 10 computer and TeamViewer program are updated to their latest stable versions.
Option 1 – Reboot your router
The first thing you can try to do to fix the error is to simply restart your router. All you need to do is reboot the router from its Admin panel or you can also turn it off manually and turn it back on after a couple of seconds so that it can completely reboot. Once you’re done, try accessing your server again and see if the error is now fixed.
Option 2 – Allow Full Access Control to TeamViewer
First, open TeamViewer, and then from the Menu bar, click on Extras.
After that, click on Options and select Advanced from the left side navigation panel.
Next, click on the “Show advanced options” button located on the right-hand side.
Then select Full Access from the drop-down menu of the Access Control option under the “Advanced settings for connection to this computer section”.
Now click OK and check if the error is now fixed or not.
Option 3 – Try to flush the DNS configuration
You could also try to flush the DNS configuration in your computer to fix the error. How? Refer to these steps:
Tap the Win + X key combination and click on the Command Prompt (Admin) option or you could also search “cmd” in the Cortana search box and right-click on Command Prompt from the search results and select the “Run as administrator” option.
After opening Command Prompt with admin privileges, enter each one of the commands given below sequentially in order to flush the DNS cache.
ipconfig/release
ipconfig/renew
ipconfig/flushdns
Now type the exit command to close Command Prompt and then restart your computer and see if the problem is fixed.
On the other hand, you could also try to reset Winsock as well as the TCP/IP.
Option 4 – Run the Network Adapter troubleshooter
To run the Network Troubleshooter, refer to these steps:
Open the Search bar on your computer and type in “troubleshoot” to open the Troubleshoot settings.
Next, scroll down and select the “Network Adapter” option from the right pane.
Then click on the Run Troubleshooter” button.
After that, your computer will check for any possible errors and will pinpoint the root cause of the problem if possible.
Restart your computer.
Option 5 – Try to perform Network Reset
You might perform a Network Reset to resolve the problem if none of the four given options worked. This will reset the entire network configuration including your IP address. To perform Network Reset, follow these steps:
Tap the Win + I keys to open Settings.
From there, go to the Network and Internet section.
Next, scroll down and look for “Network Reset” under the status pane.
After that, click on Network Reset and then on Reset now to start resetting the network configuration. Once done, check if it is able to fix the error or not.
As you know, Microsoft Store is the ultimate source of applications for Windows 10 devices and it’s turning to be the hub for various applications. In fact, aside from applications, it has also become a source for movies, books, TV and even buying hardware directly from Microsoft and many more. Although downloading goes smoothly most of the time, depending on your internet connection, there are also times when you might experience slow download speeds while downloading apps and other things in the Microsoft Store.
There are several factors that could be causing this kind of issue. It can be due to the Microsoft Store app itself or it could be enforced speed limiter on the application or it could be due to a corrupted Microsoft Store cache, or it could be due to the Windows Update service running in the background, and so on. To fix this problem, you can try to reset the Microsoft Store cache, or set the bandwidth limit for downloads, or try to re-register the Microsoft Store app via Windows PowerShell.
Before you proceed with the troubleshooting options provided below, make sure that your internet connection is stable enough to download apps and games. You also have to check if there is an update or a massive download in progress. Once you have these things covered, follow the given options below.
Option 1 – Try to reset the Microsoft Store cache
Just like browsers, Microsoft Store also caches as you view apps and games so it is most likely that the cache is no longer valid and must be removed. To do so, follow the steps below.
Right-click on the start button and click on Command Prompt (administrator).
Next, type in the command, “exe” and tap Enter. Once you do, the command will clear the cache for the Windows Store app.
Now restart your PC and afterward, try opening Microsoft Store again and then try to install your app or update your computer again.
Option 2 – Try to set the bandwidth limit for downloads
Tap the Win + I key combination to open the Windows Settings app.
After that, navigate to Update & security > Windows Update.
From there, select the Advanced options located on the right-side panel.
Next, select Delivery Optimization and check the box for “Limit how much bandwidth is used for downloading updates in the background under the Download settings section and then set the slider to 100%.
Option 3 – Try to re-register the Microsoft Store app via Windows PowerShell
Tap the Win + X key combination or right-click on the Start button and click on the Windows PowerShell (Admin) option.
If a User Account Control or UAC prompt appears, just click on Yes to proceed and open the Windows PowerShell window.
Next, type in or copy-paste the following command to re-register the Microsoft Store app and tap Enter:
If you’re having some problem browsing multiple websites on the Firefox browser on your Windows 10 computer, then this post might be of help. One of the most common problems you could encounter in Firefox is mostly related to HTTPS and one of them is the MOZILLA PKIX ERROR MITM DETECTED or ERROR SELF SIGNED CERT or SEC ERROR UNKNOWN ISSUER error which means that Firefox was unable to trust certificates issued on secured websites.
If you encounter the MOZILLA_PKIX_ERROR_MITM_DETECTED error in Firefox, this indicates that something in your network or system is interrupting your connection and injecting certificates and when that happens, Firefox won’t trust it. In such cases, one of the culprits is malware. Malware will try to replace a legitimate certificate with its certificate. Another cause is security software where it keeps a tab on a secure connection and creates a false positive, for instance:
“In Microsoft Windows accounts protected by Family Safety settings, secure connections on popular websites like Google, Facebook and YouTube might be intercepted and their certificates replaced by a certificate issued by Microsoft in order to filter and record search activity.”
And if you are connected to a corporate network, there might be a monitoring/filtering product that could be replacing certificates. Moreover, there are also users who reported getting this issue when they use the Nightly version of Firefox. And if that’s the case, you have to try accessing secure websites using only the stable build especially when it comes to payments. However, if you are not doing that, then here are some options you need to check out.
Option 1 – Try turning off HTTPS Scanning on your security and antivirus programs
Each security-based software has a security option that allows you to turn off the HTTPS scanning functionality. They may be available under different names such as HTTPS Scanning, Scan SSL, Show safe result, Do not scan encrypted connections, etc. Find what is applicable for your security or antivirus software and then try turning it off temporarily and see if it helps in fixing the MOZILLA_PKIX_ERROR_MITM_DETECTED error in Firefox.
Option 2 – Try to disable security.enterprise_roots.enabled
The next thing you can do if the first option didn’t work is to disable security.enterprise_roots.enabled which is an HTTPS certificate check on Firefox. Note that this is not recommended but you have to at least try in order to fix the error.
Open Firefox and then type “about: config” in the Firefox address bar and hit Enter.
After that, if an info message appears, confirm it.
Next, search for the security.enterprise_roots.enabled preference and once you found it, double click on it.
Then change its value to true and restart the Firefox browser once. This will import all the custom certificates from the other security software into Firefox. As a result, it will make sure to mark those sources as trusted and you won’t get the MOZILLA_PKIX_ERROR_MITM_DETECTED error.
It really sucks when you can’t fully enjoy the newest version of your favorite OS.
Windows 11 is still relatively fresh and consequently has some annoying little bugs that really ruin our experience. The good news is that you’re not alone and most of them are easy to fix.
Here are 5 commonly reported Windows 11 issues and what you can do to get rid of them.
1. Windows 11 audio problems
One of the absolute most irritating things in the world is struggling with the sound on your computer. Windows 11 users have reported facing the issue of low or no sound. If you’re currently experiencing the same frustration, you can be relieved. Chances are fixing it will only take a few minutes.
The first thing to check would be whether you accidentally muted your device by pressing the mute button on your keyboard. Yes, we know it sounds a lot like the old “have you tried turning it off and on again?” But it’s important to leave no stone unturned, and the most obvious things are usually the ones we easily overlook.
Moreover, if you have several audio output sources, check whether the right one is selected. You can do this via the Action Center or through Settings. If you want to use the same source every time, we also recommend you set it as the default one.
It’s also important to have a good, up-to-date audio driver. More often than not, this will be the true cause of your audio struggles. Make sure to update your driver, and if that doesn’t work out, you can always un- and reinstall it or install a different one.
Lastly, if all attempts remain unsuccessful, run the audio troubleshooter to figure out what’s actually going wrong.
2. Unable to find files
Such a powerful new operating system, yet it can’t seem to do the simplest thing imaginable? The File Explorer not responding on Windows 11 is one of the most frustrating and most common problems with Microsoft’s newest iteration of its awesome OS.
However, 9/10 times it can be fixed by simply restarting your PC. You could also try killing the Windows Explorer process in the Task Manager and then rerunning it.
If these don’t help, check whether there are any pending Windows 11 updates. A single missing update can compromise your PC’s functionality, so always make sure to install them all on time.
Should none of that work, then there are other ways to solve the File Explorer problem. However, then the issue is probably a bit deeper and it’s no longer in the ‘easy fix’ territory.
3. Start menu not working
Just like the File Explorer, the Start menu is a fundamental element of your OS. So, it’s only natural that its malfunction grinds your gears. It may be more customizable than on previous Windows versions, but it doesn’t always work smoothly.
If you’re facing the so-called Start menu critical error, there are a few things this could be caused by. Usually it means you turned off your system while an important update was still being installed, there is a corrupt file on your PC, or Windows forcefully stopped a program.
Whatever the reason, the solution should be pretty simple. Try the basic steps: restarting your File Explorer (like we explained above) and signing out and back into your account. If that doesn’t do anything, you may want to try uninstalling third-party start menu apps (if you have any), since they can interfere with your default programs’ functionality.
Now, those are the easy fixes. If you get nowhere with them, you might need to identify the root cause and search for more complex solutions than that.
4. Snipping tool not working
Our beloved screenshot tool was introduced with Windows 10 and Microsoft decided to keep it. However, you were probably just as disappointed as us when you tried to run it and failed.
Normally, this can be fixed by installing the latest Out-of-band (OOB) update, or even pending updates in general. Even if your system appears to be up-to-date, run the checker just in case.
Another cool thing Windows 11 lets you do is ‘Repair’ and ‘Reset’, which is the easiest way to troubleshoot your Snipping tool. If this fails, you can also try the good old un- and reinstall method. Simply uninstall the tool through the Control Panel and reinstall it from the Microsoft Store.
Furthermore, in the case of an upgrade from Windows 10 to 11, it may be that the old Snipping tool version is interfering with the launch of the new one. If you don’t care that much about the additional options available with the enhanced screenshot tool, you can use the old version instead.
Simply go to your C Drive, find the Windows.old folder, search for the tool and open it from there. Make sure to pin it to your taskbar as well, if you know you’re going to use it often.
5. Can’t install the latest update
The latest Windows 11 version, 22H2, has brought tons of enhancements to our dearest operating system. Unfortunately, a lot of users still haven’t had the opportunity to experience it. A mere update of your OS version should be the one thing that goes smoothly, but sometimes that’s not the case.
Failure to install 22H2 can be caused by a few things. Most commonly, the issue is caused by lack of storage space or corrupted files, but there could be other culprits.
There are a couple of things you could try. For example, it’s crucial that your drivers be up-to-date and some important services be enabled. These are: Windows Modules Installer, Background Intelligent Transfer Service, Cryptographic Service, Windows Update services.
To enable them, search ‘Services’, find the service you need and right-click on it. Open ‘Properties’ and select the startup type ‘Automatic’.
It may also be necessary to unplug all peripherals that aren’t crucial and disable third-party antivirus tools until after the update is finished.
Ultimately, you can run the Windows Update troubleshooter to detect and fix other possible issues.
Summary
Tiny bugs like these are nothing out of the ordinary. That said, we still all hate when they happen.
Hopefully some of our solutions have helped you to a smoother Windows 11 experience. But if you’re still struggling, feel free to reach out to us. We’d be happy to help!
To turn password login in Windows 10 you will need approximately one minute of your time.
So let's do it fast and efficient
Press ⊞ WINDOWS + X to open the secret menu
Click on command prompt (admin)Type in command prompt following:


 History of Commodore
 With sales booming and the early reliability issues with the hardware addressed, software for the C64 began to grow in size and ambition during 1984. This growth shifted to the primary focus of most US game developers. The two holdouts were Sierra, who largely skipped over the C64 in favor of Apple and PC compatible machines, and Broderbund, who was heavily invested in educational software and developed primarily around the Apple II. In the North American market, the disk format had become nearly universal while cassette and cartridge-based software all but disappeared. So most US-developed games by this point grew large enough to require multi-loading.
At a mid-1984 conference of game developers and experts at Origins Game Fair, Dan Bunten, Sid Meier, and a representative of Avalon Hill said that they were developing games for the C64 first as the most promising market. By 1985, games were an estimated 60 to 70% of Commodore 64 software. Over 35% of SSI's 1986 sales were for the C64, ten points higher than for the Apple II.
Everything was great for Commodore but the industry was moving forward and by the year 1988, PC compatible computers were stated to be the largest and fastest-growing home entertainment systems pushing C64 on to second place. Also, Nintendo’s gaming system has started to take hold in the world with amazing 7 million systems sold in 1988 only.
By the year 1991, many developers exited the gaming market for Commodore 64 home computer system and its popularity started to fall due to lack of software and not so many hardware changes.
With sales booming and the early reliability issues with the hardware addressed, software for the C64 began to grow in size and ambition during 1984. This growth shifted to the primary focus of most US game developers. The two holdouts were Sierra, who largely skipped over the C64 in favor of Apple and PC compatible machines, and Broderbund, who was heavily invested in educational software and developed primarily around the Apple II. In the North American market, the disk format had become nearly universal while cassette and cartridge-based software all but disappeared. So most US-developed games by this point grew large enough to require multi-loading.
At a mid-1984 conference of game developers and experts at Origins Game Fair, Dan Bunten, Sid Meier, and a representative of Avalon Hill said that they were developing games for the C64 first as the most promising market. By 1985, games were an estimated 60 to 70% of Commodore 64 software. Over 35% of SSI's 1986 sales were for the C64, ten points higher than for the Apple II.
Everything was great for Commodore but the industry was moving forward and by the year 1988, PC compatible computers were stated to be the largest and fastest-growing home entertainment systems pushing C64 on to second place. Also, Nintendo’s gaming system has started to take hold in the world with amazing 7 million systems sold in 1988 only.
By the year 1991, many developers exited the gaming market for Commodore 64 home computer system and its popularity started to fall due to lack of software and not so many hardware changes.
 Commodore announced that the C64 would be finally discontinued in 1995.
However, only one month later in April 1994, the company filed for bankruptcy. When Commodore went bankrupt, all production on their inventory, including the C64, was discontinued, thus ending the C64's 11 and a half year production.
Commodore announced that the C64 would be finally discontinued in 1995.
However, only one month later in April 1994, the company filed for bankruptcy. When Commodore went bankrupt, all production on their inventory, including the C64, was discontinued, thus ending the C64's 11 and a half year production.
 Zak McKracken and the Alien Mindbenders
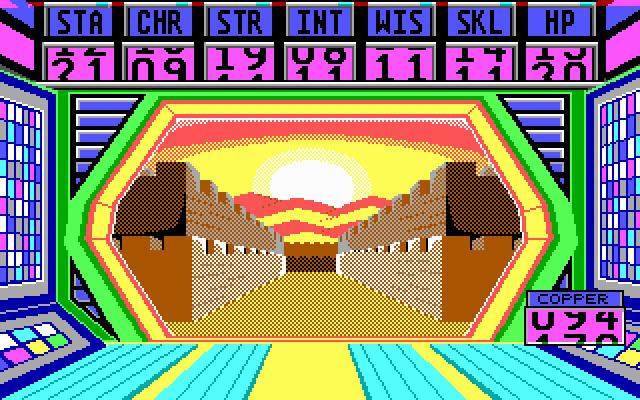
 If you are not keen on spending money for reliving and checking games or software of C64 here are some links to help you to at least experience part of it completely free.
Commodore 64
If you are not keen on spending money for reliving and checking games or software of C64 here are some links to help you to at least experience part of it completely free.
Commodore 64 


 Click on command prompt (admin)
 Type in command prompt following: