Logo

How to Fix Windows 8 Error Code 0x80070422

Error Code 0x80070422 - What is it?

Error Code 0x80070422 can be found on many versions of the Windows operating system including Windows 7, Windows 8, and 8.1, and Windows 10. The reason for its occurrence may vary, however, depending on the version of the operating system that you use.

In the case of error code 0x80070422 in Windows 8, it often occurs when users attempt to update their firewall or download apps from the Windows store. When this error occurs the user is unable to complete the updates and will need to apply different solutions to correct the issue.

Solution

Restoro box imageError Causes

Whenever error code 0x80070422 is encountered on Windows 8 or 8.1, it might be a result of various factors. These error codes include:

  • Registry errors – This occurs when new programs are installed over old ones
  • Malicious software such as adware, spyware, and or viruses

Further Information and Manual Repair

You do not need to be a Windows expert to attempt to solve errors like the 0x80070422 Windows 8 error code. Simply try the solutions below. If however, you feel you need a professional’s help, contact a certified Windows technician.

  • Check for any viruses or malicious software

Viruses and other malicious software are often the cause of various issues within the PC. For this reason, be sure to check your machine for a possible virus infestation. If you are unable to use your anti-virus software or if none is present you might need to download an automated tool that offers overall repair and other solutions.

  • Disable third-party security apps

Another step you can take is to disable third-party security apps. When these apps are downloaded onto your device, it can lead to the disabling of your Firewall and the inability of your device to download other apps. If this is the source of the 0x80070422 error code on your machine, the issue will be resolved after you disable the third-party apps and reboot your computer.

  • Disable Firewall

If error code 0x80070422 in Windows 8 or 8.1 occurred while you attempted to update Windows firewall, one of the best solutions you can try is to disable the firewall. Note however that disabling your firewall should be temporary as it protects your computer from worms as well as hackers that might infect or compromise your PC. Access the firewall by swiping right on the screen then searching for “firewall”. Click “Windows firewall” then select “Turn off Windows firewall”.

  • Performs a clean boot

Another option is for you to perform a clean boot. This simply refers to a reboot in Windows where only a minimum set of drivers and programs are used. A clean boot can help resolve issues related to software conflict which can occur when Windows users install programs or updates or simply run a program. Note that you must log on to the computer as an administrator. Otherwise, you will not be able to perform the clean boot.

  • Clean registry

The source of many errors related to Windows can lie within the registry. This is because the registry is involved in every aspect of a Windows computer’s operation. If there is an issue in the files of the registry or if it has been hacked, your computer will not function. For this reason, begin by cleaning the registry regularly. To clean our registry, use a powerful tool that is both reputable and user-friendly. Research your option before you make a selection as choosing the wrong tool could lead to even more errors or computer malfunctions.

  • Set Windows Update to Automatic

Another important method to solve issues related to error code 0x80070422 in Windows 8 or 8.1 is your Windows Update service. Though you may have never noticed this feature before now, the Windows Update services allow PC owners to access updates to their operating system automatically. This leads to a properly functioning PC as your machine will always have the latest features and tools available. However, if the setting is not correct, your computer may end up experiencing error code 0x80070422. Check if this is the source of your problems by verifying if your Windows Update settings are automatic. Once the settings are on automatic, reboot your machine to ensure your computer responds to the changes.

  • Download an Automate Tool

Always be prepared for the possibility of other errors. You can do this by downloading powerful software. This enables users to regularly check for issues that may cause errors on their Windows device.
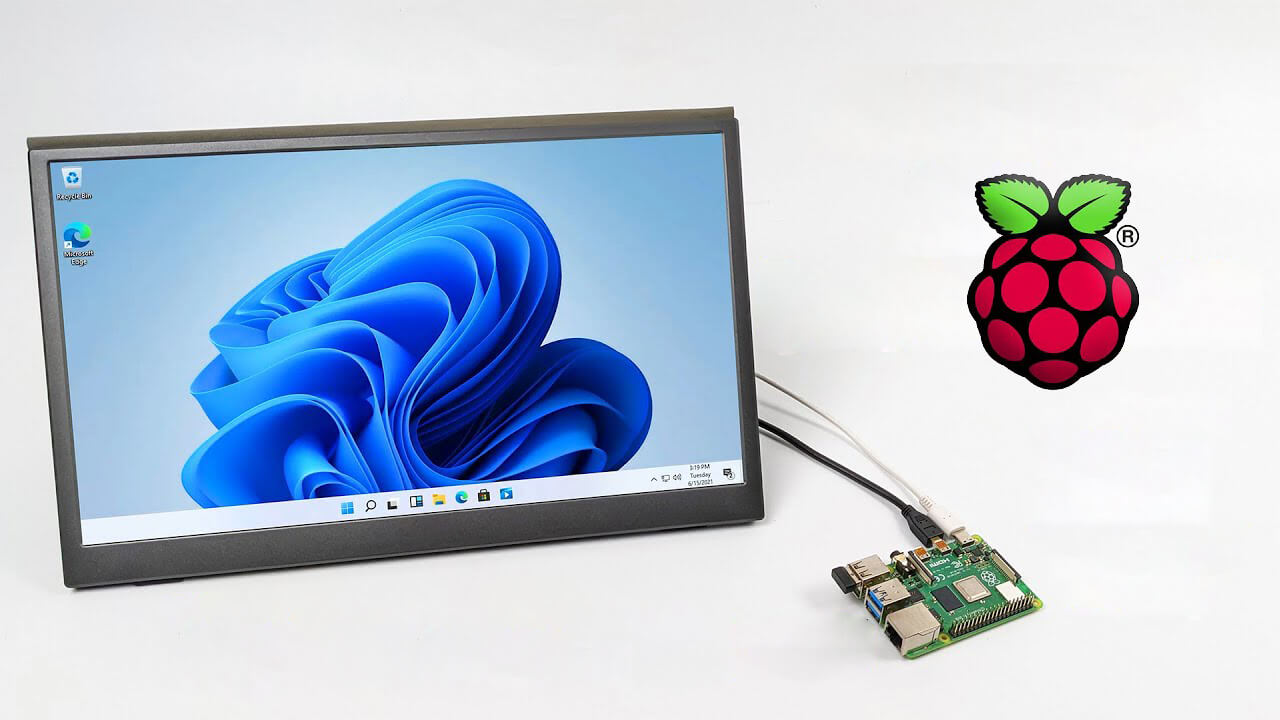
Do You Need Help with Your Device?

Our Team of Experts May Help
Troubleshoot.Tech Experts are There for You!
Replace damaged files
Restore performance
Free disk space
Remove Malware
Protects WEB browser
Remove Viruses
Stop PC freezing
GET HELP
Troubleshoot.Tech experts work with all versions of Microsoft Windows including Windows 11, with Android, Mac, and more.

Share this article:

You might also like

Fix cannot open IPv4 Properties in Windows 10
Many Windows 10 users often change the IP addresses of their computers’ network adapter in order to connect to the internet or network they belong to in times when there is no automatic connection for their computers. In most cases, access to modifying this setting is restricted for some odd reason even if you are an administrator. So if you are one of the users whose Windows 10 VPN IPv4 Properties are not working, this post can help you remedy that so that you can open and edit the IPv4 Properties on your Windows 10 PC. The common way to change IP settings is by going to Settings > Network and then to Internet > Change adapter options > Select Network adapter > right click and open Properties. From there, you can select TCP/IP 4 and modify it. If you aren’t able to do this, refer to the instructions laid out below to troubleshoot the problem in accessing the IPv4 Properties.

Option 1 – Try using PowerShell to manually set the IPv4 properties

As you are not able to set it using the interface, you can do so using PowerShell instead. Note that this option will only work for you if you run PowerShell with administrator privileges. After opening PowerShell, according to many users, you have to run the this command – set-DnsClientServerAddress -InterfaceAlias “Ethernet” -ServerAddresses xxx.xx.xxx.xxx,x.x.x.x,xxx.xx.xxx.xxx,x.x.x.x Usually, Ethernet is the name of your network adapter which is set by default. If you want to see the actual name of your network adapter, you can just type this command and tap Enter after doing so – Get-NetAdapter -physical | where status -eq 'up' After entering the given command, you will see a list of active Ethernet adapter in your computer as you can see on the image above. Note that the 4 sets of X like the one on the image below should match with the sequence:

Option 2 – Try editing the rasphone.pbk files

The rasphone.pbk files stores property for the connections and since you are not able to access the IPv4 properties, it is most likely that it has been disabled here. The good thing is that you can open these files and edit them using Notepad. Refer to the steps below to do so.
  • Open the Windows Explorer and then enable the show hidden files option.
  • After that, look for the files at this location – C:Users <username>AppDataRoamingMicrosoftNetworkConnectionsPbk_hiddenPbkrasphone.pbk
  • Then right-click on it and select the “Open with” option and choose the Notepad app.
  • After opening the file, look for “IpPrioritizeRemote” from the long list.
  • Once you found it, set its value from “1” to “0”.
  • After that, look for “IPInterfaceMetric” and set its value to “1” and tap Ctrl + S to save the changes you’ve made, and then exit and try accessing the IPv4 properties again. It should work, but if you’re still unable to access it, try the next option below.

Option 3 – Enable the Split Tunneling if you use VPN

All data goes back and forth when you are using a VPN service on your computer. And since you are using VPN, it could be that it disables the IPv4 interface. If that’s the case, you need to stay connected with both the local network and VPN and to do so, you have to enable Split Tunneling. How? Follow these steps:
  • Open PowerShell with administrator privileges.
  • Next, type in “Get-VpnConnection” and tap Enter. After doing so, it will give you the exact name of your VPN.
  • After that, type in “Set-VpnConnection -Name “yourVPNName” -SplitTunneling $True” and tap Enter. Once you enter the command, it will free your IPv5 settings so that you can change it to connect with your local network if you prefer it to.
Read More
No Audio Device Error – Fix Tricks

What exactly is no audio device malfunction?

No audio device error is among the malfunctions that many Computer consumers run into. No sound or audio can be heard from the computer when the error occurs.

Solution

driverfix boxError Causes

There are numerous elements that may be the basis of this malfunction. Corrupted or broken sound card drivers, incorrect Device Manager Options for example, or even incorrect BIOS configurations.

Further Information and Manual Repair

How could you recover the standard production of audio by your personal computer and solve this malfunction? Like a number of additional malfunctions, the method of the repair depends on its trigger. To properly solve this dilemma, you are required to run through an evaluation of the pc system so that you can pinpoint the cause. This is because there are numerous variables, which alone, or concurrently may trigger this dilemma. These measures will allow you to work out the no sound device error in your personal computer programs, identify the trigger and fix it. Follow the directions in step 1 if your computer has an onboard audio device installed in it and assess the BIOS settings. You can jump step 1 and move to step two if you utilize a separate sound card.

STEP #1 - Assess the BIOS options.

No sound device error can be caused by incorrect BIOS configurations in your Personal Computer. By fixing these settings if they are the cause of the malfunction, you can easily solve it. Make Sure you restart the pc and immediately access the BIOS options. By locating the Sound card, which is usually known as the AC97 Audio, you should subsequently open the Integrated Peripherals. As soon as you locate it, set it to Allow or Auto. Finally, you should access the On-Board Audio AC97 Control and set it to Allow or Auto as well. If it doesn't solve the situation, proceed to Step Two.

STEP #2 - Analyze the Device Manager

No sound device malfunction can be additionally caused by malfunctions with the Device Manager. To solve this issue, go to My Computer, right-click it, select properties, click on the Hardware tab, then click on Device Manager. At this windowpane, analyze the movie, audio, and game controllers. If you learn that there is a cross on any of the sub things, right-click it subsequently and set it to Enable. The sound card driver may have not been correctly installed or may be damaged if there is Exclamatory Mark or Question Mark on the device manager menu. This does not mean that the sound card driver is ok. It may have malfunctioned even though you do not locate anything unusual. This is because the Device Manager doesn't always recognize errors in audio hardware. After this, you can proceed to step 3.

STEP #3 - Upgrade or reinstall the Sound Card Driver.

About 80% of "no sound system discovered/installed" malfunctions come from broken and/ or out-of-date card drivers. The sound card will not be detected by the Windows Operating System, when the audio card driver is corrupted, damaged, or out-of-date and therefore no sound will be produced by your computer. If this is the cause of the no sound device malfunction, you should reinstall the Audio Card Driver on your computer. Still, you can utilize driver upgrade applications on the web that will help you upgrade out-of-date drivers.
Read More
Computer is stuck on the Hi there screen
As you know, installing Windows 10 is quite a complicated process in the background even though it may look like an easy task in the foreground. There are times when the setup is stuck on the “Hi there” screen where you won’t be able to input any information in the fields given and you wouldn’t be able to do anything else since the screen does not move ahead. There are a lot of possible reasons why this issue occurs. It could be due to a damaged setup image, invalid boot configuration, and many more. To resolve this problem, there are several options you can check out. You can try to get a new setup image or run the Automatic Repair or you could also try to recreate the Boot Configuration files or BCD. To get started in checking out these solutions, make sure to follow the instructions provided below.

Option 1 – Try to run the Automatic Repair Utility

You might also want to use Automatic Repair in fixing the error. To do so, follow the steps below.
  • You can start by creating and booting from a bootable Windows 10 USB Stick.
  • After that, click on Repair your computer located on the bottom left corner when you are on the initial Windows Startup screen.
  • Next, click on Troubleshoot, and then on the other screen, click the Startup Repair option.
  • Now select the operating system you want to repair. Once you do that, it will start to repair your operating system. Wait until the process is completed and then check if the problem’s now fixed.

Option 2 – Try to rebuild the BCD files

You can also try rebuilding the BCD files to resolve stuck screen issue in your Windows 10 computer.
  • You can start by booting into the installation environment for Windows 10 from an installation media.
  • After that, click on Repair your computer and on the blue screen, select Troubleshoot and then select the Advanced options menu.
  • From there, select Command Prompt and once you open it, enter each one of the commands given below by sequence.
    • bootrec /FixMbr
    • bootrec /FixBoot
    • bootrec /ScanOS
    • bootrec /RebuildBcd
  • Once you’re done executing the commands given above, type “exit” to close the Command Prompt window and then restart your computer and see if it fixed error code 0xc000014c.

Option 3 – Try recreating the Windows 10 installation USB

Recreating the Windows 10 installation USB might help in fixing the problem. You can use a USB drive to do so but make sure that it has a great read-write speed. Follow the steps below to recreate Windows 10 installation USB”
  • Click this link and then click the Download Tool Now button.
  • Next, click the “Use the tool to create installation media (USB flash drive, DVD, or ISO file)…” option and follow the next given instructions on the screen.
  • Now select the ISO file option in step 5.
  • After that, you should now have an ISO file.
  • Next, go to the location where you’ve downloaded the ISO file.
  • Then right-click on the Windows 10 ISO file and select the Open with option and then select File Explorer.
  • Now click on “setup.exe” and follow the next instructions that appear on the screen. When asked, you have to select either Nothing (clean install) or Keep personal files only option. Take note that you must not select the “Keep personal files, apps, and Windows settings since it doesn’t really work.

Option 4 – Try getting a new Windows image file

If none of the four given options above worked, you might want to get a newer installation image using the Windows Media Creation tool. After that, create the bootable USB drive and once completed and then try to run the Windows 10 setup again.
Read More
Managing the Local Users and Groups
As you know, Windows PowerShell is a useful command-line utility in Windows 10 that can be used to manage the Local Users and Groups which affirms the multiuser operating system principle of Windows 10. Although there are other GUI-based utilities used to manage the Local Users and Groups, there are some system administrators that would still like to use the command-line utility to manage these Local Users and Groups. So in this post, you will be guided on how exactly you can manage the Local Users and Groups using PowerShell on your Windows 10 computer. To get started, refer to the options provided below to manage both the Local Users and Groups using Windows PowerShell.

Option 1 – Manage the Local Users via Windows PowerShell

  • You need to first open Windows PowerShell as an admin. To do that, just tap the Win + X keys and select the Windows PowerShell (Admin) option.
  • After opening PowerShell, you need to execute the “Get-LocalUser” cmdlet so that you can find all the details about all the local user accounts in your computer which would include the Account Name, Enabled status, as well as description.
Note: On the other hand, you can also get the customized data about several objects that are related to your account. For instance, if you want to check when was the last time the Local account’s password was set, then you need to execute the “Get-LocalUser -Name root | Select-Object PasswordLastSet” cmdlet. Thus, the structure for this cmdlet is “Get-LocalUser -Name root | Select-Object *”. Here are the objects you can use to get different sorts of data:
  • AccountExpires
  • Description
  • Enabled : True
  • FullName
  • PasswordChangeableDate
  • PasswordExpires
  • UserMayChangePassword
  • PasswordRequired
  • PasswordLastSet
  • LastLogon
  • Name
  • SID
  • PrincipalSource
  • ObjectClass

Option 2 – Manage the Local User Groups using Windows PowerShell

  • Like what you did earlier, open Windows PowerShell as admin and then execute the “Get-LocalGroup” cmdlet so you can get all the information about all the groups of all the local user accounts.
  • Now if you want to create a new Local User Group, just execute the “New-LocalGroup -Name <NAME OF THE GROUP> -Description '<ENTER THE DESCRIPTION OF THE GROUP HERE>'” cmdlet.
  • And if you want to add Local User Accounts to a specific group, just execute the “Add-LocalGroupMember -Group '<NAME OF THE GROUP' -Member ('NAME 1','NAME 2','<ROLE>') -Verbose” cmdlet. You could also use the “Get-Localuser -Name john | Add-LocalGroupMember -Group '<NAME OF THE GROUP>'” cmdlet for the same purpose.
  • If you want to display all the User Accounts of a specific group, just use the “Get-LocalGroupMember –Group ‘ ’” cmdlet.
  • Now if you want to remove a local user account from a group, all you have to do is use the “Remove-LocalGroupMember -Group '<NAME OF THE GROUP>' –Member <NAME OF THE LOCAL USER ACCOUNT>” cmdlet.
Read More
Software review series:CodeTwo QR Code Desktop

What is a QR Code

QR code or if you want to be more technical Quick Response code is a two-dimensional code made of square dots creating a pattern that can be scanned via QR scanner and then interpreted. Usually, they are present on product packaging, on business cards, websites, etc. When you decode a QR code you can get a link to a website or link to a file or whatever, you can get text, image, email, contact information, etc.

QR Code Desktop Reader & Generator sample code

How to decode a QR Code? You can scan it with your mobile devices like iPhone, iPad, Android or Blackberry equipped with additional software for scanning QR Codes. You might want to check out tools like Barcode Scanner or Red Laser. If you don’t have a mobile device or you need to scan a barcode on your PC, simply use CodeTwo QR Code Desktop Reader & Generator.

How this program works

QR Code reading

CodeTwo QR Code Desktop Reader & Generator is a free tool that will let you quickly scan any QR Code from your screen – be it a part of the website, email, banner, or document. Simply run the program and hit From the screen on the top menu. Your standard mouse cursor will change into a cross to help you make a selection on your screen. Simply select an area with a QR Code and the program will automatically scan it. You can scan QR codes from websites, documents, movie files – you name it. You can also select an image file that contains a QR Code and the program will locate it automatically and decode it. To do that, simply click From file on the top menu of the program and select the desired image from your hard drive. If you have a file copied to your clipboard, or if you make a screenshot of a QR Code, QR Code Desktop Reader & Generator will let you decode those QR codes in one click. Just click From clipboard and the program will automatically locate and decode the QR code for you. That is not all, you can also use your camera to scan QR codes. If you have more than one camera, the program will let you choose which one to use. To use this option, simply click From webcam, and you will be able to scan QR codes with your recording device.

QR Code generation

  • CodeTwo QR Code Desktop Reader & Generator also acts as a QR code generator. Creating QR codes is as easy as reading them. Here is how to generate a QR code:
  • In the top menu, click Generate mode on and enter the text you want to translate into QR Code
  • Choose if you want to copy it to the clipboard or save it in a file. The QR Code will be scaled automatically, but you can resize it in the Size settings tab.
  • The resulting QR code can be used however you like. To name just a few options, you can:
  • Upload it to your blog/website which is especially useful for mobile users.
  • Print it on a poster, providing easily accessible links with more information on your event.
  • Send it in newsletters, or include it in your email signature.

QR Codes in email signatures

Inserting QR codes in email signatures lets mobile users quickly grab your contact details, or provides them with links so that they can get more information on your company or topic you were discussing. You can also provide your recipients with a link to QR Code Desktop Reader & Generator. This will help them easily decode QR codes when they open your email on a PC.

QR code

If you want to include a QR code automatically in email signatures throughout a whole organization, try CodeTwo central email signature management solution. It is a very useful tool, which enables you to unify email signatures on Exchange Server and Office 365 (Microsoft 365).
Read More
Rise of video-making AI

Recently Meta has gone viral that it is working on an AI video-making algorithm named Make a Video. AI will like in picture making AI take text input and produce a video from it.

Now, a new player enters the AI video battlefield, its name is GOOGLE!

google ai

The Google research project Imagen Video is also text to video generator similar to Meta's Make a Video with one little difference. unlike Meta's offering which includes only sign-up, Google is withholding access for now under the veil of safeguarding issues.

Google has been in the Ai space before with their Imagen, a DALL-E style generator capable of photorealistic picture generation based on text prompts. The new Google tool works in a similar way but with better functions. Ai can generate a diverse range of high-fidelity videos across different aesthetic styles and with a deep understanding of 3D models thus creating high-definition, 24-frames-per-second videos.

"With the help of progressive distillation, Imagen Video can generate high-quality videos using just eight diffusion steps per sub-model. This speeds up video generation time substantially, by a factor of ~18x,”

Jonathan Ho, author of the research paper

Despite filtering for “undesirable content”, the team admits “there is a risk that Imagen has encoded harmful stereotypes and representations”. So, until the AI - and its users - can be trusted, Google refuses to release Imagen Video without additional safeguards in place.

Read More
Fix Steam stuck on Allocating disk space
If you have been stuck on allocating disk space on steam you know how annoying this error could be. Here you are, with your new game eager to play it and relax a little and all of the sudden steam gets stuck on allocating disc space. Luckily this error is fixable, follow provided guide to fix the error and continue with installing the game.
  1. Restart computer

    An old age solution of turning it off and turning it back on but in this case, it works 90% of the time.
  2. Run Steam as administrator

    Allocating disk space when done by a third-party application can be a task that requires privileges higher than the normal user. Find the steam executable file in the installation folder, right-click on it and run it as an administrator
  3. Clear Steam cache

    Launch Steam in admin mode. Once in the client, click on Steam at the top left corner of the screen. From the drop-down box, click on Settings. Once in the Settings, navigate to the Downloads tab. Click the Clear Download Cache option. Click OK on the prompt to confirm your action. Wait for the process to complete. When done, save changes and exit the client.
  4. Change download server

    Launch Steam client in admin mode. Once in the client, click on Steam at the top left corner of the screen. From the drop-down box, click on Settings. Once in the Settings, navigate to the Downloads tab. Click the drop-down menu under the Download Region. Choose a different server to download from. Exit the Steam client.
  5. Refresh installation files

    • Kill a Steam process in Task Manager.
    • Navigate to your Steam folder
    • Inside the Steam folder, select everything except the steamapps folder and the Steam.exe executable file.
    • Tap the Delete key on your keyboard.
  6. Turn off firewall

    Firewall can prevent steam and cut access to system operations, disable firewall to fix this issue.
  7. Stop overclocking

    If you have overclocked your PC, you can simply reverse the change. The steps you will need to take depends on the overclocking software. Launch the software and look for the option to stop the overclocking. Once done, restart your computer, rerun the game installation.
Read More
A Quick Guide to Repair User32.dll Error Code

User32.dll Error Code - What is it?

User32.dll is a Dynamic Link Library file. Windows stores instructions for graphical elements such as dialog boxes and Windows in this file. This file is a crucial file, necessary to run Windows operations. If this file is damaged, deleted, or removed from the system you may not be able to run the programs on your system that use and share the User32.dll file thereby causing you inconvenience. The User32.dll file error is displayed in the following format:

“This application has failed to start because USER32.dll was not found. Reinstalling the application may fix this problem.”

Or

“[Program] illegal system DLL relocation”

Program here refers to the name of a program that caused the User32.dll error message.

Solution

Restoro box imageError Causes

User32.dll errors are triggered by the following reasons:
  • Missing and damaged .dll files
  • Viral infection
  • Registry corruption
User32.dll error is also referred to as C0000135 blue screen of death error. When the User32.dll error occurs it not only locks you out of your desired program but also turns your computer screen blue. If the error is not repaired timely it may expose your PC to serious threats such as abrupt system shutdowns, system failure, and crash.

Further Information and Manual Repair

To resolve the User32.dll error on your PC, try the following solutions:

1. Reinstall Programs Causing User32.dll errors

Sometimes User32.dll error may occur due to missing DLL files.  This happens when you delete a program from your PC and accidentally the DLL file also gets deleted which is shared by other programs on your system. Therefore to resolve this first find out what programs on your system use User32.dll to load and run on your system. To do this use the Tasklist command-line tool. It displays the names of all the programs that currently use the User32.dll file. After this, reinstall the programs that use User32.dll files on your system. This will hopefully resolve the error.

2. Install and Run Restoro

If it doesn’t, then this probably means that the damage is deep-rooted. It is related to the damaged DLL files, registry corruption, or viral infection. To resolve all of these causes in one go, it is best to download Restoro instead of downloading 3 different software to resolve each cause for the error separately. This is basically an advanced, innovative, and multi-functional PC repair tool embedded with multiple powerful utilities including a registry cleaner, and a system optimizer. It is a one-stop solution for all your PC-related problems including the User32.dll error. The registry cleaner wipes the clutter and obsolete files damaging the hard disk and simultaneously repairs the DLL files and the registry. The antivirus feature removes all the viruses on your system while the system stability utility boosts the PC speed significantly. It is safe, user-friendly, and compatible with all Windows versions including Windows Vista, XP, Windows 7, 8, 8.1, and 10. Click here to download Total System Care to resolve the User32.dll error right away.
Read More
Fix MEMORY_MANAGEMENT due to Chrome browser
When you try to open your Google Chrome browser and it starts to connect to the internet but suddenly, your Windows 10 computer crashes along with a Blue Screen error that says, “MEMORY_MANAGEMENT”, then read on as this post will guide you in fixing the problem. This kind of BSOD error occurs when Google Chrome requests more memory or when it tries to access the network and demand is raised for more memory, the memory management program fails. To fix the problem, here are some possible solutions you might want to try. Follow them thoroughly.

Option 1 – Use the Driver Verifier Manager

The Driver Verifier Manager is another tool in Windows that could help you fix driver-related issues. And since the MEMORY_MANAGEMENT Blue Screen error concerns Google Chrome and an internet connection, the root cause of the problem might have something to do with the Network driver and to verify that, you can use the Driver Verifier Manager:
  • Type in the keyword “Verifier” in the Cortana search box to search for Verifier in Windows 10.
  • After that, select the option “Create custom settings”.
  • Make sure that you have checked everything except the options “DDI compliance checking” and “Randomized low resources simulation”.
  • Next, select the option “Select driver names from a list” option.
  • Afterward, you have to select all the drivers from any unofficial or third-party provider. To simply put it, you have to select all the drivers that are not supplied by Microsoft.
  • Then click on the Finish button.
  • Open Command Prompt as administrator and execute this command – verifier /querysettings
  • The command you just executed will display the Driver Verifier settings so if you see any of the flags enabled boot your Windows 10 PC into Safe Mode.
  • Open the Command Prompt as admin again and run this command – verifier /reset
  • The command will reset the Driver Verifier. Once the process is done, restart your PC and check.

Option 2 – Try updating the Network drivers

  • Tap the Win + R keys to launch the Run window and then type in the “devmgmt.msc” command and hit Enter to open the Device Manager window.
  • Under the Device Manager, you will see a list of drivers. From there, look for the Network Adapters and expand it.
  • Then right-click on each one of the Network drivers and update them all.
  • Restart your PC and see if it helped in fixing the MEMORY_MANAGEMENT BSOD error.

Option 3 – Try disabling Hardware Acceleration

You might want to disable Hardware Acceleration system-wide or for a particular program like Google Chrome and see if it resolves the MEMORY_MANAGEMENT error

Option 4 – Run the Memory Diagnostic Tool to check for Memory leaks

  • Tap the Win + R keys to open Run and type exe and hit Enter to open the Windows Memory Diagnostic Tool.
  • After that, it will give two options such as:
    • Restart now and check for problems (Recommended)
    • Check for problems the next time I start my computer
  • Once your computer has restarted, perform a basic scan or you could also go for the “Advanced” options such as “Test mix” or “Pass count”. Simply tap the F10 key to start the test.
Note: After you select the option, your PC will restart and check for memory-based issues. If it finds any issues, it will automatically fix them and if there’s no issue found, then it’s most likely not a memory-based issue so you should try the other options given below.

Option 5 – Perform a System Restore

Performing System Restore might help you in fixing the SYNTP.SYS Blue Screen error. You can do this option either by booting into Safe Mode or in System Restore. If you are already in the Advanced Startup Options, just directly select System Restore and proceed with the next steps. And if you have just booted your PC into Safe Mode, refer to the steps below.
  • Tap the Win + R keys to open the Run dialog box.
  • After that, type in “sysdm.cpl” in the field and tap Enter.
  • Next, go to the System Protection tab then click the System Restore button. This will open a new window where you have to select your preferred System Restore point.
  • After that, follow the on-screen instructions to finish the process and then restart your computer and check if the problem is fixed or not.

Option 6 – Run the Blue Screen Troubleshooter

The Blue Screen troubleshooter is a built-in tool in Windows 10 that helps users in fixing BSOD errors like MEMORY_MANAGEMENT. It can be found in the Settings Troubleshooters page. To use it, refer to these steps:
  • Tap the Win + I keys to open the Settings panel.
  • Then go to Update & Security > Troubleshoot.
  • From there, look for the option called “Blue Screen” on your right-hand side and then click the “Run the troubleshooter” button to run the Blue Screen Troubleshooter and then follow the next on-screen options. Note that you might have to boot your PC into Safe Mode.
Read More
How to Fix Can’t start your Camera, 0xa00f429f
If you are using the Camera app on your Windows 10 computer but encountered an error code 0xa00f429f with an error message that says, “Can’t start your camera”, read on as this post will guide you in fixing this problem. This kind of error in the Camera app could be due to a recent update gone wrong or it could also be due to a corrupted driver. If you are certain that the camera is connected and is properly installed, you can try to check for updated drivers. The error code signifies that the drivers have to be updated. However, that isn’t always the case sometimes as the problem could also have something to do with corruption in the driver. The effective ways to troubleshoot this problem would be trying to reinstall or reset the Windows Camera app, or update, rollback or uninstall some device drivers as well as use the Registry Editor. Before you proceed with the instructions provided below, make sure that you have admin privileges and don’t forget to create a System Restore point.

Option 1 – Try to reset or reinstall the Windows Camera app

As pointed out earlier, you can also reset the Camera app to fix the error. To do so, follow the steps below.
  • The first thing you have to do is go to the My Pictures folder under the C: drive of the File Explorer and then delete the Camera Roll folder.
  • Once you’re done, right-click on an empty area on your screen and create a new folder and name it “Camera Roll”.
  • Then from the Start menu open the Settings app and select System.
  • From there, navigate to the Apps and features section.
  • Now go to Camera and click on the Advanced Options and click the Reset button.

Option 2 – Try to reinstall the Camera app

If resetting the Camera app didn’t help, you might want to reinstall it by following these steps:
  • Tap the Win + X keys and select the “Windows PowerShell (Admin)” option from the menu to open Windows PowerShell as admin.
  • Next, type this command to uninstall the Camera app: Get-AppxPackage *camera* | Remove-AppxPackage
  • Once done, exit the Windows PowerShell and restart your computer and then try to install the latest version of the Camera app from Microsoft Store.

Option 3 – Try to rollback, update or disable drivers

The next thing you can do to fix the error code 0xa00f429f in the Camera app is to roll back, or update, or disable device drivers. It is most likely that after you updated your Windows computer that your driver also needs a refresh. On the other hand, if you have just updated your device drivers then you need to roll back the drivers to their previous versions. Whichever applies to you, refer to the steps below.
  • Open the Devices Manager from the Win X Menu.
  • After opening the Device Manager, look for the device drivers which have a yellow exclamation mark.
  • Then right-click on each one of them. If you haven’t updated this driver in a while, select the “Update Driver” option. On the other hand, if you’ve just updated this driver, then select the Uninstall Device option.
  • Next, follow the screen option to update or uninstall it.
  • Finally, restart your computer. It will just reinstall the device drivers automatically if you have chosen to uninstall them.
Note: You can install a dedicated driver on your computer in case you have it or you could also look for it directly from the website of the manufacturer.

Option 4 – Try to use the Registry Editor

  • Tap the Win + R keys to open the Run dialog box and type “Regedit” in the field and then hit Enter to open the Registry Editor.
  • Next, navigate to this registry key: ComputerHKEY_LOCAL_MACHINESOFTWAREWOW6432NodeMicrosoftWindows Media FoundationPlatform
  • From there, right-click on any empty space on the right side part of the window and select New > DWORD (32-bit) Value.
  • Then name it as “EnableFrameServerMode” and double click on it.
  • Now set its value data to “0” and its base value as Hexadecimal and then click on OK.
  • After that, restart your computer and see if it helped in fixing the problem or not.
Read More
1 2 3 171
Logo
Copyright © 2023, ErrorTools. All Rights Reserved
Trademark: Microsoft Windows logos are registered trademarks of Microsoft. Disclaimer: ErrorTools.com is not affiliated with Microsoft, nor claims direct affiliation.
The information on this page is provided for information purposes only.
DMCA.com Protection Status