In the latest Windows 11 fiasco, it is reported that the operating system is slowing down some SSD drives. Good thing is that it does not affect all of SSD on the market but the ones which it is affecting can see even a 45% of speed drop.
Microsoft has not published a solution to this issue, but users point out two potential problems. The first is a security mechanism based on disk virtualization, which is supposed to slow down the performance of SSDs.
The second, in turn, is related to the place of installation of Windows 11 – users indicate that if the performance test is performed on a medium with no files associated with the system, its performance results are similar to the parameters given by the manufacturer.
Transfer speeds were to be slightly improved with the latest Windows 11 update 22000.348. However, users are still waiting for a solution to the problem that significantly reduces the efficiency of SSD media.
More information
The details described leading to speculation that the problem could be related to drivers that Microsoft is providing. On further tests, all Nvme drives that use the Microsoft driver have this problem, but Intel 905P, which has its own driver provided by Intel, is working at full power,”.
If you have received a BSOD error message that says, “Tcpip.sys”, read on as this post will show you how you can fix the problem. The “Tcpip.sys” means Transmission Control Protocol over Internet Protocol. It is a library of a set of rules that are used to interconnect different devices all over the internet. The Tcpip.sys file is a driver and if a BSOD error message includes this one, it could only mean that the driver file is corrupted or incompatible with your system or there are some conflicting programs installed in your computer.
To fix this error, you can try the following workarounds. Make sure to carefully follow each one of them.
Option 1 – Check for conflicting or incompatible programs by putting your PC in a Clean Boot state
As mentioned, the “tcpip.sys” BSOD error might be caused by some problematic programs that clash with your existing operating system. Several users reported that numerous programs that are supposedly designed to enhance computer performance are causing conflict in the system instead. To identify which program is causing the problem, you need to put your computer in a Clean Boot State. To do so, follow the steps below.
Log onto your PC as an administrator.
Type in MSConfig in the Start Search to open the System Configuration utility.
From there, go to the General tab and click “Selective startup”.
Clear the “Load Startup items” checkbox and make sure that the “Load System Services” and “Use Original boot configuration” options are checked.
Next, click the Services tab and select the “Hide All Microsoft Services” checkbox.
Click Disable all.
Click on Apply/OK and restart your PC. (This will put your PC into a Clean Boot State. And configure Windows to use the usual startup, just simply undo the changes.)
After putting your PC in a Clean Boot State, try creating a system restore point and see if the problem still occurs. Clean Boot troubleshooting is designed to help you isolate the problem. For you to execute a clean boot troubleshooting, you must do a couple of actions (the steps are given above) and then restart your PC after every action. You might have to disable one third-party app after the other to really isolate the issue. And once you’ve narrowed down the problem, you can either disable the third-party app that’s causing the problem or remove it. Note that you must switch your PC back into the Normal Startup mode after you’re done troubleshooting the problem. Here’s how you can do it:
From the “Start” menu, go to System Configuration.
After that, switch to the General tab and click the option for “Normal Startup”.
Next, go to the Services tab and clear the checkbox for “Hide all Microsoft services”.
Then find and click “Enable all” and if prompted, you have to confirm.
Afterward, go to the Task Manager and enable all the Startup programs and confirm the action.
Restart your PC when prompted.
Option 2 – Disabling Antivirus Software
There are cases when the “tcpip.sys” BSOD error is caused by the antivirus program installed in your computer that’s blocking some essential operations. Because of this, the operating system fails which throws up the BSOD error. As you know, the antivirus program is designed to protect the computer and monitor every action in the system. However, there are instances when the antivirus program gives false positives and shuts down some modules even if it’s harmless. So this could be the case for the “tcpip.sys” error. To verify if the problem is indeed caused by the antivirus program in your computer, you need to temporarily disable it. After you’ve disabled it, restart your PC and then check if the problem’s fixed or not.
Option 3 – Try to update all your Drivers
From time to time, drivers get corrupted or outdated so it’s no surprise that they conflict with the operating system and cause errors like the “tcpip.sys” BSOD error. To fix the problem, you need to update all your drivers especially the network driver since the “tcpip.sys” error is closely related to this driver. Follow the steps below to update your drivers.
Tap the Win + R keys to launch Run.
Type in devmgmt.msc into the box and tap Enter or click OK to open the Device Manager.
After that, a list of device drivers will be displayed. If you see a red or yellow sign that shows up against the driver, right-click on the driver’s name and select “Update Driver Software” or “Uninstall”. And if you find any “Unknown device”, you need to update it as well.
Select the “Search automatically for updated driver software” option and then follow the instructions to complete the process.
Restart your PC.
Note: You also have the option to go directly to the website of your graphics card manufacturer and check if there’s a new update – if there is, download it. After that, you could also check if there’s a new update of the game you’re getting the issue of the black bar.
Error code 1309 is an error code that occurs when installing either Microsoft Office 2003 or Microsoft Office Project 2003.
This error code may hamper your ability to run and use applications associated with Microsoft Office. To ensure installation is successful, it is first advisable to fix this error code. Error 1309 is displayed in any one of the two formats illustrated below.
When installing Microsoft Office Project 2003, the error message may pop up as:
Error 1309. Error reading from file: pathfilename.cab. Verify that the file exists and that you can access it.
When installing Microsoft Office 2003, the error message may appear in the following format:
Fatal Error During Installation
Solution
Error Causes
Error code 1309 message may appear during Microsoft Office installation due to several reasons. These include:
Problems in the Oclncore.opc file. Project 2003 uses this version of the file for program installation.
Lack of adequate use permission
The requested file was not found
Setup registry entries are modified in an unacceptable manner
To avoid inconvenience and access Microsoft Office 2003 or Microsoft Office Project 2003, it is recommended to fix the error immediately.
Further Information and Manual Repair
To resolve this error you don’t need to be a technical whiz. Here are some of the best, easiest, and proven do-it-yourself methods to resolve error 1309 on your computer screen instantly.
Method 1 - Change CacheLevel Settings
If the problem is related to Oclncore.opc file then try changing CacheLevel settings.
Follow these steps to work around this method.
First, locate the PRJPRO*.XML file in the FILESSETUP folder of the Project 2003 installation source and then open this file in the Notepad.
Also, make sure that you do not open the file as read-only and make sure that a checkmark is not displayed next to Word Wrap on the Format menu.
The next step is to search the file for the following text string: OCLNCORE.OPC_1033.
Now on the line where this string is located, change the CacheLevel=’1’ setting to the following CacheLevel=’3’ save the file back to the original location, and then quit Notepad.
After the changes are activated, try installing the software again on your system. If it installs successfully, then this means error 1309 is resolved. If the error still persists then try other given methods.
Method 2 - Configure security settings to get full permission
When the cause of error 1309 on your PC is related to lack of adequate permission issues, then configure security settings to resolve.
To do this, simply locate the folder on your installation drive.
Then right-click the folder and click Properties. On the Security tab, click edit and now make sure your user name is added to the list.
Grant required security permissions and then click OK to save changes.
After this, try installing Microsoft Office 2003 again on your system.
Method 3 - Copy the requested file from another source
If the error 1309 pops up because the requested file was not found, then try this method. Simply copy the file specified in the error to the destination directory.
For example, if the error shows data1.cab was not found, then copy this file from another source and paste it into the directory specified in the error description.
Method 4- Remove bad registry entries
Bad registry entries are responsible for registry setup modification. If this is the reason for error code 1309, then download Restoro.
This is a user-friendly PC Repair Tool embedded with a powerful registry cleaner. It scans and removes all bad and invalid entries accumulated in the registry. It cleans and repairs the registry resuming it back to its normal function.
Click here to download Restoro and repair error 1309 today.
Error Code 0x800705b4 is an error that will appear when the computer is not stable, and very critical system files will fail to respond or they will start going missing. This will happen when the computer is not being maintained properly. The problem should be solved immediately to avoid any further damage or loss of data. This error code may be regarded as one of the most severe computer problems that can present itself.
Common symptoms include:
There will be a failure to install updates and a display of the error message.
The Error Code 0x800705b4 will display itself.
After a system update, the computer will not be able to install new drivers.
Solution
Error Causes
Windows 10 update error 0x800705b4 can be caused when the user wants to update their windows system when important dll registries or files are missing or are corrupt. This will also happen when the user is trying to install or uninstall programs in a way that is wrong, or it may be infected with a Trojan virus. Additionally, this error code will be displayed when a PC's drivers are either outdated or installed the wrong way. There could be a registry error, a failure to update by the operating system, or even a device failure to update automatically.
Further Information and Manual Repair
There are several ways to resolve the appearance of error code 0x800705b4 on Windows devices. If you are not familiar with fixing error codes on a computer or are having trouble fixing this one, consider contacting a Windows technician to help with fixing the error. The computer must be run on administrator mode no matter which steps you are taking or which methods you are using. Depending on which version of Windows you are using, the steps for each method may differ slightly, but the basic process will remain the same.
Method One: Fixing it with updates
Start the computer in safe mode to begin troubleshooting for error code 0x800705b4. When the computer is starting up, press F8—this will enter the computer into safe mode.
You will now need to manually update your computer's outdated drivers. To do this, click on Start. Then, type in Device Manager into the search box to see if there are any outdated or corrupt issues with the drivers.
Method Two: Run an SFC scan
This will allow users to find files in Windows that are corrupt, damaged, or lost.
Start the Command Prompt. To do this, click Start and then type in cmd inside of the search box to see the icon. Right-click and choose to Run as administrator. If asked, enter the password for the administrator.
When viewing the command prompt, type in “sfc/scannnow” and then press enter. This will be scanning all of the protected system files and will fix the corrupt files. Do not close the command prompt before it is done.
Method Three: System Restore
This is the most efficient way to fix any problem or system status. System backup is vital when performing this.
Click on the Start button, and then type in “system restore” inside of the search box. Right click on System Restore, and then choose Run as Administrator. This could also be found in the Control Panel. Now you will choose the time point in which to restore the system. You will be able to choose the recommended or specific restore based on the situation. Now you can review the restore point and then click Finish.
Method Four: For Windows 10
You may need to update the Windows Defender in the security center. To locate this, click Start, Settings, Update and Security, Windows Defender.
Go to the Windows Updates and click on Advanced Options. Click on the option that will get updates for more Microsoft products.
Restart the computer, and then check for updates again. This update process will be able to be done without a problem. When a message comes up that says “Your device is up to date” you will need to click Advanced Options once again and check for update options.
Check for updates one more time and now the proper updates should be able to be downloaded and installed properly.
Method Five: Use An Automated Tool
If you wish to always have at your disposal a utility tool to fix these Windows 10 and other related issues when they do arise, download and install a powerful automated tool.
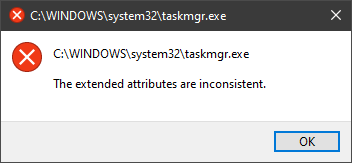
One of the most critical errors inside your Windows operating system is The Extended Attributes Are Inconsistent error. This error means that your operating system has been corrupted and it may produce many annoying issues like for example time lags, random crashes, and even freezing of the system when running multiple applications.
There are a lot of reasons for this error, from the registry to faulty application installations to sometimes even hardware issues like bad RAM memory or bad hard drive. Mostly issue is due to corrupted files inside Windows and most often people only think that resetting the PC or complete reinstallation is the only way to fix this problem.
Although reinstalling the system or resetting the PC will solve this error for sure there are other less time-consuming ways to fix this error.
In this guide, we will show you common ways in fixing Extended Attributes are inconsistent errors inside your Windows that are easy to do and less time-consuming than complete reinstallation of the system.
Fixing Extended Attributes Are Inconsistent error
Run SFC scan
Press ⊞ WINDOWS + X to open the hidden menu
Click on command prompt (admin)
In command prompt type in SFC /scannow and press ENTER
Wait for the operation to complete
Reboot your PC
Use System Image Repair Tool
Press ⊞ WINDOWS + X to open the hidden menu
Click on command prompt (admin)
In command prompt type in Dism /Online /Cleanup-Image /RestoreHealth and press ENTER
Wait for the operation to complete
Reboot your PC
Change all user accounts to the administrator
Press ⊞ WINDOWS + R to open the run dialog
Type in netplwiz and press ENTER
Select a first user account and click on Properties
Click on the Group Membership tab
Choose Others from the options
Select administrator (if all accounts are already administrators change all to users)
Repeat process for all other accounts
Click OK to save settings
Change Windows Sound scheme to default
Right-click on the sound icon in the taskbar
Click on Sound options
Go to the Sounds tab
In Sound Scheme click and choose Windows Default
Under Program Events choose Windows User Account Control
Click on the drop-down menu and choose None
Click on Apply
Click on OK
Downgrade the Sound driver
Press ⊞ WINDOWS + X to open the hidden menu
Click on Device Manager
Find your Audio driver and right-click on it
Click on uninstall and then on OK
Reboot your system
Do System Restore
If none of the provided solutions have worked, perform a system restore to the last point where everything was working fine.
Reset PC
If even system restore has not solved the issue or you do not have valid point in system restore time, perform Reset this PC and hopefully, the error will be finally fixed.
Conclusion
If all of the provided methods have not managed to repair this error that checks your hardware, your computer might have some faulty components if after complete PC reset error persists.
Error code 0x803f7001 results when users fail to update their Windows operating system. This often occurs when they seek to update from Windows 8 or 8.1 to Windows 10. Users will be able to identify error code 0x803f7001 because of the following common symptoms which occur:
Inability to upgrade your Windows operating system to Windows 10
Message box with error code 0x803f7001
Solution
Error Causes
The causes for error code 0x803f7001 are usually associated with the use of an unlicensed version of Windows 8 when upgrading to Windows 10. In such cases, the error code occurs when there is no valid Windows license or product key on your device.
Further Information and Manual Repair
To fix error code 0x803f7001, users may not necessarily need technical knowledge or the help of a Windows repair technician. Usually, the process is simple and can be resolved with the use of a valid product key. However, if users have trouble implementing the instructions found in the manual repair methods listed below, contact a Windows repair specialist for help or use an automated tool that provides the best solutions for problems like error code 0x803f7001.
Method One: Use a Valid Product Key
A product key is a 25-character code that enables users to activate their Windows operating system. To successfully activate your operating system and resolve error code 0x803f7001, enter the product key in the correct order. Once you have a valid product key in your possession, begin to resolve the error code by following the instructions below:
Step one: Click the Start button then select Settings
Step two: Select Update & security then Activation
Step three: Click the Change product key
Step four: Type in your valid product key. (Ensure you include the 25 characters of your product key in the correct order.)
Once you type in the valid product key, you should be able to successfully upgrade to the latest version of Windows. However, this method is only effective if the error code 0x803f7001 on your device is caused by issues related to the product key.
If the error code reappears after attempting manual repair method one, move to the next manual method suggested below.
Method Two: Reinstall Genuine Version of Windows 8
This method is crucial for you to perform if method one was not successful. Begin the reinstallation process by ensuring you have a genuine version of Windows 8. After reinstalling this version of your Windows operating system, attempt to upgrade to Windows 10 by following the instructions below:
Step one: Type Settings in the search box near the Start button or click the Start button and select Settings
Step two: After clicking Settings, select Update & Security
Step three: Select Windows Update then the Check for updates tab
Step four: Activate Windows 10 update
If this method is successful, you will no longer see error code 0x803f7001 pop up in a message box. You will also be able to access Windows 10, and all the benefits it provides users, on your device.
Method Three: Install an Automated Tool
Automated tools help PC users eliminate common issues such as Windows error codes. To address or rectify error codes like error code 0x803f7001 download a powerful automated tool on your machine. This tool enables users to access quick solutions. It also scans for and corrects issues that may result in error codes or poor PC performance.
In 2014 Proton mail started as an end-to-end encrypted email service offering secure and private email services. Proton mail is still live and going with the same dedication to privacy and security but the company has expanded its offering into cloud storage drive services.
Starting as a public beta at the end of 2020, Proton Drive is keeping its privacy and security policy philosophy with the new service. Proton Drive is the newest service besides Proton Calendar, Proton VPN, and Proton Mail.
Drive has end-to-end encryption for everything on it including files themselves, filenames, folder structure, folder names, extensions, and file sizes. This means that you and only you can access your files. Servers are located in Geneva, Switzerland and they are under Swiss privacy laws making sure that your files are protected. Proton services in general are all open source so anyone can take a look at them to be sure that nothing is lurking under the hood. For now, sync is done either via the android app or web interface but the desktop client will come soon since currently, it is under development.
Sadly free plan of Proton Drive will give you only 1GB of storage which is much less than other services and sadly payments plans are also not so jaw-dropping going for $4 USD per month for a 200GB plan or with Proton ultimate subscription that will set you $10 behind but you will get 500GB of drive storage. Of course, if you value privacy for your files these options are good but if you do not mind that part other services have much better options.
All in all Proton Drive is a great cloud storage solution if you need privacy and well worth the investment. With the ultimate subscription, you will get enough space for most people and company needs with other services and guaranteed privacy and security, on the other hand, if you just need a large amount of cloud storage not caring too much about privacy other options are better.
Error Code 37 is a Device Manager Error Code that you may come across when you are unable to use an installed hardware device on your PC. It will pop up on your screen with the following display:
“Windows cannot initialize the device driver for this hardware. (Code 37)”
If you receive the above message, it means that your operating system was unable to acknowledge the drivers for a particular peripheral device.
Solution
Error Causes
Error Code 37 mainly occurs due to device driver corruption. However, there are other factors that can trigger this error code, some of which are the following:
Missing device drivers
Out-of-date device drivers
Presence of malware or spyware in the system
The particular device is not compatible with your PC
Device driver corruption or other data corruption is not uncommon and part of everyday PC use.
From an installation gone wrong to an unexpected shutdown, commonly generated data errors are considered the main culprit behind error codes.
Further Information and Manual Repair
Just like most PC error codes, Error Code 37 isn’t that difficult to get rid of. There are many DIY methods you can try to have your PC running smoothly in no time. Here are a few methods to resolve this issue:
Method 1: Restart your PC
It is possible that the display of the error code is merely due to a temporary issue with your peripheral device and not anything serious.
Therefore, the quickest and easiest method to solve the error code 37 is to simply restart your PC.
Method 2: Scan for Viruses
If restarting does not do the trick, a quick scan for viruses and removing them is another simple method you can follow to fix your PC.
Since the error code is due to corruption of data, viruses such as malware or spyware create error in your PC’s registry and eliminating them can help restore some of the corrupt data, which also speeds up your PC.
Method 3: Undo recent changes
A possible explanation for the error code may be the recent changes in your Device Manager or due to the peripheral device installation. You can thus undo the changes by either:
Remove or change settings of the installed peripheral device
Roll back the version of the driver to the one before the update.
Use System Restore to reverse the changes made in the Device Manager
Method 4: Manually uninstall and reinstall the drivers
If the above stated methods do not help in speeding up your PC and is still giving you an error code, you may want to manually uninstall and reinstall the corrupt or missing drivers. Here are the following steps:
Double-check if the installed external device is properly connected and working smoothly
Open Device Manager and double click on the device that is causing problems
When it opens, click on the ‘Driver’ tab and click ‘Update Driver’
Method 5: Use DriverFIX
However, updating the missing or corrupt drivers can be time consuming and may also require having a hardware documentation ready that contains specific details about the driver that you should download.
To avoid this time-consuming process, you can use DriverFIX software.
DriverFIX will help you to download the required driver without you having to waste your precious time and effort looking it up in a user manual. This latest software technology is embedded with its own database that tracks the missing or corrupt driver according to your PC’s motherboard version and specific details.
It is user-friendly, which means that it will relieve you from the frustration of such PC error codes appearing from time to time and enable your PC to work efficiently in no time.
Click here to download DriverFIX to resolve Device Manager error code 37 today!
Lately, some users reported getting an error that says, “System doesn’t have any USB boot option, Please select other boot option in Boot Manager Menu” when they tried to reinstall the Windows 10 operating system on their PCs or boot from an installation media. If you have the same problem, then this post should help.
This kind of error is applicable to multiple devices by various OEMs and is mostly due to the Secure boot being enabled, or the Legacy or CSM support being disabled. It could also be that the bootable USB device was not correctly made and so on. Whatever the cause may be, here are some suggestions you need to check out to resolve the “System doesn’t have any USB boot option, Please select other boot option in Boot Manager Menu” error and reinstall Windows 10 successfully.
Option 1 – Disable the Secure Boot in the BIOS
Disabling the Secure Boot in the BIOS settings is definitely recommended to resolve the error. To disable Secure Boot, here’s what you have to do:
First, boot your computer into Windows 10.
Next, go to Settings > Windows Update. From there, check if there is anything that you have to download and install if you see any available updates. Usually, OEMs send and update the list of trusted hardware, drivers, and operating systems for your computer.
After that, go to the BIOS of your computer.
Then go to Settings > Update & Security > Advanced Startup options. If you click on Restart Now, it will restart your computer and give you all the advanced options.
Next, select Troubleshoot > Advanced Options. As you can see, this screen offers you further options including System restore, Startup repair, Go back to the previous version, Command Prompt, System Image Recovery, and UEFI Firmware Settings.
Select the UEFI Firmware Settings which will take you to the BIOS.
From there, go to the Security > Boot > Authentication tab where you should see Secure Boot. Note that every OEM has its own way of implementing the options so it varies.
Next, set Secure Boot to Disabled and set Legacy Support to On or Enabled.
Save the changes made and exit. Afterward, your computer will reboot.
Option 2 – Try to reset the BIOS or the UEFI Settings
If updating the BIOS didn’t help in fixing Error 0199, you can try to reset the BIOS instead.
Start your computer and tap the F10 key during the booting process to enter the BIOS. If it does not work, you can try tapping the F1 or F2 key as well as the Del key.
Once you’re already in the BIOS, tap the F9 key to get the prompt to RestoreLoad default configuration now for the BIOS.
Next, click on Yes and then follow the next on-screen instructions that appear to set the BIOS back to its default settings.
Once you’re done restoring the default settings of the BIOS, restart your computer and then check if it now boots properly.
Option 3 – Make a proper bootable USB Drive/Stick
To make a proper bootable USB drive, you need to use the Windows Media Creation tool. The Media Creation tool in Windows allows you to use the ISO installation file to make a bootable device that you can use to install Windows on your PC. Note that this is kind of different from the usual installation process as it could erase your computer’s current settings and data on the primary drive. Thus, before you proceed, you need to backup all your data into some removable drive and then use the Media Creation Tool to make a bootable drive.
After making the bootable drive, you need to plug it into your computer and then reboot.
Next, tap the F10 or Esc key to open the boot options.
Now set the boot priority of the removable drive the highest. Once the setup comes forth, follow the next onscreen instructions and install Windows without any problems.
Option 4 – Try enabling Legacy or CSM boot support
If the Legacy or CSM boot support is disabled, then it’s no wonder why you’re getting an error. Thus, you need to enable it by following these steps:
Open Settings and go to Update & Security > Advanced Startup options.
Next, click on Restart Now to reboot your computer.
After that, select Troubleshoot > Advanced Options where, you will see more options such as System Restore, Startup Repair, Go back to the previous version, Command Prompt, System Image Recovery, and UEFI Firmware Settings.
From there, enable Legacy Support and then save the changes and exit. This will restart the computer.
Once your computer has restarted, check if the error is now fixed.
Windows updates have become a regular occurrence in our digital lives. They are frequent and have become quite necessary. Most of the time they bring us quality content like fixed security, resolved bugs, and even new features but from time to time update itself can be not downloaded properly or it can have some issues when installing. Windows Update Error 0x800F0825 is one of these update errors that will be reported seemingly after applying the update.
Altho annoying error it is nothing system breaking and can be easily resolved.
Hello and welcome everyone, today we will provide you with solutions on how to resolve error 0x800F0825 when trying to complete a Windows update.
Run Windows troubleshooter
Built-in Windows troubleshooter can help a lot in resolving these issues and we will try it as a first solution because of its simplicity and ease of use.
Click on START
Click on settings
Navigate to Update & Security > Troubleshoot > Additional Troubleshooter > Windows Update
Click on Run the troubleshooter
Follow onscreen instructions and let the troubleshooter try to solve the issue
Clear contents of SoftwareDistribution & Catroot2 folders
Altho SoftwareDistribution and Catroot2 folders are essential for the update process it can happen that badly downloaded updates or similar corruption can be stored there and thus producing this error.
Open file explorer and locate these two folders, go inside and delete content inside them
Try updating again to see if corruption inside folders was the issue.
Update manually
If the previous two solutions have not produced a result and the error is still present then go to the official Microsoft Update Catalog and download the update manually
The catalog is here.
Search for updates from the Windows Update Catalog In the Search box, type your search terms. You can carry out a full-text search, using a keyword, KB article, MSRC bulletin, driver manufacturer, driver model, driver version, product, and a classification. Select the appropriate version of Windows. Search or click on Advanced Search if you want to refine your search. A list will be displayed. Select the updates that you want to download. Click Add for each selection to add it to the download basket.
Download the updates. You may be asked to install an Active-X download control to be able to download files from this site
Double-click on the downloaded updates to install them
Administrators can download updates from the Microsoft Download Center or the Windows Update Catalog to deploy to multiple computersIf you are running Windows Server Update Services (WSUS) 3.0, System Center Essentials (SCE), or System Center Configuration Manager (SCCM) you can import updates directly into these applications. Security updates, critical updates, service packs, update rollups, definition updates, and critical drivers can be configured to synchronize with your server automatically. You can still import these updates into your application by using Microsoft Update Catalog; however, depending on how you configure WSUS, SCE, and SCCM, you may not need to import the updates.
Disable system protection
In some rare cases, antivirus or firewall could interfere with both downloads and execution of certain files. If each previous solution failed disable temporarily your security software and try executing the update again.
What software are you using to keep your information and all your files and memories safe?
None? Yikes. Let’s hope no damage has been done to your data yet then. Because with how the digital world has evolved, your data might be getting leaked and you have no idea.
Why do you need to invest in security software?
There’s really no good excuse not to purchase a quality platform for PC protection. Especially since top security solutions are available at such affordable prices nowadays, your wallet would barely even notice it.
At this point, only people who barely use their PCs and have zero sensitive information on them can get away with simply using the built-in Windows 10/11 security software. But we guarantee that those people are extremely hard to find and that you’re not one of them, and here’s why.
Even if you don’t use your computer for things that are very obviously sensitive, such as internet banking, you still have some personal data at risk of being stolen. How so? Well, think about the data you enter into your social media profiles, for example. How devastating would it be if somebody got a hold of any of it? Yep, that’s what we thought.
Credit: FLY:D on Unsplash
In the hands of a skilled cybercriminal, your phone number alone could put you at risk of scams, ransomware, identity theft and more. Also think about the stuff you share in texts and social media chats. Think about the websites you visit and how many times you may have accidentally clicked on an ad, which could very well contain malicious software. Those all seem harmless until someone’s actually used them against you.
Now imagine the dangers involved when you actually store truly confidential data on your PC and browsers. Sends shivers down your spine, doesn’t it?
In the case of a successful cyberattack of whatever type (virus, phishing, worms, etc.), there’s so much that is at stake. Businesses/legal persons will suffer from financial loss and damaged reputation, at the very least. Natural persons may be threatened or exploited, get their banking or medical information and even their identity stolen, etc. And that’s just the tip of the iceberg.
These are our biggest reasons for investing in Windows PC protection software:
Cyberthreats are constantly evolving to the point where built-in or free software won’t cut it anymore.
Those working remotely can have peace of mind knowing both personal and business data is completely secure.
Businesses using top security solutions ensure their customers trust them.
Data breaches are a pain in the you-know-what to handle. Fighting a cyberattack and going back to normal is a demanding process, and not to mention the stress it’ll cause. We’d rather prevent all that by using trustworthy security products!
It helps parents worry a little less about their children’s safety in the online world.
Added bonus: with most products, you get an ad-free browsing experience!
Obviously, there are a lot more reasons to get your PC secured. But we think you get it. So let’s cut to the chase and take a look at our 6 favorite protection solutions and the wonders they can do for you.
*Note that in this article we’re looking at products primarily suited for households and home offices, some for small businesses. No enterprise solutions will make the list today, but stay tuned for a future article on those.
Top 6 best PC protection solutions
1. Bitdefender Total & Internet Security\
One of the biggest security product vendors out there, Bitdefender offers several awesome solutions. We want to introduce two of our favorites, Bitdefender Total Security and Bitdefender Internet Security.
Bitdefender Total Security is great for both households and smaller offices. You can choose to protect 5 or 10 devices, and not necessarily just Windows devices. It also works for macOS, Android and iOS. It offers a range of powerful features, such as:
Real-time data protection
Webcam and microphone protection
Device optimization options
Anti-phishing/-fraud/-spam technology
Ransomware protection
Anti-loss and anti-theft tools
VPN and privacy firewall
Anti-tracking technology
Parental controls
24/7 support
Bitdefender Internet Security shares almost all of these features, but there are a few important differences to note. Unlike Total Security, Internet Security has more options in terms of the number of protected devices: 1, 3, 5 or 10. However it’s only compatible with the Windows platform and it doesn’t offer device optimization tools or anti-theft options. Whether or not this is a deal-breaker depends on your needs alone - we still find it a great security tool.
Credit: Firmbee.com on Unsplash
2. ESET Internet Security
An award-winning Windows security product, ESET Internet Security is essential on this list. It has an outstanding protection rate of 99.9% and a range of amazing options you’ll definitely want to make use of. It can be installed on up to 10 devices, making it an awesome tool for your household, home office or a small business. It’s also compatible with macOS and Android.
These are ESET Internet Security’s best features:
Protection against ransomware and spyware
Protection against malware specifically designed to avoid detection
In-depth scans when the computer is not in use
Firewall to prevent unauthorized access to your PC
Anti-spam tool
Anti-phishing and botnet protection technologies
Tool to scan your router and smart devices for vulnerabilities
Special browser for secure internet banking
Parental controls
Prevention of unauthorized webcam access
If you ask us, ESET has it all!
Credit: rupixen.com on Unsplash
3. Kaspersky Total & Internet Security
Having a deja vu? Didn’t you just read Total Security and Internet Security somewhere? Oh, that’s right - the first entry on our list! But here we’re talking about Kaspersky, a vendor you’ve also definitely heard about before.
Just like Bitdefender, Kaspersky is another one of those renowned names in the cybersecurity world that always make it to every ‘best of’ list. And for good reason - its products really fulfill their purpose. So let’s take a closer look at the two we chose.
These are the features both Kaspersky Total Security and Kaspersky Internet Security have in common:
Real-time virus and spyware blocking
Webcam protection
Wi-Fi security notifications
Advanced identity theft protection
Free technical support on several channels
Remote security management
Multiple devices (up to 10)
The main difference between Kaspersky Total Security and Internet Security is that the former offers more capabilities. These are the features KTS offers that KIS does not:
System cleanup
File shredding
Password management
Data backup and encryption
Both are excellent security tools, though we do prefer KTS a little more because of these additional options.
4. Norton 360 Deluxe
Of course one of the industry-leading solutions makes the list. Norton 360 Deluxe can protect up to 5 devices, be it Windows, iOS, macOS or Android. It’s worth noting that its features are best developed for Windows. Here’s what you get with Norton 360 Deluxe:
Protection against viruses, hackers, malware
100% virus protection promise
VPN included for all devices
Unlimited VPN on Windows
Password manager
Parental controls
So is there anything aside from these standard protection features that makes it such a favorite among us techies? Let us tell you! Norton added a little bit of spice here with two really powerful capabilities. The Deluxe product offers 50GB of cloud backup and dark web monitoring. The latter means the software notifies you if any of your personal information is found on the dark web, which helps protect you against identity theft.
Credit: Luke Peters on Unsplash
5. McAfee Antivirus
Don’t be misled by the name of this product. Antivirus software may have started as protection against viruses only, but it’s developed quite a lot. The name simply stuck. All that to say that McAfee Antivirus - another award-winning security solution - protects you against several different threats.
The basic and essential plan allow 1 and 5 devices respectively, while McAfee+ Premium and Advanced work on an unlimited number of devices. The latter two also offer more capabilities, as you can imagine. Here’s what you can expect from all of them:
Secure unlimited VPN
File shredder to delete sensitive files completely
Ultimate safety while browsing
Protection against hackers
100% virus protection promise
Advanced firewall to block dangerous traffic
Online support from specialists
Protection score (shows how safe you are and detects vulnerabilities)
Identity monitoring (notifies you if any of your information is on the dark web)
Password management
Unlike the previous products, McAfee Antivirus does not offer parental controls. Otherwise it’s a pretty strong and comprehensive protection tool and might just be the right choice for you!
6. Trend Micro Maximum Security
Last but definitely not least, we’ve got Maximum Security by Trend Micro. And yes, you guessed it, Trend Micro is also an award winner in terms of cybersecurity. Its products have been recognized as industry-leading security solutions by AV-Test since 2003. Among all its fantastic solutions, our favorite for households or small offices is Maximum Security.
You can use Trend Micro Maximum Security to protect 3-5 devices for a year or two years before needing to renew your license. Aside from Windows, it’s compatible with iOS, Android, Mac and Chromebook devices. Here’s what you can expect from this protection software:
Powerful malware protection
Phishing detection and prevention (email)
Password management and protection
Maximum security for online banking and shopping
System optimization
Social media privacy protection
Parental controls
24/7 technical support
No notifications during gaming
It’s truly one of the most effective platforms out there dedicated to protecting your digital life. Using this product, ransomware, identity thieves and malicious websites don’t stand a chance.
The bottom line
If you’ve made it all the way here, congratulations, you’ve made the right choice: to invest in securing your valuable data! Now the question is: which one of these 6 awesome antivirus/antimalware products to select?
The paradox of choice is a very real thing - we feel you. As mentioned, it comes down to what your specific needs are. So before you go ahead and purchase your security software, make sure to explore all options.
And if you really can’t handle the decision-making anxiety, feel free to reach out. We’ll happily assist you in finding the right product to keep your digital life secure!
 Microsoft has not published a solution to this issue, but users point out two potential problems. The first is a security mechanism based on disk virtualization, which is supposed to slow down the performance of SSDs.

 In this guide, we will show you common ways in fixing Extended Attributes are inconsistent errors inside your Windows that are easy to do and less time-consuming than complete reinstallation of the system.