Hello and welcome everyone, today we will be talking about power toys, a great, completely free, open-source, Microsoft-supported Windows project which aims to provide Windows itself with powerful features not found natively in it.
We will explore power toys completely here and explain each module and its features.
The first thing is of course to download power toys themselves. You can find themhere. After you download them, double click on the downloaded file and install. Start power toys, you will find them at the bottom of the taskbar, note that power toys need to be active in order to use their features.
When opened you will be greeted with general settings window. These are settings for power toys themselves, Here you can check for updates, change the looks of power toys, run it on system startup and run them as administrator. Set them up so they best suit your needs.
Color Picker
Moving down next tab we have is Color picker.
The color picker will let you as the name suggests pick colors, it will sample colors from running applications and windows, snap their values, and place them in the clipboard. A useful application if you are working as a graphic designer, want to create some cool word document, or just want to compare the difference between colors.
After the Color Picker is activated, hover your mouse cursor over the color you would like to copy and left-click the mouse button to select a color. If you want to see the area around your cursor in more detail, scroll up to zoom in. The copied color will be stored in your clipboard in the format that is configured in the settings (HEX by default). The editor lets you see the history of picked colors (up to 20) and copy their representation in any predefined string format. You can configure what color formats are visible in the editor, along with the order that they appear. This configuration can be found in PowerToys settings. The editor also allows you to fine-tune any picked color or get a new similar color. Editor previews different shades of currently selected color - 2 lighter and 2 darker ones. Clicking on any of those alternative color shades will add the selection to the history of picked colors (appears on the top of the colors history list). Color in the middle represents your currently selected color from the history of the colors. By clicking on it, the fine-tuning configuration control will appear, which will let you change the HUE or RGB values of the current color. Pressing OK will add newly configured color into the history of the colors.
Fancy Zones
Moving down, we have fancy zones.
FancyZones is a window manager utility for arranging and snapping windows into efficient layouts to improve the speed of your workflow and restore layouts quickly. FancyZones allows the user to define a set of window locations for a desktop that are drag targets for windows. When the user drags a window into a zone, the window is resized and repositioned to fill that zone. When first launched, the zones editor presents a list of layouts that can be adjusted by how many windows are on the monitor. Choosing a layout shows a preview of that layout on the monitor. The selected layout is applied automatically.
File Explorer
Next, File Explorer.
Only 3 options here but maybe some are important to you. This extension lets you enable SVG file preview in File Explorer, enable Markdown preview, and enable SVG thumbnails. Turn on each one you might need.
Image Resize
Next down the line, we have Image resize.
Image Resizer is a Windows shell extension for bulk image-resizing. After installing PowerToys, right-click on one or more selected image files in File Explorer, and then select Resize pictures from the menu. You can specify your own sizes if you want, you can resize when dragging files, you can overwrite files or make new copies of new sizes, and many more options. A very useful tool I am sure plenty of users can use since this eliminates the need for pictures or any other image application for common resizing tasks.
Keyboard Manager
The keyboard manager is the next tab in power toys.
The PowerToys Keyboard Manager enables you to redefine keys on your keyboard. For example, you can exchange the letter A for the letter D on your keyboard. When you select the A key, a D will display. You can also exchange shortcut key combinations. For example, the shortcut key, Ctrl+C, will copy the text in Microsoft Word. With the PowerToys Keyboard Manager utility, you can exchange that shortcut for ⊞ Win+C). Now, ⊞ Win+C) will copy text. If you do not specify a targeted application in PowerToys Keyboard Manager, the shortcut exchange will be applied globally across Windows. PowerToys Keyboard Manager must be enabled (with PowerToys running in the background) for remapped keys and shortcuts to be applied. If PowerToys is not running, key remapping will no longer be applied.
Power Rename
Nex we have a very cool and powerful Power Rename
PowerRename is a bulk renaming tool that enables you to:
Modify the file names of a large number of files (without renaming all of the files with the same name).
Perform a search and replace on a targeted section of file names.
Perform a regular expression rename on multiple files.
Check expected rename results in a preview window before finalizing a bulk rename.
Undo a rename operation after it is completed.
Run Utility
Power Toys Run utility follows next.
PowerToys Run is a quick launcher for power users that contains some additional features without sacrificing performance.
PowerToys Run features include:
Search for applications, folders, or files
Search for running processes (previously known as WindowWalker)
Clickable buttons with keyboard shortcuts (such as Open as the administrator or Open containing folder)
Invoke Shell Plugin using > (for example, > Shell:startup will open the Windows startup folder)
Do a simple calculation using the calculator
Shortcut Guide
Last but not least we have a Shortcut guide.
This guide uses PowerToys to display common keyboard shortcuts that use the Windows ⊞ key. Windows key keyboard shortcuts can be used while the guide is being shown and the result of those shortcuts (active window moved, arrow shortcut behavior changes, etc) will be displayed in the guide. Releasing the Windows ⊞ key will make the overlay disappear. Tapping the Windows ⊞ key will display the Windows Start menu.
Hey, you made it till the end, thank you for reading and I hope to see you soon.
If you are facing a missing sechost.dll error in your Windows 10, welcome, you have come to the right place to solve it and get back your computer in working order. Sechost.dll is a file that allows other programs to function and complete their tasks as well as control and change the behavior of other programs.
The file is found in Windows subfolder System32, it is a completely safe file and should not be deleted. Sometimes however various other reasons can corrupt it or delete it. This guide will lead you to common solutions on how to get file back up and running.
Update device driver
Have you installed a new device and all of a sudden you get the error message that Sechost is missing? Update device driver, it is possible that the file has been corrupted or replaced with an older version and therefore reported as missing. Update device driver to lastest version and issue should run away.
Re-register file via command prompt
If Sechost got corrupted re-registering will solve the issue, press ⊞ WINDOWS + X and choose Command prompt (administrator), click on it.
type regsvr32 sechost.dll and press ENTER
Reboot your PC
Reinstall application
Usually, Sechost gone bad or missing is due to the installation of another application that corrupts the file. Reinstall the application to try to solve errors. In order to properly reinstall the application first use the control panel to remove it completely from the system and then install it again, hopefully, this time correct version of Sechost.dll will be installed in the system.
Check your hard drive
In some cases, a hard drive malfunction can cause several files to be corrupted or gone missing. To eliminate hard drive malfunction run check disk from Windows on C drive to check it and find if there are any errors.
Uninstall Windows update
Same as with some application, even Windows update could corrupt some files due to update not being properly downloaded. Try uninstalling the latest update and revert to the previous Windows state, then update it again.
In trying to upgrade your Windows 10 computer, you might have come across the error 0x800F0923. This kind of Windows upgrade/update error is caused by an incompatible driver or software that’s installed on your computer. Thus, to fix the problem, you need a working fix which you can choose from below.
As mentioned, you can try updating the concerned application or software to its latest version to resolve the compatibility issue and in turn, fix error 0x800F0923. Note that depending on where you had installed the application, your steps will change. So if you have it installed directly from the website, refer to these steps:
Look for the built-in option to check the updates since the most application has this option.
You also have the option to go to the website of the application and check if there is a new version available. If there is, download and update the app.
On the other hand, if you have downloaded the app from the Microsoft Store, here’s what you have to do:
Open the Store and click on the three dots located at the top-right of the window.
Next, click the Download and Updates option.
From there, check if there is an update available for the store. If there is, update it.
Option 2 – Try to uninstall the application or software
If updating the app or software to its latest version didn’t help and you’re still getting the error 0x800F0923 every time you attempt to install the Windows Updates, you may have to uninstall it. You will need to use the usual Program and Features to uninstall it if you have downloaded it from the website.
In the search box, type in “control” and then click on Control Panel (desktop app) among the search results.
After that, select Programs and Features from the list which will give you a list of all the programs installed on your computer.
From there, look for the concerned program and select it and then uninstall it.
Note: If you have downloaded the app from the Windows Store, you can simply right-click on it from the application list and then uninstall it.
Option 3 – Try to disable your antivirus program
Disabling the antivirus program or any security software installed in your computer is always a good idea you can try when the Windows Update process does not go smoothly. So before you try updating your computer again, make sure to disable the antivirus or security program and once the Windows Update is done, don’t forget to enable the antivirus program back again.
Option 4 – Try to run the Windows Update Troubleshooter
Running the built-in Windows Update troubleshooter could also help you resolve the Windows Update error 0x80073712. To run it, go to Settings and then select Troubleshoot from the options. From there, click on Windows Update and then click the “Run the troubleshooter” button.
Option 5 – Try to do the Update in a Clean Boot state
Putting your PC in a Clean Boot state can also help you install Windows Updates or Upgrades without any trouble because, during this state, you can start the system with a minimum number of drivers and startup programs that will surely help you in isolating the root cause of the issue.
Log onto your PC as an administrator.
Type in MSConfig in the Start Search to open the System Configuration utility.
From there, go to the General tab and click “Selective startup”.
Clear the “Load Startup items” checkbox and make sure that the “Load System Services” and “Use Original boot configuration” options are checked.
Next, click the Services tab and select the “Hide All Microsoft Services” checkbox.
Click Disable all.
Click on Apply/OK and restart your PC. (This will put your PC into a Clean Boot State. And configure Windows to use the usual startup, just simply undo the changes.)
After that, try to install the Windows Updates or upgrade again.
This post will guide you in fixing the (1058) ERROR_SERVICE_DISABLED error you can encounter when trying to launch various games. Usually, this error pops up during startup and prevents you from running the game. In fact, this error has become quite a headache for many users. Some of the games it affects are Smite, Paladins, Far Cry, and many more.
In most cases, this error is caused by missing or corrupted game files. It could also be caused by the anti-cheat utility you might have installed along with your games. Whichever the cause is, you can try to check out the possible fixes given below to resolve the (1058) ERROR_SERVICE_DISABLED error.
Option 1 – Verify the Integrity of the Game files
This is the first option you can try no matter what kind of issues you are having with Steam games.
Double click on the game’s icon located on your Desktop and then go to the Library tab in the Steam window.
From there, look for GTA V from the list of games installed in your library.
Next, right-click on its entry and select Properties.
After that, navigate to the Local Files tab and click the “Verify Integrity of Game Files” button.
Now, wait for the tool to complete checking the game’s integrity. You should see that some of the files may have been downloaded.
Reopen the game and see if it now runs properly without crashing.
Option 2 – Apply some tweaks in the Service’s startup settings
As pointed out earlier, the error can also occur due to the anti-cheat tools that were installed alongside the game. These tools are usually used by games to check if you are running something which might give you an unfair advantage over other players. These anti-cheat tools include but are not limited to BattlEye, EasyAntiCheat, and PunkBuster. The error might occur if the service’s startup settings are not correctly configured which is why you can apply some tweaks in order to resolve the problem.
Tap the Win + R keys to open the Run dialog box.
Next, type “services.msc” in the field and hit Enter or click OK to open Services.
From the list of Services, look for any of the services mentioned above such as BattlEye, EasyAntiCheat Service, or PunkBuster Service. Then right-click on the service and select Properties from the context menu.
After that, check if the service is started by checking the Service status. If it is started, click on the Stop button to stop the service and if it is already stopped, leave it as it is, at least for now.
Next, make sure that the Startup type menu in the Service’s properties is set to Automatic before you go on.
Now confirm any dialog boxes that may appear as you set the Startup type and then click on the Start button located in the middle before you exit Properties.
Note: You might get the following error message when you click on the Start button:
“Windows could not start the service on Local Computer. Error 1079: The account specified for this service differs from the account specified for other services running in the same process.”
If you got the error message above, then here’s how you can fix it:
Tap the Win + R keys to open the Run dialog box.
Next, type “services.msc” in the field and hit Enter or click OK to open Services.
From the list of Services, look for any of the services mentioned above such as BattlEye, EasyAntiCheat Service, or PunkBuster Service. Then right-click on the service and select Properties from the context menu.
Now go to the Log On tab and click on the “Browse…” button.
After that, type in your account’s name under the “Enter the object name to select” box and click on Check Names then wait for the name to be recognized.
Then click OK once you’re done and type in the password in the Password field when you are prompted to do so. This should resolve the issue.
Option 3 – Try reinstalling the Anti-cheat program
If the first two options did not work out, you can try reinstalling the anti-cheat program.
Open Steam from your Desktop or by searching for it in the Start menu.
After opening the Steam client, go to the Library tab in the Steam window and then look for the Rust entry from the list.
Next, right-click on the game’s icon in the library and select Properties.
Now go to the Local Files tab under Properties and click the Browse Local Files button.
From there, look for BattlEye, EasyAntiCheat, or PunkBuster folder depending on the game, and then double click on it to open the folder.
Then right-click on EasyAntiCheat_setup.exe or the BattlEye installed file in the folder or PunkBuster and select the Run as administrator option.
Exit the Steam client by clicking Steam > Exit from the menu located at the top.
It really sucks when you can’t fully enjoy the newest version of your favorite OS.
Windows 11 is still relatively fresh and consequently has some annoying little bugs that really ruin our experience. The good news is that you’re not alone and most of them are easy to fix.
Here are 5 commonly reported Windows 11 issues and what you can do to get rid of them.
1. Windows 11 audio problems
One of the absolute most irritating things in the world is struggling with the sound on your computer. Windows 11 users have reported facing the issue of low or no sound. If you’re currently experiencing the same frustration, you can be relieved. Chances are fixing it will only take a few minutes.
The first thing to check would be whether you accidentally muted your device by pressing the mute button on your keyboard. Yes, we know it sounds a lot like the old “have you tried turning it off and on again?” But it’s important to leave no stone unturned, and the most obvious things are usually the ones we easily overlook.
Moreover, if you have several audio output sources, check whether the right one is selected. You can do this via the Action Center or through Settings. If you want to use the same source every time, we also recommend you set it as the default one.
It’s also important to have a good, up-to-date audio driver. More often than not, this will be the true cause of your audio struggles. Make sure to update your driver, and if that doesn’t work out, you can always un- and reinstall it or install a different one.
Lastly, if all attempts remain unsuccessful, run the audio troubleshooter to figure out what’s actually going wrong.
2. Unable to find files
Such a powerful new operating system, yet it can’t seem to do the simplest thing imaginable? The File Explorer not responding on Windows 11 is one of the most frustrating and most common problems with Microsoft’s newest iteration of its awesome OS.
However, 9/10 times it can be fixed by simply restarting your PC. You could also try killing the Windows Explorer process in the Task Manager and then rerunning it.
If these don’t help, check whether there are any pending Windows 11 updates. A single missing update can compromise your PC’s functionality, so always make sure to install them all on time.
Should none of that work, then there are other ways to solve the File Explorer problem. However, then the issue is probably a bit deeper and it’s no longer in the ‘easy fix’ territory.
3. Start menu not working
Just like the File Explorer, the Start menu is a fundamental element of your OS. So, it’s only natural that its malfunction grinds your gears. It may be more customizable than on previous Windows versions, but it doesn’t always work smoothly.
If you’re facing the so-called Start menu critical error, there are a few things this could be caused by. Usually it means you turned off your system while an important update was still being installed, there is a corrupt file on your PC, or Windows forcefully stopped a program.
Whatever the reason, the solution should be pretty simple. Try the basic steps: restarting your File Explorer (like we explained above) and signing out and back into your account. If that doesn’t do anything, you may want to try uninstalling third-party start menu apps (if you have any), since they can interfere with your default programs’ functionality.
Now, those are the easy fixes. If you get nowhere with them, you might need to identify the root cause and search for more complex solutions than that.
4. Snipping tool not working
Our beloved screenshot tool was introduced with Windows 10 and Microsoft decided to keep it. However, you were probably just as disappointed as us when you tried to run it and failed.
Normally, this can be fixed by installing the latest Out-of-band (OOB) update, or even pending updates in general. Even if your system appears to be up-to-date, run the checker just in case.
Another cool thing Windows 11 lets you do is ‘Repair’ and ‘Reset’, which is the easiest way to troubleshoot your Snipping tool. If this fails, you can also try the good old un- and reinstall method. Simply uninstall the tool through the Control Panel and reinstall it from the Microsoft Store.
Furthermore, in the case of an upgrade from Windows 10 to 11, it may be that the old Snipping tool version is interfering with the launch of the new one. If you don’t care that much about the additional options available with the enhanced screenshot tool, you can use the old version instead.
Simply go to your C Drive, find the Windows.old folder, search for the tool and open it from there. Make sure to pin it to your taskbar as well, if you know you’re going to use it often.
5. Can’t install the latest update
The latest Windows 11 version, 22H2, has brought tons of enhancements to our dearest operating system. Unfortunately, a lot of users still haven’t had the opportunity to experience it. A mere update of your OS version should be the one thing that goes smoothly, but sometimes that’s not the case.
Failure to install 22H2 can be caused by a few things. Most commonly, the issue is caused by lack of storage space or corrupted files, but there could be other culprits.
There are a couple of things you could try. For example, it’s crucial that your drivers be up-to-date and some important services be enabled. These are: Windows Modules Installer, Background Intelligent Transfer Service, Cryptographic Service, Windows Update services.
To enable them, search ‘Services’, find the service you need and right-click on it. Open ‘Properties’ and select the startup type ‘Automatic’.
It may also be necessary to unplug all peripherals that aren’t crucial and disable third-party antivirus tools until after the update is finished.
Ultimately, you can run the Windows Update troubleshooter to detect and fix other possible issues.
Summary
Tiny bugs like these are nothing out of the ordinary. That said, we still all hate when they happen.
Hopefully some of our solutions have helped you to a smoother Windows 11 experience. But if you’re still struggling, feel free to reach out to us. We’d be happy to help!
If you are trying to update your Windows 10 computer but encounter the Windows update error 0x80244019 instead, read on as this post will help provide you some possible fixes to resolve the problem. This kind of Windows Update error is usually caused by your Windows Update settings or the Windows Update components. Many users who encountered this error reported that the update fails with the said error which keeps them from enjoying the latest features that the Windows Update brings.
In such cases, some of the common culprits for this Windows Update error are the Windows Update settings, Windows Update configuration, third-party antivirus programs, and so on. To resolve this error, you can check out the options provided below.
Option 1 – Restart your computer and try installing the Updates again
You can restart your computer and then try installing the updates once again. There are instances when a simple restart resolves Windows Update errors. Aside from that, it would also be better if you make sure that your internet connection is working and that it’s stable. And so after you restart your computer, check for updates once again and see if you’re still getting the error or not.
Option 2 – Try to change the Windows Update settings
You might also want to try tweaking the Windows Update settings. This will prevent other Microsoft products from being updated and besides, you can always turn the option back on afterward. To change Windows Update settings, follow these steps:
Tap the Win + I keys to open Settings.
Next, go to Updates and Security and click on the Advanced Options.
From there, turn off the “Get me updates for other Microsoft products when I update Windows” option.
Option 3 – Run the Windows Update Troubleshooter
Running the built-in Windows Update troubleshooter is one of the things you can first check out as it is known to automatically resolve any Windows Update errors like error code 0x80244019. To run it, Refer to these steps:
Tap the Win + I keys to open Settings.
From there, click Update and Security and go to the Troubleshoot section.
Next, select Windows Update and click the “Run the troubleshooter” button and wait until it’s finished, and then try to run Windows Update again.
Option 4 – Try to disable the third-party antivirus program
Disabling the antivirus program or any security software installed in your computer is always a good idea you can try when the Windows Update process does not go smoothly. There are times when you encounter Windows Update errors like 0x80244019 due to interference of third party antivirus programs. So before you try updating your computer again, make sure to disable the antivirus or security program and once the Windows Update is done, don’t forget to enable the antivirus program back again.
Option 5 – Try to manually install the Windows Updates
Windows Update Error 0x80244019 might be due to a Windows Update that has failed. So if it is not a feature update and only a cumulative update, you can download the Windows Update and install it manually. But first, you need to find out which update has failed, and to do so, refer to the following steps:
Go to Settings and from there go to Update and Security > View Update History.
Next, check which particular update has failed. Note that Updates that have failed to install will be displayed under the Status column which has a label of “Failed”.
After that, go to the Microsoft Download Center and look for that update using its KB number and once you find it, download and then install it manually.
Note: You can also use the Microsoft Update Catalog, a service from Microsoft that provides a list of software updates that can be distributed over a corporate network. With the help of this service, it can be easier for you to find Microsoft software updates, drivers as well as fixes.
Option 6 – Restart some Windows Update services
The first thing you have to do is to restart Windows Update-related services. Refer to the steps below to do so.
Open the WinX Menu.
From there, open Command Prompt as admin.
Then type in the following command – don’t forget to hit Enter right after typing each one of them.
net stop wuauservnet stop bits
After entering these commands, it will stop the Windows Update Service and the Background Intelligent Transfer Service.
Next, go to the C:/Windows/SoftwareDistribution folder and get rid of all the folders and files thereby tapping the Ctrl + A keys to select them all and then click on Delete. Note that if the files are in use, you won’t be able to delete them.
Once all the contents in the Software Distribution folder are deleted, restart your PC and then go back to Command Prompt and input the following commands again.
net start wuauservnet start bits
Since the folder has already been flushed, it will be populated afresh the instant your restart your computer and open Windows Update. Now try to update your computer again and see if the error is fixed or not.
Error code 0x80070422 is a Windows-based error code occurring in various versions of Windows including Windows 7, Windows 8 and Windows 8.1, and Windows 10. It usually occurs when users attempt to update Windows. A message box will appear stating that the error code has occurred. Users will notice the following common symptoms:
Inability to complete Windows updates
Error message occurring during use of Windows Update service
The error code, if left unresolved, can cause serious problems for PC users as they will be unable to access the latest updates to the Windows operating system. Such a situation can expose their system to vulnerabilities. Thus, fixing Windows 10 error code is of utmost importance.
Solution
Error Causes
Among the many reasons Error code 0x80070422 is encountered includes:
Corrupted or missing registry and DLL files
Badly or poorly installed software. The software could also be infected by a virus or Trojan
Outdated or poorly installed drivers
Further Information and Manual Repair
Fixing Windows-based error codes can be a simple process. However, in some cases, it requires specialized skills. In the case of Windows 10 error code 0x80070422 consider the two (2) main solutions available through manual repair. You may also need to consider help from a certified Windows repair technician or the use of an automated tool if you are not confident you have the skills to perform the solutions below.
Method 1: Check if Windows Update is Running Properly
One of the main reasons for error code 0x80070422 is a Windows Update service that is not running on the right settings. To verify if an issue with your Windows Update service is the source of the problem applies the following steps:
Type “Windows Update” in the search bar near the Windows home button.
Select “Windows Update settings” when this option appears. (You may also click the home button, then “Settings” followed by “Update and Security”.)
Select “Advanced Options”
(You will be given an option to choose how updates are installed.) Select Automatic.
Save settings and restart the computer.
Once these settings are in place Windows will be able to download updates automatically. This enables your machine to run more smoothly. However, if after applying the steps above, Windows 10 error code 0x80070422 is not resolved, you may proceed to solution two (2).
Method 2: Disable Internet Protocol Version 6 (IPv6)
IPv6 is the latest or most current version of Internet Protocol (IP). This provides your machine with an IP address, a crucial aspect of all communications related to the Internet. By disabling this IP some users have been able to successfully resolve Windows 10 error code 0x80070422.
Like many tasks involving Windows, there are more than one ways in which you can attempt to disable IPv6. These require different types of skills and must be approached with care, as mistakes can lead to serious issues with your machine. Methods include using Command Prompt, Registry Editor, or Control Panel.
If your experience with Windows 10 is quite limited and you are not certain of your skills choose the simplest approach as listed below.
Select Control Panel.
Choose “Network and Internet”, then “Network and Sharing Center”.
Right-click your Internet Connection. The name of your connection will be listed underneath the heading – “View your basic network connection and set up connections”.
Select “Properties” then uncheck Internet Protocol version 6 (IPv6)
Save settings by clicking OK.
Restart the computer and check if the 0x80070422 error code has been corrected.
Method 3: Using An Automated Tool
If the issue persists despite following the solutions above, the best step to take is to use an automated tool. This may not be your preferred course of action, especially since it can be difficult to ascertain the safety of certain tools found online. For this reason, choose a reputable source offering automated tools which are designed to specifically fix Windows 10 error code including error code 0x80070422.
Download and install a powerful automated tool to access the best Windows 10 error code solutions. The process is simple and includes clear instructions which enable even average Windows users to completely resolve complicated errors on their machine.
How to Stop Future Error Codes from Occurring
Though it is hard to predict when an error code will occur, each Windows 10 user can take precautionary steps to prevent other errors from occurring. This includes the following:
Ensure you download software from reputable sources to avoid viruses and other forms of malware.
Clean your registry often. The registry stores settings across all applications. Regular cleaning will your machine function more efficiently as it reduces the likelihood of issues such as crashes or system errors.
If you got the FAULTY_HARDWARE_CORRUPTED_PAGE Blue Screen error on your Windows 10 computer then it is most likely caused by various factors. It could be caused by an incomplete installation or uninstallation of some applications or program, or it could also be caused by some exploit that intervenes with the normal functioning of the computer, as well as bad sectors on the hard disk, damaged system files, malfunctioned system drivers, modified Windows Registry files, or a Blue Screen occurrence during a Windows Update and many more. Getting this bug check means that a single-bit error was found on this page. It also indicates that this is a hardware memory error and to resolve it, you need to follow the suggestions laid out below but before that, it is recommended for you to create a System Restore Point first so that if anything goes wrong, you can always go back to the previous state.
Option 1 – Run a Memory Check to test RAM
Since the problem might have something to do with hardware memory, you need to test RAM by running a Memory Check using the Windows Memory Diagnostic. Refer to these steps to do so.
Tap the Win + R keys to open the Run dialog box.
Then type “mdsched.exe” in the field and hit Enter to open the Windows Memory Diagnostic.
After that, the Windows Memory Diagnostic will give out two options such as:
Restart now and check for problems (recommended)
Check for problems the next time I start my computer
Select any of the given options. After that, your computer will restart and check for memory-based issues upon the restart. If there are any issues, it will automatically them.
Option 2 – Run the System File Checker
System File Checker or SFC is a built-in command utility that helps in restoring corrupted files as well as missing files. It replaces bad and corrupted system files with good system files that might be the cause why you’re getting the FAULTY_HARDWARE_CORRUPTED_PAGE Blue Screen error. To run the SFC command, follow the steps given below.
Tap Win + R to launch Run.
Type in cmd in the field and tap Enter.
After opening Command Prompt, type in sfc /scannow
The command will start a system scan which will take a few whiles before it finishes. Once it’s done, you could get the following results:
Windows Resource Protection did not find any integrity violations.
Windows Resource Protection found corrupt files and successfully repaired them.
Windows Resource Protection found corrupt files but was unable to fix some of them.
Option 3 – Check for conflicting or incompatible programs by putting your PC in a Clean Boot state
As mentioned, the FAULTY_HARDWARE_CORRUPTED_PAGE Blue Screen error might be caused by some problematic programs that clash with your existing operating system. Several users reported that numerous programs that are supposedly designed to enhance computer performance are causing conflict in the system instead. To identify which program is causing the problem, you need to put your computer in a Clean Boot State. To do so, follow the steps below.
Log onto your PC as an administrator.
Type in MSConfig in the Start Search to open the System Configuration utility.
From there, go to the General tab and click “Selective startup”.
Clear the “Load Startup items” checkbox and make sure that the “Load System Services” and “Use Original boot configuration” options are checked.
Next, click the Services tab and select the “Hide All Microsoft Services” checkbox.
Click Disable all.
Click on Apply/OK and restart your PC. (This will put your PC into a Clean Boot State. And configure Windows to use the usual startup, just simply undo the changes.)
From there, start to isolate the problem by checking which one of the programs you installed recently is the root cause of the problem.
Option 4 – Update or rollback drivers
If the first few options didn’t work for you, then it’s time to either update or roll back the device drivers. It is most likely that after you updated your Windows computer that your driver also needs a refresh. On the other hand, if you have just updated your device drivers then you need to roll back the drivers to their previous versions. Whichever applies to you, refer to the steps below.
Open the Devices Manager from the Win X Menu.
Then locate the device drivers and right-click on them to open the Properties.
After that, switch to the Driver tab and click on the Uninstall Device button.
Follow the screen option to completely uninstall it.
Finally, restart your computer. It will just reinstall the device drivers automatically.
Note: You can install a dedicated driver on your computer in case you have it or you could also look for it directly from the website of the manufacturer.
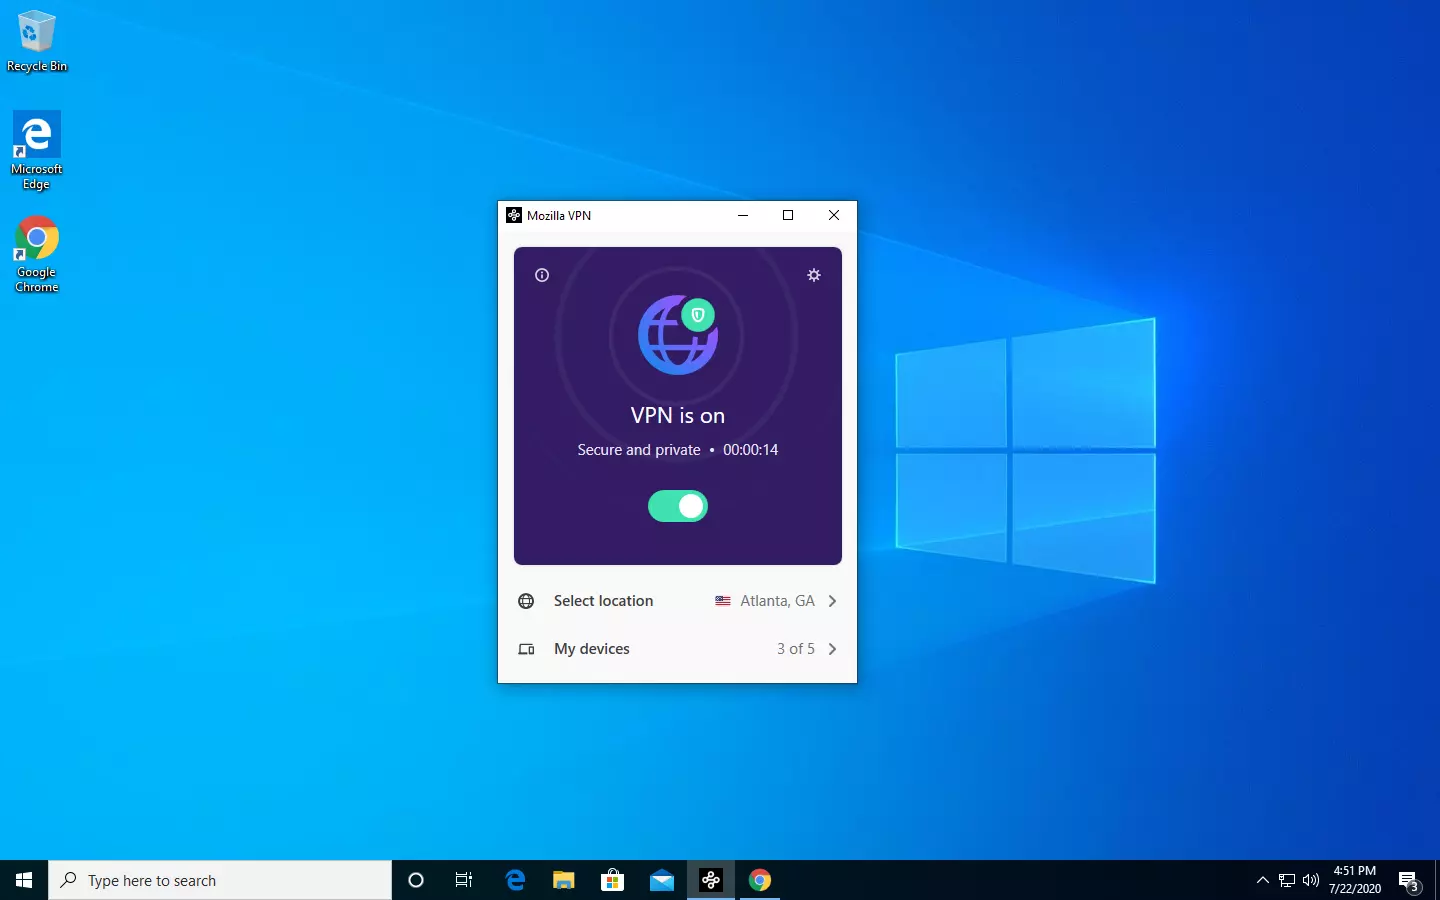
The new thing from Mozilla is not a browser, it is a VPN!
Besides Firefox, Mozilla offers now Firefox Relay, an app helping you to mask your email and phone number, and a new Mozilla VPN.
Mozilla has recently announced a new subscription model that will let you use all products together for $6.99 per month. Although this is a little more expensive than the competition that goes around for $5 per month note that with this subscription you are having access to all services, not just VPN.
VPN will not only hide your IP address but will also make sure websites cannot access your real location and it encrypts all of your network activity. Relay will give you protection against spam, serving as a shield for your email and limiting spammers from access to your real email address and phone number. With Mozilla subscription will let you use both services.
Long working hours on a laptop can have some issues with laptop heating and thus slowing down. Today we will take a look at how can you prevent it from heating and keep it in a normal temperature range so it lasts longer and works better.
Close unnecessary programs or browser tabs
Usually, the main reason for high laptop temperature is the heavy and constant workload. Of course, the solution is very simple, turn off unnecessary browser tabs or applications running in the background, and less power will be needed for operation thus directly reducing workload and temperature.
Place it on a hard flat surface
Laptops generally have vents on the side and even under them, these vents, of course, are made so hot air is disposed of through them but if they are covered that will create issues. Placing computers on textiles, pillows, and legs can obstruct their venting holes and increase heat also since they are materials that are not taking heat away.
Your best practice should be placing the laptop onto a hard flat surface so air can flow freely and if you need to keep it in your lap there are lap desks made for this purpose.
Clean the laptop
With some good cleaning, the laptop can stop overheating, and generally, it will be cooler. Vents that has for ventilation can get clogged over large periods of time due to dust which is always present. Compressed air can be a quick easy solution to open the vents and redust it. Other methods include a compressor, vacuum, or brush in order to quickly remove any dust clogs. Taking it into service for complete redusting and paste change is also a great option.
Place it on the dedicated pad
There is some disagreement about using dedicated cooling pads for laptops, some say they are not effective at all, and some swear by them but from my experience good paired laptop and pad can indeed help with cooling it down. Usually, cooling pads will come with fans that will take away heat from the laptop itself reducing its overall heat.
Change your Windows power plan
If your laptop is constantly hot but you are not doing much with him check Windows power settings. There is a good chance it is set to run on a high-performance plan and if this is the case switch it back to a balanced power setting. Power plan like high performance will drain more power and more power will mean more heating. Of course, this will affect performance as well but for regular work that excludes some power gaming, video, and picture manipulations and other demanding tasks this power plan will work just fine.
Take control of the fans inside your laptop
Internal cooling is important and sometimes fans are not running to their full capacity so increasing their speed or changing their plan of work can cool down the computer nicely. Some laptops have fans controlling application already on them, especially gaming laptops but most of them do not. If your laptop does not have it, go to your laptop brand website and see if such an application exists for your model, if it does, download and install it but if there is no such application try general free ones like SpeedFan or Argus Monitor.
Reduce voltage of CPU and GPU
How more power means more heat, reducing the power that CPU and/or GPU take can be reduced inside BIOS by lowering voltage of these 2 components. First, go to BIOS and write down the voltage that is currently assigned to your CPU and/or GPU so you can bring it back if ever needed, also take note that reducing voltage and thus power will not affect negatively your components but increasing it thus overclocking can and will so be careful when bringing voltage back not to overdo it. You can always also reset your BIOS settings to bring them back to factory settings.
Do not use the laptop when charging it
When the laptop is placed on the charger in order to be charged and used at the same time, more power is drawn to it, and since the battery is taking electric charge instead of providing it more heat will be generated now since two different sources will be generating it, the battery itself and computer. When you really can not wait for the laptop to be charged, use it, but turn it off and wait to be fully charged if you can.
Website breaches and stealing user data is nothing new in the world of the internet. Although a very unpleasant experience it still happens even on some high-quality websites. In this article, we will not focus on how can you not be the target of this kind of attack, because you really cannot. Weel you can kind of if you decide not to have your data on websites at all, but let's just say that is not something you are willing to do.
So, in this case, you have some social, forum, or gaming accounts but you heard that service has been breached and that your email or password might be stolen. Well in this case all you need to do is of course to login into the service and change your password. But, what happens if you are not aware at all that service has been compromised?
Mozilla foundation has asked themselves this same question it seems and they have decided to help us out. They have placed a free online service where you can just by typing in your email address find out if your email or data has been compromised in any way.
Go to https://monitor.firefox.com/ and check it out, if you find out that there is some website that you did not know was breached, change your password right away, and if you have used the same password for anything else (I hope not), change them as well.
 When opened you will be greeted with general settings window. These are settings for power toys themselves, Here you can check for updates, change the looks of power toys, run it on system startup and run them as administrator. Set them up so they best suit your needs.
 The color picker will let you as the name suggests pick colors, it will sample colors from running applications and windows, snap their values, and place them in the clipboard. A useful application if you are working as a graphic designer, want to create some cool word document, or just want to compare the difference between colors.
 FancyZones is a window manager utility for arranging and snapping windows into efficient layouts to improve the speed of your workflow and restore layouts quickly. FancyZones allows the user to define a set of window locations for a desktop that are drag targets for windows. When the user drags a window into a zone, the window is resized and repositioned to fill that zone. When first launched, the zones editor presents a list of layouts that can be adjusted by how many windows are on the monitor. Choosing a layout shows a preview of that layout on the monitor. The selected layout is applied automatically.
 Only 3 options here but maybe some are important to you. This extension lets you enable SVG file preview in File Explorer, enable Markdown preview, and enable SVG thumbnails. Turn on each one you might need.
 Image Resizer is a Windows shell extension for bulk image-resizing. After installing PowerToys, right-click on one or more selected image files in File Explorer, and then select Resize pictures from the menu. You can specify your own sizes if you want, you can resize when dragging files, you can overwrite files or make new copies of new sizes, and many more options. A very useful tool I am sure plenty of users can use since this eliminates the need for pictures or any other image application for common resizing tasks.
 The PowerToys Keyboard Manager enables you to redefine keys on your keyboard. For example, you can exchange the letter A for the letter D on your keyboard. When you select the A key, a D will display. You can also exchange shortcut key combinations. For example, the shortcut key, Ctrl+C, will copy the text in Microsoft Word. With the PowerToys Keyboard Manager utility, you can exchange that shortcut for ⊞ Win+C). Now, ⊞ Win+C) will copy text. If you do not specify a targeted application in PowerToys Keyboard Manager, the shortcut exchange will be applied globally across Windows. PowerToys Keyboard Manager must be enabled (with PowerToys running in the background) for remapped keys and shortcuts to be applied. If PowerToys is not running, key remapping will no longer be applied.
 PowerRename is a bulk renaming tool that enables you to:
 PowerToys Run is a quick launcher for power users that contains some additional features without sacrificing performance.
 This guide uses PowerToys to display common keyboard shortcuts that use the Windows ⊞ key. Windows key keyboard shortcuts can be used while the guide is being shown and the result of those shortcuts (active window moved, arrow shortcut behavior changes, etc) will be displayed in the guide. Releasing the Windows ⊞ key will make the overlay disappear. Tapping the Windows ⊞ key will display the Windows Start menu.


 So, in this case, you have some social, forum, or gaming accounts but you heard that service has been breached and that your email or password might be stolen. Well in this case all you need to do is of course to login into the service and change your password. But, what happens if you are not aware at all that service has been compromised?