So, you have finished with work, game, movie, music, email, or whatever on your PC, you look at the clock, it is late, you decide to go to sleep or outside, you click on the power button and choose shutdown. Now when a PC is shut down you feel good and go with your business but the next time you power it up you get the same error like the computer never really shut down in the first place. You wonder why and reboot it, just in case and all of the sudden error is gone.
If something similar has happened to you or you had the feeling that after shutting down your computer has not really felt like shutting it down, do not seek professional help, everything is OK with you because when you click on shut down, your computer does not really shut down!
Truth is that Microsoft has changed how to shut down works and how rebooting works in Windows with an update but has not publicly said anything about it so some users may experience this feeling of not shutdown phenomenon and might even think there is something wrong with their PC.
Why this change?
A few years ago shutdown button and option in Windows were really shutting down OS, but things changed when Microsoft wanted to increase boot-up speed. Now when that decision was made shutdown option was changed. So, what was changed? Well in order to increase Windows booting time, the shutdown will now turn off power to PC components and it will look like everything is indeed shutdown but the Windows kernel will actually be saved to a hard drive with all settings and just awaken once the PC is turned back ON. This will result in all errors and other stuff being just still present same as they were once the system was instructed to be turned off.
Rebooting your PC will now clear kernel and file from the hard drive and you will get a clean system startup without any issues tied with the kernel itself.
Workaround
Now that we know why and what change has been made to Windows logical question is can we shut down our PC at all properly? Luckily for us, the answer is yes and we will not need any external application to do it, we can still do it inside Windows itself and it is quite quick and easy.
Bringing back the old shutdown
In order to bring the old shutdown functionality of your PC please follow the instructions but be aware that by doing this your PC will boot a little bit slower since it will have to load the kernel from scratch each time computer is turned ON.
First thing is to go to settings and go to System
Then once you are inside the system, navigate to the power and sleep and click on it to select it. Once you have it selected to all the way to the right and click on additional power settings.
When you click on advanced power settings you should be led to the control panel's power options. Inside this panel click on top left link where it says Choose what the power button does.
Inside options, you will need to untick the box next to Turn on fast startup (recommended), this option has been ticked ON by the Windows update and probably without notifying you. Option means exactly what was described, it will save kernel state on the hard drive for faster boot time but sadly it can cause some issues since it will never be reloaded from 0.
If you are unable to uncheck the box click on the text beside the shield icon that says: Change settings that are currently unavailable (you will have to be logged in as administrator).
Conclusion
Altho turning off fast startup and shutting down the PC completely will for sure extend your bootup time I still believe that it is the right choice since sometimes a lot of clutter and bad things accumulate over time inside the OS and can cause a vast variety of problems in a long run. So stay safe and shut down that PC as it used to be in the past.
Hacker group recently came up with claims that they have stolen data from 100 million T-Mobile customers. T-Mobile has responded with confirmation it has been compromised and that over 40 million records were stolen, among them are not just present customers, but anyone who has applied for T-Mobile service as well as past accounts.
What has been stolen?
Report from T-Mobile states that stolen records included first and last name, date of birth, social security number, driver’s license & ID information. The company said that it has “no indication that the data contained in the stolen files included any customer financial information, credit card information, debit or other payment information.” Not really a reassuring statement meaning that they really do not know, but even if the statement is true, already stolen information is as much if even not more damaging and devastating as payment information.
What T-Mobile is planning to do now?
It is stated that the hole used for the hack has been addressed and closed so no more data can be stolen.
Considering people that had their personal information compromised, T-Mobile said it is planning to reach out to them and offer them two years of free identity protection through McAfee’s ID Theft Protection Service.
Additionally, T-Mobile recommends postpaid customers change their PIN by going online into their T-Mobile account or calling T-Mobile customer service by dialing 611 on their phone. The company also recommends a feature called Account Takeover Protection that prevents unauthorized individuals from stealing a phone number and porting it out of T-Mobile.
Finally, the company will publish a website “for one-stop information and solutions to help customers take steps to further protect themselves.”
Libmysql.dll is missing or not found error appears in Windows when the user is trying to open and run the application.
In this guide, we will offer you solutions on how to fix and remove this annoying error.
Check recycle bin
Some applications or purely by accident itself libmysql.dll gets deleted. If you have not turned recycle bin off go to it and check to see if the file is by any chance there. If you find it, right-click on it, choose restore, the error will be gone.
Update drivers
Press ⊞ WINDOWS + X to open the Windows menu and click on Device manager
In device manager locate device which has alert mark next to it
Right-click on it and choose update driverReboot your computer
Run SFC scan
Press ⊞ WINDOWS + X and choose command prompt (admin)
In command prompt type in sfc /scannow and press ENTERwait for the operation to complete and Reboot your system
Reinstall application
if you are getting an error only on one application or an error has started to appear after the installation of a particular application go to Windows applications, uninstall it and then install it again. There is a chance that the file has been corrupted during the installation process.
0x00000050 is a type of stop error code. It is also known as a Blue Screen of Death error. It usually occurs when you try to start your PC or load a program. It can also occur while running a program.
This error may also pop up when you restart your PC after installing Windows XP Service Pack (SP1) on your computer. Unlike some PC related errors, 0x00000050 error code occurs without any warning.
The stop 0x00000050 error is displayed in a blue screen and interrupts you from carrying your desired activities on your PC smoothly. This error message is prompted in the following format:
Stop 0x00000050 error code may pop up on your Windows computer screen due to multiple causes. The most common causes for this error code include:
Poor PC maintenance
Registry issues- Bad registry keys, invalid entries, corrupt and damaged registry
Incompatible DLL files
Corruption of system files- Pool corruption in the Srvnet.sys file
Spyware and viruses
Overheating of PC components
The conflict between Windows XP SP1 and the display adapter drivers that are currently installed on your PC.
It is advisable to resolve 0x00000050 error code on your PC right away. BSOD errors are fatal errors and can pose serious threats to your PC. If not fixed timely it can lead to system crash, failure and valuable data loss.
Further Information and Manual Repair
To prevent data loss and system failure, there are some effective methods to resolve Stop 0x00000050 error code on your PC. To implement these solutions on your PC, you don’t need to be a technical whiz or a computer programmer.
Method One
If the error cause is the conflict between Windows XP SP1 and the display adapter drivers then here’s what you need to do to resolve it:
First start Windows in safe mode. To do this, restart your computer and press F8. On the Windows Advanced Options Menu, use the arrow keys to select Safe Mode.
Once you select it press enter. Now use the arrow keys to select the operating system, press enter to start your computer in safe mode.
Go to Start, click Run and then type ’msinfo32’ in the open box and press OK to continue. Then under the System Summary option, expand Components and then click Display to note the information that corresponds to the INF File Item. And then simply quit the utility.
After that, go to the start menu again and then the My Computer and Properties option.
Press the Hardware Tab and then click the Device Manager tab. Go to the ‘Display Adapters’ option and press the option ‘Uninstall. To confirm action press OK.
Once again, go to the start menu and run and then type the following commands as illustrated below and after each command press enter.
ren %systemroot%infINF file name from Step 5.inf *inf.old
ren %systemroot%infINF file name from Step 5.pnf *pnf.old
This procedure may look pretty lengthy but it is worth it. Once you insert the commands, close all open windows and then reboot your system. Now download the latest drivers for your display adapter and install them. This will hopefully resolve the 0x00000050 error code on your system.
Method Two
Sometimes 0x00000050 BSOD error may occur due to temporary issues like overheating PC components. In times like these, all you need to do to fix the issue is to switch off your computer and allow the components to cool down. Try starting your PC after a few hours.
Method Three
If the issue is triggered by malware, then it is advisable to download a powerful antivirus. Scan your entire PC to detect and remove viruses affecting your PC and generating BSOD errors on your system.
Method Four
However, if the error still persists after trying all the methods stated above, then this means the cause of the error is deep-rooted. It is related to the Windows registry. Registry stores all your system files and activities performed on your PC. It usually gets damaged and corrupt if it is not cleaned frequently.
The registry loads with unnecessary and obsolete files like junk files, cookies, internet history, bad registry keys and invalid entries. These files if not removed, accumulate and damage the registry, DLL files, and system files too thereby generate BSoD errors like 0x00000050 error messages.
You can clean and repair the registry manually but it requires a great deal of expertise.
The ideal and easiest way to clean it is to download Restoro. This is highly functional and easy-to-use software. It is embedded with multiple powerful utilities including such as a registry cleaner, an antivirus and a system optimizer.
The registry cleaning feature scans for all errors related to the registry. It removes obsolete files, invalid entries, restores damaged DLL and system files.
The antivirus feature simultaneously detects and removes all kinds of malware. These include viruses, Trojans, spyware, and adware affecting your PC. While the system optimizer feature ensures that your PC functions at its optimum speed.
It is a safe and powerful PC Fixer. It has a user-friendly interface and compatible with all Windows versions.
Click here to download Restoro and Fix Error 0x00000050
Windows updates have become a regular occurrence in our digital lives. They are frequent and have become quite necessary. Most of the time they bring us quality content like fixed security, resolved bugs, and even new features but from time to time update itself can be not downloaded properly or it can have some issues when installing. Windows Update Error 0x800F0825 is one of these update errors that will be reported seemingly after applying the update.
Altho annoying error it is nothing system breaking and can be easily resolved.
Hello and welcome everyone, today we will provide you with solutions on how to resolve error 0x800F0825 when trying to complete a Windows update.
Run Windows troubleshooter
Built-in Windows troubleshooter can help a lot in resolving these issues and we will try it as a first solution because of its simplicity and ease of use.
Click on START
Click on settings
Navigate to Update & Security > Troubleshoot > Additional Troubleshooter > Windows Update
Click on Run the troubleshooter
Follow onscreen instructions and let the troubleshooter try to solve the issue
Clear contents of SoftwareDistribution & Catroot2 folders
Altho SoftwareDistribution and Catroot2 folders are essential for the update process it can happen that badly downloaded updates or similar corruption can be stored there and thus producing this error.
Open file explorer and locate these two folders, go inside and delete content inside them
Try updating again to see if corruption inside folders was the issue.
Update manually
If the previous two solutions have not produced a result and the error is still present then go to the official Microsoft Update Catalog and download the update manually
The catalog is here.
Search for updates from the Windows Update Catalog In the Search box, type your search terms. You can carry out a full-text search, using a keyword, KB article, MSRC bulletin, driver manufacturer, driver model, driver version, product, and a classification. Select the appropriate version of Windows. Search or click on Advanced Search if you want to refine your search. A list will be displayed. Select the updates that you want to download. Click Add for each selection to add it to the download basket.
Download the updates. You may be asked to install an Active-X download control to be able to download files from this site
Double-click on the downloaded updates to install them
Administrators can download updates from the Microsoft Download Center or the Windows Update Catalog to deploy to multiple computersIf you are running Windows Server Update Services (WSUS) 3.0, System Center Essentials (SCE), or System Center Configuration Manager (SCCM) you can import updates directly into these applications. Security updates, critical updates, service packs, update rollups, definition updates, and critical drivers can be configured to synchronize with your server automatically. You can still import these updates into your application by using Microsoft Update Catalog; however, depending on how you configure WSUS, SCE, and SCCM, you may not need to import the updates.
Disable system protection
In some rare cases, antivirus or firewall could interfere with both downloads and execution of certain files. If each previous solution failed disable temporarily your security software and try executing the update again.
In an operating system, it is ideal for an administrator to have permission to access all the folders and files. However, there are times when you try to access the security settings or attempt to view the properties of a file, you could encounter an error saying, “You do not have permission to view this object’s security properties, even as an administrative user”.
This kind of error may be caused by several reasons. For one, if your computer is infected with a virus or malware which might have caused some changes to the concerned folder or file. It could also occur if a program or service is using the folder or file simultaneously which explains why you’re not able to access the system. It could also be that the folder or file might have been owned by a user account that no longer exists or you might not have the permissions to view the targeted folder or file even though you’re logged in as administrator.
To fix the “You do not have permission to view this object’s security properties, even as an administrative user” error, here are some options that might help.
Option 1 – Put your computer in a Clean Boot State
You can also troubleshoot the problem in a Clean Boot state. It could be that there are some third-party applications in your computer that’re preventing you from accessing security settings or properties of a file and to isolate this possibility, you need to boot your computer in a Clean Boot State and then try installing the program again. Putting your computer in this state can help you identify which program is the culprit and thus isolates the problem. In a Clean Boot state, your computer will start using only the pre-selected minimal set of drivers and startup programs. Note that you have to disable and enable one process at a time.
Log onto your PC as an administrator.
Type in MSConfig in the Start Search to open the System Configuration utility.
From there, go to the General tab and click “Selective startup”.
Clear the “Load Startup items” check box and make sure that the “Load System Services” and “Use Original boot configuration” options are checked.
Next, click the Services tab and select the “Hide All Microsoft Services” check box.
Click Disable all.
Click on Apply/OK and restart your PC. (This will put your PC into a Clean Boot State. And configure Windows to use the usual startup, just simply undo the changes.)
After you’ve set your computer into a Clean Boot State, try to check if the error is now fixed and that you can now view the Properties.
Option 2 – Try booting your computer into Safe Mode and delete inactive users
Aside from the Clean Boot State, you can also reboot your computer in Safe Mode and then delete all the inactive users. There are instances when the folder was created or owned by a user account that’s either deleted or inactive now and so you need to get rid of these inactive user accounts to resolve the error.
First, boot your computer in Safe Mode.
Then right-click on the concerned folder or file and select Properties.
Next, select Advanced in the Security tab and click on Add.
A new window will appear and from there, click on “Select a principal”.
And then type the name of the user to who you wish to give permissions in the “Enter the object name to select” box.
Now select Check Names and this would resolve the user name.
After that, click OK to save the settings. This will close the window and take you back to the previous one.
Next, from the drop-down menu, change the Type to Allow and select the Full Control checkbox.
Click OK to save the changes made and then restart your computer in a normal mode.
Option 3 – Try to take ownership of the folder or file
Another thing you can do to fix the problem is to take ownership and force the system into giving permissions to the Administrator. How? Refer to these steps:
Type “command prompt” in the Windows Search bar and then right-click on the relevant search result and select “Run as administrator”.
After that, if a User Account Control or UAC prompt appears, just click on Yes to proceed.
Next, type and enter this command: TAKEOWN /F <path>
Note that the <path> is the location of the folder or file in File Explorer.
Now type and enter this second command: ICACLS <path> /grant administrators:F
Finally, once the command has been executed, restart your computer and then see if you can now access the folder or file.
Option 4 – Try scanning your computer using Windows Defender
As mentioned, the error when accessing the security settings or properties of a folder or file might be due to a virus or malware. It could be that it had made some modifications that prevents you from accessing security settings or properties. To eliminate it, you have to scan your computer using security programs like Windows Defender.
Tap the Win + I keys to open Update & Security.
Then click on the Windows Security option and open Windows Defender Security Center.
Next, click on Virus & threat protection > Run a new advanced scan.
Now make sure that Full Scan is selected from the menu and then click the Scan Now button to get started.
The File Explorer in Windows 10 provides several ways to organize the contents of folders and files in the system. Windows users can utilize some efficient styles to view the contents of the file system as per the user’s requirement. A user may opt to display the file picture in large size thumbnails while the other one could opt to set the icons of folder and files in a small or medium size list. On the other hand, while setting up several styles for the folder and file icons, some Windows 10 users have experienced some unusual issues where there is the Black background showing up behind folder icons. They tried refreshing the File Explorer a couple of times but it didn’t help in fixing the problem and the black squares are still visible on some folder icons.
The black squares behind the folder icons might look disturbing though it’s not really a big problem and is merely a graphical glitch that does not cause any damage or whatsoever to the content of the folder and files. The most likely cause of this glitch might have something to do with the corrupted system files or it could also be caused by outdated thumbnail caches. In addition, graphical glitches like this one could also occur if you are using out outdated graphics drivers. To fix this problem, you need to follow the options laid out below.
Option 1 – Try using the Disk Cleanup to remove Thumbnail files
The Disk Cleanup tool is one of the options you can try to fix the black squares behind the folder icons. Through this tool, you can delete all the Thumbnail files on your disk. To use it, refer to these steps:
Open the Search bar and type “disk cleanup” in the field.
After opening Disk Cleanup from the search results, then from the drop-down menu select the C: drive to clean up and click OK.
Wait for the scanning process to complete. Once it’s done, select the files you want to delete.
Ensure that you select the box labeled “Thumbnails” under the Files to Delete section then click on OK.
After that, a confirmation box will appear, just click on Delete files to delete the files permanently.
Restart your PC.
Option 2 – Try resetting the Thumbnail cache
You have the option to manually delete the Thumbnail Cache to resolve the black square background behind the folder icons issue. Follow the steps given below to reset the Thumbnail cache.
Open the File Explorer.
Next, navigate to the View tab and select the option with Hidden items to display all the hidden folders and files.
Next, go to this path: C:Users<username>AppDataLocal
In the given path, make sure that you put your actual username in the username field. Then look for a file named “IconCache.db”. Right-click on this file and click on Delete.
After that, go to this path: C:Users<username>AppDataLocalMicrosoftWindowsExplorer
From there, select all the files and delete them.
Note: If a prompt appears saying, “The files are in use and cannot be deleted”, simply select the “Do this for all current items” option and then click on Try Again. If you get an error message, click on Cancel to close the window and restart your computer.
Option 3 – Try updating or reinstalling the Graphics driver
Tap the Win + R keys to open the Run dialog box and then type in devmgmt.msc and tap Enter or click OK to open the Device Manager.
Expand the section for the outdated device drivers.
And then select the outdated driver(s) and right-click on it/them.
From the drop-down menu, select the Update Driver option if you wish to update the driver or select the Uninstall device if you want to uninstall the driver and then follow the on-screen instructions to install the latest version of the driver.
Restart your PC after the installation to allow the system to reinstall the driver.
If the Sleep option is missing from the Power Menu then this could be caused by the power settings, local group policy configuration, etc. in your computer. Based on the reports of users who experience the same problem, the issue occurred after they’ve updated or upgraded their Windows 10 computers.
As you know, the sleep mode is quite useful in certain cases and is utilized by most users. If you put your computer in sleep mode, it actually minimizes the power usage of your computer while at the same time keeps your current session running. So if sleep mode is suddenly missing, then that could be a problem but worry not for this post will give you possible fixes to resolve the issue. Make sure to follow each one of them carefully to achieve good results.
Option 1 – Check the Power settings
As mentioned, one of the reasons why the Sleep option is missing could be the power settings in your computer. To check this possibility, make sure that you’ve enabled the sleep mode in the Power options setting window. How? Refer to these steps:
First, go to the Start menu, and from there open Control Panel.
Next, set the View by Large icons and select the Power Options.
After that, click on the “Choose what the power buttons do” option on the left-hand side.
Then click on the “Change settings that are currently unavailable” option and make sure that Sleep is checked under the Shutdown settings.
Afterward, click on Save changes.
Option 2 – Modify the Local Group Policy
If the Power setting isn’t the cause of the problem, then you might want to check the Local Group Policy and modify it. There is a dedicated policy for showing the sleep option in the power menu and if this policy is disabled, then it’s no wonder why you don’t see the sleep option in the power menu. To change this policy, refer to the steps below.
Tap the Win + R keys to open the Run dialog box.
Then type “gpedit.msc” in the field and hit Enter to open the Group Policy Editor.
Next, navigate to this path: Computer Configuration -> Administrative Templates -> Windows Components -> File Explorer
Look for the “Show sleep in the power options menu” option from the right-hand side pane and double click on it.
Now change it to Enabled and click on the Apply and OK buttons to save the changes made and restart your computer.
Option 3 – Try to turn on Standby
Standby, also known as InstantGo, is a feature in Windows 8 and 10 that allows users to maintain network connectivity after a computer has been put into sleep mode. Thus, if this feature is disabled, it can cause the Sleep option to disappear from the power menu. To turn it on, follow these steps:
Tap the Win + R keys to open Run.
And type “Regedit” in the field and tap Enter to open the Registry Editor.
Next, navigate to this path: HKEY_LOCAL_MACHINESYSTEMCurrentControlSetControlPower
From this path, look for the “CsEnabled” key on the right-hand side of the pane and double-click on it.
Set its value to “1” and click OK to save the changes made.
Now reboot your PC.
Note: If you were not able to find the CsEnabled key, then this indicates that your computer does not support the Standby feature. And if that’s the case, proceed to the next given option below.
Option 4 – Try to install a Video Card driver
On the other hand, some users reported that the problem was caused by the video card driver. And if your computer lacks the video adapter driver, it can also cause the same problem. Windows 10 typically install the video card driver on its own, however, there are rare cases when it doesn’t which is why you have to do it yourself manually. All you have to do is go to your manufacturer’s website and look for the video card driver, download it and then install it. Once you’ve installed the video card driver, reboot your computer and check if it has fixed the problem.
If your WIFI signal is strong but you can not connect to the internet then keep reading in order to find out why this happens and what can you do to fix it.
One very important thing to know and understand is that WIFI and the internet are two different things and that they altho connected and working together are basically 2 things.
WIFI is a name for a group of technologies that are using radio vawes to connect to the router in order to access the internet. The Internet itself is series of computers all connected in LAN. Think of WIFI like some invisible cable that connects your computer to the router. When we put things into perspective this way it becomes clear that we can indeed have a strong WIFI signal and that we are connected to the router but the router itself is not connected to the internet.
So basically troubleshooting an internet connection is troubleshooting the router itself. The most common approach is to reset the router, turn it off, then back on, check cables, etc. But be sure that if your WIFI signal is strong and you can not access the internet it is a router issue.
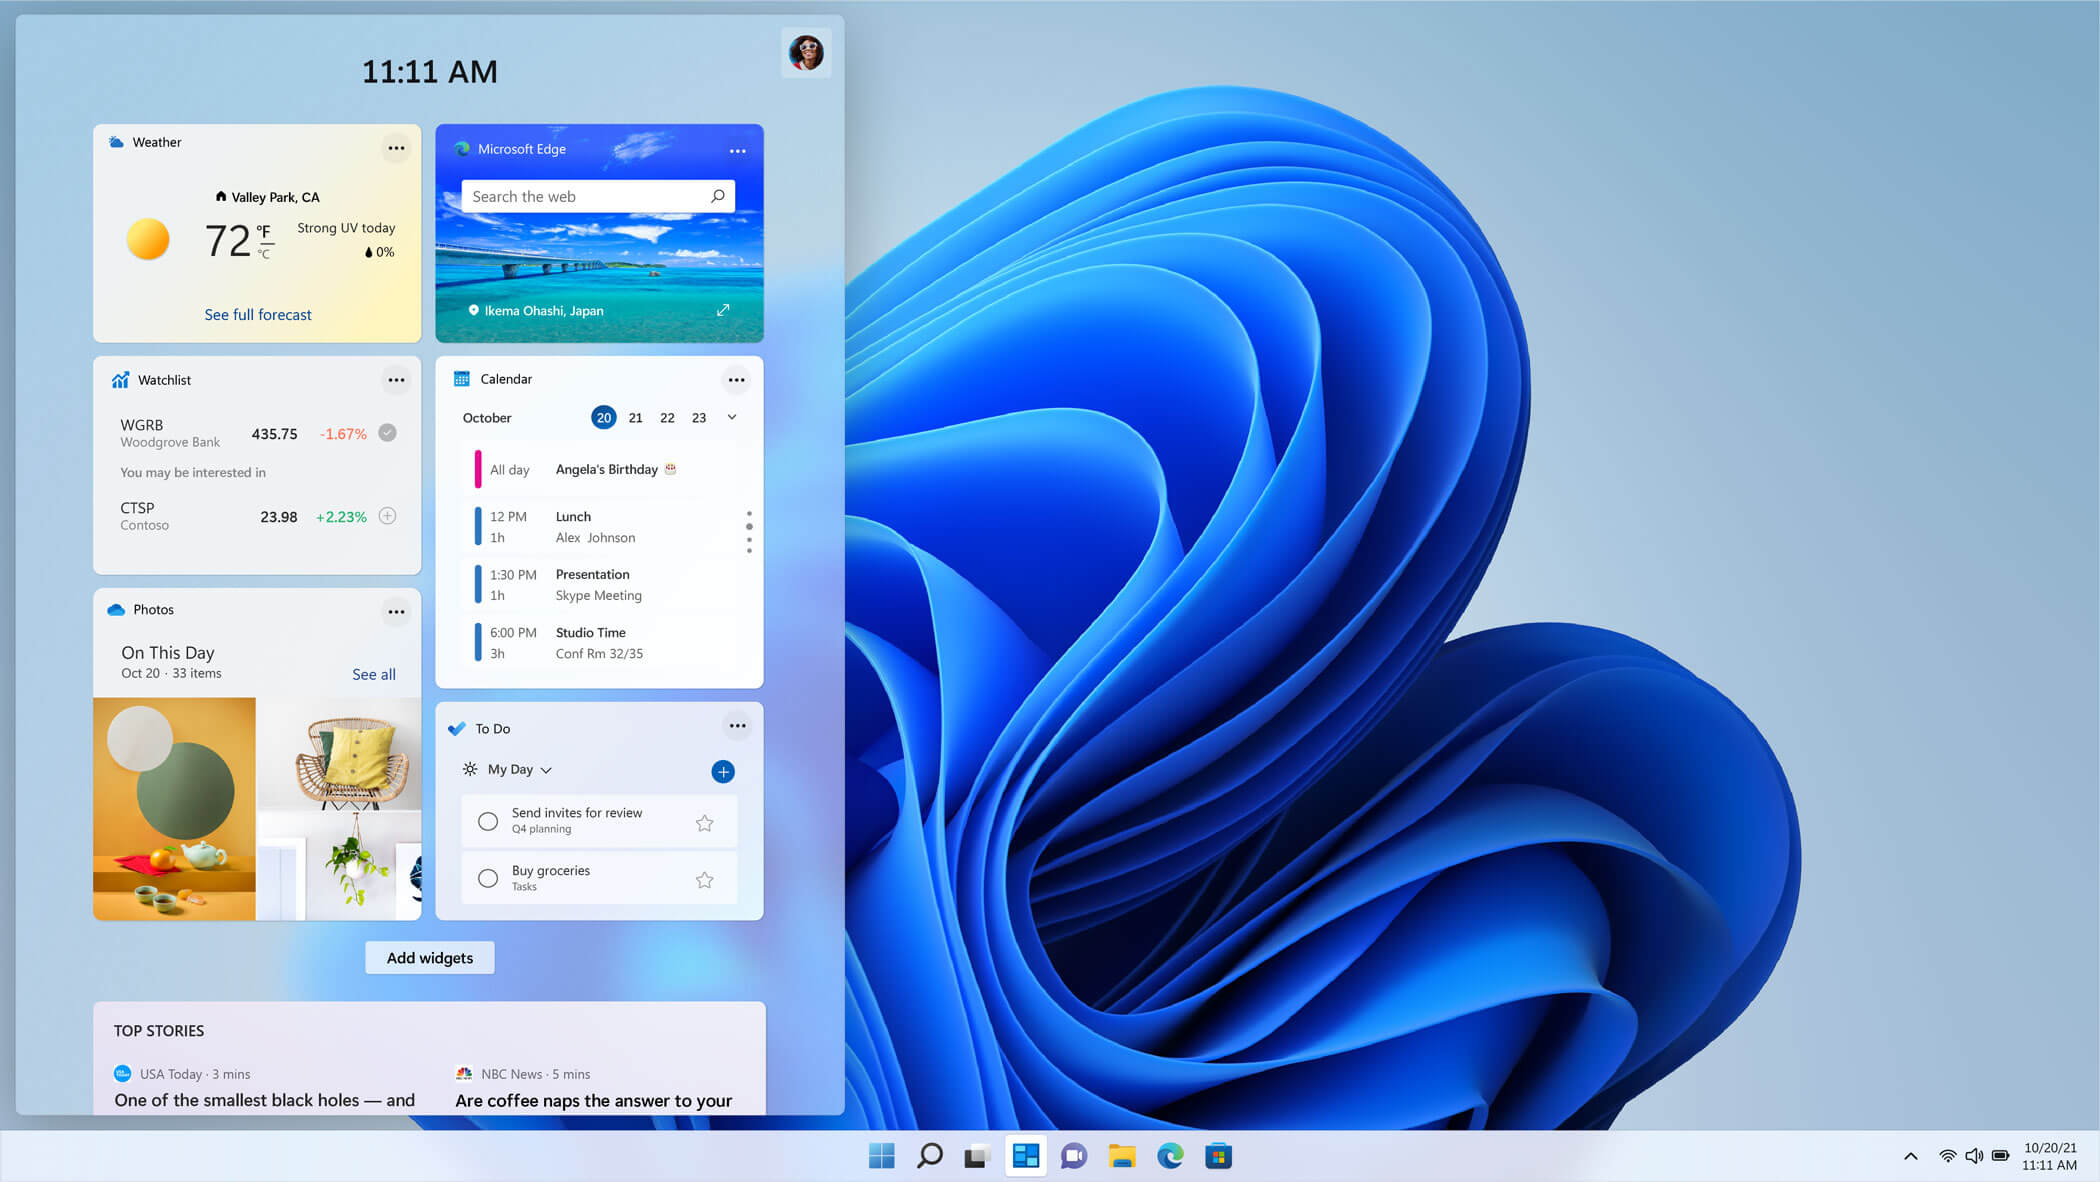
The new widget's menu inside Windows 11 is generally met with a positive attitude but there are still users which prefer not to have it. Luckily for them, Microsoft included a very easy way to turn the widgets menu on or off. Follow this easy guide to see how.
Right-click on the widget button in the taskbar and click on Hide from Taskbar and that’s it
Alternatively, you can also turn it off via the setting app.
Go to the settings app and navigate to Personalization > Taskbar > Taskbar Items and flipping the switch beside Widgets to Off.
Please note that both methods will only hide the button to toggle widgets menu, at the current state there is no really a way to actually turn it off, only hide it and make it not available to bring it up.
There are a lot of home users that often get a computer that comes installed with the Windows 10 Home. And since Windows 10 Pro offers more features and utilities compared to Windows 10 Home, a lot of users also prefer to upgrade their Windows 10 Home computers to Windows 10 Pro. However, while doing so, a number of users reported that they encountered error 0xc03f6506 and they were not able to proceed with the upgrade.
If you are one of these users, when you encounter error 0xc03f6506, you will see the following error message on your screen:
“The last product key you entered can’t be used on this copy of Windows (0xc03f6506).”
This particular error tends to occur when you go on to activate Windows 10 although it can also appear during the upgrade process. In such cases, you will see the following error message:
“Unable to upgrade your edition, We can’t upgrade your edition of Windows. Try upgrading your edition of Windows again. (0xc03f6506).”
To fix the Activation Error Code 0xc03f6506 in Windows 10, use the options provided below as references but before you proceed, make sure that you create a System Restore point first.
Option 1 – Try to use the Registry Editor
If you have already upgraded from Windows 10 Home to Windows 10 Pro and you’re having trouble with its Activation, then you might want to apply some registry tweaks to fix the problem. How? Refer to these steps:
Tap the Win + R key combination to open the Run dialog box.
Then type “Regedit” in the field and click OK or tap Enter to open the Registry Editor.
Next, navigate to this registry key: ComputerHKEY_LOCAL_MACHINESOFTWAREMicrosoftWindows NTCurrentVersion
From there, look for a DWORD named “EditionID” and once you found it, double click on it and change its Value data to Windows 10 Professional.
After that, look for another DWORD named “ProductName” and double click on it to change its Value data to Windows 10 Professional.
Once you’re done, restart your computer to apply the changes made successfully.
Option 2 – Try to use Command Prompt
If the registry tweaks you applied didn’t fix the Activation error, then you can try using Command Prompt instead. Note that you can use this option in both scenarios pointed out above.
First, you have to insert a bootable drive of the Windows10 installer.
Next, tap the Win + X keys and select Command Prompt (Admin) from the menu.
After opening Command Prompt as admin, navigate to the root location of the bootable drive inside the Command Prompt command line.
Once you’re already there, type the following command and tap Enter:
setup.exe /auto upgrade /pkey <YOUR WINDOWS 10 PRO EDITION PRODUCT KEY>
After entering the command, check if it was able to fix the Windows Upgrade or Activation error 0xc03f6506. If not, refer to the next given option below.
Option 3 – Try to disable the Network Adapter
Just like the second option, you can also use this option for both the given scenarios above.
Tap the Win + X keys and select Network Connections from the menu.
This will open the settings for your network and on the left side panel, click on the “Change adapter settings” link. This will open Control Panel.
From there, click on the network your computer is connected to, and then right-click on the Network Adapter that you are using and select Disable.
After disabling the Network Adapter, try to switch to the edition of your copy of Windows 10 again and see if the problem is now fixed and don’t forget to double click on the disabled Network Adapter to get back on the Network.


 Hacker group recently came up with claims that they have stolen data from 100 million T-Mobile customers. T-Mobile has responded with confirmation it has been compromised and that over 40 million records were stolen, among them are not just present customers, but anyone who has applied for T-Mobile service as well as past accounts.

 The new widget's menu inside Windows 11 is generally met with a positive attitude but there are still users which prefer not to have it. Luckily for them, Microsoft included a very easy way to turn the widgets menu on or off. Follow this easy guide to see how.
Right-click on the widget button in the taskbar and click on Hide from Taskbar and that’s it
Alternatively, you can also turn it off via the setting app.
Go to the settings app and navigate to Personalization > Taskbar > Taskbar Items and flipping the switch beside Widgets to Off.
Please note that both methods will only hide the button to toggle widgets menu, at the current state there is no really a way to actually turn it off, only hide it and make it not available to bring it up.
The new widget's menu inside Windows 11 is generally met with a positive attitude but there are still users which prefer not to have it. Luckily for them, Microsoft included a very easy way to turn the widgets menu on or off. Follow this easy guide to see how.
Right-click on the widget button in the taskbar and click on Hide from Taskbar and that’s it
Alternatively, you can also turn it off via the setting app.
Go to the settings app and navigate to Personalization > Taskbar > Taskbar Items and flipping the switch beside Widgets to Off.
Please note that both methods will only hide the button to toggle widgets menu, at the current state there is no really a way to actually turn it off, only hide it and make it not available to bring it up.