Logo

Windows keyboard language changes on its own

If you have multiple keyboards, things can get quite tricky. There are times when the keyboard language changes on its own since the keyboard changes while you are typing. The thing is, the keyboard changes because sometimes we accidentally tap shortcuts like Win key + Space key or Alt + Shift or Ctrl + Shift which changes the keyboard pairs or language. Thus, if your keyboard language changes on its own, there are two ways to resolve it. First, you have to make sure that Windows 10 does not add keyboards without your permission. Second, you have to make sure that the shortcut keys don’t change the keyboard language. This second option is what we’re going to discuss in this post.

You need to first set a different input method for each app window. To do that, you have to disable the change in layout. Refer to these steps:

  • Go to Settings > Language and input.
  • Next, type “switching input methods” to open the Advanced keyboard settings with this option inside.
  • After that, select the checkbox labeled as “Let me set a different input method for each app window” and then click the Save button.
  • Restart your computer.

Now that you’ve disabled the change in layout, you now have to find the keyboard settings. Just go to Settings > Devices > Typing > Advanced Keyboard settings. From there, you have the option to select which keyboard is going to be used for any app. When you change the keyboard every time you use an app, usually, Windows remember it so that you won’t have to set it up all over again. In addition, the Advanced keyboard settings page also allows you to override the default input method which could be different from the first one in your language list. Aside from that, there is also a Language bar option that comes in handy as you can quickly switch between keyboards. And if you removed it, you have the option to restore the language bar back as well.

Now all that’s left for you to do is to change the Language Settings under the Administrative tab. A user from a forum that came up with this solution, reported that the issue occurred when he started typing in some program with non-Unicode characters which caused Windows to use the default system local language to interpret these characters even though the language is unavailable in the Language bar. To change the Language Settings under the Administrative tab, follow these steps:

  • Go to Settings > Time and Language > Language > Administrative language settings.
  • After that, click on Copy Settings under the Administrative tab.
  • Now make sure that all the Display language, Input language, and Format are English (United States) or any language you prefer.
  • Then mark the two checkboxes in “Copy your current settings to Welcome screen and system accounts & New user accounts”.
  • After that, click OK and then exit.

Note: You also have the option to disable those shortcut combinations which can change your keyboard settings accidentally.

Do You Need Help with Your Device?

Our Team of Experts May Help
Troubleshoot.Tech Experts are There for You!
Replace damaged files
Restore performance
Free disk space
Remove Malware
Protects WEB browser
Remove Viruses
Stop PC freezing
GET HELP
Troubleshoot.Tech experts work with all versions of Microsoft Windows including Windows 11, with Android, Mac, and more.

Share this article:

You might also like

Shutdown your PC properly

So, you have finished with work, game, movie, music, email, or whatever on your PC, you look at the clock, it is late, you decide to go to sleep or outside, you click on the power button and choose shutdown. Now when a PC is shut down you feel good and go with your business but the next time you power it up you get the same error like the computer never really shut down in the first place. You wonder why and reboot it, just in case and all of the sudden error is gone.

If something similar has happened to you or you had the feeling that after shutting down your computer has not really felt like shutting it down, do not seek professional help, everything is OK with you because when you click on shut down, your computer does not really shut down!

Truth is that Microsoft has changed how to shut down works and how rebooting works in Windows with an update but has not publicly said anything about it so some users may experience this feeling of not shutdown phenomenon and might even think there is something wrong with their PC.

Why this change?

A few years ago shutdown button and option in Windows were really shutting down OS, but things changed when Microsoft wanted to increase boot-up speed. Now when that decision was made shutdown option was changed. So, what was changed? Well in order to increase Windows booting time, the shutdown will now turn off power to PC components and it will look like everything is indeed shutdown but the Windows kernel will actually be saved to a hard drive with all settings and just awaken once the PC is turned back ON. This will result in all errors and other stuff being just still present same as they were once the system was instructed to be turned off.

Rebooting your PC will now clear kernel and file from the hard drive and you will get a clean system startup without any issues tied with the kernel itself.

Workaround

Now that we know why and what change has been made to Windows logical question is can we shut down our PC at all properly? Luckily for us, the answer is yes and we will not need any external application to do it, we can still do it inside Windows itself and it is quite quick and easy.

Bringing back the old shutdown

In order to bring the old shutdown functionality of your PC please follow the instructions but be aware that by doing this your PC will boot a little bit slower since it will have to load the kernel from scratch each time computer is turned ON.

First thing is to go to settings and go to System

system settings

Then once you are inside the system, navigate to the power and sleep and click on it to select it. Once you have it selected to all the way to the right and click on additional power settings.

power and sleep options

When you click on advanced power settings you should be led to the control panel's power options. Inside this panel click on top left link where it says Choose what the power button does.

power options in control panel

Inside options, you will need to untick the box next to Turn on fast startup (recommended), this option has been ticked ON by the Windows update and probably without notifying you. Option means exactly what was described, it will save kernel state on the hard drive for faster boot time but sadly it can cause some issues since it will never be reloaded from 0.

If you are unable to uncheck the box click on the text beside the shield icon that says: Change settings that are currently unavailable (you will have to be logged in as administrator).

shutdown options for power buttons

Conclusion

Altho turning off fast startup and shutting down the PC completely will for sure extend your bootup time I still believe that it is the right choice since sometimes a lot of clutter and bad things accumulate over time inside the OS and can cause a vast variety of problems in a long run. So stay safe and shut down that PC as it used to be in the past.

Read More
Samsung had Data Breach

After Plex, DoorDash, and LastPass, Samsung has also confirmed that they also have experienced a data breach and that some customer data has been stolen.

samsung HQ

On Friday, September 2nd Samsung announced that an unauthorized third party gained access to some of the company's U.S. systems in late July and that Samsung learned in August that some personal information was affected. It was also stated that affected information is: names, contact information, demographics, dates of birth, and product registration information. Also so far it was said that no Social Security numbers nor credit card number information have been compromised.

For now, Samsung is sending an email directly to anyone that has been affected by this data breach, however, they did not state what service or product has experienced this breach, we just know that it has happened at Samsung Electronics America which sells everything, from smartphones to debit cards. Also keep an eye on your inbox if you are a Samsung user since it took them a whole month in order to go public with this information and there is no justification for this, if it was reported on time people could change their information and take other steps.

Read More
Fix Element Not Found for Bootrec /Fixboot
One of the most useful utilities for advanced users in Windows is the Windows command line or Command Prompt. It is efficient in fixing system files, checking the disk for errors as well as other intensive tasks that are made convenient using this. One of the tasks you can carry out using Command Prompt is repairing the Windows bootup process if it encounters any issues. However, if you tried running the “bootrec/fixboot” command and you receive an error message saying, “Element not found”, read on as this post will guide you in fixing this error. This kind of error in the command line could be due to a damaged BCD or MBE, inactive system partition, or it could also be that there is no drive letter being assigned to the EFI partition. Whichever the case is, here are some possible fixes that should help you resolve the problem.

Option 1 – Try to repair BCD

As mentioned the error could be caused by a damaged BCD and so to fix the problem, you need to repair BCD by following these steps:
  • First, make sure that you have a bootable Windows 10 USB drive with you and use it to boot your computer.
  • Once you’re on the Welcome Screen, click on Next.
  • After that, click on Repair your computer located at the bottom-left portion of the window.
  • Then select Troubleshoot > Advanced Options > Command Prompt.
  • After you open the Command Prompt window, execute the following command:
bootrec /fixboot
  • Afterward, enter the next command below to rename the BCD file:
ren BCD BCD.bak
  • Next, type the following command and make sure to replace “b:” with the letter of your bootable drive attached to your computer.
bcdboot c:Windows /l en-us /s b: /f ALL
  • Now, wait until the process is completed and restart your computer to successfully apply the changes made.

Option 2 – Try assigning the drive letter to the EFI partition

  • Tap the Win + X keys or right-click on the Start button and click on Command Prompt (Admin) to open Command Prompt with admin privileges.
  • Then type the following command to start the Diskpart utility:
diskpart
  • After that, if you receive a UAC prompt, just click on Yes to proceed.
  • Next, type the following command to list all the volumes created on your PC including both types of partitions that are visible to a normal user in the File Explorer as well as the ones created by Windows 10 by default which helps it in storing the boot files and other important system files:
list volume
  • Now type the following command to select the desired volume:
select volume number
  • Then type the following command to assign a letter to the selected volume:
assign letter=<LETTER>
Note: Make sure to replace “<LETTER>” with the letter you want to allocate to that partition. Afterward, it will assign a letter to the selected volume.
  • Reboot your PC to apply the changes made.

Option 3 – Try setting the System Partition to Active

Like the first given option, you also have to make sure that you have a bootable Windows 10 USB drive before you proceed to set the System Partition to Active. Once you have it covered, refer to these steps:
  • Boot your computer using the bootable Windows 10 USB drive.
  • Next, click Next when you get to the Welcome Screen.
  • Then click on Repair your computer located at the bottom left part of the window and select Troubleshoot > Advanced Options > Command Prompt.
  • After opening Command Prompt, type the following command and hit Enter to start the Diskpart utility. It is a command line-based utility just like Command Prompt but has a UAC prompt once you provoke it. So if you encounter a UAC prompt, just click on Yes to proceed.
diskpart
  • Now type the following command:
list disk
  • From there, select your primary disk by typing the following command:
select disk number
  • After that, list all the partitions on the selected disk by entering the following command:
list partition
  • The command you just entered will list all the partitions created on your PC including both types of partitions that are visible to a normal user in the File Explorer as well as the ones created by Windows 10 by default which helps it in storing the boot files and other important system files.
  • Now type the following command to select the partition that is usually around 100 MB in size:
select partition number
  • Finally, type the following command to mark the partition active:
active
  • Then type the “exit” command to exit the disk part utility.
Read More
Fixing “The .NET Framework 4.7 is not supported on this operating system” Error in Windows 10
In case you don’t know, the .Net Framework is a programming infrastructure introduced by Microsoft. You will need it to run on lots of services and applications. Note that most of the applications that require the .Net Framework are packed with their installation files which is why it will be installed automatically on your computer when you install an application. However, there are instances when you’ll get an error message saying, “The .NET Framework 4.7 is not supported on this operating system” while trying to install the .NET Framework as a standalone service. The very reason why this error message appears is stated in the error message itself. Although the .Net Framework is supported on Windows 10, it is not actually compatible with some other Windows 10 versions. So it is most likely that you are seeing this error message because the .Net Framework in your computer is not compatible with the Windows 10 version you are running. Since that’s the case, you need to update Windows 10 to fix the problem. Updating your Windows 10 computer is the only solution you can try to fix this problem. Thus, it is advised that you check for Windows Updates even if you are now using the latest version of Windows 10. And since the issue is caused by an incompatible operating system version, once you install the exact version of Windows 10 required by the .Net Framework, the problem will be fixed. Simply follow the steps given below to do so.
  • Step 1: Tap the Win + R keys to open the Run dialog box.
  • Step 2: After that, type in “winver” in the field and tap Enter.
  • Step 3: Next, your Windows 10 version should be given in the new window that appears. Take note that the number after the Version which is in the second line is your version number of Windows 10. And that the number must be 1507 or 1709. The first two digits in these numbers are the year while the second two represent the month when the update was released. So if you are running a 1709 version, this means that the Windows 10 version you are using was released in September 2017.
  • Step 4: The next thing you have to do is to make sure that you have the Windows 10 version that’s compatible with the .Net Framework. To verify, you need to click here and click on the System Requirements.
After opening the link, take a look at the Supported Operating System section where it says, “Windows 10 Anniversary Update” and “Windows 10 Creators Update”. Since there are users who are not familiar with the version numbers related to both the Anniversary and Creators updates, refer to the list given below.
  • November Update (1511)
  • Anniversary Update (14393)
  • Creators Update (1703)
  • Fall Creators Update (1709)
  • Spring Creators Update (1803)
As you can see, the Creators Update has version 1703 while the Anniversary Update has version number 14393 so if you are using a version lower than the 14393 version then it’s no wonder you aren’t able to install the .Net Framework 4.7 on your Windows 10 PC. Now all that’s left to do is to update your Windows 10 version and make sure that you will be updating it to the latest version available and then try installing the .Net Framework again.
Read More
How to Repair Windows 10 Error 8024001F

Error Code 8024001F – What is it?

During the Microsoft Windows 10 upgrade, certain users have experienced an issue with error code 8024001F. Users should note that this error is also known as Windows Update 8024001F and 0x8024001F. This error code is relatively common and is usually caused by a faulty internet connection. Thanks to this common reasoning, the error is generally fixed easily, and users are able to restart their Microsoft Windows 10 upgrade. Common symptoms include:
  • A dialog box appears with the Error Code 8024001F when attempting to upgrade to Microsoft Windows 10.
  • Your current version of Windows is unable to recognize the need for an update to Microsoft Windows 10.

Solution

Restoro box imageError Causes

With only three issues causing error code 8024001F, it is relatively easy to determine your particular issue and then follow the steps below to rectify the situation.
  • Your computer is not connected to the internet.
  • The Windows firewall is interfering with the Microsoft Windows 10 update.
  • Your third-party antivirus and firewall software is interfering with the Microsoft Windows 10 update.
  • Your system is infected with the Conficker worm, which is preventing the Microsoft Windows 10 update from processing correctly.
Microsoft Support asks that you contact them directly for further assistance if you are able to rule out these three reasons for error code 8024001F.

Further Information and Manual Repair

Error code 8024001F is easily corrected using one of the following methods. Each of these methods should be convenient and comfortable for a basic computer user at home. If at any time you are unsure or feel you need more assistance, Microsoft Support asks that you contact them directly for more guided support.

Method 1- Access the Troubleshooter

  1. Access the Windows Update Troubleshooter
  2. When the dialog box pops up, click OK.
  3. Click NEXT on the following dialog box.
  4. Windows will then run the Troubleshooter, attempting to detect any known issues with your system.
  5. Depending upon the results you should be able to follow the on-screen prompts which will alleviate the update issue.

Method 2- Correct your internet connections

  1. Closeout of the error code 8024001F dialog box.
  2. Close the Microsoft Windows 10 updater.
  3. Attempt to access the internet through your normal browser.
  4. ** If you can successfully access the internet, then an internet connection is not the cause for this error code.
  5. If you are unable to access the internet verify that you are plugged into your network, both at the router/wall and at your computer jack.
  6. If you use a router, verify that all of the lights are on and active (showing an active internet connection).
  7. Establish an internet connection if possible. If you are unable to establish an internet connection, you may need to contact your internet provider.
  8. If you are able to reestablish an internet connection, then you should have no problem running your Microsoft Windows 10 update.

Method 3- Adjust the Windows Update settings

  1. Log into your current version of Windows as the Administrator (enter a password if prompted).
  2. Click the START button on your keyboard or screen.
  3. Search for the term “admin”, press ENTER
  4. Click the “administrative tools” option
  5. Select the “services” file, re-enter your password.
  6. Open the Windows Update file by right-clicking on the name.
  7. Choose the “properties” option
  8. Under the GENERAL tab, make sure that the “startup type:” is set to AUTOMATIC (DELAYED START)
  9. Under the “Service Status” header, click the START button.
  10. Click OK
  11. Restart the Microsoft Windows 10 update.

Method 4- Scan for the Conficker Worm

  1. Access the web address to be directed to the Microsoft Safety Scanner.
  2. Run this free scanner provided by Microsoft to verify if the Conficker Worm is your issue.
  3. If this worm is causing your error, Microsoft will walk you through the steps necessary to remove the worm.

Method 5- Firewall and Anti-Virus software

  1. If you are using the Windows firewall or a third-party anti-virus and firewall software, disable these programs.
  2. Run the Microsoft Windows 10 upgrade.
  3. After the upgrade is complete, turn your antivirus and firewall software back on.
Users should not have a problem employing the above methods. Start with the simplest solutions first, and then work your way to the more intricate methods. In some cases, depending on why this particular error code was caused, you may have to use a powerful automated tool to have it resolved.
Read More
Fix 169 IP address error in Windows 10
169 IP address error can stop your computer from connecting to the internet which could be a very frustrating experience. In this guide, we will cover simple but effective tips on how to fix this error so you can continue with internet use.
  1. Reconnect your Modem or Router

    Simple and sometimes effective solution, unplug and plug back in modem or router so IP is fetched again, it is very likely that computer will pick right IP address with this stunt.
  2. Use built-in Windows Network troubleshooter

    Press ⊞ WINDOWS + X top open secret menu Go to settings Go to Network & Internet Inside click on Network troubleshooter Follow onscreen instructions After the troubleshooter ends reboot your PC
  3. Reconfigure IP address

    Press ⊞ WINDOWS + R to open the run dialog Inside run dialog type ncpa.clp and press ENTER Right-click on your network adapter and select properties Uncheck Internet Protocol Version 6 (TCP/IPv6) and click on OK Now press ⊞ WINDOWS + X and click on Command prompt (admin) In command prompt type and after each line press ENTER netsh winsock reset catalog netsh int ip reset reset.log ipconfig /release ipconfig /renew Reboot your computer
  4. Restart DHCP client

    Press ⊞ WINDOWS + R to open the run dialog In run dialog type services.msc and click on OK Find DHCP client Right-click on it and choose Restart Reboot PC
  5. Reinstall Network Adapter

    Press ⊞ WINDOWS + X to open the windows menu Click on Device Manager Expand Network Adapter and right-click on wireless or ethernet adapter, click on Uninstall device Reboot the computer to automatically reinstall the device driver
  6. Reset IP and subnet mask

    Press ⊞ WINDOWS + R to open the run dialog In run dialog type in ncpa.cpl and press OK Right-click on your network adapter and select properties Uncheck Internet Protocol Version 6 (TCP/IPv6) Double click on Internet Protocol Version 4 (TCP/IPv4) Select Use the following IP address and change it to 192.168.0.1 Change Subnet mask to 255.255.255.0 Leave default gateway blank Click OK to save changes
Read More
How to Fix Error Code 0x8007042c

What is Error 0x8007042c?

0x8007042c is a Windows Firewall error code. This error hampers your ability to turn on Windows Firewall on your PC. Firewall is a network security system. It establishes a barrier between a trusted, secure internal network and another network (the internet) that is assumed unsecure. Error 0x8007042c is displayed in the following format: “0x8007042c” error message when you try to start Windows Firewall

Solution

Restoro box imageError Causes

Error 0x8007042c may pop up on your computer screen because of many reasons. These include:
  • Firewall service is disabled
  • Malware infection
  • Registry corruption

Further Information and Manual Repair

The good news is that this error code is easy to resolve. To repair, you don’t to be technically sound or hire a professional for the job. Try our DIY methods illustrated below to fix the problem by yourself in a few minutes.

Method 1 - Start Firewall Manually

This method allows you to start Windows Firewall service manually and then make sure that it starts automatically in the future. This can be done by following these steps, first, go to the start menu and then type services in the search box. Right-click services and then click RUN as Administrator. Now scroll down until you see Windows Firewall. Then double click on it. After that, click the startup type box and then click Automatic. If ‘Service Status’ is stopped, then click Start. Now click ‘Apply’ and then press OK. Scroll until you see ‘Base Filtering Engine’, double click it. If again the ‘Service Status’ is stopped, click start. Press Apply and then OK to activate changes. Now restart Windows, Firewall will be enabled.

Method 2 - Remove Malware

If the error cause is a malware infection, use the Microsoft Safety Scanner to remove malware immediately from your PC. Download it from Microsoft’s official website, install, accept terms and then run it to perform a quick scan. The Microsoft Safety Scanner will scan and remove all malware infecting your PC. Once this is done, click Start and then type Windows Firewall in the Search box. Click Windows Firewall and the navigation pane of Control Panel; Click Turn Windows Firewall on or off. Click Turn on Windows Firewall for each network location and then press OK to activate changes.

Method 3 - Repair the Registry

Sometimes the underlying cause can be registry corruption. In such a situation, download Restoro. It is a PC Repair Tool deployed with a registry cleaner. It scans and removes all the bad entries and files infecting your PC, cleans and repairs the registry in a few minutes. Click here to download Restoro.
Read More
Fix Windows Activation Error 0xC004F211
If you got an Activation Error 0xC004F211 after having installed or upgraded your Windows 10 PC, then this indicates that some hardware in your computer has changed which’s causing the error to pop up. Windows might not be able to determine if the key is used on a new computer or if it’s still the same one if you have just removed or upgraded old hardware. But worry not for this post will guide you in fixing the Windows Activation Error 0xC004F211 on your Windows 10 computer. When you encounter this error, you will see the following error message on your screen:
“Cannot activate Windows 10. Try activating again later. If that doesn’t work, contact support. Error code: 0xC004F211.”
Note that although hardware changes cause this error, the minor ones don’t really cause any issues with activation, however, if you have made any significant hardware change such as replacing your motherboard, it will most likely cause the activation error. In such cases, the Windows Activation system will treat this as new hardware and you will need a new license for that. Even if your Windows 10 computer has a genuine key, it might still fail to get activated which results in the Windows Activation Error 0xC004F211. Thus, before you do other troubleshooting steps, you need to run the Windows 10 Activation Troubleshooter first. To do so, follow these steps:
  • Go to Settings and then select Activation.
  • After that, click on the Windows Activation and then troubleshoot. This will help you address most of the commonly found activation issues in Windows devices.
In addition, there is an exception offered by Microsoft – if you are connected to a Microsoft account prior to the hardware change, then you can most certainly use the same license key to reactivate Windows 10 again. Microsoft calls this an “Exception path” which should be fixed easily by the Windows Activation Troubleshooter as pointed out earlier. However, if the Windows Activation Troubleshooter isn’t able to resolve the error you can try purchasing a new license. In such rate case, even if you do have a Microsoft account available on your Windows 10 computer, and if Windows was never activated, this solution will not work. And if you haven’t connected your Microsoft account with your Windows 10 computer prior to the major hardware change, then your only option left is to purchase a new license. For you to do that here are some steps you can follow.
  • To purchase a new Windows license, the first thing you have to do is click on the Start button > Settings > Update & Security.
  • From there, go to Activation and select the “Go to Microsoft Store” option.
  • After receiving your new license, you need to go back to Update & Security then go to Activation and select the “Change product key” option.
  • Now update your Windows 10 computer using the new key and it should automatically activate your computer.
  • Next, you have to create a Microsoft account or connect your existing local account to your online account.
  • Once the system links the key and the account, you need not buy a new license in case something like this happens again.
Note: If you are an IT administrator, you need to keep in mind that there is a limit to the number of times you can reactivate Windows on your computer. Moreover, if you don’t see any option to reactivate the license, and it is a work computer, you need to contact your organization’s tech support.
Read More
How to Fix Explorer.exe System call failed
One of the most critical processes in the Windows 10 operating system is the Explorer.exe. And there are times when you might encounter an error that says, “System call failed”. You can encounter this error when you try to launch File Explorer, and in such case when the File Explorer does not work, it could cause issues in accessing folders and files on your computer. This kind of error pops up when the explorer.exe system file has become corrupted or if there is some process that interferes with its smooth functioning. To fix this error, you can try to restart the explorer.exe process, run both the System File Checker scan and DISM tool. You could also put your computer in a Clean Boot State or uninstall any programs you’ve installed recently. For more details, follow each one of the given suggestions below.

Option 1 – Try to restart the Explorer.exe process

The first thing you can do is try to restart the Explorer.exe process. To do so, refer to these steps:
  • First, right-click on the Taskbar and select the Task Manager.
  • Next, expand the Task Manager window to see all the active processes.
  • From there, look for the Windows Explorer process, right-click on it and select Restart.
  • After that, check if the error is now fixed.

Option 2 – Run System File Checker scan

If restarting the explorer.exe process didn’t work, you can also try running the System File Checker or SFC scan to fix the error. System File Checker is a command utility built into your computer that helps restore corrupted files and missing files. Refer to the following steps to run it:
  • Hit the Win + R keys to launch Run.
  • Type in cmd in the field and tap Enter.
  • After opening Command Prompt, type in this command: sfc /SCANFILE=c:windowsexplorer.exe
Note: If you are using a 64-bit Windows operating system, enter the “sfc /SCANFILE=C:WindowsSysWow64explorer.exe” command instead.
  • Wait until the process is completed and then restart your computer.

Option 3 – Run the DISM tool

You might also want to run the DISM tool. This tool is known to repair potentially corrupted files in your system as having them could also system issues like the “System call failed” error. To repair these corrupted system files, you can run the DISM commands:
  • Tap the Win + X keys and click on the “Command Prompt (Admin)” option.
  • After that, input each one of the commands listed below sequentially to execute them:
    • Dism /Online /Cleanup-Image /CheckHealth
    • Dism /Online /Cleanup-Image /ScanHealth
    • Dism /Online /Cleanup-Image /RestoreHealth
  • Once you’ve executed the commands given above, restart your computer and check if the problem is now fixed.

Option 4 – Try running the Check Disk utility

  • In the Windows Search box, type “command prompt” and from the search results, right-click on Command Prompt and select “Run as administrator”.
  • After opening Command Prompt, type this command and tap Enter: chkdsk c: /f /r
  • The command you entered will start to check for errors and fix them automatically. Else, it will throw an error message saying, “Chkdsk cannot run because the volume is in use by another process. Would you like the schedule this volume to be checked the next time the system restarts? (Y/N)”.
  • Tap the Y key to schedule Disk Check the next time your computer restarts.

Option 5 – Put your computer in a Clean Boot State

As pointed out, there are some instances that some conflicting programs installed in your computer might be the one that triggers the “System call failed” error to appear when you try to open File Explorer. To identify which program is causing the problem, you need to put your computer in a Clean Boot State. To do so, follow the steps below.
  • Log onto your PC as an administrator.
  • Type in MSConfig in the Start Search to open the System Configuration utility.
  • From there, go to the General tab and click “Selective startup”.
  • Clear the “Load Startup items” check box and make sure that the “Load System Services” and “Use Original boot configuration” options are checked.
  • Next, click the Services tab and select the “Hide All Microsoft Services” check box.
  • Click Disable all.
  • Click on Apply/OK and restart your PC. (This will put your PC into a Clean Boot State. And configure Windows to use the usual startup, just simply undo the changes.)
  • Once your computer has restarted in a Clean Boot State, perform your scan again and see if it now works, and then start to isolate the problem by checking which one of the programs you installed recently is the root cause of the problem.

Option 6 – Try to uninstall the programs you’ve installed recently

In case you don’t know, freeware software packages aren’t always free as some of them could contain malicious software that can cause serious damage to your computer. Thus, if you have installed a program recently prior to getting the “System call failed” error, then you have to uninstall that program.
  • Tap the Win + R keys to open the Run dialog box.
  • Then type “appwiz.cpl” in the field and tap Enter to open the Programs and Features in Control Panel.
  • Next, arrange the list of installed programs in the order of the installation date.
  • After that, look for the problematic program and right-click on it, and then select Uninstall.
  • Once the process is done, restart your computer and see if the error is fixed.
Read More
Why You Need Antivirus Software & How to Select the Right One

Anxiety from all these digital threats lurking everywhere? An antivirus program can help put your mind at ease.

What can a virus do to your device?

A virus is malicious software that can affect pretty much any device and does so in a variety of ways. Be it your computer, your phone or your smart lightbulb - as long as there’s access to the internet, malware can get to it.

How exactly does this kind of attack manifest itself? Well, there’s a wide variety of effects ranging from mild to severe. Among other things, they depend on which type of malware attacks your device - a virus, spyware, ransomware, adware or something else.

These are some of the things you can expect to happen:

  • Slow performance
  • System crashes
  • Theft of data and sensitive information
  • Connectivity issues
  • Constant browser redirects
  • Strange messages sent to your contacts 
  • Interference with files

It really can be the stuff of nightmares. So, if you want to sleep peacefully knowing that your devices are completely safe, you should definitely consider getting an antivirus.

P.S. don’t let its name fool you - an antivirus does indeed protect your devices against more than just viruses.

What is antivirus software exactly?

Antivirus software is designed to help you battle and ward off malware. Basically, it scans your device to detect any suspicious activity and offers tools to get rid of the culprit. 

At first, antiviruses were developed to fight against viruses only, but nowadays they cover a lot more ground. Here are some of the biggest benefits of getting yourself a powerful defender.

Advantages of antivirus software

1. It fights those pesky ads

Look, constant ads that pop up everywhere aren’t the absolute worst thing that can happen on your computer. If anything, they are annoying, like when you’re trying to sleep but that one fly in your room just won’t stop buzzing.

Now, there’s a free, well-established solution for that - installing an ad blocker. And we’re about a hundred and ten percent sure you’ve already done that on each and every browser you use.

However, “if I can’t see it, it doesn’t exist” isn’t the most ideal approach for your online safety. Ad blockers can’t block everything and they won’t protect you from potential adware. An antivirus on the other hand offers that layer of protection against malware snuck into pop-ups and spammy websites.

2. It protects you from hackers

Hackers don’t target government institutions only. They’ll target regular people too if they have something to gain.

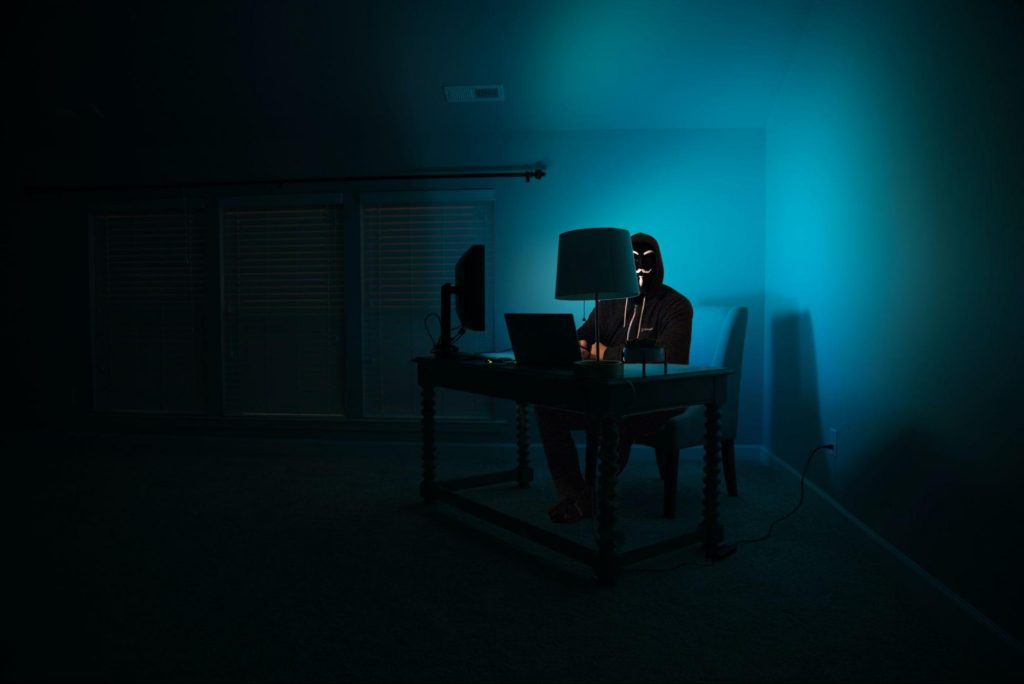
Antivirus can protect you from hackers
Credit: Clint Patteron (Unsplash)

There are different types of hacking, such as phishing e-mails, transmission of malicious programs, credential reuse, denial of service and more. In any case, they take control of your device and hijack your data.

The good thing is that, as threats evolve, antiviruses evolve too and there are tons of quality programs on the market that can keep you secure for an affordable price.

3. It keeps your files and data safe

When malware enters your device, it can target pretty much any file and get access to any and all data.

Installing an antivirus program will make sure that every single file, new or old, is monitored at all times, warning you against threats immediately. That way, you can make sure to react before your other files become infected and data is lost or stolen.

Another great thing for data protection is that the best antivirus software normally comes with a password manager, so no one can use malware to steal your passwords.

4. It blocks all kinds of malware

As we already stated, malicious attacks can be performed in many ways and malware comes in in different shapes an sizes, such as:

  • Trojan horse
  • Spyware
  • Ransomware
  • Adware
  • Rootkit
  • RAT (remote access Trojan)
  • Keyloggers
  • Worms
  • Botnets
Illustration of a computer worm
Credit: Growtika (Unsplash)

Nowadays, antivirus software is designed to fight against all of these types. That’s why more often than not we hear the term 'antivirus' used interchangeably with 'anti-malware,' like in this article.

5. It keeps your children protected

You can’t keep your eyes on your kid every second of the day and you can’t protect them from everything. But at least you can limit their exposure to the threats they can encounter at every corner of the digital world.

An antivirus program will block harmful or suspicious websites and ads, which is great both for you and your children. To take it a step further, though, many such programs come with special parental controls and offer monitoring as well. It’s a great solution for keeping your kids safe online without sounding like the irritating, overbearing, controlling parent who “just doesn’t get it!”

How to pick one

There are definitely lots of different antivirus programs out there, both free and paid. We recommend you look for a paid option, since free ones are unfortunately a lot more susceptible to being compromised through malicious attacks.

Now, there are a few factors to consider when choosing the right software. If you use your PC for basic things then a basic antivirus will suffice. However, the more complex your use and the more sensitive the data you deal with, the stronger it needs to be.

It’s also crucial that you take into account the features it includes. As we already mentioned, some programs have additional security options. For example, depending on the package you select, Bitdefender provides:

  • Webcam and mic monitoring
  • Parental control
  • Firewall
  • VPN
  • Password management
  • Identity theft protection

Some are included in plans and some are separate products, so make sure to check out all the offers.

And don’t worry if you have multiple PCs or you’re looking for protection for your smartphone or tablet as well; Bitdefender has suitable solutions for your needs. Of course, you can also just pick their classic antivirus software if you’re not in need of advanced protection.

Another important point is how regularly the software is updated and enhanced. The more frequent the updates the better, as bugs can make the program more vulnerable. Other things we advise you consider are user-friendliness, impact on performance, reputation (user reviews especially) and, of course, price.

The bottom line

Fact is: anyone can be a malware victim. Don’t let it be you.

You can’t put a price on peace and security, so don’t be reluctant to pay for yours - especially since a lot of options out there are extremely affordable. Is $159.00 a year really too much to pay for cross-platform protection for up to 10 devices? We don’t think so.

Explore your options and protect your files and data before it’s too late.

Read More
1 2 3 171
Logo
Copyright © 2023, ErrorTools. All Rights Reserved
Trademark: Microsoft Windows logos are registered trademarks of Microsoft. Disclaimer: ErrorTools.com is not affiliated with Microsoft, nor claims direct affiliation.
The information on this page is provided for information purposes only.
DMCA.com Protection Status