As you know, just like other web browsers, Google Chrome offers Incognito Mode or private browsing which you can use to make sure that your browsing activities are not being tracked by any websites you visit and it also keeps targeted ads at bay. On the other hand, signing in to a website, even when in Incognito Mode is a different thing since that website can track your browsing activities.
Thus, Incognito Mode is still useful especially if you want to browse the web safely and without getting tracked except when you log in to some site. However, there have been reports recently that Incognito Mode is missing in Chrome and users are clueless as to how or why it happened. If you are one of them, worry not for this post will walk you through what you can do if there’s no Incognito Mode in Chrome on your Windows 10 computer.
This is an unusual and strange issue since the Incognito Mode in Chrome is available by default and you don’t have to do anything to enable it. It is possible that there might be corruption in the Windows Registry which caused the disappearance of Incognito Mode, worry not though for there are some tweaks you can apply to restore the missing Incognito Mode. To apply these tweaks, you need to create first a System Restore point, and then once you’re done, follow the instructions provided below carefully.
Step_1: Tap the Win + R keys to open the Run dialog box and type “Regedit” in the field and then hit Enter to open the Registry Editor.
Step_2: Next, after opening the Registry Editor, navigate to this path – ComputerHKEY_LOCAL_MACHINESOFTWAREPolicies
Step_3: From there, look for ChromePolicies and locate the DWORD named “IncognitoModeAvailability” and double click on it.
Step_4: Edit the value of the “IncognitoModeAvailability” DWORD by changing its value from 1 to 0 so you can enable Incognito Mode in Chrome.
Step_5: Once done, exit the Registry Editor and restart your computer and then check if you can now see Incognito Mode in Chrome.
On the other hand, there is also another option that allows you to force open your Chrome browser in Incognito Mode. All you have to do is set the value of the “IncognitoModeAvailability” key to “2” instead of 0. This can be useful especially if you always browse the web in this mode. But you need to remember that you won’t be able to go back to the normal mode once you do this. Here are what the values of the IncognitoModeAvailability DWORD actually mean:
0 – Incognito mode is enabled by default
1 – Incognito mode is disabled
2 – Chrome is forced to always open in Incognito mode
A number of users reported lately that their Windows 10 PCs automatically boots into the BIOS whenever they start their computers. And when they tried to exit the BIOS and restart their computers, it still boots into the BIOS. If you are one of the users who experience the same problem, worry not for this post will walk you through what you can do to resolve the problem.
Each time a Windows 10 computer boots, it goes through a lot of processes and one of them is where it checks the computer for any hardware issue such as hard drives, peripherals, as well as external devices. So if it finds some issue, the computer will halt the boot process and will boot into the BIOS. To fix this, there are several suggestions you can try. You have to check if you’ve pressed any key, especially the F2 or F12, or Del keys. You also have to check the peripherals and external devices in your computer or update the BIOS or reset it. For more information, make sure to follow each one of the options laid out below.
Option 1 – Try to check for any pressed key
The first thing you can do is to check for any pressed key. This might not make any sense but a pressed key can actually cause this problem. So you have to check if you have the F2 or F12 or Del buttons pressed since these are hardware keys that are usually set by the OEM to boot into the BIOS.
Option 2 – Try checking the physical device connections
You might also want to try checking if there are other devices that are connected to your PC. This is because the configuration of the BIOS or UEFI might be configured in a way that any external device connected to the computer has a higher boot priority compared to the hard disk. And if it’s really the case, the externally attached disk might be the drive your computer is trying to boot into and not the hard disk. In such cases, Pen Drives, USB storage devices, CDs, DVDs, and so on, are included in this category of physical device connections.
Option 3 – Try to set a proper boot device
If the Boot Manager wasn’t able to locate a proper boot device, then it could be the reason why your computer boots into the BIOS when you turn it on. Thus, you have to check if there is an available proper boot device. You can usually find it under the Boot priority section. However, if you’re unable to locate your hard drive or SSD under the Boot device, then you have to change the hard drive but you have to check first if it is properly plugged in and that it works on other computers. If it works on other PCs, then the problem lies in the motherboard of your computer, and in that case, you have to consult its manufacturer.
Option 4 – Try to update the BIOS
Updating the BIOS can help you fix the issue but as you know, BIOS is a sensitive part of a computer. Even though it is a software component, the functioning of the hardware depends on it largely. Thus, you must be careful when modifying something in the BIOS. So if you don’t know much about it, it’s best if you skip on this option and try the other ones instead. However, if you are well-versed in navigating the BIOS, then follow the steps below.
Tap the Win + R keys to open the Run dialog box.
Next, type “msinfo32” in the field and press Enter to open System Information.
From there, you should find a search field on the bottom where you have to search for the BIOS version and then press Enter.
After that, you should see the developer and version of the BIOS installed on your PC.
Go to your manufacturer’s website and then download the latest version of BIOS on your computer.
If you are using a laptop, make sure that you keep it plugged in until you have updated the BIOS.
Now double click on the downloaded file and install the new BIOS version on your computer.
Now restart your computer to apply the changes made.
Note: If updating the BIOS didn’t help, you might want to consider resetting it instead.
Option 5 – Try resetting the BIOS/UEFI configuration
You might also want to reset the BIOS configuration which will lead to arranging the boot configuration since it is intended by the manufacturer. Note that this will get rid of any blockage in the boot process. All you have to do is take out the CMOS battery for a couple of seconds and then put it back again. After that restart, your computer and will be booted directly into Windows. Resetting the BIOS would also get rid of any password set for BIOS and you need to change your CMOS battery in case it didn’t work.
Users who constantly use graphic-intensive applications like games or any video-rendering software need to control how their graphics card is used. There are some who always toggle their Graphic Quality settings to get the Frames Per Second or FPS up. While some tend to adjust the size, orientation, scaling, and other display settings in order to use their PCs in a more efficient way or to simply work better. And in all of that, that’s where the NVIDIA Graphics Card comes into the picture. Take note that this software only works on PCs which has NVIDIA Graphics Card attached to them. Thus, if you use another Graphics Card then this post is not for you, otherwise, proceed reading to know what you can do if the NVIDIA Control Panel is not opening on your Windows 10 PC.
Here are a couple of things you can try if the NVIDIA Control Panel is not opening, not responding, or not working:
Restart the process of the NVIDIA Control Panel
Restart the NVIDIA Display Driver Service
Update your NVIDIA Display Drivers
For more details, refer to the instructions provided below.
Option 1: Restart the process of the NVIDIA Control Panel.
Tap the Ctrl + Shift + Esc keys to open the Task Manager.
After opening the Task Manager, look for the process named NVIDIA Control Panel Application.
Once you found it, expand it and right-click on the NVIDIA Control Panel sub-process, and click on End Task.
Now try opening the NVIDIA Control Panel from the Start Menu and see if it now works fine or not.
Option 2: Restart the NVIDIA Display Driver Service
Tap the Win + R keys to open the Run dialog box.
Then type “services.msc” in the field and hit Enter to open the Windows Services Manager.
After opening the Services window, you will see a list of services. From there, look for services named “NVIDIA Display Container LS” and double click on it to open its Properties.
Now make sure that the service is Started. If it isn’t, you need to start it, otherwise, you need to Stop it and Start It again. You also have to make sure that the Startup Type is set to Automatic.
Do the same for the NVIDIA LocalSystem Container service.
Restart your computer and check if the problem’s fixed.
Option 3: Try updating the drivers from the official site of NVIDIA
If both the first and second given options didn’t work, you can also try updating the drivers from the official NVIDIA website. And in case you don’t know the type of Nvidia graphics card that your computer is on, follow the steps below:
Tap the Win + R keys to open the Run dialog box.
Next type in “dxdiag” in the field and click OK or hit Enter to open the DirectX Diagnostic Tool.
From there, you can see what type of Nvidia graphics card that your system is on.
Take note of your graphics card information and then look for the best drivers for your operating system. Once you’ve downloaded and installed the file, restart your PC.
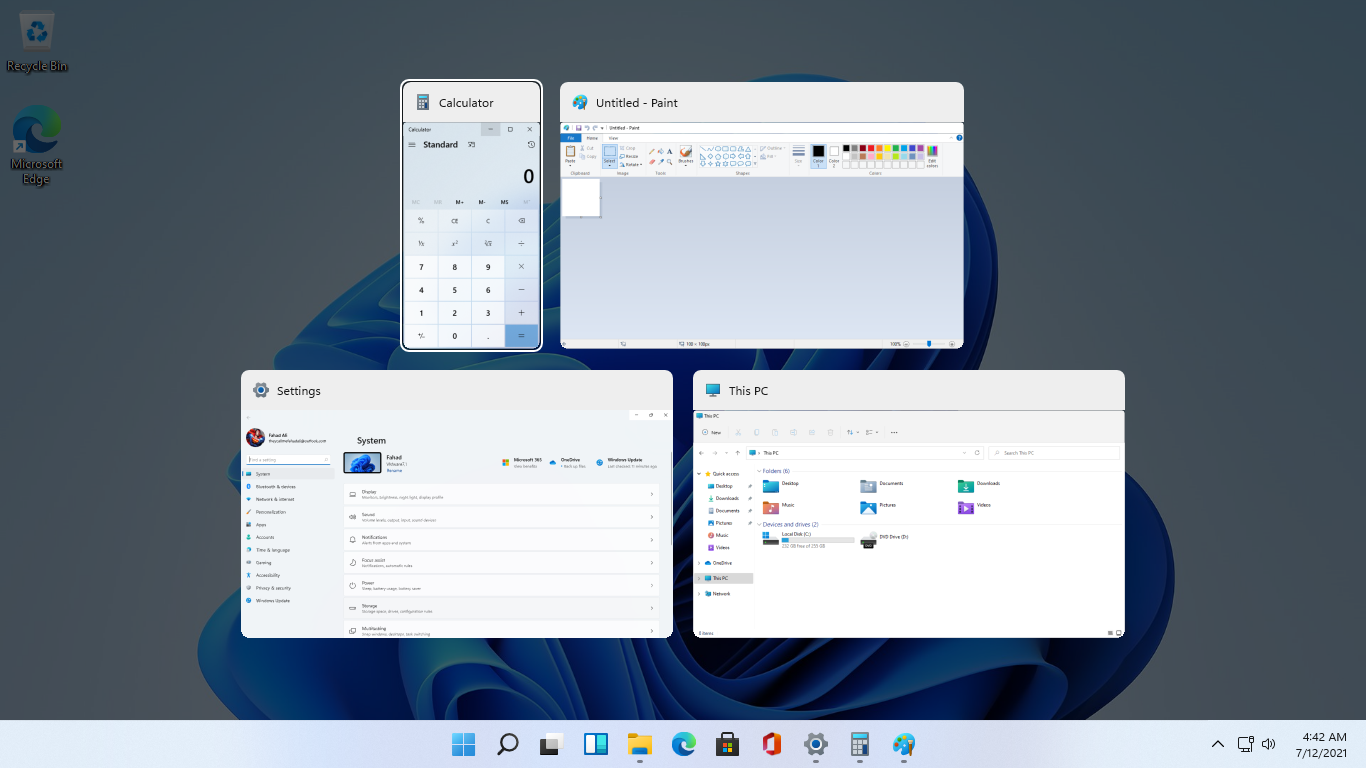
As in previous Windows 10, inside Windows 11 also when you press the ALT + TAB key combination you will get a preview of all running applications along with all Browser tabs so you can go through them and pick the one you want to switch to.
Alto, I personally am a big fan of alt-tabbing, I must admit that I am not a big fan of having multiple browsers tabs on screen when I do press key combo. Luckily there is a very easy way to turn this feature off.
Turning browsers tabs thumbnails off
Press ⊞ WINDOWS + I to open settings
Click on System in the sidebar
Scroll down and select Multitasking
Find Alt + Tab section and click on the drop-down menu
Pick Open Windows Only
Close settings
Now when you press the ALT + TAB key combination you will still see your browser but only an active tab in it instead of all tabs as different preview thumbnails.
We have all experienced Windows errors over time and that can range from simple ones that will do very little to no harm and can be even system breaking making us lose our work or completely making the PC unusable. No one likes them but they happen, and usually, they happen once we least expect them.
No matter how frequent and unpleasant they might be there are ways to keep them at the minimum and even avoid them.
We will discuss steps that you can take in order to do this, simple tips and guides on how to keep your computer in top form and eliminate not just Windows, but any kind of errors altogether.
Keep your hardware clean
Believe it or not, some serious Windows errors like the dreaded blue screen of death can come from hardware issues not from the software at all. It is very important to keep your computer clean and with enough air flow so it can function properly.
Keeping applications on the drive might seem harmless but sadly that is not the case. Some applications have a certain impact on the system itself after all most of them are tweaking registry entries in Windows and sometimes having too many applications means an increased possibility of conflict over certain resources even when they are not running.
Some applications like adobe creative suite, for example, will have certain services always running in the background, and more of these kinds of applications you have, more services, more places for unexpected errors when they collide. Some of them will also install certain dependencies that could be problematic.
The general idea is: if you are not using it, uninstall it and you will be safer and more resilient to errors inside OS.
Do not use pirated or cracked software
Besides moral and law implications that using pirated or cracked software might bring you there are also certain other things that might be problematic. Certain "free" software might come packet with some problematic malware, for example, it is not uncommon for attackers to use some popular software to pack their malicious application with it.
Other things might be wrong and incomplete tweaking with application in order to bypass security and thus bringing some instability due to scripts needed to run in order to achieve this goal.
Keep your drivers updated
Errors can also come from old drivers or bad drivers, device manufacturers are not all-knowing and perfect, and sometimes drivers can wreak havoc on the system. Having updated drivers can minimize any kind of unexpected behaviors inside the operating system making it more stable and reliable.
You can check your driver version in the control panel inside the Windows OS and then compare it to the ones found on the manufacturer's site, if there are newer available it is recommended to download and install them,
Keep software updated
Applications can have bugs, and bugs can lead to certain errors both in the system and when using the app as well. It is in your best interest to get the latest patch or newer version of the software in order to avoid these unpleasant experiences.
Also, certain codecs and extensions that are installed directly in Windows can also have some unpredictable behavior, updating is the best solution to keep them in line.
Keep Windows updated
Same as with drivers and applications, Windows itself is not immune from bugs and some unpredictable issues. Luckily Microsoft is always working on fixes and features of Windows but in order to actually have benefited from that work, you will need to keep Windows updated. Sometimes a bad update can introduce some errors but you can always roll back to the previous and wait for them to fix everything and then download them all.
Check the health of your hardware regularly
Hardware components have their life cycle, more quality ones tend to last longer but eventually, they will reach the end of their lifecycle. There are a lot of testers for various components in your computer that can check different things and provide you with information about the state of your components.
If you are on Windows 11, Microsoft has included a basic health app inside OS, just type PC health check in search and start the app. For some more detailed information and advanced checks, you will have to use a custom application. There are plenty of them specialized for single components like RAM, SSD, etc. A simple google search with providing you with top results and most of them are free for personal use.
Remember, a faulty component or component that is reaching its life cycle can produce many errors inside the operating system.
Bandoo application, specifically product version 5.0.2.4762, is a bundled program. What does this mean? Simply, Bandoo, upon installation, installs additional programs, extensions, and add-ons to a computer and computer’s browser, without the knowledge of the user. This version of Bandoo concentrates on providing features for entertainment and also functionality/tools for backing up your computer files. Once executed, the file installs the iLivid Download Manager Software.
Additional tools installed within the bundle include a Movie Toolbar and the thriving search engine ‘Ask.com.’
Technical details about Bandoo include:
Digital Signature/Publisher: Bandoo Media, Inc.
Product Version: 5.0.2.4762
Entry Point: 0x000038AF
Assessment of Bandoo Potentially Unwanted Program
Interestingly, before the installation of Bandoo product version 5.0.2.4762 was complete, Spyhunter detected that the software was a PUP. After the installation was complete, product version 5.0.2.4762 of Bandoo added add-ons and extensions to both Internet Explorer and Chrome Browsers (these were the only 2 browsers used within the assessment). These appeared in the form of a Movie toolbar, providing quick access to movie trailers, reviews, ratings, and other video functionality, and ‘Ask’ (Ask.com) search engine.
Areas of Infiltration by Bandoo
Bandoo product version 5.0.2.4762 infiltrated several areas of the computer system. After installation, folders were neatly placed as files within all programs. Within “All Programs” there were 3 newly added programs. These included:
iLivid
Movies Search App for Chrome
Movies Search App for Internet Explorer
The iLiVid application seems to be the main offer while the others, namely Movies App for Internet Explorer by Ask was featured as promotions or advertisements. Additionally, just below the 'END USER LICENSE AGREEMENT AND PRIVACY POLICY' a request was made that the user set Ask.com as both their homepage, new tab, and default search engine. This is just another well-concocted plan to get Internet users onto the 'Ask.com' search engine.
Along with the 3 programs installed as a bundle, a new folder was found within the computer's local drive. This program was termed OLBPre.
What is OLBPre?
OLBPre.exe is reputed as dangerous adware that weakens the security settings of a computer system. It's also covertly used for dropping files on a targeted computer, often without the user's consent or knowledge.
Manual Steps for Removal of Movie Search Apps
I found this removal pretty simple. Depending on your Operating System, there will be slight discrepancies in the manual removal steps. Using the Windows 8 (8.1) OS on your computer:
Step 1: from your desktop, right-click on the ‘Start Button’. A menu box will then appear.
Step 2: from the menu box, click ‘Search’.
Step 3: enter “Programs and Features” within the Input Box.
Step 4: locate the installed apps. You should be able to see “Movies Search App for Chrome” & “Movies Search App for Internet Explorer”.
Step 5: right-click on the names of the Apps (the ones you want to remove) when you’ve located them.
Note: you will have to remove the apps one after the other.
Step 6: after right-clicking the app, click the uninstall option (probably the only option available anyway).
Note: If a box appears asking If you wish to ‘block’ or ‘allow’, select the allow option. That’s just the Publisher’s way to annoy you out of uninstalling the app.
Step 7: follow instructions until the app is fully removed.
Step 8: Repeat steps for the other app.
Since Bandoo also changed your search engine, you’ll have to reset that manually for Internet Explorer and Chrome. Follow the steps below:
Step 1: Open your Internet Explorer browser.
Step 2: Click the tool option located in the top right-hand corner of the page.
Step 3: Click the “Internet Options” option.
Step 4: Under the “General” tab, you’ll be able to see approximately 3 buttons. Click the button labeled ‘Use Default”.
Step 5: At the bottom right-hand corner of the pop-up menu, select the “Apply” button and “OK”. That should do the trick.
Removal for Chrome Extension
This removal is simple.
Step 1: Open your Chrome browser.
Step 2: A pop-up box will be visible.
Step 3: Click the “Remove from Chrome” option.
After removing the extensions/add-ons, perform another scan with Spyhunter. You’ll pick up a few threats. The second scan should clear up everything.
To completely remove Bandoo from your computer, click here to download and install Spyhunter.
If you are trying to upgrade your computer but encounter the Windows Update Error 0x800F081F – 0x20003 instead, then read on as this post will guide you in fixing this Windows Update error. This kind of error is commonly encountered when upgrading your copy of Windows 10 and is caused by errors with various developer-related settings that are being enabled in the system.
When you encounter Windows Update Error 0x800F081F – 0x20003, you will see either of these error messages:
“We couldn’t install Windows 10. The installation failed in the SAFE_OS phase with an error during INSTALL_UPDATES operation: Error 0x800F081F”“The installation failed in the Safe_OS phase with an error during apply_image operation: Error: 0x800f081f – 0x20003”
To fix this kind of Windows Update error, you need not use external programs but you can try to disable the Developer Mode, run the Windows Update troubleshooter or restart all the Windows Update-related services and components. For more details, refer to the options provided below.
Option 1 – Try to disable Developer Mode
You might have to disable Developer Mode to fix the Windows Update Error 0x800F081F – 0x20003. How? Refer to these steps:
Tap the Win + I keys on your keyboard to open the Settings app.
Next, go to Update & Security > For Developers.
From there, select the toggle for Sideload apps or Microsoft Store apps located on the right-side panel.
If you get any prompt, just click on Yes.
After that, navigate to Apps > Apps & features and then click on Optional features on the right-side panel.
Then scroll down to locate the Windows Developer Mode entry and select it and click on Uninstall.
Once you’re done uninstalling the Windows Developer Mode component, close the Settings app and restart your computer to apply the changes made.
Option 2 – Try to run the Windows Update Troubleshooter
You should also try to run the built-in Windows Update troubleshooter as it could help you resolve the Windows Update Error 0x800F081F – 0x20003. To run it, go to Settings and then select Troubleshoot from the options. From there, click on Windows Update and then click the “Run the troubleshooter” button. After that, follow the next on-screen instructions and you should be good to go.
Option 3 – Try restarting various Windows Update-related services and components
Tap the Win + X key combination and select Command Prompt (Admin) to open Command Prompt with admin privileges.
After opening Command Prompt, copy and paste each one of the commands listed below one by one and tap Enter right after you enter each command.
Once you’ve entered all the commands given above, they will stop all the Windows Update services that are running on your computer as well as clear the SoftwareDistribution folder, and reset the Catroot2 folder. Now you have to start all these Windows Update services you’ve just stopped by executing the following commands:
net start wuauserv
net start bits
net start appidsvc
net start cryptsvc
After that, restart your computer and try to run the setup again, and see if the error is now fixed.
If Error Code 0xc00000e9 appears on your screen, there is no cause to panic yet as there are different ways to fix this. Here, I will list down different methods to get your computer back on track:
Check peripheral connections
Check your SATA cables
Check your hard drive
Check your BIOS settings
Quick Fix 1. Check Peripheral Connections
Turn off your computer.
After the computer has been shut down, take off all the peripherals or the USB cables that are connected to your USB ports. This includes even the keyboard and the mouse. We just need to have only the monitor plugged in for this one.
Turn on your computer and see if it starts as it normally does.
If it does, try connecting back your external devices or peripherals one by one until you find the one that causes the error.
Once you trace the device that’s causing the error, you will have to change its USB cable and update its driver to support your operating system.
Quick Fix 2. Check your SATA cables
It is possible that what causes a barrier between your operating system and your hard drive from communicating is the SATA cable used. For example, if you’re using an older SATA with a SATA III port, there might not be adequate support for the transfer of data from one another. Or, the problem might be a loose SATA cable which would still require you to buy a new one to replace your loose or damaged cable. To check if your SATA cables are causing the error, simply follow these steps:
Turn off your computer.
Carefully open its case.
Check the hard drive and the SATA port where it’s connected.
Try to use a newer cable and connect it to your SATA port. (If you used a SATA II cable, you can see if a SATA III cable is more compatible.)
Replace your SATA cable with a newer one if Step 4 proves to be successful.
Quick Fix 3. Check your hard drive.
Try to use a different hard drive and see if error code 0xc00000e9 still appears.
If it works out just fine, then the problem might be physical damage to your hard drive and would need to be repaired depending on the case. Just simply take it to a technician and let him know about the issue.
Quick Fix 4. Check your BIOS settings
Restart your computer.
Once your computer starts, press and hold the ESC, F2, F12, or DEL key to go to BIOS settings.
You will then be redirected to the BIOS Setup Utility screen. From here, go to Boot options.
In the Boot Options, see if your first boot device is your hard drive. If it isn’t, press the arrow key to select the hard drive and move it to the top of the boot device list.
Save the settings.
Reboot your computer.
Note: If all the methods above do not work, the problem might be on your drivers and you might need to update them. You can update your driver in two ways: Manual driver update and Automatic driver update. You can find procedures online in updating your drivers.
In today's IT world, if you want a computer for typical day-to-day actions and gaming, there are 3 primary ways you can go. An Apple computer with its proprietary hardware and operating system or a typical machine with Windows or Linux operating system.
Each system has both advantages and disadvantages and picking the right one might be difficult for some users. From hardware differences to specific software and operating system, each system is aimed at a different type of work, and in this article, we will explore each one and help you in choosing the right one for you.
Apple ecosystem
Apple has managed to create a unique ecosystem of its own devices, from its iMac desktop computers to more professional MAC studio and power MAC and all the way to tablet iPad and iPhone are powered by Apple's own operating system that connects all of these devices into one large system. So if you really need one singular ecosystem this is a huge advantage.
The ecosystem on the side, MAC computer systems are great, some would argue best for coding, design, video work, and sound editing. MAC M2 chip is optimized for all of these tasks and a specially tailored operating system is just the icing on the cake. Specific Apple-made software like a logic pro or final cut also helps a lot to position MAC systems on top of the line.
Reading all of this you might think hey this is the computer for me, it does everything! Sadly the truth is not like that. The first thing that is difficult on MAC systems and a maybe big reason that it is not so adopted outside professional working environment is lack of games. If you are a gamer or plan on using MAC for gaming, well I have some bad news. The second big turn-off is that MAC systems tend to be more expensive than PC systems, yes components are of higher quality but rest assured that you will pay for also for branding.
Get MAC as your workstation for serious work and for good tech support, if you need a plain home computer keep reading.
Windows PC machine
There is no better feeling than assembling your own computer, tweaking hardware to make a monster and despite haters hating, Windows is the best all-around operating system on the market. It is supporting the largest variety of hardware and the largest variety of software.
The best platform for serious gaming and streaming Windows machine has cemented itself as a multimedia powerhouse. But, this kind of computer is not alien to being also a professional machine, you can practically do everything that you can do on Apple or Linux machine inside Windows, yes some things might require extra steps or will be slightly slower but in the end, being able to do anything is the greatest strength of Windows machine.
Of course, every system has its flaws and Windows is not immune to that. One of the biggest is being the operating system for every hardware ever made and every software as well while keeping legacy support for old software and hardware, basically, its biggest strength is in the same time its biggest weakness leading to sometimes stability issues. Also being able to place any kind of hardware can also lead to the same stability issues. Executing something a little slower than other systems and having some extra steps can also be looked upon as weaknesses.
Linux system
First and perhaps for some people, the biggest advantage of the Linux operating system is its price, it is completely free! Other advantages include the great server and networking included in the OS itself, the large amount of customization, and unmatched stability. The ability to write scripts inside the OS terminal is also a great thing and coding is much more streamlined and friendlier than on other machines.
The power of Linux is the ability to change anything, even on the system layer, no other operating system will let you change the basic functionality of the OS itself while Linux will let you do this. It is also the only operating system you can fully use by booting it up from a USB stick and having the same experience as it was installed on a local hard drive. Among other OS mentioned earlier, Linux is by far the lightest one, taking the smallest amount of memory among the three.
The bad side of the Linux machine is the steep learning curve, among the three mentioned operating systems rest assured Linux is the most difficult to learn and be comfortable in it. The operating system will require you to know the hardware and how computers work in order to fully use its potential. Other things that place it behind are not so wide hardware support compared to Windows and the somewhat confusing distro model.
Linux versions come in form of different distro packages and first-time users will face many of them being left in awe of which one to choose. Also installing drivers and software via a package system can also be a tedious task as well, often being that some version of the driver will not work on the newer version of the Linux distro.
Get a Linux machine if you are well versed in computer technology, if you want great customization of the OS itself or if you do not want to spend money on OS and software since almost entire Linux software is open source.
Copy & Paste is an essential part of Operating and working on a computer. We copy and paste a lot of different stuff through our workday, moving stuff from application to application. In an earlier article today we have explored troubleshooting and how to repair copy-paste stopped responses, this time we are going to focus on a little feature of Windows 10 called Clipboard history.
Clipboard history is a built-in feature in Windows 10 which lets you store multiple copies of different types and then selectively pasting them into another application. Let's say you have multiple copies of different text from different websites and you then paste everything or just some into a Word processor.
If this feature sounds interesting to you then let's turn it on.
Press the start button and then on settings.
In settings window click on Systemin system dialog click on the clipboard and on the right screen turn ON CLipboard history.
Installation Error 1628 is, as the name suggests, an installation error. When it occurs, a generic 1628 message is displayed to the user. When this message appears, it is either a problem with the install files or an issue with the InstallShield.
Solution
Error Causes
Installation Error 1628 is caused because every Windows-based program or application has been designed that such that it has to be installed on the computer for use.
This installation process is important because it not only moves files to the appropriate location on one’s hard drive but also because the process creates registry entries in Windows System files.
A vast majority of these programs and applications have a built-in tool that’s responsible for aptly performing this installation. This built-in tool is the InstallShield.
This establishes that when this error occurs, it is either because of some unforeseen issue that occurred during the installation process or because of some problem with the InstallShield.
Further Information and Manual Repair
In order to keep this error from occurring in the future, some recommendations are outlined below.
Check the installation disc and determine if there are any smudges, scratches, or fingerprints on it. If the system is unable to read data from the disc, Installation Error 1628 will be generated. In order to ensure that the Installation Disc is clean, use a microfiber cloth. Dampen it lightly with water and clean the disc. Wipe the inside of the disc lightly in an outward direction, making sure that it is not wiped in a circular pattern. Try to reinstall the application or program after cleaning the disc. The issue should be resolved. However, if it persists, some problems may be with the InstallShield.
The alternative solution is to repair the InstallShield and the procedure goes as follows.
Stop InstallShield’s running process. It may have been crashed and simply needs to be restarted. Now access task manager. Press Ctrl+Alt+Del and the task manager will open. Now go to the processes tab and disable ‘idriver.exe’ and ‘msiexec.exe’ from here.
Now go to ‘C: Program Files/Common Files’. Here you will find the ‘InstallShield’ folder. Select ‘rename’ and modify the folder name to ‘InstallShield1’. Confirm rename and start the installation process again. Now Windows will try to re-install any InstallShield files one needs.
If the error persists after renaming the InstallShield folder, download the Windows Installer from Microsoft’s website. This file will determine whether or not your version is valid. Old versions often have bugs that cause problems. Your system is now ready to be used.

 As in previous Windows 10, inside Windows 11 also when you press the ALT + TAB key combination you will get a preview of all running applications along with all Browser tabs so you can go through them and pick the one you want to switch to.
Alto, I personally am a big fan of alt-tabbing, I must admit that I am not a big fan of having multiple browsers tabs on screen when I do press key combo. Luckily there is a very easy way to turn this feature off.
Turning browsers tabs thumbnails off
As in previous Windows 10, inside Windows 11 also when you press the ALT + TAB key combination you will get a preview of all running applications along with all Browser tabs so you can go through them and pick the one you want to switch to.
Alto, I personally am a big fan of alt-tabbing, I must admit that I am not a big fan of having multiple browsers tabs on screen when I do press key combo. Luckily there is a very easy way to turn this feature off.
Turning browsers tabs thumbnails off


 in system dialog click on the clipboard and on the right screen turn ON CLipboard history.

