PrintNightmare vulnerability has been a struggling issue for Microsoft in the past weeks, each time it seems to be addressed and fixed something new popped up and it still had issues.
Microsoft finally addressed the issue but with a price. The default behavior of Point and Print is changed. From this fix onward, the Point and Print driver installation and update behavior will require administrator privileges, which should prevent the exploit to the Windows Print Spooler that could be used by malicious individuals to gain administrative privileges in Windows.
The drawback of this fix from Microsoft is that non-elevated users may have difficulty adding or updating printers. Microsoft feels that the security risks caused by PrintNightmare are worth the tradeoff, though.
If you really want to let non-elevated users add printers, you can follow the instructions in this Microsoft Support article to disable this mitigation with a registry key. However, doing so will expose you to this known vulnerability and isn’t recommend.

Just click here Download and install Stellar Phoenix Outlook PST Repair tool in your computer. Run it to regain all of your data within your e-mail account and to regain your lost MS-Outlook PST File Password.Besides assisting you to regain your PST file password, it can be utilized to solve malfunctions in the PST Files and any other associated problems. For instance, this repair tool can help to fix damaged and corrupted PST file size limit errors as well as PST files. If you use MS Outlook 2002 version on your PC and you use it quite often and prefer not to delete emails in it, then you might come across the PST file size 2GB limit error. This error occurs when you reach or exceed the 2 gigabytes memory limit. If this happens, your ability to send and receive emails through your MS-Outlook account is greatly hindered. You can't add new contacts either. In instances such as these, Stellar Phoenix Outlook PST Repair Tool is useful. It helps increase the GB limit twice as much as normal. This means that your memory limit rises from 2-4GB making Stellar PST Outlook Repair a crucial tool for all MS Outlook users.
Are you trying to update your Windows 11 OS and are receiving a 0x800f0905 error? Do not sweat and do not worry we have a couple of solutions that you can try in order to fix this issue. How this error is tied to various things like misconfigured settings, corrupt system files, and more there is no way to present one simple solution that will solve everything in one click.
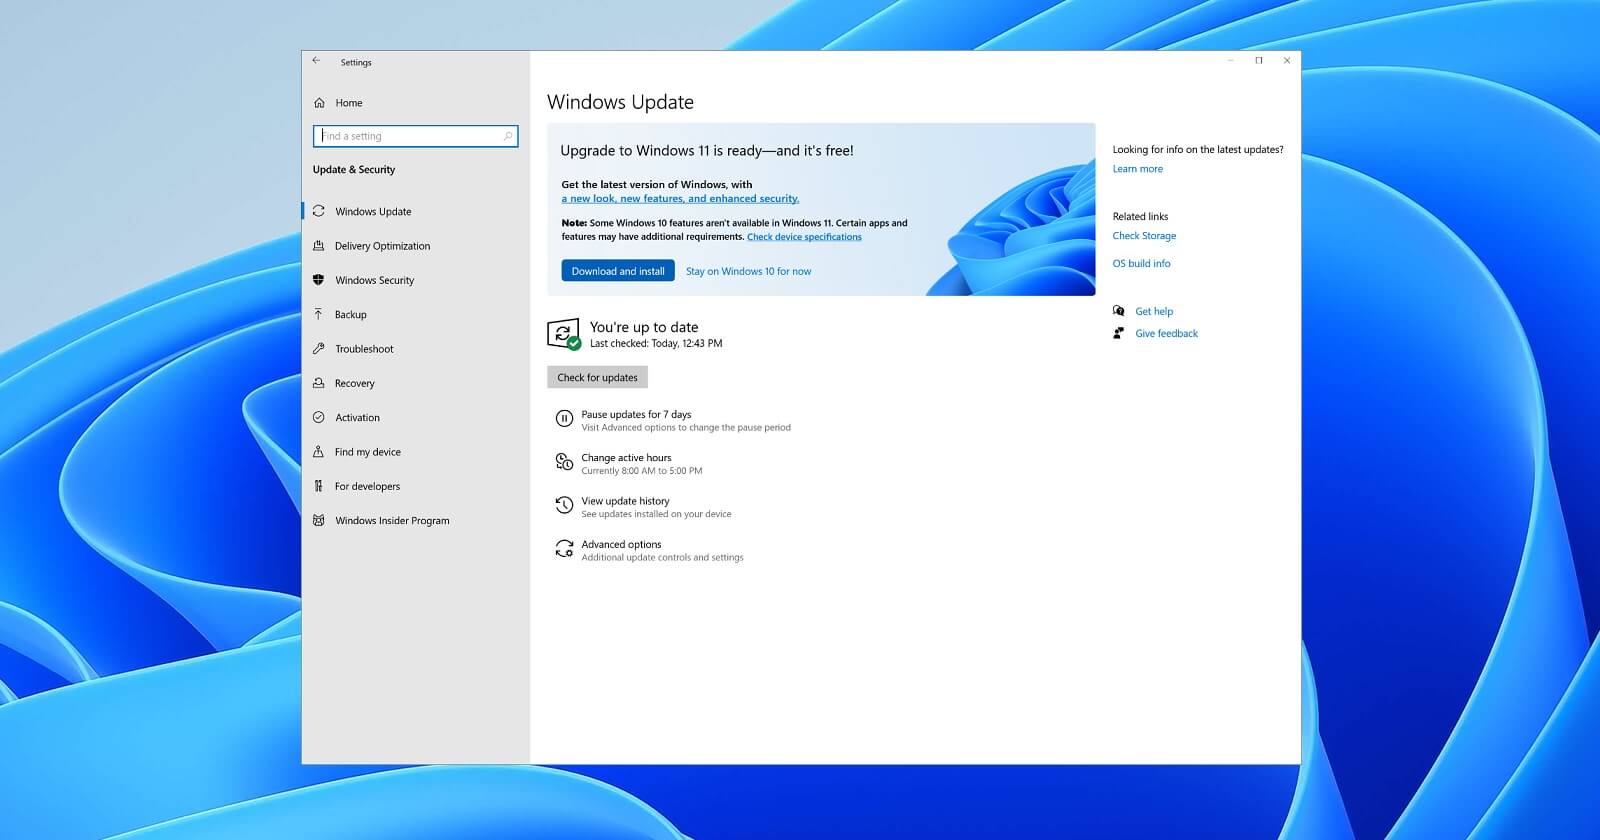 Therefore we are presenting a couple of solutions that will fix your issue, it is advisable to follow them as presented since they will go from the most common to the more complex one.
The most common fix and one that will actually repair things most of the time is simply running the Windows Update troubleshooter.
If the previous solution did not work we will need to do things manually. Follow the steps as presented in order to reset Windows update components.
Well, that was a lot of typing or copy and pasting line by line followed by ENTER after each one but hopefully, your issue is solved. These provided solutions fixed most users' issues with this error but if for some reason this is not the case for you, move to the next step.
If you are still having 0x800f0905 error after previous attempts do the following:
If for any reason previous solutions have not provided you with the solution we will try to fix the issue by performing system restore.
If for any reason Windows still cannot install the update, try installing it manually.
If nothing worked, reset your Windows 11 to its factory settings to fully repair and reset the whole operating system.
Error code 0x80073afc deals with an antivirus program first built into Windows 8/8.1 This error occurs when Windows Defender, the built-in anti-virus software in Windows 8/8.1 and higher, does not start automatically and users attempt to manually start the program. During the initialization period of the program start-up, something goes wrong and users get a 0x80073afc Error message. The error message states there was a problem with the initialization of the program. Windows Defender provides protection of your computer and it is advised by the Microsoft Corporation that you ensure it starts up automatically on every start-up.
 Further Information and Manual Repair
Users have found several manual repairs that have fixed the problem without needing to contact technicians for extra help. While the methods below should solve your problem easily, if this is the first time you have encountered the issue you may want to do a simple restart. This has fixed the problem for some users and is the easiest first troubleshooting move. If it doesn’t work move on to the methods listed below, which are easily completed without extra help.
Before trying any of these methods, please make sure that you are logged into a profile that is listed as the administrator of the computer of his administrative powers enabled. If this is not the case you will not be able to complete the following methods. Please log out and log back in on the administrator profile.
First, check to see if you have a third-party anti-virus program installed on your computer. Some users believe that the built-in Windows Defender program is not powerful enough to handle the safety of their computer so they usually download a third-party program. However, that program may have caused a conflict with Windows Defender and may not allow it to open. If you do have a third-party program installed, try uninstalling it then manually starting Windows Defender.
If method one does not work, you may be infected by malware or a virus that has tampered with the settings on your computer and will not allow Windows Defender to start automatically or manually.
First, open Run by holding the “Win” key and pressing the “R” key. Then type “Regedit”. The program will ask for permission to follow through with this action. Click on “Yes” and the Open Registry Editor will open.
Find the HKEY_LOCAL_MACHINESoftwareMicrosoftWindows NTCurrentVersionImage File Execution Option and check to see if there are any files similar to MSASCui.exe or MpCmdRun.exe. If there are any file entries that resemble that, you will want to right-click on them before selecting the “Delete” option. If you do not see any entries that match, this is not the issue with your Windows Defender and you will want to try another method.
The Registry on your computer is very important. It helps tell your computer what programs are safe to run, what programs should be run, and what programs should not be run. If it is tampered with by a virus or Malware, multiple system operations can be affected.
However, if you did find similar file names, and you deleted them, try to start Windows Defender manually. If it does not work again, move on to the next method.
If the first two methods do not work for your issue, and you are still receiving error code 0x80073afc when attempting to start Windows Defender, this step should solve the problem if you have Restore Point installed on your computer, which you most likely do.
For this method, we will be restoring your computer to a previous Restore Point. First, just like in method two, hold the “Win” key and press the “R” key. This will open run. Next type “Rstrui.exe” and click “ok”. After some time, you will see System Restore Windows. Click “Next” and select the restore point that you would like to go back to. After your computer has restored to the point you selected, check to ensure that Windows Defender has started correctly.
If the above methods aren't able to rectify the issue, you might have to download and install a powerful automated tool to get the job done.
NoteHomepage (by MyWay) is a browser extension that may be bundled with other free software that you download off of the Internet, or delivered via other advertising means. When installed NoteHomepage will set the homepage and search engine for your web browser to http://search.myway.com. While installing this extension will gather information from your browsing sessions, including website visits, clicked links, and sometimes even private information, that it later sends back to display unwanted ads into your browser. Several anti-virus scanners have marked this extension as a Browser Hijacker and are therefore not recommended to keep on your computer. It is considered potentially unwanted, and many users wish to remove it, so it is flagged for optional deletion.
reg add "HKEY_LOCAL_MACHINESOFTWAREMicrosoftWindowsCurrentVersionWindowsUpdateAuto Update" /v AUOptions /t REG_DWORD /d 0 /f
sc config wuauserv start= autoThe command you entered will set the Windows Update to auto so you should be good to go.
Nvidia announced the third generation of GeForce RTX GPUs called Ada Lovelace. New technology is bringing 76 billion transistors with 18,000 CUDA cores along with new gen ray tracing cores and improved Tensor cores as well. The new lineup also comes with DLSS 3 which is vastly improved from its previous version pushing a 4 times increase in frame rates over native rendering.

RTX 4090, a better model of GPU will come with 16,384 CUDA cores and a boost clock speed of 2.52 GHz. Also, it is packed with stunning 24 GB of GDDR6V VRAM. In Nvidia's words, its performance is twice faster than the 3090 Ti in games like Flight simulator, three times faster on Portal RTX, and four times faster on RacerX.
RTX 4080 comes in two modes, one with 12GB VRAM and a stronger one with 16GB VRAM but differences do not end here. The lower model is packing 7,680 CUDA cores while the stronger one is going to 9,728 CUDA cores. We will wait to see how will these cores count impact real-world performance in games.
As for prices, the flagship model RTX 4090 will be $1,600 USD and it will hit the market on October 12th. RTX 4080 12GB model will be $900 USD and the model with 16GB VRAM will go up to $1,200 USD. This, of course, is the price for Founders Edition cards, OEM cards from third parties like ASUS, MSI, Gigatech, etc will cost more.
While running your Windows 7/Windows Server 2008 R2, your system suddenly stops responding out of complete randomness and you see an error message popping up which says something like this:
0x00000050 (parameter1, parameter2, parameter3, parameter4)
Error CausesThe stop error 0x00000050 signifies that there’s a PAGE_FAULT_IN_NONPAGED_AREA problem. If you’ve seen this error on different occasions then you will find the parameters in the message to be varying. That is because they are dependent on your PC’s configuration. Not all Stop errors "0x00000050” occur due to a single issue.
However, the most common problem which is encountered which results in the stop error popping up is due to a pool corruption occurring in the Srvnet.sys file.
This issue might be caused because of software incompatibility or a defective physical memory which resulted in requests for data for a hardware driver or service which was not found in the memory.
If you find the error occurring after you’ve installed a new application or a device driver then you should access Safe Mode and uninstall, disable or remove that application or driver.
For this you have to follow the below-mentioned steps:
Error Code 0xc0000005 can be a frustrating error that occurs when you attempt to use programs within Windows 10. While it is most often associated with Windows 10, this particular error has also made an appearance in previous versions of the Windows operating system. In each case, the error works in the same ways and is generally caused by the same things.
Common symptoms include:While it can be hard to have to deal with an error like Error Code 0xc0000005 on your Windows machine, there are at least three different strategies that you can use to attempt to resolve the problem at hand. If you do not feel like you have the skill or ability to complete these steps on your own, get in touch with a professional who is familiar with the Windows 10 operating system that can assist you. Please note, if this error code is not rectified, you could be exposing your computer to other error messages such as error code 0xC1900101 -0x20017.
Error CausesThe most common causes of Error Code 0xc0000005 on Windows 10 machines include interference with other programs that are running on the computer, such as antivirus programs, problems encountered within the registry entries made on the operating system, or faulty drivers that cause bad interactions between the system and the program in question.
Fortunately, there are several methods that can be used to resolve these specific issues.
There are three main ways that you can try to resolve Error Code 0xc0000005 on your Windows machine. Depending on your degree of technical ability and confidence, it may be easy to moderately difficult to follow these steps, so if you feel like you are not able to complete the methods below on your own, be sure to get in touch with a qualified computer repair technician to aid you in the process.
Here are the best ways to resolve Error Code 0xc0000005 on your Windows machine:
Always be sure to keep on other security software, such as Windows Defender, while you disable your antivirus programs, ensuring that your computer is still protected from malicious software. In general, this is usually the best security tool that you can run on your computer, without interfering with other programs.
In some cases, the error code can appear when a registry entry is either seen to be missing or faulty by the system. If you believe this is the primary cause of your problem, use a trusted registry cleaning software to scan the files and attempt to automatically fix the problem.
Always be sure to check out the provider of the registry cleaning tool that you use, as not every tool that you can download from the Internet is safe. When possible, always try to use registry tools that are directly available from the Microsoft website, rather than ones that you do a simple search for online.
Once the registry scan is complete, take the time to reboot your computer to ensure that every change that has been made can be recognized and applied by your operating system and devices.
If your drivers aren’t communicating properly with your hardware, it can cause the error code to appear. To fix this, open up your device manager software and choose to update your driver software. You can run an automatic search for updates to your drivers to make things easier.
When the driver updates have been downloaded and installed, make sure that you take the time to reboot your computer, which can allow your computer to apply and recognize any changes that have been made.This specific Windows 8.1 or Windows 10 error code has to do with the number of times you can use your license number to install windows programs on computers. All windows activation codes are licensed to be used one time for a device, to control piracy, but what happens when your PC crashes, or you have to change a hard drive component and are forced to re-install Windows Operating System. Luckily, there is an easy fix for this issue.
Error CausesBasically, when you need to re-install the Windows operating system that you have previously bought and installed on another computer an error code will be displayed with a message telling you that the activation server determined that the specific key could not be used for activation. This occurs because the key has already been used on that computer, or a different one, to install operating systems. There are a few easy fixes for this issue, and most of them should be easily completed on your own.
There aren’t many explanatory ways to repair Error Code 0xc004c008. Below are two methods to go about addressing this issue.
If the first method did not work, the only other option is to call Microsoft and walk through the process with a technician. To do this, dial “1-800-936-5700”. Explain the error that you received and the steps in the update process during which it was displayed. The technician will be able to walk through the steps from getting a new product key to finishing the installation.
If you're not a tech-savvy individual but would like to solve this problem without the aid of a technician, download a powerful automated tool to fix error code 0xc004c008.