Setup Voice control in Windows11

Computer voice control has moved a long way from its beginning routes and in today's age controlling your PC with voice is truly a reality and fully possible. Voice control is taking up the steam in everyday life, from simple commands in cars, Alexa, smartphones, TVs, etc. to modern computers.

voice control

Windows 10 has introduced voice control into PC with Cortana even during the installation process but a lot has changed from having a virtual assistant in begging days and in today's modern Windows 11 OS. You can now freely open apps, move, copy delete files, and even dictate in order to create a word document.

However, in order to take this advantage, you will need to turn it off first since it is disabled by default. Of course, you will need a microphone and some spare time to train Windows in understanding you properly.

Setting up Voice Control

Just like in Windows 10, in Windows 11 voice control is also in accessibility options and the first step is to turn ON Windows Speech Recognition.

Click on the Start button and type Settings into the search bar, click on Open, or press ENTER. On the left side of the settings, window locate and click on Accessibility. On the right part once Accessibility is selected scroll down and find a section titled Interaction and click on Speech. Turn on the switch next to Windows Speech Recognition.

A pop-up will appear that will lead you through the rest of the setup and that's it.

Improving Voice Control

In order to make your voice control better, if you are not satisfied with the results, you can sample more of your voice into the algorithm to tune it more to your liking. Sadly this option is still deep in Control Panel.

Click the Start button and type in Speech recognition into the search bar, look for the search result with Control Panel displayed under it, and click on Open. Click on Train Your Computer to Better Understand You and follow the instructions.

The process will probably take a few minutes. The more data you provide to the speech recognition model, the more accurate it will be when interpreting your instructions. You can train the model multiple times, and each time you do, it should improve the accuracy.

Do You Need Help with Your Device?

Our Team of Experts May Help
Troubleshoot.Tech Experts are There for You!
Replace damaged files
Restore performance
Free disk space
Remove Malware
Protects WEB browser
Remove Viruses
Stop PC freezing
GET HELP
Troubleshoot.Tech experts work with all versions of Microsoft Windows including Windows 11, with Android, Mac, and more.

Share this article:

You might also like

Fixing Windows 10 stuck at “Preparing Security Options”
There are cases when your Windows 10 PC can encounter an issue where it gets stuck and will display a message that says, “Preparing Security Options”. If this is happening to your Windows 10 PC, you won’t be able to use your keyboard or even mouse and your screen will only be stuck on the screen as mentioned above. As your computer is still stuck, you will be left with no choice but to shut it down and restart it. Tap the F11 key as soon as your PC powers on. This will take you to the Advanced Startup options where you can carry out some steps. If it still didn’t work, you have to boot your Windows 10 PC into Safe Mode and then try out the troubleshooting options below.

Option 1 – Try using System Restore

You can do this option either by booting into Safe Mode or in System Restore. If you are already in the Advanced Startup Options, just directly select System Restore and proceed with the next steps. And if you have just booted your PC into Safe Mode, refer to the steps below.
  • Tap the Win + R keys to open the Run dialog box.
  • After that, type in “sysdm.cpl” in the field and tap Enter.
  • Next, go to the System Protection tab then click the System Restore button. This will open a new window where you have to select your preferred System Restore point.
  • After that, follow the on-screen instructions to finish the process and then restart your computer and check if the problem is fixed or not.

Option 2 – Uninstall the Windows Updates you’ve installed recently

The issue could be caused by Windows Updates so you need to check if it’s indeed the case. The best way you can do so is via Safe Mode.
  • Boot your PC into Safe Mode and then tap the Win + I keys to open Settings.
  • After that, click on Update and Security and then select Windows Update from the left side menu column.
  • Next, select the “View installed update history” option on the right-side column and click on Uninstall Updates which will open a window that will show the list of all the installed updates on your PC.
  • From there, select the update you want to uninstall and click the Uninstall button located in the lower right corner of the window.

Option 3 – Try disabling the Fast Startup

  • Boot your PC into Safe Mode.
  • Then tap the Win + R keys to open the Run dialog box.
  • Next, type in “control” to open Control Panel.
  • After that, select Hardware and Sound and click on Power Options.
  • Select “Choose what the power buttons do” from the left side menu pane and click on Change settings that are currently unavailable.
  • Afterward, uncheck the “Turn on fast startup (Recommended)” entry and click on Save Changes.
  • Now restart your PC and check if the problem’s fixed.

Option 4 – Try running both the SFC scan and CHKDSK utility

You can do both SFC and CHKDSK using Safe Mode and Advanced Startup options. For Advanced Startup options, click on the Command Prompt option and proceed with the steps. And if you have booted your computer into Safe Mode, follow these steps:
  • Tap the Win + X keys or right-click on the Start button and click Command Prompt (admin).
  • After that, type in this command and tap Enter to run the System File Checker or SFC – “Sfc /scannow”.
  • Alternatively, you can use this command instead if the previous command didn’t work – “sfc /scannow /offbootdir=c: /offwindir=c:windows”.
  • Wait until the SFC scan is done with the process and then restart your PC.
  • Next, run the CHKDSK utility and once it’s done checking your disk for errors and then reboot your PC to save the changes made.

Option 5 – Try resetting Windows 10

You can reset your Windows 10 PC using either the Advanced Startup Options or by booting into Safe Mode.
  • Tap the Win + I keys and go to Update and Security > Recovery.
  • Then click on Get Started under the Reset this PC section.
  • After that, follow the on-screen instructions with how you want to reset your PC and what files and settings you want to revert.
  • Then it will reset your PC by reinstalling it

Option 6 – Try to rename the SoftwareDistribution folder

In this option, the Command Prompt is supposed to be like the one in option 4. You can use both ways there to open the Command Prompt.
  • Open an elevated Command Prompt as admin and type in the commands below and tap Enter right after you typed in each one of them
  • net stop wuauserv
  • net stop bits
  • rename c:windowsSoftwareDistribution SoftwareDistribution.bak
  • net start wuauserv
  • net start bits
Note: You can also rename the SoftwareDistribution folder to “SoftwareDistribution.bak” or “SoftwareDistribution.old” after you boot your PC into Safe Mode.

Option 7 – Try rebuilding BCD

Rebuilding the BCD can help you in fixing the stuck Windows 10.
  • You can start by booting into the installation environment for Windows 10 from an installation media.
  • After that, click on Repair your computer and on the blue screen, select Troubleshoot and then select the Advanced options menu.
  • Next, select Command Prompt and type in the commands below one by one, and tap Enter right after you do so.
  • exe /FixMbr
  • exe /FixBoot
    • exe /RebuildBcd

Read More
The Steam Autumn sale is coming!

Oh, gamers rejoice, the Steam autumn sale is just around the corner!!!

The sale starts on November 22nd and lasts until November 29th. A great deal for any gamer, especially for ones that have plenty on their wishlist. Speaking of wishlists now would be a good time to place some interesting titles on them so you can be notified about discounts on them.

If you by any chance are unavailable to participate in the Autumn sale, do not worry, Steam winter sale is coming on December 22nd and it will last until January the 5th so you can save for it.

The best tactic for sale is not to jump on the train right away, it is best to wait until a few days, maybe even until the last 2 days since some games can go even lower on discount in the last days of the sale. Also, there might be also some packages that include games you wish to buy but are packed with other ones in a bundle and even with a higher discount.

So get prepared for the upcoming sale and treat yourself to something nice!

steam sale
Read More
NVIDIA Control Panel is not opening
Users who constantly use graphic-intensive applications like games or any video-rendering software need to control how their graphics card is used. There are some who always toggle their Graphic Quality settings to get the Frames Per Second or FPS up. While some tend to adjust the size, orientation, scaling, and other display settings in order to use their PCs in a more efficient way or to simply work better. And in all of that, that’s where the NVIDIA Graphics Card comes into the picture. Take note that this software only works on PCs which has NVIDIA Graphics Card attached to them. Thus, if you use another Graphics Card then this post is not for you, otherwise, proceed reading to know what you can do if the NVIDIA Control Panel is not opening on your Windows 10 PC. Here are a couple of things you can try if the NVIDIA Control Panel is not opening, not responding, or not working:
  • Restart the process of the NVIDIA Control Panel
  • Restart the NVIDIA Display Driver Service
  • Update your NVIDIA Display Drivers
For more details, refer to the instructions provided below.

Option 1: Restart the process of the NVIDIA Control Panel.

  • Tap the Ctrl + Shift + Esc keys to open the Task Manager.
  • After opening the Task Manager, look for the process named NVIDIA Control Panel Application.
  • Once you found it, expand it and right-click on the NVIDIA Control Panel sub-process, and click on End Task.
  • Now try opening the NVIDIA Control Panel from the Start Menu and see if it now works fine or not.

Option 2: Restart the NVIDIA Display Driver Service

  • Tap the Win + R keys to open the Run dialog box.
  • Then type “services.msc” in the field and hit Enter to open the Windows Services Manager.
  • After opening the Services window, you will see a list of services. From there, look for services named “NVIDIA Display Container LS” and double click on it to open its Properties.
  • Now make sure that the service is Started. If it isn’t, you need to start it, otherwise, you need to Stop it and Start It again. You also have to make sure that the Startup Type is set to Automatic.
  • Do the same for the NVIDIA LocalSystem Container service.
  • Restart your computer and check if the problem’s fixed.

Option 3: Try updating the drivers from the official site of NVIDIA

If both the first and second given options didn’t work, you can also try updating the drivers from the official NVIDIA website. And in case you don’t know the type of Nvidia graphics card that your computer is on, follow the steps below:
  • Tap the Win + R keys to open the Run dialog box.
  • Next type in “dxdiag” in the field and click OK or hit Enter to open the DirectX Diagnostic Tool.
  • From there, you can see what type of Nvidia graphics card that your system is on.
  • Take note of your graphics card information and then look for the best drivers for your operating system. Once you’ve downloaded and installed the file, restart your PC.
Read More
Fix Remote Desktop: Your credentials ...
Experiencing issues while using Remote Desktop connections is not uncommon. One of the issues that users encountered recently while trying to connect to their Remote Desktop network is the error saying, “Your credentials did not work, The login attempt failed”. If you are one of these users, then you’ve come to the right place as this post will walk you through fixing the problem. When facing this kind of problem, the first thing you can try before you do some troubleshooting steps is to verify the credentials. But if you are certain that you’ve entered the correct credentials just like what other users reported, then it’s completely a different matter. Based on the reports, this error is common on newly installed versions of Windows 10 or after reinstalling the operating system which could mean that the problem might be due to the Windows security policies or the username might have been recently modified. The latter case is a possibility especially if you’ve reinstalled Windows 10 and had entered a new username. In such a case, you will really have a difficult time connecting to your Remote Desktop connection since its credentials do not really automatically change. If you’ve verified that your credentials are correct, then now’s the time you troubleshoot the problem with the help of the potential fixes provided below. Just make sure that you follow each one of them in sequence.

Option 1 –Try to run the Network Adapter troubleshooter

To run the Network Troubleshooter, refer to these steps:
  • Open the Search bar on your computer and type in “troubleshoot” to open the Troubleshoot settings.
  • Next, scroll down and select the “Network Adapter” option from the right pane.
  • Then click on the Run Troubleshooter” button.
  • After that, your computer will check for any possible errors and will pinpoint the root cause of the problem if possible.
  • Restart your computer.

Option 2 – Try to change the network profile from public to private

According to some reports, this error occurs on systems where the network profile was set to public. Thus, you need to change the network profile to private to resolve the problem. How? Refer to these steps:
  • Go to Start and from there click on Settings > Network & Internet > Status.
  • Next, click on the “Change connection properties” option.
  • After that, set the radio button of Network Profile from Public to Private.
  • Wait for a couple of seconds until the system is done applying the changes you’ve made and then see if you can now connect to the Remote Desktop connection.

Option 3 – Try changing the account username

As mentioned, one of the possible causes for this error is the reinstallation of the operating system. You might have changed the username for the system but it does not really change the username of the Remote Desktop connection as well. Thus, you have to change the username back to what it was before you’ve reinstalled Windows 10.

Option 4 – Try modifying the Windows Security Policy

You can also try to edit the Windows Security Policy as it could help in resolving the error. This Windows Security Policy, when enabled, will not allow non-admin users to log on to the Remote Desktop connection. So if you want to allow non-admin users to use the Remote Desktop connection, then you need to modify this policy. Note that you can only do that if you are the admin of the system yourself.
  • Tap the Win + R keys to open the Run utility.
  • Then type “secpol.msc” in the field and tap Enter or click OK to open the Local Security Policy.
  • After opening the Local Security Policy window, select Local Policies > User Rights Agreement located on the left pane.
  • Next, double click on “Allow log on through Remote Desktop Services” located in the right pane.
  • And in the next window that appears, select Add user or group.
  • After that, type in the username of the intended non-admin user under the “Enter the object names to select” column.
  • Once done, click on the Check Names button to fix the username and then click OK to save the changes made.
  • Restart your computer.

Option 5 – Use the Group Policy Editor

  • Tap the Win + R keys to open the Run dialog box and then type “gpedit.msc” in the field and tap Enter to open the Group Policy Editor.
  • Next, navigate to this path: Computer Configuration > Administrative Templates > System > Credentials Delegation.
  • Double click on the “Allow delegating default credentials with NTLM-only server authentication” policy setting located on the right pane to edit it.
  • After that, shift its radio button to Enabled and click on Show.
  • Then type “TERMSRV/*” in the Value box and click OK.
  • Now repeat the same for the following policy settings:
    • “Allow delegating default credentials”
    • “Allow delegating saved credentials”
    • “Allow delegating saved credentials with NTLM-only server authentication”
  • Once you’re done, restart your computer and see if the problem is fixed.
Read More
Fix Windows Activation Error 0xC004F211
If you got an Activation Error 0xC004F211 after having installed or upgraded your Windows 10 PC, then this indicates that some hardware in your computer has changed which’s causing the error to pop up. Windows might not be able to determine if the key is used on a new computer or if it’s still the same one if you have just removed or upgraded old hardware. But worry not for this post will guide you in fixing the Windows Activation Error 0xC004F211 on your Windows 10 computer. When you encounter this error, you will see the following error message on your screen:
“Cannot activate Windows 10. Try activating again later. If that doesn’t work, contact support. Error code: 0xC004F211.”
Note that although hardware changes cause this error, the minor ones don’t really cause any issues with activation, however, if you have made any significant hardware change such as replacing your motherboard, it will most likely cause the activation error. In such cases, the Windows Activation system will treat this as new hardware and you will need a new license for that. Even if your Windows 10 computer has a genuine key, it might still fail to get activated which results in the Windows Activation Error 0xC004F211. Thus, before you do other troubleshooting steps, you need to run the Windows 10 Activation Troubleshooter first. To do so, follow these steps:
  • Go to Settings and then select Activation.
  • After that, click on the Windows Activation and then troubleshoot. This will help you address most of the commonly found activation issues in Windows devices.
In addition, there is an exception offered by Microsoft – if you are connected to a Microsoft account prior to the hardware change, then you can most certainly use the same license key to reactivate Windows 10 again. Microsoft calls this an “Exception path” which should be fixed easily by the Windows Activation Troubleshooter as pointed out earlier. However, if the Windows Activation Troubleshooter isn’t able to resolve the error you can try purchasing a new license. In such rate case, even if you do have a Microsoft account available on your Windows 10 computer, and if Windows was never activated, this solution will not work. And if you haven’t connected your Microsoft account with your Windows 10 computer prior to the major hardware change, then your only option left is to purchase a new license. For you to do that here are some steps you can follow.
  • To purchase a new Windows license, the first thing you have to do is click on the Start button > Settings > Update & Security.
  • From there, go to Activation and select the “Go to Microsoft Store” option.
  • After receiving your new license, you need to go back to Update & Security then go to Activation and select the “Change product key” option.
  • Now update your Windows 10 computer using the new key and it should automatically activate your computer.
  • Next, you have to create a Microsoft account or connect your existing local account to your online account.
  • Once the system links the key and the account, you need not buy a new license in case something like this happens again.
Note: If you are an IT administrator, you need to keep in mind that there is a limit to the number of times you can reactivate Windows on your computer. Moreover, if you don’t see any option to reactivate the license, and it is a work computer, you need to contact your organization’s tech support.
Read More
Fix SPECIAL POOL DETECTED MEMORY CORRUPTION
If you suddenly encounter the SPECIAL POOL DETECTED MEMORY CORRUPTION Blue Screen error with a bug check value of “0x000000C1” while you are using your computer then it might be due to some problem with the hardware of your Windows 10 computer. According to security experts, it is most likely caused by the physical RAM which could be due to some error in the Realtek driver for Wireless USB 2.0 as well as corruption of the files inside the RAM, and so on. This kind of problem indicates that the driver wrote to an invalid section of the special pool. On the other hand, system files like the rtwlanu.sys or nvlddmkm.sys can also trigger the SPECIAL_POOL_DETECTED_MEMORY_CORRUPTION Blue Screen error. To resolve this Blue Screen error, you can use the options provided below as reference but before you do that, make sure to create a System Restore point first. After you have that covered, proceed to the given options below.

Option 1 – Delete the settings of the Driver Verifier Manager

  • Open the Driver Verifier Manager using the Start search.
  • After that, select or click on the “Delete existing settings” option and then click on Finish.
  • Reboot your computer and see if it fixes the Blue Screen error or not.

Option 2 – Try to update or rollback your Network driver

If you have updated the driver software as of late and you suddenly got this BSOD error, you might have to roll back the device driver – in other words, switch back to the previous working version. To do that, follow these steps:
  • Tap the Win + R keys to launch the Run window and then type in the “msc” command and hit Enter to open the Device Manager window.
  • Under the Device Manager, you will see a list of drivers. From there, look for the Network Adapters and expand it.
  • From the list of Network Drivers, look for “Realtek <Model> Wireless LAN 802.11n PCI-E NIC” and then right-click on it and select Update Driver.
  • Restart your PC and see if it helped in fixing the BSOD error.
Note: If you see any of the following entries under the Network drivers, you might want to download their latest available versions from each one of their manufacturer’s websites.
  • Realtek High-Definition (HD) Audio Driver
  • Realtek Card Reader Driver
  • Realtek Local Area Network (LAN) Driver
On the other hand, if updating the Network driver didn’t help, you can also try to roll back to its previous version.
  • Open the Device Manager again and then look for Network Drivers.
  • Next, select Realtek <Model> Wireless LAN 802.11n PCI-E NIC from the list of Network Drivers and then double click to open a new mini window.
  • After that, make sure that you’re on the Driver tab and if you are not, just navigate to it then click the Roll Back Driver button to switch back to the previous version of the Realtek driver.
  • Now restart your computer to successfully apply the changes made.

Option 3 – Try running the ChkDsk utility

You can also run the ChkDsk utility to fix the SPECIAL_POOL_DETECTED_MEMORY_CORRUPTION Blue Screen error.
  • First, open This PC and right-click on your operating system partition for Windows.
  • Next, click on Properties and navigate to the Tools tab.
  • Then click on Check under the Error Checking section.
  • After that, a new mini window will be opened and from there click on Scan drive and let it scan your disk drive partition for any errors and then restart your computer.

Option 4 – Use the Windows Memory Diagnostics

Since the problem has something to do with the physical RAM, you need to use Windows Memory Diagnostics. To run it, refer to these steps:
  • Tap the Win + R keys to open Run and type exe and hit Enter to open the Windows Memory Diagnostic Tool.
  • After that, it will give two options such as:
    • Restart now and check for problems (Recommended)
    • Check for problems the next time I start my computer
  • Once your computer has restarted, perform a basic scan or you could also go for the “Advanced” options such as “Test mix” or “Pass count”. Simply tap the F10 key to start the test.
Note: After you select the option, your PC will restart and check for memory-based issues. If it finds any issues, it will automatically fix them.

Option 5 – Run the Blue Screen Troubleshooter

The Blue Screen troubleshooter is a built-in tool in Windows 10 that helps users in fixing BSOD errors like SPECIAL_POOL_DETECTED_MEMORY_CORRUPTION. It can be found in the Settings Troubleshooters page. To use it, refer to these steps:
  • Tap the Win + I keys to open the Settings panel.
  • Then go to Update & Security > Troubleshoot.
  • From there, look for the option called “Blue Screen” on your right-hand side and then click the “Run the troubleshooter” button to run the Blue Screen Troubleshooter and then follow the next on-screen options. Note that you might have to boot your PC into Safe Mode.
Read More
How to Fix Windows Activation Error Code 0xc004f050

Error Code 0xc004f050 – What is it?

Error code 0xc004f050 refers to a problem with activating the Windows key. The problem appears when you try to activate a copy of Windows by using Windows Activation wizard. This happens when the system becomes unstable and critical system files start missing. Though Windows 10 is a free upgrade for Windows 7/Windows 8/Windows 8.1 users, the activation error is still an issue. If you already had Windows 7/Windows 8/Windows 8.1 activated and did an upgrade successfully, then there should be no problem. This Problem Occurs only when you do a clean install.

Symptoms

When you try to activate a copy of Windows Vista or Windows 7 by using the Windows Activation wizard, you receive an error similar to the one below:
An error has occurred Code: 0xC004F050 Description: The Software Licensing Service reported that the product key is invalid

Solution

Restoro box imageError Causes

  • This causes due to an invalid product key.
  • This problem may occur if the license validity interval has expired, or if the license is not signed correctly.
  • Error Code 0xc004f050 occurs when the system becomes unstable and critical system files start missing.
  • Improper way of installing, deletion of some very important system files, misconfigured system files, etc. may also cause this error.
  • When you do a clean install, it wipes everything from the Primary Drive and after the install, windows can't find the Hardware ID which is used to verify your license.
  • For Windows 7, Windows Server 2008, and Windows Vista-based computers, this error may occur if you have entered the key for a beta version of the operating system while using the released version of the operating system.

Further Information and Manual Repair

This error is not something that can be fixed in seconds but will require some time and technical knowledge.

Method 1:

Re-insert the product key by using the Change Product Key tool:
  1. Click Start, click Computer, and then click System properties on the toolbar.
  2. In the Windows activation section, click Change product key.
  3. If you are prompted for an administrator password, type the password or click Continue.
  4. In the Product key box, type the product key, and then click Next.
  5. Follow the steps in the Windows Activation Wizard to complete the activation process.

Method 2:

Activate Windows by using the automated telephone system:
  1. Click Start, and then click Computer.
  2. Click System properties on the toolbar, and then click Click here to activate Windows now in the Windows activation
  3. If you are prompted for an administrative password, type it and click Continue.
  4. Click Show me other ways to Activate.
  5. Click Use the automated phone system and follow the instructions.

Method 3:

  1. Clean install Windows 7/Windows 8/Windows 8.1 using the installation disk and activate your copy.
  2. Now, download all the updates to see the Windows 10 Upgrade notification or download Windows Media Creation Tool and use the option Upgrade this PC to get Windows 10 right away.
  3. Once the upgrade is done, check the Activation Status. It will be fully activated as it should be. The Error code 0xc004f050 should not appear anymore.
If you want to get rid of the old Windows installation folder, then use the Windows Media Creation Tool to create a Flash Drive. Clean Install Windows 10. Now, every time when it asks for a product key, skip it. After installation is complete, Windows will automatically identify and activate your Copy. NOTE: Clean Install will make Sure you cannot roll back to your previous Windows 7 or Windows 8. So do it only if you are confident of using Windows 10 from here on. To verify the Windows activation status, follow these steps:
  • Click the Start button, and then click Computer.
  • Click System properties on the toolbar, and then view the activation status in the Windows activation section.
Read More
How to Fix Error Code 0x8007007B on Your PC

Error Code 0x8007007B (Code 0x8007007B) – What is it?

Error code 0x8007007B (Code 0x8007007B) is an error that occurs when you attempt to activate Windows 10, as well as Windows Server 2008, Windows Vista, Windows 7, Windows 8, or Windows Server 2012.

Common symptoms include:

  • You will see an error message like this: “Error 0x8007007B 'The filename, directory name, or volume label syntax is incorrect”.
  • If you are using volume-licensed media to install: Windows 7, Windows 8, Windows Vista Business, Windows Vista Enterprise, Windows Server 2008 R2, Windows Server 2008, Windows Server 2012, Windows 10.
  • Your computer is not connecting the activation wizard to a Key Management Service (KMS) host computer.

Solution

Restoro box imageFurther Information and Manual Repair

Error Code 0x8007007B usually occurs when a product key has been activated too many times. Blocking activation aids in avoiding abuse of the key. If abuse of the key is not the case, it is possible to get the key reset, or you may receive a new key altogether. When you are not sure that you can complete these methods yourself, as they do contain advanced steps, it would be wise to consult a computer repair technician to avoid making the problem any worse.

Generally, the solution can be simple; it is just dependent on how comfortable you are with getting technical in your computer. Volume licensed media means that the media has a preset number of times that it is allowed to be activated. This helps to avoid misuse of the product. Some people install the Windows 10 program multiple times on their computer if they are software developers or do certain types of software testing. It is important to know the cause in order to effectively find the solution.

Method One:

  1. From the desktop screen, press the Windows key and S, type “Command Prompt”. Then, right-click on Command Prompt in the results. Select Run as Administrator.  Click Yes when asked about requesting permission.
  2. In the Command Prompt box, enter the command: slmgr.vbs -ipk xxxxx-xxxxx-xxxxx-xxxxx-xxxxx
  3. The x's represent the product key. Replace these with your unique product key.
  4. Type in the following command into the “Command Prompt” window: slmgr.vbs -ato
  5. Click Enter
  6. Restart your computer and try to activate windows again. It should not show the error code anymore.

Method Two:

  1. While on the desktop, press the Windows key and R.
  2. A window saying Run should open.
  3. Type in the following command: Slui 3
  4. Press ENTER and a window should appear.
  5. This window asks for you to enter the operating system activation product key.
  6. Enter this key in the space provided.
  7. After entering this, click Activate.
  8. Restart your computer now.
  9. Check for activation. The Error code should be gone now.

Method Three:

  1. Open the Command Prompt with access as administrator just as in Method One, and enter the following command: sfc /scannow
  2. The command will complete the tasks. This will take some time so just let the computer do its thing and work. Let the sfc finish the scan.
  3. When the scan is complete, restart the computer.
  4. Check for the activation. The error code should be gone at this point.
  5. If it is gone, revisit Method One or move on the Method Four.

Method Four:

Call the Microsoft Support Team and explain the problem in as much detail as you can give. Give the team the error code 0x8007007B and ask to have a different product key. When they give you the new product key, repeat Method 2. The Microsoft Support Team will either change your product key, or they will reset your current product key so that it can be used for activation again.

Read More
What to do if Windows Media Player is not playing the Music Playlist in Windows 10
Many users would probably agree that the Windows Media Player, in most cases, is a lot better than the Groove. Although it is understandable why the Groove Music app was created, it may be time for Microsoft to bring its focus back on Windows Media Player. Even more, so that some users are experiencing an issue where they were not able to play their playlist in the Windows Media Player on their Windows 10 PCs. One particular user claimed that when he removed his music from the C drive and transferred them to the C drive for some reason he didn’t state. Right after he did that, any attempts to play songs in the Windows Media Player just don’t seem to work. Transferring music to a different location shouldn’t cause any issue but for some unknown reason, it did. According to security experts, the reason why the Windows Media Player didn’t play the playlist is that it still believes that the songs are still located in the C drive when they’re really not. So the question here is, how can you get the Windows Media Player to recognize the exact and correct location of the songs? Worry not, for this post will show you how exactly you can do that. Carefully follow each one of the instructions given below to fix the Windows Media Player issue.

Option 1 – Try running the WMP Troubleshooters

In case there are any issues with the Windows Media Player, you can always count on the WMP Troubleshooters to fix the problem for you. These built-in troubleshooters, namely, Windows Media Player Library and Windows Media Player DVD Troubleshooters can help you fix the problem, so run them both and see if you can now play those songs or not.

Option 2 – Try rebuilding the Windows Media Player Database

If the first option didn’t work for you, you might have to rebuild the Windows Media Player database. You can do this by following the steps below.
  • Tap the Win + R keys at the same time to open the Run dialog box.
  • After that, copy and paste this command in the field: %userprofile%Local SettingsApplication DataMicrosoftMedia Player
  • Once you’ve pasted the command, hit Enter then you will see a new File Explorer which is the folder for the Media Player. You will have to delete every item in this folder, except for the folders. Meaning to say, you must only delete the individual contents inside but not the folders.
  • Now launch the Windows Media Player again and watch as it rebuilds the music library automatically.
Read More
Razer Iskur gaming chair for healthy gaming
Razer IskurIt seems that last few days we were riding some Razer bandwagon but rest assured that we are not sponsored by them in any way, truth is that simply they come up with some interesting accessories which I believe are worth covering. 
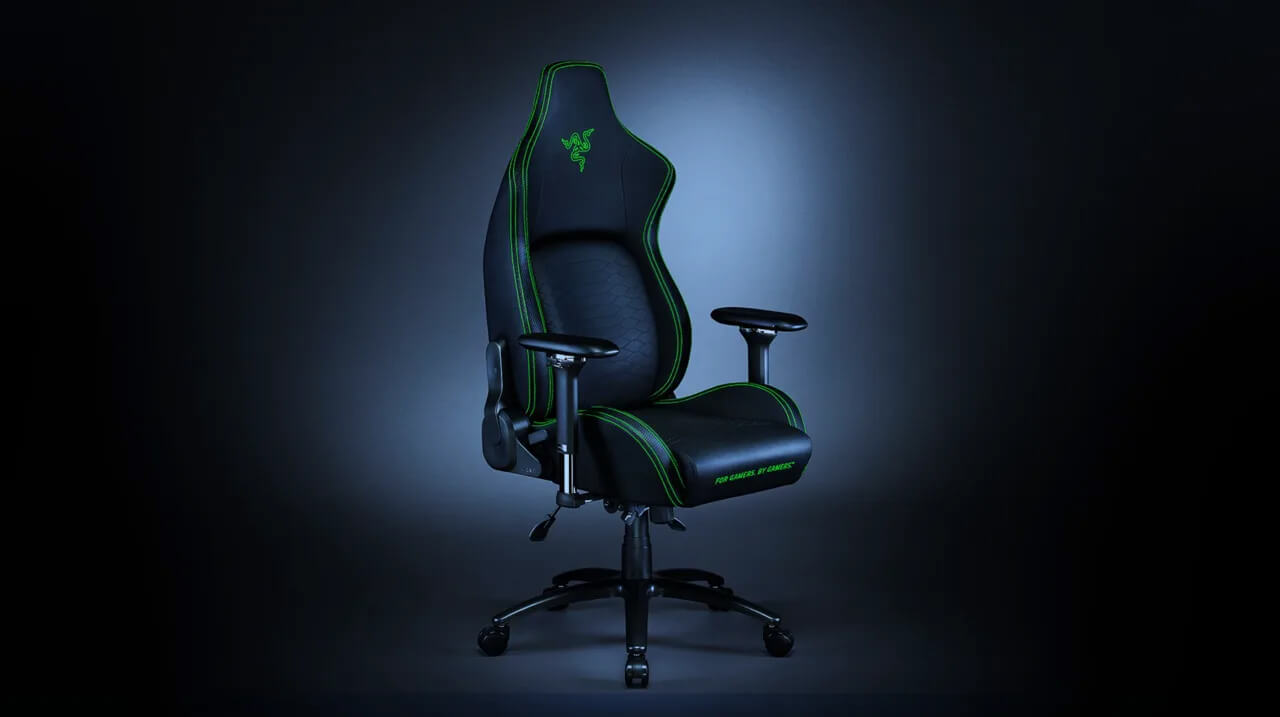
Gaming Chair itself comes in two colors, fully black and green black combination and it is not really an entry-level chair if we are talking about price. The chair itself is around 600USD depending on the distributor and considering that price range it is placed in more top cream of gaming chairs but it is worth every dime.

Iskur Specifications

Iskur is made of a steel frame with a reinforced plywood lumbar support frame for added weight tolerance. Frame and lumbar support are surrounded with memory foam and all of that is wrapped in cotton and polyester layer which is again wrapped in multi-layer synthetic leather making the chair very durable for long hours of daily use. The chair also comes with a memory foam head cushion which is detachable and removable if you do not wish to use it. On the Razer website among specifications, it stands that the chair is best suited for persons from 5’6” – 6’2” (170 – 190cm) height and up to 299lbs (136kg).

Features

The chair has, of course, height adjustment as any gaming chair and surprisingly it has great control for the armrest. The armrest can be adjusted in 4 different ways: up & down, left & right, forward & backward, and inward & outward. The backrest can be also tilted up to 26 degrees angle. All of these features are great and good but there is one more feature that really makes this chair stand out from rest and it is Lumbar support. Iskur has an adjustable lumbar support system on the lower part of the backrest. With your lumbar support secured, you can then make the necessary tweaks to optimize the rest of your posture using the Razer Iskur’s adjustable height, backrest, and armrests.

Conclusion

Razer Iskur is neither cheapest nor perhaps the best gaming chair you can buy, but it is a really good one. It is well manufactured and made to feel and look like a premium product that actually it is.
Read More
1 2 3 171
Logo
Copyright © 2023, ErrorTools. All Rights Reserved
Trademark: Microsoft Windows logos are registered trademarks of Microsoft. Disclaimer: ErrorTools.com is not affiliated with Microsoft, nor claims direct affiliation.
The information on this page is provided for information purposes only.
DMCA.com Protection Status