A few days ago we celebrated fixing of months-long PrintNightmare vulnerability by Microsoft, sadly a new bug and issue have been found.
Firstly discovered Microsoft stated:
A remote code execution vulnerability exists when the Windows Print Spooler service improperly performs privileged file operations. An attacker who successfully exploited this vulnerability could run arbitrary code with SYSTEM privileges. An attacker could then install programs; view, change, or delete data; or create new accounts with full user rights.
A few days ago, Microsoft officially released a patch that was supposed to finally fix it. As you might recall this vulnerability was present for quite some time, Microsoft's solution after a long struggle was to elevate certain privileges to administrator account only and remove user accounts from managing printers. It complicated things a little bit but it was stated payoff was worth it.
The new issue now is that on a system that already had accounts created and set, old accounts still can hijack the system, patch issues address only accounts that are created after the fix is administrated, old ones can still do whatever they want.
Once again of course Microsoft has stated that until it is again resolved you should again disable the Print Spooler service as a temporary workaround.
If you are a person which spends a lot of time in front of the computer doing work, then you are aware of the importance of having a proper backup of your archive so if anything bad happens you will lose almost none of the work.
We can never tell when we might experience HDD failures or when we might be a victim of cyber attacks, natural disasters,s and other unpredictable circumstances where we could lose all of our data in a matter of minutes. Having a backup of our data is very important but sometimes we are too busy or not around and we miss that data backup we wanted to do, and if in this case disaster strikes we are out of luck and data is lost. To avoid such circumstances, you can set up automatic Windows Backups at a scheduled time. This way it will help to have the loss of important files and documents from unexpected hazards.
in order to create automatic backups of your files, you have several options, and below we will explore each one in hopes that you will find one that best suits your needs.
Create automatic file backup with OneDrive
This is probably the best way to do it because each time when you sign in OneDrive files get backed up right away, files are stored in the cloud and can be accessed on any device via a Microsoft account.
To get started, open the Settings app first.
Click on the Update & Security category
Select the Backup tab from the left pane.
Move to the right page and click on the Back up files button that is available under Back up files to OneDrive.
Select the folders you want to backup in the cloud, and remove those ones you don’t want to backup.
On the next page, click the Start backup button to start the procedure.
Create a backup using File History
File History is an inbuilt feature that allows users to create automatic file backup on Windows 10. File History allows the users to back up their files in an external or cloud drive at different intervals of time. To create automatic file backup using File History:
Press the ⊞ WINDOWS + I to open the Settings app.
Click on the Update & Security category and then select the Backup tab from the left pane.
Under the Back up using File History section, click on Add a drive button.
Now choose the drive to store the backup files. Windows will use this drive for File History.
Then turn on the toggle button under Automatically back up my files. This will back up your data to the drive automatically whenever you connect it to the system.
Below the toggle button, click on the “More options” link to set how frequently File History will back up.
Use the Keep my backups drop-down menu to get the option to configure the time for how long you want to keep your backups. By default, it will keep your backups forever.
Under the section Back up these folders, tap on the Add a folder button in order to add one more folder to the backup. Then click on the Add a folder button, under Exclude these folders. This will exclude the files that you don’t want to back up.
You can stop the drive from storing backup files to change the backup storage location. To do this, click the Stop using drive option under the Back up to a different drive category.
Backup using Windows backup & restore tool
Open Control Panel
Click on the System and Security option
Scroll down and select the Backup and Restore (Windows 7) button
Next click on the Set up backup button, available under the Back up or restore your files section
Under the Save backup on section, select the Backup Destination where you want your backup files to get stored
On the “Set up backup” page, Windows will ask you to choose the way to backup, check Let me choose checkbox, and then hit the Next button
Under the section Computer, select the files and folders you want to backup. Then uncheck the box next to the Include a system image of drives option, and then hit the Next button
Now click on the Change schedule link. Set the time and check the box beside Run backup on a schedule button
Click OK then select the Save settings and run backup option
If you don’t have the required drivers installed in your computer, the hardware that you try to connect to your computer will most likely fail. In order to keep the operating system running on your computer, manufacturers develop drivers that can work harmoniously with your devices and applications. However, internet Wi-Fi connections can fail if suitable drivers are not installed. Worry not though for this post will guide you in installing Wi-Fi drivers on your Windows 10 computer.
As you know, a driver is an essential piece of software designed for a specific operating system like Windows 10, Linux, and many more. The operating system uses it to communicate with other hardware devices such as printers and mice. Most hardware manufacturers feature a support page of their own product where you can look for the necessary drivers available for download.
You will see that the Windows operating system has a set of drivers that are already installed and you do not have to do anything except plug in the device. So if the driver is not locally available, it will pull it down from its web server and automatically install it for you after you connect the device. However, there are instances when you might encounter some issues while using your Wi-Fi and during these times, you might have to reinstall your Wi-Fi drivers so read on as this post will provide you guidelines in installing Wi-Fi drivers in Windows 10. Refer to the steps below to do so.
Step 1: First, go to your manufacturer’s website and look for the right driver you want to install to download your Wi-Fi driver.
Step 2: After that, you have to download the correct Wi-Fi driver if it’s available. You have to know the exact name and version of the driver so that you can download it and this information can be found from the Device Manager. Just make sure that you have the right wireless adapter driver downloaded.
Step 3: Once done, open the setup of the new driver that you’ve downloaded earlier and run the file and then follow the next on-screen instructions that appear right after.
Step 4: You’re not done yet as you need to verify if you have downloaded and installed the correct Wi-Fi driver. Refer to the sub-steps below to do so:
First, right-click on the Start button and select the Device Manager to open it.
From there, look for the Network Adapters and expand its category to make all the network adapters visible including the wireless adapter.
You can easily spot the wireless adapter as it has the “wireless” term in its entry.
Next, right-click on the wireless driver entry in the Device Manager and select Network adapters, and then click on Properties to check the version number of the driver.
Now select the Driver tab and view the details. If it looks well then it means that you have the right version of the driver installed.
The holiday season is almost upon us and buying gifts for loved ones can sometimes present some headaches, especially if that loved one is a Gamer or PC enthusiast. We have all been there and how almost every household today has a console or PC struggles are infecting more and more people. But do not despair, we have made a nice list of potential gifts for you.
The list contains some nice essential and good things but we gave our best not to break the bank so you will not find any large screens or 300$ keyboards here. Of course, you can always get expensive gifts and if you have money for it do it, it is just we want to have affordable stuff here.
A Steam gift card
For gamers, a good game is a great gift but most of the time when we are buying a game we can miss what the person wants. That is why a Steam gift card is a great gift for gamers. He can use it and buy whatever he or she wants for its value.
Xbox Game pass
This is another for those Gamers type. Xbox game pass is a great gift even if you do not own Xbox since all games will work on PC as well. Xbox Game Pass Ultimate includes the PC version, which will unlock somewhere between 300 and 350 games automatically. It’s a subscription service, so your PC gamer will have to keep up with it. The monthly price is worth it, though.
Pack of cable ties
Almost every PC user has tons of cables lying around, and most of the time they are not really tidy. Cable ties come to the rescue!!! Let us be honest, no one likes cables that are scattered all over the place, even the computer users so if they do not have this essential piece of equipment, we are sure they will like it.
Compressed air duster
Dust is enemy no.1 for computer users, it gets into the keyboard, into small spaces, etc. It is very difficult to get it out so an air duster for compressed air is a great cleaning gift for any kind of computer enthusiast. You can get it with a can of compressed air as well so everything is ready for cleaning.
New Headset
A headset is always a great gift. Over time earbuds can deteriorate and get damaged simply just by using them and when enough time passes even cables can start losing contact and overall sound quality may drop. Usually, computer users change headsets like keyboards so if your loved one has some old headsets showing their age, a new one is a perfect present.
New SSD drive
More hard disk space is always a welcome sight for any PC user and new SSD drives fueled with new technology are faster than ones of the same size in past years making them a perfect gift.
Large mouse pad
A good mouse pad can mean a lot to a gamer. Over time mouse pad deteriorates simply with its use so a new and fancy large pad is a great gift for any user. If you want a great gift, make it with RGB light.
If you are dissatisfied with your internet speed on your computer but do not want to shell out more money for a faster package or simply there is not a faster package, lay down and enjoy this article where we will go through some common practices and tweaks which will result in increasing your internet speed.
Please note that this guide will not be able to go beyond the limits of your internet provider's physical speed, this guide is made you can squeeze the maximum from your existing plan and eliminate speed drops.
Modify IRPStackSize
Press ⊞ WINDOWS + R to open the run dialog
In run dialog type RegEdit and press ENTERIn registry editor find HKEY_LOCAL_MACHINE\SYSTEM\CurrentControlSet\Services\LanmanServer\Parameters
Right-click on Parameters> New> DWORD 32
Name it IRPStackSize and change the value to 32
Save and reboot your computer.
Add a Default TTL
Press ⊞ WINDOWS + R to open the run dialog
In run dialog type RegEdit and press ENTERIn registry editor find a key Computer\HKEY_LOCAL_MACHINE\SYSTEM\CurrentControlSet\Services\Tcpip\Parameters
Right-click on Parameters> New> DWORD 32
Name it DefaultTTL and change the value to 64
Save and Reboot
Close Background Applications which are using the internet
If some applications are running in the background that are using the internet, your speed will be much lower. CLose them to gain speed.
Modify theTCP1323Optsvalue
Press ⊞ WINDOWS + R to open the run dialog
In run dialog type RegEdit and press ENTERIn registry editor find a key Computer\HKEY_LOCAL_MACHINE\SYSTEM\CurrentControlSet\Services\Tcpip\Parameters
There should be a DWORD Value, TCP1323Opts, if not, then create it. Right-click on Parameters> New> DWORD (32-bit) Value.
Double-click on it and change its value to 1
Save and reboot
Scan system for Viruses and other malware
Viruses and malware applications can not only slow your entire system, but they can also reduce your internet speed as well. Do a complete scan of your system to be sure you do not have any malicious software on it.
In today's modern world many households have internet access, most of the connection nowadays is done via Wi-Fi or wireless but there is a high probability that you have also a few devices connected via cable. There are of course many disadvantages and advantages between cable connection and wireless connection.
The main advantages of a hard cable connection are of course faster speed and stability compared to Wi-Fi. But if we look into the cables themselves there is also a big difference between them. Not all cables are the same and quality as well as speed vary a lot between them. Choosing the right cable is essential in order to make a maximum of your internet and we have some great tips and explanations of what cables do so you can make the right choice and enjoy your full internet potential.
Not all cables are the same
Cheap cables and expensive ones are not the same no matter what everyone tells you. The old proverb you get what you pay is true and more expensive cables will be made from better materials and will have a higher transfer rate.
Quality network cables are separated into different categories with proper markings and when buying one you should always look for these markings on the cables themselves, do not buy cables that do not have markings since they will often provide lower transfer rates or will not be shielded from outside influences resulting in packet drops and instability in a network.
Categories and what they mean are:
Cat-5 with a maximum speed of 100Mbps, typically unshielded.
Cat-5e with a maximum speed of 1Gbps, available in both shielded and unshielded varieties.
Cat-6 with a maximum speed of 10Gbps for runs under 55 meters (around 180ft), available in both shielded and unshielded varieties.
Cat-6a with a maximum speed of 10Gbps, shielded.
Cat-7 uses a proprietary GG45 connector rather than the standard RJ-45 connector seen on other cables for speeds of 10Gbps, shielded.
Cat-8 with a maximum speed of 25Gbps (Cat-8.1) or 40Gbps (Cat-8.2) at a distance of around 30 meters (around 100ft), shielded.
Unless stated, these standards are typically rated at their quoted speeds for a run of around 100 meters (around 330 ft) and use a standard RJ-45 Ethernet connector. Each generation of cable is designed to be compatible with the generations that came before it, so it’s possible (for example) to use a Cat-6a cable with a router that only supports speeds of 1Gbps.
Shielded cables
When purchasing higher quality cable you might not be able to choose if you have shielding or not since some standards like Cat-6a, Cat-7, and Cat-8 are always shielded. But if you do not have the need for these and you are satisfied with Cat-5e for example you can choose.
Shielded cables are a little more expensive but they will provide you with a coating that will eliminate interference from outside waves making cables more reliable. Of course, if the cable will go through a room that does not have many radio waves or some other interferences then buying a shielded cable is a waste of money.
Cable platings
Usually, there are two types of connector platings on connectors, silver, and gold, and people usually think that gold is much better but there are major differences between silver and gold platings and truth to be told there is no better one, both are different and should be considered depending on your need.
Silver plating will provide you with faster speed since its conductivity is larger than gold, but gold is slower on the oxidation front so its life span is longer. On the other hand, if your cables are always connecting and disconnecting gold will be first to be scrubbed off from the surface since the gold coating is much thinner.
Overall if you would only connect cable once and have slower internet than cable capacity gold is the way to go, in another case if you would use the cable as always connecting and switching and your internet plan is the same as cable transfer capacity you might want to go with silver one.
Cable material quality
Network cables are made from copper, your standard conduction material but even here there are differences in quality and therefore the chance of pocket losses over it. More quality less loss and more stable connection and this will depend on the purity of copper that is used in the cable itself. More purity in copper, more stability, simple as that.
Conclusion
So as you can see, there are a lot of different things that will influence your pick of proper network cable but the overall best advice is to get one that will fit well into your needs and setup. pair it up with your router and your internet plan since just simply buying something that you can not use is really a waste of money.
Error Code 0x80070422 can be found on many versions of the Windows operating system including Windows 7, Windows 8, and 8.1, and Windows 10. The reason for its occurrence may vary, however, depending on the version of the operating system that you use.
In the case of error code 0x80070422 in Windows 8, it often occurs when users attempt to update their firewall or download apps from the Windows store. When this error occurs the user is unable to complete the updates and will need to apply different solutions to correct the issue.
Solution
Error Causes
Whenever error code 0x80070422 is encountered on Windows 8 or 8.1, it might be a result of various factors. These error codes include:
Registry errors – This occurs when new programs are installed over old ones
Malicious software such as adware, spyware, and or viruses
Further Information and Manual Repair
You do not need to be a Windows expert to attempt to solve errors like the 0x80070422 Windows 8 error code. Simply try the solutions below. If however, you feel you need a professional’s help, contact a certified Windows technician.
Check for any viruses or malicious software
Viruses and other malicious software are often the cause of various issues within the PC. For this reason, be sure to check your machine for a possible virus infestation. If you are unable to use your anti-virus software or if none is present you might need to download an automated tool that offers overall repair and other solutions.
Disable third-party security apps
Another step you can take is to disable third-party security apps. When these apps are downloaded onto your device, it can lead to the disabling of your Firewall and the inability of your device to download other apps. If this is the source of the 0x80070422 error code on your machine, the issue will be resolved after you disable the third-party apps and reboot your computer.
Disable Firewall
If error code 0x80070422 in Windows 8 or 8.1 occurred while you attempted to update Windows firewall, one of the best solutions you can try is to disable the firewall. Note however that disabling your firewall should be temporary as it protects your computer from worms as well as hackers that might infect or compromise your PC. Access the firewall by swiping right on the screen then searching for “firewall”. Click “Windows firewall” then select “Turn off Windows firewall”.
Performs a clean boot
Another option is for you to perform a clean boot. This simply refers to a reboot in Windows where only a minimum set of drivers and programs are used. A clean boot can help resolve issues related to software conflict which can occur when Windows users install programs or updates or simply run a program. Note that you must log on to the computer as an administrator. Otherwise, you will not be able to perform the clean boot.
Clean registry
The source of many errors related to Windows can lie within the registry. This is because the registry is involved in every aspect of a Windows computer’s operation. If there is an issue in the files of the registry or if it has been hacked, your computer will not function. For this reason, begin by cleaning the registry regularly. To clean our registry, use a powerful tool that is both reputable and user-friendly. Research your option before you make a selection as choosing the wrong tool could lead to even more errors or computer malfunctions.
Set Windows Update to Automatic
Another important method to solve issues related to error code 0x80070422 in Windows 8 or 8.1 is your Windows Update service. Though you may have never noticed this feature before now, the Windows Update services allow PC owners to access updates to their operating system automatically. This leads to a properly functioning PC as your machine will always have the latest features and tools available. However, if the setting is not correct, your computer may end up experiencing error code 0x80070422. Check if this is the source of your problems by verifying if your Windows Update settings are automatic. Once the settings are on automatic, reboot your machine to ensure your computer responds to the changes.
Download an Automate Tool
Always be prepared for the possibility of other errors. You can do this by downloading powerful software. This enables users to regularly check for issues that may cause errors on their Windows device.
The Adaptive Brightness setting in Windows 10 is a useful setting you can use in adjusting your computer’s brightness. It helps you get the brightness automatically based on the light around your computer. However, there are times when it does not work or it doesn’t turn off when you want it to. If this issue happened right after you update or install Windows 10, then read on as this post will give you a couple of options you can try to resolve the problem.
Option 1 – Try to run the Power Troubleshooter
The first thing you can do to resolve the issue with Adaptive Brightness is to run the Power Troubleshooter as the problem could occur due to some conflicted power settings. To use it, refer to the following steps:
Open the Windows 10 Settings panel and go to Update & Security and then to Troubleshoot.
After that, scroll down to your left-hand side and click the Power option.
From there, you should see the “Run the troubleshooter” button. Click on it to fix the problem.
Afterward, follow the next on-screen instructions that follow.
Option 2 – Try disabling or turning off the corresponding options in GPU settings
The problem might be due to the Graphics card settings. If you are using either an AMD graphics card or the HD graphics of Intel, you may have to disable the power-related options in the GPU settings. To be specific, you have to disable the Vari-Bright in AMD graphics card settings or the Display Power Saving Technology under Intel’s Graphics panel.
AMD users:
Open the AMD Radeon settings panel.
Then go to Preferences. From there, select Radeon Additional Settings.
Next, go to the Power tab and click the PowerPlay option.
You should find an option called “Enable Vari-Bright” located on your right-hand side. Remove the mark from its checkbox and then save the changes you’ve made.
Intel users:
Open the Intel Graphics and Media Control Panel from your Desktop.
Then select the Basic mode and go to the Power tab.
From there, select “On battery” as Power Source and then you’ll get the Display Power Saving Technology option. It should be set to enabled by default.
Now remove the mark from the checkbox and then save the changes you’ve made.
Option 3 – Try resetting the Power Plan defaults
You might also want to use a command-line tool to resolve the problem. This command-line tool is known as PowerCfg. It is a command utility tool that will scan your computer for 60 seconds to know its power. This tool gives detailed results in the form of an HTML report that will help you in evaluating the real cause of the battery drain issues. You can also use this tool to reset the Power Plan defaults of your computer. To use it, follow the steps below.
Open the Command Prompt as administrator.
Then type in the following command and tap Enter to execute it:
powercfg –restoredefaultschemes
After the command has been executed, restart your computer.
Option 4 – Try updating your Graphics drivers
First, boot your computer into Safe Mode.
After that, tap the Win + R keys to launch Run.
Type in devmgmt.msc into the box and tap Enter or click OK to open the Device Manager.
After that, a list of device drivers will be displayed. From there, look for the Display Adapters and click on them.
After that, right-click on each entry under the Display Adapters and select the “Uninstall Device” option from the menu.
Now restart your computer.
After restarting your computer, go to the Settings app and Check for Updates in the Windows Update section.
Note: You also have the option to go directly to the website of your graphics card manufacturers like NVIDIA, Intel, or AMD and go to the section called Drivers then check if there’s a new available update – if there is, download and install it.
Option 5 – Try disabling adaptive brightness via Registry Editor
Since you will be dealing with Registry files in this post, you need to create a System Restore point first. Once you have that covered, proceed to the following steps:
Tap the Win + R keys to open the Run dialog box.
Next, type “regedit” in the field and hit Enter to open the Registry Editor.
After that, navigate to this path: HKEY_LOCAL_MACHINESOFTWAREIntelDisplayigfxcuiprofilesMediaBrighten Movie
Now double click on the “ProcAmpBrightness” and set its value to “0”.
Now go to this path: HKEY_LOCAL_MACHINESOFTWAREIntelDisplayigfxcuiprofilesMediaDarken Movie
From there, double click on “ProcAmpBrightness” and set the value to “0”.
Then close the Registry Editor and restart your PC and then see if the problem’s fixed or not.
Windows Updates are important and though it is not recommended for any user to turn it off completely, there are just some remote cases where you might have to keep it off. Such are the cases when you want to use your Windows 10 computer just for gaming and you don’t want Windows Update to interrupt it because of some messy driver update. A lot of users have in fact want to disable Windows 10 updates completely. Although you can always use the built-in option to delay Windows Updates or make Windows 10 inform you before downloading the updates, however, there are instances when Windows 10 Update may enable itself even after you turn it off or delay it. To resolve this issue, read on.
You may have to disable the Windows Update Medic Service if Windows Update just keeps on starting and turning itself back on even after turning it off in Windows 10 on top of turning off the Automatic Windows Update Service or wuauserv and setting a Guest Log on. To get started, refer to the instructions prepared below.
Option 1 – Change the Log on account of the Windows Update Service
It appears that one of the major upgrades in Windows 10 has made sure that Windows 10 enables back the Windows Update Service all on its own even if the service has been set to disable by the administrator. And that’s the important thing here, Windows 10 uses admin credentials in order to ensure that it can re-enable the Windows Update Service each time it is in a disabled state. So in this fix, you can prevent the Windows Update Service from changing the account credentials used to run it.
Tap the Win + R keys to open the Run prompt with admin privileges.
Then type “services.msc” and click OK or hit Enter to open Services.
After that, locate the Windows Update Service from the list. Once you see it, double-click on it to open its Properties.
From there, click the Stop button to stop the service.
Next, go to the Log On tab and select the “Log on as ‘Guest” option which is the Guest account.
Just leave the password blank and then click Apply to save the changes made.
Note: After you made the changes, every time the Windows 10 Update Service attempts to run, you might get an error message that states, “Windows could not start the Service” or “The account specified for this service is different from the account specified for other services running in the same process”.
This is what makes this fix a lot better compared to other software or batch file to keep turning off the Windows Update Service. You did not exactly disable the service but you just changed the account used to run the Windows Update service and since there is a password, the service never really works. On the other hand, Windows Defender can’t be stopped using this trick as it will keep getting an update.
Option 2 – Try to disable the Windows Update Medic Service using the Windows Update Blocker
Aside from changing the Log on account of the Windows Update Service, there is also another way you can prevent the service from enabling itself after you disable it. This alternative you can use is the Windows Update Blocker. This is a new Windows Service that was introduced in the recent Windows 10 versions. You can use this service to disable the service.
Shortcut virus is an easily spreadable and annoying combination of Worm and Trojan that hides all of your files and folders and then replaces them with shortcuts that look identical to replaced files and folders.
Once disguised it will wait patiently for a user's click and once that happens it will replicate itself and further infect the system. This rapid spread can lead to stolen personal data, some system hick-ups, and other system-related issues.
This malware mainly affects physical file transfer devices like for example and most USB drives, hard drives, and SD memory cards and it can easily transfer itself to the computer.
The advantage of this shortcut virus comparing it to others is that it is mostly undetected by a vast variety of antivirus software. So running just anti-virus software maybe not be enough to remove it from your system. Luckily for all unfortunate users that have caught this annoyance, it can be easily removed fully manually in a short time.
How to Remove Virus from USB and other removable media
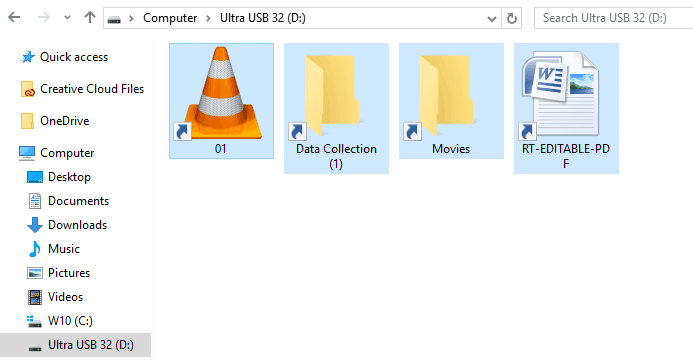
Firstly plugin USB, SD, or removable drive. The infection will transfer to your computer when the infected drive is plugged in so before we go to clean the computer itself, clean each removable drive that you have. Also know that infection will spread from computers into removable devices as well if it is not cleaned.
Open the File Explorer and remember under which letter is removable drive registered. Open Command prompt but with administrator privileges and go to infected rive by typing its letter followed with “:” (for example D:) and press ENTER
Once you have successfully gone to infected drive type in command prompt:
Attrib -s -r -h /s /d *.*
This will unlock all original files back into removable storage, next copy all files to your computer, and format the removable drive. Once the format is complete, unplug the removable device. Continue to clean all devices with the same method.
How to Permanently Remove a Shortcut Virus from Your PC
Now once we have cleaned all removable devices it is time to fully clean the PC
Firstly open the task manager ( CTRL + SHIFT + ESC ), in the process tab find wscript.exe or wscript.vbs, right-click on it (or both if present), and select End Task. Now close the task manager and press Start. Inside start typing in registry editor to search for it and once found open it.
Find the following key inside the registry editor:
HKEY_CURRENT_USER/Software/Microsoft/Windows/CurrentVersion/Run
In the right panel, look for any strange-looking key names, such as odwcamszas, WXCKYz, OUzzckky, etc. For each one, run a Google search to see if it's related to shortcut viruses.
If any returns a positive match, right-click on them and select Delete. !!! Accidentally deleting an important key can cause Windows to become unstable, so double-check everything !!!.
Close the Registry Editor
Now press ⊞ WINDOWS + R to open the run dialog and type in it Msconfig followed by ENTER. Once the System Configuration window opens go to the Startup tab. In the Startup tab, look for any strange-looking .EXE or .VBS programs, select each one and click Disable. Close the Window.
Once again open the run dialog and type inside %TEMP% and press ENTER in order to open the Windows temp folder. Inside this folder delete everything.
Next in the File explorer go to
C:\Users\[username]\AppData\Roaming\Microsoft\Windows\Start Menu\Programs\Startup
Look for any strange-looking .EXE or .VBS files and delete them.
Windows 10 users a set of rules or standards called Network Protocols in communicating over the internet. These protocols are the ones that made sure that the data is correctly sent between computers. However, if any of the Network Protocol is missing in your Windows 10 computer, then you will most likely encounter a problem like not being able to browse the internet, or share files. For this, you can try to run the Incoming Connections troubleshooter:
As you were not able to connect to your internet connection using your PC, you can try to run the Incoming Connections troubleshooter as it might resolve the problem. Refer to the following steps to run this troubleshooter:
Tap the Win + I keys to open Settings.
After opening Settings, go to Update and Security.
Next, navigate to the Troubleshoot pane and select the Incoming Connections section and click the Run Troubleshooter button to get started.
Wait until the troubleshooter is finished doing its job and then try connecting to your network again.
If after running the Incoming Connections troubleshooter you receive an error message instead that says, “Network Protocol is missing”, then here are some suggestions you need to check out to fix it. Take note that you must have admin privileges before you start troubleshooting the problem.
Option 1 – Try to update or rollback or uninstall the Network drivers
You might also want to update, roll back, or disable your Network drivers to fix the “This operation failed as no adapter is in the state permissible for this operation” error.
Tap the Win + R keys to launch the Run window and then type in the “devmgmt.msc” command and hit Enter to open the Device Manager window.
Under the Device Manager, you will see a list of drivers. From there, look for the Network Adapters and expand it.
Then right-click on each one of the Network drivers and depending on your preference, you can either select “Update driver”, “Disable device” or “Uninstall device”.
After that, restart your PC and see if it helped in fixing the netio.sys Blue Screen error.
Option 2 – Try to reset Winsock, TCP/IP & Flush DNS
You might also want to try resetting Winsock, TCP/IP, and flushing DNS might help you resolve errors. To do so, follow these steps:
Right-click on the Start button and click on Command Prompt (administrator) so you can pull up an elevated Command Prompt.
After that, execute each one of the commands listed below. And after you typed in one after the other, you have to hit Enter.
netsh winsock reset – type in this command to reset Winsock
netsh int ip reset resettcpip.txt – type in this command to reset TCP/IP
ipconfig /flushdns – type in this command to flush the DNS cache
Next, restart your PC and check if the problem’s fixed.
Option 3 – Diagnose the Network Adapter
To diagnose the Network Adapter, go to Control Panel > All Control Panel Items > Network Connections, and from there, look for the network adapter that could be causing the error. Note that if you are using a Wi-Fi connection, then it’s probably your Wi-Fi adapter, otherwise it has something to do with your Ethernet adapter. Just right-click on the problematic network adapter and select diagnose to troubleshoot.
Option 4 – Try to perform Network Reset
You can also try to perform a Network Reset to resolve the problem. This will reset the entire network configuration including your IP address. To perform Network Reset, follow these steps:
Tap the Win + I keys to open Settings.
From there, go to the Network and Internet section.
Next, scroll down and look for “Network Reset” under the status pane.
After that, click on Network Reset and then on Reset now to start resetting the network configuration. Once done, check if it is able to fix the error or not.
Option 5 – Try importing Winsock settings from another computer
If resetting Winsock or the Network didn’t fix the problem, then you can try to import settings from a computer that’s in good condition. You need to have access to the registry to get this done and then export and import a couple of settings. Refer to these steps to get started:
Tap the Win + R keys to open the Run dialog box and type “Regedit” in the field and hit Enter to open the Registry Editor.
After that, go to this registry path: HKEY_LOCAL_MACHINESYSTEMCurrentControlSetServices
Next, look for two registry keys named “Winsock” and “Winsock2” and then right-click on each one of them and select the Export option.
Now copy the registry keys to a USB drive and then copy the keys on the PC in excellent condition.
Then double click on each one of them and it will install the WINSOCK keys.
 A few days ago we celebrated fixing of months-long PrintNightmare vulnerability by Microsoft, sadly a new bug and issue have been found.
 The list contains some nice essential and good things but we gave our best not to break the bank so you will not find any large screens or 300$ keyboards here. Of course, you can always get expensive gifts and if you have money for it do it, it is just we want to have affordable stuff here.
 In run dialog type RegEdit and press ENTER
 In registry editor find HKEY_LOCAL_MACHINE\SYSTEM\CurrentControlSet\Services\LanmanServer\Parameters
Right-click on Parameters> New> DWORD 32
Name it IRPStackSize and change the value to 32
Save and reboot your computer.
In registry editor find HKEY_LOCAL_MACHINE\SYSTEM\CurrentControlSet\Services\LanmanServer\Parameters
Right-click on Parameters> New> DWORD 32
Name it IRPStackSize and change the value to 32
Save and reboot your computer.

 Once disguised it will wait patiently for a user's click and once that happens it will replicate itself and further infect the system. This rapid spread can lead to stolen personal data, some system hick-ups, and other system-related issues.
This malware mainly affects physical file transfer devices like for example and most USB drives, hard drives, and SD memory cards and it can easily transfer itself to the computer.
The advantage of this shortcut virus comparing it to others is that it is mostly undetected by a vast variety of antivirus software. So running just anti-virus software maybe not be enough to remove it from your system. Luckily for all unfortunate users that have caught this annoyance, it can be easily removed fully manually in a short time.
Once disguised it will wait patiently for a user's click and once that happens it will replicate itself and further infect the system. This rapid spread can lead to stolen personal data, some system hick-ups, and other system-related issues.
This malware mainly affects physical file transfer devices like for example and most USB drives, hard drives, and SD memory cards and it can easily transfer itself to the computer.
The advantage of this shortcut virus comparing it to others is that it is mostly undetected by a vast variety of antivirus software. So running just anti-virus software maybe not be enough to remove it from your system. Luckily for all unfortunate users that have caught this annoyance, it can be easily removed fully manually in a short time.