If your Microsoft Edge browser encountered a Stop Error that says, “INVALID_POINTER_READ_c0000005 (atidxx64.dll)” in your Windows 10 computer, then this indicates that your Graphics card driver is outdated. According to security experts, Microsoft has already acknowledged the problem and stated that this issue exists with Windows 10 v1809, Windows Server 2019, and Windows Server version 1809.
Although there is no direct way to resolve the problem, there are still some workarounds you can try. If you are using a RadeonHD2000 or HD4000 series video card, the update will be blocked for you. Some users also claim to experience performance issues with the lock screen or the ShellExperienceHost. However, if you are using AMD, the problem is that it no longer supports Radeon HD2000 and HD4000 series graphics processing units or GPUs. Even though Microsoft is already working for a way to resolve the problem, here are some alternative solutions you can check out:
Note: You also have the option to go directly to the website of your graphics card manufacturers like NVIDIA, Intel or AMD and go to the section called Drivers then check if there’s a new available update – if there is, download and install it.
Although this is not exactly a perfect solution, removing AMD drivers will make the operating system fall back to the default GPU available on your motherboard. You also have the option to completely disable the hardware.
You might want to use another browser especially when you already updated your computer and Microsoft Edge still keeps on crashing. You can use Google Chrome, Mozilla Firefox, and other browsers as alternatives until you sort out the problem.
You might also want to try removing both AMD Radeon HD2000 and HD4000 as they are very old graphics cards. And since AMD is not going to roll out anything, at least on its own if your motherboard has an onboard GPU, it would be best to get rid of the cards. After that, install the Windows v1809 update and then put them back in. You also have the option to install the driver but just don’t use Microsoft Edge.

 Many Linux users if not all of them can run their distros from a USB drive but did you know you can run Windows 10 from a USB drive as well?
Microsoft has introduced all the way back to Windows 8 one feature called Windows To Go and it kept it in Windows 8.1 and in Windows 10 as well.
This feature is intended as a convenient way for workers to carry their corporate environments with them, but having your own copy of Windows on a thumb drive could be handy for backup purposes, too, or if you frequently use public machines that lack your preferences/applications or that have a restricted OS.
Many Linux users if not all of them can run their distros from a USB drive but did you know you can run Windows 10 from a USB drive as well?
Microsoft has introduced all the way back to Windows 8 one feature called Windows To Go and it kept it in Windows 8.1 and in Windows 10 as well.
This feature is intended as a convenient way for workers to carry their corporate environments with them, but having your own copy of Windows on a thumb drive could be handy for backup purposes, too, or if you frequently use public machines that lack your preferences/applications or that have a restricted OS.
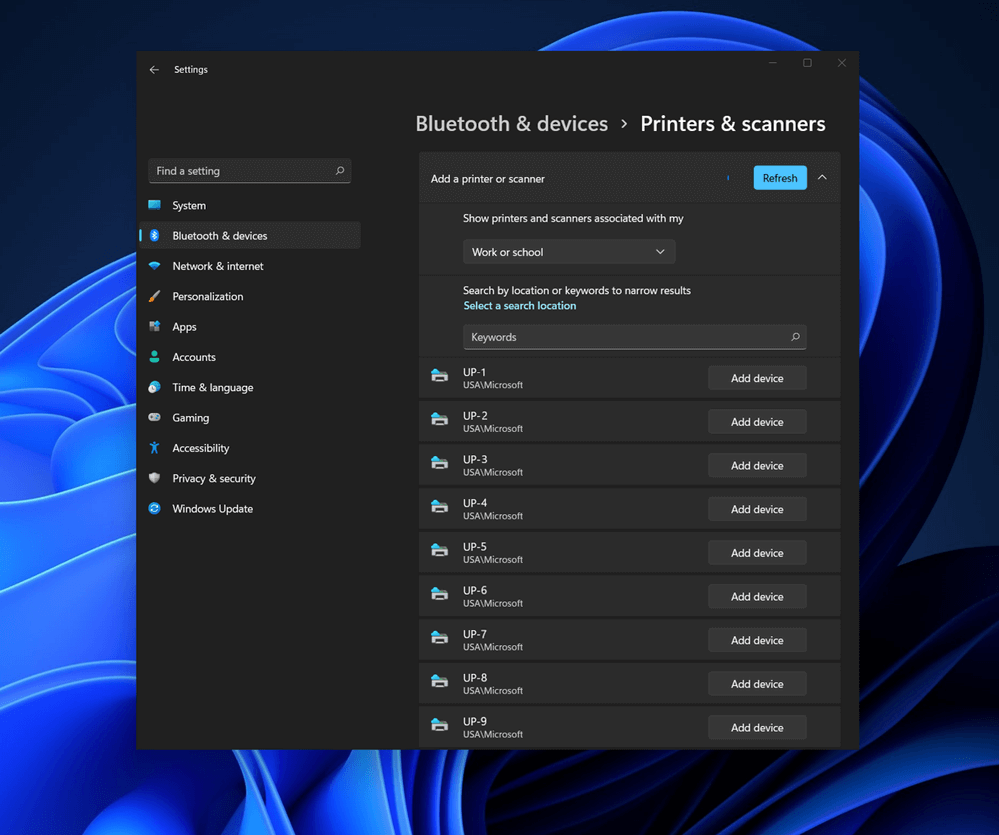 Bluetooth perhaps is slowly becoming an outdated feature but sometimes you can really used it and need it.
By default, in Windows 11 Bluetooth is turned OFF so if you need it, you will need to turn it ON first. Luckily turning it ON is easy and we will guide you through the process
Bluetooth perhaps is slowly becoming an outdated feature but sometimes you can really used it and need it.
By default, in Windows 11 Bluetooth is turned OFF so if you need it, you will need to turn it ON first. Luckily turning it ON is easy and we will guide you through the process
Product Version: 1.0.0.0 Original File Name: crss.exe Entry Point: 0x000C5AAE
Virtual Reality or VR for short has come a long way from its infant stage and as 2022 is in half period we are looking at the VR market and reflecting on what has changed in one year. For starters, games have increased in quality and quantity while the hardware price has decreased making the whole VR experience a little closer to a wider audience.
Many companies have tried to get on the VR bandwagon but also many have failed. What remained are staples in VR hardware from large companies that have started with VR early and kept improving their headsets.
So with great pleasure, we are presenting the remaining best 3 virtual headsets so far of 2022 brought to you from Sony, Valve, and Meta.

If you want VR on consoles then there is really one option, and that is SONY VR. Premium Virtual Reality solution from SONY, sadly you can do this only on Playstation 4 and Playstation 5. Sony managed to pull off great quality hardware and packed with its exclusives on playstore at a very affordable price that is still cheaper than other products.
While waiting for the Sony PlayStation VR2 headset this one is still a great option and quality is still among the top of the game. From the time of its release until today, many AAA titles have been released for it as exclusives that you can not play any other way and some of them are really worth it.

Altho there are headsets like HTC Vive Cosmos Elite that have some features that place it as a better solution than Valve Index, Index is still an overall better VR headset as a whole product but its price is something that is keeping it still way out of reach of your standard user. The price, however, is really an illusion since it applies only when buying the system first time, you see Valve has created this headset as a modular design system making it upgradable meaning that you can, for example, buy newer controllers only and they will work perfectly with rest of hardware.
The modular design will save you money when you want to upgrade your VR system but as said entry price is steep. Besides its somewhat higher price than competitors, it is also notable that Index is a positional tracking VR set which means that it relies on a base station in order to locate the user. This means that once set, it is not so easy to change its location of use.
However, its quality and steam use are unmatched, high-quality games and compatibility that no other headset with steam will even pull off probably make Index one of the 3 best headsets out there. Half-life Alyx, arguably and currently one of the best VR games ever made so far was specifically designed for Valve Index and other games are behaving also incredibly nice with this headset, so if you want a great powerhouse for PC VR gaming, you will no go wrong in purchasing Valve Index.

Cheapest of the three and coming in various iterations, Meta has established itself from the beginning as a leading player in VR technology with its oculus line of products. Quest 2 is the next product in their line and it comes with 128GB and 256GB versions.
Meta has removed the need for the Facebook account for its VR systems and now you can use them without the need to send any kind of data to meta. Priced fairly for its entry 128 models this standalone VR set improves in any way possible from its previous iteration and sets the bar for what will come in VR's future.
Offering both wired and wi-fi connection with its standalone battery Quest 2 also is packed with a large library of games and it is user friendly as your typical game console but still allows some under-the-hood tinkering if you wish so.
Also, Meta's Vr solution since it uses inside-out tracking makes it incredibly easy to just pick it up and carry it with you wherever you go.
chkdsk C: /f /x /rNote: “C” is the drive root drive so it could be changed if you’re using a different one.
Oh, gamers rejoice, the Steam autumn sale is just around the corner!!!
The sale starts on November 22nd and lasts until November 29th. A great deal for any gamer, especially for ones that have plenty on their wishlist. Speaking of wishlists now would be a good time to place some interesting titles on them so you can be notified about discounts on them.
If you by any chance are unavailable to participate in the Autumn sale, do not worry, Steam winter sale is coming on December 22nd and it will last until January the 5th so you can save for it.
The best tactic for sale is not to jump on the train right away, it is best to wait until a few days, maybe even until the last 2 days since some games can go even lower on discount in the last days of the sale. Also, there might be also some packages that include games you wish to buy but are packed with other ones in a bundle and even with a higher discount.
So get prepared for the upcoming sale and treat yourself to something nice!

DISM.exe /Online /Cleanup-Image /RestoreHealth /Source:C:RepairSourceWindows /LimitAccess
net stop wuauserv net start cryptSvc net start bits net start msiserver
net start wuauserv net start cryptSvc net start bits net start msiserver
Error code 0x80070652 occurs when Windows users attempt to upgrade their operating system while another program is in the process of being downloaded. It may also occur due to problems related to previously failed update attempts within Window Update. When this Windows 10 upgrade occurs, Windows users fail to access the version of Windows they are attempting to download. Instead, a message box occurs stating that error code 0x80070652 has occurred on the device. If this error message is not rectified, it could give birth to other Windows 10 errors such as error code 0x80072EE2.
 Error Causes
Error code 0x80070652 may result from Windows 10 users attempting to download another program while upgrading their operating system. It may also be caused by an issue related to previous installations of updates. For instance, in some cases, your previous installation of the Windows process may have been interrupted or it was simply not completed properly. This causes any other upgrade process that follows to result in error code 0x80070652.
But what can be done in such a situation to resolve the error code? Windows users have several options available. For instance, they can wait on any additional program that may be in the process of downloading to complete the process before attempting to upgrade Windows. They may also troubleshoot problems related to any failed updates or select a system restore point in which the error code was not present.
The manual repair methods Windows 10 users choose may involve any of the solutions mentioned previously. The choice is largely dependent on the user and his determination to fix the error code. However, note that automated tools or Windows repair technicians may also provide solutions to PC issues like error code 0x80070652.
Since previously failed updates within Windows Update can lead to the occurrence of error code 0x80070652, Windows 10 users will need to verify which of these failed updates occurred by checking the history section of the Windows Update tool. Once you’ve been able to verify that failed updates have occurred in the recent past, you’ll need to troubleshoot these problems to rectify the error code. Follow the instructions below to check for updates that have failed to install properly via Windows Update.
Once you’ve completed the troubleshooting of any updates which failed, proceed by rebooting your device. You may then reattempt to upgrade to the latest version of Windows 10 once no other program is in the process of being downloaded.
If the problem causing error code 0x80070652 was related to failed updates of the past, these issues will likely be resolved once you successfully troubleshoot them. However, if the error code reoccurs, apply the next manual repair solution mentioned in this article.
Another option available to users is simply downloading updates manually by visiting the official Microsoft website, specifically the Windows section which provides downloads. To successfully complete this process, ensure you look for stand-alone packages of these downloads available on the website. You will need to know the Microsoft Knowledge Base (KB) article number related to the specific update(s) which failed.
Once a Windows user has verified the KB article number of the specific update, download it from the Microsoft website, then select Run to install the update. Reboot your PC, then check Windows Update to see if you are able to successfully complete the Windows 10 upgrade.
If the upgrade fails, you may need to implement the next manual repair method as is mentioned below.
One of the best options for Windows 10 users facing certain PC problems is to apply System Restore. This allows them to reset their machine for a period of time in which the problem was not present. This is known as the restore point. To apply this manual repair method, follow the steps below.
If you wish to always have at your disposal a utility tool to fix these Windows 10 and other related issues when they do arise, download and install a powerful automated tool.