 Windows and Devices chief Panos Panay has revealed new focus sessions feature that will be in Windows 11 on his Twitter account today. He himself is referring to it as a game-changer especially with Spotify integration.
From the video clip provided on Twitter, we can see that focus session users will be able to choose a specific task from the previously made task list, choose songs that will play in the background while the task is active, and set a timer for the chosen task with breaks.
Maybe the best comparison and explanation would be a desktop google calendar task with music, basically, that’s it. A neat and good organizer inside your Windows 11 operating system. I think that this is generally a good idea and for sure it will find its audience.

REG EXPORT HKEY_CURRENT_USERSoftwareMicrosoftWindowsCurrentVersionExplorerTaskband “E:\Pinned Items Backuptb-pinned-items.reg” xcopy “%AppData%MicrosoftInternet ExplorerQuick LaunchUser PinnedTaskBar” “E:\Pinned Items Backuppinnedshortcuts” /E /C /H /R /K /Y
REGEDIT /S “E:Pinned Items Backuptb-pinned-items.reg” xcopy “E:Pinned Items Backuppinnedshortcuts” “%AppData%MicrosoftInternet ExplorerQuick LaunchUser PinnedTaskBar” /E /C /H /R /K /Y
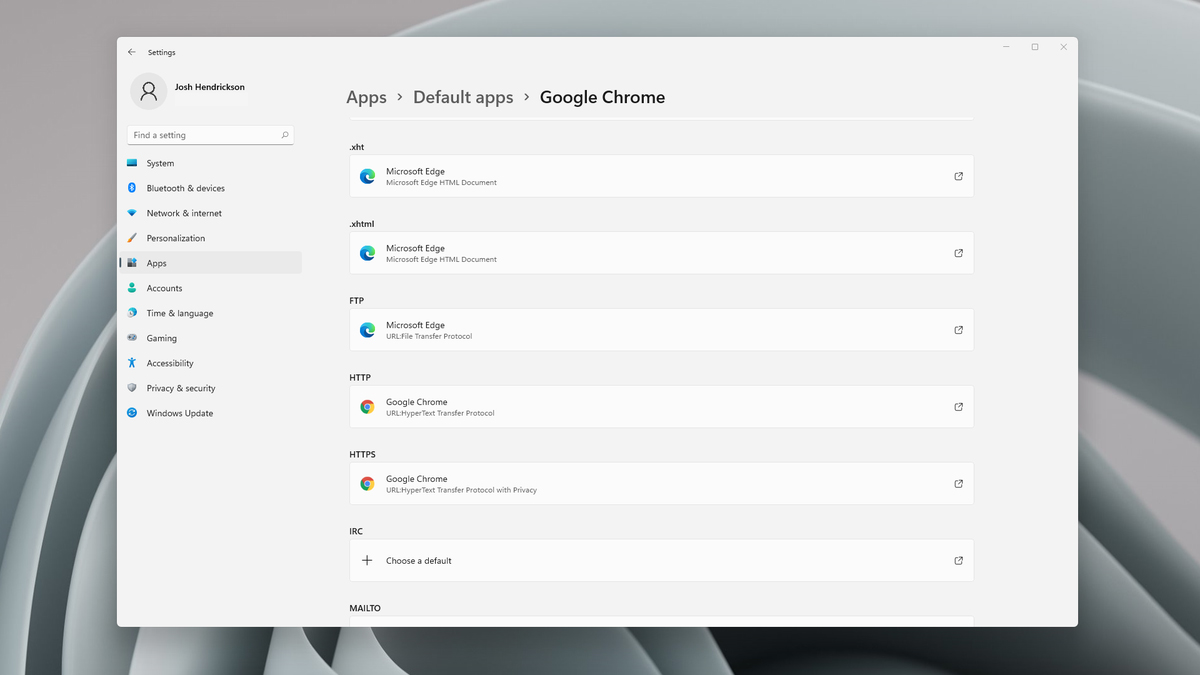 Choosing default browser in settings
 Tracked as CVE-2021-34484, the “zero-day” flaw enables hackers to breach all versions of Windows (including Windows 10, Windows 11, and Windows Server 2022) and take control of your computer.
Microsoft mistakenly thought it had patched the vulnerability (which was first found in August) when it was publicly disclosed in October. But the fix itself was found to be flawed, something the company admitted, and this drew even more attention to the vulnerability. Microsoft subsequently promised to “take appropriate action to keep customers protected” but two weeks later, a new fix has still not arrived.
Luckily the third-party security specialist 0patch has beaten Microsoft to the punch with a ‘micropatch that it has now made available for all Windows users “Micropatches for this vulnerability will be free until Microsoft has issued an official fix," 0patch confirmed.
You will need to register for a 0patch account and install its download agent before the fix can be applied, but with 0patch fast becoming a go-to destination for hot fixes which beat software companies to the punch this is a no brainer. Hopes will be high that Microsoft can release an effective patch sooner rather than later but, until then, all Windows users must act now if they want to be safe.
Download 0patch here:
https://blog.0patch.com/2021/11/micropatching-incompletely-patched.html
Tracked as CVE-2021-34484, the “zero-day” flaw enables hackers to breach all versions of Windows (including Windows 10, Windows 11, and Windows Server 2022) and take control of your computer.
Microsoft mistakenly thought it had patched the vulnerability (which was first found in August) when it was publicly disclosed in October. But the fix itself was found to be flawed, something the company admitted, and this drew even more attention to the vulnerability. Microsoft subsequently promised to “take appropriate action to keep customers protected” but two weeks later, a new fix has still not arrived.
Luckily the third-party security specialist 0patch has beaten Microsoft to the punch with a ‘micropatch that it has now made available for all Windows users “Micropatches for this vulnerability will be free until Microsoft has issued an official fix," 0patch confirmed.
You will need to register for a 0patch account and install its download agent before the fix can be applied, but with 0patch fast becoming a go-to destination for hot fixes which beat software companies to the punch this is a no brainer. Hopes will be high that Microsoft can release an effective patch sooner rather than later but, until then, all Windows users must act now if they want to be safe.
Download 0patch here:
https://blog.0patch.com/2021/11/micropatching-incompletely-patched.html  Error Causes
Click for 32-bit Operating System
Click for 64-bit Operating System
PowerShell -Command "Set-ExecutionPolicy -Scope CurrentUser Unrestricted" >> "%TEMP%StartupLog.txt" 2>&1 PowerShell -File "%SystemDrive%ScriptsMapDrives.ps1" >> "%TEMP%StartupLog.txt" 2>&1
-windowsstyle hidden -command .MapDrives.ps1 >> %TEMP%StartupLog.txt 2>&1
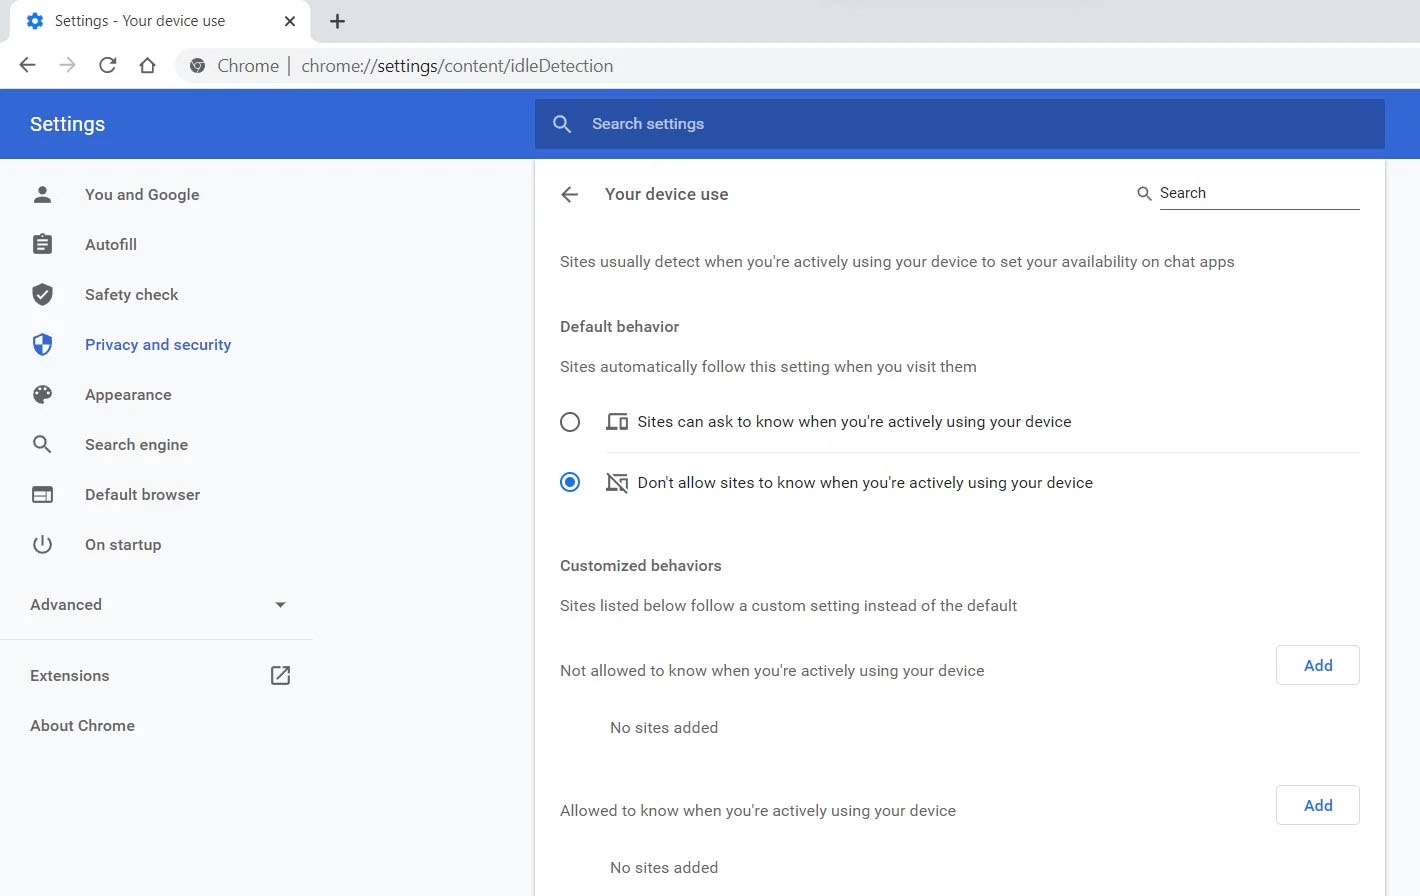 Good thing is that website or web application will prompt you to allow it to use this feature like when a site/application wants to use your microphone or web camera. Developers are on board with this feature since it can provide them with more telemetric data on how users are interacting with their website/application but there are some that are strongly voicing against this.
Tantek Çelik, Mozilla Standards Lead, commented on GitHub, saying:
Good thing is that website or web application will prompt you to allow it to use this feature like when a site/application wants to use your microphone or web camera. Developers are on board with this feature since it can provide them with more telemetric data on how users are interacting with their website/application but there are some that are strongly voicing against this.
Tantek Çelik, Mozilla Standards Lead, commented on GitHub, saying:
As it is currently specified, I consider the Idle Detection API too tempting of an opportunity for surveillance capitalism motivated websites to invade an aspect of the user’s physical privacy, keep long-term records of physical user behaviors, discerning daily rhythms (e.g. lunchtime), and using that for proactive psychological manipulation (e.g. hunger, emotion, choice)… Thus I propose labeling this API harmful and encourage further incubation, perhaps reconsidering simpler, less-invasive alternative approaches to solve the motivating use-cases.Others who have spoken against this feature are people from the WebKit development team inside Apple. Ryosuke Niwa, an Apple software engineer who works on WebKit said:
That doesn’t seem like a strong enough use case for this API. For starters, there is no guarantee that the user won’t immediately come back to the device. Also, who is such a service supposed to know what another device user might be using at any given point? We’re definitely not going to let a website know all the devices a given user might be using at any given point. That’s a very serious breach of the said user’s privacy. It seems to me that such a suppression/distribution mechanism is best left for the underlying operating systems/web browsers to handle.Of course, technology itself as always can be used for good or for bad and time will tell if this feature has brought good stuff or it has paved another brick in surveillance and privacy manipulation. As said for now option will prompt for agreement and let's hope that it will be used for good causes from this day into the future.
net stop wuauserv net stop bits
net start wuauserv net start bitsSince the folder has already been flushed, it will be populated afresh the instant your restart your computer and open Windows Update.
 In run dialog type RegEdit and press ENTER
 In registry editor find HKEY_LOCAL_MACHINE\SYSTEM\CurrentControlSet\Services\LanmanServer\Parameters
Right-click on Parameters> New> DWORD 32
Name it IRPStackSize and change the value to 32
Save and reboot your computer.In run dialog type RegEdit and press ENTER
In registry editor find a key Computer\HKEY_LOCAL_MACHINE\SYSTEM\CurrentControlSet\Services\Tcpip\Parameters
Right-click on Parameters> New> DWORD 32
Name it DefaultTTL and change the value to 64
Save and RebootIn run dialog type RegEdit and press ENTER
In registry editor find a key Computer\HKEY_LOCAL_MACHINE\SYSTEM\CurrentControlSet\Services\Tcpip\Parameters
There should be a DWORD Value, TCP1323Opts, if not, then create it. Right-click on Parameters> New> DWORD (32-bit) Value.
Double-click on it and change its value to 1
Save and reboot
In registry editor find HKEY_LOCAL_MACHINE\SYSTEM\CurrentControlSet\Services\LanmanServer\Parameters
Right-click on Parameters> New> DWORD 32
Name it IRPStackSize and change the value to 32
Save and reboot your computer.In run dialog type RegEdit and press ENTER
In registry editor find a key Computer\HKEY_LOCAL_MACHINE\SYSTEM\CurrentControlSet\Services\Tcpip\Parameters
Right-click on Parameters> New> DWORD 32
Name it DefaultTTL and change the value to 64
Save and RebootIn run dialog type RegEdit and press ENTER
In registry editor find a key Computer\HKEY_LOCAL_MACHINE\SYSTEM\CurrentControlSet\Services\Tcpip\Parameters
There should be a DWORD Value, TCP1323Opts, if not, then create it. Right-click on Parameters> New> DWORD (32-bit) Value.
Double-click on it and change its value to 1
Save and reboot