Windows 11 will bring some old applications in new looks and some will get additional features as well. One of the old apps that will get new stuff is a calculator.
The calculator was always a way to go application for quick calculations but Microsoft aims to expand on that and make the calculator a little more useful.
The first thing that you will notice is the calculator look, the calculator has now an application theme setting that allows you to change the look of the application. It comes in standard and professional mode as usual but this time calculator will come with features that will enable it to handle some programming and engineering tasks.
The new calculator features a full graphing mode that lets you visually analyze a graph to identify key features. It also packs a deep converter that can switch between more than 100 units and currencies.
Other Windows 11 apps
A new snipping tool will be delivered with this latest update as well packed with new functionality. We have covered new features of the snipping tool in another article, if you are interested you can find the article here: https://errortools.com/windows/new-snipping-tool-redesigned-in-windows-11/
Mail and Calendar apps will also get a redesign, sadly all redesign that they will include will be of visual nature to fit in the overall Windows 11 theme, functionality will remain the same.
If you are a person which spends a lot of time in front of the computer doing work, then you are aware of the importance of having a proper backup of your archive so if anything bad happens you will lose almost none of the work.
We can never tell when we might experience HDD failures or when we might be a victim of cyber attacks, natural disasters,s and other unpredictable circumstances where we could lose all of our data in a matter of minutes. Having a backup of our data is very important but sometimes we are too busy or not around and we miss that data backup we wanted to do, and if in this case disaster strikes we are out of luck and data is lost. To avoid such circumstances, you can set up automatic Windows Backups at a scheduled time. This way it will help to have the loss of important files and documents from unexpected hazards.
in order to create automatic backups of your files, you have several options, and below we will explore each one in hopes that you will find one that best suits your needs.
Create automatic file backup with OneDrive
This is probably the best way to do it because each time when you sign in OneDrive files get backed up right away, files are stored in the cloud and can be accessed on any device via a Microsoft account.
To get started, open the Settings app first.
Click on the Update & Security category
Select the Backup tab from the left pane.
Move to the right page and click on the Back up files button that is available under Back up files to OneDrive.
Select the folders you want to backup in the cloud, and remove those ones you don’t want to backup.
On the next page, click the Start backup button to start the procedure.
Create a backup using File History
File History is an inbuilt feature that allows users to create automatic file backup on Windows 10. File History allows the users to back up their files in an external or cloud drive at different intervals of time. To create automatic file backup using File History:
Press the ⊞ WINDOWS + I to open the Settings app.
Click on the Update & Security category and then select the Backup tab from the left pane.
Under the Back up using File History section, click on Add a drive button.
Now choose the drive to store the backup files. Windows will use this drive for File History.
Then turn on the toggle button under Automatically back up my files. This will back up your data to the drive automatically whenever you connect it to the system.
Below the toggle button, click on the “More options” link to set how frequently File History will back up.
Use the Keep my backups drop-down menu to get the option to configure the time for how long you want to keep your backups. By default, it will keep your backups forever.
Under the section Back up these folders, tap on the Add a folder button in order to add one more folder to the backup. Then click on the Add a folder button, under Exclude these folders. This will exclude the files that you don’t want to back up.
You can stop the drive from storing backup files to change the backup storage location. To do this, click the Stop using drive option under the Back up to a different drive category.
Backup using Windows backup & restore tool
Open Control Panel
Click on the System and Security option
Scroll down and select the Backup and Restore (Windows 7) button
Next click on the Set up backup button, available under the Back up or restore your files section
Under the Save backup on section, select the Backup Destination where you want your backup files to get stored
On the “Set up backup” page, Windows will ask you to choose the way to backup, check Let me choose checkbox, and then hit the Next button
Under the section Computer, select the files and folders you want to backup. Then uncheck the box next to the Include a system image of drives option, and then hit the Next button
Now click on the Change schedule link. Set the time and check the box beside Run backup on a schedule button
Click OK then select the Save settings and run backup option
If you are trying to install a Feature Update in Windows 10 but you got the error code 0x80190001, then it means that there is something wrong with the installation files. The installation files are either corrupted or some of them failed to be downloaded. On the other hand, the issue might also have something to do with a driver issue.
When you encounter error 0x80190001, you will see the either of following error message on your screen:
“Something went wrongCouldn’t download Windows 10, please check your network settings and try again. You can contact Microsoft support for help with this error. Here’s the error code 0x80190001”.
Or:
“An unexpected error was encountered while attempting to download files required for the upgrade”.
Here are some fixes that could help you resolve the error 0x80190001. Follow them carefully.
Option 1 – Run the Network Troubleshooter
As mentioned in the error message the issue might have something to do with the network settings of your computer so you can try to run the Network Troubleshooter and then try updating or installing Windows 10 again.
Option 2 – Update Network drivers
Tap the Win + R keys to launch Run.
Type in msc into the box and tap Enter or click OK to open the Device Manager.
After that, look for Network Adapters from the list of device drivers displayed. Once you find it, expand it to see the Network drivers.
Right-click on it and select the option “Uninstall device” – do the same thing for the other Network drivers.
Restart your PC so Windows can detect and reinstall the drivers you just uninstalled.
Option 3 – Use Storage Sense to clean up temporary and junk files
Open Setting > System > Storage from the WinX Menu.
From there, you will see a list of all the local and connected storage devices along with the details on the free space.
Now make sure that the Storage Sense feature is turned On then go find a link that says “Free Up Space” and click it to open.
After that, a screen which is the built-in program in Windows 10 will appear and will scan your computer for the following junk files so you can free up disk space:
Windows Upgrade Log Files
The system created Windows Error Reporting Files
Thumbnails
Temporary Internet Files
Previous Windows Installation Files
Delivery Optimisation Files
DirectX Shader Cache
Note: Once you’re done freeing up space on your drive, try to run the setup file again.
Option 4 – Delete the contents in the SoftwareDistribution folder
The Software Distribution folder in the Windows operating system is a folder that can be found in the Windows directory and is used to store files temporarily which might be required to install the Windows Update on your PC. Thus, it is required by the Windows Update and maintained by WUAgent. A lot of users tried deleting the files in this folder to fix the problem and so far it has worked. Like them, you can try clearing the Windows Update cache by simply deleting the contents of the folder named “SoftwareDistribution” since Windows apparently can’t clear and re-download the update contents once they are corrupted. Thus, deleting the contents of this folder will make Windows download the contents again which will fix the problem. To do that, follow the steps below.
Open the WinX Menu.
From there, open Command Prompt as admin.
Then type in the following command – don’t forget to hit Enter right after typing each one of them.
net stop wuauservnet stop bits
After entering these commands, it will stop the Windows Update Service and the Background Intelligent Transfer Service.
Next, go to the C:/Windows/SoftwareDistribution folder and get rid of all the folders and files thereby tapping the Ctrl + A keys to select them all and then click on Delete. Note that if the files are in use, you won’t be able to delete them.
Once all the contents in the Software Distribution folder are deleted, restart your PC and then go back to Command Prompt and input the following commands again.
net start wuauservnet start bits
Since the folder has already been flushed, it will be populated afresh the instant your restart your computer and open Windows Update.
Option 5 – Run the Windows Update Troubleshooter
You might also want to run the Windows Update Troubleshooter as it is also known to help users resolve Windows Update errors like error 0x80190001.
Option 6 – Try to disable your antivirus program
Disabling the antivirus program or any security software installed in your computer is always a good idea you can try when the Windows Update process does not go smoothly. So before you try updating your computer again, make sure to disable the antivirus or security program and once the Windows Update is done, don’t forget to enable the antivirus program back again.
Option 7 – Try to use the Media Creation tool
The Media Creation tool in Windows allows you to use the ISO installation file to make a bootable device that you can use to install Windows on your PC. Note that this is kind of different from the usual installation process as it could erase your computer’s current settings and data on the primary drive. Thus, before you proceed, you need to backup all your data into some removable drive and then use the Media Creation Tool to make a bootable drive.
After making the bootable drive, you need to plug it into your computer and then reboot.
Next, tap the F10 or Esc key to open the boot options.
Now set the boot priority of the removable drive the highest. Once the setup comes forth, follow the next onscreen instructions and install Windows without any problems.
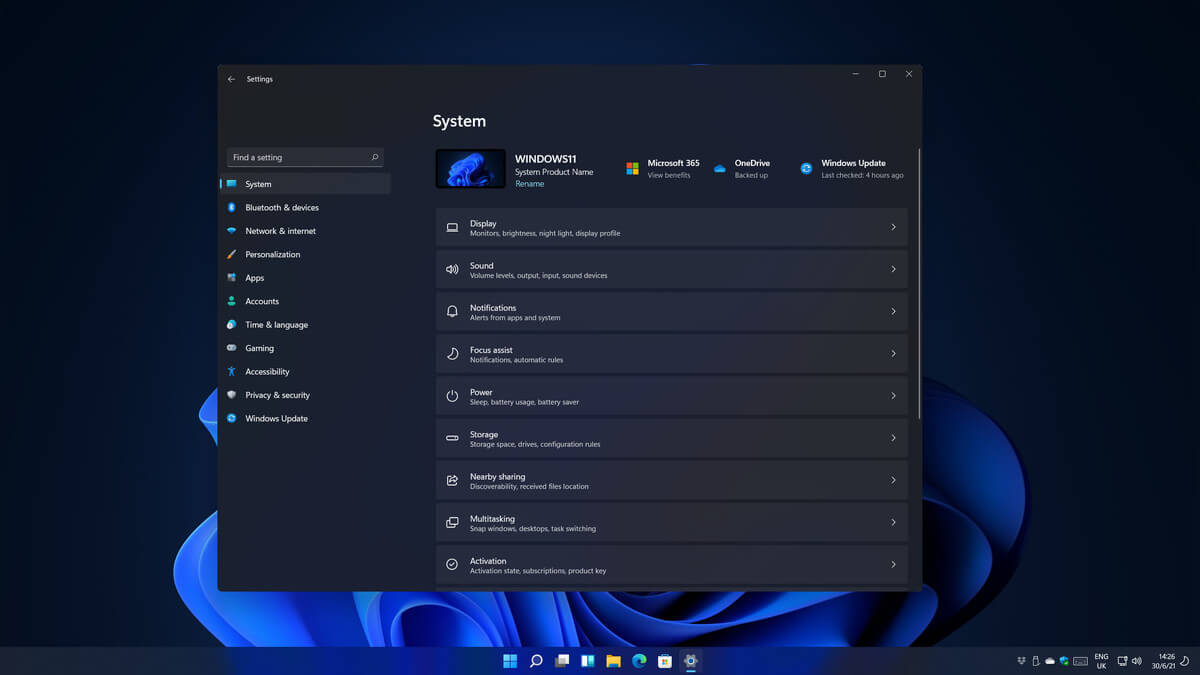
Same as Windows 10, Windows 11 also keeps track of date and time using an internet time server. But in a case that you need to change the date or time for any kind of reason here is a guide for that process:
Press ⊞ WINDOWS + I to open settings
Click on Time & Language in Taskbar
Inside Time & Language click on Date & Time
Turn off Set Time Automatically by clicking on the switch next to it
Below find Set the date and time manually and click on Change
Inside, Change Date and Time window use the drop-down menu to set desired date and time
The GeForce Experience on graphics card manufactured by NVIDIA is an advantage for users who loves gaming as it makes enhances users’ gaming experience. However, there are times when it may also encounter some problems. One of the problems users may encounter is the error code 0x0001. This kind of error occurs when users open the NVIDIA GeForce Experience utility. Here’s the full content of the error message:
“Something went wrong, try rebooting your PC and then launch GeForce Experience, ERROR CODE: 0x0001.”
Errors like this one diminish the overall experience of users due to the fact that when this error occurs, the NVIDIA GeForce experience wouldn’t even start which renders its features useless. There are several potential fixes you can check out to resolve this error but before you check them out, you can try to restart your computer first and then open the NVIDIA GeForce Experience once again, if you still encounter the error, then you need to check the NVIDIA Display Driver Services or update your NVIDIA display drivers or switch to the BETA release. You could also try to install and reinstall the NVIDIA display drivers or perform System Restore and see if it helps. For detailed instructions, follow the given options below.
Option 1 – Try to check the NVIDIA Display driver services
Tap the Win + R keys to open Run and then type “services.msc” in the field and hit Enter to open the Services Manager.
From there, look for the following NVIDIA services and make sure that their Startup types are as follows:
NVIDIA Display Container LS – Automatic
NVIDIA NetworkService Container – Manual
NVIDIA LocalSystem Container – Automatic
NVIDIA LocalSystem Container – Automatic
NVIDIA GeForce Experience Service – Automatic (Delayed Start)
NVIDIA Geforce Experience Backend Service – Automatic (Delayed Start)
NVIDIA Telemetry Container service – Automatic
Next, double click on each one of the services and go to Properties. Here, check if the service is running. If it’s not, just click on the Start button. On the other hand, if they’re already running, just click on Stop and then click on Start again.
Option 2 – Try to update the NVIDIA Display drivers
You can also try updating the NVIDIA display drivers as it might help in fixing the error. To update them, follow the steps below.
Tap the Win + R keys to open the Run dialog box.
Next type in “dxdiag” in the field and click OK or hit Enter to open the DirectX Diagnostic Tool.
From there, you can see what type of NVIDIA graphics card that your system is on.
Take note of your graphics card information and then look for the best drivers for your operating system. Once you’ve downloaded and installed the file, restart your PC.
Note: If you want to try out the beta release of the NVIDIA display drivers, click on this link. Beware though that the beta software is unstable and buggy and may cause some different bugs.
Option 3 – Try to roll back the driver to the previous version
If updating the NVIDIA display drivers didn’t work for you, then it’s time to roll back the device drivers. It is most likely that after you updated your Windows computer that your driver also needs a refresh.
Tap the Win + R keys to launch the Run window and then type in the “msc” command and hit Enter to open the Device Manager window.
Under the Device Manager, you will see a list of drivers. From there, look for the NVIDIA Drivers and expand it.
Next, select the driver entries that are labeled appropriately.
Then select each one of them and double click to open a new mini window.
After that, make sure that you’re on the Driver tab and if you are not, just navigate to it then click the Roll Back Driver button to switch back to the previous version of the NVIDIA Drivers.
Now restart your computer to successfully apply the changes made.
Option 4 – Try to run System Restore
You could also run System Restore as it might help fix the error code 0x0001 in NVIDIA GeForce Experience.
Tap the Win + R keys to open the Run dialog box.
After that, type in “sysdm.cpl” in the field and tap Enter.
Next, go to the System Protection tab then click the System Restore button. This will open a new window where you have to select your preferred System Restore point.
After that, follow the on-screen instructions to finish the process and then restart your computer and then check if the error code 0x0001 in GeForce Experience is now fixed.
Option 5 – Do a clean install on the NVIDIA driver
Before you do a clean install on the NVIDIA driver, you have to download the latest version of the Display Driver first.
Boot your Windows 10 PC into Safe Mode.
After that, double click on the executable file of the Display Driver Uninstaller to run and install it.
After the installation, open the program. Once you do, you should see the following window on your screen:
In the program window, click on the “Clean and restart” button.
After your PC has rebooted, download the NVIDIA drivers.
Then select your Product Type, Product Series, Product, Operating System, and Language appropriate for your hardware specifications as well as personal requirements.
Next, click on Search to display the latest available driver as per the information you entered.
And click on Agree and Download to start downloading the latest driver executable file.
Run the executable file after you finished downloading the latest driver executable file and then select Custom and click on Next.
Afterward, select “Clean Install” and proceed. Doing so would install the latest driver on your PC.
Restart your PC and check if the error’s now fixed. If not, you can try installing an older version of the driver instead.
Error code 80004002 will be encountered when there are absent registry keys. These missing registry keys will hinder an update process when initiated. However, this error code can be averted once the user makes a reinstall of the Windows Update Client. The steps will be highlighted throughout the article.
Solution
Error Causes
Error code 80004002 might occur for various valid reasons. In cases of installing programs, a user might mistakenly install a new program over another, that was not properly (completely) uninstalled. This could cause a stack-up of registry keys and error messages. Additionally, error code 80004002 might be a consequence of malware, viruses, and adware.
Further Information and Manual Repair
If left unchecked, error code 80004002 could amount to system freezes and crashes, slow computer performance, error codes upon installation, and even blue screen errors. To fix this error code, you might want to attempt one or all the methods below. This is due to the fact that the problem might stem from various reasons.
Method 1: Safe Mode
Ensure to boot your computer in safe mode. This is to ensure that you are properly able to troubleshoot Windows update error code 80004002. To load your computer in safe mode, turn on the computer, press F8 before it fully loads to the ‘sign in’ screen.
Method 2: Update Outdated Drivers
One of the many reasons why you’ll encounter error code 80004002 is in light of the fact that your drivers might have been outdated. To check if your driver is outdated, Right click on the Start menu, select the Device Manager option. From there, you’ll be able to tell which device(s) is corrupted and needs updating.
Method 3: Reinstall Windows Update Client
To perform this process, follow the steps below:
Locate “My Computer” or “This PC” on your device.
Select the “Properties” option.
Under the System option, determine whether your System type is 64-bit or 32-bit version of Windows.
Use the links below to install the Windows Update client:
After installation, search for Windows Update from the Search option.
Select the Check for Updates option.
Once any updates are found, hit Install Updates.
Method 4: Use An Automated Tool
If you wish to always have at your disposal a utility tool to fix these Windows 10 and other related issues when they do arise, download and install a powerful automated tool.
CLR20R3 error is received when you are launching an application in Windows 10. It can happen because of two reasons, a corrupted application file or missing system components. Keep on reading in order to find solutions to fix this error.
Run the program in compatibility mode
Locate problematic application executable file
Right-click on executable
Click on properties
Go to the compatibility tab and try running the application in the previous version of Windows or as an administrator.
Reset Windows media component
Right-click on Start, then left-click on command prompt (admin)
In command prompt type next command and after each line of command press ENTERregsvr32 atl.dllcd C:\WINDOWS\eHomeehSched /unregServerehSched /serviceehRecvr /unregServerehRecvr /serviceehRec.exe /unregServerehRec.exe /regserverehmsas.exe /unregServerehmsas.exe /regserver
Reinstall Windows media player
Go to control panel
Click on Program and Features > Turn Windows feature on or off.
Expand Media Features, uncheck Windows Media Player, and click Ok.
Restart your PC, go through the same steps, tick Windows Media Player, and restart your computer once again.
Reinstall .NET framework
Go to control panel
Click on Program and Features > Turn Windows feature on or off.
Uncheck “.NET Framework 3.5” and “.NET Framework 4.8”, and click Ok.
Restart your computer, go through the same steps, check “.NET Framework 3.5” and “.NET Framework 4.8”, and restart your computer once again.
Have you been feeling anxious in the digital space? Feeling like you have a million eyes on you each time you visit a website? It can definitely make you uneasy. Luckily there’s an easy fix, and it’s called a VPN.
In this article we’ll take you through the basics of what a VPN does and some of the biggest benefits you can reap from buying one.
VPN: definition and how it works
VPN stands for Virtual Private Network, so its name already says a lot about what it does.
A VPN is specialized software that keeps your browsing private and secure. Essentially it hides your identity, preventing possible cyberattacks and data theft. This is especially important in cases of public network use, where you’re highly exposed to potential threats.
To be more specific, this software encrypts your Internet Protocol (IP) address by filtering it through a server hosted by the VPN provider first. That way, it prevents your Internet service provider, third parties and lurking online thieves from tracking the actual you.
Credit: FLY:D on Unsplash
Some providers, such as Surfshark VPN with its IP Rotator feature, even make it a habit to frequently change your IP address to further protect your identity. With most VPN providers, you can also appear to be in a completely different country, adding to your disguise.
There are tons of advantages you can look forward to if you decide to use a VPN. Take a look at some of the crucial ones.
Benefits of using a VPN
When choosing a VPN, you can find both free and paid options. We recommend you go with the paid ones, since they have stronger security, encryption and data protection, as well as more advanced features. Free VPNs come with limitations and risk of malicious attacks on the software itself.
You can choose to buy a singular VPN service or opt for antivirus software that has a VPN built in, for example Bitdefender’s Ultimate Security plan. That depends on what you use your computer for and how much.
When you pick one, here’s what it can do for you.
1. Access region-specific content
When we said you could change your location, we meant it. Say you’re using a streaming service and a show you desperately want to watch isn’t available in your country. You can use your VPN to make it look like you’re browsing from a country where it’s unlocked.
This option is also convenient for gamers who want to access maps, skins and other in-game items unavailable in their location.
In addition, you can use this powerful feature when you’re traveling to a region where some of your favorite content may not be accessible.
Do keep in mind that you need to read the Terms and Conditions (yeah, we know - who does that?) of your games and services before doing this, since you could end up getting a penalty. It’s also important to remember that there are entire countries that have strict regulations or even bans on VPNs, for example Belarus, Russia and China. So make sure to be very cautious with your VPN use, friends.
2. Browse like no one’s watching
VPNs shield your browsing habits from prying eyes on the web. Those can be malicious hackers or just third-party cookies tracking your every move to later bombard you with targeted ads. For example, Surfshark VPN features a Cookie blocker that blocks all cookie-related pop-ups and lets you browse in peace (and secret). It works even when the VPN is turned off, which is also pretty neat.
In addition, their CleanWeb 2.0 technology makes sure ads and especially malware don’t stand a chance at all, since they’re blocked before they can even load.
The inability of sites to track your browsing means they can’t collect and analyze any of your data. So, your personal information - or your company’s information in case that’s what you’re using your computer for - is entirely hidden and secure.
3. Save money
It’s well-known that the prices of certain items and services vary based on your location, browsing time, age and many other factors. This most commonly goes for airline tickets and hotel stays.
You can use your VPN to avoid high prices and surcharges. Clear all cookies, turn on your VPN and visit an online shopping site to check out their prices. Then compare your findings with the offers you see when your VPN is off, when you spend a long time on the site or have an active account with the company.
Sometimes this can really help you find the best deals and avoid breaking the bank. But again, check the Terms and Conditions before you purchase something using a VPN.
4. Secure your smart home
The more smart devices you have connected to your network, the more exposed you are to potential cyberattacks. Phones and computers are generally designed to be decently secure even without a VPN or antivirus, but smart home devices leave a lot to be desired in that regard.
Protecting your home network with a VPN software means all devices connected to it are secure, be it an air purifier or Alexa.
Credit: Bence Boros on Unsplash
5. Prevent connection slowdown
Your ISP can intentionally slow down your internet speed based on how much data you’ve consumed (data throttling) or your activities online (bandwidth throttling).
But with a VPN, what kind of data you send and receive and how much is entirely hidden. Therefore, if your ISP can’t see you, they can’t control you and they can’t throttle down your speed.
The bottom line
You can never be too safe online. So definitely think about getting yourself a solid VPN to pump up your privacy and security as much as you can. And if you have any questions or need help choosing the perfect software for you, feel free to reach out to us.
One of the great remote assistance software that helps you remotely access and control computers is TeamViewer. However, despite how efficient it is, there are still times when it throws up some errors and one of them is when TeamViewer is not able to connect and throws an error that says, “No connection to partner, Partner did not connect to router, Error Code WaitforConnectFailed”.
This kind of error in TeamViewer mostly occurs when the Partner computer is not connected to a network. On the other hand, it could also occur when they are connected to a network so there are various causes for this issue. It could also be that the installation of the program itself was at fault or there is an incompatibility between the TeamViewer versions installed on both the computers and so on.
Although there are several causes for this error, the potential fixes are still the same. You can try to restart the network or allow Full Access Control to TeamViewer or flush the DNS cache. For more information, refer to the following options but before you proceed, make sure that both your Windows 10 computer and TeamViewer program are updated to their latest stable versions.
Option 1 – Reboot your router
The first thing you can try to do to fix the error is to simply restart your router. All you need to do is reboot the router from its Admin panel or you can also turn it off manually and turn it back on after a couple of seconds so that it can completely reboot. Once you’re done, try accessing your server again and see if the error is now fixed.
Option 2 – Allow Full Access Control to TeamViewer
First, open TeamViewer, and then from the Menu bar, click on Extras.
After that, click on Options and select Advanced from the left side navigation panel.
Next, click on the “Show advanced options” button located on the right-hand side.
Then select Full Access from the drop-down menu of the Access Control option under the “Advanced settings for connection to this computer section”.
Now click OK and check if the error is now fixed or not.
Option 3 – Try to flush the DNS configuration
You could also try to flush the DNS configuration in your computer to fix the error. How? Refer to these steps:
Tap the Win + X key combination and click on the Command Prompt (Admin) option or you could also search “cmd” in the Cortana search box and right-click on Command Prompt from the search results and select the “Run as administrator” option.
After opening Command Prompt with admin privileges, enter each one of the commands given below sequentially in order to flush the DNS cache.
ipconfig/release
ipconfig/renew
ipconfig/flushdns
Now type the exit command to close Command Prompt and then restart your computer and see if the problem is fixed.
On the other hand, you could also try to reset Winsock as well as the TCP/IP.
Option 4 – Run the Network Adapter troubleshooter
To run the Network Troubleshooter, refer to these steps:
Open the Search bar on your computer and type in “troubleshoot” to open the Troubleshoot settings.
Next, scroll down and select the “Network Adapter” option from the right pane.
Then click on the Run Troubleshooter” button.
After that, your computer will check for any possible errors and will pinpoint the root cause of the problem if possible.
Restart your computer.
Option 5 – Try to perform Network Reset
You might perform a Network Reset to resolve the problem if none of the four given options worked. This will reset the entire network configuration including your IP address. To perform Network Reset, follow these steps:
Tap the Win + I keys to open Settings.
From there, go to the Network and Internet section.
Next, scroll down and look for “Network Reset” under the status pane.
After that, click on Network Reset and then on Reset now to start resetting the network configuration. Once done, check if it is able to fix the error or not.
If your VPN software blocks and disconnects the Internet or Wi-Fi connection as soon as it is connected, read on as this post will give you fixes to resolve the problem. This kind of issue is odd but not unheard of. Many users use VPN for privacy and security but if it causes internet connection problems, you have to pin down the root cause of the problem and fix it in order to continue browsing the internet with privacy and security.
Here are some suggestions you need to check out to resolve the issue between your VPN software and network.
Option 1 – Try installing the latest version of the TAP adapter
Since all VPN software uses a TAP adapter which is mostly from OpenVPN, you might want to download and install the TAP adapter driver to resolve the problem.
Option 2 – Run the Network Adapter Troubleshooter
Open the Search bar on your computer and type in “troubleshoot” to open the Troubleshoot settings.
Next, scroll down and select the “Network Adapter” option from the right pane.
Then click on the Run Troubleshooter” button.
After that, your computer will check for any possible errors and will pinpoint the root cause of the problem if possible.
Option 3 – Configure the client computer to use the default gateway
This kind of connection problem can occur when you configure the VPN connection as the default gateway on the remote network. In such a case, the VPN settings override the default gateway settings (TCP/IP settings). Thus, you have to configure the client computers in order to use the default gateway setting on your local network for internet traffic as well as a static route on the remote network for VPN-based traffic.
Option 4 – Try to use the Google Public DNS
You might want to change your DNS to Google Public DNS as it could help you resolve the internet connection problem caused by your VPN. To do so, follow the steps below.
The first thing you have to do is right-click on the network icon in the Taskbar and select Network and Sharing Center.
Next, click on the “Change Adapter Settings” option.
After that, search for the network connection that you are using to connect to the internet. Note that the option might be “Wireless Connection” or “Local Area Connection”.
Right-click on your network connection and click on Properties.
Then select the new window to choose the “Internet Protocol 4 (TCP/IPv4)” option.
After that, click on the Properties button and click the checkbox in the new window for the option “Use the following DNS server addresses”.
Type in “8.8.8.8” and “8.8.4.4” and click OK and exit.
Option 5 – Try checking the settings of your VPN software
If your VPN software has a built-in “kill switch” it prevents any internet usage every time there is a problem in connecting with the VPN server which explains why your internet connection is disconnected when your VPN software is connected.
In addition, you could also try to change your VPN software’s protocol since all VPNs support multiple protocols. It could be that the protocol your VPN uses is blocked so try changing to another protocol and see if it fixes the problem.
Option 6 – Update the Network Adapter drivers
You might also want to update the Network Adapter drivers by following these steps:
Tap the Win + R keys to launch the Run window and then type in the “devmgmt.msc” command and hit Enter to open the Device Manager window.
Under the Device Manager, you will see a list of drivers. From there, look for the Network Adapters and expand it.
Then right-click on each one of the Network drivers and update them all.
Restart your PC and see if it helped in fixing the BSOD error.
Note: If updating the network drivers didn’t help in fixing the “Windows could not find a driver for your network adapter” error, you can also try to uninstall the very same drivers and restart your Windows 10 PC. After that, the system itself will reinstall the drivers you just uninstalled. Alternatively, you can also download and install the drivers from the manufacturer’s website directly.
To reinstall the network adapter driver, refer to these steps:
Open the Devices Manager from the Win X Menu.
Then locate the device drivers and right-click on them to open the Properties.
After that, switch to the Driver tab and click on the Uninstall Device button.
Follow the screen option to completely uninstall it.
Finally, restart your computer. It will just reinstall the device drivers automatically.
The use of Biometrics is supported by Windows 10. Aside from that, it also supports PIN, password, picture password on all computers and if your computer has the proper hardware, Windows 10 also supports facial scanning, iris scanning, and even fingerprint scanning. You can see all these exciting features inside Settings > Accounts > Sign In Options.
On the other hand, you can’t really expect to make use of all the above-mentioned features since it depends if the hardware is available to support them. One of the most interesting features is the use of Biometrics which is really useful in workplaces and so this post will show you how you can enable or disable the Domain Users Sign In on Windows 10 using Biometrics via Registry Editor or Group Policy Editor. But before you go on, you need to create a System Restore Point first since the modifications you’re about to do might affect the functioning of your computer. So in case something went wrong, you can always undo the changes you’ve made.
Option 1 – via Registry Editor
Tap the Win + R keys to open the Run dialog box.
Next, type “Regedit” in the field and hit Enter to open the Registry Editor.
After that, navigate to the following registry path:
From there, right-click on the right-side panel and click on New > DWORD (32-bit) Value.
And then set the name of the newly created DWORD as “Domain Accounts”.
Afterward, click on “Domain Accounts” and set its value to “1”. This will allow the domain users to sign in to Windows 10 using Biometrics. While the value of 0 will disable the domain users sign in to Windows 10 using Biometrics.
Exit the Registry Editor and restart your computer for the changes to take effect.
Option 2 – via Group Policy Editor
Tap the Win + R keys to open the Run dialog box.
Next, type “gpedit.msc” in the field and hit Enter to open the Group Policy Editor.
After that, navigate to the following setting:
Computer Configuration > Administrative Templates > Windows Components > Biometrics
Then double click on the following entries located on the right-side panel and set the radio button to Enabled on all of them.
Allow the use of Biometrics.
Allow users to log on using Biometrics.
Allow domain users to log on using biometrics.
Now exit the Group Policy Editor and restart your computer to apply the changes made properly.
 Windows 11 will bring some old applications in new looks and some will get additional features as well. One of the old apps that will get new stuff is a calculator.
 Same as Windows 10, Windows 11 also keeps track of date and time using an internet time server. But in a case that you need to change the date or time for any kind of reason here is a guide for that process:


