Windows 11 will bring some old applications in new looks and some will get additional features as well. One of the old apps that will get new stuff is a calculator.
The calculator was always a way to go application for quick calculations but Microsoft aims to expand on that and make the calculator a little more useful.
The first thing that you will notice is the calculator look, the calculator has now an application theme setting that allows you to change the look of the application. It comes in standard and professional mode as usual but this time calculator will come with features that will enable it to handle some programming and engineering tasks.
The new calculator features a full graphing mode that lets you visually analyze a graph to identify key features. It also packs a deep converter that can switch between more than 100 units and currencies.
Other Windows 11 apps
A new snipping tool will be delivered with this latest update as well packed with new functionality. We have covered new features of the snipping tool in another article, if you are interested you can find the article here: https://errortools.com/windows/new-snipping-tool-redesigned-in-windows-11/
Mail and Calendar apps will also get a redesign, sadly all redesign that they will include will be of visual nature to fit in the overall Windows 11 theme, functionality will remain the same.
If you are trying to connect to the internet using a Wi-Fi, Ethernet, or a Wi-Fi connection and you suddenly encounter Error 633, then read on as this post will guide you on how you can fix this problem in your Windows 10 computer.
According to users who encountered the same problem, when they try to connect to the internet, an error pops up that states, “The modem or other connecting device is either already in use or not appropriately configured”. This error is the VPN Error 633 which indicates that the modem is malfunctioning due to some broken configuration. It is possible that this broken configuration is caused by the WAN Miniport device which is associated with your preferred VPN protocol. It could also be due to the TCP port that’s required for the VPN connection to work might be used by another application.
There are instances when Error 622 could occur when there are multiple internet connections set up on one device or when the communication port is exploited by another program. It could also occur when the affected modem is not bound to one specific device. Thus, any model and computer can be affected by this problem.
The first and basic thing you can do to fix the VPN Error 633 is to turn off or unplug the modem your computer is using and then plug it back in to see if the problem is fixed. If not, then there are several other potential fixes you need to check out to resolve the problem. You can try the suggestions provided below and see if any of them help.
Option 1 – Run the Network Adapter Troubleshooter
Open the Search bar on your computer and type in “troubleshoot” to open the Troubleshoot settings.
Next, scroll down and select the “Network Adapter” option from the right pane.
Then click on the Run Troubleshooter” button.
After that, your computer will check for any possible errors and will pinpoint the root cause of the problem if possible.
Option 2 – Try to explicitly reserve the TCP port
The next thing you can do to fix the error is to reserve the TCP port explicitly and to do that, follow the steps below.
Tap the Win + R keys to pull up the Run dialog box and type “Regedit” in the field and hit Enter to open the Registry Editor.
Next, navigate to this registry path: HKEY_LOCAL_MACHINESYSTEMCurrentControlSetServicesTcpipParameters
After that, follow the path New > Multi-String Value on the edit menu and rename the multi-string value as “ReservedPorts” and then double click on it.
Now in the value data of ReservedPorts, input “1723-1723” and click OK to save the changes made.
Close the Registry Editor and restart your PC. Once your computer has restarted, check if the VPN Error 633 is fixed or not.
Option 3 – Try to use the netstat command
In the Windows Start Search, type “cmd” and from the search results that appear, right-click on Command Prompt and then select the “Run as administrator” option.
After opening Command Prompt as admin, type this command and hit Enter: netstat –aon
After that, the output will be displayed and from there, look for the process ID or PID of any program that uses the TCP port 1723 on your computer.
Next, type this next command and hit Enter: taskkill /PID PID /F
Once the command has been executed, the concerned program will be forced to close and the TCP port 1723 will be freed up. Keep in mind that the taskkill command ends the process corresponds to the process ID number and the given command above, “/F” option is used to end the program’s process forcefully.
Now restart your computer and after that, the concerned program should start using a TCP port other than 1723 which leaves the TCP port 1723 free for your internet device to use.
Option 4 – Remove any irrelevant internet device programs
You could also try removing any irrelevant device programs since it is possible that any of these programs could be the one that’s causing the modem to malfunction. These irrelevant programs could be an internet booster or third-party tools that comes with the modem and so on. These programs are not necessarily needed for your modem to function. Thus, if you want to fix the VPN Error 633, you can try uninstalling them and see if it fixed the error.
Option 5 – Update the Network Adapter drivers
You might also want to update the Network Adapter drivers by following these steps:
Tap the Win + R keys to launch the Run window and then type in the “devmgmt.msc” command and hit Enter to open the Device Manager window.
Under the Device Manager, you will see a list of drivers. From there, look for the Network Adapters and expand them.
Then right-click on each one of the Network drivers and update them all.
Restart your PC and see if it helped in fixing the BSOD error.
Note: If updating the network drivers didn’t help in fixing the VPN Error 633, you can also try to uninstall the very same drivers and restart your Windows 10 PC. After that, the system itself will reinstall the drivers you just uninstalled. Alternatively, you can also download and install the drivers from the manufacturer’s website directly.
To reinstall the network adapter driver, refer to these steps:
Open the Devices Manager from the Win X Menu.
Then locate the device drivers and right-click on them to open the Properties.
After that, switch to the Driver tab and click on the Uninstall Device button.
Follow the screen option to completely uninstall it.
Finally, restart your computer. It will just reinstall the device drivers automatically.
There are instances when instead of fixing problems the Windows Update brings you problems on your Windows 10 computer. You might even see some pending Windows Updates which for some reason, refuse to install no matter what you do. The good thing is you won’t have to deal with those failed and pending updates that are incompletely downloaded to your PC as you can actually delete them.
Follow the instructions prepared below to delete the failed and pending Windows Updates.
Step 1: The first thing you have to do is delete all the contents in the Temporary folder
Tap the Win + R keys to open the Run dialog box.
Next, type in “%temp%” in the field and hit Enter or click OK to open the Temporary folder.
From there, select all the folders and files within the Temporary folder and then delete them all.
Note: %temp% is one of the many environment variables in Windows that could open the designated folder by Windows as the Temporary folder which is usually located at C:\Users[username]AppDataLocalTemp.
Step 2: Next, remove the pending.xml file
Go to the C:\Windows WinSxS folder.
Once you’ve opened the folder, look for a file named “pending.xml” file and right-click on it and you can either rename it or delete it.
After that, the Windows Update should delete the pending tasks and build a fresh new update.
Step 3: Delete all the contents of the SoftwareDistribution folder
The Software Distribution folder in the Windows operating system is a folder that can be found in the Windows directory and is used to store files temporarily which might be required to install the Windows Update on your PC. Thus, it is required by the Windows Update and maintained by WUAgent. Aside from that, it also contains all the Windows Update History files and once you delete them, you will most likely lose the Update history. As a result, the next time you run the Windows Update, it may result in a longer detection time.
Open the WinX Menu.
From there, open Command Prompt as admin.
Then type in the following command – don’t forget to hit Enter right after typing each one of them.
net stop wuauservnet stop bits
After entering these commands, it will stop the Windows Update Service and the Background Intelligent Transfer Service.
Next, got to the C:\Windows\Software\Distribution folder and get rid of all the folders and files thereby tapping the Ctrl + A keys to select them all and then click on Delete. Note that if the files are in use, you won’t be able to delete them.
Once all the contents in the Software Distribution folder are deleted, restart your PC and then go back to Command Prompt and input the following commands again.
net start wuauservnet start bits
Since the folder has already been flushed, it will be populated afresh the instant your restart your computer and open Windows Update.
Step 4: Try resetting the catroot2 folder
You can also try resetting the catroort2 folder as it is known to fix tons of Windows Update issues. Both the Catroot and catroot2 are Windows operating system folders that are required for the Windows update process. So when you run the Windows Update, the catroort2 folders stores the signatures of the Windows Update package and helps it in the installation. It makes use of the “%windir%System32catroot2edb.log” file in the updating process. Afterward, the updates are stored in the SoftwareDistribution folder which is used then by the Automatic Updates in order to execute the updating process. Keep in mind that you must not rename or delete the Catroot folder. Although the Catroot2 folder is recreated automatically by Windows, the Catroot folder isn’t.
High Dynamic Range or HDR is a technique that’s used to create lifelike videos which have improved and better dynamic range, especially when it comes to details. And as you know, Windows 10 supports the steaming of HDR videos as long as the display supports it and it comes with the option to enable the HDR Playback for Windows 10 Video Streaming apps. However, before you can get the best viewing experience, you need to calibrate the display further for HDR video on your Windows 10 PC.
Take note that even when you have the HDR Playback feature enabled on your computer, you still need a display that supports it. To make sure that your display supports this feature, you can use the DirectX Diagnostic Tool to have the display correctly wired and have the latest WDDM 2.4 drivers installed as well as set the other settings properly.
Once you’ve made sure that your computer’s display really supports HDR and you’ve already enabled the HDR Playback feature, now it’s time for you to calibrate. Remember that when you calibrate the display, you should make an external monitor your primary display if you are using it for HDR and then adjust the settings to your liking. And if you are calibrating for primary display, you need to disconnect all other displays.
Follow the given steps below to calibrate the display of your PC.
Step 1: You need to open the Video Playback first. To do so, navigate to Settings > Apps > Video Playback.
Step 2: Under the Video Playback settings, uncheck the “Don’t increase display brightness when watching HDR video on battery” checkbox or plug in your PC.
Step 3: Next, click the “Change calibration settings for HDR video on my built-in display” link located on the right side.
Step 4: After that, click on the Play button located on the left side to play the video. Then move the sliders to the left or right so you can start to calibrate. Once you see that the quality of the image is to your preference, stop.
Note: Just a tip when calibrating – you just have to find the right balance between the details in the darker parts of a scene. For instance, you have Mountains in the background and buildings in the front – you need to drag the slider to the right to add more details to the snow on the mountain or drag the slider to the left to add more details to the buildings. After that, you can pause the video and exit the full-screen mode. Keep in mind that the quality of HDR depends on you as it is a personal choice. Some users might like a brighter shade while other ones want the darker shade so it really depends on your taste. If you are not satisfied with how your HDR turned out, you can just try calibrating the display again. Simply go back to the default HDR video calibration and click or tap the Reset calibration button.
Another thing to remember. First, you can only see HDR content on the full screen and if you’re using a laptop, you need to make sure to watch videos when plugged in and check that the battery settings won't’ lower the brightness.
Error 0x80004005 is a typical Outlook error. This error code occurs either when sending emails or receiving them. The error message may be displayed in either of the following formats:
‘Sending and receiving reported error "0x80004005": The operation failed.’‘This message could not be sent. Try sending the message again or contact your network administrator. The client operation failed. Error is [OX80004005- 0X0004B9-OXOO501].’
Error Causes
There are several causes for the error 0x80004005 such as:
The Script Blocking Feature Enabled While Using Norton Antivirus
Spyware
Viruses
Registry problems-Missing or corrupt registry keys
It is advisable to repair and resolve error 0x80004005 immediately as it may cause a great deal of inconvenience to you.
This error may hamper your ability to receive and send emails from your Outlook account and lower your productivity too as you may be unable to communicate with your peers.
Further Information and Manual Repair
To fix error 0x80004005, you don’t have to wait for the network personnel or be a technical expert yourself. This may be a critical error but the good news is that it is easy to resolve.
Here are some effective methods and quick fixes to resolve the error 0x80004005 instantly.
Method 1: Disable Script Blocking Feature in Norton Antivirus
After installing Norton Antivirus on your PC, if you start experiencing the Outlook error 0x80004005, then the best way to resolve it is to simply disable the script blocking feature.
However, the downside of this is that by disabling this feature your PC will become vulnerable to viruses and malware.
Method 2: Disable the New-Mail Notification Feature in MS Outlook
If you don’t have Norton Antivirus downloaded on your PC, then try method 2. This method involves disabling the new-mail notification feature in MS Outlook. The error code 0x80004005 is often resolved by switching off this feature. Try it to see if it works.
To disable the new-mail feature all you have to do is open your Outlook account and then go to the Tools menu, then go to Options and then select the ‘Preferences’ tab.
After that click on the ‘Emails Options’ tab and then simply uncheck the check-box against ‘Display a notification message when new mail arrives’.
To confirm changes press OK.
Method 3: Scan for Viruses
The error 0x80004005 may also be triggered due to viral infection or spyware. Such malicious software enters your PC through phishing emails and while downloading files and attachments. You may not be aware of this but your PC may be infected by viruses.
It is important you remove them immediately as they can expose you to serious risks including privacy issues, identity thefts, data breaches, and more.
Random freezing in a Windows in the middle of work can be a very frustrating experience and can even cost us the loss of work. From time delays to sometimes complete crashes this behavior is something that every PC user wants to avoid or at least have very little of.
In this article, we will cover solutions on what to do and how to fix the random freezing of computers.
Run a virus scan on your computer.
Viruses and other malware can cause freezes and other issues in your computer, run a complete system scan for any kind of viruses and malware and if needed remove them.
Uninstall applications that you are not using
Besides taking your hard drive space some applications can have and require to have some services always running on your computer which can cause some issues, if an application is not needed and it is not used, removing it might solve freezing issues.
Increase RAM memory
Sometimes the problem with freezing is not a software issue, having less RAM memory than the application requires can cause the application not to work properly and it can cause freezing of the entire system since precious RAM can not be allocated to the required application.
Run system checker
Corrupted Windows system files can cause freezing of the entire system, to fix this, start the command prompt in administrator mode and type sfc /scannow
Keep running applications to a minimum
Having too many applications running in the background can drain system resources and can cause system freezes because of lack of memory. Close applications that are running in the background and keep them minimal.
Delete files and folders which you are not using
Having many files and/or folders on the hard drive can cause a lot of system resources to be wasted, from indexing size to less free space for caching. If you have files that you no longer need, removing them will free up space and can increase performance and introduce the stability.
Run memory check
Memory issues could lead to system freezing. When an application needs to write or read to a corrupted memory cluster, freezing will occur since it can not. To check memory bring up run dialog and type in ti mdsched.exe, click on restart now and let the memory test finish.
Update all drivers
Hardware issues can cause freezing of applications and having the latest drivers can make a world of difference. Make sure that you have all device drivers to the latest versions.
Optimize Disk drives and check for errors
Windows 10 has built-in tools to check hard drives for errors and to optimize them, use them in order to see if this issue is causing freezes.
Clean your registry
A Clean registry is a happy registry and Windows is appreciating it. Make sure that you do not have any keys which you do not need in the registry and that long-forgotten application trails are deleted for good.
Upgrade SSD firmware
Like updating drivers, updating firmware is also important, and having the latest firmware for your SSD can help a lot, newer firmware can eliminate freezing if the issue was in Windows not using SSD properly.
Update BIOS
Like updating SSD firmware can help so it can update Firmware on your BIOS. Make sure that you have the latest firmware version and freezing can go away if that was the issue.
Spying via some malicious app on the target phone is not a new thing but it can be very uncomfortable and even against the law in some countries.
Infecting the target phone can be done in various ways, another person can intentionally download and install applications on it, and you can install them via some phishing attacks or by an online scam. Once installed this piece of software presents a very serious invasion of privacy since it can track text messages, track phone location in real-time, record calls in real-time, eavesdrop on calls, take control of the camera and microphone, and many other applications.
Here are some common symptoms of mobile phones infected with spyware.
Symptoms of spyware
Random reboots Slow performance Strange text messages Overheating Unusual high data usage Non-familiar apps in the app list The fast drain of the battery Long shutdown time Strange interference and sounds during calls Signs of activity during standby mode
If your phone exhibits any of these symptoms you might have a spyware app installed and running on it.
Common spy apps
There are many apps that have been designed to spy on people that can be downloaded in the app store or on Google Play today. Most of these spyware apps are aimed at parents wanting to keep an eye on and protect their children. However, these can be used by anyone in order to spy on a target person via their phone.
Below is a list of common apps that can be used to spy on you. Many spyware apps require a phone to be ‘jailbroken’ or ‘rooted’ before being installed, this is when the phone’s operating system is changed to allow the phone to become unlocked and customizable.
mSpy : An undetectable spying app for iOS devices. It can be used to read your chats, see your location, view your email, check your call history, record your keystrokes, and more.
Spyera : This app requires rooted and jail-broken iPhones to work. It can go undetected and monitors phone calls and your call history. It even allows call recording and eavesdropping on live calls.
Flexispy : Flexispy prides itself as the #1 phone monitor for parents and can monitor everything from calls to social texts.
Umobix : This powerful spyware app has a dashboard that allows users to easily monitor someone’s location, calls, texts, keystrokes, all major social media, and more. You can detect Umobix because it heats up the infected phone and greatly affects the battery life of the infected device.
Ikey Monitor : Although it requires the device to be rooted for Android or jailbroken for iPhones, this spy app captures keystrokes, passwords, and screenshots, allows for call recording and supports multiple languages.
Clevguard : Available for both iOS and Android, Clevguard allows users to track GPS and Wi-Fi locations, capture screenshots remotely, and more. Due to a recent update, the spy app drains the target phone’s battery significantly.
Remove spyware from your phone
If any of the beforementioned apps are present on your phone you need to remove them right away.
Go to your phone settings and remove the malicious applications, then download some protection suite and scan the whole phone for any other trace of software remains or other malware apps.
If you suddenly encounter PFN_LIST_CORRUPT Blue Screen of Death error while using your computer then it means that the Page Frame Number or PFN list is corrupted. Page Frame Number is an indexing number used by the hard drive to find out the location of every single file on the physical disk. This kind of Blue Screen error is usually caused by a driver that’s passing a bad memory descriptor list and it can either be temporary or permanent. And so to fix this particular BSOD error, read on as this post contains a couple of suggestions that could help.
Keep in mind that when you get a Blue Screen error like PFN_LIST_CORRUPT, the power connection to your PC must not be interrupted and so if you are using a laptop, it’s best if you connect it to a power source. On the other hand, if creating a dump from 0% to 100% takes up more than 5-10 minutes, then you have to force shut down your computer by pressing and holding the Power Key for 10 seconds or at least until the CPU lights turn off. After you do that, proceed to the troubleshooting tips prepared below.
Option 1 – Run the Blue Screen Troubleshooter
The Blue Screen troubleshooter is a built-in tool in Windows 10 that helps users in fixing BSOD errors like PFN_LIST_CORRUPT. It can be found on the Settings Troubleshooters page. To use it, refer to these steps:
Tap the Win + I keys to open the Settings panel.
Then go to Update & Security > Troubleshoot.
From there, look for the option called “Blue Screen” on your right-hand side and then click the “Run the troubleshooter” button to run the Blue Screen Troubleshooter and then follow the next on-screen options. Note that you might have to boot your PC into Safe Mode.
Option 2 – Run a System File Checker scan
You can also try to run a System File Checker or SFC scan in order to scan your computer for corrupted files that might be the cause behind the PFN_LIST_CORRUPT error. Once it finds any corrupted system files, it will automatically fix them. To run System File Checker, here’s what you have to do:
Tap Win + R to launch Run.
Type in cmd in the field and tap Enter.
After opening Command Prompt, type in sfc /scannow
The command will start a system scan which will take a few whiles before it finishes. Once it’s done, you could get the following results:
Windows Resource Protection did not find any integrity violations.
Windows Resource Protection found corrupt files and successfully repaired them.
Windows Resource Protection found corrupt files but was unable to fix some of them.
Restart your computer after the scan is completed.
Option 3 – Check for any hard disk errors
On your desktop, right-click on the “This PC” or computer icon and then select Manage to open the Disk Management. Here you get to check your drive’s health.
Next, click on Disk Management on the left side panel.
From there, check the state of your drives. If it shows that all your partitions are healthy then it means all is good and that the problem may have something to do with some physical issues with your hard drive.
You might also want to run the CHKDSK utility to help you fix any issues with your hard disk. If your hard drive has issues with integrity, the update will really fail as the system will think that it’s not healthy and that’s where the CHKDSK utility comes in. The CHKDSK utility repairs hard drive errors that might be causing the problem.
Open Command Prompt with admin privileges.
After opening Command Prompt, execute the following command and hit Enter:
chkdsk /f /r
Wait for the process to be completed and then restart your computer.
Option 4 – Update the Device drivers
Updating the Device drivers can also help you fix the PFN_LIST_CORRUPT Blue Screen error. To do so, follow the steps below.
Tap the Win + R keys to launch Run.
Type in devmgmt.msc into the box and tap Enter or click OK to open the Device Manager.
After that, a list of device drivers will be displayed. If you see a red or yellow sign that shows up against the driver, right-click on the driver and select “Update Driver Software”.
Select the “Search automatically for updated driver software” option and then follow the instructions to complete the process.
Restart your PC and then check if the Blue Screen error is now fixed or not.
Option 5 – Disable OneDrive
The PFN_LIST_CORRUPT error might also be caused by OneDrive. Thus, you have to try disabling this program to resolve the problem.
Tap the Ctrl + Shift + Esc keys to open the Task Manager.
Once the Task Manager is open, click on More Details located at the bottom left portion of the window.
Then go to the Startup tab and select Microsoft OneDrive and then click Disable.
It is a fact that Google Chrome is one of the world’s most used web browsers and it’s because this search giant is focused on following the standards of the web. Although this web browser has become quite bloated over the years, it still remains at the top of the list of browsers used most by users. If you are a user of Google Chrome for a long time now, you have most likely come across a couple of issues in the past while using this browser. In this post, we’ll help you fix one of the issues commonly encountered in Chrome which is the “No Data Received – ERR_EMPTY_RESPONSE” error.
This kind of error message in Chrome pops up when you try to log into a website. It isn’t clear what’s the cause of this error but worries not, for there are several ways you can try to fix it.
Option 1 – Try checking if your network connection is working
The No Data Received – ERR_EMPTY_RESPONSE error is not usually related to a downed network. However, anything is possible so you need to check if your internet connection is working just fine or not as it might be the reason why you’re getting this error in Chrome.
Option 2 – Try resetting the network
There are instances when a network goes into haywire because of a bad DNS. Thus, a bad DNS might be the one that’s causing this headache so it’s time for you to reset the entire network to resolve the issue. To reset the network, here’s what you have to do:
Click the Start button and type in “command prompt” in the field.
From the search results that appear, right-click on Command Prompt and select the “Run as administrator” option.
After opening Command Prompt, you have to type each one of the commands listed below. Just make sure that after you type each command, you hit Enter
ipconfig /release
ipconfig /all
ipconfig /flushdns
ipconfig /renew
netsh int ip set dns
netsh winsock reset
After you key in the commands listed above, the DNS cache will be flushed and the Winsock, as well as the TCP/IP, will reset.
Now restart your computer and open Google Chrome then try opening the website you were trying to open earlier.
Option 3 – Try to clear the browsing data of Google Chrome
If your browsing data in Chrome hasn’t been cleared for some time now then that might be the reason why you’re suddenly getting the ERR_EMPTY_RESPONSE error when you browse the web. To fix this error, you need to clear your web browsing data. Refer to the following steps to do so.
Tap the Ctrl + Shift + Delete buttons to go to the Clear browsing data section in Chrome.
Next, set the time range to “All time” and tick all the boxes and then click on the Clear data button.
After that, restart the Chrome browser and try to open the website you were trying to open earlier.
Option 4 – Reset Google Chrome
If none of the options given above worked, you can try resetting the Chrome browser. To do that, follow these steps:
Open Google Chrome, then tap the Alt + F keys.
After that, click on Settings.
Next, scroll down until you see the Advanced option, once you see it, click on it.
After clicking the Advanced option, go to the “Restore and clean up an option and click on the “Restore settings to their original defaults” option to reset Google Chrome.
Restart Chrome and check if you can now open the webpage or not.
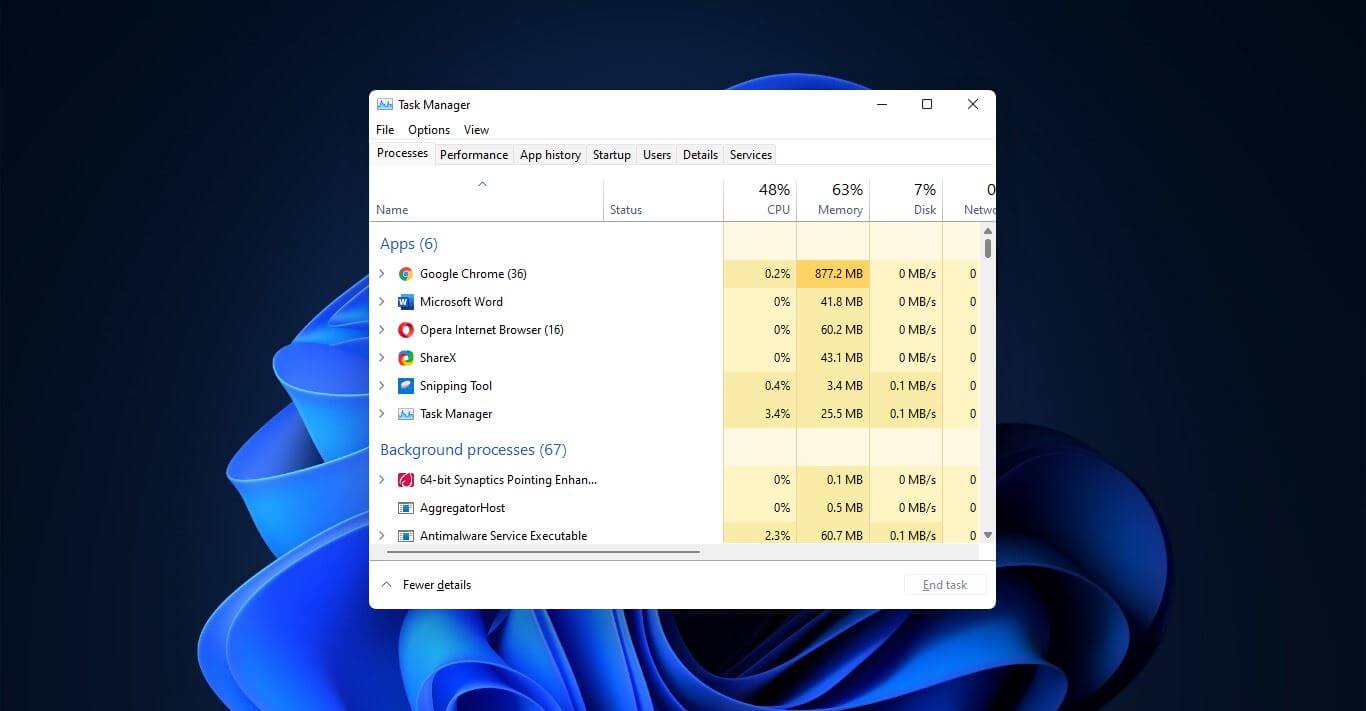
Something we are used to doing in a certain way inside Windows 10 is slightly changed in Windows 11. One of those things is how you open task manager, well kind of.
Option to right-click on the taskbar and launch task manager is gone but do not worry there are other same and simple ways you can launch it.
Press CTRL + SHIFT + ESC or CTRL + ALT + DEL
Right-click on the START button
Type task manager in start search on top in the start menu
Type taskmgr in command prompt
Press ⊞ WINDOWS + R to open run dialog and type in taskmgr
And that’s it, now depending on your situation, you might use different methods to evoke task manager.
When performing a Windows Backup to the NAS device (backup to a network share) that is running Samba, fails with an error message The backup failed, The version does not support this version of the file format (0xC03A0005). The problem occurs because of a conflict with the VHD file that is created by Windows Backup and is mounted during the process. There are three types of VHD files:
Fixed,
Expandable
Differencing
If the VHD file is a sparse file that is not supported by the native VHD driver, the mounting will fail, and you will get this error. An example VHD file is one that keeps expanding depending on the backup size. The problem occurs only in the case of File Level backup (file/folders in a volume) but not on the block level backup as the vhd file is never mounted. However, in the case of File Level Backup, the vhd is mounted, created by Windows Backup, which does not support the mounting of sparse files.
The solution is to use Strict Allocate: option in the smb.conf file
Login to SMB using SSH. Open the configuration file using the VI editor located at /etc/samba/smb.conf. If the option is not there, you can manually add strict allocate = yes which will make sure there are no sparse file that is created.
 Windows 11 will bring some old applications in new looks and some will get additional features as well. One of the old apps that will get new stuff is a calculator.

 Option to right-click on the taskbar and launch task manager is gone but do not worry there are other same and simple ways you can launch it.