Libvlc.dll error is a type of DLL file error. Libvlc.dll is a type of Dynamic Link Library file associated with 3rd party software developed by the Videolan Team for the Windows OS.
Libvlc.dll file contains small programs similar to EXE executable files which allow multiple software programs to share the same functionality. It helps load and run certain programs developed by Videolan Team on your system.
The Libvlc.dll error pops up when the file fails to load and run your desired program. This error is usually triggered during program installation while a Libvlc.dll related software is running on the PC or during Windows start-up or shut down.
Libvlc.dll error code may appear on your Windows computer in any of the following formats:
"Libvlc.dll not found."
"The file libvlc.dll is missing."
"Cannot register libvlc.dll."
"Cannot find C:WindowsSystem32\libvlc.dll."
"Libvlc.dll Access Violation."
"Cannot start Third-Party Software. A required component is missing: libvlc.dll. Please install Third-Party Software again."
"This application failed to start because libvlc.dll was not found. Re-installing the application may fix this problem."
Though Libvlc.dll error is not a fatal error code but nonetheless it is advisable to resolve it immediately to avoid any inconvenience.
 Error Causes
Libvlc.dll error code may occur due to several reasons including but not limited to:
Here are some of the best and easy-to-work-around methods that you can try to resolve Libvlc DLL error on your system in minutes. Let’s get started:
Since DLL are shared files, sometimes the error code may pop up if it is deleted accidentally while uninstalling a program that is also run by the same file.
In such a situation, to resolve the Libvlc.dll error all you have to do is re-install the deleted file by going into the recycle bin. If you find it reinstall, but if you don’t then simply download Libvlc.dll file from a reliable DLL file website and install. Hopefully this will resolve the issue.
Alternatively, you can re-install VLC which should come with a complete copy of the libvlc.dll.
However, if the error code still persists, then try other methods given below.
Another way to resolve Libvlc dll error is to restore your Windows system to an earlier point.
System Restore can return your PC system files and programs back to a time when everything was working absolutely fine. This can help you avoid hours of troubleshooting headaches.
This can be easily done by going to the start menu. In the search box type System Restore and press enter. Now click System Restore and enter administrator password if prompted. Follow the steps in the Wizard to choose a restore point and then reboot to activate changes.
The Libvlc dll error can be triggered by invalid registry entries. To resolve, simply download Restoro. This is a user-friendly and multi-functional PC Fixer embedded with a powerful registry cleaner. It removes all the invalid files, repairs the damaged DLL files, and cleans the registry in seconds.
Click here to download Restoro and resolve Libvlc dll error today!

“It looks like you don’t have permission to save changes to this file. Try saving a copy instead.”There are several options you can explore to resolve this error. You can try updating the Microsoft Photos app or verify the ownership of the destination folder. You can also re-register and reinstall the app. For more detailed instructions, make use of the options provided below.
Set-ExecutionPolicy Unrestricted
Get-AppXPackage -AllUsers | Foreach {Add-AppxPackage -DisableDevelopmentMode -Register "$($_.InstallLocation)AppXManifest.xml"}Note: In the command given, do not forget to replace the “PackageFullName” with the actual package name for the Photos app. After executing the command, it will uninstall the Photos app from your computer so you need to install it again from the Windows Store by simply looking for it. Once you found it, just click on install to start the installation process.
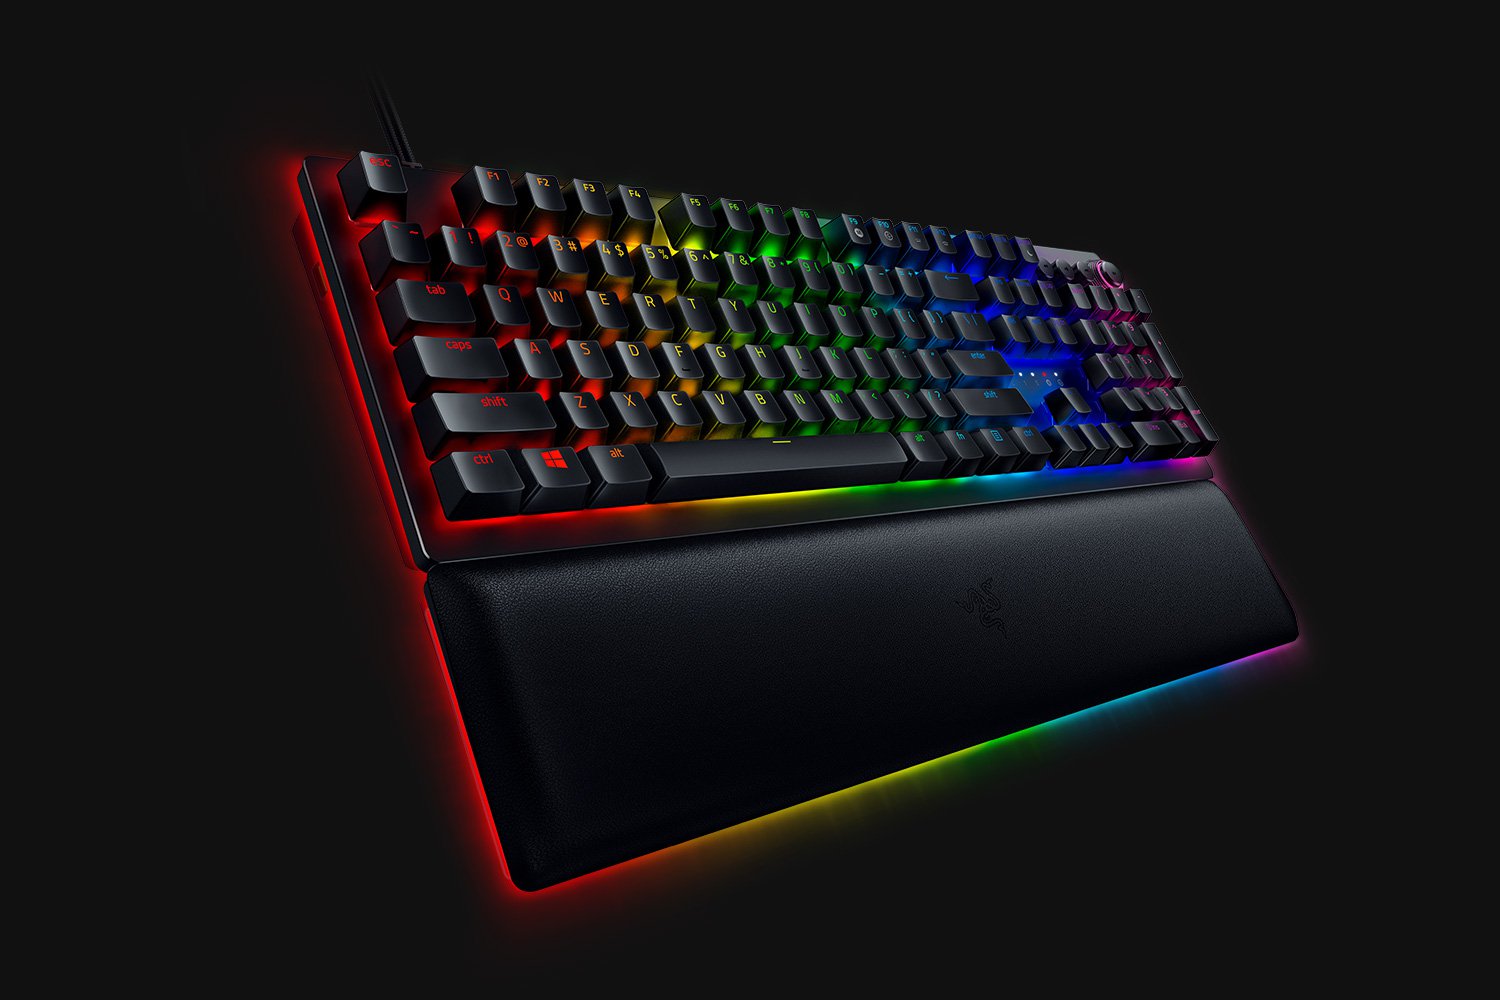 When it comes to computer peripherals first thing that comes to people's minds is probably Mouse and Keyboard. Also when discussing peripherals brands, Razer is not a stranger and over the years it has built its name and cult following.
Razer’s mechanical keyboards have been always in the upper field of quality and trust from users and Huntsman is no different.
When it comes to computer peripherals first thing that comes to people's minds is probably Mouse and Keyboard. Also when discussing peripherals brands, Razer is not a stranger and over the years it has built its name and cult following.
Razer’s mechanical keyboards have been always in the upper field of quality and trust from users and Huntsman is no different.
“Error 0x80070079: The semaphore timeout period has expired.”To fix this error, you can try to run the three built-in Network-related troubleshooters or update or reinstall the network adapter drivers or perform a network reset. For more details, follow the options laid out below.
In the Windows ecosystem, MS Surface laptops are among the best laptops on the market, they are regarded as equivalent to Apple MAC laptops but for Windows. Microsoft Fall 2022 Event will be held on October 12th at 10 AM. The event itself will be held right before it kicks off its annual, developer-focused Ignite event in Seattle from that same day through October 14.

This event is the first in-person event that Microsoft has held since the beginning of the pandemic. We expect the launch of the Surface Pro 9 and the Surface Laptop 5, and maybe Surface Studio 3 as well. There are also some rumors about products themselves like choices between an ARM or x86 CPU but nothing is confirmed so far, we can just wait and see.
"The file d3dx9_32.dll is missing" "D3DX9_32.DLL is missing. Replace D3DX9_32.DLL and try again." "File d3dx9_32.dll not found" "D3dx9_32.dll not found. Reinstalling might help fix this." "Missing component d3dx9_32.dll"This error usually pops while using gaming software. The D3dx9_32.dll error is displayed after a game is loaded or before the game-play begins. However, it may also appear in software that uses advanced graphic features.
Error Causes