Bluetooth perhaps is slowly becoming an outdated feature but sometimes you can really used it and need it.
By default, in Windows 11 Bluetooth is turned OFF so if you need it, you will need to turn it ON first. Luckily turning it ON is easy and we will guide you through the process
Turning Bluetooth using the Quick Settings menu
The easiest and fastest way to turn the Bluetooth ON is using the quick setting menu:
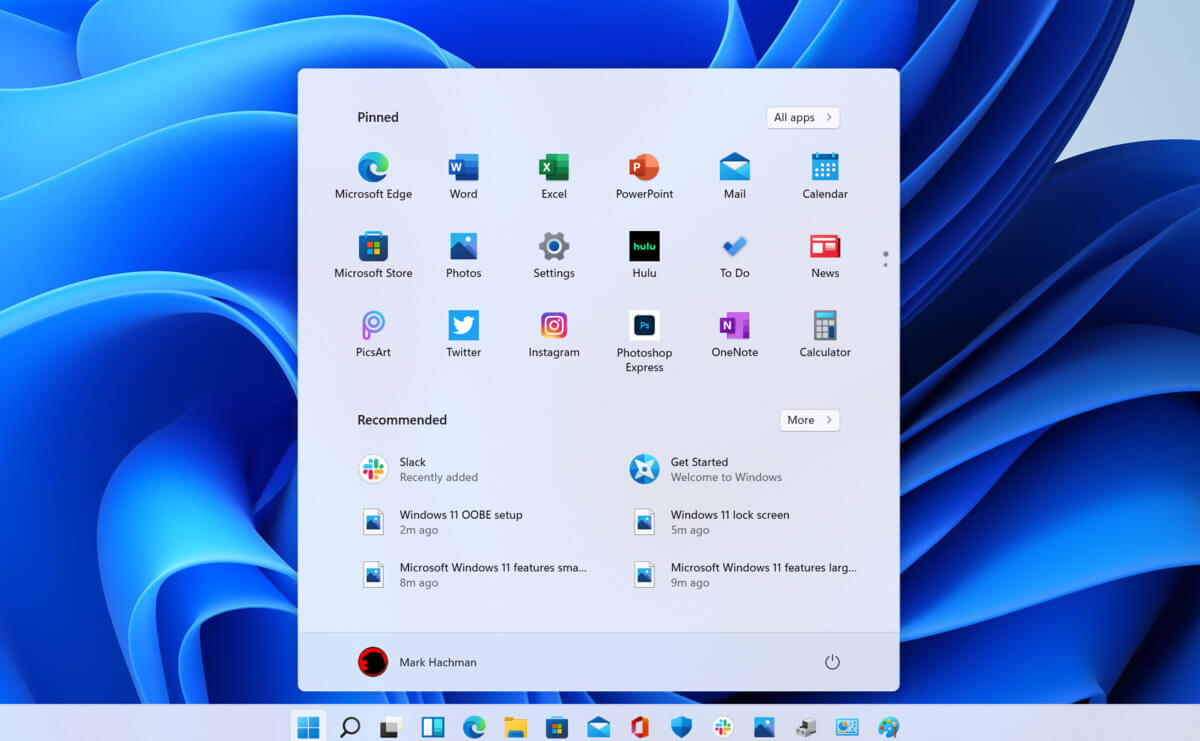
Click on indicator icons located left of date and time in Taskbar
Click on the Bluetooth icon (if the icon is not displayed, click on the pencil icon, then click on Add and add Bluetooth icon from the list)
Right-click on the Bluetooth icon and select go to Settings
Go to Adding a Bluetooth Device to Windows 11 section
Switch it ON via Windows Settings
Open Windows settings by using ⊞ WINDOWS + I combination
Click on Bluetooth & Devices
Inside settings turn Switch to ON beside Bluetooth
Click + Add Device large button on top
Click Bluetooth
Select device in the list of found devices (make sure device is turned ON, it has Bluetooth sharing ON, and that it is in pairing mode)
If the device needs the password, type it in
When the message Your device is ready to go is showed on the screen click on the Done
Advice on Bluetooth devices
Note that the Bluetooth devices you connect to Windows 11 stay linked to your PC unless you pair them with a different PC, smartphone, or tablet later.
After a time, most Bluetooth devices power down automatically to save battery life. To continue where you left off, either power the Bluetooth device up (if it has a power button) or press a button on a keyboard or mouse, and it should automatically turn on and reconnect with your PC.
If you’re having trouble connecting your Bluetooth device, make sure that Windows 11 is fully updated and that you’ve installed any drivers that came with your device.
Make sure that the device is fully charged or that it has a fresh set of batteries.
while Windows is searching. You’ll need to remove the device from Windows 11 first and then attempt to pair it with your PC again.
Removing devices
If you need to remove (un-pair) a Bluetooth device, just open Windows Settings and navigate to Bluetooth & Devices. Locate the name of the device that you want to remove, click the three dots button in the corner of its square and select Remove Device.
When you try to open your Google Chrome browser and it starts to connect to the internet but suddenly, your Windows 10 computer crashes along with a Blue Screen error that says, “MEMORY_MANAGEMENT”, then read on as this post will guide you in fixing the problem.
This kind of BSOD error occurs when Google Chrome requests more memory or when it tries to access the network and demand is raised for more memory, the memory management program fails. To fix the problem, here are some possible solutions you might want to try. Follow them thoroughly.
Option 1 – Use the Driver Verifier Manager
The Driver Verifier Manager is another tool in Windows that could help you fix driver-related issues. And since the MEMORY_MANAGEMENT Blue Screen error concerns Google Chrome and an internet connection, the root cause of the problem might have something to do with the Network driver and to verify that, you can use the Driver Verifier Manager:
Type in the keyword “Verifier” in the Cortana search box to search for Verifier in Windows 10.
After that, select the option “Create custom settings”.
Make sure that you have checked everything except the options “DDI compliance checking” and “Randomized low resources simulation”.
Next, select the option “Select driver names from a list” option.
Afterward, you have to select all the drivers from any unofficial or third-party provider. To simply put it, you have to select all the drivers that are not supplied by Microsoft.
Then click on the Finish button.
Open Command Prompt as administrator and execute this command – verifier /querysettings
The command you just executed will display the Driver Verifier settings so if you see any of the flags enabled boot your Windows 10 PC into Safe Mode.
Open the Command Prompt as admin again and run this command – verifier /reset
The command will reset the Driver Verifier. Once the process is done, restart your PC and check.
Option 2 – Try updating the Network drivers
Tap the Win + R keys to launch the Run window and then type in the “devmgmt.msc” command and hit Enter to open the Device Manager window.
Under the Device Manager, you will see a list of drivers. From there, look for the Network Adapters and expand it.
Then right-click on each one of the Network drivers and update them all.
Restart your PC and see if it helped in fixing the MEMORY_MANAGEMENT BSOD error.
Option 3 – Try disabling Hardware Acceleration
You might want to disable Hardware Acceleration system-wide or for a particular program like Google Chrome and see if it resolves the MEMORY_MANAGEMENT error
Option 4 – Run the Memory Diagnostic Tool to check for Memory leaks
Tap the Win + R keys to open Run and type exe and hit Enter to open the Windows Memory Diagnostic Tool.
After that, it will give two options such as:
Restart now and check for problems (Recommended)
Check for problems the next time I start my computer
Once your computer has restarted, perform a basic scan or you could also go for the “Advanced” options such as “Test mix” or “Pass count”. Simply tap the F10 key to start the test.
Note: After you select the option, your PC will restart and check for memory-based issues. If it finds any issues, it will automatically fix them and if there’s no issue found, then it’s most likely not a memory-based issue so you should try the other options given below.
Option 5 – Perform a System Restore
Performing System Restore might help you in fixing the SYNTP.SYS Blue Screen error. You can do this option either by booting into Safe Mode or in System Restore. If you are already in the Advanced Startup Options, just directly select System Restore and proceed with the next steps. And if you have just booted your PC into Safe Mode, refer to the steps below.
Tap the Win + R keys to open the Run dialog box.
After that, type in “sysdm.cpl” in the field and tap Enter.
Next, go to the System Protection tab then click the System Restore button. This will open a new window where you have to select your preferred System Restore point.
After that, follow the on-screen instructions to finish the process and then restart your computer and check if the problem is fixed or not.
Option 6 – Run the Blue Screen Troubleshooter
The Blue Screen troubleshooter is a built-in tool in Windows 10 that helps users in fixing BSOD errors like MEMORY_MANAGEMENT. It can be found in the Settings Troubleshooters page. To use it, refer to these steps:
Tap the Win + I keys to open the Settings panel.
Then go to Update & Security > Troubleshoot.
From there, look for the option called “Blue Screen” on your right-hand side and then click the “Run the troubleshooter” button to run the Blue Screen Troubleshooter and then follow the next on-screen options. Note that you might have to boot your PC into Safe Mode.
This is a type of Google Chrome update error code. It indicates a failure to communicate with Google update. The error code is displayed in the following format:
‘Update server not available (error: 3)’
Solution
Error Causes
Error 3 may be triggered by several reasons. These include:
You are running Vista/ 7 and you have configured Google Chrome to run as an administrator
Google Update is not registered properly
Registry issues
Further Information and Manual Repair
Here are some of the best and effective DIY methods to resolve error 3 on your PC without any professional help. You don’t need to be a technical whiz to try these methods.
Method 1
If the reason for the error cause is related to Google Chrome configured as administrator on your PC, then simply run it as a normal user. This is a common issue with Google Chrome auto-updating mechanism.
Method 2
If the problem still persists, then it is advisable to try re-installing Google Chrome.
To do this, first, uninstall Google Chrome. Go to the start menu, control panel, and then program and features. Choose Add and Remove Programs and uninstall Google Chrome.
To activate changes, reboot your system. Now reinstall Google Chrome by downloading it from Google Chrome’s official website.
Method 3
If error 3 is triggered because Google Chrome is not registered properly, then try this method to fix the issue.
First, verify that GoogleUpdate.exe exists in the location specified in the Windows Registry Editor. For this, go to the Start Menu and then type Regedit in the search bar.
Now click OK. The registry editor will appear. Now in the tree view on the left, navigate to the following directory:
Make sure the default value corresponds to the location of your GoogleUpdate.exe or GoogleUpdateOnDemand.exe file. Also, verify that these files are located in the given path.
For instance, if they are located in different locations, then right-click the default value and select Modify.
Enter the correct file path and use double quotation marks for example "C:\Documents and Settings%USERNAME%Local SettingsApplication DataGoogleUpdateGoogleUpdate.exe(or GoogleUpdateOnDemand.exe)"
Method 4
Error 3 may also pop up because of registry issues.
These issues occur when the registry gets overloaded with obsolete and unnecessary files like cookies, internet history, bad entries, and junk files. In such an event, it is advisable to download Restoro
This is a user-friendly and cutting-edge PC Fixer embedded with a registry cleaner. The registry cleaner removes all the obsolete files instantly and repairs the damaged registry thereby resolving all errors including error 3.
Click here to download Restoro and resolve error 3.
So, you have finished with work, game, movie, music, email, or whatever on your PC, you look at the clock, it is late, you decide to go to sleep or outside, you click on the power button and choose shutdown. Now when a PC is shut down you feel good and go with your business but the next time you power it up you get the same error like the computer never really shut down in the first place. You wonder why and reboot it, just in case and all of the sudden error is gone.
If something similar has happened to you or you had the feeling that after shutting down your computer has not really felt like shutting it down, do not seek professional help, everything is OK with you because when you click on shut down, your computer does not really shut down!
Truth is that Microsoft has changed how to shut down works and how rebooting works in Windows with an update but has not publicly said anything about it so some users may experience this feeling of not shutdown phenomenon and might even think there is something wrong with their PC.
Why this change?
A few years ago shutdown button and option in Windows were really shutting down OS, but things changed when Microsoft wanted to increase boot-up speed. Now when that decision was made shutdown option was changed. So, what was changed? Well in order to increase Windows booting time, the shutdown will now turn off power to PC components and it will look like everything is indeed shutdown but the Windows kernel will actually be saved to a hard drive with all settings and just awaken once the PC is turned back ON. This will result in all errors and other stuff being just still present same as they were once the system was instructed to be turned off.
Rebooting your PC will now clear kernel and file from the hard drive and you will get a clean system startup without any issues tied with the kernel itself.
Workaround
Now that we know why and what change has been made to Windows logical question is can we shut down our PC at all properly? Luckily for us, the answer is yes and we will not need any external application to do it, we can still do it inside Windows itself and it is quite quick and easy.
Bringing back the old shutdown
In order to bring the old shutdown functionality of your PC please follow the instructions but be aware that by doing this your PC will boot a little bit slower since it will have to load the kernel from scratch each time computer is turned ON.
First thing is to go to settings and go to System
Then once you are inside the system, navigate to the power and sleep and click on it to select it. Once you have it selected to all the way to the right and click on additional power settings.
When you click on advanced power settings you should be led to the control panel's power options. Inside this panel click on top left link where it says Choose what the power button does.
Inside options, you will need to untick the box next to Turn on fast startup (recommended), this option has been ticked ON by the Windows update and probably without notifying you. Option means exactly what was described, it will save kernel state on the hard drive for faster boot time but sadly it can cause some issues since it will never be reloaded from 0.
If you are unable to uncheck the box click on the text beside the shield icon that says: Change settings that are currently unavailable (you will have to be logged in as administrator).
Conclusion
Altho turning off fast startup and shutting down the PC completely will for sure extend your bootup time I still believe that it is the right choice since sometimes a lot of clutter and bad things accumulate over time inside the OS and can cause a vast variety of problems in a long run. So stay safe and shut down that PC as it used to be in the past.
In Installing or upgrading your Windows 10, there really is no guarantee that everything will go smoothly as there are times you encounter errors like the “ We couldn’t install Windows 10, 0x8007002C - 0x400D ” error message among other Windows update/upgrade errors. When you encounter this particular error message you will the following message on your screen:
“We’ve set your PC back to the way it was right before you started installing Windows 10.0x8007002C-0x400DThe installation failed in the SECOND_BOOT phase with an error during MIGRATE-DATA operation”
This kind of Windows upgrade error indicates that some of the files needed for the installation are locked out for some reason and that Windows was not able to migrate them to a new version. It could be that your computer does not have sufficient space for those files. Thus, no matter how many times you try to upgrade your computer, you always end up going back to the previous version of Windows. To fix the “0x8007002C – 0x400D, The installation failed in the SECOND_BOOT phase with an error during MIGRATE-DATA operation” error, here are some suggestions that might help:
Option 1 – Disable your antivirus program
There are times when the antivirus program installed in your computer blocks file access and even disk access. Thus, disabling the antivirus program or any security software installed in your computer is always a good idea you can try when the Windows Update process does not go smoothly. So before you try updating your computer again, make sure to disable the antivirus or security program and once the Windows Update is done, don’t forget to enable the antivirus program back again.
Option 2 – Perform a Disk Cleanup to free up disk space
Chances are, some unnecessary files in your computer might be interrupting the installation process which explains why you’re getting the “0x8007002C – 0x400D, The installation failed in the SECOND_BOOT phase with an error during MIGRATE-DATA operation” error instead so you need to perform a Disk Cleanup in order to fix the problem.
In the Cortana Search box, type “disk cleanup” and click on the related search result.
Then select the disk you want to clean and click OK.
Wait for the process to be completed and then restart your PC and try to install the Windows upgrade again.
Option 3 – Get rid of any file protection software
The Windows setup migrates the folder from one version to another during the upgrade. However, if some of your folders, if not all, are protected using some file protection software, then Windows won’t succeed in moving the folder and you will encounter this Windows upgrade error instead. Thus, you need to unlock all those protected files or better yet uninstall the file protection software after you remove the locked files. After that, try installing the upgrade again.
Option 4 – Rename the SoftwareDistribution folder
The Software Distribution folder in the Windows operating system is a folder that can be found in the Windows directory and is used to store files temporarily which might be required to install the Windows Update on your PC. Thus, it is required by the Windows Update and maintained by WUAgent. Aside from that, it also contains all the Windows Update History files and once you delete them, you will most likely lose the Update history. As a result, the next time you run the Windows Update, it may result in a longer detection time.
Open the WinX Menu.
From there, open Command Prompt as admin.
Then type in the following command – don’t forget to hit Enter right after typing each one of them.
net stop wuauservnet stop bitsrename c:windowsSoftwareDistribution SoftwareDistribution.bak
After entering these commands, it will stop the Windows Update Service, the Background Intelligent Transfer Service, and rename the SoftwareDistribution folder.
Next, got to the C:\Windows\SoftwareDistribution folder and get rid of all the folders and files thereby tapping the Ctrl + A keys to select them all and then click on Delete. Note that if the files are in use, you won’t be able to delete them.
Once all the contents in the Software Distribution folder are deleted, restart your PC and then go back to Command Prompt and input the following commands again.
net start wuauservnet start bits
Since the folder has already been flushed, it will be populated afresh the instant your restart your computer and open Windows Update.
Option 5 – Run the DISM tool
As mentioned, the “0x8007002C – 0x400D, The installation failed in the SECOND_BOOT phase with an error during MIGRATE-DATA operation” error might also be caused by corrupted files in the computer. Thus, you can try using the DISM tool to repair them. Running the DISM tool can repair the Windows System Image and Windows Component Store in Windows 10.
Open the Command Prompt as admin.
Then type in this command: DISM /Online /Cleanup-Image /RestoreHealth
Do not close the window if the process takes a while as it will probably take a few minutes to finish.
Option 6 – Run the Windows Update Troubleshooter
Running the built-in Windows Update troubleshooter could also help you resolve this particular Windows upgrade error. To run it, go to Settings and then select Troubleshoot from the options. From there, click on Windows Update and then click the “Run the troubleshooter” button.
You also have the option to run Microsoft’s online troubleshooter which could help you fix Windows Update errors including the “0x8007002C – 0x400D, The installation failed in the SECOND_BOOT phase with an error during MIGRATE-DATA operation” error.
When it comes to booting an operating system on a computer, one of the most essential pieces of software you can use is the UEFI. In fact, a lot of users now prefer to use UEFI instead of BIOS. It also depends on whether the UEFI or the BIOS is supported on the motherboard. Recently, a number of users reported an issue with UEFI where they were unable to find it under the Advanced Options screen where it’s supposed to be located.
The missing UEFI Firmware settings in the Advanced Options could be caused by several reasons. It is possible that the access to the UEFI menu is blocked or it could also be due to the Extra Fast Startup feature being enabled. It is also possible that the operating system is installed in Legacy mode.
There are several options to try to fix this issue. You need to check if your computer supports UEFI or you could also try to disable Fast Startup or bypass the Extra Fast Startup feature. You can also use a boot to UEFI shortcut as well as check the CMOS battery.
Option 1 – Try checking if your computer supports UEFI
The first thing you have to do is to verify if your computer supports UEFI. If your computer does not support UEFI, then it’s no wonder why you don’t see the UEFI Firmware settings in the Advanced Options.
Option 2 – Try turning off Fast Startup
First, boot your computer in Safe Mode.
Once your computer is booted in Safe Mode, tap the Win + R keys to open the Run dialog box and type in “control” to open the Control Panel.
Next, click on the Hardware and Sound section and click on Power Options.
Afterward, select the “Choose what the power buttons do” option from the left side menu pane.
Now click on Change settings that are currently unavailable and uncheck the entry that says, “Turn on fast startup (Recommended)”.
Then click on Save Changes and restart your computer and see if it has fixed the problem or not.
Option 3 – Try bypassing the Extra Fast Startup feature
As mentioned, the missing UEFI Firmware settings could be due to the Extra Fast Startup feature. To fix it, you have to disable this feature. All you have to do is tap and hold the Shift key and click on the Shutdown button from the Start button. This will boot your PC with the UEFI booting from the beginning and then use the hotkey for your motherboard to boot into the UEFI setup.
Option 4 – Try using a boot to UEFI shortcut
Right-click on any empty space on your Desktop and select New > Shortcut.
This will open a new mini window. And here, you have to type this in the text field: shutdown /r /fw
After that, click on Next and name the desktop shortcut and then click on Finish.
Next, right-click on the newly created shortcut and select Properties.
Click on the Advanced button and select the “Run as administrator” option.
Now click OK to save the changes made. Each time you execute this shortcut, your computer will automatically be booted to the UEFI Firmware Settings.
Option 5 – Try to check the CMOS battery
Another thing you can do is check the CMOS battery physically on the motherboard and see if it has to be replaced since a damaged CMOS battery can also cause the issue with the missing UEFI Firmware settings.
Option 6 – Set your computer from Legacy to UEFI
If applicable, you can try to set your computer from Legacy to UEFI to resolve the problem.
In the Windows Search box, type “command prompt” and from the search results that appear, right-click on Command Prompt and select the “Run as administrator” option.
After that, execute this command: mbr2gpt.exe /convert /allowfullOS
Now, wait until the process is completed since you can track its process on your screen.
Once it’s done, go to Settings > Update & Security > Advanced Startup options and from there, click on Restart Now. This will restart your computer and give you advanced options.
Next, select Troubleshoot > Advanced Options where you will see further options including System Restore, Startup Repair, Go back to the previous version, Command Prompt, System Image Recovery, and UEFI Firmware Settings.
Now select the UEFI Firmware Settings. This will take you to the BIOS. Boot Mode is typically available under Boot > Boot Configuration. Once you’re there, set it to UEFI and then save the changes you’ve made. After that, your computer will restart.
Recently, a lot of users reported getting several error messages when they upgraded their Windows 10 computers. One of these error messages users encountered during a Windows 10 upgrade is the Error 0x8007002C-0x4001E. if you are one of the users who is facing this error, read on as this post will help you fix it.
When you encounter this error, you will see the following error message on your screen:
“We couldn’t install Windows 10We’ve set your PC back to the way it was before you started installing Windows 100x8007002C-0x4001E, The installation failed in the SECOND_BOOT phase with an error during PRE_OOBE operation.”
To resolve the 0x8007002C-0x4001E, The installation failed in the SECOND_BOOT phase error, here are some suggestions that might help.
Option 1 – Try flushing the SoftwareDistribution and Catroot2 folders
You have to stop a couple of services such as BITS, Cryptographic, MSI Installer, and Windows Update Services. And to do that, you need to flush the contents in the SoftwareDistribution folder. The Software Distribution folder in the Windows operating system is a folder that can be found in the Windows directory and is used to store files temporarily which might be required to install the Windows Update on your PC. Thus, it is required by the Windows Update and maintained by WUAgent. Aside from that, it also contains all the Windows Update History files and once you delete them, you will most likely lose the Update history. As a result, the next time you run the Windows Update, it may result in a longer detection time.
Open the WinX Menu.
From there, open Command Prompt as admin.
Then type in the following command – don’t forget to hit Enter right after typing each one of them.
net stop wuauservnet start cryptSvcnet start bitsnet start msiserver
After entering these commands, it will stop the Windows Update Service, Background Intelligent Transfer Service (BITS), Cryptographic, and the MSI Installer
Next, go to the C:\Windows\SoftwareDistribution folder and get rid of all the folders and files thereby tapping the Ctrl + A keys to select them all and then click on Delete. Note that if the files are in use, you won’t be able to delete them.
After flushing the SoftwareDistribution folder, you need to reset the Catroot2 folder to restart the services you just stopped. To do that, follow these steps:
Type each one of the following commands.
net start wuauservnet start cryptSvcnet start bitsnet start msiserver
After that, exit Command Prompt and restart your computer, and then try to run Windows Update once more.
Option 2 – Select the Keep your files option
You can also select the option to perform an in-place upgrade and opt for the “Keep my files” option during an installation as it might make the process a lot smoother and if you need to perform a clean install, you can do so once the setup is completed.
Option 3 – Try to run the Windows Update Troubleshooter
Running the built-in Windows Update troubleshooter could also help you resolve the 0x8007002C-0x4001E, The installation failed in the SECOND_BOOT phase error. To run it, go to Settings and then select Troubleshoot from the options. From there, click on Windows Update and then click the “Run the troubleshooter” button.
Option 4 – Try to run Microsoft’s online troubleshooter
Aside from the Windows Update Troubleshooter, you can also run the online troubleshooter of Microsoft as it can help you with Windows 10 upgrade errors.
Option 5 – Perform a clean install
If none of the options worked, you can try to clean install Windows 10. Just make sure that you have the ISO from the official Microsoft Website and then a bootable USB drive to install Windows 10 again. Take note that this will delete all the data from your drive where Windows 10 was installed previously.
Windows 11 has brought some bad reviews for its inability to change the taskbar location to the screen. Luckily we can still hide it if needed.
In order to hide the taskbar from the screen follow these simple instructions:
Right-click the taskbar itself and select “Taskbar Settings” in the tiny menu that pops up or open Windows Settings and navigate to Personalization > Taskbar
Click on Taskbar Behaviors
Check the box next to Automatically hide the Taskbar
Close settings
As soon as you click on the box to hide the taskbar Windows 11 will apply your settings and hide the taskbar, you will get one line at the very bottom of the screen indicating that the taskbar is still present, just hidden.
When you reach the bottom of your screen with the mouse it will pop up and be visible again, just like in all Windows so far.
Have you been feeling anxious in the digital space? Feeling like you have a million eyes on you each time you visit a website? It can definitely make you uneasy. Luckily there’s an easy fix, and it’s called a VPN.
In this article we’ll take you through the basics of what a VPN does and some of the biggest benefits you can reap from buying one.
VPN: definition and how it works
VPN stands for Virtual Private Network, so its name already says a lot about what it does.
A VPN is specialized software that keeps your browsing private and secure. Essentially it hides your identity, preventing possible cyberattacks and data theft. This is especially important in cases of public network use, where you’re highly exposed to potential threats.
To be more specific, this software encrypts your Internet Protocol (IP) address by filtering it through a server hosted by the VPN provider first. That way, it prevents your Internet service provider, third parties and lurking online thieves from tracking the actual you.
Credit: FLY:D on Unsplash
Some providers, such as Surfshark VPN with its IP Rotator feature, even make it a habit to frequently change your IP address to further protect your identity. With most VPN providers, you can also appear to be in a completely different country, adding to your disguise.
There are tons of advantages you can look forward to if you decide to use a VPN. Take a look at some of the crucial ones.
Benefits of using a VPN
When choosing a VPN, you can find both free and paid options. We recommend you go with the paid ones, since they have stronger security, encryption and data protection, as well as more advanced features. Free VPNs come with limitations and risk of malicious attacks on the software itself.
You can choose to buy a singular VPN service or opt for antivirus software that has a VPN built in, for example Bitdefender’s Ultimate Security plan. That depends on what you use your computer for and how much.
When you pick one, here’s what it can do for you.
1. Access region-specific content
When we said you could change your location, we meant it. Say you’re using a streaming service and a show you desperately want to watch isn’t available in your country. You can use your VPN to make it look like you’re browsing from a country where it’s unlocked.
This option is also convenient for gamers who want to access maps, skins and other in-game items unavailable in their location.
In addition, you can use this powerful feature when you’re traveling to a region where some of your favorite content may not be accessible.
Do keep in mind that you need to read the Terms and Conditions (yeah, we know - who does that?) of your games and services before doing this, since you could end up getting a penalty. It’s also important to remember that there are entire countries that have strict regulations or even bans on VPNs, for example Belarus, Russia and China. So make sure to be very cautious with your VPN use, friends.
2. Browse like no one’s watching
VPNs shield your browsing habits from prying eyes on the web. Those can be malicious hackers or just third-party cookies tracking your every move to later bombard you with targeted ads. For example, Surfshark VPN features a Cookie blocker that blocks all cookie-related pop-ups and lets you browse in peace (and secret). It works even when the VPN is turned off, which is also pretty neat.
In addition, their CleanWeb 2.0 technology makes sure ads and especially malware don’t stand a chance at all, since they’re blocked before they can even load.
The inability of sites to track your browsing means they can’t collect and analyze any of your data. So, your personal information - or your company’s information in case that’s what you’re using your computer for - is entirely hidden and secure.
3. Save money
It’s well-known that the prices of certain items and services vary based on your location, browsing time, age and many other factors. This most commonly goes for airline tickets and hotel stays.
You can use your VPN to avoid high prices and surcharges. Clear all cookies, turn on your VPN and visit an online shopping site to check out their prices. Then compare your findings with the offers you see when your VPN is off, when you spend a long time on the site or have an active account with the company.
Sometimes this can really help you find the best deals and avoid breaking the bank. But again, check the Terms and Conditions before you purchase something using a VPN.
4. Secure your smart home
The more smart devices you have connected to your network, the more exposed you are to potential cyberattacks. Phones and computers are generally designed to be decently secure even without a VPN or antivirus, but smart home devices leave a lot to be desired in that regard.
Protecting your home network with a VPN software means all devices connected to it are secure, be it an air purifier or Alexa.
Credit: Bence Boros on Unsplash
5. Prevent connection slowdown
Your ISP can intentionally slow down your internet speed based on how much data you’ve consumed (data throttling) or your activities online (bandwidth throttling).
But with a VPN, what kind of data you send and receive and how much is entirely hidden. Therefore, if your ISP can’t see you, they can’t control you and they can’t throttle down your speed.
The bottom line
You can never be too safe online. So definitely think about getting yourself a solid VPN to pump up your privacy and security as much as you can. And if you have any questions or need help choosing the perfect software for you, feel free to reach out to us.
As you know, “JPEG” is one of the commonly used formats for image files which is a compression of digital images. It is one of the topmost used file formats by mobile phones and digital cameras and usually achieves a 10:1 compression with little visible loss in the quality of the image.
There are tons of cases as of late, most particularly after the latest Windows 10 update where users were not able to open JPEG files on their PCs. Every time they try to open any JPEG file, they either get an error or nothing happens at all. This issue could be due to the default handler application for JPEG applications not being set or there could be some third-party image viewer not working properly. To fix this issue with JPEG files, refer to the troubleshooting options below.
Option 1 – Try to change the file type association
You need to check if the file type association of the JPEG files are correctly set or not since there are tons of third party programs that change the file type association automatically to themselves without your permission the instant they are installed and so if any of these third-party programs are broken, then naturally, your JPEG files won’t really open. That’s why you can try changing the setting to the default photo viewer instead of the third-party one. To do so, follow the steps below.
Tap the Win + R keys to open the Run dialog box.
Then type in “control panel” in the field and hit Enter to open the Control Panel.
After opening Control Panel, click on the Programs category and select the “Default Programs” option from the menu.
Next, select the second option “Associate a file type or protocol with a program” and then select the “Choose default apps by file type” option.
After that, click on the .jpg file extension and choose the option from the pop-up.
Now restart your PC to refresh all your programs and then see if it has fixed the problem or not.
Option 2 – Try to update your computer
Microsoft frequently releases updates to target bugs and improve users’ experience. And this particular error where JPEG files won’t open is already acknowledged by Microsoft so you need to make sure that your Windows 10 PC is updated to the latest released update and that there are no pending updates.
Tap the Win + S keys to open Search and then type in “update” in the field and open the system setting from the search results.
After that, check for updates and then download and install them if needed.
Now restart your PC once the update is done and check if you can now open JPEG files.
Option 3 – Try to reset the Photos app via Settings
Resetting the Photos app could also help you in fixing the problem. Note that this option will reset all the configurations and your data associated with your Photos and makes the application go into a state when you first started using it and that this option will fix any discrepancies that your application might be experiencing right now.
Tap the Win + S keys to open the search bar.
Then type in “settings” in the field to open the Settings application.
After opening Settings, click the “Apps” category.
From there, a list of applications installed on your computer will appear.
Navigate through these applications until you find the Photos app and then click on the Advanced options.
Afterward, click the Reset button that appears on the next screen. Then a new pop-up comes up and will warn you that all the preferences, as well as sign-in information, will be lost. Click on “Reset” anyway to proceed in resetting the Photos app.
Restart your PC once the reset is done.
Option 4 – Try to reinstall the Photos app
Before you start using other third-party image viewers just yet, you can try to reinstall the Photos app first. Thus, if there is something wrong with it, it will instantly get fixed right after it reinstalls. Just take note that this option requires administrative privileges so you need to be logged in as an administrator.
The first thing you have to do is tap the Windows + S keys and type in “PowerShell”.
Next, right-click on the file and click on the “Run as administrator” option from the context menu.
Once PowerShell is opened, execute this command: get-appxpackage *Microsoft.Windows.Photos* | remove-appxpackage
The command you just entered will remove the Photos app. After the process is done, go to the Microsoft Store and look for Microsoft Photos then download and install it again.
Error Code 49 is a common device driver error that users encounter on any Windows 2000 and later operating system versions.
The error occurs when the connected peripheral devices fail to function properly due to an overload of the system hive’s size.
The error when prompted pops up on your screen with the following message:
"Windows cannot start new hardware devices because the system hive is too large (exceeds the Registry Size Limit). (Code 49)”
The error causes unattached devices to be displayed on the system hive list.
Solution
Error Causes
Error Code 49 mainly results from problems in Windows registry system files; the system hive in the Windows registry exceeds its size limit.
The system hive is part of the Windows registry and it is where files regarding devices are contained along with user preferences and applications.
The devices will not work until the system hive size is brought back to normal levels.
Further Information and Manual Repair
There are several ways you can use to fix your error code. Here are the following.
Method 1 – Uninstall unused devices
One of the best ways to address the error code is to uninstall the unused devices which are listed on your computer’s system hive. To do this:
Log in using an Administrator account
Click the Start button and then click ‘Run’
In the box, enter the command:
"set devmgr_show_nonpresent_devices=1 cd%SystemRoot%System32 exit"and click enter
Open Device Manager, click ‘View’, and then choose ‘Show hidden devices’ to see unused devices.
When you can see the list, click on the device you want to uninstall by selecting the ‘Driver’ tab and then select ‘Uninstall’.
After uninstall is complete, restart your computer.
Method 2 – Use System Restore
If the error still persists, you can use system restore to eliminate the problem. Here is how you can do so:
Log in using an Administrator account
Click ‘Start’ button and select All Programs > Accessories > System Tools > System Restore
Click ‘Restore my computer to an earlier time’ and click ‘Next’
Select the last Windows restore point from the ‘On this list, click a restore point’ list, and click ‘Next’
Click ‘Next’ on the confirmation window to proceed
Restart your PC after restoration is complete
By restoring the system via a last saved system checkpoint, you can obtain undamaged Windows system files that can help avert the error code.
Method 3 – Manually uninstall and reinstall the device driver
If using system restore does not work in resolving the error code either, you may have to resort to manually uninstalling and then reinstalling the device driver causing the problem.
This would be necessary since the remaining incomplete files due to a partial removal or installation of programs is what results in the error code. By uninstall and reinstalling the device driver program, it would lead to the completion of the files.
You can do this by firstly logging in as Administrator and open Device Manager. Select the device that is causing the problem and double click it and make sure that the peripheral is connected properly to the PC.
Upon opening, click on the ‘Driver’ tab and then select ‘Update Driver’. Make sure to refer to the system documentation that you received with your PC or computer to check for the motherboard details and driver specifics.
Method 4 – Use software to automatically download the driver
Manually uninstalling and reinstalling the driver will do the trick; however, it may be time-consuming, especially when you would have to resort to your hardware user manual.
Therefore, using a program such as DriverFIX can save you a lot of time and frustration in having your device work properly on your computer.
DriverFIX, with its user-friendly approach to help you fix your PC issues, comes with an integrated database that detects which drivers you need to reconfigure within just a few seconds and downloads it automatically.
It further ensures that your drivers are installed in their entirety leaving no room for any incomplete files to remain that create Error Code 49.
It also has the added advantage of being able to backup and restore your files should there be the slightest possibility of system file damage. DriverFIX is the answer to fixing your PC error codes accurately and quickly.
Click here to download DriverFIX to fix Error Code 49 quickly and effectively!
 Bluetooth perhaps is slowly becoming an outdated feature but sometimes you can really used it and need it.


 Windows 11 has brought some bad reviews for its inability to change the taskbar location to the screen. Luckily we can still hide it if needed.
In order to hide the taskbar from the screen follow these simple instructions:
Windows 11 has brought some bad reviews for its inability to change the taskbar location to the screen. Luckily we can still hide it if needed.
In order to hide the taskbar from the screen follow these simple instructions:


