As you know, Microsoft’s Windows Media Creation Tool is a useful tool that helps you download and install the latest version of the Windows 10 operating system. However, there are times when it could encounter some problems during the update process. One of these programs is the following error message:
“0x8007001F-0x20006, The installation failed in the SAFE_OS phase with an error during REPLICATE_OC operation.”
The error pointed out the “Safe OS phase”. It is the phase that’s initiated to install all the required Windows Updates. Thus, the possible cause for this error could have something to do with an interrupted download, internet connection, and many more. Although this error could be caused by a lot of factors, fixing it shouldn’t be that hard. You can try to reset the Windows Update Components or delete the Windows Update cache. You could also disable both the Firewall and your antivirus program temporarily or run the Windows Update in a Clean Boot state, as well as run the Windows Update troubleshooter. To get started troubleshooting the error, follow each one of the suggestions provided below.
Option 1 – Try to reset the Windows Update components
Resetting the Windows Update components could help you resolve the Windows Update error 0x8007001f – 0x20006. How? Refer to the following steps:
Open Command Prompt with admin privileges.
After that, type each one of the following commands and hit Enter after you key in one after the other.
net stop wuauserv
net stop cryptsvc
net stop bits
net stop msiserver
Note: The commands you entered will stop the Windows Update components such as Windows Update service, Cryptographic services, BITS, and MSI Installer.
After disabling WU components, you need to rename both the SoftwareDistribution and Catroot2 folders. To do that, type each one of the following commands below, and don’t forget to hit Enter after you type one command after the other.
Now, restart the services you’ve stopped by entering another series of commands. Don’t forget to hit Enter after you key in one command after the other.
net start wuauserv
net start cryptsvc
net start bits
net start msiserver
Exit Command Prompt and then restart your computer.
Option 2 – Try to delete the Windows Update Cache
You might also want to delete the Windows Update cache since there are times when existing corrupt or incomplete Windows Update files can cause some problems in downloading and installing Windows Updates. To achieve this, simply delete the “$Windows.~BT” & “$Windows.~WS” folders in your computer. Once you’re done, try to run Windows Update again and see if the error is now fixed.
Option 3 – Try to temporarily disable anti-virus and Windows Defender Firewall
As mentioned, the error could be due to the antivirus program or the Windows Defender Firewall installed on your computer. Thus, disabling them or any security software installed in your computer is always a good idea you can try when you’re not able to access the shared drive on your computer. There are times when you encounter problems like error 0x8007001f – 0x20006 due to interference of antivirus or security programs. Thus, you have to disable both your antivirus program and Windows Defender Firewall for the meantime and check if it fixes the error or not
Option 4 – Run the Windows Update in a Clean Boot State
It is possible that some third-party application is the one that’s causing the problem so it’s best if you put your computer in a Clean Boot state. During this state, you can start the system with a minimum number of drivers and startup programs that will surely help you in isolating the root cause of the issue.
Log onto your PC as an administrator.
Type in MSConfig in the Start Search to open the System Configuration utility.
From there, go to the General tab and click “Selective startup”.
Clear the “Load Startup items” check box and make sure that the “Load System Services” and “Use Original boot configuration” options are checked.
Next, click the Services tab and select the “Hide All Microsoft Services” check box.
Click Disable all.
Click on Apply/OK and restart your PC. (This will put your PC into a Clean Boot State. And configure Windows to use the usual startup, just simply undo the changes.)
After that, try to run Windows Update again.
Note: If you are able to install the app without any trouble at all then it means that the error is caused by some third-party application on your computer. You need to look for the culprit and uninstall it once you found it.
Option 5 – Run the Windows Update Troubleshooter
You might also want to run the Windows Update Troubleshooter as it could also help in fixing error 0x8007001f – 0x20006. To run it, go to Settings and then select Troubleshoot from the options. From there, click on Windows Update and then click the “Run the troubleshooter” button. After that, follow the next on-screen instructions and you should be good to go.
The Recycle Bin is undeniably an important place to make files ready for deletion. To put it simply, it assumes some importance but there are times when it displays an unpredictable behavior. For instance, it just suddenly goes missing and even Cortana is unable to find it. A lot of users have experienced the missing Recycle Bin issue in their Windows 10 computers. If you are one of these users, you might have wondered where the Recycle Bin icon has gone and how you can get it back. Worry not, as this post will provide you a couple of options you can try to bring back Recycle Bin in your Windows 10 computer.
Follow the given options below to get started.
Option 1 – Try to restore Recycle Bin
It could be that you have disabled the Recycle Bin by accident which is why Windows was not able to show it on your desktop. To restore Recycle Bin, follow these steps:
First, click on the Start button and select Settings.
Next, select the Personalization setting and then select Themes from the left pane.
After that, click on the “Desktop icon settings” link under the “Related Settings” heading. This will display a list of icons in the Desktop Icons window.
From there, make sure that you check the checkbox for “Recycle Bin” to make it appear on your Desktop screen once again.
Option 2 – Try to recreate the Recycle Bin
If the first option didn’t work, then it could be that Recycle Bin might have been deleted which is why you fail to restore it. And to resolve this problem, you need to recreate Recycle Bin. Refer to the following steps to do so:
You need to launch the Windows File Explorer first and go to the View tab.
From this tab, select Options and click on the drop-down arrow and then select the “Change folder and search option”.
Afterward, switch to the View tab when the Folder Options window appears on your screen and select the “Show hidden files, folders, and drives” option.
And then unmark the checkbox next to the “Hide protected operating system files (Recommended)” option and click on both the Apply and OK buttons, respectively.
Next, go back to the File Explorer and click on “This PC” located on the left bar and go to the C: drive.
From there, you will find a file named “$Recycle.Bin” located at the top.
Open this folder to access its contents and you should see the Recycle Bin icon located at the top.
After that, right-click on the Recycle Bin icon and click on the “Send To” option and then click on “Desktop (create shortcut)”.
It will then confirm and recreate the Recycle Bin icon on your Desktop screen.
Note: Even though this icon is quite similar to the original one, it actually differs from it. The difference is that you won’t see if fill up when you delete files and you can’t simply empty it by right-clicking on the shortcut. On the other hand, you can still drag items into it just like with the original one. So when you want to empty the content of the newly restored Recycle Bin, you just have to double-click on the shortcut and right-click on the recycle bin in the window that appears, and select the “Empty Recycle Bin” option. In addition, now that you’ve set up the Recycle Bin shortcut, you have to re-activate the “Hide protected operating system files” to keep the important files and folders in your computer hidden.
Option 3 – Try to repair the Recycle Bin
If both the first two options failed to restore the missing Recycle Bin, then you can try repairing it instead. There are times when the Recycle Bin is removed from the Desktop screen due to some corrupted Windows system files. To fix these corrupted system files, you can run the DISM tool. This tool is known to repair potentially corrupted files in your system as having them could also system issues like the missing Recycle Bin. To repair these corrupted system files, you can run the DISM commands:
Tap the Win + X keys and click on the “Command Prompt (Admin)” option.
After that, input each one of the commands listed below sequentially to execute them:
Dism /Online /Cleanup-Image /CheckHealth
Dism /Online /Cleanup-Image /ScanHealth
Dism /Online /Cleanup-Image /RestoreHealth
Once you’ve executed the commands given above, restart your computer and check if the problem is now fixed.
Option 4 – Make sure that you are not in Tablet Mode
Since Windows 10 is designed to work on both desktop and mobile devices, it could be that your computer has slipped into Tablet Mode which explains why you’re not seeing the Recycle Bin. To check if your computer is really in Tablet Mode, follow these steps:
Go to the Start menu and select Settings.
Next, select the System setting and from the left pane select the Tablet Mode.
From there, make sure that the buttons next to the options given below are set to the off position:
If you find it hard to update Google Chrome to its latest version and each time you try to do so it keeps on failing, worry not for this post will guide you in fixing a list of Google Chrome Update errors. Even though there are a lot of error codes around Chrome, these are only caused by issues with the update.
Here are some of the errors you can encounter when updating Google Chrome:
Update failed: You can encounter this error when the Updates are disabled by the administrator.
Update failed with
Error 3 or 11: When Chrome’s inbuilt updater fails to find the Update server to download the latest version.
Error 4 or 10: This happens while checking for updates with the message “Update check failed to start”
Error 7 or 12: This occurs when the download fails while checking for updates.
Windows OS version is not supported.
Google Chrome may not be able to keep itself updated.
Any other errors that mention that “Update failed”
Since these aforementioned error codes are related to “Update Failure”, then they have common solutions and here they are:
Option 1 – Restart your computer
You need to restart your computer first and then try updating Chrome again. There are times when it’s only a temporary issue that can be fixed by simply restarting your computer.
Option 2 – Try checking antivirus programs, firewall, and parental control settings
If you have antivirus programs, a firewall installed in your computer, as well as parental controls, then any of these could be blocking you to download anything, including the update for Chrome. This is why you have to double-check and make sure that software updates aren’t being blocked by these programs. On the other hand, you can also try running the Network Troubleshooter as it can help you resolve any DNS or connectivity issues. To use it, follow the steps below.
Open the Search bar on your computer and type in “troubleshoot” to open the Troubleshoot settings.
Next, scroll down and select the “Network Adapter” option from the right pane.
Then click on the Run Troubleshooter” button.
After that, your computer will check for any possible errors and will pinpoint the root cause of the problem if possible.
Option 3 – Try to remove Proxy
Removing the Proxy might also help you in fixing the Chrome Update errors. Here’s how you can do it:
Tap the Win + R keys to open the Run dialog box.
Then type “inetcpl.cpl” in the field and hit Enter to pull up the Internet Properties.
After that, go to the Connections tab and select the LAN settings.
From there. Uncheck the “Use a Proxy Server” option for your LAN and then make sure that the “Automatically detect settings” option is checked.
Now click the OK and the Apply buttons.
Restart your PC.
Note: If you are using a third-party proxy service, you have to disable it.
Option 4 – Try to reset Winsock, TCP/IP & Flush DNS cache
Resetting Winsock, TCP/IP, and flushing DNS might help in resolving the Chrome Update errors just follow these steps:
Right-click on the Start button and click on Command Prompt (administrator) so you can pull up an elevated Command Prompt.
After that, execute each one of the commands listed below. And after you typed in one after the other, you have to hit Enter.
netsh winsock reset – type in this command to reset Winsock
netsh int ip reset resettcpip.txt – type in this command to reset TCP/IP
ipconfig /flushdns – type in this command to flush the DNS cache
Next, restart your PC and check if the problem’s fixed.
Option 5 – Try to run the Chrome Cleanup tool
You might want to run Google Chrome’s built-in Malware Scanner & Cleanup tool as it could also help in getting rid of any unwanted ads, pop-ups, and even malware, as well as unusual startup pages, toolbars, and anything else that might overtake the network and could affect the performance of the browser.
Option 6 – Get rid of any conflicting browser extensions
Open Chrome and press Alt + F keys.
Go to More tools and click Extensions to look for any suspicious browser extensions or toolbars.
Click the Recycle bin and select Remove.
Restart Chrome and press Alt + F keys again.
Proceed to On Startup and mark Open a specific page or set of pages.
To check if the browser hijacker is still active, click Set pages, if it is active, overwrite the URL.
Option 7 – Reset Google Chrome
Resetting Chrome can also help you get rid of the error. Resetting Chrome will restore its default settings, disabling all the extensions, add-ons, and themes. Aside from that, the content settings will be reset as well and the cookies, cache, and site data will also be deleted. To reset Chrome, here’s what you have to do:
Open Google Chrome, then tap the Alt + F keys.
After that, click on Settings.
Next, scroll down until you see the Advanced option, once you see it, click on it.
After clicking the Advanced option, go to the “Restore and clean up option and click on the “Restore settings to their original defaults” option to reset Google Chrome.
As you know, installing Windows 10 is quite a complicated process in the background even though it may look like an easy task in the foreground. There are times when the setup is stuck on the “Hi there” screen where you won’t be able to input any information in the fields given and you wouldn’t be able to do anything else since the screen does not move ahead.
There are a lot of possible reasons why this issue occurs. It could be due to a damaged setup image, invalid boot configuration, and many more. To resolve this problem, there are several options you can check out. You can try to get a new setup image or run the Automatic Repair or you could also try to recreate the Boot Configuration files or BCD. To get started in checking out these solutions, make sure to follow the instructions provided below.
Option 1 – Try to run the Automatic Repair Utility
You might also want to use Automatic Repair in fixing the error. To do so, follow the steps below.
You can start by creating and booting from a bootable Windows 10 USB Stick.
After that, click on Repair your computer located on the bottom left corner when you are on the initial Windows Startup screen.
Next, click on Troubleshoot, and then on the other screen, click the Startup Repair option.
Now select the operating system you want to repair. Once you do that, it will start to repair your operating system. Wait until the process is completed and then check if the problem’s now fixed.
Option 2 – Try to rebuild the BCD files
You can also try rebuilding the BCD files to resolve stuck screen issue in your Windows 10 computer.
You can start by booting into the installation environment for Windows 10 from an installation media.
After that, click on Repair your computer and on the blue screen, select Troubleshoot and then select the Advanced options menu.
From there, select Command Prompt and once you open it, enter each one of the commands given below by sequence.
bootrec /FixMbr
bootrec /FixBoot
bootrec /ScanOS
bootrec /RebuildBcd
Once you’re done executing the commands given above, type “exit” to close the Command Prompt window and then restart your computer and see if it fixed error code 0xc000014c.
Option 3 – Try recreating the Windows 10 installation USB
Recreating the Windows 10 installation USB might help in fixing the problem. You can use a USB drive to do so but make sure that it has a great read-write speed. Follow the steps below to recreate Windows 10 installation USB”
Click this link and then click the Download Tool Now button.
Next, click the “Use the tool to create installation media (USB flash drive, DVD, or ISO file)…” option and follow the next given instructions on the screen.
Now select the ISO file option in step 5.
After that, you should now have an ISO file.
Next, go to the location where you’ve downloaded the ISO file.
Then right-click on the Windows 10 ISO file and select the Open with option and then select File Explorer.
Now click on “setup.exe” and follow the next instructions that appear on the screen. When asked, you have to select either Nothing (clean install) or Keep personal files only option. Take note that you must not select the “Keep personal files, apps, and Windows settings since it doesn’t really work.
Option 4 – Try getting a new Windows image file
If none of the four given options above worked, you might want to get a newer installation image using the Windows Media Creation tool. After that, create the bootable USB drive and once completed and then try to run the Windows 10 setup again.
If you have been stuck on allocating disk space on steam you know how annoying this error could be. Here you are, with your new game eager to play it and relax a little and all of the sudden steam gets stuck on allocating disc space.
Luckily this error is fixable, follow provided guide to fix the error and continue with installing the game.
Restart computer
An old age solution of turning it off and turning it back on but in this case, it works 90% of the time.
Run Steam as administrator
Allocating disk space when done by a third-party application can be a task that requires privileges higher than the normal user. Find the steam executable file in the installation folder, right-click on it and run it as an administrator
Clear Steam cache
Launch Steam in admin mode.
Once in the client, click on Steam at the top left corner of the screen.
From the drop-down box, click on Settings.
Once in the Settings, navigate to the Downloads tab.
Click the Clear Download Cache option.
Click OK on the prompt to confirm your action. Wait for the process to complete.
When done, save changes and exit the client.
Change download server
Launch Steam client in admin mode.
Once in the client, click on Steam at the top left corner of the screen.
From the drop-down box, click on Settings.
Once in the Settings, navigate to the Downloads tab.
Click the drop-down menu under the Download Region.
Choose a different server to download from.
Exit the Steam client.
Refresh installation files
Kill a Steam process in Task Manager.
Navigate to your Steam folder
Inside the Steam folder, select everything except the steamapps folder and the Steam.exe executable file.
Tap the Delete key on your keyboard.
Turn off firewall
Firewall can prevent steam and cut access to system operations, disable firewall to fix this issue.
Stop overclocking
If you have overclocked your PC, you can simply reverse the change. The steps you will need to take depends on the overclocking software. Launch the software and look for the option to stop the overclocking. Once done, restart your computer, rerun the game installation.
The Windows update error 0x8024ce0e can happen as a result of improper installation, a virus, or due to file corruption. Follow this guide to easily fix errors and continue with your work.
Restart Windows
As awkward as it seems this method actually works most of the time. Click on the start button and restart your system.
Check hard disk space
Of course, when installing updates there should be enough disk space for updates to be downloaded and installed. Check your disk space to see if there is sufficient available space.
Disconnect external components
External components can interfere sometimes with the update process, disconnect external hard drives, USB, and other devices, leaving only the keyboard, mouse, and core ones.
Check devices in the device manager
Open device manager and visually check to see if there is a device with a yellow exclamation sign next to it. If there is such a device, right-click on it and choose update driver.
Booting Windows 10 in safe mode can solve many issues with your computer since Windows will boot just in its basic core and you can safely maintain it, find a solution for issues, etc.
Before, entering safe mode was easy and pretty straightforward, during Windows evolution, entering safe mode was somewhat complicated and not being made so directly like once it was but do not worry. Starting Windows in safe mode today is even maybe easier than it was before, it is just not so obvious as it once was.
In this article, we will go through several ways how you can boot up Windows in safe mode in order to solve whatever issue is troubling you.
Start safe mode from settings
Open Settings by pressing the ⊞ WINDOWS + I or by just clicking on the Start button and clicking Settings.
Go to Update & Security, then Recovery.
In Advanced startup, click Restart now.
Once your PC reboots, click Troubleshoot, then Advanced options. Select Startup Settings then Restart.
Go to safe screen from Sign-in screen
Click the Shift on your keyboard while clicking on the Power button on the bottom right corner of the screen.
Once your PC restarts, click on Troubleshoot, then Advanced options.
Select Startup Settings then Restart.
After the reboot, select 4 or the F4 on your keyboard to run in Safe Mode. If you choose to use Safe Mode with Networking, select 5 or F5.
Start Windows recovery Environment
Go to the Windows Recovery Environment by doing the following steps:
Press on the power button to turn off your device.
Press on the button again to turn it on.
Once Windows starts, press the power button again for 10 seconds to turn it off. Then press it on again.
Upon the reboot, hold on to the power button for 10 seconds to turn it off, then turn it on again.
Because you've repeatedly turned on and off your PC, you will be redirected to Windows Recovery Environment.
On the pop-up window, click on Troubleshoot, then Advanced options. Select Startup Settings, then Restart.
After the reboot, select 4 or the F4 on your keyboard to run in Safe Mode. If you choose to use Safe Mode with Networking, select 5 or F5.
Hold SHIFT while pressing RESTART on the start menu
On the Windows 10 sign-in screen, hold on the SHIFT on your keyboard.
While pressing on the key, click on the Power button, then choose Restart on the pop-up menu.
Once your PC restarts, click on Troubleshoot, then Advanced options.
Select Startup Settings then Restart.
After the reboot, select 4 or the F4 on your keyboard to run in Safe Mode. If you choose to use Safe Mode with Networking, select 5 or F5
Boot from installation media and choose it in the command prompt
Create a Windows 10 bootable installation media on any external storage media.
Once you do this step, wait for the installation to load.
Select your preferred language and click on Next.
Click on Repair your computer at the bottom left of the menu.
Click on Troubleshoot, then Advanced options.
Select Command Prompt - Use the Command Prompt for advanced troubleshooting options.
Type in the following command on the prompt: bcdedit /set {default} safeboot minimal
Hit Enter and wait for it to tell you that "The operation completed successfully".
Exit Command Prompt and click on Continue.
Use system configuration tool
In the Search bar, type in msconfig.
Select the Boot tab and under the Boot options, put a check beside Safe boot.
Click OK.
Reboot PC
Press SHIFT + F8
Press SHIFT + F8 when turning on Windows.
This redirects you to Advanced Boot Options Window, then choose to run Windows on Safe Mode
There you have it, 7 different ways to enter safe mode in Windows 10, we hope that any of these tips proved helpful and that you managed to enter the safe mode and fix your Windows issues.
The speed at which the CPU runs varies depending on any Windows laptop or desktop. And in case you don’t know, the CPU does not run at full speed all the time as it depends on how the operating system distributes the load so it works accordingly. However, there are instances when it runs at full speed especially if your Windows 10 computer is on a heavy workload. But if you find that even when your computer is already on a heavy workload and the CPU is still not running at full speed, then you need to look into this situation. To verify that your CPU’s speed, you can use any CPU stress test tool.
This kind of issue is common on laptops compared to desktop computers since laptop runs on battery. The Intel Processor on laptops uses the Speed Stepping Technology which means that when you are doing some small tasks on your laptop, the processor’s speed is reduced. On the other hand, if this happens when you are using a heavy application, it can be due to a low charge on the laptop’s battery. Thus, Windows will try its best to keep the computer running for as long as possible by reducing the CPU speed or processor. But there are times when you are ready to sacrifice battery to make sure that the work gets done on time. To achieve that, here are some options you can check out.
Option 1 – Try setting the processor state to the maximum in Power Options
Type “control” in the search box to view the classic Control Panel as well as the popular options.
Next, click on Power Options > Change plan settings > Change advanced power settings.
Then navigate to Processor power management > Maximum processor state.
Now select 100% when it is on Battery and Plugged in.
After that, expand the System cooling policy option and make sure to set it as Active to make sure that the battery won’t overheat.
Finally, apply the changes made to all the profiles of the power management and restart your computer. This will ensure that your CPU will run at maximum power at all times.
Option 2 – Try to update or disable the Intel Power Management driver
The next option you can try is to update or disable the Intel Power Management driver. The Intel-powered computers have dedicated software that controls CPU speed and Fan speed when it needs to save battery. You can try disabling it temporarily and check if there are any changes with the CPU fan speed.
First, restart your computer by holding the Shift key to boot your computer into Troubleshooting or Advanced mode.
Next, go to Troubleshoot > Advanced Options > Command Prompt.
Then change the directory to C:/Windows/System32/driver and then rename the file named “Intelppm” by entering the “ren intelppm.sys intelppm.sys.bak”.
Now restart your computer.
Note: If you were not able to find the drivers in C:/Windows/System32/driver, check if they are available under C:/Drivers/IntelPPM. After that, the CPU speed should change now with the Intel driver missing from the system. And in case you want to enable it, simply follow the same steps given above and rename the file again.
Option 3 – Try disabling the IPPM using the Command Line or Registry Editor
Command Prompt:
Tap the Win + R keys to open the Run dialog box and type “cmd” and tap Enter to open Command Prompt.
Next, type this command and hit Enter: sc config intelppm start= disabled
The “sc config” command you entered modifies the value of a service’s entries in the registry as well as in the Service Control Manager database.
Registry Editor:
Tap the Win + R keys to open the Run dialog box and type “Regedit” in the field and hit Enter to open the Registry Editor.
Next, navigate to HKEY_LOCAL_MACHINESYSTEMCurrentControlSetServicesintelppm.
From there, double click on the intelppm and change the Start key value to
Now close the Registry Editor and reboot your computer.
Note: The steps given will make sure that the CPU will run at maximum power at all times.
Stable Diffusion is a machine learning model developed by Stability AI to generate digital images from natural language descriptions. The model can be used for different tasks like generating image-to-image translations guided by text prompts and upscaling images.
Unlike competing models like DALL-E, Stable Diffusion is open source and does not artificially limit the images it produces. Stable diffusion was trained on a subset of the LAION-Aesthetics V2 data set. It can run on most consumer hardware equipped with a modest GPU and was hailed by PC World as "the next killer app for your PC".
Since Stable Diffusion is run locally and not in the cloud, as mentioned there is no limit to the number of images that you can produce but in order to use it you will have to get down a little dirty with setting your PC environment for it since it is not really an application, it is a command line text based descriptor that will use python to generate your images, so there is no install nor GUI.
In this guide, we will show you how to both install and run Stable Diffusion on your local PC so you can start producing some cool images all by yourself.
Hardware and software requirements
Make no mistake, Stable Diffusion will not run on a potato PC, in order to harvest the power of AI-generated imagery this is what you will need:
A GPU with at least 4GB of VRAM
10GB of hard disk space
Python and libraries (Miniconda3 installer will install everything you need)
The Stable Diffusion files
Git
Any OS (Windows, Linux, macOS)
Installing components
For this tutorial, we are covering the installation and running of Stable Diffusion on Windows PC. The steps presented here are presented in a way that installation can be performed on any operating system but precise instructions will be for Windows OS.
GIT
The first thing to do is to install GIT. It is a tool that will let you easily maintain and install repos from the internet. to install it go to: https://git-scm.com/ and click on download. Follow the instructions for your version of the operating system. If you are a developer you are familiar with GIT and if you already have it installed you can skip this step.
One thing that is important when installing GIT locally is to select to use it via the command line (the second option that says "Git from the command line and also from 3rd-party software").
Miniconda3
Now when we have GIT installed, next thing is to use Miniconda3 to install python and all required libraries that are needed. Get the installer at: https://docs.conda.io/en/latest/miniconda.html
Miniconda3 is basically an easy installer so you do not have to install tons of stuff manually from different websites and sources, it is nicely packaged in the installer that will take care of everything.
Stable Diffusion
After the previous two steps, we are ready now to actually install Stable Diffusion. Go to https://huggingface.co/CompVis/stable-diffusion#model-access and install the latest library (as of the writing of this article currently it is stable-diffusion-v1-4-original, the last one on the right), the library is almost 5GB in size so be prepared for big download.
Once downloaded click on the Windows start button and type in Miniconda3 and click on open. Create a folder and name it how you want on a drive of your choice. For this example, we will install it all in disk C under folder AI_art, follow the instructions below but use your own names and destination instead. Do not close Minicoda3 after typing commands!!!
cd c:/
mkdir AI_art
cd AI_art
Extract GitHub files that you have downloaded into your new folder and get back to Minicoda3 and type the next commands:
Let the whole process finish, some files are large and it might take a while. After the whole process is finished and completed, copy the checkpoint file that you have downloaded into: C:\AI_art\stable-diffusion-main\models\ldm\stable-diffusion-v1
After the file is copied rename it to model.ckpt and you are finished.
Running Stable Diffusion
The created environment is needed in order to actually use Stable Diffusion to create images. Each time you want to use it you will have to run it, so go into Miniconda3, and inside it type:
conda activate ldm
cd C:\AI_art\stable-diffusion-main
after we are inside the folder call the script with the parameters:
python scripts/txt2img.py --prompt "TXT DESCRIPTION OF IMAGE THAT YOU WANT TO CREATE" --plms --n_iter 5 --n_samples 1
and that's it, your image is created and it is located in C:\AI_art\stable-diffusion-main\outputs\txt2img-samples\samples
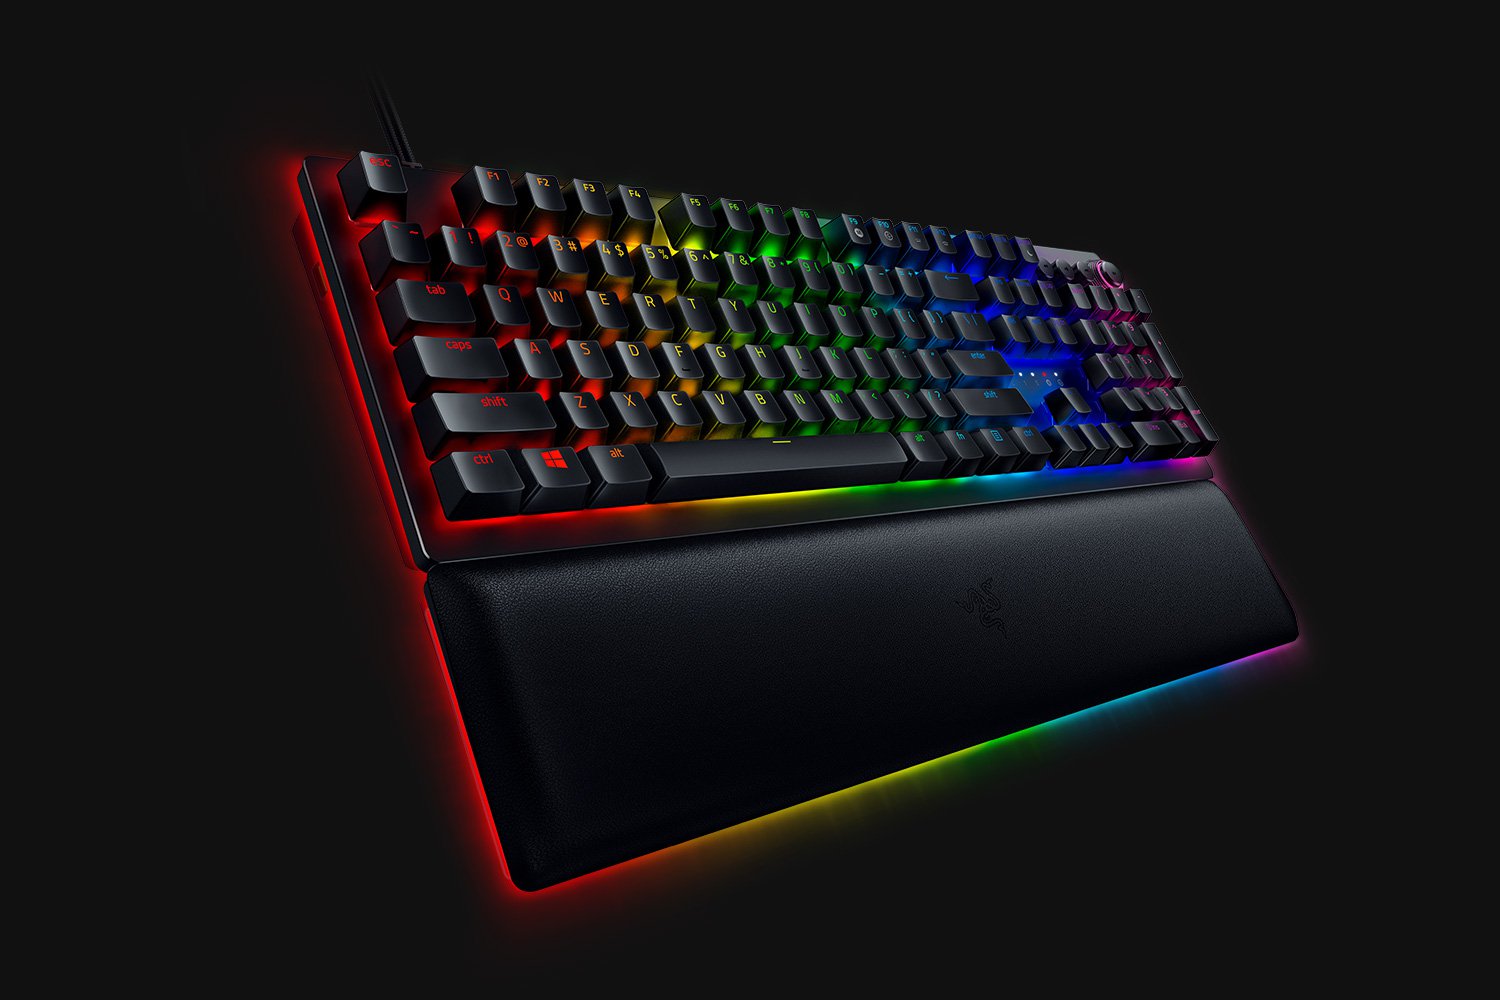
When it comes to computer peripherals first thing that comes to people's minds is probably Mouse and Keyboard. Also when discussing peripherals brands, Razer is not a stranger and over the years it has built its name and cult following.
Razer’s mechanical keyboards have been always in the upper field of quality and trust from users and Huntsman is no different.
Tech specifics of Huntsman keyboard
Mechanical optical switches
Razer has introduced their new optical technology switch with this keyboard. These switches are faster and more accurate than typical mechanical switches and if tests are to be believed this is the fastest keyboard currently on the market.
Multi-functional digital dial
A multi-function digital dial with three tactile media keys gives you instant access to everything from brightness to volume in seconds. All programmable and customizable through Synapse 3, so you can set your preferred configurations right at your fingertips.
10-key rollover
Anti-ghosting technology that enables 10-key simultaneous presses at the same time
4-side underglow with Razer chroma
Go crazy and personalize lighting effects any way you want with a full 4-side underglow and 38 customization zones. Powered by Razer Chroma
Feel and noise
In the department of noise, well it is the mechanical keyboard so naturally, it will be louder than membrane ones but in terms of comparing it to other mechanical keyboards it is within the same noise range, maybe just a tiny bit silenced.
The keyboard comes with 2 different types of switches, purple clicky ones that are louder and have that *click* sound for sound feedback, and red ones, that are not equipped with clicky sound but are linear providing slightly faster performance.
If you choose the Huntsman elite model of the keyboard it will come with a nice hand resting mat that is very comfortable and feels right. Using a keyboard feels like using a Razer keyboard, it is responsive and gives that superior mechanical feeling.
Conclusion
Razer Huntsman mechanical keyboard is not the cheapest nor the best on the market but it is the fastest one out. It is in the top tier of keyboards and worth the investment.
Windows 11 has been rolling out for a while now so many PC users ask the question is it wise and good to upgrade your Operating System to the latest Microsoft incarnation.
No
Thank you for reading, cya tomorrow in next article.
Jokes aside, I truly believe that choosing to upgrade your System to Windows 11 at this point in time is a bad decision and I will explain why I do believe it.
Reasons to upgrade to the new OS
First of all, let me say what is good in Windows 11 and provide reasons why you should upgrade your computer.
The new fancy look made for modern computers.
New Windows new look, Microsoft has tried their best to bring a new modern look to its flagship operating system and I must say that they have managed it. I could argue that it is a little bit late since Apple had this kind of look in years but hey, better late than never I guess.
Increased security
This point is very valid but it will play a role only if you have all system requirements including TPM 2.0. If that is the case new security features of OS are really well done and are perhaps one thing that might nudge some people in installing W11 on their system.
New settings app
The New and redesigned settings app inside Windows 11 is really great and it provides a great workflow and easy management of system settings. This is not some radical change but it will save time and make life much easier.
It is better suited to the newest hardware
Windows 11 was made with the newest hardware in mind and its performances on it are great so if you are punching the latest tech this reason is sufficient to make a switch, however, if you are still on an older system you will not gain much by switching.
Reasons to avoid Windows 11 for now
Almost just a visual update to Windows 10
Some features of Windows 11 are great but they are not plenty of them to justify a new number and new version of OS. Considering what we really got new under the hood Windows 11 could have been just a patch and update to Windows 10 since the architecture is the same.
Bugs
Each day there are new bugs reporting for Windows 11, most of them are at the moment unsolvable and are caused because hardware manufacturers' drivers and software overall is not W11 ready. This hinders the stability of some systems and introduces headaches to others.
Runs poorly on unsupported hardware
Strange behavior has been reported on some older systems, granted systems are not officially supported but the point is OS is simply not working at the top of its game on older hardware.
No updates on non supported systems
Officially stated if you install Windows 11 on non-supported hardware you will not get any security updated on in. This is a deal-breaker as far as I am concerned.
It is still under development
When Windows 11 was released, Android native apps were not working on it, it later came with an update, this is just one example but there are more features that were promised but are not delivered on release and constant updates are fixing these things. It is obvious that Windows 11 is still under active development and not the final product that was promised.
Microsoft’s edge pushing
And not just edge, some other things as well but most notably is edge pushing to borders they are risking lawsuit similar as they did in the past pushing and disabling any other browser except internet explorer.
Conclusion
Firstly I want to point that this is my personal opinion but going through facts and taking into account the current state of Windows 11, at this point, it is not worth making a switch. I am sure that in time it will become a system that will be worth upgrading to but until that time comes, my advice would be to stay with Windows 10.


 When it comes to computer peripherals first thing that comes to people's minds is probably Mouse and Keyboard. Also when discussing peripherals brands, Razer is not a stranger and over the years it has built its name and cult following.
Razer’s mechanical keyboards have been always in the upper field of quality and trust from users and Huntsman is no different.
When it comes to computer peripherals first thing that comes to people's minds is probably Mouse and Keyboard. Also when discussing peripherals brands, Razer is not a stranger and over the years it has built its name and cult following.
Razer’s mechanical keyboards have been always in the upper field of quality and trust from users and Huntsman is no different.
 Jokes aside, I truly believe that choosing to upgrade your System to Windows 11 at this point in time is a bad decision and I will explain why I do believe it.